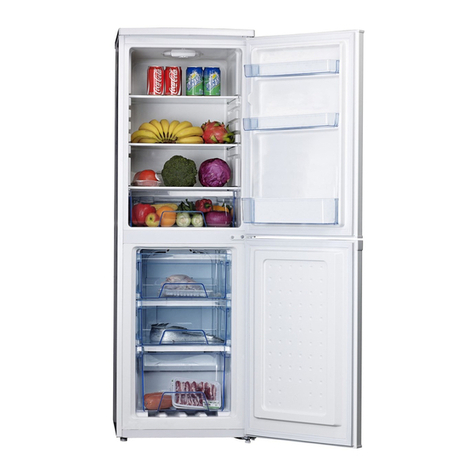
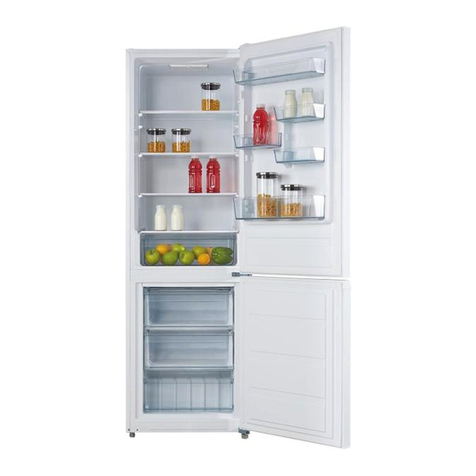
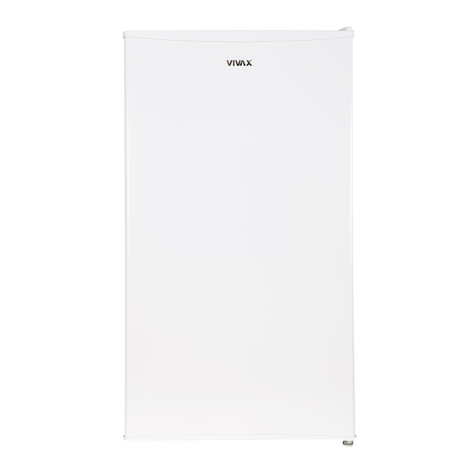
Vivax DD-132 WH User manual

HR
Upute za uporabu
Jamstveni list /Servisna mjesta
BIH
Korisničko uputstvo
Garantni list / Servisna mjesta
CG
Korisničko uputstvo
Izjava o saobraznosti / Servisna mjesta
EN
User manual
DD-132 WH


HR BIH CG
Upute za uporabu
Hladnjak
DD-132 WH

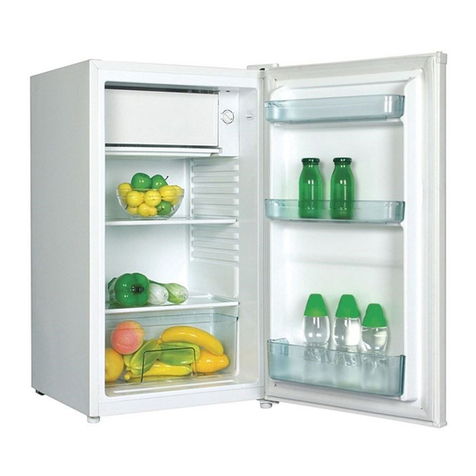
OPIS APARATA
1. Gornji dio hladnjaka –Zamrzivač
2. Kućište termostata
3. Polica hladnjaka
4. Poklopac ladice za salatu
5. Polica hladnjaka - Ladica za salatu
6. Utikač
7. Podesive nogice
8. Gornja polica za boce
9. Donja polica za boce
1

Sigurnosne informacije
Ova informacija je u interesu vaše sigurnosti. Molimo pročitajte pažljivo sljedeće
prije izvođenja instalacija ili korištenja aparata.
Ako bacate stari zamrzivač ili hladnjak sa zaključavanjem/osiguračem, pripazite da je
u sigurnom stanju kako se mala djeca ne bi uhvatila u zamku.
Pošto stara rashladna oprema može sadržavati CFC (kloroflourugljike) koji će oštetiti
ozonski omotač, pri bacanju bilo koje rashladne opreme molimo da se obratite
lokalnom odjelu za zbrinjavanje otpada kako biste dobili savjet o pravilnom načinu
zbrinjavanja.
Ovaj uređaj se mora koristiti samo za namjenjene svrhe, poput zamrzavanja i
skladištenja domaćih jestivih namirnica i ne smije se koristiti ni u koje druge svrhe.
Ako glavni kabel zahtijeva zamjenu, može je obaviti samo za to kvalificirana osoba, s
obzirom da su potrebni posebni alati.
Postavljanje
Postavite aparat i ostavite ga da odstoji dva do tri sata prije nego se uključi po prvi
put kako bi se sustav stabilizirao. Ne postavljajte pokraj izvora topline, poput
štednjaka, bojlera ili na izravnu sunčevu svjetlost.
Razmak od 10 cm mora ostati između aparata i susjednih ormarića ili zidova kako bi
se omogućio odgovarajući protok zraka. Aparat nije namijenjen za ‘building in’
ugradnju.
Postavite na dobru čvrstu i ravnu površinu, a bilo koju neravninu poda treba ispraviti
prije postavljanja, a blage neravnine se mogu svladati podešavanjem prednjih nogica.
NAPOMENA: Ako je uređaj postavljen na tepih ili mekane podne obloge, trebali bi
ponovno podesiti prednje nogice nakon što je uređaj imao vremena da se stabilizira.
Imajte na umu da vrata uređaja ne mogu biti promijenjena.
2

Upute za korištenje
Uklonite svu ambalažu i operite unutrašnjost aparata pomoću mlake vode koja sadrži
malo natrijevog bikarbonata u omjeru 1 žličica na 1,2 litra vode. Ne koristite
deterdžente ili sapune jer oni mogu pokvariti hranu. Nakon čišćenja, temeljito
osušite sve dijelove.
Regulacija temperature
Hladnjak je dizajniran tako da održava unutarnju temperaturu skladištenja u
hladnjaku između + 2C do + 5C.
Da biste omogućili podešavanje temperature u aparatu, opremljen je s podesivim
termostatom koji se nalazi u odjeljku za hlađenje, a može se podesiti od 1 (najtoplije)
do 6(najhladnije). Za normalnu radnu temperature preporuča se podesiti regulaciju
termostata na središnji položaj, a nakon nekoliko sati podesiti thermostat na željenu
temeperaturu. Postoji i položaj za isključivanje - “OFF” koji uključuje ili isključuje
odjeljak za zamrzavanje. Napominjemo da ovo ne isključuje uređaj iz električne
mreže. Da bi ste to učinili, morate isključiti utikač iz utičnice.
Da biste dobili nižu unutarnju temperaturu, okrenite u smjeru kazaljke temperaturu
termostata na veći broj. Da bi se dobila veća unutarnja temperatura, okrenite
termostat ulijevo na manji broj. Međutim, unutrašnja temperature i regulacija
temperature ovisi o brojnim čimbenicima:
1. Različite temperature okoline.
2. Koliko puta se vrata uređaja otvaraju i koliko dugo ostanu otvorena.
3. Količina i temperature hrane i pića koja se unesu u uređaj.
4. Vremenski uvjeti i doba godine, npr. ljeto/zima.
5. Postavljanje uređanja i prikladan protok zraka sa strane i stražnjeg dijela uređaja.
Nikada ne stavljajte vruću ili toplu hranu u hladnjak i ne ostavljajte vrata otvorena
duže no što je potrebno, jer će to podići temperature i uzrokovati velike količine
vlage čime se povećava količina leda u hladnjaku/zamrzivaču.
3

Unutarnje svjetlo
Unutarnje svjetlo će se automatski uključiti i isključiti kad god su vrata hladnjaka
otvorena ili zatvorena. Kako biste promijenili žarulju, molimo pogledajte poglavlje o
promjeni žarulje.
Skladištenje svježe hrane u hladnjaku
Hrana bi uvijek trebala biti čvrsto pokrivena aluminijskom ili plastičnom folijom,
stavljena u vrećice ili pohranjena u hermetičke posude. Ovo će spriječiti dehidraciju
hrane i jake mirise neke hrane koji prelaze na one blaže.
Kako bi ste pohranili sirovo meso, umotajte ga u plastične vrećice ili hermetičke
posude i smjestite na najnižu policu.
Nemojte dopustiti da sirovo meso dođe u kontakt s kuhanom hranom. Zbog
sigurnosti, svježe meso čuvajte samo dva ili tri dana. Voće i povrće treba temeljito
očistiti i staviti u ladicu za salatu/povrće.
Mlijeko i druge tekućine bi trebale biti zatvoreni poklopcima i stavljeni u policu za
boce na vratima.
Skladištenje smrznute hrane
Kada koristite zamrzivač prvi put ili nakon odmrzavanja, okrenite regulator
termostata na 6(najhladnije), najmanje dva sata prije skladištenja hrane,a zatim
podesite na željenu postavku.
Sve smrznute prehrambene proizvode koje kupite treba staviti u zamrzivač što je
prije moguće kako bi se izbjeglo odleđivanje smrznute hrane.
Uvijek bi trebalo slijediti preporuke o skladištenju od strane proizvođača, otisnute
na ambalaži smrznute hrane.
Zamrzavanje svježe hrane
Pobrinite se da vaše zamrzavanje provodite u najhigijenskijim uvjetima, s obzirom da
samo zamrzavanje ne sterilizira hranu. Nikad ne stavljajte vruće ili čak tople
namirnice u zamrzivač. Prije skladištenja, zapakirajte hranu u plastične vrećice,
aluminijsku foliju ili posude za zamrzavanje i stavite u zamrzivač bez da ih dovedete u
kontakt s hranom koja je prethodno smrznuta. Pogledajte tehnički list na poleđini
ove knjižice za najveće dopuštene količine u kilogramima svježih namirnica koje se
mogu zamrznuti u bilo kojem 24-satnom razdoblju na sobnoj temperaturi od 25 ° C
Nikada zamrznuti više od maksimalno dopuštenog.
Pravljenje kockica leda
Lijevajte vodu u posudicu za led dok se ne napuni dvije trećine i potom stavite u
zamrzivač. Kockice leda će se formirati otprilike za 2 do 3 sata. Kockica leda može se
lako ukloniti uvijanjem posudice za led ili ako se stavi pod mlaz hladne vode u
kratkom vremenu.
4

Proces odmrzavanja hladnjaka
Proces odmrzavanja hladnjaka se automatski provodi svaki put kad kompresor
prestane raditi.
Odmrznuta voda se cijedi u posudu smještenu na vrh kompresora na stražnjoj strani
uređaja gdje isparava.
Proces odmrzavanja zamrzivača
Male količine mraza će se nakupiti unutar zamrzivača, ovisno o duljini vremena u
kojem se vrata ostave otvorena ili o količini uvedene vlage. Neophodno je
osigurati da se ni mraz ni led nedopušteno formiraju na mjestima gdje će utjecati
na zatvaranje vrata. Ovo bi moglo omogućiti da zrak prodre u odjeljak, i na taj
način potakne kontinuiran rad kompresora. Tanko formiranje mraza je vrlo
mekano i može biti uklonjeno pomoću četke ili plastične strugalice Ne koristite
metalne ili oštre strugalice, mehaničke uređaje ili druga sredstva kako biste ubrzali
popstuka odleđivanja. Uklonite sav pomaknuti mraz sa dna odjeljka. Za uklanjanje
tankog sloja mraza nije potrebno isključiti uređaj.
Za uklanjanje teških ledenih naslaga isključite uređaj iz struje i ispraznite sadržaj u
kartonske kutijame i zamotajte u debelim dekama ili slojeva papira da bi ih držali
hladnima. Odmrzavanje će biti najučinkovitije ako se provodi kada zamrzivač je
gotovo prazan, i to treba provesti što je moguće brže kako bi se spriječilo
pretjerano povećanje temperature sadržaja.
Nemojte koristiti metalne ili oštre strugalice, mehanički uređaji ili druga sredstva
kako biste ubrzali postupak odleđivanja. Porast temperature smrznute hrane
tijekom odleđivanja će skratiti vijek skladištenja. Pod uvjetom da je sadržaj dobro
umotan i postavljeni u hladnom prostoru trebali bi zadržati temperaturu nekoliko
sati. Pregledajte sadržaj kada ih mijenjate u zamrzivaču, a ako su neki od paketa
otopljeni treba ih pojesti unutar 24 sata ili skuhati i ponovno zamrznuti.
Nakon što završite s odleđivanjem, očistite unutrašnjost s otopinom tople vode i
malo sode i zatim temeljito osušite. Operite sve odvojive dijelove na isti način i
ponovno sastavite. Ponovno spojite uređaj u struju i ostaviti za 2 do 3 sata na
postavki broj 6 prije uvođenja hrane natrag u zamrzivač.
5

Upozorenje: Rashladni sustav ne smije biti oštećen ni u bilo kojem trenutku.
Čišćenje i održavanje
Prije provođenja čišćenja ili održavanja, morate isključite uređaj iz električne mreže
izvlačenjem utikača, nikad ne izvlačite utikač povlačenjem kabela za napajanje.
Izvadite utikač povlačenjem samog utikač.
Preporučuje se da tijekom čišćenja aparata, iznutra i izvana, možete čistiti toplom
vodom s malo natrijevog bikarbonata. Koristite 1 žličicu na 1.2 litra vode.
Ako se uređaj ne treba koristiti dulje vremensko razdoblje, tada je preporučljivo
ukloniti svu hranu, očistiti unutrašnjost aparata i ostaviti vrata otvorena kako bi se
omogućilo kruženje zraka čime se izbjegavaju neugodni mirisi.
Zamjena žarulje
Napomena: Žarulje nisu pokrivene jamstvom.
Isključite uređaj iz električne mreže.
Gurnite poklopac žarulje dolje, da bi pristupili držaču žarulje.
Odvijte žarulju u smjeru obrnutom od kazaljke na satu od nositelja.
Zamijenite žarulju s onom odgovarajuće vrste i veličine.
Vratite poklopac pomicanjem poklopca prema gore.
Ponovno spojite uređaj u struju.
Nestanak struje
U slučaju nestanka struje u vremenskom razdoblju manjem od 16 sati, držite vrata
zatvorenima.
Ne bi trebalo utjecati na smrznutu hranu ako nestanak struje traje manje od 16 sati.
Može se dodatno zaštititi pokrivanjem aparata s dva ili tri deblja pokrivača.
Ako je predviđen duži nestanak struje, pokušajte prebaciti namirnice u drugi uređaj
ili hladnjaču, ako je moguće.
Ako nestanak struje traje dulje od 16 sati, provjerite sadržaj zamrzivača.
Nikad ne zamrzavajte ponovno hranu koju ste odmrznuli.
Ako aparat ne radi ispravno:
Molimo provjerite sljedeće točke:
Postoji li nestanak struje? (Provjerite paljenjem kućnog svjetla)
Je li osigurač pregorio ili iskočio?
Jesu li vrata ispravno zatvorena?
Provjerite je li termostat ispravno postavljen.
Provjerite je li mrežni utikač ispravno uštekan u zidnu utičnicu i je li prekidač utičnice
uključen.
6

DA i NE
Da - Držati sirovo meso i perad ispod kuhane hrane i mliječnih proizvoda.
Da -Ostaviti salatu, kupus, peršin i cvjetaču na stabljici.
Da -Prvo zamotajte sir u papir otporan na masnoću, zatim stavite u plastičnu
vrećicu, istiskujući zrak što je više moguće. Za najbolje rezultate, izvadite iz hladnjaka
sat vremena prije jela.
Da -Zamotajte sirovo meso i piletinu labavo u plastičnu ili aluminijsku foliju. Ovo
sprječava isušivanje.
Da –Zamotajte ribu i iznutrice u plastične vrećice.
Da -Zamotajte hranu s jakim mirisom ili onu koja se može osušiti u plastične vrećice
ili aluminijsku foliju ili u hermetičke posude.
Da –Dobro zamotajte kruh kako bi ostao svjež
Da –Ohladite bijela vina, pivo, i mineralnu vodu prije posluživanja.
Da –Provjerite sadržaj odjeljka s niskom temperaturom svako toliko.
Da - Držite hranu što je manje vremena moguće i pridržavajte se "upotrijebiti
najbolje do" i ‘upotrijebiti’ i sl. datuma.
Da –Pohranite kupovnu hranu u skladu s uputama na pakiranju.
Da -Uvijek izaberite kvalitetnu svježu hranu i budite sigurni da je temeljito očistite
prije skladištenja.
Da -Zamotajte svu hranu u aluminijsku foliju ili kvalitetne plastične vrećice i
provjerite da je zrak istisnut.
Da –Držite ventilacijske otvore u uređaju ograđenima od ometanja.
Da –Pobrinite se da smrznutoj hrani ne poraste temperatura tijekom odmrzavanja
hladnjaka, porast temperature tijekom odleđivanja može skratiti vijek skladištenja.
Ne –Pokriti police nikakvim zaštitnim materijalom koji može ometati protok zraka.
Ne-Skladištiti otrovne ili bilo kakve opasne supstance u vašem hladnjaku Namjenjen
je za pohranu samo jestivih namirnica.
Ne –Konzumirati hranu koja je bila zamrznuta prekomjernu duljinu vremena..
Ne –Skladištiti kuhanu i svježu hranu skupa u isti spremnik. Trebala bi biti zapakirana
i spremljena odvojeno.
Ne –Pustiti da odmrznuta hrana ili sokovi hrane kapaju na već skladištenu hranu
Ne - Ostaviti vrata otvorena dulje vrijeme, jer to će učiniti rad uređaja skupljim i
izazvati prekomjerno stvaranje leda.
Ne –Koristiti oštre šiljaste predmete kao što su noževi ili viljuške za uklanjanje leda
Ne –Nikad ne koristite sušila za kosu ili električne aparate za odmrzavanje, koristite
samo predmete koje je preporučio proizvođač
Ne –Stavljati vruću hranu u uređaj. Pustiti prvo da se ohladi.
Ne –Staviti boce s tekućinom ili limenke s gaziranim pićem u zamrzivač, jer mogu
puknuti
Ne –Davati djeci sladoled i ledene štapiće izravno iz zamrzivača. Niska temperatura
može prouzročiti ‘ledene’ opekline na usnama.
Ne –Pokušati zadržati smrznutu hranu koja je otopljena; Treba je pojesti unutar 24
sata ili skuhati i ponovno zamrznuti.
Ne –Oštetiti rashladni krug u bilo koje vrijeme.
7
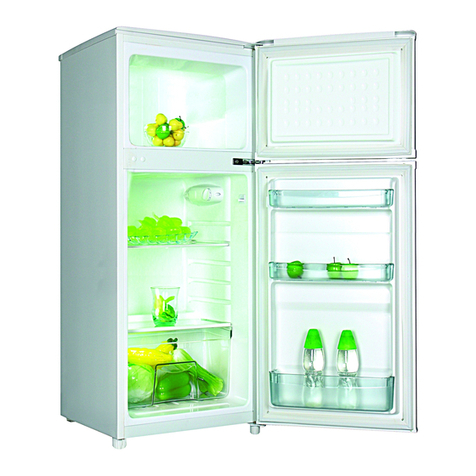
EN
User manual
Refrigerator
DD-132 WH

DISCRIPTION OF APPLIANCE
1. Cabinet Top -Freezer Shelf
2. Thermostat Housing
3. Fridge Shelf
4. Salad Drawer Cover
5. Fridge Shelf- Salad Drawer
6. Plug
7. Adjustable Feet
8. Upper Bottle Shelf
9. Bottom Bottle Shelf
1

Safety information
This information is provided in the interest of your safety. Please read the following
carefully before carrying out the installation or use of the appliance.
If you are discarding an old freezer or refrigerator with a lock / catch fitted to the
door, ensure that it is left in a safe condition to prevent the entrapment of young
children.
As old refrigeration equipment may contain CFC’s which will damage the ozone
layer, when disposing of any refrigeration equipment please contact your local waste
disposal department for advice on the correct method of disposal
This appliance must only be used for its intended purpose i.e. the freezing and
storage of domestic edible foodstuffs and should not be used for any other purpose
If the mains cable requires replacement, this must only be undertaken by a suitably
qualified person, as special purpose tools are required.
Installation
Position the appliance and allow to stand for two to three hours before it is turned
on for the first time to allow the system to settle. Do not position next to any heat
source e.g. cooker, boiler or in direct sunlight etc.
A clearance of 10 cm must be left between the sides of the appliance and any
adjacent cabinets or walls to allow for adequate air circulation. The appliance is not
designed for recessed installation (“building in”).
Install on a good firm level surface, and any unevenness of the floor should be
corrected prior to installation, slight unevenness can be overcome by adjusting the
front feet.
NOTE: If the appliance is positioned on a carpet, soft floor covering you should re-
adjust the front feet once the appliance has had time to settle.
Please note that the doors on this appliance can not be reversed.
2

Instructions for use
Remove all packing materials and wash the interior of the appliance using lukewarm
water containing a little bicarbonate of soda in the proportion of 1 teaspoon to 1.2
litres (2 pints) of water. Do not use detergents or soaps as they may taint the food.
After cleaning, dry all parts thoroughly.
Temperature Control
The refrigerator is designed to maintain an internal storage temperature in the
refrigerator compartment between +2C to + 5C.
To enable adjustment of the temperature in the appliance it is fitted with an
adjustable thermostat located in the fridge compartment, which can be adjusted
from setting 1 (warmest) to 6 (coldest). For normal working temperature it is
recommended to adjust the thermostat control to the midway position, after a few
hours readjust the thermostat to the desired temperature. There is also an off
position “OFF”. Which turns OFF/ON the refrigerator freezer compartment. Please
Note this dose not disconnect the appliance from the mains supply. To do this you
must remove the mains plug from the socket.
To obtain a lower internal temperature turn the thermostat temperature control
clockwise to a higher number. To obtain a higher internal temperature turn the
thermostat control anticlockwise to a lower number. However, the internal
temperature and temperature control setting is dependent on a number of factors:
1. Varying ambient temperatures.
2. The number of times the appliance doors is opened and how long the doors
remain open.
3. The amount and temperature of the food and drink introduced into the
appliance.
4. The weather conditions and time of year e.g. summer/winter.
5. The positioning of the appliance and an adequate air circulation to the sides and
back of the cabinet.
Never place hot or warm foods into the cabinet or leave the doors open for longer
than necessary as this will raise the temperature and cause excessive amounts of
moisture thus increasing the amount of ice in the refrigerator / freezer
compartment.
3

The Internal Light
The internal light will automatically switch ON and OFF whenever the refrigerator
door is opened or closed. To change the light bulb, please see the chapter on
changing the light bulb.
Storage of fresh food in the refrigerator
Food should always be covered tightly with foil, plastic film, placed in bags or stored
in airtight containers. This will prevent food from dehydrating and prevent the
strong smell of some foods transferring to milder ones.
To store raw meat wrap in polythene bags or airtight containers and place on the
lowest shelf.
Do not allow raw meat to come into contact with cooked foods. For safety, only
store raw meat for two or three days. Fruit and vegetables should be thoroughly
cleaned and placed in the vegetable/ salad bin.
Milk and other liquids should be sealed with lids and placed in the bottle shelf on the
door.
Store frozen food
When using the freezer for the first time or after defrosting, turn the thermostat
temperature control to setting 6 for at least two hours before introducing the food
to be stored, Then adjust to your preferred setting.
All frozen food products you purchase should be placed in the freezer as soon as
possible to avoid the frozen food from defrosting.
Storage recommendations printed on the packaging of frozen food by the
manufactures should always be followed.
Freezing fresh food
Ensure that your freezing operations are carried out under the most hygienic
conditions, as freezing alone does not sterilise the food. Never put hot or even warm
foodstuffs into the freezer. Prior to storing the food, pack it in plastic bags,
aluminium foil or freezer containers and place into the freezer without putting them
in contact with food that has already been frozen. See the technical data sheet at the
rear of this booklet for the maximum permissible amount in kilograms of fresh food
that can be frozen in any 24 hour period with a room temperature of 25C Never
freeze more than the maximum permissible.
Making ice cubes
Pour water into the ice cube tray until it is two thirds full and place into the freezer.
Ice cubes will form in approximately 2 to 3 hours. The ice cube can be easily removed
by twisting the ice cube tray or running under cold water for a short time.
4

Refrigerator defrost process
The refrigerator defrosting process is carried out automatically every time the
compressor stops.
The defrost water drains from the cabinet into a tray placed on the top of the
compressor to the rear of the unit where it evaporates.
Freezer defrost process
Small amounts of frost will accumulate inside the freezer depending upon the
length of time during which the door is left open or the amount of moisture
introduced. It is essential to ensure that no frost or ice is allowed to form at
places where it will affect the close fitting of the door seal. This might allow air to
penetrate the cabinet, thus encouraging continuous running of the compressor.
Thin frost formation is quite soft and can be removed with a brush or plastic
scraper. Do not use metal or sharp scrapers, mechanical devices or other means to
accelerate the defrosting process. Remove all dislodged frost from the cabinet
floor .For the removal of thin frost it is not necessary to switch off the appliance.
For the removal of heavy ice deposits disconnect the appliance from the mains
supply and empty the contents into cardboard boxes and wrap in thick blankets or
layers of paper to keep them cold. Defrosting will be most effective if carried out
when the freezer is nearly empty, and it should be carried out as quickly as
possible to prevent undue increase in temperature of the contents.
Do not use metal or sharp scrapers, mechanical devices or other means to
accelerate the defrosting process. An increase in temperature of frozen food
packages during defrosting will shorten the storage life. Provided that the
contents are well wrapped and placed in a cool area they should keep for several
hours. Examine the contents when replacing them in the freezer and if some of
the packages have thawed out it should be eaten within 24hours or be cooked
and re-frozen.
After defrosting has finished clean the inside with a solution of warm water with
a little bicarbonate of soda and then dry thoroughly. Wash all removable parts in
the same way and reassemble. Reconnect the appliance to the mains supply and
leave for 2 to 3 hours on setting number 6 before introducing the food back into
the freezer.
5

Warning : The refrigerating system must not be damaged at any time.
Cleaning and maintenance
Before any cleaning or maintenance is carried out you must disconnect the appliance
from the mains supply by removing the plug, never remove the plug by pulling on
the mains cord. Remove the plug by pulling on the plug itself.
It is recommended that when cleaning the appliance, both the inside and outside,
can be cleaned using warm water and a little bicarbonate of soda. Use 1 teaspoon to
1.2 litres of water.
If the appliance is not to be used for a long period of time then it is recommended to
remove all the food stuff, clean the inside of the appliance and leave the door open
to allow the air to circulate thus avoiding unpleasant odours.
Changing the light bulb
Note. Light bulbs are not covered by the warranty
Disconnect the appliance from the mains supply.
Slide the lamp cover downwards, to gain accesses to the lamp holder.
Unscrew the light bulb in an anticlockwise direction from the holder.
Replace the bulb with one of the correct type and size.
Replace the cover by sliding the cover upwards.
Reconnect the appliance to the mains supply.
Power Failure
If there is a power failure for a short time less than 16 hrs keep the door closed
Frozen food should not be affected if the failure lasts for less than 16 hrs.
Extra protection can be given by covering the appliance with two or three thick
blankets.
If a long power failure is anticipated, try to get the foodstuff into another appliance
or cold store, if possible.
If the power cut is longer than 16 hrs then check the content of the freezer.
If the food as defrosted cook and refreeze the food or it should be eaten
immediately.
Never refreeze food that as been defrosted.
If the appliance is not operating correctly:
Please check the following points.
Is there a power failure? (Check by turning on a house light)
Has the fuse blown or has the circuit breaker tripped.
Has the door been closed correctly?
Check the thermostat as been set correctly.
Check the mains plug seated in the wall socket correctly and the socket switch is on.
6

Do’s and don’ts
Do- keep raw meat and poultry below cooked food and dairy products.
Do- Leave lettuce, cabbage, parsley and cauliflower on the stem.
Do- Wrap cheese firstly in greaseproof paper and then in a polythene bag, excluding
As much air as possible. For best results, take out of the fridge compartment an hour
before eating.
Do- Wrap raw meat and poultry loosely in polythene or aluminium foil. This prevents
drying.
Do- Wrap fish and offal in polythene bags.
Do- Wrap food with a strong odour or which may dry out, in polythene bags, or
aluminium foil or place in airtight container.
Do- Wrap bread well to keep it fresh.
Do- Chill white wines, beer, larger and mineral water before serving.
Do- Check contents of the low temp compartment every so often.
Do- Keep food for as short a time as possible and adhere to “best before” and “Use
by” etc. dates.
Do- Store commercially prepared food in accordance with the instructions given on
the packets.
Do- Always choose high quality fresh food and be sure it is thoroughly clean before
Storing it.
Do- Wrap all food in aluminium foil or food quality polythene bags and make sure
any air is excluded.
Do-Keep ventilation openings, in the appliance enclosure clear of obstruction.
Do-ensure that frozen food does not rise in temperature while defrosting, a rise in
temperature during defrosting may shorten the storage life of your food.
Don’t- Cover the shelves with any protective materials which may obstruct air
circulation.
Don’t-Store poisonous or any dangerous substances in your fridge. It has been
designed for the storage of edible foodstuffs only.
Don’t- Consume food which has been refrigerated for an excessive length of time.
Don’t- Store cooked and fresh food together in the same container. They should be
packaged and stored separately.
Don’t-Let defrosting food or food juices drip onto already stored food.
Don’t- leave the door open for long periods, as this will make the appliance more
costly to run and cause excessive ice formation.
Don’t- Use sharp edged objects such as knives or forks to remove the ice.
Don’t- Never use hairdryers, or electrical appliances for defrosting only use item
recommended by the manufacturer.
Don’t- put hot food into the appliance. Let it cool down first.
Don’t- put liquid-filled bottles or sealed cans containing carbonated liquids into the
freezer section, as they may burst.
Don’t- Give children ice cream and water ices direct from the freezer section. The
low temperature may cause ‘freezer burns’ on the lips.
Don’t- Try to keep frozen food which has thawed; it should be eaten within 24 hours
or cooked and refrozen.
Don’t- Damage the refrigerant circuit at any time
7
Table of contents
Other Vivax Refrigerator manuals

Vivax
Vivax CF-180 S User manual

Vivax
Vivax MF-45G User manual

Vivax
Vivax VL- 235 W User manual

Vivax
Vivax CF-170LF W User manual

Vivax
Vivax DD-220 WH A User manual

Vivax
Vivax CF-295D NFW User manual

Vivax
Vivax VL-235 W User manual

Vivax
Vivax MF-45 User manual

Vivax
Vivax CFRB-246BLF User manual

Vivax
Vivax CF- 310 NFX User manual

Vivax
Vivax CF-278 W User manual

Vivax
Vivax DD-215 W User manual

Vivax
Vivax DD-207 WH User manual

Vivax
Vivax TTF-60 User manual

Vivax
Vivax CF 360 S User manual

Vivax
Vivax TTL-93 User manual

Vivax
Vivax CF 310 WH User manual

Vivax
Vivax CF-180 WH User manual

Vivax
Vivax MFR-32 User manual

Vivax
Vivax DD-220 WH A User manual