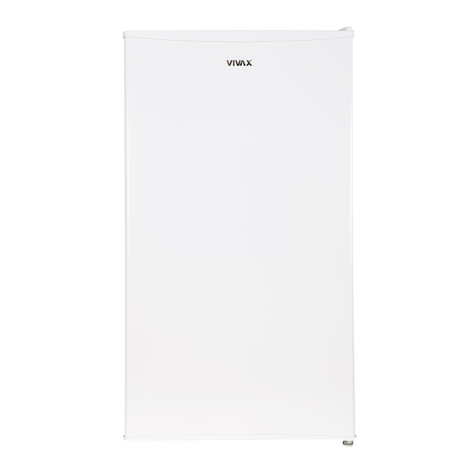
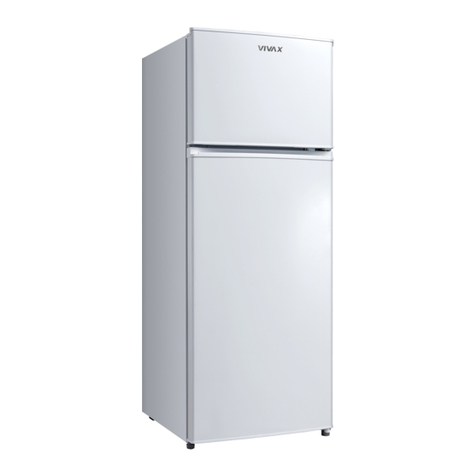
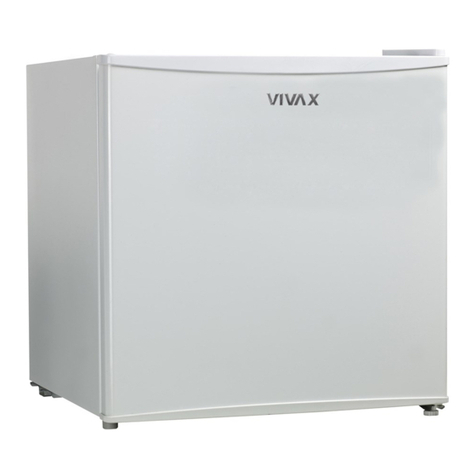
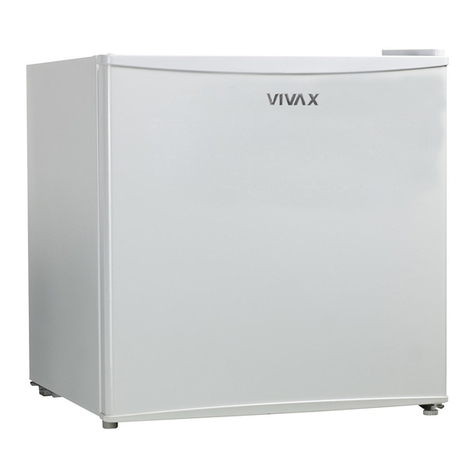
Vivax TT-90 User manual

Upute za uporabu
Korisničko uputstvo
Servisna mjesta
Jamstveni list
HR
Servisna mjesta
Garantni list
BiH
07/BB 4
TT-90
Upatstvo za uporaba
User Manual
Servisna mjesta
Garantni list
CG
Servisna mesta
Garantni list
SR

TT-90
User
manual
Refrigerator
ENG
07/BB 4

TT-90
1. Name of parts
PARTS AND FEATURES
Cabinet
Freezer Compartment Door
Drip Tray
Shelves
Glass cover
Compressor (back)
Crisper box
Leveling Legs
Bottle Racks
Recessed Handle
Door switch
Temperature Control Knob

TT-90
2. Correctly positioning
Well Ventilating
There is need of good ventilation around the refrigerator for easy
dissipation of heat, high efficiency of refrigeration and low power
consumption. For this purpose, sufficient clear space should be
need around the refrigerator. Its back is at least 100mm away from
the wall, its sides at least have a space of 100mm separately and
the height from over its top is not less than 200mm. A clear space
should be left to open its doors to 160 °
Power Supply
The refrigerator is only applied with power supply of single phase
alternating current of (220-240)V~/50Hz;230V~/60Hz. If
fluctuation of voltage in the district user is of so large that the
voltage exceeds the above scope, for safety sake, be sure to
apply a.c. automatic voltage regulator to the refrigerator. The
refrigerator must employ a special power socket instead of
common one with other electric appliances. Its plug must match
the socket with ground wire.
Power Line Cord
The cord should be neither lengthened nor folded into
coil during operation. Moreover, it is forbidden that cord
is kept close onto the compressor at the back of the
refrigerator, the surface temperature of which is quite
high when operating. Touching with it would deactivate
the insulation or cause leakage for electricity.
Protection from Moisture
Avoiding placing the refrigerator in a place where heavy
moisture is present so as to minimize possibility of rusty for
its metal parts. Still more, the refrigerator is forbidden to be
directly sprayed by water, otherwise, poor insulation and
current leakage would occur.

TT-90
2. Correctly Positioning
Protection from Heat
The refrigerator should be far away from any heat
source or direct sunshine.
Fixing Stable
Floor on which refrigerator will be placed must be flat and
solid. It should not be laid on any soft material such as
foam plastic, etc. If the refrigerator is not on the same level,
adjust the screws suitably. The refrigerator should not be
placed near anything which may echo.
Keep Away from Danger
It is inadvisable that the refrigerator is placed near any
volatilizable or combustible such as gas, petrol, alcohol,
lacquer and banana oil, etc. The above-mentioned objects
can not be stored in the refrigerator.
Moving
When fixed or moved, the refrigerator can not be
set horizontally or declined to more than 45" or
upside-down.

TT-90
3. Cautions
Water contained in food or getting into air inside the refrigerator by opening doors
may form a layer of frost inside, It will weaken the refrigerator when the frost is thick,
while it is more than 2mm thick, you should defrost.
Defrosting in freezer chamber is operated manually. Before defrosting, take the food, the
ice tray and the shelf out into the cold storing chamber temporarily then set the knob of
the temperature regulator to position"0"(where the compressor will stop working) and
leave the door open until ice and frost dissolve thoroughly deposited at the bottom drip
tray of the freezer chamber. Take out the drip tray and discard the water carefully. In the
case of speeding up the defrosting, you may put a bowl of warm water (about 50°C into
the freezer chamber, and be sure to set the knob of the temperature regulator to original
position after defrosting.
It's inadvisable to heat the freezer chamber directly with hot water or hair dryer while
defrosting to prevent deformation of the inner case.
It's also inadvisable to scrape of ice and frost or separate food from the containers
which have been congealed together with the food with sharp tool or wooden bars,
so as not to damage the inner casing or the surface of the evaporator.
If the supply cord of this appliance is damaged, it must only be replaced by a repair
shop appointed by the manufacturer, because special purpose tools are required.

TT-90
4. Changing the reversible door
This refrigerator has been built with the door hinges on the right. If you wish to
change the opening direction, follow the instructions below:
1. Remove the upper hinge cover(6) first
2. Remove the two screws (1) that hold the upper hinge (5) (right side) to the
frame. Take away the upper hinge (5).
3.Lift the door and place it on a padded surface to prevent scratching it.
4. Remove the two screws(8) that hold the lower hinge(2) and Make sure to
Remove the lower hinge(2).
5. Remove the left front leg (4) and transfer it to the right side.
6. Remove the hole cover plate(7) to the right side.
7. Before placing this lower hinge(2), remove the bolt-pin (9) and reverse
the direction of the lower hinge(2). Then install the lower hinge (2) onto
the left side of the lower frame with two screws (8).
8. Insert the bolt-pin(9) to the lower hinge (2).
9. Set the door to its place making sure the door seat at the lower hinge(2)
10. While holding the door in the closed position secure the upper hinge (5) in the
top frame of left side with two screws (1). Please remember that do not tighten
the two screws(1) until the top of the door is levelled with the counter top.
11. Install the upper hinge cover(6) on the upper hinge.

TT-90
4. Changing the reversible door
FIGURE 1 FIGURE 2
FIGURE 1 - REPRESENTS POSITION OF COMPONENTS PRIOR TO
DOOR REVERSAL.
FIGURE 2 - REPRESENTS POSITION OF COMPONENTS AFTER
DOOR REVERSAL.

TT-90
5.Maintenance
The refrigerator should be cleaned and maintained once a month.
When performing maintenance, make absolutely sure that the power plug is
first disconnected from the power outlet.
Wipe the inner and outer surface of the refrigerator and its accessories with wet
cloth. If they are too dirty, scrub them with neutral detergent, and then clean
them with water and dry them with clean cloth. After this, a small quantify of
glass wax is recommended to polish the refrigerator surface with a flannelette.
For cleaning, don't use hot water, diluent, petrol, alcohol, kerosene, washing
powder, cleanser, aikailinous detergent, acid, Chemical cloth, etc. So as not to
damage the lacquer coat and plastics. It is forbidden than the refrigerator is
directly sprayed with water. Otherwise, it would cause rusty or weaken the
insulation.
Be careful to upkeep the sealing rubber bars of the doors. They should always be
cleaned.
If the plastic parts in refrigerator remain contaminated for a long time by oil
(animal or vegetable), they will be easy aged and possibly cracked. The drain
pan gets dirty very easily if it is not cleaned regularly, bad odours will be produ-
ced, get into the habit of cleaning this pan regularly.

TT-90
9
6. Troubleshooting
1. When the refrigerator does not work
Check if there is a power failure.
Check if the power plug is plugged into the power outlet.
Check that the fuse has not blown.
2. When the refrigerator is cooling excessively
The temperature control dial may be set too high.
If you place foodstuffs containing a lot of moisture directly under the cool
air outlets, they will freeze easily. This does not indicate a malfunction.
3. When the refrigerator is not cooling sufficiently
The food may be packed too tightly together which will block the flow of cool air.
You may have put something hot or a lot of foodstuffs into the refrigerator.
The door may not have been closed properly.
The door gaskets may be damaged.
The refrigerator may not be ventilated.
There may be insufficient clearance between the refrigerator and the surfaces
Immediately both sides and above.
The temperature control dial may not be set properly.
4. When the defrosting water overflows inside the refrigerator and onto the floor.
Check that the drain pipe and the drain hose are not clogged.
Check that the drain pan is housed properly.
5. When condensation form on the outside of the refrigerator.
Condensation may form on the outside when the humidity is high such as during
a wet season. This is the same result as the condensation formed when chilled
water is poured into a glass. It does not, therefore, indicate a failure, wipe dry
with a dry cloth.
6. When you hear a sound like water flowing .
A sound like water flowing is the refrigerant flowing. It does not Indicate a
malfunction.
7. When the cabinet's side panel heats up
The side panel of the cabinet will heat up when the door is opened or closed
frequently, when starting the unit and when the unit operates in summer with high
ambient outside temperature, In such case, do not touch the panel, it results
from the dissipation of the heat from inside the cabinet, and it does not mean
that something is wrong with the refrigerator.
TT-90
7.Technical specifications
* For the detailed technical specifications, please refer to the nameplate at
the back of the refrigerator.
* Specifications are subject to change without prior notice.

Upute za
uporabu
Hladnjak
HR
TT-90
BiH
CG
07/BB 4

TT-90
1. Nazivi dijelova
DIJELOVI I ZNAČAJKE
12 11
10
1
2
3
49
5
6
7
8
Kućište
Vrata zamrzivača
Pladanj za vodu
Police
Stakleni poklopac
Kompresor (straga)
Kutija za povrće
Noge za poravnanje
Police za boce
Udubljena drška
Vratni prekidač
Dugme za kontrolu temperature
1

TT-90
2. Ispravno pozicioniranje
Dobro prozračivanje
Za jednostavnu disipaciju topline, visoku učinkovitost hlađenja i nisku
potrošnju energije potrebno je dobro prozračivanje oko hladnjaka. U
tu svrhu nužno je ostaviti dovoljnu količinu praznog prostota oko
hladnjaka. Stražnji dio hladnjaka mora biti najmanje 100mm udaljen
od zida, stranice 100mm, te praznina iznad hladnjaka mora iznositi
najmanje 200mm. Treba ostaviti dovoljno praznog prostora da se
vrata mogu otvoriti do kuta od 160°.
Napajanje
Hladnjak se napaja isključivo jednofaznom izmjeničnom strujom
napona (220-240) V~/50Hz;230V~/60Hz. Ukoliko je kolebanje napona
u području stanovanja korisnika toliko veliko da nadmašuje gornju
granicu radnog napona, iz sigurnosnih razloga se preporuča instalacija
automatskog regulatora napona u hladnjak. Hladnjak se mora
uključivati u zasebnu strujnu utičnicu, koju ne smije dijeliti sa drugim
električnim uređajima. Utikačmora odgovarati utičnici sa
žicom uzemljenja.
?
Kabel napajanja
Kabel napajanja se tijekom uporabe ne smije
produljivati ili namatati. Nadalje, zabranjeno je držati
kabel napajanja blizu kompresora sa stražnje strane
hladnjaka, čija je površina tijekom rada prilično visoka.
Dodirivanje bi moglo oštetiti izolaciju kabela napajanja ili
uzrokovati istjecanje struje.
Zaštita od vlage
Izbjegavajte postavljanje hladnjaka na jako vlažna mjesta
kako biste minimalizirali mogućnost od hrđanja njegovih
metalnih dijelova. Nadalje, hladnjak je zabranjeno izravno
prskati vodom jer bi u suprotnom moglo doći do oštećenja
izolacije i istjecanja struje.
N

TT-90
2. Ispravno pozicioniranje
Zaštita od topline
Hladnjak bi trebao biti podalje svih izvora topline i
izravne sunčeve svjetlosti.
Stabilno postavljanje
Pod na koji namjeravate postaviti hladnjak mora biti ravan
ičvrst. Hladnjak ne bi trebalo postavljati na mekane
materijale, poput plastične pjene, itd. Ukoliko hladnjak nije
ravan, poravnajte ga pomoću nogu. Hladnjak ne bi trebao
biti postavljen pored predmeta koji bi mogli odjekivati.
Držanje podalje opasnosti
Ne preporuča se postavljanje hladnjaka u blizinu bilo
kakvih eksplozivnih ili zapaljivih tvari, poput plina, benzina,
alkohola, laka, ulja banane, itd. Gore spomenute tvari se
ne smiju pohranjivati u hladnjak.
Pomicanje
Prilikom učvršćivanja ili pomicanja, hladnjak se ne
smije postavljati vodoravno, naginjati za više od 45°
ili okretati naopako.

TT-90
3. Predostrožnosti
Voda sadržana u hrani ili vlaga koja ulazi unutar hladnjaka prilikom otvaranja vrata
može oformiti sloj leda unutar hladnjaka. Debeli led smanjuje radna svojstva
hladnjaka, te se preporuča otapanje ukoliko debljina leda premaši 2mm.
Otapanje zamrzivača se vrši ručno. Prije otapanja izvadite hranu, posudu za led i
policu i privremeno ih postavite u drugi uređaj za hlađenje, te zatim postavite
dugme za kontrolu topline na položaj "0" (kompresor prestaje s radom) i ostavite
vrata otvorena dok se led u potpunosti ne otopi i voda nakupi u pladnju za vodu
zamrzivača. Izvadite pladanj i oprezno izlijte vodu. Ukoliko zatrebate ubrzati
otapanje, možete postaviti posudu tople vode (oko 50°C) u odjeljak zamrzivača.
Nakon otapanja vratite dugme za kontrolu topline u prvobitni položaj.
Ne preporuča se izravno zagrijavanje zamrzivača vrućom vodom ili sušilom za
kosu tijekom otapanja kako bi se spriječilo deformiranje unutrašnjosti hladnjaka.
Također se ne preporuča struganje leda ili odvajanje hrane od spremnika
zamrznutih za hranu pomoću oštrih predmeta ili drvenih poluga, kako se ne bi
oštetila unutrašnjost hladnjaka ili površina isparivača.
Ukoliko je kabel napajanja hladnjaka oštećen, mora biti zamijenjen isključivo od
strane ovlaštenog servisa, jer su tijekom zamjene potrebni posebni alati.
4

TT-90
4. Promjena smjera otvaranja vrata
Ovaj hladnjak je proizveden sa vratnim šarkama na desnoj strani. Ukoliko želite
promijeniti smjer otvaranja vrata slijedite donja uputstva:
1. Prvo uklonite poklopac gornje šarke (6)
2. Uklonite dva vijka (1) kojima je gornja šarka (5) (desna strana) pričvršćena za
tijelo hladnjaka. Uklonite gornju šarku (5).
3. Podignite vrata i postavite ih na podloženu površinu kako biste spriječili njihovo
grebanje.
4. Uklonite dva vijka (8) kojima je učvršćena donja šarka (2), te zatim uklonite
donju šarku (2).
5. Uklonite lijevu prednju nogu (4), te je premjestite na desnu stranu.
6. Premjestite poklopac rupe (7) na desnu stranu.
7. Prije namještanja donje šarke (2) uklonite klin (9) i preokrenite smjer donje
šarke (2). Zatim sa dva vijka (8) učvrstite donju šarku (2) na lijevu stranu
donjeg okvira.
8. Umetnite klin (9) na donju šarku (2).
9. Postavite vrata na mjesto, pazeći pritom da ''sjednu'' na donju šarku (2)
10. Držeći vrata zatvorenima pričvrstite gornju šarku (5) za gornji okvir lijeve
strane pomoću dva vijka (1). Molimo imajte na umu da ne stegnete dva vijka
(1) dok ne poravnate vrh vrata sa vrhom tijela hladnjaka.
11. Postavite poklopac gornje šarke (6) na gornju šarku.
5

TT-90
4. Promjena smjera otvaranja vrata
6
7
7
8
4
5 1
6
5
2
2 4
3 9
8 9
3
SLIKA 1 SLIKA 2
SLIKA 1 – PRIKAZUJE POLOŽAJ DIJELOVA PRIJE PROMJENE
SMJERA OTVARANJA VRATA
SLIKA 1 – PRIKAZUJE POLOŽAJ DIJELOVA NAKON PROMJENE
SMJERA OTVARANJA VRATA

TT-90
5. Održavanje
Hladnjak bi trebalo čistiti i održavati jednom mjesečno.
Prilikom održavanja obavezno isključite utikačkabela napajanja iz strujne
utičnice.
Obrišite unutarnju i vanjsku površinu hladnjaka i dodatke mokrom krpom.
Ukoliko su jako prljavi, operite ih neutralnim deterdžentom, te ih zatim isperite
vodom i osušite čistom krpom. Nakon pranja se preporuča glačanje površine
hladnjaka malom količinom voska za staklo i flanelskom krpom.
Za čišćenje ne koristite vruću vodu, razrjeđivač, benzin, alkohol, kerozin, prašak
za pranje, alkalne deterdžente, kiselinu, kemijska platna, itd. kako ne biste
oštetili lakirni premaz i plastiku. Zabranjeno je izravno prskanje hladnjaka
vodom. To bi moglo uzrokovati hrđanje hladnjaka i oštetiti izolaciju.
Obavezno održavajte gumene brtve na vratima. Njih uvijek treba čistiti.
Ukoliko se plastični dijelovi u hladnjaku zaprljaju uljem (životinjskim ili biljnim) na
dulje, oštetiti će se i možda napuknuti. Pladanj za vodu se vrlo lako zaprlja
ukoliko se redovito ne čisti, što rezultira neugodnim mirisima. Steknite naviku
redovitog čišćenja pladnja za vodu.

TT-90
6. Otklanjanje problema
1. Kada hladnjak ne radi
Provjerite je li nestalo struje.
Provjerite je li utikačkabela napajanja uključen u strujnu utičnicu.
Provjerite je li pregorio osigurač.
2. Kada hladnjak pretjerano hladi
Dugme za kontrolu temperature je možda postavljeno na previše visoku postavku.
Ukoliko postavite hranu koja sadrži veliku količinu vlage izravno ispod
otvora za hladan zrak, ona će se jednostavno zamrznuti. Ovo ne
predstavlja kvar.
3. Kada hladnjak ne hladi dovoljno
Hrana je možda smještena previše blizu što sprječava protok hladnog zraka.
Možda ste u hladnjak postavili nešto vruće ili puno hrane.
Vrata možda nisu dobro zatvorena.
Možda su oštećene vratne brtve.
Hladnjak se možda ne prozračuje.
Možda nema dovoljno praznog prostora između hladnjaka i površina izravno
pored i iznad hladnjaka.
Dugme za kontrolu temperature možda nije ispravno postavljeno.
4. Kada otopljena voda istekne u untrašnjost hladnjaka i na pod.
Provjerite jesu li odvodna cijev i odvodno crijevo začepljeni.
Provjerite je li pladanj za vodu ispravno postavljen.
5. Kada se na vanjskoj strani hladnjaka kondenzira vlaga.
Na vanjskoj strani hladnjaka se može kondenzirati vlaga kada je vlaga u zraku
visoka, kako npr. u proljeće. Ova pojava je jednaka kondenzaciji vodene pare na
površini čaše kada se u nju ulije hladna voda. Stoga, dakle, ne predstavlja kvar.
Obrišite hladnjak suhom krpom.
6. Kada čujete zvuk nalik protjecanju vode.
Zvuk nalik protjecanju vode uzrokuje protok sredstva za hlađenje. To ne
predstavlja kvar.
7. Kada se bočna strana kućišta zagrije
Bočna strana kućišta će se zagrijati ukoliko se vrata često otvaraju i zatvaraju,
prilikom uključivanja uređaja i kada uređaj radi ljeti pri visokoj vanjskoj
temperaturi. U tom slučaju ne dodirujte bočnu stranu. Toplina je posljedica
disipacije topline iz unutrašnjosti hladnjaka i ne predstavlja kvar uređaja.
Table of contents
Languages:
Other Vivax Refrigerator manuals

Vivax
Vivax CF-259LF W User manual

Vivax
Vivax CF-180 WH User manual

Vivax
Vivax CF-170LF W User manual

Vivax
Vivax TTL-93 User manual

Vivax
Vivax MF-45 User manual

Vivax
Vivax CF-180 WH User manual

Vivax
Vivax DD-207 WH User manual

Vivax
Vivax CF- 310 NFX User manual

Vivax
Vivax CF-278 W User manual

Vivax
Vivax CF 360 S User manual

Vivax
Vivax VL-235 W User manual

Vivax
Vivax DD-207 WH User manual

Vivax
Vivax TTF-60 User manual

Vivax
Vivax MFR-32 User manual

Vivax
Vivax VF-157 WH User manual

Vivax
Vivax DD-207 S User manual

Vivax
Vivax DD-132 WH User manual

Vivax
Vivax CF-310 NFX User manual

Vivax
Vivax MF-45G User manual

Vivax
Vivax DD-215 W User manual