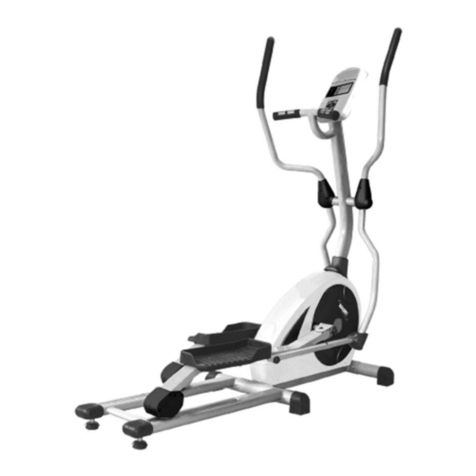
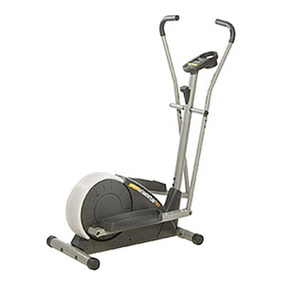
Vivotion 8001E User manual

ELLIPTICAL
TRAINER
INSTRUCTION MANUAL

1
Dear Customers,
We want to thank you for having chosen an Elliptical Trainer and
wish you a lot of fun and success during training.
Please note and follow the enclosed safety and assembly
instructions carefully.
If you have questions please do not hesitate to contact us.
Contents:
1.) Safety Instructions
2.) Exploded Drawing
3.) Parts List
4.) Assembly Instructions
5.) Computer Instructions
6.) Training Instructions

2
SAFETY INSTRUCTION
Before you start training on your home Elliptical Trainer, please
read the instructions carefully. Be sure to keep the instructions for
information, in case of repair and for spare part delivery.
This
elliptical trainer
is suitable for home use only and tested up
to a maximum body weight of 150 kg.
Follow the steps of the assembly instructions carefully.
During assembly use only suitable tools and asks for assistance
with assembly if necessary.
Check that all connecting elements are tight fitting and are in the
correct condition before first use and then again every 1-2 months.
Replace defective components immediately and/ or keep the
equipment out of use until it has been repaired. For repairs, use
only original parts.
In case of repair, please ask your dealer for advice.
Avoid the use of aggressive detergents when cleaning the home
exerciser.
Ensure that training starts only after correct assembly and
inspection of the item.
For all adjustable parts be aware of the maximum positions to
which they can be adjusted/tightened to.
The home exerciser is designed for adults. Please ensure that
children use it only under the supervision of an adult.

3
Ensure that those present are aware of possible hazards, e.g.
movable parts during training.
Consult your physician before starting with any exercise program.
He or she can advise on the kind of training and which impact is
suitable.
Please follow the advice for correct training as detailed in training
instructions.
The resistance/work level can be adjusted by turning the
adjustment knob on the handle bar stem.
The safety level of this equipment will only be maintained only if
it is checked regularly using the assembly procedure mentioned in
the assembly instruction sheet.
Please check the tightening knobs regularly for any wear and tear.
WARNING!
!!
!
INCORRECT/EXCESSIVE TRAINING CAN CAUSE HEALTH
INJURIES.

4
EXPLODED DRAWING

5
PART LIST
Part# Description Quantity
1 Computer 1
2
φ
φφ
φ
23*5T*1020L Hand Sponge 1
3 Handle Pulse Cable 1
4 Handle Pulse(L+R) 1 SET
5 Front Handle Bar 1
6 Upper Swing Bar (L+R) 1 SET
7 End Cap 2
8
φ
φφ
φ
30*5T*580mml Hand Sponge(L+R) 1 SET
9 M8*40mml Screw 4
10 8*19*1.5mmT Washer 14
11 M8 Nut 8
12 Lower Swing Bar (L+R) 1 SET
13 10*26*8 Tube 4
14 End Cap (Front & Rear) 2
15 End Cap (L+R) 1 SET
16 M6 Screw 4
17 Pedal (L+R) 1 SET
18 Main Cover (L+R) 1 SET
19 Plastic End Cap 2
20 M8*20 Washer 2
21 Chain Cover ( L+R) 1 SET
22 Crank 1
23 Rear End Cap( L+R) 1 SET
24 8*70mml Bolt 4
25 Rear Stabilizer 1
26 5*12 Screw 4
27 10*78mml Screw 2
28 Pedal Bar (L+R) 1 SET
29
φ
φφ
φ
10*19*2mmT Washer 4
30 M10 Nut 3
31 6*14*2 Washer 4
32
φ
φφ
φ
6 Washer 4
33 M6 Knob 4

6
Part# Description Quantity
34 8*20 Screw 2
35
φ
φφ
φ
8*24*2mmT Washer 2
36 M8*48 Screw 2
37 Plastic Tube 4
38 8*16*1.5 Washer 2
39 Nut 2
40 10*19*1.5 Washer 2
41 10*40mml Screw 1
42 Bearing 4
43
φ
φφ
φ
10*17*25mml Tube 1
44 Socket 1
45 Main Frame 1
46 M5*10 Screw 9
47 Manual Tension With Cable 1
48 M5*15 Screw 4
49 Socket for motor 1
50 17*22*3 Washer 2
51 Belt Wheel 1
52 Arbor 1
53 M8*15L*1.25 Screw 3
54 M5*15 Screw 8
55 5x15 Screw 4
56 4.5x25 Screw 5
57 Plastic Cover 1
58 M5*10 Screw 4
59 Junction 2
60 M4.5*25 Screw 2
61 M8*20 Screw 2
62 8*16*1.5 Washer 1
63 Plastic Tube 6
64 Axle 1
65 Tube 2
66 M8*20Screw 2
67 Nut 1
68 10*19*2T Washer 1
69 Chain Adjuster 1

7
Part# Description Quantity
70 Belt 1
71 Fly Wheel 1
72 Front End Cap(L+R) 1SET
73 Front Stabilizer 1
74 Motor 1
75 Lower Computer Cable 1
76 Plastic Cover 1
77 Lute 1
78 Upper Computer Cable 1
79
φ
φφ
φ
8 Spring Washer 6
80 8*20mml*1.25(5mm) Screw 6
81 Upper Support 1
82 Tube 2
83 Magnet 1
ASSEMBLY INSTRUCTION
STEP 1
73
45
75

8
I. Fasten the front stabiliser (73)
with 2 bolts (24) from the
underside of the stabiliser and
secure it with 2 washers (10)
and 2 cap nuts (11).
II. Fasten the rear stabiliser (25)
with 2 bolts (24) from the
underside of the stabiliser and
secure it with 2 washers (10)
and 2 cap nuts (11).
STEP 2
Put the plastic cover (76) into the
upper support (81) and then put the
upper support (81) into the main
frame (45). Secure it with screws
(80) and washers (79).
STEP 3
I. Put the right upper swing bar (6)
into the right lower swing bar
(12) and screw it with bolts (9),
washers (10) and nut (11). Do
the same for the left upper
75
76
77
78
79
81
STEP 2
80
10
45

9
swing bar (12).
II. Fasten the front side of right
pedal bar (28) to the left lower
swing bar (12) with bolt (27),
nut (30) and washer (29). Do
the same for the left pedal bar
(28).
III. Put the swing bar into the main
frame and secure it with
washers (62) and screws (61).
Then fasten the pedal bar into
the crank (22) and secure it with
washer (35) and screw (34).
STEP 4
I. Fasten the right pedal (17) to the
pedal bar (28) and secure it with
washer (31) and knob (33). Do
the same to the left pedal.
STEP 5
Fasten the handle bar (5) to the
upper support (81) and screw it with
bolts (66) tightly. Then connect the
computer cable (78) with the
STEP4
28
17
16
31
32
33
81
3
1
66
29
26
5

10
computer (1) and fix it into bracket
of the upper support.
Now your machine is ready for use.
COMPUTER INSTRUCTIONS

11
PROGRAM OPERATION
Manual program
PROGRAM 1 is a manual program. Press the ENTER key to select
TIME, DISTANCE and CALLORIE. Then press the UP or DOWN key

12
to adjust the values. After pressing the START/STOP button to
workout, please also apply the heart rate detector appropriately.
Users can workout in any desirable level (by Pressing UP or DOWN)
with a time limit or target distance.
Preset programs: rolling, valley, fat burn, ramp, mountain, intervals
PROGRAM 2 to PROGRAM 7 are the preset program. Press ENTER
key to select TIME, DISTANCE, and CALORIES. Then, Press UP or
DOWN to adjust the values. Users can workout with different levels of
resistance for each of the profiles.
After pressing the START/STOP key to exercise, please also apply the
heart rate detector appropriately. Users may also exercise in any desired
level (by Pressing UP or DOWN) with a time limit or target distance..
User profile programs: user setting profile
Program 8 is the user-setting program. Users are free to edit the
values of the TIME, DISTANCE, CALLORIE, and the level of
resistance in 10 intervals.
The values and profiles will be stored in the memory after setup. Users
may also change the ongoing resistance in each interval by turning the
nut, and they will not change the level of resistance stored in the
memory.
Speed independent program: watt control
Program 9 is a Speed Independent Program. Press the ENTER key to
select the values of TIME, DISTANCE, and WATT. Then, Press the UP
or DOWN to adjust the values. After pressing the START/STOP key
to exercise, please also apply the heart rate detector appropriately.
During the exercise, the level of resistance is not adjustable.

13
In this program, computer will adjust the level of resistance according
to the value of WATT setup. For example, the level of resistance may
increase while the speed is too slow. Also, the level of resistance may
decrease while the speed is too fast. As a result, the calculated value
of WATT will close when the value of WATT setup by the user is
reached.
Heart rate control programs (h.r.c): 60% h.r.c, 75% h.r.c, 85%
h.r.c.
Program 10 to Program 12 are the Heart Rate Control Programs. When
using Program 10 to Program 12, press the “Enter” key to select TIME,
DISTANCE, Cal & AGE, and TARGET H.R., then press UP or DOWN
to adjust the values.
Users can workout in a period of time or a certain distance with 60%
Max Heart Rate in Program10, 75% Max Heart Rate in Program 11,
and 85% Max Heart Rate in Program 12.
After pressing the START/STOP key to exercise, please also apply the
heart rate detector appropriately. Or you can choose the Target H.R.
(Heart Rate) working program under these 3 main programs, users may
setup a target heart rate to exercise in a period of time or a certain
distance. In these programs, the computer will adjust the level of
resistance according to the heart rate detected. For example, the level
of resistance may increase while the heart rate detected is lower than
TARGET H.R. Also, the level of resistance may decrease while the
heart rate detected is higher than TARGET H.R. As a result, the user’s
heart rate will be adjusted to close the TARGET H.R. in the range of
TARGET H.R. –5 and TARGET H.R. +5.
Body fat program: body fat measurement
Program 13 is a special program designed to calculate users’ body fat
ratio and to design a specific loading profile for users. With 9 different
body types, the computer can generate 9 different profiles for each.
Press the ENTER key to select GENDER, HEIGHT, WEIGHT, and

14
AGE. Then, Press the UP or DOWN to adjust the values.
After pressing the START/STOP key to calculate body fat, please
also apply the heart rate detector appropriately. If the detector cannot
pick up any signals, an error message “E3” will show up in the profile
display. If it happens, press the START/STOP key to calculate again.
Then, the calculation values of FAT%, BMR, BMI, BODY TYPE, and a
designed profile will show up shortly. Press the START/STOP key to
exercise. The profile shown in the display is specially designed for
your body type.
Fitness test: press the pulse recovery button
The fitness note is for personal orientation and compares the pulse rate
before and after training. You will notice that your fitness will improve
when exercising regularly.
Press the Pulse Recovery key directly after a training session.
Hold the hand on pulse connections or leave the chest transmitter attached.
Time will count down from 60 to 0 seconds.
Your personal fitness note appears (F1.0 – F6.0) on the display.
F1.0 = Excellent
F2.0 = Good
F3.0 = Fair F4.0 = below average
F5.0 = No Good
F6.0 = Poor
KEY FUNCTIONS
POWER
This model has been supplied with a power adapter. The specification
for the adapter is 6V/1A.

15
AUTO ON
Press any key or begin pedaling to automatically turn on the computer. If
part of the display malfunctions check the power adaptor and all
connections.
AUTO OFF
The monitor will turn off automatically when the equipment has not
been in use for 4 minutes.
RECOVERY
Press this key to enter the fitness test. The ranking of the test resolute is
from F1.0 to F6.0.
USER
Press this key to enter the user’s setting value.
ENTER
1. During the program choosing function, press this key to confirm the
program you would like to do the exercise.
2. During the setting mode, Press this key to confirm the value you
would like to set up.
3. During the start mode, press this key to choose the time, speed, RPM,
calorie, distance, watt or pulse to display on the bigger digital
number.

16
4. In the body fat measurement program, press this key to read the next
result after body
UP or DOWN
1. Press the UP or DOWN key to select the program form Manual,
Rolling, Valley, Fat Burn, Ramp, Mountain, Intervals, User Setting
Profile, Watt Control, 60% H.R.C. (Heart Rate Control Program),
75% H.R.C., 85% H.R.C., to Body fat test.
2. Press the UP or DOWN button to increase or decrease the setting
value of Time, Distance, Calories, height, weight, age, sex, and
pulse.
3. In the start mode, Press the UP or DOWN key to increase or
decrease the resistance level.
4. Press the START key to start or stop exercise or begin to measure the
body fat.
RESET
Press the START/STOP key for 3 seconds to set all displayed values
back to zero.
FUNCTIONS OPERATION
Plug in the power
Plug in the adaptor to the equipment. The monitor will produce a beep

17
sound and turn on the monitor.
Determine the user (this can only be processed in the stop mode.)
Press the USER key to the USER DATA, only can use on the stop
mode.
Press the ENTER key to the USER SELECT.
Press the UP or DOWN key to select the User from U1 to U4.
Press the ENTER key to decide the User.
Press the UP or DOWN key to set up your height, and then press
the ENTER to confirm your setting value.
Press the UP or DOWN key to set up your weight, and then press
the ENTER to confirm your setting value.
Press the UP or DOWN key to set up your age, and then press the
ENTER to confirm your setting value.
Press the UP or DOWN key to set up your sex, and then press the
ENTER to confirm you are M (male) or F (female).
Finish the user data input.
Program select and setting value
C-1 manual program
Press the UP or DOWN key to select the Manual program, press the
ENTER button to confirm the manual program.

18
The TIME display will flash, and then press the UP or DOWN key to
set up the desired time to do the exercise. Press ENTER button to
confirm your setting value.
The DISTANCE display will flash, and then press the UP or DOWN
key to set up the desired distance value. Press the ENTER key to
confirm your setting value.
The CALORIE display will flash, and then press the UP or DOWN
key to set up the desired calories to be consumed. Press the ENTER
key to confirm your setting value.
Press the START/STOP key to begin exercise.
NOTE:
1. Time and distance cannot set up at the same time in this program.
2. When you reach the target, the monitor will produce beep sound
and then stop.
3. If you set up more than one target and you would like to reach next
target, then press start to exercise again.
C-2 preset program: rolling, valley, fat burn, ramp, mountain,
intervals and program
Press the UP or DOWN key to select one of the above programs,
Press the ENTER Button to enter this program.
The TIME display will flash, and then press the UP or DOWN key
to set up the desired time to do the exercise. Press the ENTER key
to confirm your setting value.
The DISTANCE display will flash, and then press the UP or

19
DOWN key to set up the desired distance value. Press the ENTER
key to set the value.
The CALORIE display will flash, and then press the UP or DOWN
key to set up the desired calories to be consumed. Press the ENTER
key to confirm the setting value.
Press the START/STOP key to begin exercise.
NOTE:
1. Time and distance cannot set up at the same time in this program.
2. When you reach the target, the monitor will produce beep sound and
then stop.
3. If you set up more than one target and you would like to reach next
target, press start to exercise again.
C-3 user setting profile
Press the UP or DOWN key to set the user’s value.
Press the ENTER key to enter this program.
The TIME display will flash, and then press the UP or DOWN key
to set up the desired time to do the exercise. Press the ENTER key
to confirm your setting value.
The DISTANCE display will flash, and then press the UP or
DOWN key to set up the desired distance value. Press the ENTER
key to confirm your setting value.
The CALORIE display will flash, and then press the UP or DOWN
Table of contents
Popular Elliptical Trainer manuals by other brands
Pro-Form
Pro-Form 700 CARDIOTRAINER user manual
NordicTrack
NordicTrack E4.1 Elliptical Manual do utilizador
NordicTrack
NordicTrack Freestrider 30s Elliptical Manuel de l'utilisateur

Sunny
Sunny ENDURANCE Series user manual
Christopeit Sport
Christopeit Sport CT 1 Assembly and exercise instructions
Christopeit Sport
Christopeit Sport CT 4 Assembly and exercise instructions


