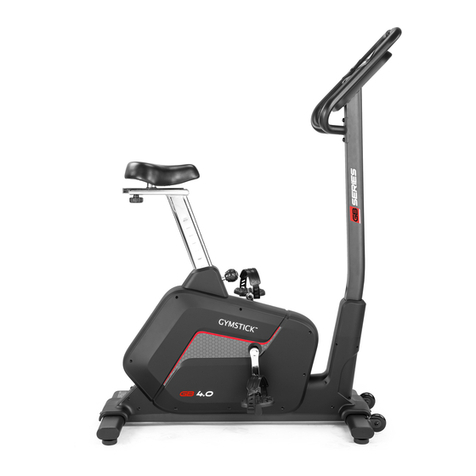
Vivotion C300 User manual

EXERCISE BIKE
INSTRUCTION MANUAL
Product may vary slightly from the item pictured due to model upgrades
Model number uoted above is the manufacturers model number
C300

2
IMPORTANT SAFETY INSTRUCTIONS
• It is important to read this entire manual before assembling and using the
e uipment. Safe and efficient use can only be achieved if the e uipment is
assembled, maintained and used properly. It is your responsibility to ensure
that all users of the e uipment are informed of all warnings and precautions.
• Before starting any exercise program you should consult your doctor to
determine if you have any physical or health conditions that could create a
risk to your health and safety, or prevent you from using the e uipment
properly. Your doctor's advice is essential if you are taking medication that
affects your heart rate, blood pressure or cholesterol level.
• Keep children and pets away from the e uipment. The e uipment is designed
for adult use only over 18 years of age.
• Use the e uipment on a solid, flat level surface with a protective cover for
your floor or carpet. For safety, the e uipment should have at least 0.5 meter
of free space all around it.
• Before using the e uipment, check the nuts and bolts are securely tightened.
Some parts like pedals, etc, as moving parts may come loose
• The safety level of the e uipment can only be maintained if it is regularly
examined for damage and/or wear and tear.
• Always use the e uipment as indicated. If you find any defective components
whilst assembling or checking the e uipment, or if you hear any unusual
noise coming from the e uipment during use, stop. Do not use the e uipment
until the problem has been rectified.
!
WARNING

3
• Wear suitable clothing whilst using the e uipment. Avoid wearing loose
clothing which may get caught in the e uipment or that may restrict or
prevent movement.
• The e uipment is suitable for domestic, home use only. Braking is speed
independent.
• The e uipment is not suitable for therapeutic use.
• Care must be taken when lifting or moving the e uipment so as not to
injure your back. Always use proper lifting techni ues and/or use assistance.
• Care must be taken when assembling or moving the e uipment to
avoid trapped fingers in any of the moving parts.
INCORRECT/EXCESSIVE TRAINING CAN CAUSE
HEALTH INJURIES
!
!
!

4
EXPLODED DRAWING

5
PART LIST
Part# Descr pt on Quant ty
1 Computer 1PC
2 Sponge 2PCS
3 End cap 2PCS
4 Seat 1PC
5 M10*35 screw 2PC
6 T base 1PC
7 10*25*3 washer 1PC
8 Knob 1PC
9 Seat support 1PC
10 Plastic cover 1PC
11 Plastic cover 1PC
12 Quick pin 1PC
13 Pedal 1SET
14 Crank end cap 2PCS
15 Chain cover 1SET
16 C ring 2PCS
17 M10 nut 4PCS
18 10*25*1.5 washer 4PCS
19 DC cable 1PC
20 End cap 4PCS
21 Rear stabilizer 1PC
22 Knob 4PCS
23 M10*90 screw 4PCS
24 Circles spring 1PC
25 M8*20 screw 1PC
26 Nut 1PC
27 10*19*11 tube 1PC
28 Bearing 4PCS
29 Washer 2PCS

6
Part # Descr pt on Quant ty
30 M10 nut 1PC
31 End cap 2PCS
32 3/8 screw 2PCS
33 10*19*1.5 washer 2PCS
34 Fly wheel 1PC
35 M8*12 screw 1PC
36 Sensor set 1PC
37 Sensor 1PC
38 M5 screw 2PCS
39 Motor 1PC
40 M5*15 screw 4PCS
41 Screw 2PCS
42 4.5*25 screw 7PCS
43 Belt 1PC
44 Axle 1PC
45 Belt wheel 1PC
46 Front stabilizer 1PC
47 M8*15 screw 4PCS
48 8*19*1.5 washer 4PCS
49 Computer cable II 1PC
50 Plastic cover 1PC
51 Computer cable I 1PC
52 Upper support 1PC
53 M5*10 screw 4PCS
54 Bottle fix 1PC
55 Screw 2PCS
56 Bottle 1PC
57 Knob 1PC
58 Tube 1PC
59 Plastic cover 1PC
60 Hand bar 1PC
61 4*20 screw 2PCS
62 Hand pulse 2PCS

7
23
Part # Descr pt on Quant ty
63 Hand pulse cable 1PC
64 Main frame 1PC
65 Crank 1PC
66 Screw 2PCS
67 Crank end cap 2PCS
68 Screw driver 1PC
69 Wrench 1PC
70 Adapter 1PC
Manufacturer Code HG-5013E
ASSEMBLY INSTRUCTION
STEP 1
1. Place the knob (22) on to
front stabiliser (46).
2. Place front stabiliser (46)
with 2 bolts (23) from
underside of stabiliser.
And secure it with 2
washers (18) & 2 nuts
(17) tighty.
3. Repeat the procedure for
the rear stabiliser (21).
WARNING
RISK OF PERSONAL INJURY

8
STEP 2
1. Connect computer cable
(51) and computer cable
(49) , and put upper support
(52) into main frame (64)
complete assembly with
screws (47) and washers
(48)
2. Fasten crank (65) and pedal
(13).
STEP 3
1. Attach handle bar (60)
onto upper support (52)
with plastic cover (59)
and secure them with
tube (58) and knob (57)
2. Fasten the bottle holder to
the upper support (52)
with screws (55), then
place the bottle (56) into
the bottle holder (54).

9
STEP 4
1. Fasten the T base (6) to
the seat support (9) with
screw (5), washer (7) and
knob (8), attach the seat
(4) to the seat support
(9).
STEP 5
Put the plastic cover (10) in to
seat support (9) and then put
the seat support into main
frame, secure it with uick pin
(12).

10
STEP 6
1. Connect the hand pulse
cable (63) and computer
cable (51) with computer
console (1). Then fasten
computer to the upper
support (52) with 4
screws (53).
Now, your machine is ready for
use.

11
COMPUTER INSTRUCTION
Funct on
1. Workout Programs
21 programs as following
a) 1 Manual Program
b) 10 Preset Program Profile
P1: ROLLING P2: VALLEY P3: FATBURN P4: RAMP P5: MOUNTAIN
P6: INTERVAL P7: CARDIO P8: ENDURANCE P9: SLOPE P10: RALLY
c) 1 Watt Control Program
d) 4 Heart Rate Control Program: 55%H.R, 75%H.R, 90%H.R and TARGET H.R
e) 4 User Setting Programs: CUSTOM1 to CUSTOM4
f) 1 Body Fat Measuring Program
g) 2. Records the user's data of GENDER, HEIGHT, WEIGHT and AGE even if the
power is disconnected.
3. Dot matrix display showing your current status.
4. Simulative ECG measuring the heart rate
5. Display Speed (RPM), TIME, DIST. (distance), CAL. (calories), WATT, PULSE, and
LEVEL at the same time.
RECOVERY
ENTER
START/STOP
RESET
UP/DOWN

12
6. The computer will turn off automatically if there is no operation, speed signal and
pulse signal for over 4 minutes. Meanwhile, it will store your current exercise data
and turn the loading resistance to the minimum. Once you press any button or the
machine is in motion, the computer will turn on automatically.
Buttons
ENTER
• In "STOP" mode (displayed STOP), press ENTER button to enter into program
selection and setting value which will flash in related window. When you
choose the program, press Enter to confirm the one you like. When in setting,
press ENTER to confirm the value that you would like to preset.
• During the start mode (displayed START), press ENTER to choose display the
speed or RPM, or switch automatically.
• During any mode, hold down this button for 2 seconds to totally reset the
computer.
START/STOP
• Press START/STOP button to start or stop the programs.
• During any mode, hold down the START/STOP for 2 seconds to totally reset
the computer.
UP
• In stop mode and the dot matrix character flash, press this button to select
the program up. If the related window value flashes, press this button to
increase the value.
• During the start mode (displayed START), press this button to increase the
training resistance.
DOWN
• In stop mode and the dot matrix character flash, press this button to select
the program down.
• If the related window value flashes, press this button to decrease the value.
• During the start mode (displayed START), press this button to decrease the
training resistance.

13
PULSE RECOVERY
• First test your current heart rate and show your heart rate value, press this
button to enter into pulse recovery testing.
• When you are in pulse recovery mode, press this button to exit.
OPERATION
1. Turn on the computer. Plug in the mains Adaptor to the AC electrical source
and connect the other end to the main body of the exercise bike. The computer will
beep and enter into initial mode.
2. Program selection and value setting
Manual Program and Preset Program P1 to P10
A. Press UP, DOWN button to select the program that you re uire.
B. Press ENTER button to confirm the selected program and enter the time setting
window.
C. The time will flash, press the UP, DOWN button to set up your desired time. Press
ENTER to confirm the value.
D. The distance will flash, and then press UP, DOWN to set up the desired distance
value. Press ENTER to confirm the value.
E. The calories will flash, and then press UP, DOWN to set up the desired calories to
be consumed. Press ENTER to confirm the value
F. Press START/ STOP to begin exercise.
Watt Control Program
A. Press UP, DOWN button to select the watt control program
B. Press ENTER to confirm the selected watt control program, and enter into time
setting window.
C. The time will flash, and then press the UP, DOWN button to set up the desired
time, Press ENTER to confirm the value.
D. The distance will flash, and then press UP, DOWN to set up the desired distance
value. Press ENTER to confirm the value.
E. The calories will flash, and then press UP, DOWN to set up the desired calories to
be consumed. Press ENTER to confirm the value.
F. The watt display will flash, and then press UP, DOWN to set up the watt to do the
exercise. Press ENTER to confirm the value.

14
G. Press START/ STOP to begin exercise.
NOTE: The WATT value is decided by the TORQUE and RPM. In this program, the WATT value will
keep at constant value. It means that if you peddle uickly, the load resistance will decrease and if
you peddle slowly, the load resistance will increase to ensure you at the same watt value.
Heart Rate Control Program: 55%H.R, 75% H.R and 90% H.R
The maximum heart rate depends on different age and this program will ensure you
do the healthy exercise within maximum heart rate.
A. Press UP , DOWN to choose the heart rate control program
B. Press ENTER to confirm the heart rate control program, and enter into time
setting window.
C. The time will flash, and then press UP, DOWN button to set up the desired time.
Press ENTER to confirm the value.
D. The distance will flash, and then press UP, DOWN to set up the desired distance
value. Press ENTER to confirm the value.
E. The calories will flash, and then press UP, DOWN to set up the desired calories to
be consumed. Press ENTER to confirm the value.
F. The age will flash, and then press UP, DOWN to set the user's age. Press ENTER to
confirm the value.
G. When the target heart rate control program flash, the computer will display the
user's target heart rate according to user's age.
H. Press START/ STOP to begin exercise.
Heart Rate Control program: Target Heart Rate
The user can set any target heart rate to do the exercise.
A. Press UP, DOWN to select TARGET HEART RATE program.
B. Press ENTER to confirm your choice and enter time setting window.
C. The time display will flash, and then press UP, DOWN to set the desired time to do
the exercise. Press ENTER to confirm the value.
D. The distance will flash, and then press UP, DOWN to set up the desired distance
value. Press ENTER to confirm the value.
E. The calories will flash, and then press UP, DOWN to set up the desired calories to
be consumed. Press ENTER to confirm the value.
F. The target heart rate will flash, and then press UP, DOWN to set up your target

15
heart rate. Press ENTER to confirm the value.
G. Press START/ STOP to begin exercise.
NOTE: During exercise, the user's heart rate value depends on the resistance level and speed. The
heart rate control program is to ensure your heart rate is within the preset value. When the
computer detects your current heart rate is higher than preset, it will decrease the resistance level
automatically or you may slow down exercise. If your current heart rate is lower than preset, it will
increase resistance and you may speed up.
User Prof le Programs: CUSTOM1 to CUSTOM4
A. Press UP, DOWN to select the user.
B. Press ENTER to confirm your choice, and enter into the time setting window.
C. The time display will flash, and then press UP, DOWN to set up the desired
exercise time. Press ENTER to confirm the value.
D. The distance will flash, and then press UP, DOWN to set up the desired distance
value. Press ENTER to confirm the value.
E. The calories will flash, and then press UP, DOWN to set up the desired calories to
be consumed. Press ENTER to confirm the value.
F. The first resistance level will flash, and then press UP, DOWN to set the desired
load resistance. Press ENTER to confirm. Then repeat above operation to set the
resistance from 2 to 10.
G. Press START/ STOP to begin exercise.
Body Fat Measurement Program
A. Press UP, DOWN to select BODY FAT TEST program
B. Press ENTER to confirm your choice, and enter into height setting mode
C. The height display will flash, and then press UP, DOWN to set up your height.
Press ENTER to confirm the value.
D. The weight display will flash, and then press UP, DOWN to set up your weight.
Press ENTER to confirm the value.
E. The age display will flash, and then press UP, DOWN to set up your age. Press
ENTER to confirm the value.
F. The gender display will flash, and then press UP, DOWN to set up your gender.
Press ENTER to confirm.
G. Press START/STOP to begin testing your body fat.
During the body fat measurement, place both your palms on the contact pads. The

16
test result are: FAT%, BMR (Basal Metabolic Rate), BMI (Body Mass Index), BODY
and body shape.
• FAT%: The total body fat in our body measured by percentage.
• BMR: Basal Metabolic Rate (metabolism) is the energy (measured in calories)
expended by the body at rest to maintain normal bodily function.
• BMI: means Body Mass Index, which is used for body shape building
NOTE
During the body fat measurement, if your palms do not contact the pulse sensors
correctly, the computer cannot receive any signal and it will display ERROR2. Press
START/STOP to try again.
During the test, you cannot exit the test when you press any button. After the test
finishes, press UP, DOWN to exit the body fat measurement program and switch to
another program.
Comparison sheet of Body fat and Obese
Body
shape
FAT%
Age/
Gender
Slim Healthy Fleshy Over Weight Obese
BODY1 BODY2 BODY3 BODY4 BODY5
Male/≤30 years
old <14% 14%~20% 20.1%~25% 25.1%~35% >35%
Male/>30 years
old <17% 17%~23% 23.1%~28% 28.1%~38% >38%
Female/≤30
years old <17% 17%~24% 24.1%~30% 30.1%~40% >40%
Female/>30
years old <20% 20%~27% 27.1%~33% 33.1%~43% >43%
Pulse Recovery Test
The pulse recovery test is to compare your heart rate before and after exercise. It is
a target to determine your heart strength. Please do the test as below:
A. Both your hands hold the pulse sensor or via wireless transmitter belt to test
the pulse (if applicable), the computer will display your current pulse value.
B. Press RECOVERY to enter the pulse recovery test and the computer program
will enter the stop status.
Keep pulse detecting. Time will count down from 60 seconds to 0 second. When time
reaches 0, the test result (F1.0-F6.0) appears on the display.
• F1.0=Excellent F2.0=Good F3.0=Fair F4.0=below average F5.0= No Good
F6.0= Poor

17
If the computer does not detect your current heart rate first, pressing RECOVERY
will not enter into pulse recovery test. During the pulse recovery test, press
RECOVERY to exit the test and return to the stop status.
Pulse Measurement
Please place both your palms on the contact pads and the computer will show your
current heart beat rate in beats per minute (BPM) on the LCD after 3 to 4 seconds.
During the measurement, heart icon will flash with simulative ECG showing.
Remark: During the process of pulse measurement the measurement value may
not be stable when started, then it will return to normal level. The measurement
value cannot be regarded as the basis of medical treatment.
NOTE: If the computer is also e uipped with wireless heart rate measuring via the transmitter
belt, the wireless signal detecting is preferred
D splay Spec f cat ons
SPEED KM/H
(M/H)
Showing your current speed. Range: 0.0 to 99.9 KM/H(M/H).
RPM Showing the current rotate per minute. Range: 0 t0 999.
TIME
The accumulative exercise time, range: 0:00 to
99M59S.
The preset time range is 5:00 to 99M00S.
The computer will start to count down from preset time to 0:00
with average time for each resistance level. When it reaches to
zero, the program will stop and computer alarm. If you do not
preset the time, it will run with one minute decrement each
resistance level.
DIST
The exercise accumulative distance.
Range: 0.0 to 99.9999KM(MILE)
The preset distance range: 1.0 to 99.0 to 999.
When the distance reaches 0, the program will stop and the
computer will alarm.
CALORIE
The exercise accumulative calories burnt.
Range: 0.0 to 99.9 to 999
The preset calories range: 10.0 to 90.0 to 990.
When the calorie reaches 0, the program will stop and the
computer will alarm.
PULSE
Showing the exercise heart rate value.
Range: 30 to 240 BPM (beats per minute)
RESISTANCE
LEVEL Showing the resistance level. Range:1 to 16
WATT Showing the exercise wattage

18
ERROR DISPLAY
• When the computer displays ERROR1, please check if the motor is working
and if the motor wires are connected correctly.
• When the computer displays ERROR2, please check if your hands are in
contact with the sensors as there is no body fat signal detected.
ADAPTOR INPUT: AC (The voltage depends on different country) OUTPUT: 6VDC
450mA

19
TRAINING INSTRUCTION
To achieve a considerable improvement of your physical resistance and your health,
some aspects of how to find the most efficient amount of training should be
followed. If you have not been physically active for a long period of time and also
avoid health risks you should consult your general physician before starting exercise.
INTENSITY
To achieve maximum results the right intensity has to be chosen. The heart rate is
used as guideline. As a rule of thumb, the following formula is commonly used:
Maximum pulse rate=220-Age
While exercising the pulse rate should always be between 60% to 85% of the
maximum pulse rate.
When starting to exercise, you should keep your rate at 60% of your maximum
pulse rate in the first couple of weeks. With increasing improvement of fitness, the
pulse rate should be slowly increased to 85% of your maximum pulse rate.
FAT BURING
The body starts to burn fat at approx. 60% of the maximum pulse rate. To reach an
optimum at burning rate, it is advisable to keep the pulse rate between 60% to
70% of the maximum pulse rate. The optimum training amount consists of three
workouts per week at 30 minutes each.
Example: You are 52 years of age would like to start exercising.
Maximum pulse rate=220-52(age) =168 pulse/min
Minimum pulse rate=168x 0.6=101 pulse/min
Highest pulse rate=168x0.7=117 pulse/min
During the first week it is advisable to start with a pulse rate of 101, afterwards
increase it to 117. With increasing improvement of fitness the training intensity

20
should be increased to 70% to 85% of your maximum pulse rate. This can be done
by increasing the resistance, a higher fre uency or longer training period.
TRAINING ORGANISATION
Warm-up
Before every training you should warm-up for 5 to 10 minutes. Here you can do
some stretching and training with low resistance.
Tra n ng sess on
During the actual training a rate of 70% to 85% of the maximum pulse rate should
be chosen. The time-length of your training session can be calculated with the
following rule of thumb:
* Daily training session: approx. 10 min. per unit
* 2-3 x per week: approx. 30 min. per unit
* 1-2 x per week: approx. 60 min. per unit
Cool down
To introduce an effective cool-down of the muscles and the metabolism the intensity
should be drastically decreased during the last 5~10 minutes. Stretching is also
helpful for the prevention of muscle aches.
Success
Even after a short period of regular exercise you will notice that you constantly have
to increase the resistance to reach your optimum pulse rate. The units will be
continuously easier and you will feel a lot fitter during your normal day. For this
achievement you should motivate yourself to exercise regular. Choose fixed hours
for your training session and do not start training too aggressively. An old uote
amongst sportsman says:
“The most difficult thing about training is to start it.”
Wish you have a lot of fun and success with your bike.
E&OE © 2005 Kybotech ltd.
Specifications, Weights and Dimensions may vary slightly. Kybotech reserve the right to supply products which may vary
slightly from the products listed. Errors and Omission Excepted..
Table of contents
Other Vivotion Exercise Bike manuals
