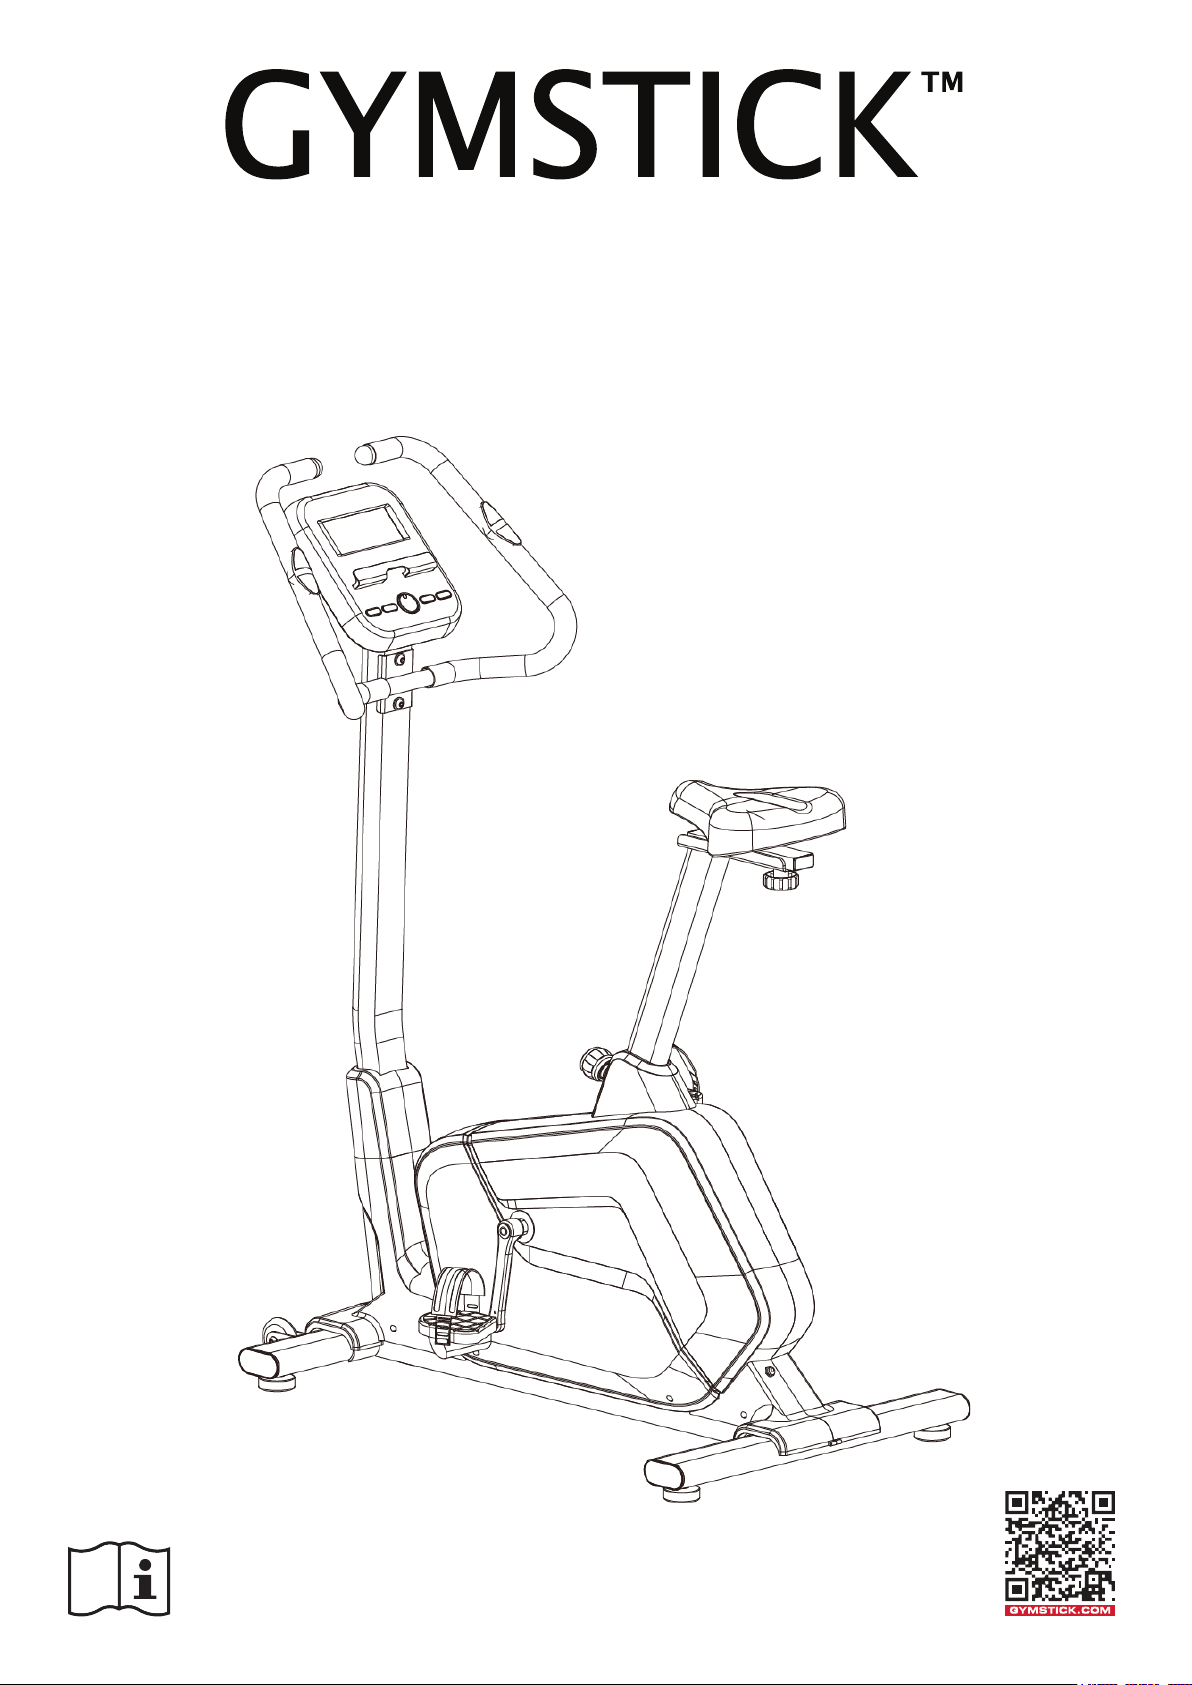
6GB4.0 EXERCISE BIKE
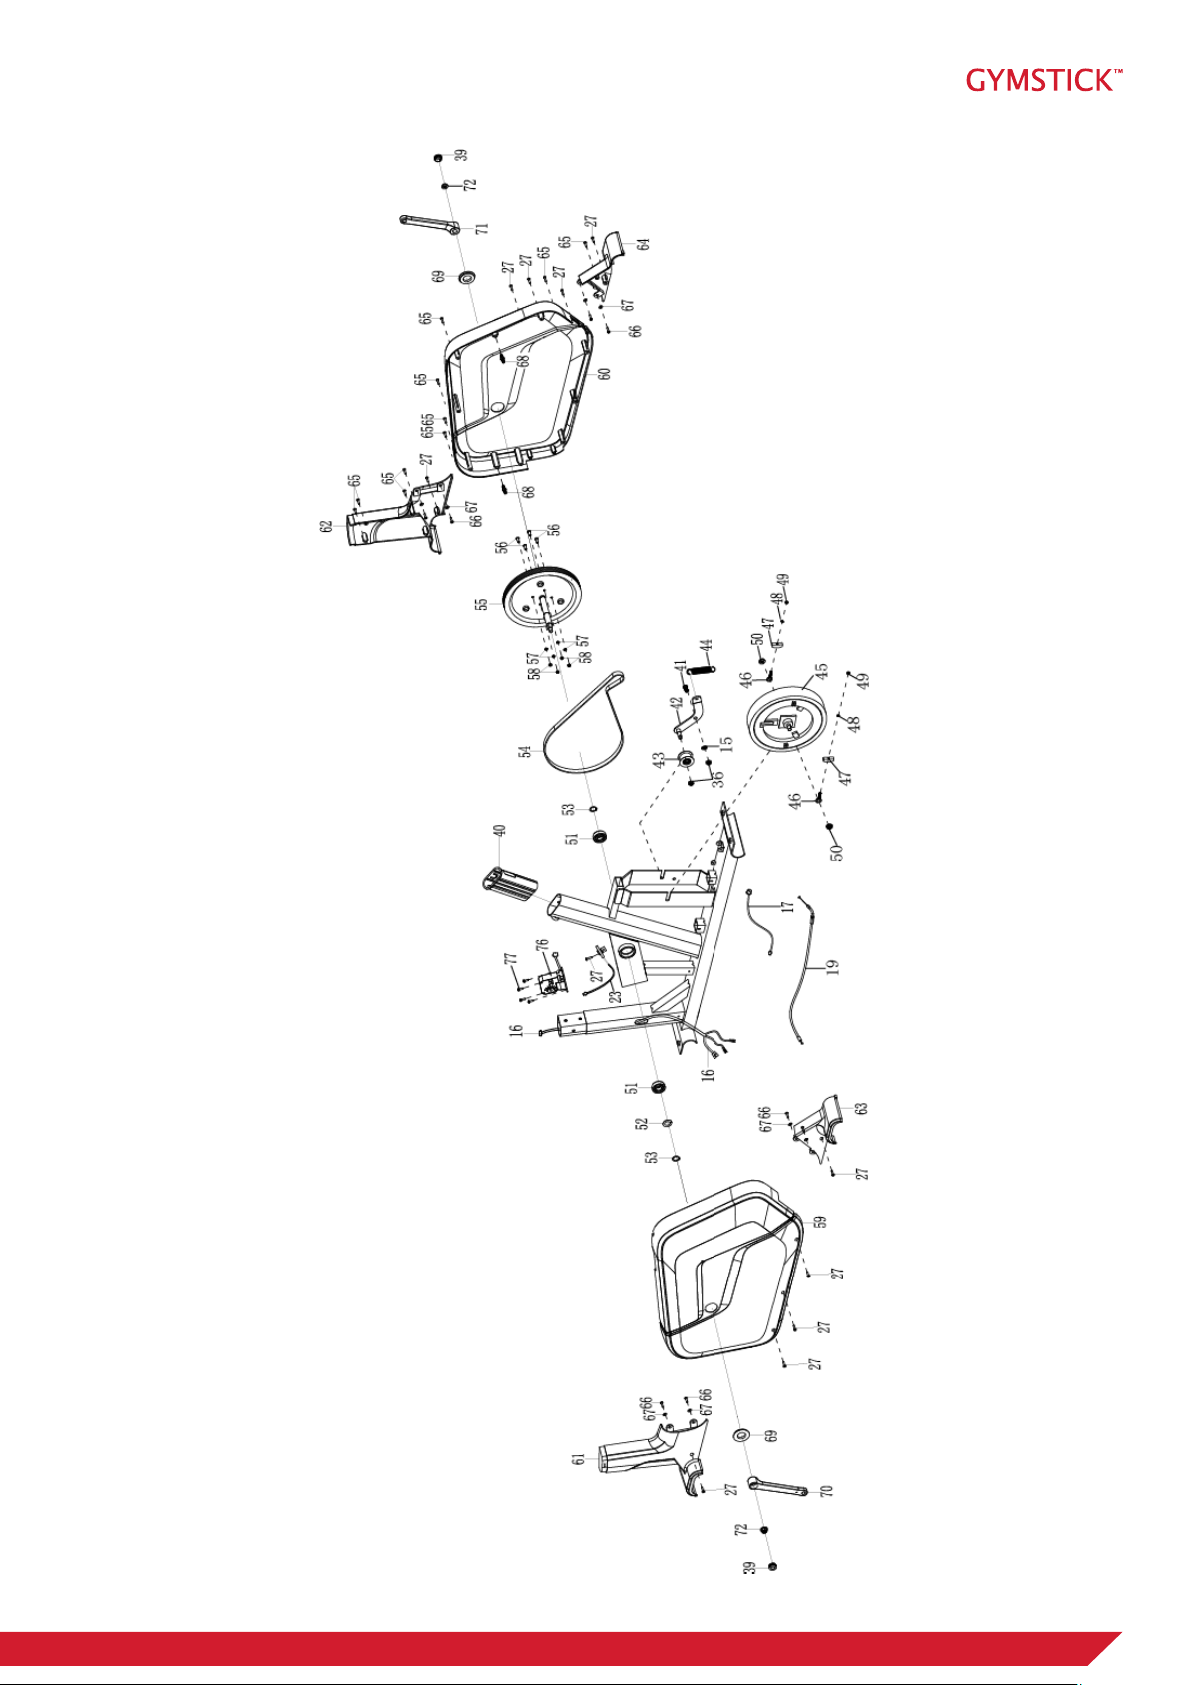
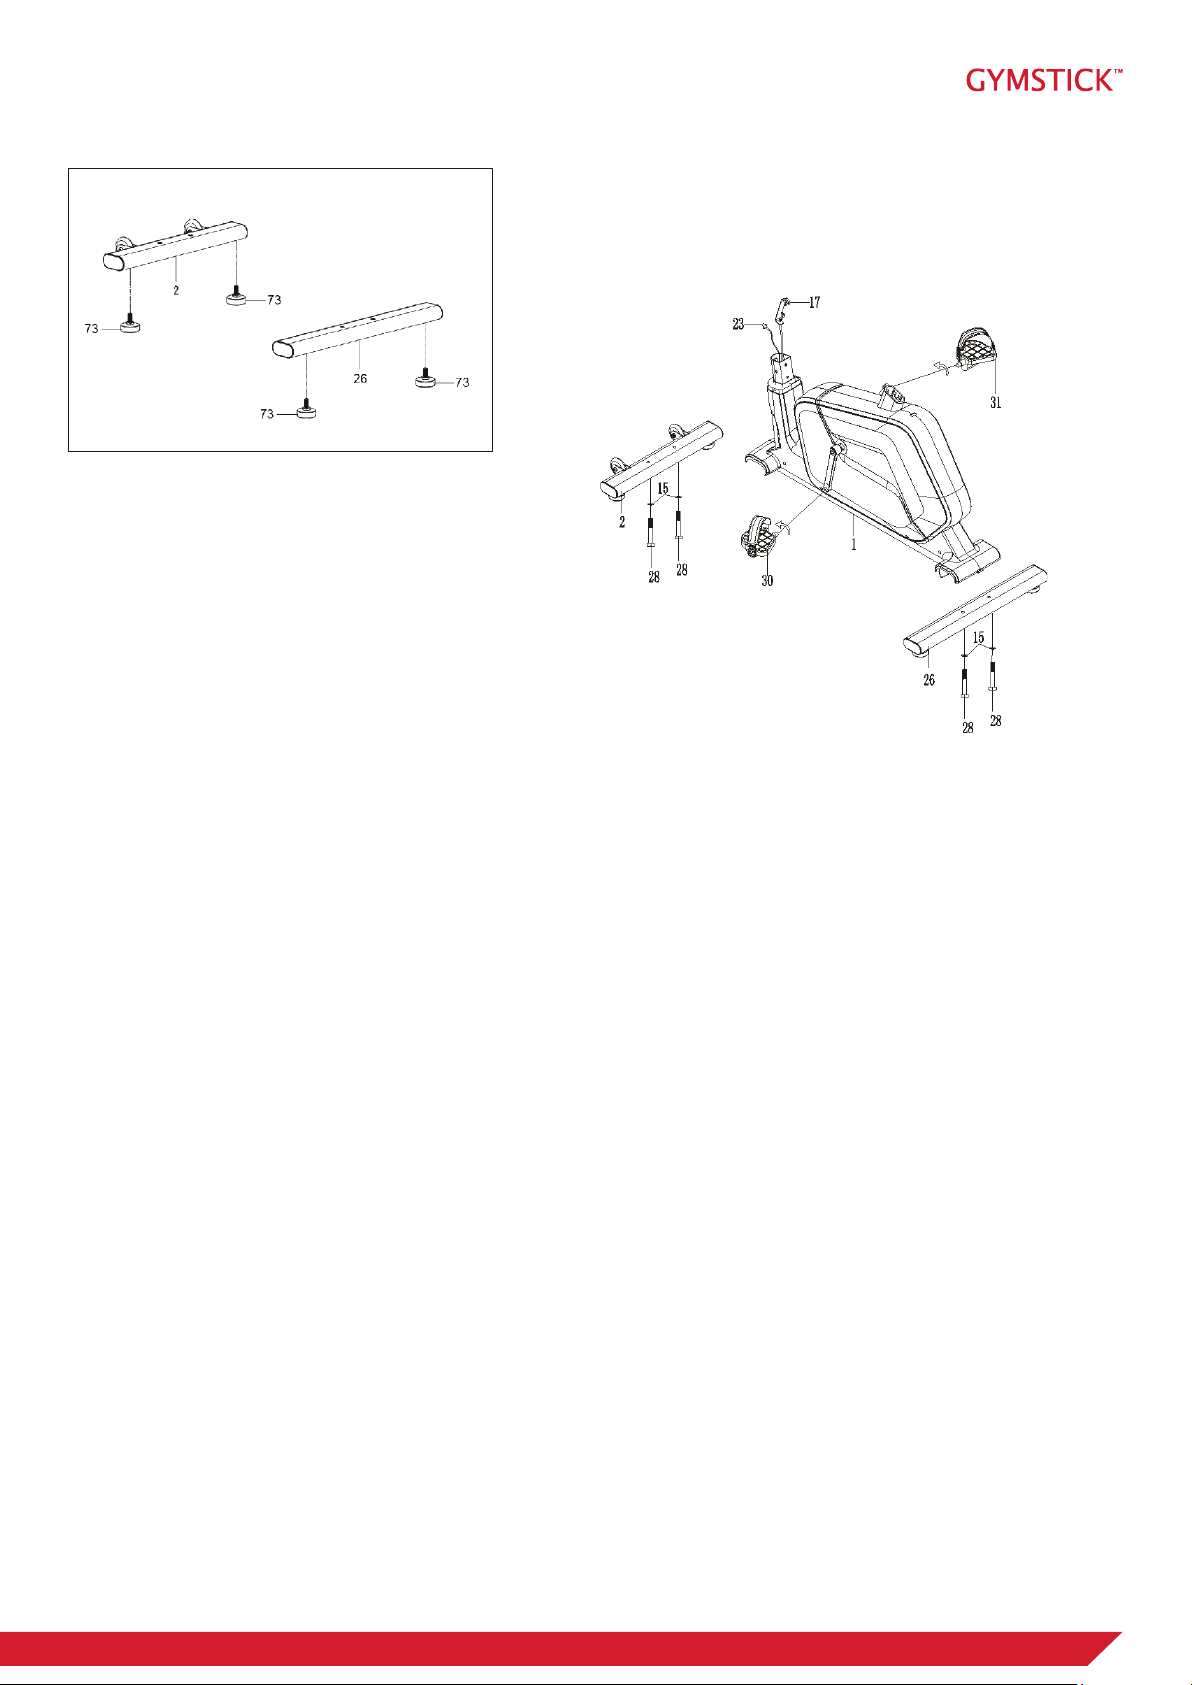
PARTS LIST
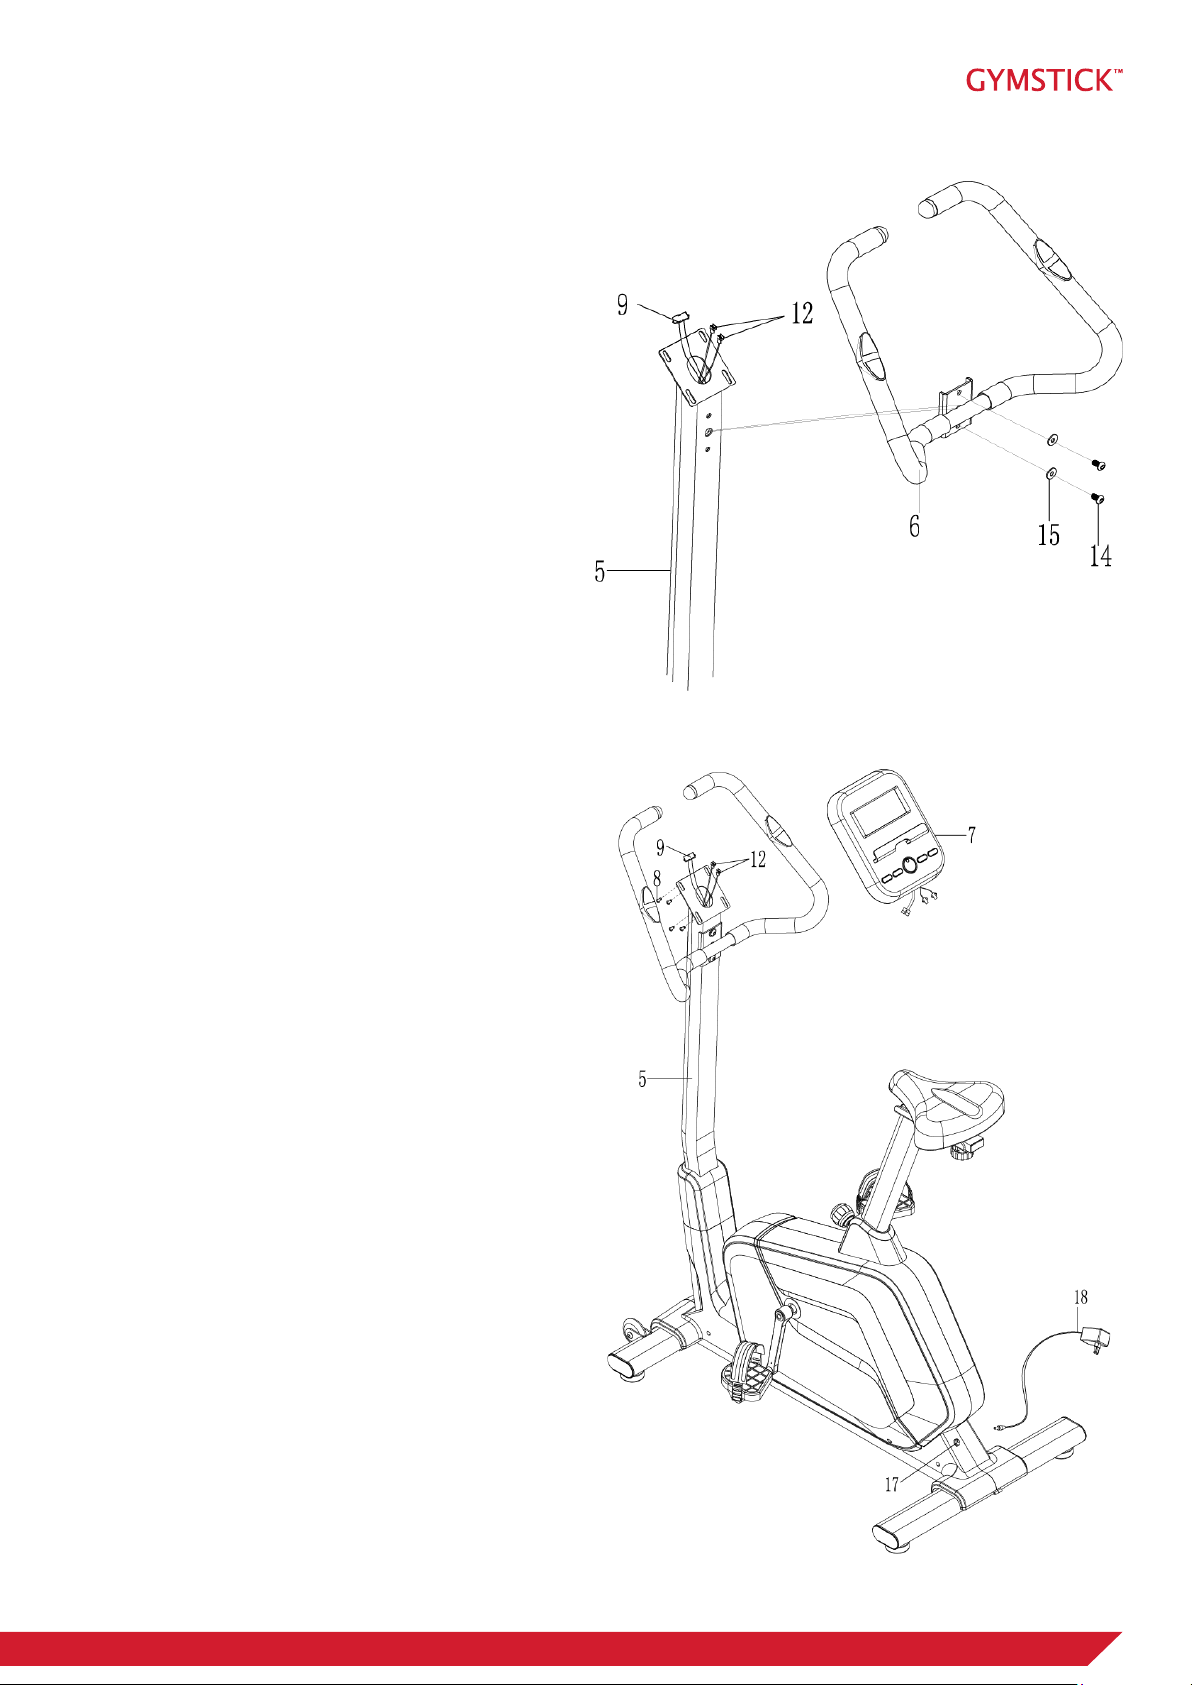
No. Description Qty No. Description Qty
001 Main Frame 1 032 Round Knob M16*1.5 1
002 Front Stabilizer 1 033 Seat Post Cover 1
003 Seat Post 1 034 Round Knob M10 1
004 Seat Sliding Tube 1 035 Big Washer Ø8*Ø20*2.0 1
005 Handlebar Post 1 036 Nut M8 7
006 Handlebar 1 037 Square End Cap40*20*2.0 2
007 Computer 1 038 Seat Cushion 1
008 Bolt M5x10 4 039 Crank Cover 2
009 Extension Sensor Wire
(L=800mm)
1 040 Bushing 1
010 Handlebar End Cap Ø25x1.5 2 041 Bolt M8*18 1
011 Handlebar Foam Grip
Ø24xØ30x700
2 042 Idle Wheel Bracket 1
012 Hand Pulse Sensor with Wire
L=850mm
1 043 Idle Wheel Roller 1
013 Screw ST4.2x20 2 044 tension spring 1
014 Bolt M8x15 2 045 Flywheel 1
015 Washer Ø8xØ16x1.5 14 046 Eyebolt M6x36 2
016 Extension Sensor Wire
L=600mm
1 047 U-Shape Bracket 2
017 Power Supply Wire L=750mm 1 048 Spring Washer Ø6 2
018 AC Adapter 1 049 Nut M6 2
019 Motor Tension Cable 1 050 Nut M10x1.0x6 2
020 Bolt M8x20 6 051 Bearing6203ZZ 2
021 Spring Washer Ø8 6 052 Wave spring washer Ø17x
Ø21x0.3
1
022 Big Arc Washer Ø8xØ20x2.0 2 053 Shaft Ring 2
023 Sensor with Wire L=400mm 1 054 Belt 1
024 Handlebar Post Cover 1 055 Belt Pulley with Crank 1
025 End Cap For Foot tube 4 056 Bolt M6x15 4
026 Rear Stabilizer 1 057 Spring Washer Ø6 4
027 Self-tapping self-drilling screw
ST4.2*20
11 058 Nut M6 4
028 Bolt M8x50 4 059 Left Chain Cover 1
029 Roller 2 060 Right Chain Cover 1
030 Left Pedal 1 061 Left Front Decorative Cover 1
031 Right Pedal 1 062 Right Front Decorative Cover 1
063 Left Rear Decorative Cover 1 071 Right crank 1
064 Right Rear Decorative Cover 1 072 Nut M10*1.25 2
065 Self-tapping screw ST4.2*25 10 073 Foot Pad 4
066 Self-tapping screw ST4.2*15 8 074 Nut M10 4
067 Washer Ø5x Ø12x1.0 8 075 Bolt M8*35 2
068 Plastic Bolt 2 076 Motor 1
069 Cover Cap 2 077 Self-tapping self-drilling screw
ST4.2*15
4
070 Left crank 1


 Service manual")