Network Deployment Guide for NovoPRO
V1.2 Page 7of 16
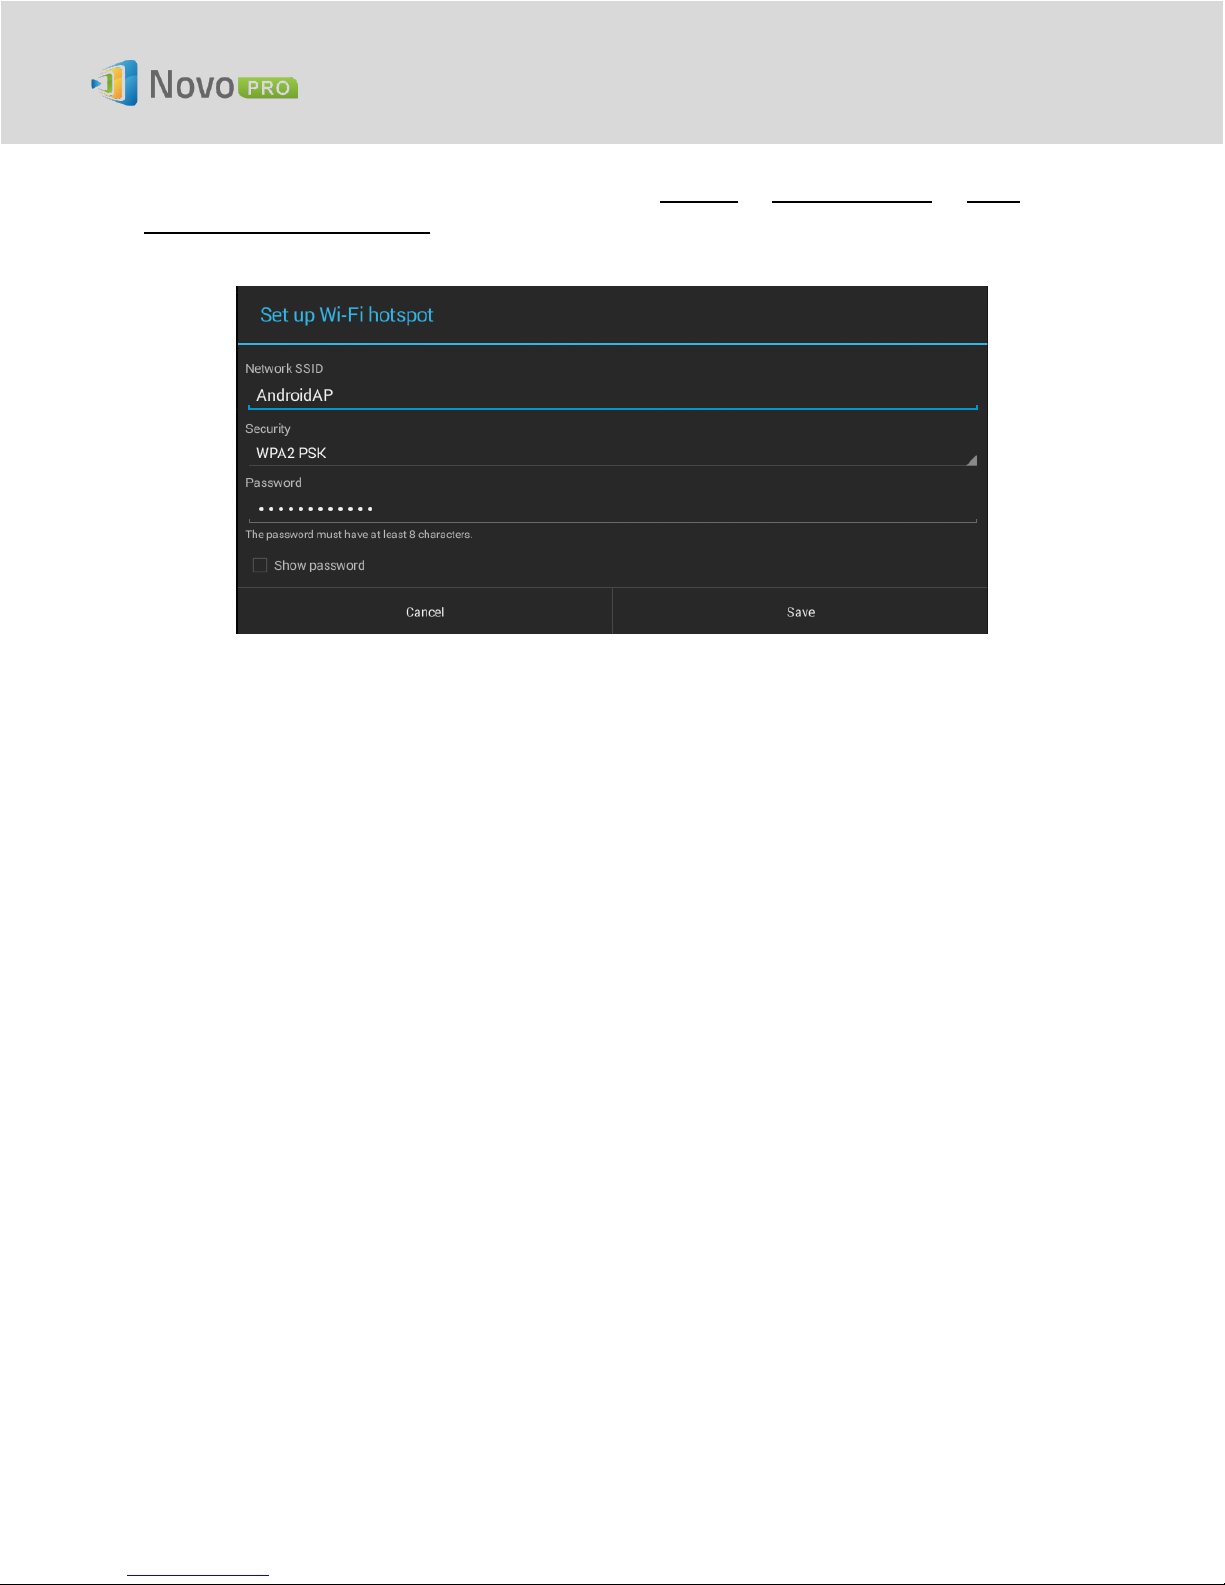
In addition, you can change rename WiFi Hotspot SSID and change its security settings (security
protocol and its password.) To do so, click on button Settings General Settings More
Tethering & portable hotspot. Then the following “Set up WiFi hotspot” window pops up to
allow you to make changes.
1.4. WiFi Network Optimization
One of the most common issues users run into when using NovoPRO is the loss of connection,
which is likely caused by instable WiFi connection. Maintaining a stable WiFi connection is
always a challenge due to the plain fact that it is wireless, subject to noise interference and
physical environment. To keep a good connection, you might follow generic WiFi setup
guideline, such as
1) Don’t place NovoPRO next to electric noise sources, such as electric fan or power
supplies. Especially when you attach NovoPRO next to a projector or an LCD monitor,
you need to keep an eye on these potential “pollution” sources.
2) Make sure you don’t place NovoPRO behind metal frames/bars, etc. Metal will greatly
degrade WiFi signal strength.
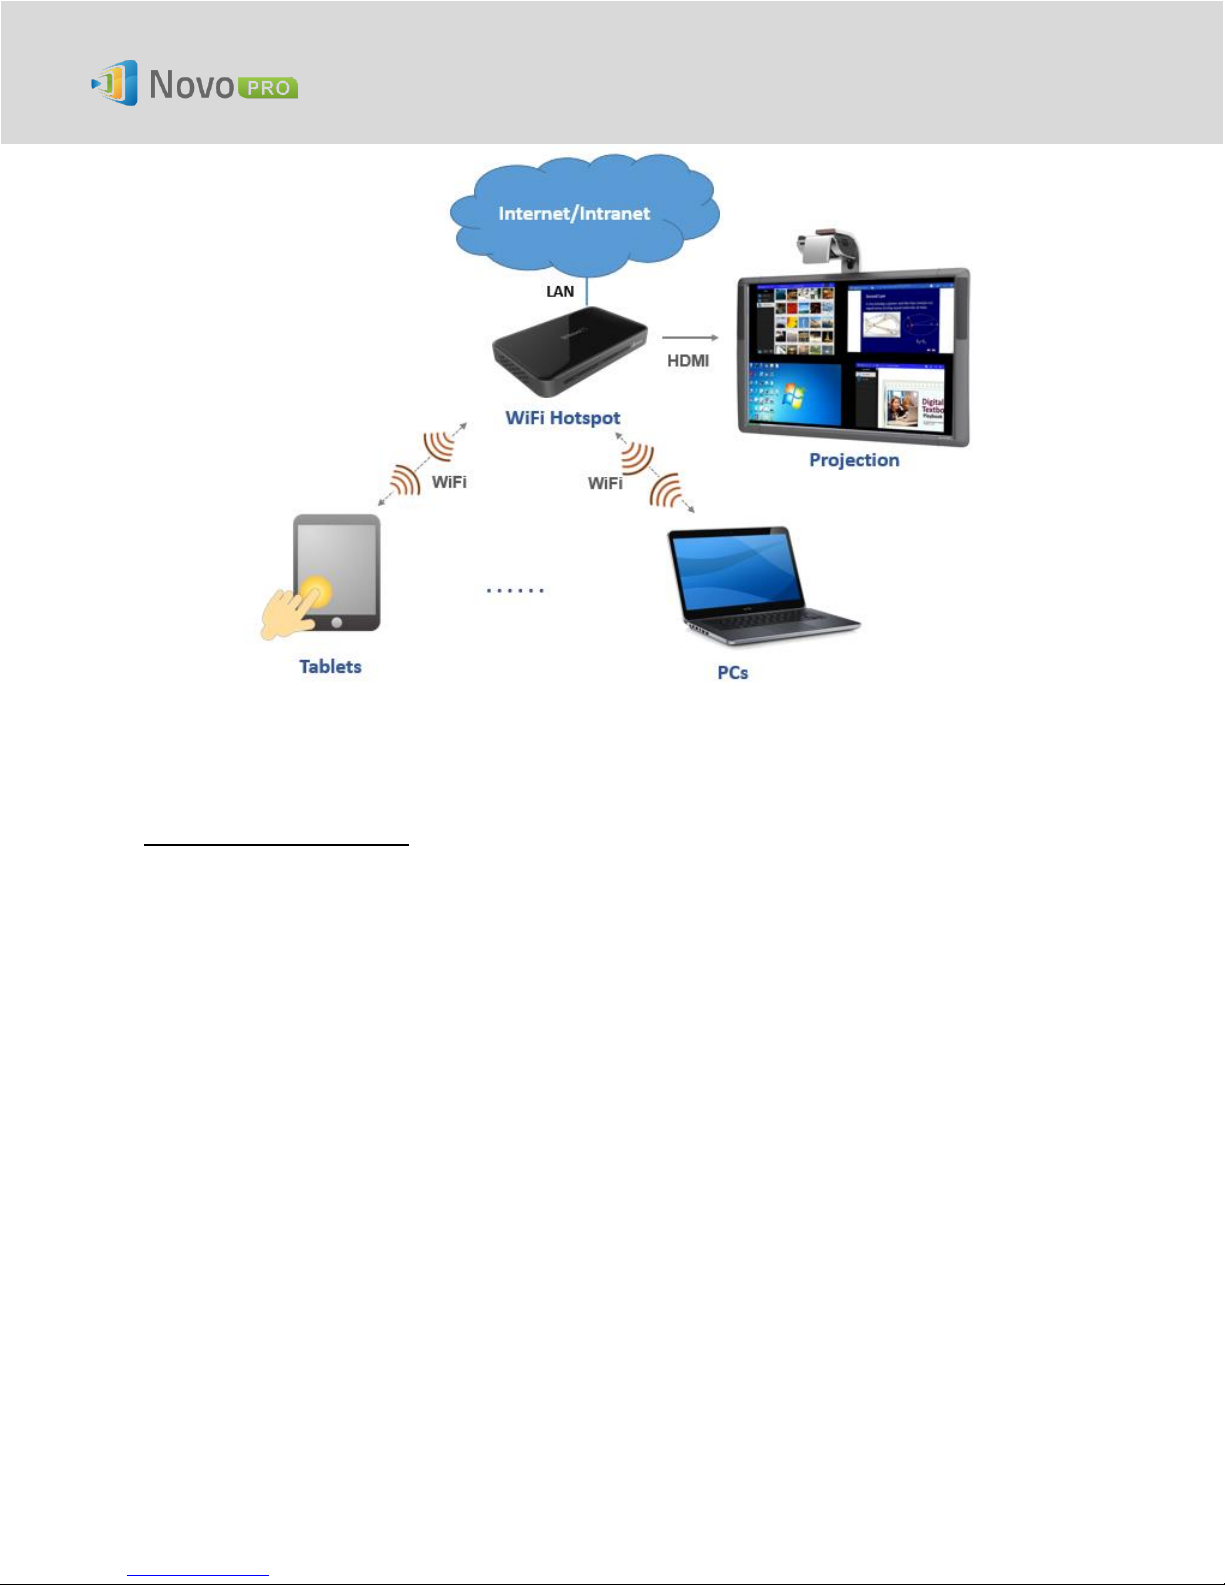
3) NovoPRO’s hotspot mode supports devices within 30 meters (100 feet). If you have an
external router, it is recommended to use NovoPRO WiFi client mode instead of hotspot
mode.
4) Try using 5GHz band as it is more robust than 2.4GHz band.
5) Lastly, you might want to check how crowded the WiFi spectrum is occupied. Two
popular Apps can give you a very good view of the WiFi spectrum.
“WiFi Analyzer” on Android devices;
“InSSIDer” tool on Windows OS.
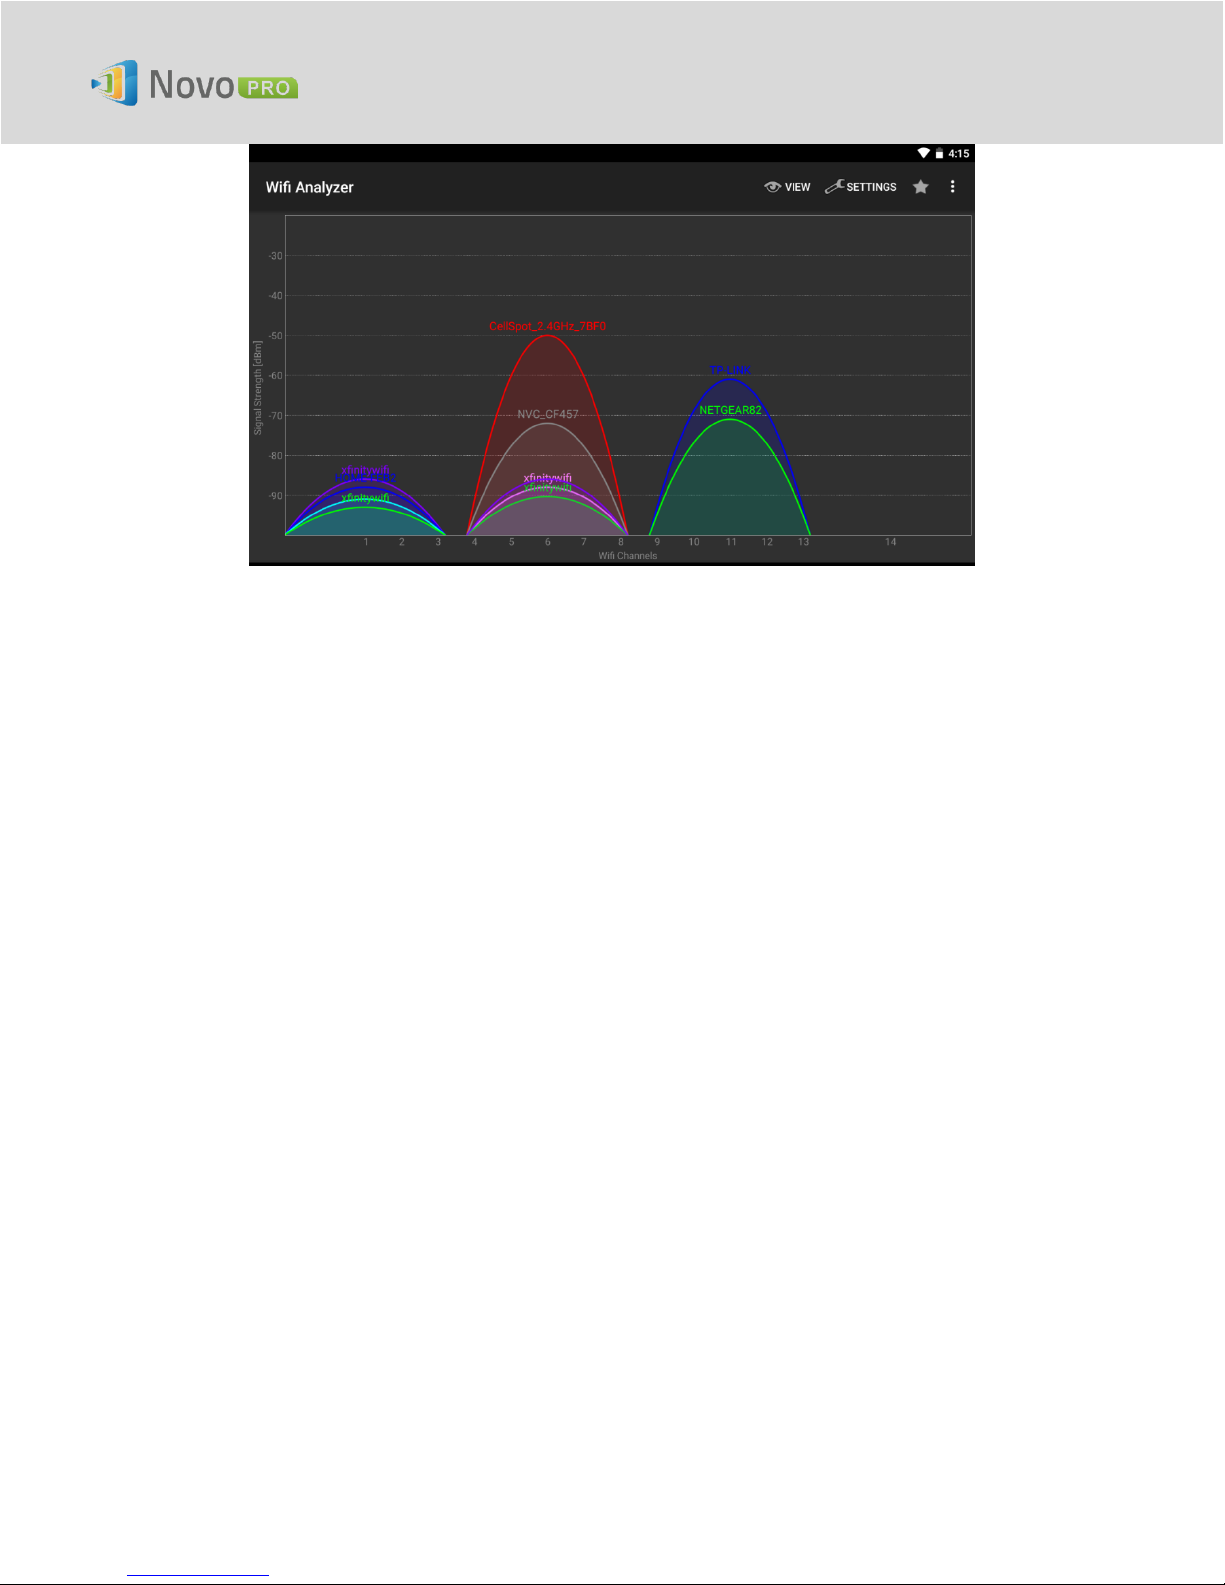
If too many WiFi Access Points occupy the same RF channel, it can lead to sluggish
performance, and, disconnection if it becomes severe. The following example is a
screenshot from “WiFi Analyzer” App. As you can tell, WiFi channel 6 is heavily utilized.
You might want to change one or some of them to other less-crowded channels.