VMS Touring 500S User manual

500s:
700 HD:
700 HDs II & 700 HD X:
VMS GPS units -
an Introductory Guide
V3.2
See more info at www.gpsoz.com.au/rfsa
Important note for X series users:
The X series has a high brightness screen, a charging time of one hour minimum prior to first use is
recommended. Depending on usage patterns, this may need to be repeated.
The VMS Touring is a powerful GPS unit comprising of two main GPS applications, “Street
Navigation” providing turn by turn voice directions to street locations and “Off Road Navigation”
giving access to detailed topographical maps across NSW.
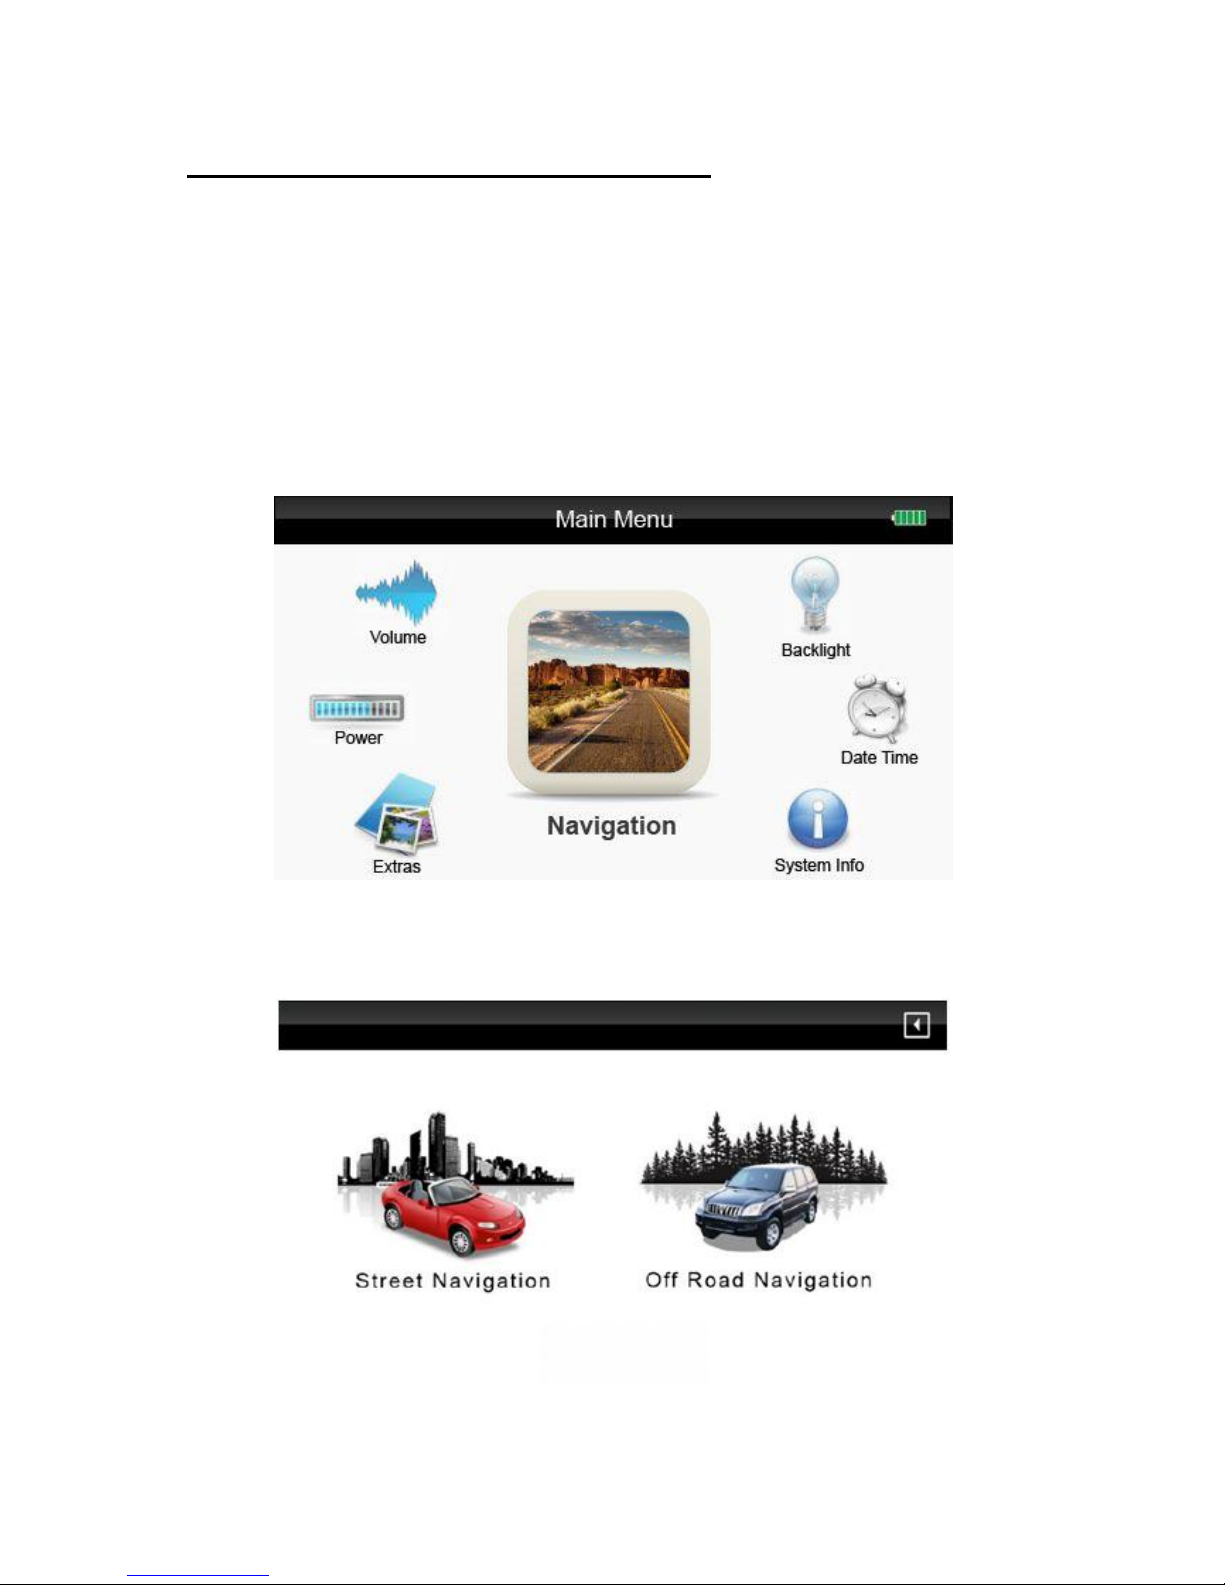
The initial menu will offer a variety of options. The options around the edge are set when shipped
and shouldn’t normally need changing. Tap “Navigation” (a round compass on some models) in the
centre to go to the next menu.
Navigation menu (500 shown):
Choice of ”Street Navigation” on the left or ”Topographical Maps” on the right.
Details on how to operate the “Street Navigation” can be found in the enclosed booklet.

The “Off Road Navigation” option provides access to detailed topographical 1:25K and 1:250K maps
of NSW (plus Qld and Vic on the 700HDs II & X) via OziExplorer. The remaining states are covered by
1:250K maps. Three custom OziExplorer screens have been created to provide access to the most
commonly used activities. Each screen can be selected by pressing the “next page” icon in the top
RH corner.
Main map screen: provides a continually updating map that will display your current
position (yellow arrow) and your speed (top centre). In addition, a yellow snail trail will be
displayed of your recent travels.
GPS Status: GPS turned on but no reception - all information invalid
GPS turned off –tap satellite dish to turn on
GPS on and operating normally
Map
Sheet
Name
Allow map
panning
Display a
page
Open
new map
Current
Speed
Turn GPS
on & off
Common
Functions
Display
Text Menus
Next
Previous
More/less
detailed
maps
Hide
Menu
Bar
Next
Page
Magnify
map
Light & exit
options
Jump to
Main Map
Current location and
direction of travel
Allow
map
panning
GPS Status
(see below)

Note: Tapping on the “speed”will change this part of the display to your current position displayed
in Latitude and Longitude. Tapping again will change the display to a six figure grid reference.
Tapping again will display current speed display.
Location Page: details of your present position are provided here numerically. All positions are
shown using GDA94 datum. Formats include Latitude and Longitude (degrees, minutes and decimal
minutes), 6 digit grid references (centre) and full grid reference (bottom). In addition, heading in
degrees and altitude in metres are also displayed.
full grid
format
Six figure grid
Altitude
in meters
Direction of
travel
“True”
Latitude
longitude
deg mins

Note: The menu bar has many options that don’t all fit across the screen at one time. By pressing
the >>> on the lower, RHS the remaining icons will appear up the RHS. So if the menu bar looks like
pressing >>> results in:
Pressing the “Hide Text Options” will “slide” the menu bar to the left, hiding the text options
Additional
Options
Hide Text
Options
Text
Options

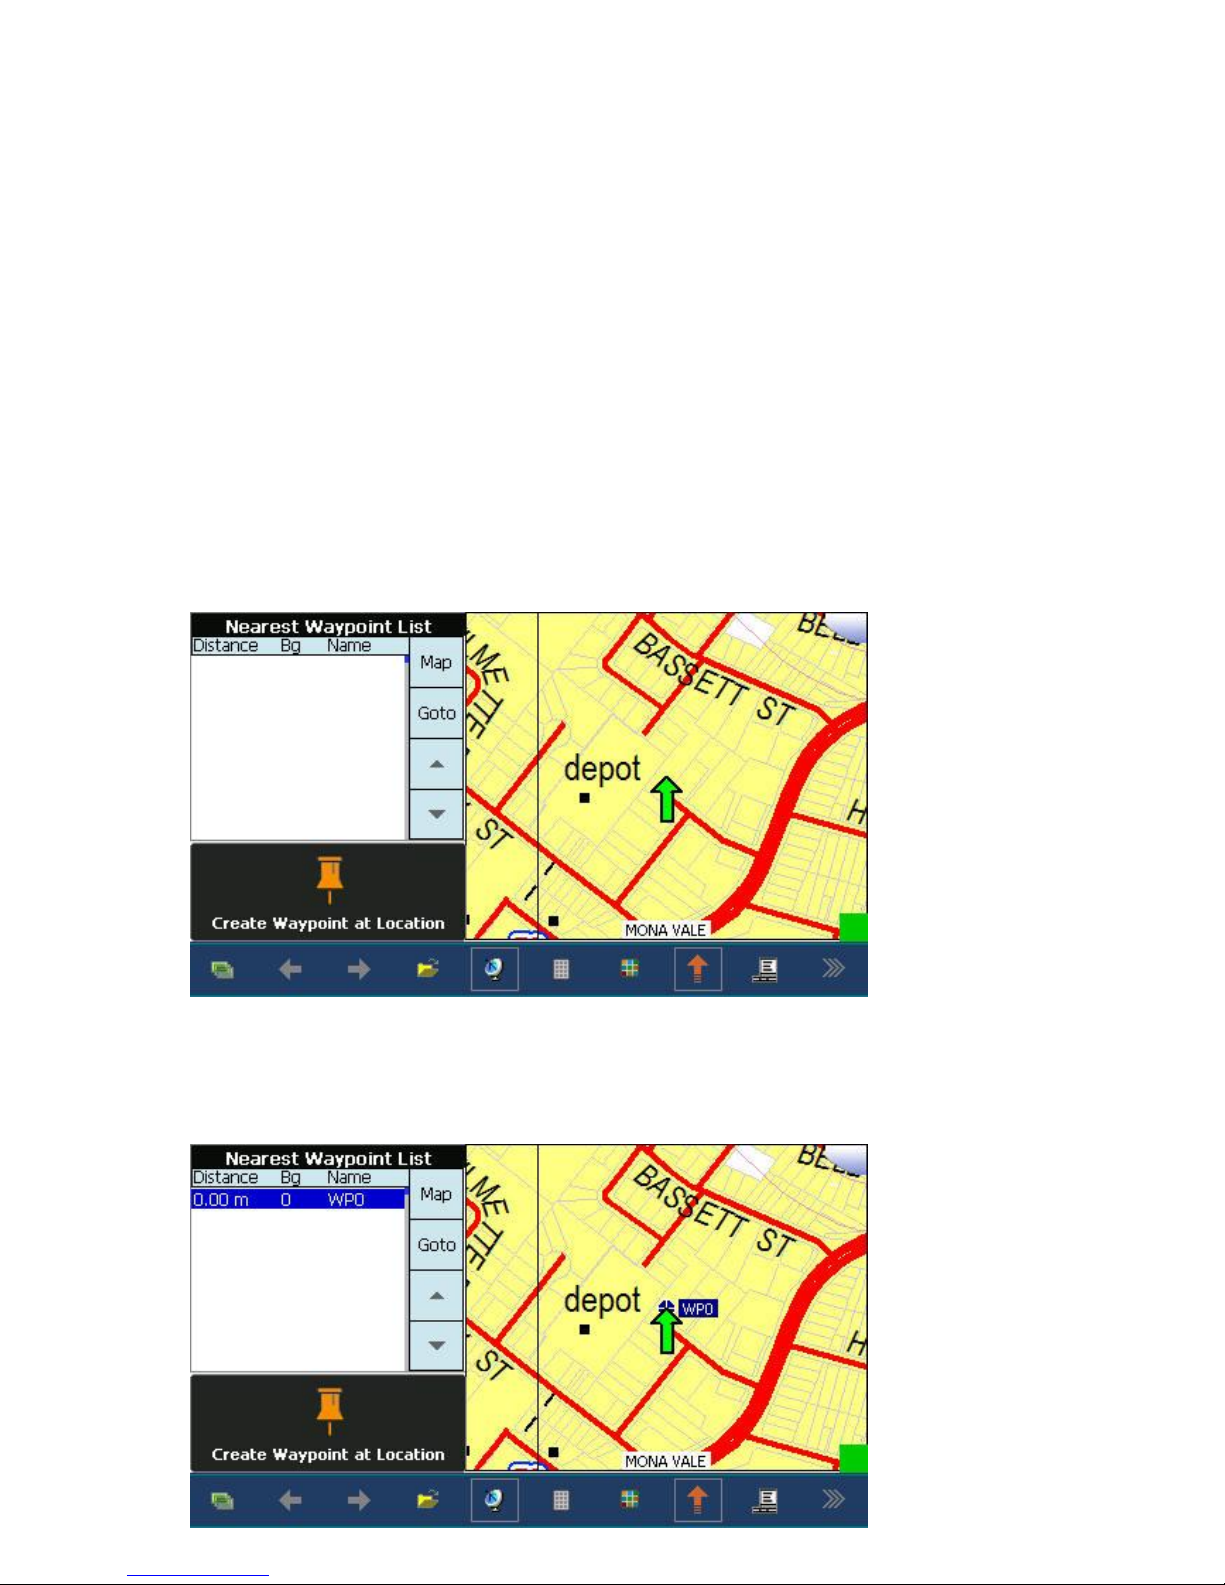
Waypoint Page: This page gives you the ability to create waypoints (save details of
important locations), get a heading to waypoint (goto) and concurrently see your location on
a moving map.
Some basic operations:
To create waypoint, tap and hold the location on the map where you would like the waypoint
created. Wait until a pop menu appears. Tap the option “Create Waypoint”. Or on the waypoint
page simply press “Create Waypoint at Location”
To create a waypoint, given a map reference, create a waypoint (see above) at any location on the
map. Tap and hold the screen on the waypoint. A small read circle will appear then a menu. Select
“Edit Wp”. A Waypoint Properties box will appear. Tap Edit Position, using the Format option,
choose Deg.Min for Lat/Long locations or UTM for grid references. Change the location values as
required. The KB button will provide an on screen keyboard for entering values.
OziExplorer has a number of additional features which can be accessed via additional menus and
options. We suggest this be left to more experienced OziExplorer users. Contact RFSA for additional
details. The complete OziExplorer users guide can be downloaded from www.gpsoz.com.au/rfsa
Swapping between on road and off road programs.
Next
Page
GPS
Status
Create a
Waypoint
List of
stored
Waypoints
Show selected
waypoint on
map
Show
straight line
to waypoint
To exit Street Navigation: From the main map screen, press the menu icon in the bottom RHS. Tap
EXIT bottom RHS, then EXIT to confirm. This will take you back to the Main Menu –Street Navigation
or Off Road Navigation.
To exit Off Road Navigation: From the main map menu press the >>> in the bottom RHS of the
screen. Press the red X, top icon. Tap Yes on pop up screen. This will take you back to the Main
Menu –Street Navigation or Off Road Navigation.
Other Options:
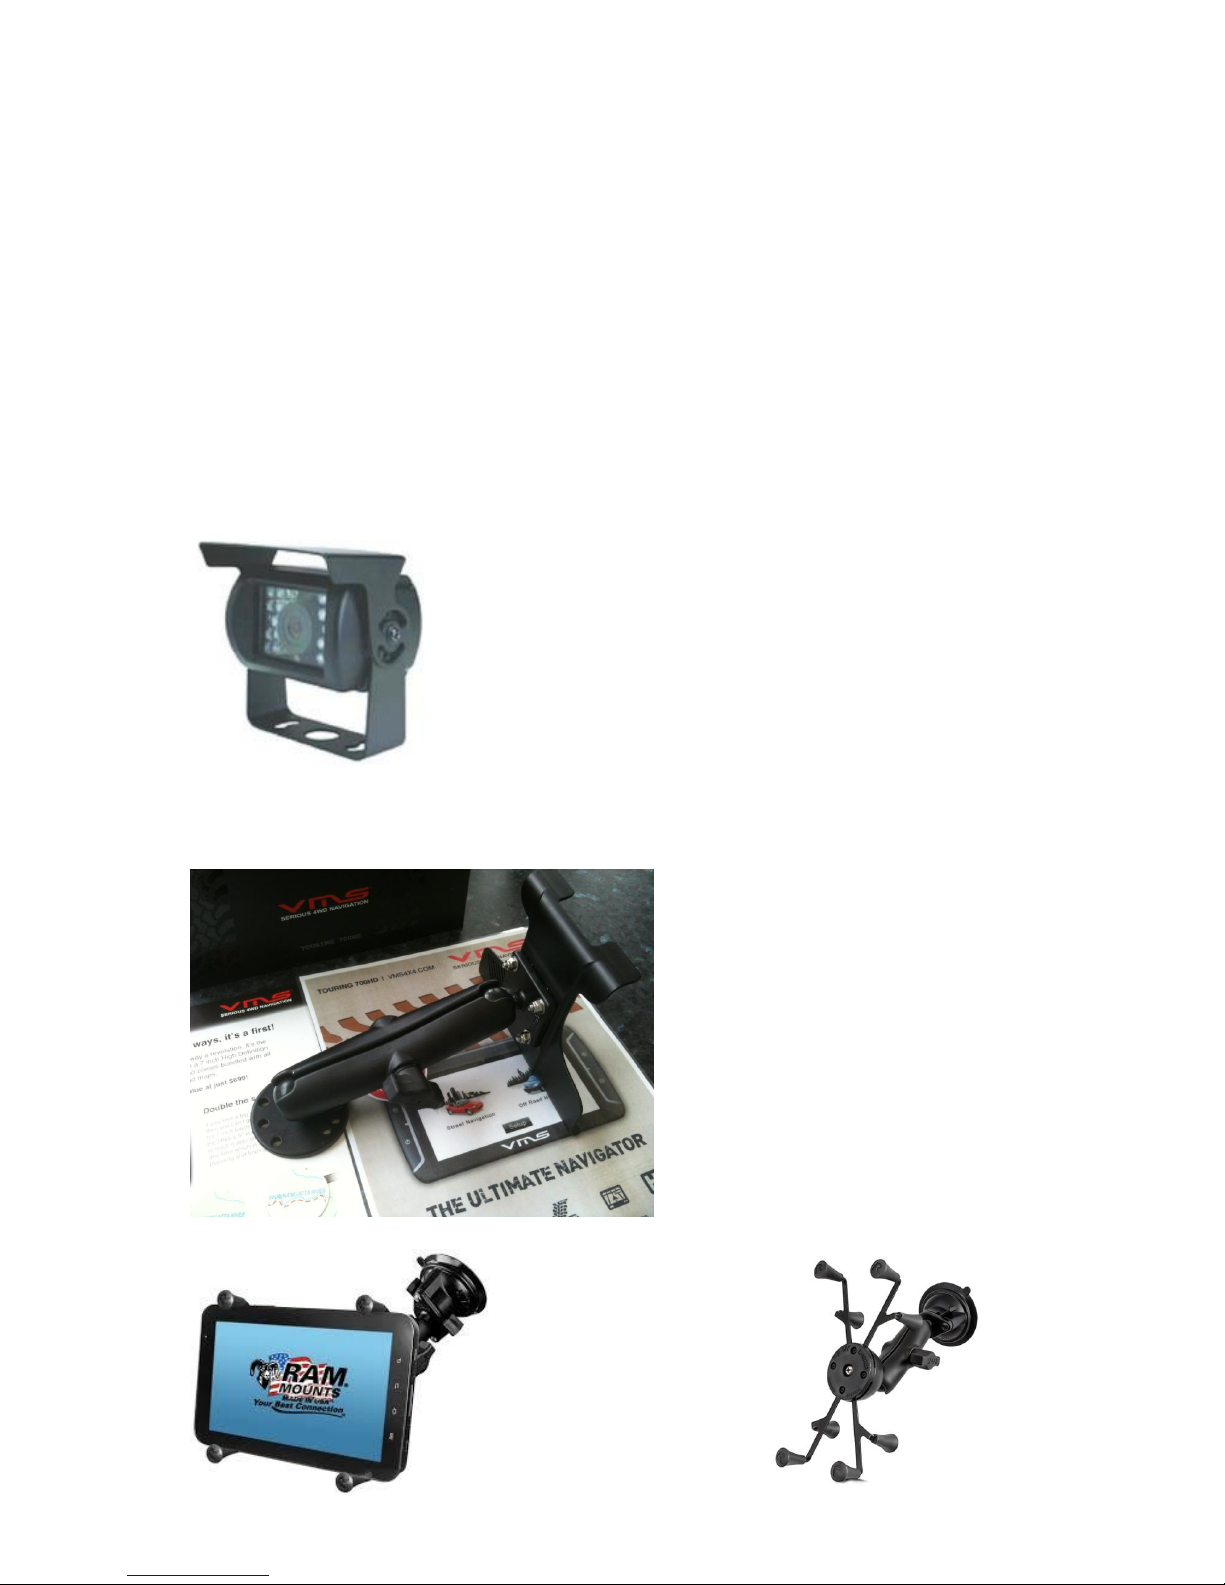
Rear Camera:
The VMS Touring unit is capable of utilising an observation camera. In addition to a reversing
camera’s normal, function it may be advantageous to have a dash mounted “manual” switch to
activate the camera while stationary or moving forward.
These cameras provide a 120° view, are waterproof and utilise CCD
camera technology.
12v model standard but a 24/12v adapter available.
20m cable supplied
Fixed Mounts:
A variety of fixed mounts are available for
those installations that require a screw
down style mounting systems. Different
length arms are also available making floor,
console or dash mounted locations
possible.
Quick mounts also available
Sample scenario:
How to save a location, pass the location on and navigate to it.
There is a tree to be removed from a location, requiring a crew and chainsaw. Both the initial crew
and the chainsaw crew have VMS GPS units. The initial crew needs to record the location of the
fallen tree and pass this location to the chainsaw crew. Then the chainsaw crew needs to add this
location to their GPS and navigate to it.
Using the stylus is recommended for this exercise. The stylus is stored in the back of the unit. It can
be found by turning the gps over and looking carefully in one of the corners of the unit. For the T700
HDsII units the stylus is stored in the cradle.
How to record a location (or create a waypoint):
The easiest way to do this is to be located at the tree then change the GPS so that it displays the
"Waypoint" page. Simply tap the top right hand corner of the screen until this screen appears:
Make sure the GPS status is green - ie the GPS knows where you are, then tap the "Create Waypoint
at Location Page" section of the screen.
A waypoint will be created, automatically named (WP0) and will appear on the map:

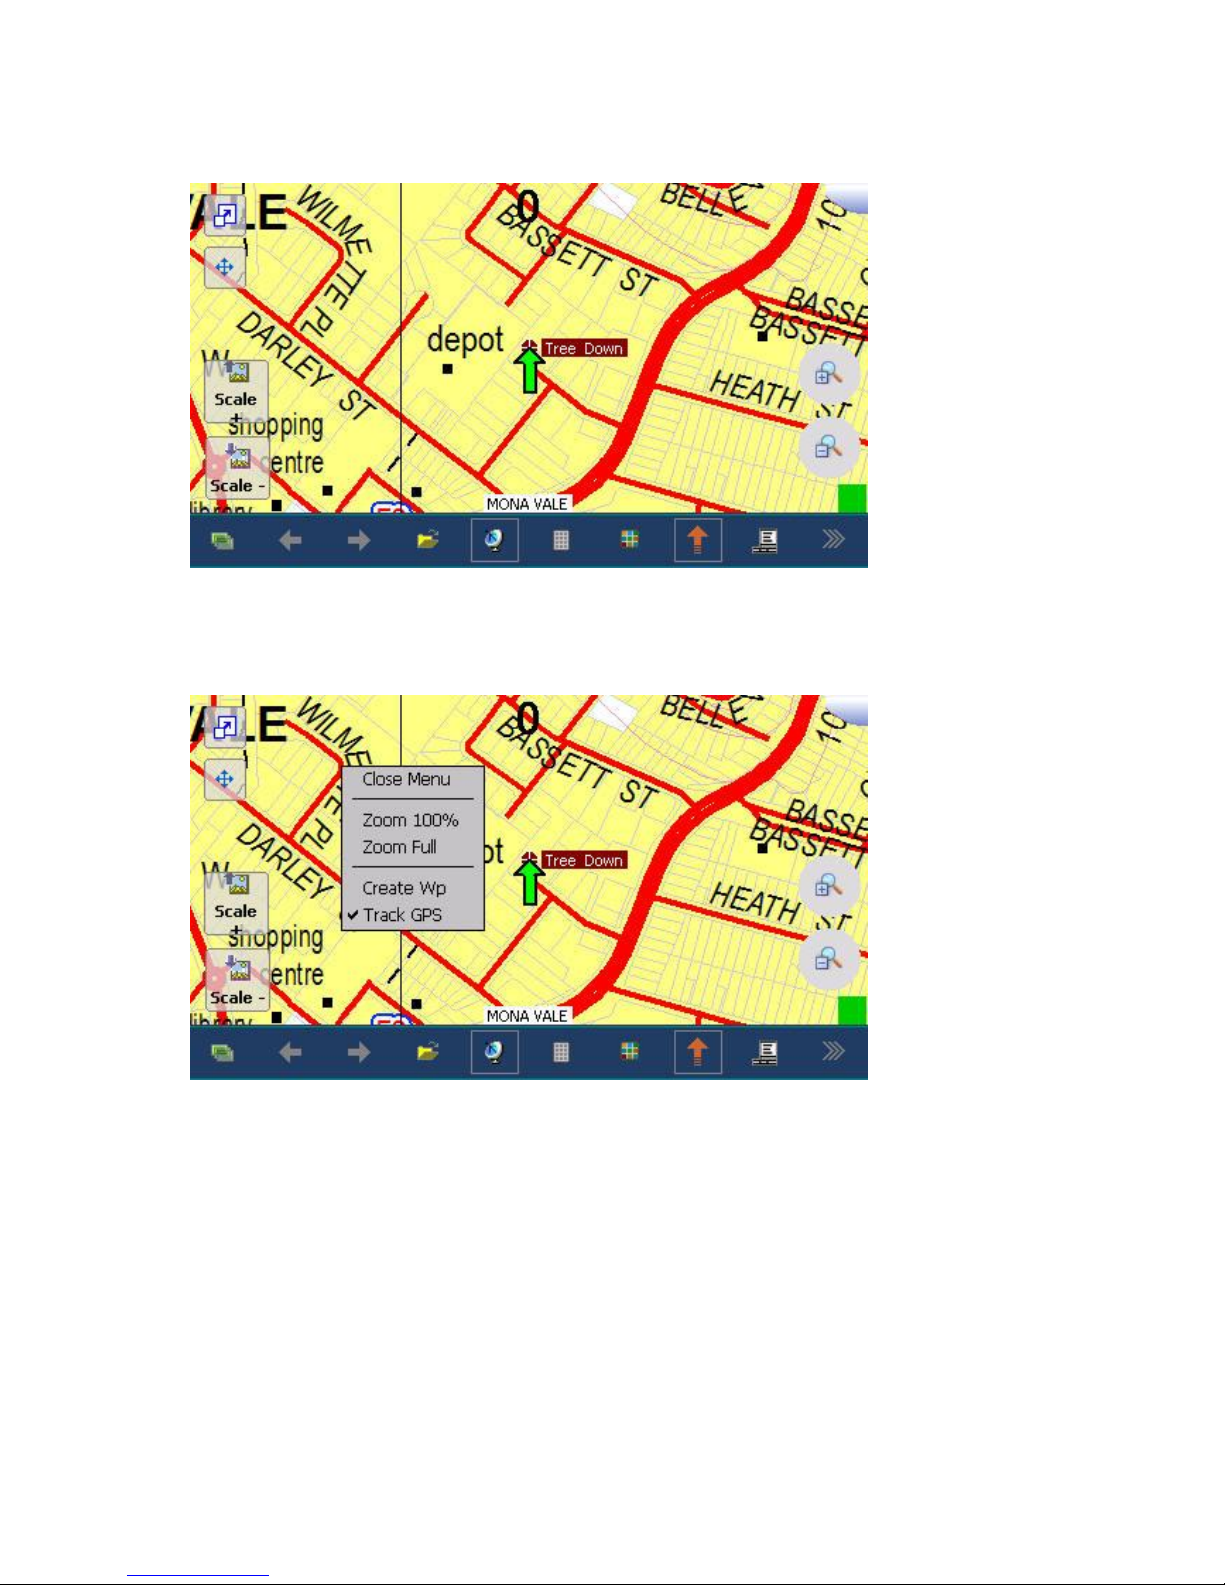
If you wish to change its name from the default WP name, simply tap and hold with the stylus on the
waypoint location icon until a pop-up menu appears:
Using the stylus, select "Edit Wp". The KB button will need to be clicked to display the Keyboard.
Change the information as required.
Then click "OK":
Return to the map page by taping the top right hand corner:
If you know the location of the tree by other means, eg a description of its location, "At the NE
corner of Wilmette Pl", then you can create a waypoint at this location by simply taping and holding
the screen with the stylus at the required location and selecting create Wp:
Again click and hold to change its name.
How to determine the position of a waypoint:
Simply tap and hold, with the stylus, the waypoint, until a red circle appears around the waypoint.
Select "Edit Wp" (edit waypoint):

then "Edit Position":
The position of the waypoint will then be displayed. In this example 33°40.3935' S 151°18.3342'E.
Click OK twice to return back to the map screen.
How to create a waypoint at a given position: (Chainsaw crew)

Using the techniques above, and the information from the observation crew's GPS, create a
waypoint anywhere on the map by taping and holding the stylus on the map:
Then with the stylus, tap and hold the waypoint and then choose "Edit Wp", then "Edit Position":

Tap on KB, then tap on the Latitude and/or Longitude that needs to be changed. Alter the digits by
entering them via the Keyboard (KB)
eg:
Changing its name might also be useful:

How to navigate to this position:
Change the GPS so that it displays the "Waypoint" page. Do this by tapping the top right hand corner
of the screen until this screen appears:
Highlight (Tap) on the desired waypoint in the table on the LHS, then tap on the "Goto" option. A
Yellow/Red line will then be drawn from your current position to the desired waypoint:
The Distance and Bg (bearing) will be updated as you move to your destination.
Other manuals for Touring 500S
1
This manual suits for next models
3
Table of contents
Other VMS GPS manuals


