*Failure to tightly screw it back in may result in water damage.
III
50
60
30
40
10
20
12
6
93
20 ATM
30
15
SWISS
MVMT
50
60
30
40
10
20
12
6
93
20 ATM
30
15
SWISS
MVMT
50
60
30
40
10
20
12
6
93
20 ATM
30
15
SWISS
MVMT
50
60
30
40
10
20
12
6
93
20 ATM
30
15
SWISS
MVMT
50
60
30
40
10
20
12
6
93
20 ATM
30
15
SWISS
MVMT
50
60
30
40
10
20
12
6
93
20 ATM
30
15
SWISS
MVMT
50
60
30
40
10
20
12
6
93
20 ATM
30
15
SWISS
MVMT
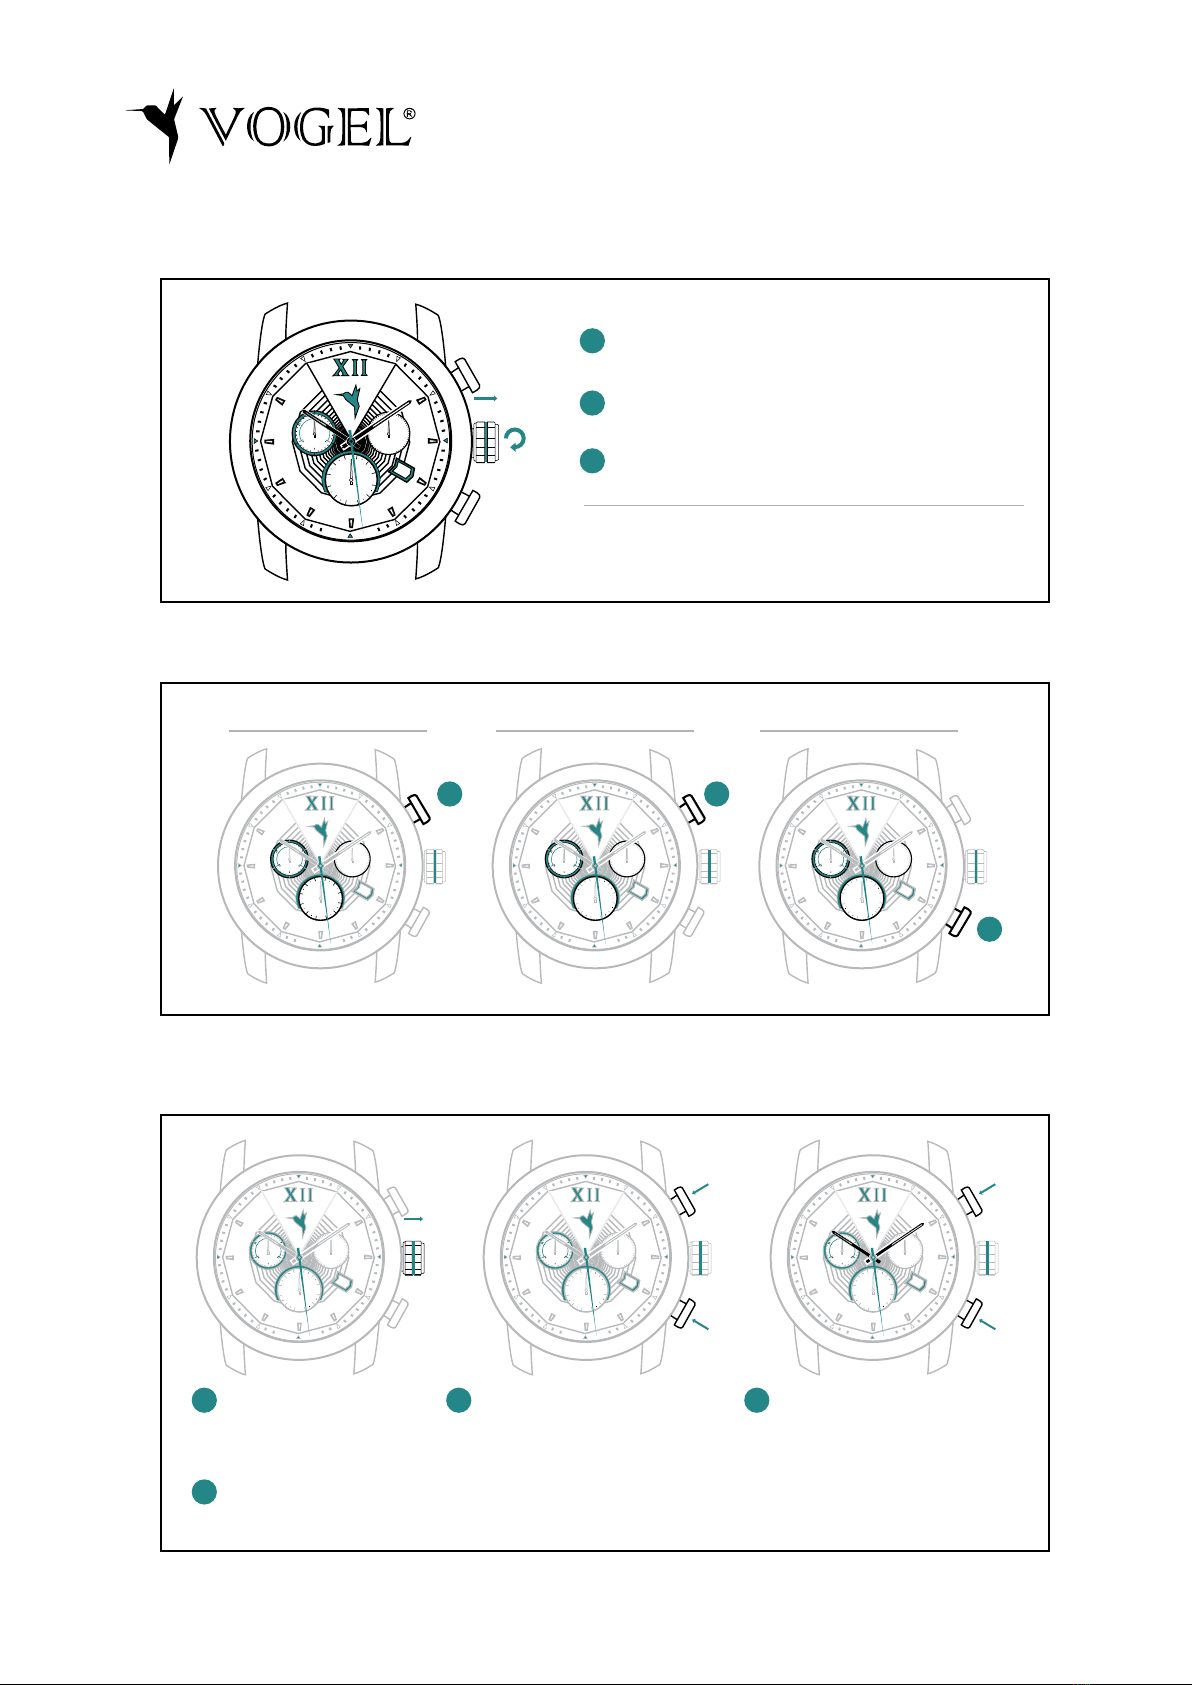
SETING THE DATE
CHRONOGRAPH DISPLAY
ADJUSTING THE CHRONOGRAPH HANDS
Unscrew and pull the crown out once to position I
Unscrew crown and pull
it twice to position
To leave set up mode, push the crown back to position I and tightly
screw it back in*
*Failure to tightly screw it back in may result in water damage.
Hold both top and bottom buttons
(2sec) until the second hand of the
chronograph does a complete turn
indicating you are in set up mode
Use the top button to adjust any of
the chronograph hands (if are not
in the correct zero position and
have to be adjusted, ej: following a
battery change). tvUse the bottom
button to switch between the
different hands.
START STOP RESET
Push the crown back to position I and tightly screw it back in.
III
II
I
I
1
4
2 3
II
III
IIITurn the crown to set the date.
USER MANUAL (EN)