Vogue CB908 User manual

RVS voorbereidingstafel
Handleiding
Comptoir de préparation inox
Mode d'emploi
Edelstahl-Küchenarbeitstisch
Bedienungsanleitung
NL
FR
DE
IT
ES
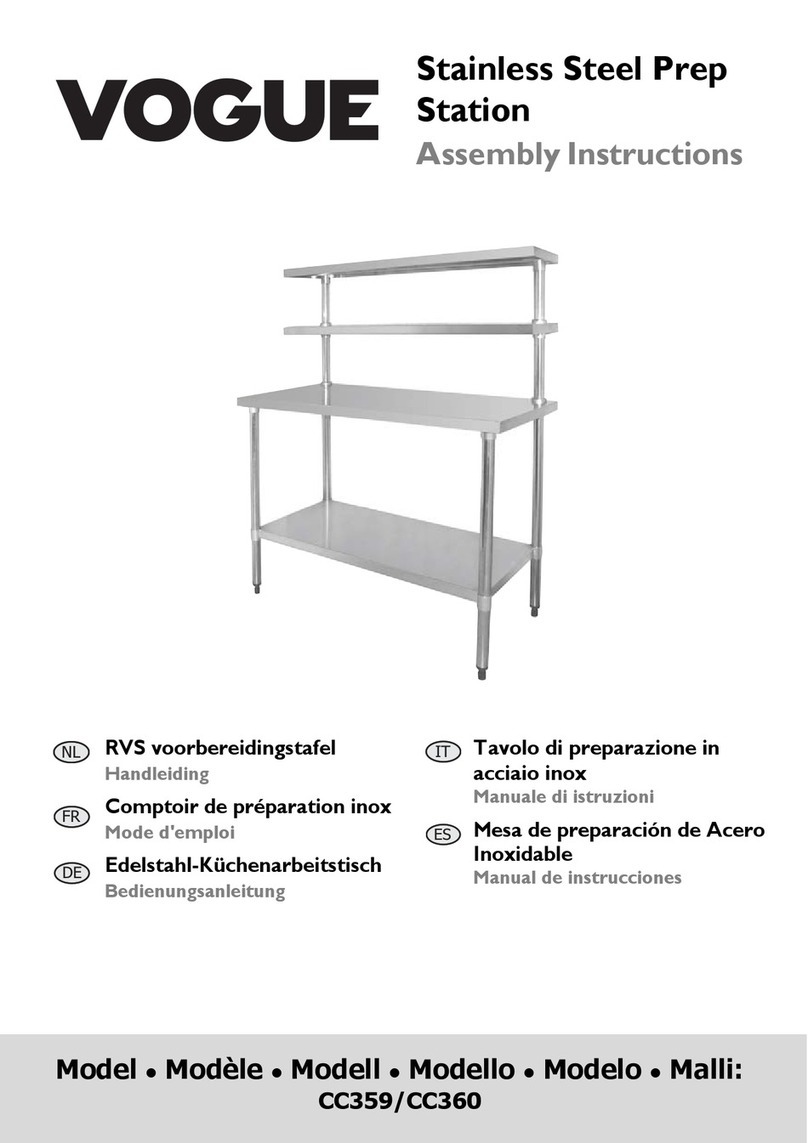
Stainless Steel Prep
Station
Assembly Instructions
Model •Modèle •Modell •Modello •Modelo •Malli:
CB908/CB909
Tavolo di preparazione in
acciaio inox
Manuale di istruzioni
Mesa depreparación de Acero
Inoxidable
Manual de instrucciones

. . . . . . . . . . . . . . . . . . . . . . . . . . . . . . . .1
. . . . . . . . . . . . . . . . . . . . . . . . . . . . . . . .2
. . . . . . . . . . . . . . . . . . . . . . . . . . . . . . . .3
. . . . . . . . . . . . . . . . . . . . . . . . . . . . . . . .4
. . . . . . . . . . . . . . . . . . . . . . . . . . . . . . . .5
. . . . . . . . . . . . . . . . . . . . . . . . . . . . . . . .6
EN
NL
FR
DE
IT
ES

(i) x1 (vi) x 1
(ii)x2 (vii) x 4
(iii) x 1 (viii) x 4
(iv) x 2 (ix)x 1
(v) x 16 (x) x 1

1
EN
Safety Instructions
• Whilst all care has been taken to remove sharp edges, care must be taken when cleaning or handling the prep station
to prevent risk of injury from exposed metal edges.
• Do not overload the work top or shelves causing them to bend.
Product Description
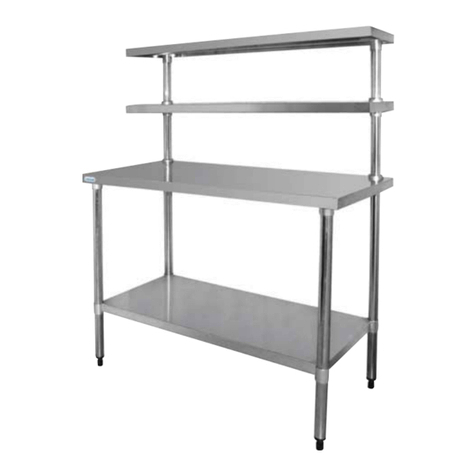
•CB908 - 1200 x 600 x 1500mm Stainless Steel Prep Station
•CB909 - 1800 x 600 x 1500mm Stainless Steel Prep Station
Assembly
Before using for the first time VOGUE recommend all surfaces are cleaned thoroughly with a suitable cleaning agent.
Remove all cleaning residues and dry thoroughly.
Cleaning
• Clean regularly using a cleaning agent suitable for use with stainless steel.
• Always remove cleaning agent residue. This can discolour the surfaces.
• Never leave the surface damp as this can cause discolouration.
All rights reserved. No part of these instructions may be produced or transmitted in any form or by any means,
electronic, mechanical, photocopying, recording or otherwise, without the prior written permission of VOGUE.
Every effort is made to ensure all details are correct at the time of going to press, however, VOGUE reserve the right to
change specifications without notice.
Note: Be sure to check all packaging materials for any small parts that may have come loose during
transportation
1. Remove all protective film, taking care to avoid scratching the surfaces.
2. Place the lower shelf (i) on its side on the floor [A]. The lower shelf has leg slots on the outside of each corner.
3. Insert the rear legs (the two longest) (ii) into the lower shelf, lining up the socket with the lines marked on the leg.
4. Slide the work top (iii) on to the two legs, lining up the sockets with the lines marked on the leg [B].
5. Insert the two shorter legs (iv) through the front sockets of the lower shelf and in to the work top sockets.
6. Use grub screws (v) to loosely fix the lower shelf and work top to the legs with the allen key (vi), then stand upright
[C, D, E].Tighten the screws when all shelves are correctly located.
7. Roll a rubber gasket (vii) followed by a collar (viii) over each of the rear legs and down to the work top.
8. Lower the gastronorm shelf (ix) over the rear legs [F].Securethe support sockets (attached to the shelf) in place
with grub screws (v) and tighten.
9. Roll a rubber gasket followed by a collar over each of the rear legs and down to the gastronorm shelf.
10. Place the upper shelf (x) over the four legs and secure in place with the remaining grub screws [G].
11. Insert the gastronorm pans (NOT INCLUDED) in to the gastronorm shelf.
Note: The Prep Station will accommodate 1/3, 1/6 and 1/9 size gastronorm pans.
Adjust the feet if necessary to level the prep station.

2
NL
Veiligheidstips
• Ondanks onze zorg om scherpe randen te verwijderen, dient men tijdens het reinigen of bij het gebruik van de
voorbereidingstafel voorzichtig te zijn om letsel te voorkomen door onbeschutte metalen randen.
• Tafelblad of planken niet te zwaar belasten waardoor deze kunnen doorbuigen.
Productbeschrijving
•CB908 - 1200 x 600 x 1500 mm RVS voorbereidingstafel
•CB909 - 1800 x 600 x 1500mm RVS voorbereidingstafel
Montage
1. Verwijder alle beschermfolie, voorkom hierbij dat u op de oppervlakken krast.
2. Plaats de onderste plank (i) op de zijkant op de vloer[A]. De onderste plank heeft in elke hoek pootaansluitingen.
3. Plaats de achterste poten (de twee langste) (ii) in de onderste plank en lijn hierbij de opening uit op de
lijnmarkeringen van de poten.
4. Schuif het werkblad (iii) op de twee poten en lijn hierbij de openingen uit op de lijnmarkeringen op poot [B].
5.
Plaats de twee kortere poten
(iv)
door de voorste openingen van de onderste plank en in de openingen van het werkblad.
6. Draai met een inbussleutel de instelschroeven (v) om de onderste plank en het werkblad losjes vast te maken aan de
poten, en zet alles rechtop [C, D, E]. Na de correcte plaatsing van de planken draait u alle schroeven vast.
7. Rol een rubberen pakking (vii), gevolgd door een ringetje (vii), over elk van de achterste poten en naar beneden tot
op het werkblad.
8. Plaats de gastronorm plank (ix) over de achterste poten [F]. Maak de steunopeningen (op de plank) op hun plaats
vast met de twee zelftappende schroeven (v) en draai ze goed vast..
9. Rol een rubberen pakking, gevolgd door een ringetje, over elk van de achterste poten en naar beneden tot op de
gastronorm plank.
10.
Plaats de bovenste plank
(x)
over de vier poten en maak ze vast met de resterende stelschroeven
[G]
.
11. Plaats de gastronorm pannen (NIET INBEGREPEN) in de gastronorm plank.
Voor het eerste gebruik, raadt VOGUE u aan om alle oppervlakken grondig te reinigen met een geschikt reinigingsmiddel.
Verwijder alle reinigingsresten en droog de tafel goed.
Reiniging, zorg & onderhoud
• Regelmatig reinigen met een geschikt reinigingsmiddel voor RVS.
• Verwijder altijd alle resten van het reinigingsmiddel. Resten kunnen oppervlakken doen verkleuren.
• Laat de oppervlakken nooit vochtig achter, dit kan verkleuring veroorzaken.
Alle rechten voorbehouden. Het is verboden om deze handleiding, hetzij volledig of gedeeltelijk, elektronisch of
mechanisch te reproduceren, kopiëren, op opslagmedia op te slaan of op enigerlei wijze over te dragen, zonder
voorafgaande goedkeuring van VOGUE.
Wij hebben er alles aan gedaan om er zeker van te zijn dat op publicatiedatum van de handleiding alle details correct
zijn, desondanks, behoudt VOGUE het recht voor om specificaties zonder aankondiging te wijzigen.
Opmerking: controleer al het verpakkingsmateriaal op de aanwezigheid van kleine onderdelen die
tijdens transport losgeraakt kunnen zijn.
Opmerking: De voorbereidingstafel is geschikt voor gastronorm pannen met de groottes 1/3, 1/6 en
1/6. Indien nodig, verstel de poten om de voorbereidingstafel te nivelleren.

3
FR
Conseils de sécurité
• Bien que toutes les précautions aient été prises pour éviter les bords coupants, nous vous recommandons de prendre
les précautions qui s'imposent pour nettoyer ou déplacer la table de préparation, afin d'éviter de vous blesser sur un
bord métallique nu.
• Ne surchargez pas le plan de travail ou les étagères, qui risqueraient de ployer sous l'excédent de charge.
Description du Produit
•CB908 - Comptoir de préparation inox 1 200 x 600 x 1 500 mm
•CB909 - Comptoir de préparation inox 1 800 x 600 x 1 00mm
Montage
1. Retirez la pellicule de protection, en veillant à ne pas rayer les surfaces.
2. Posez l'étagère inférieure (i) sur sa tranche, par terre [A]. L'étagère inférieure est munie de fentes pour les pieds, à
chaque angle.
3. Insérez les pieds arrière (les deux plus longs) (ii) dans l'étagère inférieure, en alignant l'emboîtement sur les lignes
marquées sur le pied.
4. Faites coulisser le plan de travail (iii) sur les deux pieds, en alignant les emboîtements sur les lignes marquées sur le
pied [B].
5. Insérez les deux pieds plus courts (iv) à travers les emboîtements avant de l'étagère inférieure, puis dans les
emboîtements du plan de travail.
6. À l'aide de vis sans tête (v), vissez sans serrer l'étagère inférieure et le plan de travail sur les pieds à l'aide de la clef
(vi), puis mettez l'ensemble debout [C, D, E]. Vissez les vis après avoir vérifié le bon positionnement des étagères.
7. Glissez un joint en caoutchouc (vii), puis une bague (viii) sur chacun des pieds arrière et jusqu'au plan de travail.
8. Abaissez l'étagère Gastronorme (ix) sur les pieds arrière [F]. Fixez les emboîtements de fixation (reliés à l'étagère) à
leur place à l'aide des vis sans tête (v), puis serrez.
9.
Glissez un joint en caoutchouc, puis une bague sur chacun des pieds arrière et jusqu'à l'étagère gastro.
10. Placez l'étagère supérieure (x) sur les quatre pieds et calez-la à l'aide des vis sans tête restantes [G].
11. Faites coulisser les bacs gastro (NON FOURNIS) sur l'étagère gastro.
Avant la première mise en service, VOGUE vous recommande de nettoyer les surfaces de la table à l'aide du produit de
nettoyage qui convient. Débarrassez la surface de tous résidus de nettoyage et séchez-la à fond.
Nettoyage, entretien et maintenance
• Nettoyez régulièrement à l'aide du produit de nettoyage qui convient aux surfaces en inox.
• N'oubliez pas de toujours éliminer les résidus de produit de nettoyage. Ils risquent de décolorer les surfaces de la table.
• Veillez à toujours essuyer la surface humide, pour éviter tout risque de décoloration.
Tous droits réservés. La production ou transmission, partielles ou intégrales, sous quelque forme que ce soit ou par
n'importe quel moyen, tant électronique que mécanique, sous forme de photocopie, d'enregistrement ou autre de
ce mode d'emploi sont interdites sans l'autorisation préalablement accordée par VOGUE.
Nous nous efforçons, par tous les moyens dont nous disposons, de faire en sorte que les détails contenus dans le
présent mode d'emploi soient corrects en date d'impression. Toutefois, VOGUE se réserve le droit de changer les
spécifications de ses produits sans préavis.
Remarque : veillez à vérifier que les matériaux d'emballage ne contiennent pas des pièces qui auraient
pu se détacher pendant le transport.
Remarque : la table de préparation peut accueillir des bacs gastro 1/3, 1/6 et 1/9.
Réglez les pieds si nécessaire, pour mettre de niveau la table de préparation.

4
DE
Veiligheidstips
• Obwohl alle Anstrengungen unternommen wurden, um scharfe Kanten zu beseitigen, ist beim Reinigen und
Transportieren des Arbeitstischs Vorsicht angebracht, da eventuell noch vorhandene offene Metallkanten eine
Verletzungsgefahr darstellen könnten.
• Arbeitsfläche oder Ablagen nicht überladen, da sie sich sonst biegen würden.
Productbeschreibung
•CB908 - 1200 x 600 x 1500mm Edelstahl-Küchenarbeitstisch
•CB909 - 1800 x 600 x 1500mm Edelstahl-Küchenarbeitstisch
Montage
1. Den gesamten Schutzfilm entfernen. Darauf achten, dass die Oberflächen nicht zerkratzt werden.
2. Den unteren Ablageboden (i) auf dem Boden auf die Seitenkante stellen [A]. Der untere Ablageboden ist an der
Außenseite jeder Ecke mit Schlitzen für die Beine versehen.
3. Die Hinterbeine (die beiden längeren Beine) (ii) in den unteren Ablageboden schieben. Die Aufnahme muss dabei auf
einer Höhe mit den auf dem Bein eingezeichneten Linien sein.
4. Die Arbeitsfläche (iii) auf die beiden Beine schieben. Die Aufnahmen müssen dabei auf einer Höhe mit den auf dem
Bein eingezeichneten Linien sein [B].
5. Die beiden kürzeren Beine (iv) durch die vorderen Aufnahmen des unteren Ablagebogens in die Aufnahmen der
Arbeitsfläche schieben.
6. Den unteren Ablageboden und die Arbeitsfläche mit Gewindestiften (v) und dem Inbusschlüssel (vi) locker an den
Beinen befestigen und dann aufrecht hinstellen [C, D, E]. Wenn alle Ablageböden korrekt positioniert sind, die
Schrauben anziehen.
7. Eine Gummidichtung (vii) gefolgt von einer Manschette (viii) über jedes Hinterbein bis hinunter zur Arbeitsfläche
rollen.
8. Das Gastronorm-Ablagebrett (ix) über die hinteren Beine [F] herunterlassen. Die Tragefassungen (die am Brett
angebracht sind) mit den Gewindestiften (v) befestigen und festziehen.
9. Eine Gummidichtung gefolgt von einer Manschette über jedes Hinterbein bis hinunter zum Gastronorm-Boden rollen.
10. Den oberen Boden (x) auf die vier Beine setzen und mit den übrigen Gewindestiften in Position sichern [G].
11. Die Gastronorm-Schalen (NICHT IM LIEFERUMFANG) in den Gastronorm-Boden legen.
VOGUE empfiehlt, alle Flächen vor dem ersten Gebrauch mit einem geeigneten Reinigungsmittel gründlich zu säubern. Das
Reinigungsmittel wieder vollständig entfernen und den Tisch gründlich trocknen lassen.
Reinigung, Pflege und Wartung
• Den Tisch regelmäßig mit einem für Edelstahl geeigneten Reinigungsmittel säubern.
• Rückstände des Reinigungsmittels stets entfernen, da sie sonst die Tischflächen verfärben können.
• Die Flächen nie feucht lassen, da dies zu Verfärbungen führen könnte.
Alle Rechte vorbehalten. Diese Anleitung darf ohne vorherige schriftliche Genehmigung von VOGUE weder ganz
noch teilweise in irgendeiner Form oder auf irgendeinem Wege - einschließlich elektronischer, mechanischer
erfahren, durch Fotokopieren, Aufnahme oder andere Verfahren - vervielfältigt oder übertragen werden.
Es werden alle Anstrengungen unternommen um sicherzustellen, dass alle Angaben bei der Drucklegung korrekt
sind. VOGUE behält sich jedoch das Recht vor, Spezifikationen ohne Vorankündigung zu ändern.
Hinweis: Überprüfen Sie das gesamte Verpackungsmaterial auf Kleinteile, die sich während des
Transports gelöst haben könnten.
Hinweis: Der Arbeitstisch bietet Platz für Gastronorm-Schalen der Größen 1/3, 1/6 und 1/9.
Bei Bedarf die Füße regulieren, damit der Tisch gerade steht.

5
IT
Suggerimenti per la sicurezza
• Sebbene sia stata applicata la massima cura nell'eliminare i bordi vivi, fare attenzione quando si pulisce o si maneggia la
stazione di preparazione per evitare il rischio di lesioni dovute a bordi metallici esposti.
• Non sovraccaricare il piano di lavoro o i piani di appoggio causandone il piegamento.
Descrizione dei prodotti
•CB908 - Tavolo di preparazione in acciaio inox 1200 x 600 x 1500mm
•CB909 - Tavolo di preparazione in acciaio inox 1200 x 600 x 1500mm
Montaggio
1. Rimuovere completamente la pellicola protettiva da tutti i componenti, facendo attenzione a non graffiare le superfici.
2. Collocare lateralmente il piano di appoggio inferiore (i) sul pavimento [A]. Il piano di appoggio inferiore è dotato di
alloggiamenti per le gambe sul lato esterno di ogni angolo.
3. Inserire le gambe posteriori (più lunghe) (ii) nel piano di appoggio inferiore, allineando la presa con le linee indicate
sulle gambe.
4. Fare scivolare il piano di lavoro (iii) sulle due gambe, allineando le prese con le linee indicate sulla gamba [B].
5. Inserire le due gambe corte (iv) attraverso le prese anteriori del piano di appoggio inferiore e quindi nelle prese del
piano di lavoro.
6.
Utilizzare i gambi filettati
(v)
per fissare senza serrare il piano di appoggio e il piano di lavoro alle gambe con la chiave a
brugola
(vi)
, quindi collocare in posizione verticale
[C, D, E]
. Serrare quando tutti piani sono correttamente posizionati.
7. Inserire una guarnizione in gomma (vii) seguita da una ghiera (viii) su ognuna delle gambe posteriori spingendo
fino al piano di lavoro.
8. Abbassare il piano gastronorm (ix) sulle gambe posteriori [F]. Fissare gli attacchi di supporto (connessi al piano) in
posizione con i gambi filettati (v) e serrare.
9. Inserire una guarnizione in gomma seguita da una ghiera su ognuna delle gambe posteriori spingendo fino al piano
gastronorm.
10. Posizionare il piano di appoggio superiore (x) sulle quattro gambe e fissare in posizione utilizzando i rimanenti gambi
filettati [G].
11. Inserire le bacinelle gastronorm (NON INCLUSE) nel piano gastronorm.
Precedentemente al primo utilizzo, VOGUE raccomanda di pulire tutte le superfici con un detergente appropriato.
Rimuovere tutti i residui di detergente e lasciare asciugare completamente.
Pulizia e manutenzione
• Pulire regolarmente utilizzando un detergente per acciaio inox.
• Rimuovere sempre gli eventuali residui di detergente perché possono scolorire le superfici.
• Non lasciare mai umida la superficie in quanto può scolorire.
Tutti i diritti riservati. È vietata la riproduzione o la trasmissione in alcuna forma, elettronica, meccanica, mediante
fotocopiatura o altro sistema di riproduzione, di qualsiasi parte delle presenti istruzioni senza la previa
autorizzazione scritta di VOGUE.
Le informazioni contenute sono corrette e accurate al momento della stampa, tuttavia VOGUE si riserva il diritto
di modificare le specifiche senza preavviso.
Nota: assicurarsi di controllare in tutti i materiali di imballaggio la presenza di parti di piccole
dimensioni che possono essersi allentate durante il trasporto.
Nota: nel tavolo di preparazione è possibile inserire bacinelle gastronorm da 1/3, 1/6 e 1/9. Se
necessario, regolare i piedini per mettere in piano il tavolo.

6
ES
Consejos de Seguridad
• Aunque hemos procurado eliminar los bordes afilados, debe tenerse cuidado al limpiar o manipular esta mesa de
preparación de preparación para evitar posibles lesiones mediante los bordes metálicos expuestos.
• No debe sobrecargarse la superficie de trabajo ni los estantes para no que no se comben.
Descripción del Producto
•CB908 - Mesa de preparación de Acero Inoxidable de 1200 x 600 x 1500mm
•CB909 - Mesa de preparación de Acero Inoxidable de 1800 x 600 x 1500mm
Montaje
1. Quite toda la película de protección, teniendo cuidado de no rayar las superficies.
2. Ponga el estante inferior (i) sobre el costado, en el suelo [A]. El estante inferior tiene ranuras en el exterior de cada
esquina.
3. Inserte las patas posteriores (las dos más largas) (ii) en el estante inferior, alineando el encastre con las líneas
marcadas en las patas.
4.
Deslice la superficie de trabajo
(iii)
sobre las dos patas, alineando los encastres con las líneas marcadas en la pata
[B]
.
5. Inserte las dos patas más cortas (iv) a través de los encastres delanteros del estante inferior y en los encastres de la
superficie de trabajo.
6. Utilice los tornillos de sujeción (v) para fijar sin apretar, el estante inferior y superficie de trabajo con las patas,
utilizando la llave Allen (vi) y luego póngala vertical [C, D, E]. Apriete los tornillos cuando todos los estantes estén
situados correctamente.
7. Ponga una junta de caucho (vii) seguida de un collarín (viii) en las patas posteriores y hasta la superficie de trabajo.
8. Bajar la bandeja Gastronorm (ix) sobre las patas traseras [F]. Asegurar los manguitos de soporte (sujetos a la
bandeja) en su sitio con tornillos ranurados (v) y apretar.
9. Ponga una junta de caucho seguida de un collarín en las patas posteriores y hasta el estante gastronorm.
10.
Ponga el estante superior
(x)
sobre las cuatro patas y fíjelo en su sitio mediante los tornillos de fijación restantes
[G]
.
11. Coloque las bandejas gastronorm (NO INCLUIDAS) en el estante gastronorm.
Antes de utilizarla por primera vez, VOGUE recomienda limpiar todas las superficies a fondo con un producto de limpieza
adecuado. Elimine cualquier residuo del producto de limpieza y seque totalmente.
Limpieza, Cuidado y Mantenimiento
• Limpie regularmente utilizando un producto de limpieza adecuado para el acero inoxidable.
• Siempre deben eliminarse los residuos del producto de limpieza. Este podría decolorar las superficies.
• No dejar nunca las superficies húmedas ya que también puede producirse decoloración.
Reservados todos los derechos. Puede estar prohibida la reproducción o transmisión en cualquier forma o por
cualquier medio electrónico, mecánico, de fotocopiado, registro o de otro tipo, de cualquier parte de estas
instrucciones sin la autorización previa y por escrito de VOGUE.
Se ha hecho todo lo posible para garantizar que todos los datos son correctos en el momento de su publicación; sin
embargo, VOGUE se reserva el derecho a modificar las especificaciones sin que medie notificación previa.
Nota: Asegúrese de examinar todo el material de embalaje por si se hubieran aflojado piezas
pequeñas durante el transporte.
Nota: En esta mesa de preparación caben bandejas gastronorm de 1/3, 1/6 y 1/9.
Ajuste las patas si fuera necesario para nivelar la mesa de preparación.

UK 0845 146 2887 Fourth Way, Avonmouth, Bristol,
BS11 8TB United Kingdom
Eire Unit 9003, Blarney Business Park,
Blarney Co. Cork, Ireland
NL 040 – 2628080
FR 01 60 34 28 80
BE-NL 0800-29129
BE-FR 0800-29229
DE 0800 – 1860806
ES 901-100 133
AU 1300 225 960 15 Badgally Road, Campbelltown,
NSW 2560, Australia


CB908_CB909_ML_A5_v3_2023/03/27
This manual suits for next models
1
Table of contents
Languages:
Other Vogue Commercial Food Equipment manuals
Popular Commercial Food Equipment manuals by other brands

KBS
KBS TP-12/E Installation, operation and maintenance instructions

Hussmann Chino
Hussmann Chino Entyce TY3 Installation & operation guide

H&K
H&K 804048V user manual

Bartscher
Bartscher Deli-Cool PRO 2/1 GN instruction manual

Rational
Rational SelfCooking Center Applications manual

EPTA
EPTA LINEON TMG06 Service manual

Bonnet
Bonnet MAESTRO COOKING SUITE Operating and maintenance manual

frost-trol
frost-trol ONEGA R290 Installation and maintenance manual

Ugolini
Ugolini BT 18/2 Operator's manual

Commercial CHEF
Commercial CHEF CHMF08S user manual

Philips
Philips HD9940 user manual

Cres Cor
Cres Cor H-339-1813C-GMR Operating and maintenance instructions