Volpi Tecno Energia PAGURO 2000 User manual

OWNERS MANUAL
PAGURO 2000
MARINE DIESEL GENERATOR

OWNERS MANUAL
PAGURO 2000
2

OWNERS MANUAL
PAGURO 2000
3
We thank you for the confidence you have shown in us, by purchasing the PAGURO for fitting in your boat.
The target of our design, to achieve a diesel unit with the power usually supplied in a small flat, in a compact size and
light weight, is completely reached. So there is not the need to waste a large room in your boat, and even if the
chosen place is away from the centre line of the boat, the reduced weight of the PAGURO will not influence the
stability.
TECHNICAL SPECIFICATION AND PERFORMANCES
PAGURO 2000
Diesel engine maker Yanmar Italy S.p.a.
Engine type / cylinders n. Yanmar L48
50 Hz 3000
Continuous speed (rpm) 60 Hz -
Specific fuel consumption 0.35 lt./KW/h
Cooling system Fresh water with heat exchanger
Cooling pump Johnson system self-priming directly
driven, without belt
Startingsystem 12 V Electrical starter remote controlled
Alternatormaker V.T.E. - Italy
Generator type PMG AC generator
50 Hz 2,5 KVA- 2 KW
Electric continuous power 60 Hz -
50 Hz 230
Voltage 60 Hz -
Auxiliary voltage for starting battery 12 V - 8 A
Remote control
fitted with hourmeter, load indicator, automatic
shut off device for low oil pressure and water
over temperature, starting motor self
disengagement, 15 m cable and socket
Peak current for 2 sec. (230V) 18 A
Noise level a 7 mtrs. 54 dB (A)
Weight, capsule included (kgs) 46
Weight of the electronic box(kgs) 5

OWNERS MANUAL
PAGURO 2000
4
CALIFORNIA
PROPOSITION 65 WARNING
Diesel engine exhaust and some of its constituents are known to the State of
California to cause cancer, birth defects, and other reproductive harm
WARNING
Exhaust gasses contain Carbon Monoxide, an odorless and colorless gas.
Carbon Monoxide is poisonous and can cause unconsciousness and death.
Symptoms of Carbon Monoxide exposure can include:
-Dizziness
-Nausea
-Headache
-Weakness and sleepiness
-Throbbing in temples
-Muscular twitching
-Vomiting
-Inability to think coherently
IF YOU OR ANYONE ELSE EXPERIENCE ANY OF THESE SYMPTOMS GET OUT INTO
THE FRESH AIR IMMEDIATELY. If symptoms persist, seek medical attention. Shut
down the unit and do not restart unit until it has been inspected and repaired.

OWNERS MANUAL
PAGURO 2000
5
SAFETY INSTRUCTIONS
INTRODUCTION
Read these safety instructions carefully. Most accidents
are caused by failure to follow fundamental rules and
precautions. Know when dangerous conditions exist and
take the necessary precautions to protect yourself, your
personnel and your machinery.
The following safety instructions are in compliance with
the American Boat and Yacht Council (ABYC) standards.
PREVENT ELECTRIC SHOCK
WARNING:
Do not touch AC electrical connections while
engine is running, or when connected to shore
power. Lethal voltage is present at these
connections!
-Do not operate this machinery without electrical
enclosures and covers in place.
-Shut-off electrical power before accessing electrical
equipment.
-Use insulated mats whenever working on electrical
equipment.
-Make sure your clothing and skin are dry,not damp
(particularly shoes) when handling electrical
equipment.
-Remove wristwatch and all jewelry when working on
electrical equipment.
-Do not connect utility shore power to vessel’s AC
circuits, except through a ship-to-shore double throw
transfer switch. Damage to vessel’s AC generator may
result if this procedure is not followed.
-Electrical shock results from handling a charged
capacitor. Discharge capacitor by shorting terminals
together with an insulated tool.
PREVENT BURNS - HOT ENGINE
WARNING:
Do not touch hot engine parts or exhaust
system components. A running engine gets very
hot!
WARNING:
Steam can cause injury or death!
-In case of an engine overheat, allow the engine to cool
before touching the engine or checking the coolant.
PREVENT BURNS – FIRE
WARNING:
Fire can cause injury or death!
-Prevent flash fires. Do not smoke or permit flames or
sparks to occur near thefuel line, filter, fuel pump, or
other potential sources of spilled fuel or fuel vapors.
Use a suitable container to catch all fuel when
removing the fuel line or fuel filters.
-Keep the compartment and the engine / generator
clean and free of debris to minimize the chances of
fire. Wipe up all spilled fuel and engine oil.
-Be aware – diesel fuel will burn.
PREVENT BURNS – EXPLOSION
WARNING:
Explosion from fuel vapors can cause injury or
death!
-Follow re-fueling safety instructions. Keep the vessel’s
hatches closed when fueling. Open and ventilate cabin
after fueling. Checkbelowfor fumes / vapor before
running the blower. Run the blower for four minutes
before starting your engine.
-All fuel vapors are highly explosive. Use extreme care
when handling and storing fuels. Store fuel in a well-
ventilated area away from spark-producing equipment
and out of the reach of children.
-Do not fill the fuel tank(s) while the engine is running.
-Shut off the fuel service valve at the engine when
servicing the fuel system. Take care in catching any
fuel that might spill. DO NOT allow any smoking, open
flames, or other sources of fire near the fuel system or
engine when servicing. Ensure proper ventilation
exists when servicing the fuel system.
-Do not alter or modify the fuel system.
-Be sure all fuel supplies have a positive shutoff valve.
-Be certain fuel line fittings are adequately tightened
and free of leaks.
-Make sure a fire extinguisher is installed nearby and is
properly maintained. Be familiar with its proper use.
Extinguishers rated ABC by the NFPA are appropriate
for all applications encountered in this environment.

OWNERS MANUAL
PAGURO 2000
6
ACCIDENTAL STARTING
WARNING:
Accidental starting can cause injury or death!
-Disconnect the battery cables before servicing the
engine/generator. Remove the negative leadfirstand
reconnect it last.
-Make certain all personnel are clear of the engine
before starting.
-Make certain all covers, guards, and hatches are re-
installed before starting the engine.
BATTERY EXPLOSION
WARNING:
Battery explosion can cause injury or death!
-Do not smoke or allow an open flame near the battery
being serviced. Lead acid batteries emit hydrogen, a
highly explosive gas, which can be ignited by electrical
arcing or by lit tobacco products. Shut off all electrical
equipment in the vicinity to prevent electrical arcing
during servicing.
-Never connect the negative (-) battery cable to the
positive (+) connection terminal of the starter
solenoid. Do not test the battery condition by shorting
the terminals together. Sparks could ignite battery
gases or fuel vapors. Ventilate any compartment
containing batteries to prevent accumulation of
explosive gases. To avoid sparks, do not disturb the
battery charger connections while the battery is being
charged.
-Avoid contacting the terminals with tools, etc., to
prevent burns or sparks that could cause an explosion.
Remove wristwatch, rings, and any other jewelry
before handling the battery.
-Always turn the battery charger off before
disconnecting the battery connections. Remove the
negative lead first and reconnect it last when servicing
the battery.
BATTERY ACID
WARNING:
Sulfuric acid in batteries can cause severe injury
or death!
-When servicing the battery or checking the electrolyte
level, wear rubber gloves, a rubber apron, and eye
protection. Batteries contain sulfuric acid which is
destructive. If it comes in contact with your skin, wash
it off at once with water. Acid may splash on the skin
or into the eyes inadvertently when removing
electrolyte caps.
TOXIC EXHAUST GASES
WARNING:
Carbon Monoxide (CO) is a deadly gas!
-Ensure that the exhaust system is adequate to expel
gases discharged from the engine. Check the exhaust
system regularly for leaks and make sure the water-
injected exhaust elbow is securely attached.
-Be sure the unitand its surroundings are well
ventilated.
-In addition to routineinspectionof theexhaust
system, install a carbon monoxide detector. Consult
your boat builder or dealer for installation of approved
detectors.
-For additional information refer to ABYC T-22
(educational information on Carbon Monoxide).
WARNING:
Carbon Monoxide (CO) is an invisible gas.
Inhalation produces flu-like symptoms, nausea
or death!
-Do not use copper tubing in diesel exhaust system.
Diesel fumes can rapidly destroy copper tubing in
exhaust systems. Exhaust sulfur causesrapid
deterioration of copper tubing resulting in
exhaust/water leakage.
-Do not install exhaust outlet where exhaust can be
drawn through portholes, vents, or air conditioners. If
the engine exhaust discharge outletis near the
waterline, water could enter the exhaust discharge
outlet and close or restrict the flow of exhaust. Avoid
overloading the craft.
-Although diesel engine exhaust gases are not toxic as
exhaust fumes from gasoline engines, carbon
monoxide gas is present in diesel exhaust fumes.
Some of the symptoms or signs of carbonmonoxide
inhalation or poisoning are:
Vomiting
Muscular twitching
Dizziness
Intense headache
Throbbingin temples
Weakness and sleepiness

OWNERS MANUAL
PAGURO 2000
7
AVOID MOVING PARTS
WARNING:
Rotating parts can cause injury or death!
-Do not service the engine while it is running. If a
situation arises in which it is absolutely necessary to
make operating adjustments, use extreme care to
avoid touching moving parts and hot exhaust system
components.
-Do not wear loose clothing or jewelry when servicing
equipment; tie back long hair and avoid wearing loose
jackets, shirts, sleeves, rings, necklaces or bracelets
that could be caught in moving parts.
-Make sure all attaching hardware is properly
tightened. Keep the protective shields and guards in
their respective places at all times.
-Do not check fluid levels while the engine is operating.
HAZARDOUS NOISE
WARNING:
High noise levels can cause hearing loss!
-Never operate an engine without its muffler installed.
-Do not run engines for long periods with their
enclosures open.
WARNING:
Do not work on machinery when you are
mentally orphysically incapacitated by fatigue!

OWNERS MANUAL
PAGURO 2000
8
EC DECLARATION OF CONFORMITY
The undersigned declares that the generator model:
Code Model
AP02023050M0 PAGURO 2000
Corresponds to the requirements ofthe following EEC Directives:
-89/392/EEC (as amended by the Directive 91/368/EEC and 93/44/EEC)
-89/336/EEC (as amended by the Directive 92/31/EEC)
-73/23/EEC (as amended by 93/68/EEC)

OWNERS MANUAL
PAGURO 2000
9
TABLE OF CONTENTS
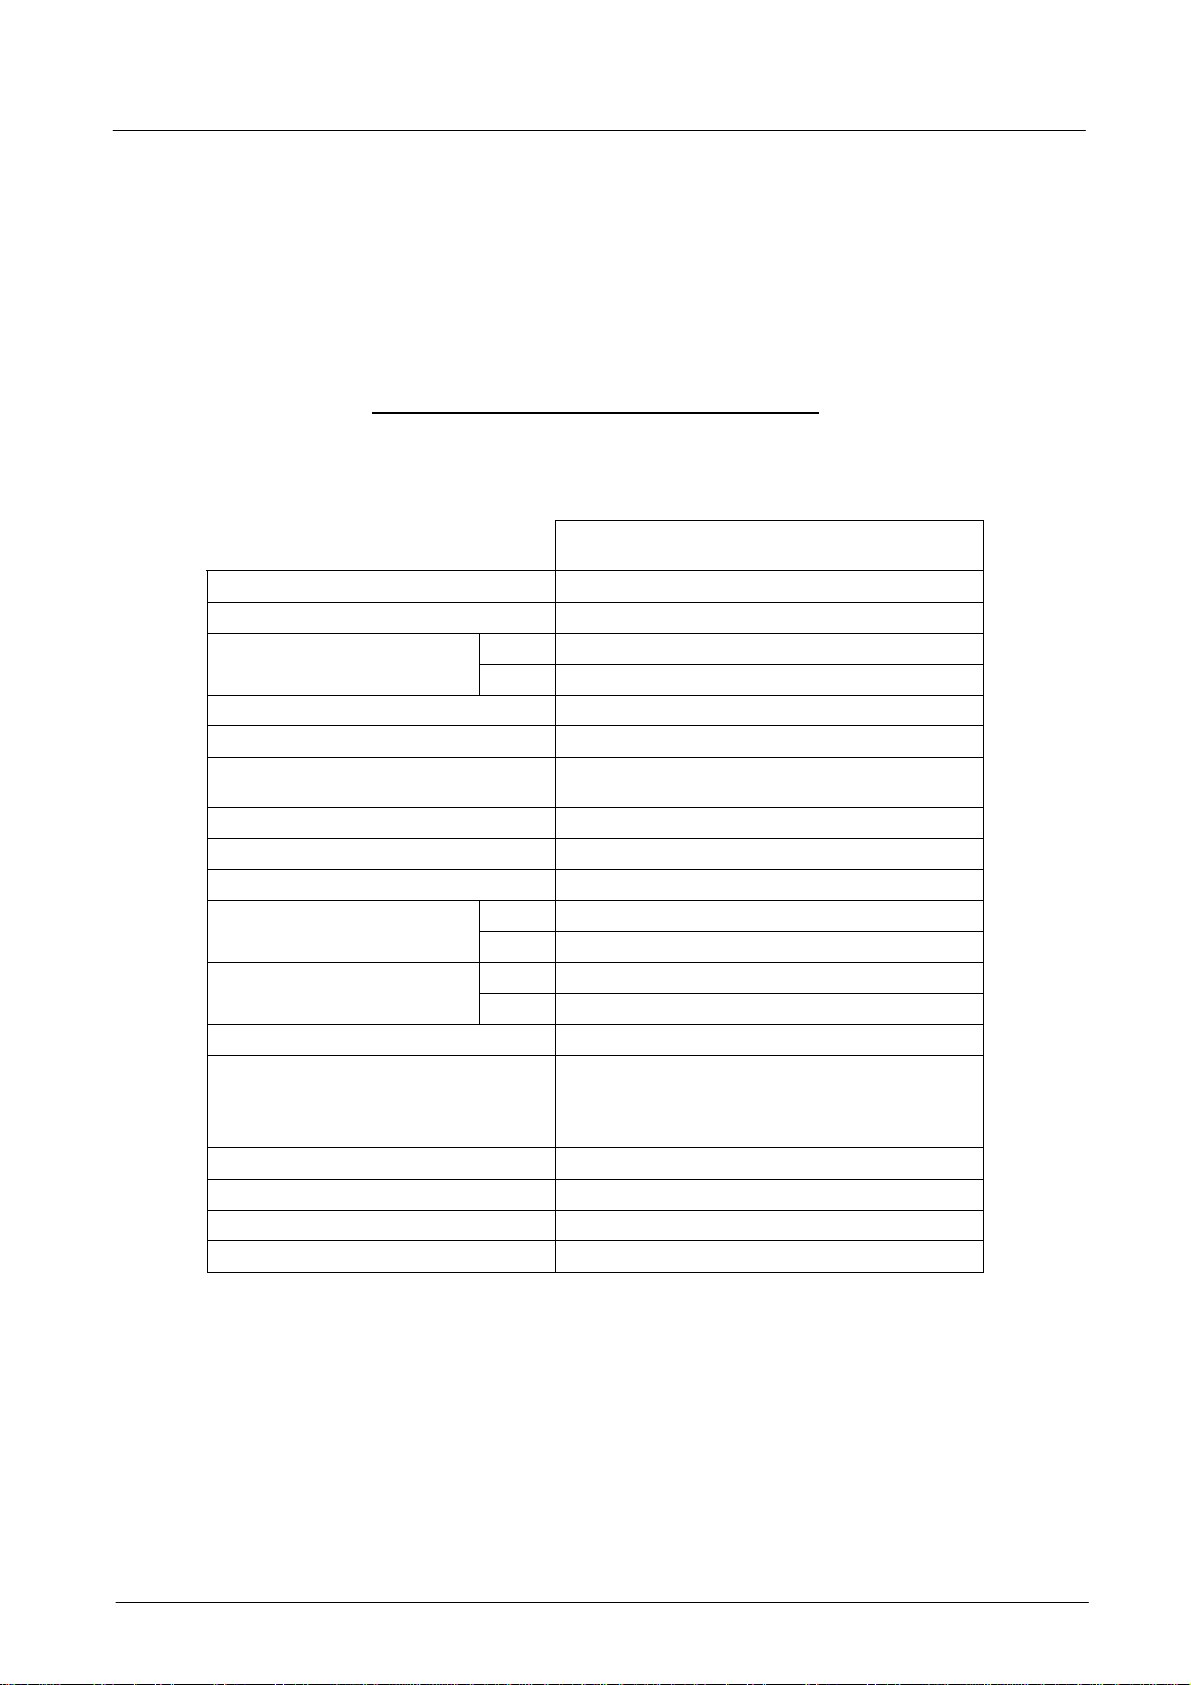
GENERAL INFORMATIONS …………………………………………………………………………………………………………………………….... 3
SAFETY INSTRUCTIONS ………………………………………………………………………………………………………………………………. 5
INTRODUCTIONS / RECOMISSIONINGS ……………………………………………………………………………………………………………… 10
1. INSTALLATION ……………………………………………………………………………………………………………………………………………….. 11
EXTERNAL CONNECTIONS ………………………………………………………………………………………………………………………………. 12
VENTILATION ……………………………………………………………………………………………………………………………………………….. 12
LOCATION AND MOUNTINGS ………………………………………………………………………………………………………………………………. 13
FUEL LINES (Fuel Supply Line, Fuel return Line) …………………………………………………………………………………………..... 13
EXHAUST SYSTEM ………………………………………………………………………………………………………………………………………………… 14
RAW WATER COOLING SYSTEM (Siphon break, Raw Water Intake) …………………………………………………………… 15
INVERTER INSTALLATION ……………………………………………………………………………………………………………………………….. 16
STARTING BATTERY CONNECTION ………………………………………………………………………………………………………………. 16
MAIN OUTPUT VOLTAGE (230 V AC) ………………………………………………………………………………………………………………. 17
CONTROL PANEL ………………………………………………………………………………………………………………………………………………… 18
2. PREPARATION FOR INITIAL START-UP ………………………………………………………………………………………………………………. 22
DIESEL FUEL ………………………………………………………………………………………………………………………………………………… 22
ENGINE OIL SPECIFICATION ……………………………………………………………………………………………………………………………….. 22
PRE-START INSPECTION ……………………………………………………………………………………………………………………………….. 22
3. STARTING/STOPPING PROCEDURE ………………………………………………………………………………………………………………. 23
ELECTRIC START ………………………………………………………………………………………………………………………………………………… 23
PRE-HEATING ………………………………………………………………………………………………………………………………………………… 23
STARTING OPERATION ……………………………………………………………………………………………………………………………….. 23
OPERATING THE GENERATOR ……………………………………………………………………………………………………………………………….. 23
INITIAL START UP CHECK LIST ……………………………………………………………………………………………………………………………….. 23
STOPPING THE GENERATOR ……………………………………………………………………………………………………………………………….. 23
4. BREAK-IN PROCEDURE ……………………………………………………………………………………………………………………………….. 24
CHECK LIST ………………………………………………………………………………………………………………………………………………… 24
STOPPING THE GENERATOR ……………………………………………………………………………………………………………………………….. 24
5. MAINTENANCE SCHEDULE ……………………………………………………………………………………………………………………………….. 25
6. EXHAUST SYSTEM ………………………………………………………………………………………………………………………………………………… 27
EXHAUST SYSTEM PRECAUTIONS ………………………………………………………………………………………………………………. 27
7. COOLING SYSTEM ………………………………………………………………………………………………………………………………………………… 28
RAW WATER PUMP (inspecting/changing the raw water pump impeller) …………………………………………………………… 28
RAW WATER INTAKE STRAINER ……………………………………………………………………………………………………………………………….. 28
8. LUBRICATION SYSTEM ……………………………………………………………………………………………………………………………….. 29
ENGINE OIL ………………………………………………………………………………………………………………………………………………… 29
OIL PRESSURE ………………………………………………………………………………………………………………………………………………… 29
OIL COOLER ………………………………………………………………………………………………………………………………………………… 29
OIL FILTER ……………………………….………………………………………………………………………………………………………………. 29
CHECKING THE OIL ………………………………………………………………………………………………………………………………………………… 29
CHANGING THE OIL ………………………………………………………………………………………………………………………………………………… 29
DRAINING THE USED OIL ……………………………………………………………………………………………………………………………….. 29
ADDING NEW OIL ………………………………………………………………………………………………………………………………………………… 30
9. FUEL SYSTEM ………………………………………………………………………………………………………………………………………………... 30
DIESEL FUEL ………………………………………………………………………………………………………………………………………………… 30
FUEL ADDITIVES ………………………………………………………………………………………………………………………………………………… 30
CARE OF THE FUEL SUPPLY ……………………………………………………………………………………………………………………………….. 30
FUEL LIFT PUMP ………………………………………………………………………………………………………………………………………………… 30
FUEL FILTER ……………………………………..…………………………………………………………………………………………………………. 30
FUEL SUPPLY LINE ………………………………………………………………………………………………………………………………………………... 31
FUEL FILTER OF THE WATER-SEPARATING TYPE ……………………………………………………………………………………………... 31
FUEL INJECTION PUMP ……………………………………………………………………………………………………………………………….. 31
FUEL SHUT-OFF SOLENOID ……………………………………………………………………………………………………………………………….. 31
BLEEDING THE FUEL SYSTEM ……………………………………………………………………………………………………………………………….. 31
SPARE PARTS ………………………………………………………………………………………………………………………………………………... 31
10. ENGINE TROUBLESHOOTING ……………………………………………………………………………………………………………………………..... 32
11. DC ELECTRICAL SYSTEM ……………………………………………………………………………………………………………………………….. 33
12 VOLT DC CONTROL CIRCUIT ……………………………………………………………………………………………………………………………….. 33
BATTERY (Battery Care, Checking the service Battery) ……………………………………………………………………………………………… 33
ELECTRICAL SCHEME ………………………………………………………………………………………………………………………………………………... 34
12. GENERATOR INFORMATION ……………………………………………………………………………………………………………………………….. 35
GENERATOR MAINTENANCE ……………………………………………………………………………………………………………………………….. 35
13. GENERATOR TROUBLESHOOTING ………………………………………………………………………………………………………………. 35
14. SHORE POWER TRANSFER SWITCH ………………………………………………………………………………………………………………. 36
15. LAY UP AND RECOMISSIONING ……………………………………………………………………………………………………………………………….. 37

OWNERS MANUAL
PAGURO 2000
10
INSTALLATION
When installing PAGURO generators, it is important that strict attention be paid to the
following information:
CODES AND REGULATIONS
Please follow the basic safety rules, when installing generators in a marine environment.
SIPHON-BREAK
For installation where the external shock absorbers close to or will be below the vessel’s
waterline, provisions must be looped a minimum of 50 cm above the vessel’s waterline.
Failure to use a siphon-break when the external shock absorbers are at or below the
load waterline will result in raw water damage to the engine and possible flooding of
the boat.
If you have any doubt about the position of the external shock absorbers relative to the
vessel’s waterline under any of the vessel’s various operating conditions or when the
vessel is not underway, install a siphon-break. This precaution is necessary to protect
your engine.
NOTE: A siphon-break requires periodic inspections and cleaning to ensure proper
operation. Failure to properly maintain a siphon-break can result in catastrophic engine
damage.Consult the siphon-break manufacturerfor apropermaintenance schedule.
EXHAUST SYSTEM
The exhaust hose must be certified for marine use. The system must be designed to
prevent water from entering the exhaust under any sea conditions and at any angle of
the vessel’s use.

OWNERS MANUAL
PAGURO 2000
11
1. INSTALLATION
The following factors should be considered when planning the installation of your PAGURO generator:
1. Size and weight of the generator.
2. Size and weight of the inverter.
3. Generator location andmounting surface.
4. Inverter location andmounting surface.
5. Ventilation.
6. Exhaust system.
7. Fuel supply and return.
8. Raw water inlet and outlet (through exhaust system).
9. Oil fill and oil drain hose.
10. Electrical connections.
11. Maintenance and service accessibility.
12. Accessories.
Refer tothe following illustrationfor the generator'soveralldimensions.
Generator dimensions
Inverter dimensions

OWNERS MANUAL
PAGURO 2000
12
EXTERNAL CONNECTIONS
The locations of the external connections are shown on the followingillustration. The various linesshould be of the specified
gauges/diameters, not only to avoid loosening or leakage, but also because using the correct sizes will prevent unnecessary
gaps in the sound-shield that could emit noise.
External connections
DIAMETERS:
PAGURO 2000
Water inlet: 19 mm
Exhaust system: 40 mm
Fuel in: 8 mm
Fuel return: 8 mm
Siphon break: 13 mm
Battery positive: 35 mm2
Battery negative: 35 mm2
Mainout put voltage: 10 mm2
VENTILATION
Allow for the sufficient intake of cool air for proper engine combustion and the discharge of the heated air while the
generator is running. Since heated air rises, the intake of cool air should be directed into the lower area of the generator
compartment and the heated air should be discharged from the upper area of the compartment. Minimum clearances of the
generator’s sound-shield hood from the generator compartment’s bulkheads are shown in the illustration. These are the
minimum clearances required to provide adequate ventilation.
NOTE: Engine combustion air enters the generator’s enclosure through holes in the base of the enclosure. This area
must be kept clear of obstructions to help insure air entry.
Minimum Clearance

OWNERS MANUAL
PAGURO 2000
13
LOCATION AND MOUNTING
A solid, levelmounting platform is veryimportant for the proper operation of yourgenerator. Selecta location that will allow
adequate space on all sides for ventilation and servicing. Locate the generator away fromliving quarters and away from bilge
splash and vapors.
The mounting platform may be of wood, metal or fiberglass. It must be horizontal and should be as small as possible to
minimize vibrations. A low mounting platform is preferred because it will be stable and easy to build; a higher mounting
platform must be very sturdy to avoid resonance and vibrations (see illustrations).
A further solution to increase the dampening of vibrations is adding a plate between the generator and the boat's mounting
platform. Thiswill also improve the sound insulation. For this plate not less than 30mm thickwood and soft mounts. Position
these mounts one on each corner (see illustration). Mount the plate to the boat's platform, then mount the generator to the
plate.
Generatormounting
FUEL LINES
Fuel supply line
In most installations,the generatorwould use the same fuel tank asthe vessel'spropulsion engine.If this is thecase, the fuel
supply line to the generator shouldcome fromits own pick-up in the common fuel tank and not tee off the supply line to the
propulsion engine. To assure proper suction, the generator's fuel pump should not be more than 1 m above the bottom of
the fuel pick-up tube.
Fuel return line
The fuel returnline at the fuel tank should be extended down to the bottom of the tank in the same manner as the fuel pick-
up tube. This must be done in an installation where the fuel tank is located below the engine's fuel system. This precaution
insures against hard starting due to air displacing fuel siphoning out of the engine'sfuel system through the return line when
the generator is shut down.
NOTE: The injection pump of thePAGURO is self-bleeding, it meansthat in case the engine shut-offforlackof fuel,after fuel
tank filling up there is no need of disconnecting the pipes for bleeding, because this operation is simply obtained
acting byhand on the leverof the feeding pump.
NOTE: Even if a fuel filteris contained in the capsule, it is necessary to install an external water/fuel separator.

OWNERS MANUAL
PAGURO 2000
14
EXHAUST SYSTEM
It is important to install a proper exhaust system to avoid engine flooding. The system must be designed to prevent water
from entering the exhaust line under any sea conditions and at any angle of the vessel's hull. Exhaust system failures are not
covered by V.T.E.'s warranty. The installer should have a basic knowledge ofmarine installation requirements.
V.T.E. recommends installing an exhaust system having in-line mufflers (see illustration). The in-line water-lock mufflers must
be located below the generator. It must accumulate any water that runs back down the exhaust line after the engine is shut
down. Designed the system, so there is an adequate drop in the line between the exhaust manifold and the through-hull
discharge end of the line. The exhaust hose must be certified for marine use. Use the following illustrations asa general guide
when installing an exhaust system.
CAUTION:
An exhaust line that is too long and/or has apoor
gradient can cause water to return back to the
generator’s engine when the generator is shut off!
WARNING:
The exhaust system must be tight and free of leaks.
Exhaust gasses are deadly. Display the Carbon
Monoxide warning decal near your generator, on
your cabin bulkhead, or in some other prominent
location.
V.T.E. presumes that the installer of this marine diesel generator is familiar with the safeguards a water-cooled marine
exhaust system will provide for the engine. Failure to design and layout a proper exhaust system can result in catastrophic
damage to the diesel engine, and possibly result in the sinking of the vessel in which the unit is installed.
Standard system:
The best noise dampingresult is obtained fitting the 3 typical exhaust mufflers:
1. the first as water-lock avoids the risk of water return into the engine and dumps 50% of noise;
2. the second reduces a further 20% noise and must be fitted with a gradient towards the out let in order to avoid
water return;
3. the third dumps a further 10% and avoids the risk of external seawater entrance due to waves.
Water-exhaust separator: it is possible to reduce the noiseof the exhaust line installing a water-exhaust separator as per the
following images. In this case, the exhaust gas output is separated from the water output, so that the typical plash of the
water (of the traditional exhaust lines) is eliminated.

OWNERS MANUAL
PAGURO 2000
15
To avoid water returns, the water-lock muffler must be installed at a lower position than the generator, so that the
connecting pipe from the generator to the water-lock muffler goes down. It is necessary that the water has a forced path in
the down direction, so when the generator is stopped the water present in the cooling circuit flows to the muffler and not to
the engine.
Please, also consider that the pipe from the generator to the water-lock muffler should be shorter as possible (but not less
than 15cm) in order toreduce the exhaust noise.
Please refer to the illustrations for theminimal/maximal length of the pipes and the location of the mufflers.
RAW WATER COOLING SYSTEM
Siphon-break
For installations where the external shock absorbers are close to or below the vessel’s waterline, provisions must be made to
install a siphon-break in the raw water supply hose to the exhaust elbow. The siphon-break provides an air ventin the raw
water cooling system to prevent raw water from filling the exhaust system and the engine’s cylinderwhen the engine is shut
down.
CAUTION:
Failure to use a siphon-break when the external
shock absorbers are located at or below the
waterline will result inraw water damage to the
engine and possible flooding of the boat.

OWNERS MANUAL
PAGURO 2000
16
If you have any doubt about the position of the external shock absorbers relative to the vessel’s various operating conditions
or when the vessel is not under way, install asiphon break.This precaution is necessary to protect your engine.
The siphon-break must be installed in the high point of a hose that is looped a minimum of 50 cm above the vessel’s
waterline. This siphon-break must always be above the waterline during all angles of vessel operation to prevent siphoning
from occurring. V.T.E. has provided two siphon-break hoses (these are tagged). The hose (19 mm diameter) to the siphon-
break connects to the raw water line at the raw water pump outlet. The hose (19 mm diameter) from the siphon-break
attaches to the oil cooler inlet. If not ordered andincluded in the generatorsupply, the owner must furnish thesiphon-break,
and any additional lengths of hose that may be required.
The siphon break must be installed in the Inlet hose connection of inverter (refer to the picture "Inverter dimensions"
pag.11).
NOTE: A siphon-break requires periodic inspections and cleaning to ensure proper operation. Failure to properly maintain a
siphon-break can result in severe engine damage. Consult the siphon-break manufacturerfor a proper maintenance
schedule.
Raw water intake
A flush-type thru-hull fittingis recommendedfor the raw water intake.It should belocated on the boat's hull where itwill be
below the waterline during all angles of the boat's operation.
NOTE: the sea water intake is usually designed asymmetrically, so that depending from the fitting direction can cause, when
the boat is sailing, pressure or vacuum in the water circuit connected. For a generator the water intake must be fitted
into the direction causing vacuum, because on the contrary a self water entrance can be caused when the boat is
sailing and thegenerator is not running, flooding the exhaust line withwater that finally reaches the engine oil sump
causing severe damages to the engine.
INVERTER INSTALLATION
The generatoris suppliedwith an external inverter thatmust beconnectedto thegenerator. The inverteris suppliedwith 2
cables of 2 mt length each: one has 6 wires and it has a male connector; one has 4 free wires.
Connect the male connector of the 6 wires cable to the female connector present on the capsule (refer to the picture
“External connections” page 12).
Connect the 4 wires cable to the gray box located inside thecapsule (pass the cable through the hole present close to the
fuel-in and fuel-return holes). The 4 wires cable must pass through the hole present in the bottom of the grey box, then:
connect the gray wire to the white presenton the terminal boards, the black wire to the black, the brown wire to thebrown.
Connect the yellow/greenwire tothe negative studinside the grey box.
Please refer to the electrical scheme of this manual.
The inverter is supplied with 2 hose connection, the left hose connection is the inlet of water and the right hose connection is
the outlet of water (refer to the picture "Inverter dimensions" pag. 11)
STARTING BATTERY CONNECTION
The PAGURO generator is negative grounded. For electric starting install a 12V battery of 90Ah. Connect the positive (+)
battery cable to the starter solenoid where is already fitted a thin red cable and the negative (-) cable to the engine ground
stud (one of the 2 studs located on the starter where is already foreseen a metallic loop)
Please refer to the electrical scheme of this manual.
The generator's battery chargerwill chargeits starting battery only (8Amax)

OWNERS MANUAL
PAGURO 2000
17
STARTING BATTERY
MAIN OUTPUT VOLTAGE (230 V AC)
The connection of the 230V AC is located into the inverter box.
Open the inverter box and connect the 230 V cable from the transfer switch present on board (generator/shore line) to the
terminal boardslocated inside: consider that the external terminals are the 230 V AC and the central one is the ground.
The diameters of thecablemust be notless of10mm2
Please refer to the electrical scheme of this manual.
As the most of the boats have installed 230 V (115 V) feeding line from the shore, it has to be absolutely avoided that the
shore line and the generator remain contemporaneously connected to the boat plant.
A manual switch (shore / generator) or an automatic switch (shore / generator) must be provided.
Both the lines or at least the generator line only, have to be protected with a thermo-switch, fitted on the main boardpanel.
For your PAGURO choose a:
230V 50cyc.
PAGURO 2000 9A

OWNERS MANUAL
PAGURO 2000
18
REMOTE CONTROL PANEL
The remote control is a management tool, supervision and safety for PAGURO.
It has a graphical LCD with white backlight, to display engine speed, supplied current, frequency
and hour-counter; it is equipped with a light for quick view of the generator alarm.
GENERAL INFORMATION
Sizes ref.: DIMENSIONS
Weight ≈ 290 gr
Electronic protection IP65
Electronic protection - connectors IP65
Operating temperature -10 – 60 °C
Feeding 8 / 30 V DC
Consumption ≈ 122 mA + Pre alternator exitation
Display LCD graphical 128x64 white backlight
Buttons 4

OWNERS MANUAL
PAGURO 2000
19
ELECTRICAL CONNECTIONS (PAGURO / 8 WIRES BLUE CABLE / CONTROL PANEL):
CONNECTOR
8 PIN CABLE
15 MT CONNECTOR
24 PIN DESCRIPTION
1A RED 8A e 4C BATTERY POSISTIVE
2A BROWN 1A FUEL SHUT-OFF VALVE
3A GRAY 3C STARTING MOTOR
4A GREEN 3B SENSORS (TEMP. / PRES.)
1B BLACK 8C BATTERY NEGATIVE
2B YELLOW 1B PREHEATING
3B WHITE 5A LOAD INDICATOR
4B BLUE 7C GENERATOR RUNNING
/// /// 3A AUTOMATIC STARTING (ON
REQUEST)
DIMENSIONS:

OWNERS MANUAL
PAGURO 2000
20
FUNCTIONAL DESCRIPTION:
POS. TYPE DESCRIPTION
DISPLAY LCD Graphical display white backlighted
UP ARROW BUTTON Up button, ESC button if kept pushed
DOWNARROW BUTTON Down button, ENTER button if keptpushed
START BUTTON START button
STOP BUTTON STOP button
TRIANGOLO ALARM LED Alarm
DISPLAY LCD:
The remote control panel is a device to start, stop and manage the generator.
As soon it is fed, for few second the display shown the VTE logo, then appears according the
following picture.
Table of contents
Other Volpi Tecno Energia Inverter manuals
Popular Inverter manuals by other brands

LIGHTBOX
LIGHTBOX LIGHTBOX POWERPACK user manual

Selectronic
Selectronic SP PRO instruction manual

SMA Solar Technology
SMA Solar Technology SUNNY CENTRAL 800CP-JP Maintenance manual

Tektronix
Tektronix SPG8000A Installation and safety instructions

Sumitomo Drive Technologies
Sumitomo Drive Technologies DeviceNet HF-520 Series installation manual

Tektronix
Tektronix Tektronix SPG8000 Service manual