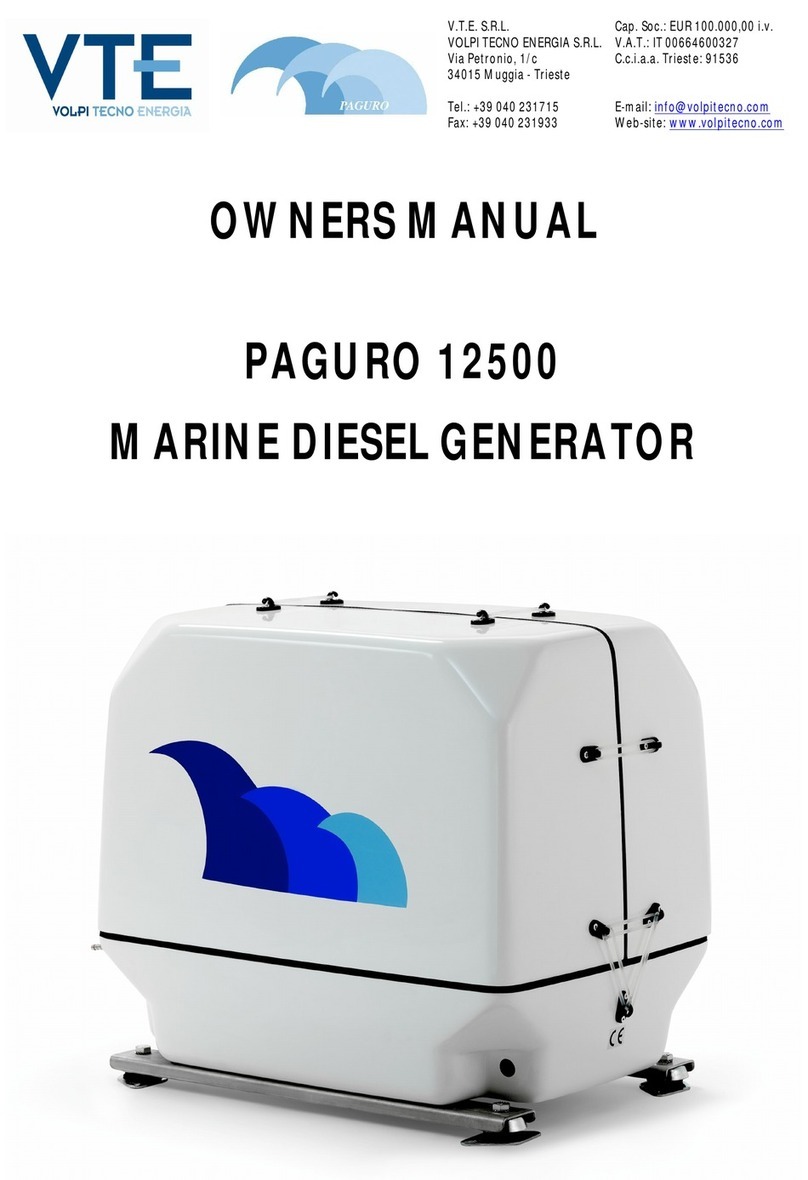
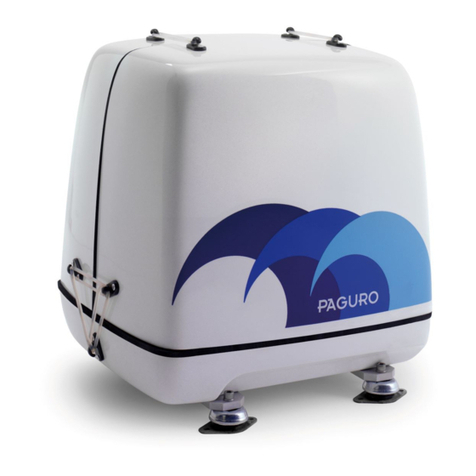
Volpi Tecno Energia PAGURO 8500 User manual


2
142302200641

3
We thank you for the confidence you have shown in us, by purchasing the PAGURO
for fitting in your boat.
The target of our design, to achieve a diesel unit with the power usually supplied in a
small flat, in a compact size and light weight, is completely reached. So there is not the need
to waste a large room in your boat, and even if the chosen place is away from the centerline of
the boat, the reduced weight of the PAGURO will not influence the stability.
TECHNICAL SPECIFICATION AND PERFORMANCES
PAGURO 8500
Diesel engine maker LOMBARDINI MARINE, Italy
Engine type / cylinders n. LDW 1404 / 4 cyl.
50 cyc. 11.5 KW
Mechanical continuous
power 60 cyc. 14 KW
50 cyc. 1500 rpm
Continuous speed 60 cyc. 1800 rpm
Specific fuel consumption 0.35 lt./KW/h
Cooling system Fresh water with heat exchanger
Cooling pump Johnson system self-priming directly
driven, without belt
Starting and shut-off system 12 V electrical starter remote controlled
Generator maker V.T.E. - Italy
Generator type Synchronus, brushless, AC
watercooled generator
Water cooling system Through stainless steel AISI 316 L
heat exchanger jacket
50 cyc. 8.5 KVA - 8 KW
Electrical continuous
power 60 cyc. 10 KVA - 9.5 KW
Pick current for 2 sec. (230 V) 90 A
50 cyc. Single phase AC 230 V
Voltage 60 cyc. Single phase AC 115 V
Auxiliary voltage for starting battery 12 V - 8 A
Remote control
fitted with hourmeter, load indicator,
automatic shut-off device for low oil pressure
and water over temperature, starting motor self
disengagement, 10m cable and socket
Noise level 49 dB(A)
Weight (soundproof hood included) 200 Kos
Engine serial number

4
WHERE TO FIT YOUR PAGURO
For a correct air replacement
Around the PAGURO have at least the shown tolerance; of course the ambient have
to be naturally vented with more then one external connection.
For fixing the PAGURO on board
A metallic, wooden or fiberglass structure have to be achieved. It must be as small as
possible to avoid the generation of vibrations and must keep the unit horizontally.

5
If the vibration-dampening mounts furnished with the generator are not adequate to
muffle vibration or resonance in an installation where the mounting surface is not ideal, then
adding a plate between the generator and the boat's mounting platform is a possible solution.
This will also improve the sound insulation. For this plate, use 3 cm thick wood that weighs
10-15 Kg, and soft mounts that are rectangular. Position these mounts so they are on the
diagonal and not aligned with the generator's mounts (see illustration). The generator's mounts
may be turned in any direction. Mount the plate to the boat's platform, then mount the
generator to the plate
EXTERNAL CONNECTIONS

6
Note: The internal diameter of the pipes have to be respected to avoid untightening and
leakage, but the external diameter is important too, because the correct size avoids a
noise way-out from the sound-proof capsule.
Exhaust line (on request)
STANDARD SYSTEM: the best dumping result is obtained fitting the 3 typical
"Vetus" exhaust mufflers:
the first as water lock avoids the risk of water return into the engine and dumps 50% of noise
so it must be installed; the second reduces a further 20% noise and must be fitted with a
gradient towards the out let in order to avoid water return; the third dumps a further 10% and
avoids the risk of external seawater due to waves.
IMPROVED SYSTEM: a further improvement in the noise dampening is achieved
fitting instead of the third muffler the water separator. The cooling water is separately throw
from a separate hole flowing smoothly, avoiding the noise produced by the water coming
alternatively spread from the exhaust pipe.

7
Cooling water intake (on request)
Note 1: The unit can be installed completely below the sea level; in this case the safety
cooling vacuum valve has to be fitted out of the capsule and connected with
separate pipes to the delivery of cooling pump.
Note 2: In case the hole in the hull for the water intake is undesired, the water line can be
connected in parallel with the water intake of the main engine. In this case a couple
of locking valves are necessary, because a failure of the main engine pump can
influence the cooling of the set and voiceovers.

8
Note 3: In case the hole in the hull for the water intake is undesired, the water line can be
connected in parallel with the water intake of the main engine. In this case a couple
of locking valves are necessary, because a failure of the main engine pump can
influence the cooling of the set and voiceovers.
Fuel oil line
It is usually employed the main fuel tank of the boat: the feeding pump driven by the
engine assure a suction from a maximal height of 1 m, no length limits.
A separate line coming from the tank avoids air bubbles troubles, but in several cases
the fuel can be taken from the pipe of the main engine: a couple of locking valve are
necessary, because a failure in the non-return valve of the feeding pump of the main engine
can influence the set and voiceovers.
Note 1: The injection pump of the PAGURO is self-bleeding, it means that in case the
engine shut-off for lack of fuel, after fuel tank filling up there is no need of
disconnecting the pipes for bleeding, because this operation is simply obtained
acting by hand on the lever of the feeding pump.
Note 2: Even if a small fuel filter is contained in the capsule, an external strainer and water
separator is suggested to delay the replacement time.

9
Starting battery connection
The PAGURO is negative grounded, and can be connected to the main board batteries
12 V or to a separate small battery 12 V of about 90 Ah; in this second case its internal
charging device takes care of feeding the battery with 8 A
Note : In case of connection to the main board batteries the 8 A are available as well, but are
irrelevant for charging them: a static high power battery charger fed by the 230 V (115
V) of the set must be installed on board (on request).
Remote control (supplied)
It allows the user to START and STOP the unit, verify if there is a cooling water or oil
pressure failure, (in that case the engine shut-off automatically and the RED LED is lighted)
and the power supplied control.
For preheating keep pushed contemporaneously the START and STOP buttons for
about 10 sec.. The GREEN LED energized means that the preheating is in progress. For
starting release the 2 pushed buttons, repushing the START only.
Note 1: The load indicator is designed to avoid overloading of the unit through feeding too
many electrical loads; it begins to show the load after the first half power supplied
and has to be considered normal when the bar is GREEN. The last RED LED
lighted means an overcharge: switch-off the exceeding load to return at normal
conditions.
Note 2: Do not forget the starter knob switched ON and the engine not running due to
aborted starting attempt (YELLOW LED flashing), the STOP button should be
pushed because on the contrary the engine shut-off valve remains energized and
takes useless power from the starting battery.
Note 3: If the YELLOW LED remains flashing when the set is running normally, it means
that the internal battery charger protection has tripped, so the starting battery is no
longer connected to it. In that condition the automatic protection shut-off system is
not operative, so do not operate the set with the YELLOW light flashing.
Reset the device by pushing the button located on the side of the GREY box fitted
on the set. The set can normally operate when the YELLOW flashing LED is OFF
and the GREEN on the opposite corner is ON.

10
Note 4: If for operator’s mistake the starting knob is pushed whilst the engine is already
running, an electrical safety device avoids the gears re-engagement, protecting the
starting motor and preventing failures.
For passing trough small holes the remote control panel cable, the disconnection must
be made panel side, opening the back cover, and not plug side, that is welded.
Main power 230 V (115 V)
As the most of the boats have installed 230 V (115 V) feeding line from the shore, it
has to be absolutely avoided that the main and the generator remain contemporaneously
connected to the boat plant.
A manual safety commutator (on request), or an automatic safety commutator (on
request) has to be provided.
Note: Both the lines or at least the generator line only, have to be protected with a magneto
thermic safety switch, fitted on the main board panel.
For your PAGURO choose a:
PAGURO 8500
If connected at: Bipolar:
230V 50Hz 34 A
115V 60Hz 68 A

11
WHAT CHECKING BEFORE FIRST STARTING
•That the lubricating oil level in the engine reaches the upper line on the deep stick.
•That the valves of the following feeding pipes are properly open:
•cooling sea water;
•fuel oil suction:
•fuel oil overflow return.
•That the main A.C. safety switch is SHUT-OFF.
•That the commutator GENERATOR / SHORE LINE is fitted in GENERATOR mode.
AFTER FIRST STARTING CHECK THAT
•Inside the capsule there is no leakage from the connections of the several pipes.
•The cooling water is flowing properly from the exhaust outlet, outboard.
When everything is in order, close carefully the capsule and your PAGURO is ready
for supply trouble less energy.
FAILURES
Each unit is carefully tested in our factory and the performances are verified; even so a
readjustment can be sometime necessary according to the following suggestions.
PROBLEMS CAUSES REMEDIES
1. Low engine speed
1. Check rpm and set at the
nominal value of 3100 rpm
without load (3700 for 60
cycles)
2. Faulty capacitor 2. Check and replace
3. Check that winding resistance
as follows:
- STATOR 0.50 Ω
- ROTOR 3.51 Ω
Alternator excitation failure
3. Faulty windings
- EXCITATION 2.35 Ω
1. Engine speed too high 1. Check and adjust rpm
High no-load voltage(over 240
V) 2. Capacitor with too high
capacity 2. Check and replace

12
PROBLEMS CAUSES REMEDIES
1. Engine speed too low 1. Check and adjust rpm
2. Faulty rotating diodes 2. Check and replace
3. Beak down in windings 3. Check windings resistance as
above
Low no-load voltage (under
230 V)
4. Capacitor with low capacity 4. Check and replace
1. Low loaded engine speed 1. Dirty fuel filter
2. Overload 2. Check the load indicator
Proper no-load but low under
load voltage 3. Rotating diodes short
circuited 3. Check and replace
1. Loose contacts 1. Check connections
Unstable voltage 2. Uneven rotation 2. Check for uniform rotation
speed (dirty fuel filter)
1. Broken bearings 1. Replace
Noisy generator 2. Loose coupling 2. Check and repair

13
WARNING
A great marine sets number of any type and manufacture, after first installation on
board are flooded by sea water causing severe damages to the unit with high replacement or
repairing costs, improperly claimed in warranty but gently refused, because it always depends
from a critical installation, made compromising some physical rules.
We draw your attention on the most common mistakes to be avoided.
1st MISTAKE
- Sea water intake oriented towards sailing direction, causing a dynamical pressure that,
when the generator is not running, let flow sea water through the cooling pump, reaching the
exhaust pipe and consequently the engine exhaust valve, flooding the cylinder and the oil
sump.

14
-On a high speed motorboat, a neutral flush hull mounted water intake can cause as
well dynamical pressure due to the hull gradient compared the sea surface, or the decreased
water line level before reaching the proper trim.
- For avoiding the risk, the water intake entrance must be fitted facing the rear position
and even so, in critical sailing conditions the internal valve must be closed when the
generating set is not in operation.

15
2nd MISTAKE
- Installation below the sea level without a proper cooling pipe goose neck and vacuum
siphon break valve.
- If the set installation surface is just a little below the external sea water level but can
be guessed that while sailing the difference is further increased, must be foreseen an external
goose neck pipe with siphon break valve, on the contrary drop by drop an internal leakage
through the pump clearance, fills the exhaust pipe with the same above explained result. For
relevant level difference the leakage occurs when the boat is not sailing too.
- The vacuum siphonbreak valve must be fitted out of the hood, on a prolonged pipe, as
more high as possible and in any case above the sea level, in connection to a cooling pipe at
the engine pump delivery side, namely in pressure zone. On the several sets the pipe to be
prolonged can be different, but each one chosen at the pump delivery side, is suitable.

16
3rd MISTAKE
-An exhaust line trapping too much water for length excess or negative gradient course,
that return back into the engine when the set is shut off.
- The first water lock muffler is designed for avoiding that risk, but if fitted not enough
lower than the engine manifold either reversing the entrance with the outlet, or of too reduced
capacity for the return water volume that has to contain, can be unable avoiding the problem.
- Particular care must be taken in designing the exhaust pipe course, preferring the
alternatives that keep self draining towards outside as more pipe stroke as possible.
- In any case, to be sure of a correct and safety installation, especially during the first
employment season, check often the lubrication oil integrity watching the engine steak level:
a transparent yellow oil if new or a black color if old, mean no water entrance, but an
emulsion similar to milk white/yellow not transparent or worst an increased level into the
sump mean water flooding.

17
-Another water presence signal, becomes from starting difficulties as due to some roost
on the exhaust valve, the compression does not reach the proper burning value.
Spraying some lubricating oil into the cylinder while insisting with the starter, very
often the engine can be started. Better if the operation is made acting on the decompression
device, for allowing some free engine revolution for better distributing the oil and adding the
flywheel kinetic energy. When started the valve self cleans, but in some cases, of too long
time water presence, also the piston rings are locked from roost, so the engine must be opened
for repairing.
- In some cases the engine does not start for external reasons like lack of fuel, air
bubbles, too flat battery. While insisting, the water pump deliver a certain quantity of water,
that is not pushed out by the engine exhaust pressure, remaining trapped into the exhaust pipe
even if correctly fitted. If that happens, drain the exhaust pipe when giving up the
unsuccessful starting operation.
- When the installation is correctly planned and carried on, surveying the result during
the first operative season, the generator on board give many troubles operative seasons,
requiring lubricating oil and fuel filter replacement only, but there is another up keeping
operation that prolong considerably the unit life. It consists in a "wintering" but useful in
summer too if the set remains unemployed for more than two months. Due to temperature
difference between night and day the water remaining into the exhaust pipe and muffler water
lock causes condensation, that on the engine exhaust valve, produces roost. Spraying into the
combustion chamber some lubricating oil, and disconnecting the exhaust pipe, moving the
piston position by the handle or a flash starting attempt, avoids completely the roost risk for
long time.
Consider that on the marine engines employed for the nautical generating sets, there
are no critical connections between cooling water and fire zone, so in case of some gasket
breakage there is water sprayed out of the engine, around it into the hood and never water
entering into the piston or the sump zone.
Our technical staff is in any case at customer’s disposal for additional suggestions or
solving out of standard cases for getting the complete satisfaction result, that can be always
reached putting more attention on the plant, or adding special accessories like a dry exhaust
pipe and similar.

18
LDW 1404 M - TAB.: 1 LDW 1404 M - TAB.: 2
LDW 1404 M - TAB.: 3 LDW 1404 M - TAB.: A
LDW 1404 M - TAB.: B LDW 1404 M - TAB.: C
LDW 1404 M - TAB.: D LDW 1404 M - TAB.: E

19
LDW 1404 M - TAB.: F LDW 1404 M - TAB.: G
LDW 1404 M - TAB.: H LDW 1404 M - TAB.: I
LDW 1404 M - TAB.: L LDW 1404 M - TAB.: M
LDW 1404 M - TAB.: N LDW 1404 M - TAB.: R

20
Tab Pos Part n. Description Tab Pos Part n. Description
1 1 12009 Complete soundshield B 1 8211.248 Ring set std.
1 2 12055 Soundshield lid B 1 8211.249 Ring set +0,50
1 3 12010 External frame B 1 8211.250 Ring set +1,00
1 4 6011 External rubber mounts B 2 6501.514 Piston set +1.00
1 5 4014 Closing o-ring B 2 6501.513 Piston set +0,50
1 6 4015 Shield hook B 2 6501.512 Piston set std
1 7 6054 Fuel connection B 3 1630.038 Small end bushing
1 9 12016 Soundshield gasket B 4 8480.081 Pin
110 6012 Bolt and wash B 5 1261.099 Snap ring
111 4071 Label B 6 1640.116 Large end bushing std.
112 12064 Soundshield bottom B 6 1640.117 Large end bushing -0,25
2 1 Stator with cooling jacket B 6 1640.118 Large end bushing -0,50
2 2 12006 Flange B 7 1526.211 Connecting rod
2 3 Rotor B 8 1770.101 Bolt
2 4 12004 Ball bearing C 1 2280.119 Key
2 5 12003 Flexing coupling C 2 1050.961 Crankshaft
2 6 12017 Internal frame C 3 9080.132 Plug
2 7 6020 Internal rubber mounts C 4 8400.120 Pin
2 9 6029 Water hose C 5 9880.938 7" 1/2 flywheel with crown
210 6022 Oil cooler C 5 9881.160 6" 1/2 flywheel with crown
211 6030 Water hose C 5 9880.875 6" 1/2 flywheel with crown
212 6056 Water hose C 5 9880.721 Flywheel with crown
213 12056 Fitting C 6 1780.097 Bolt M 10x30
214 6057 Gomito M/F C 7 9865.258 Screw M 16x1,5 sin
215 6058 Nipples 1/2" - 3/8" C 8 2816.088 Crown gear
216 6059 Gomito 1/2" F/F/fitting C 9 9732.016 Screw M 6x1x40
217 6060 Fitting C10 6975.295 Blower driv. pulley
218 6061 Fitting connection C11 2280.146 Key (mm 12)
219 6062 Nipples 1/2" C12 8430.004 Lock pin
220 6031 Clamp D 1 9850.088 Adj. screw
221 6090 Bolt washer D 2 3240.008 Nut
222 6091 Bolt washer D 3 9850.110 Adj. screw
223 6092 Bolt flange 6x35 mm D 4 3240.151 Nut
223 6093 Bolt flange10x20 mm D 5 6045.112 Rocker arm ass.y
223 12092 Bolt flange10x40 mm D 5 1541.193 Rocker arm
224 6096 Screw D 6 8615.105 Rock. arm shaft supp.
225 12049 Diode D 7 7625.020 Washer
225 12050 Zenamic D 8 3240.033 Nut
3 1 4034 Remote control panel D 9 6800.088 Stud
3 2 6038 Electrical box D10 8430.061 Pin
3 3 4047 10 m cable with connector D11 9080.182 Plug diam.10
3 4 4037 8 poles male connector D12 1541.193 Rocker arm
3 5 4036 8 poles female connector D13 1541.220 Inj. pump rocker arm
3 6 4040 Relè D14 1011.504 Camshaft
3 7 4041 Graetz bridge D15 6045.083 Rocker arm shaft
3 8 4044 Resistor D17 3580.027 Cam
3 9 6052 Transformer D18 9730.012 Screw M 6x1x20
310 4042 Fuse holder D19 2440.338 Cog belt
311 4043 Fuse (10pz) D20 5401.205 Control sleeve
312 4035 Printed board D22 1200.233 Rubber oil seal
313 6051 Label D23 8836.197 Water pump support
314 4039 Capacitor D25 9730.010 Screw M 6x1x16
316 4046 Connector D26 2690.294 Governor cover
317 4048 Gray box D27 1202.037 Rubber oil seal
318 4053 Safety switch D28 3001.066 Ball bearing
A 1 2486.257 Inlet manifold D29 6800.090 Stud
A 2 9730.032 Screw M 8x1,25x45 D30 6275.116 Plate
A 3 4420.056 Inl. manifold joint D31 9800.061 Screw M 6x1x16
A 8 ........ See drawing R D32 7495.010 Washer
A 9 ........ See drawing R D33 8805.048 Weight support
A10 9731.040 Screw M 8x60 D35 1585.085 Sleeve
A11 9732.064 Screw M 8x30 D36 3110.127 Thrust bearing
A12 3866.083 Air cleaner flange D37 9820.142 Screw
A13 4501.081 Gasket D38 7625.045 Washer
A14 6780.007 Stud M 8x20 D39 7090.012 Contr. gear pulley
A15 7565.007 Washer d.8 D40 1213.303 Seal ring
A16 3240.018 Nut M 8 D41 3240.033 Nut
A17 3700.333 Air cleaner D42 4110.009 Jockey pulley
A18 3630.152 Clamp 30-60 D43 1970.399 Bushing
Table of contents
Other Volpi Tecno Energia Inverter manuals
Popular Inverter manuals by other brands

Wavetek
Wavetek 1801A manual

Fimer
Fimer PVS-175-TL Quick installation guide

Technaxx
Technaxx TE16 user manual

Energizer
Energizer FORCE Series Installer manual

Shenzhen Huangjintai Electronic
Shenzhen Huangjintai Electronic NK-GP1000 user manual

SMA Solar Technology
SMA Solar Technology SUNNY CENTRAL technical information