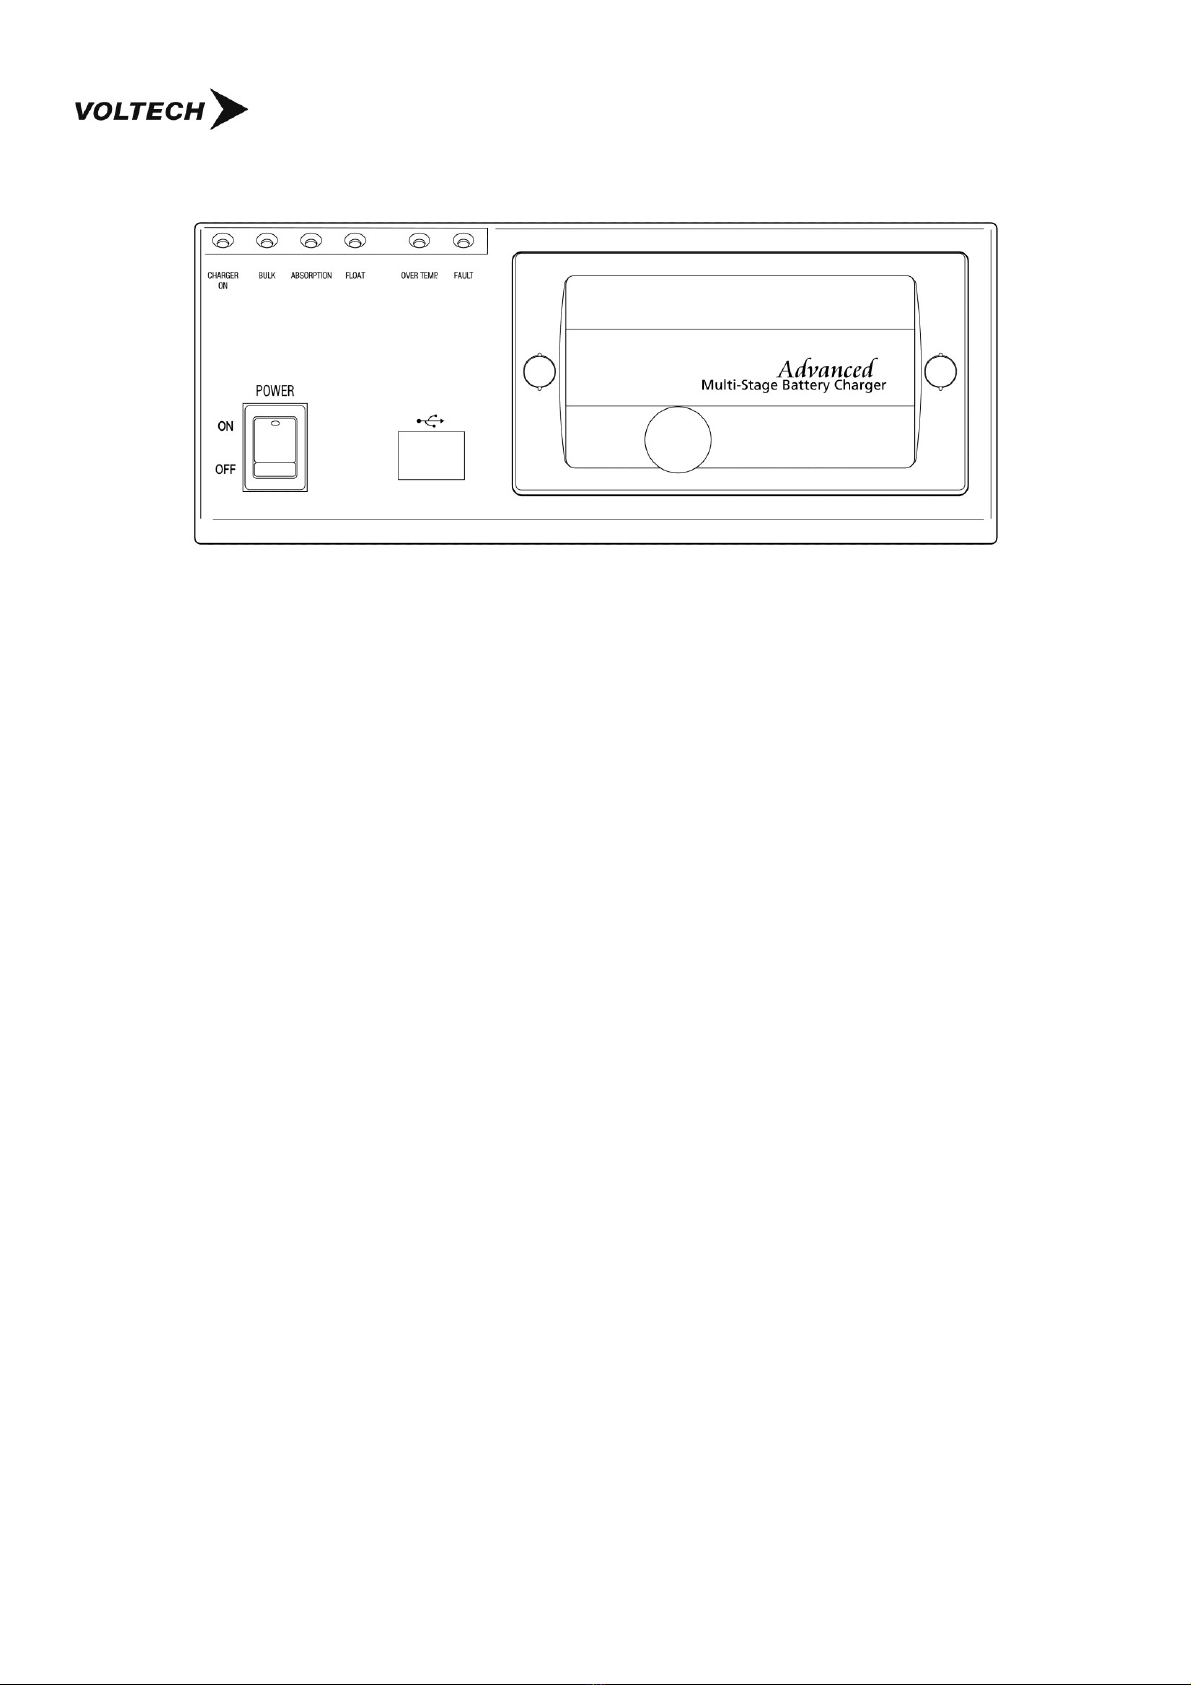
C. Power Level adjustment
End user can set the maximum output (charging) current so to make the charger can suitable for different capacity battery and
loading condition.
Make sure the charger is power OFF before adjust the power level.
Use a small slot type screw driver to select the maximum output current through the Charging Current Selection Switch (5).
The adjusted max. output current can be viewed at the optional remote panel .
1. Position 0: 40 Amp
2. Position 9: 36 Amp
3. Position 8: 32 Amp
4. Position 7: 28 Amp
5. Position 6: 24 Amp
6. Position 5: 20 Amp
7. Position 4: 16 Amp
8. Position 3: 12 Amp
9. Position 2: 8 Amp
0. Position 1: 4 Amp
Recommended Battery Capacity 15AH to 400AH
The extended range of 15 to 400 AH capacity is based on the appropriate charging current selection 10% to 100%.
Some battery type can take higher charge current.
When in doubt check with battery manufacturer for recommended charging current.
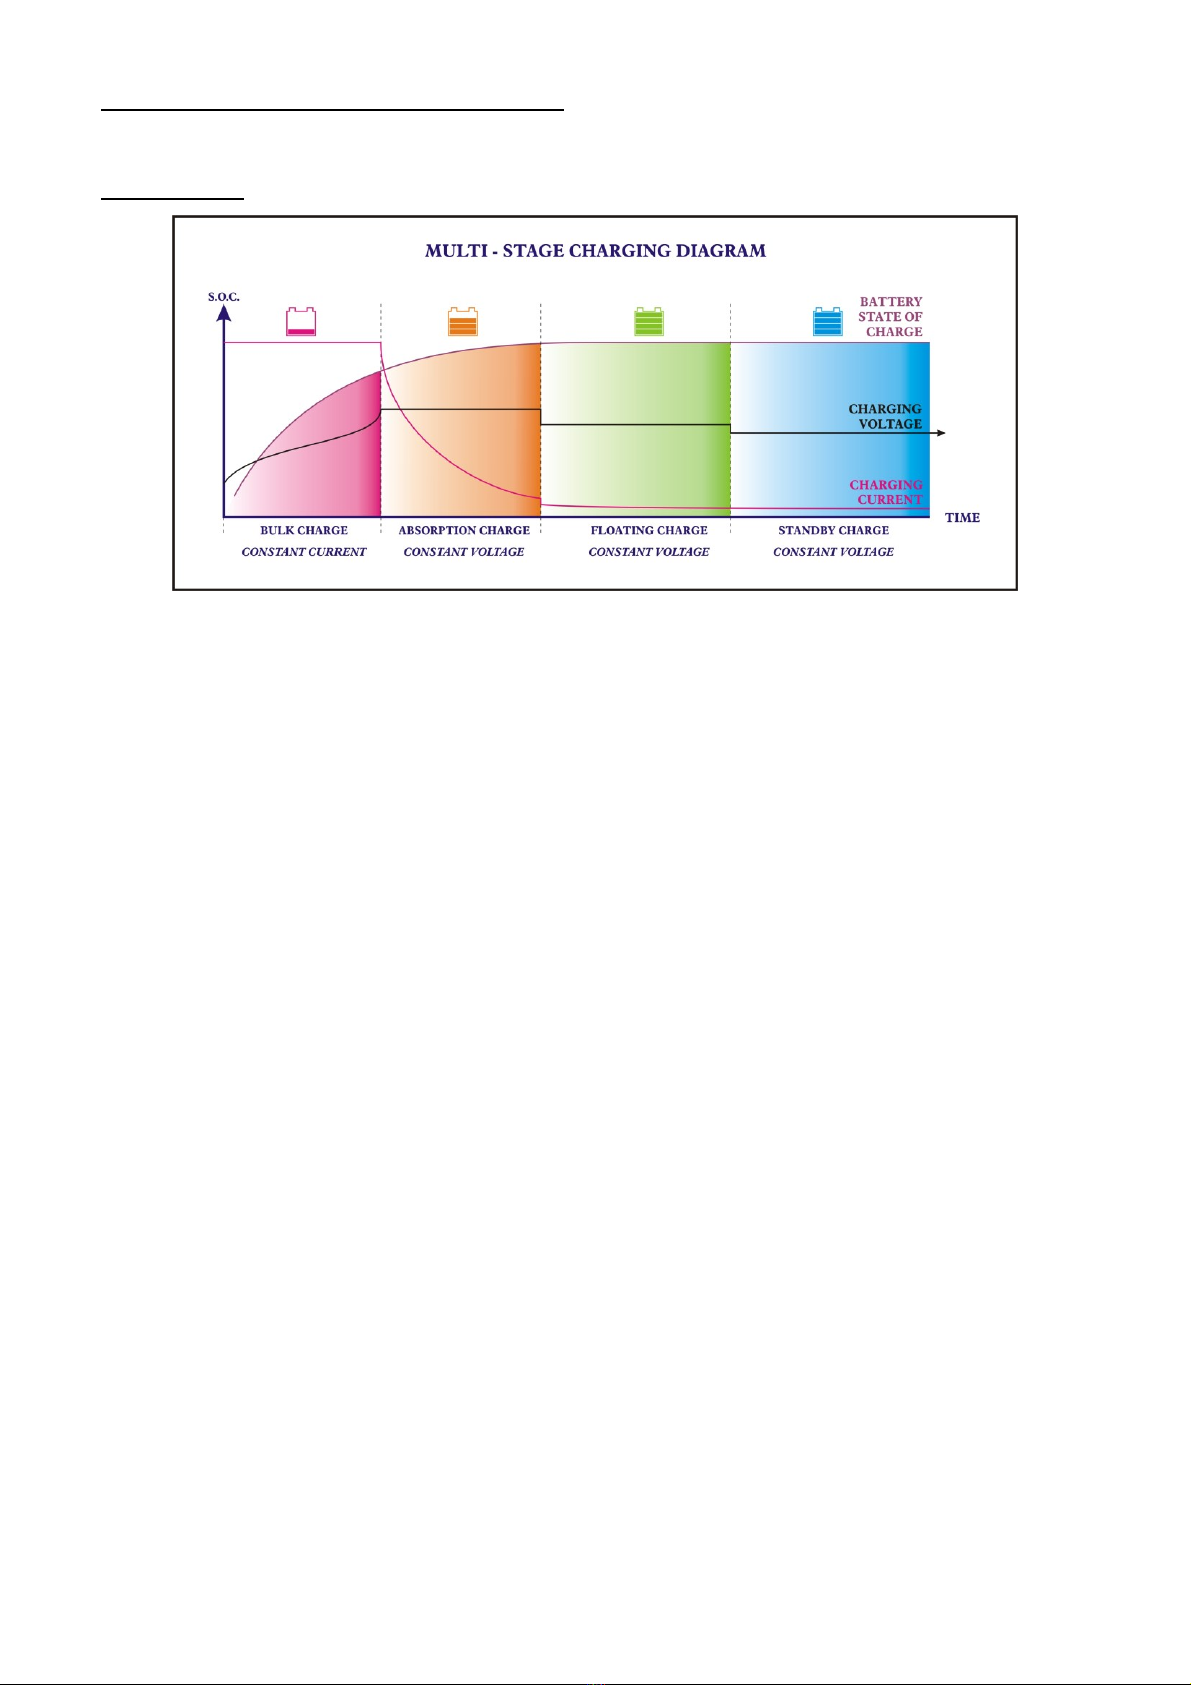
D. Testing the charger with output open circuit (nothing connected to the output terminal)
On power up, the charger will do a self check during which all the LED indicators are on and fan in full speed for a few seconds.
Then the Charger On and the Absorption LED are on if charger is checked out OK.
After 5 minute the Float LED will be on and Absorption LED off.
Remark:
You can connect a load to the output terminal and the charger will provide a constant DC source voltage according to the battery
type and available output power (current) selected as given in section B3 and C.
This feature is handy for caravan installer to check the operation of connected powered appliance or connections.
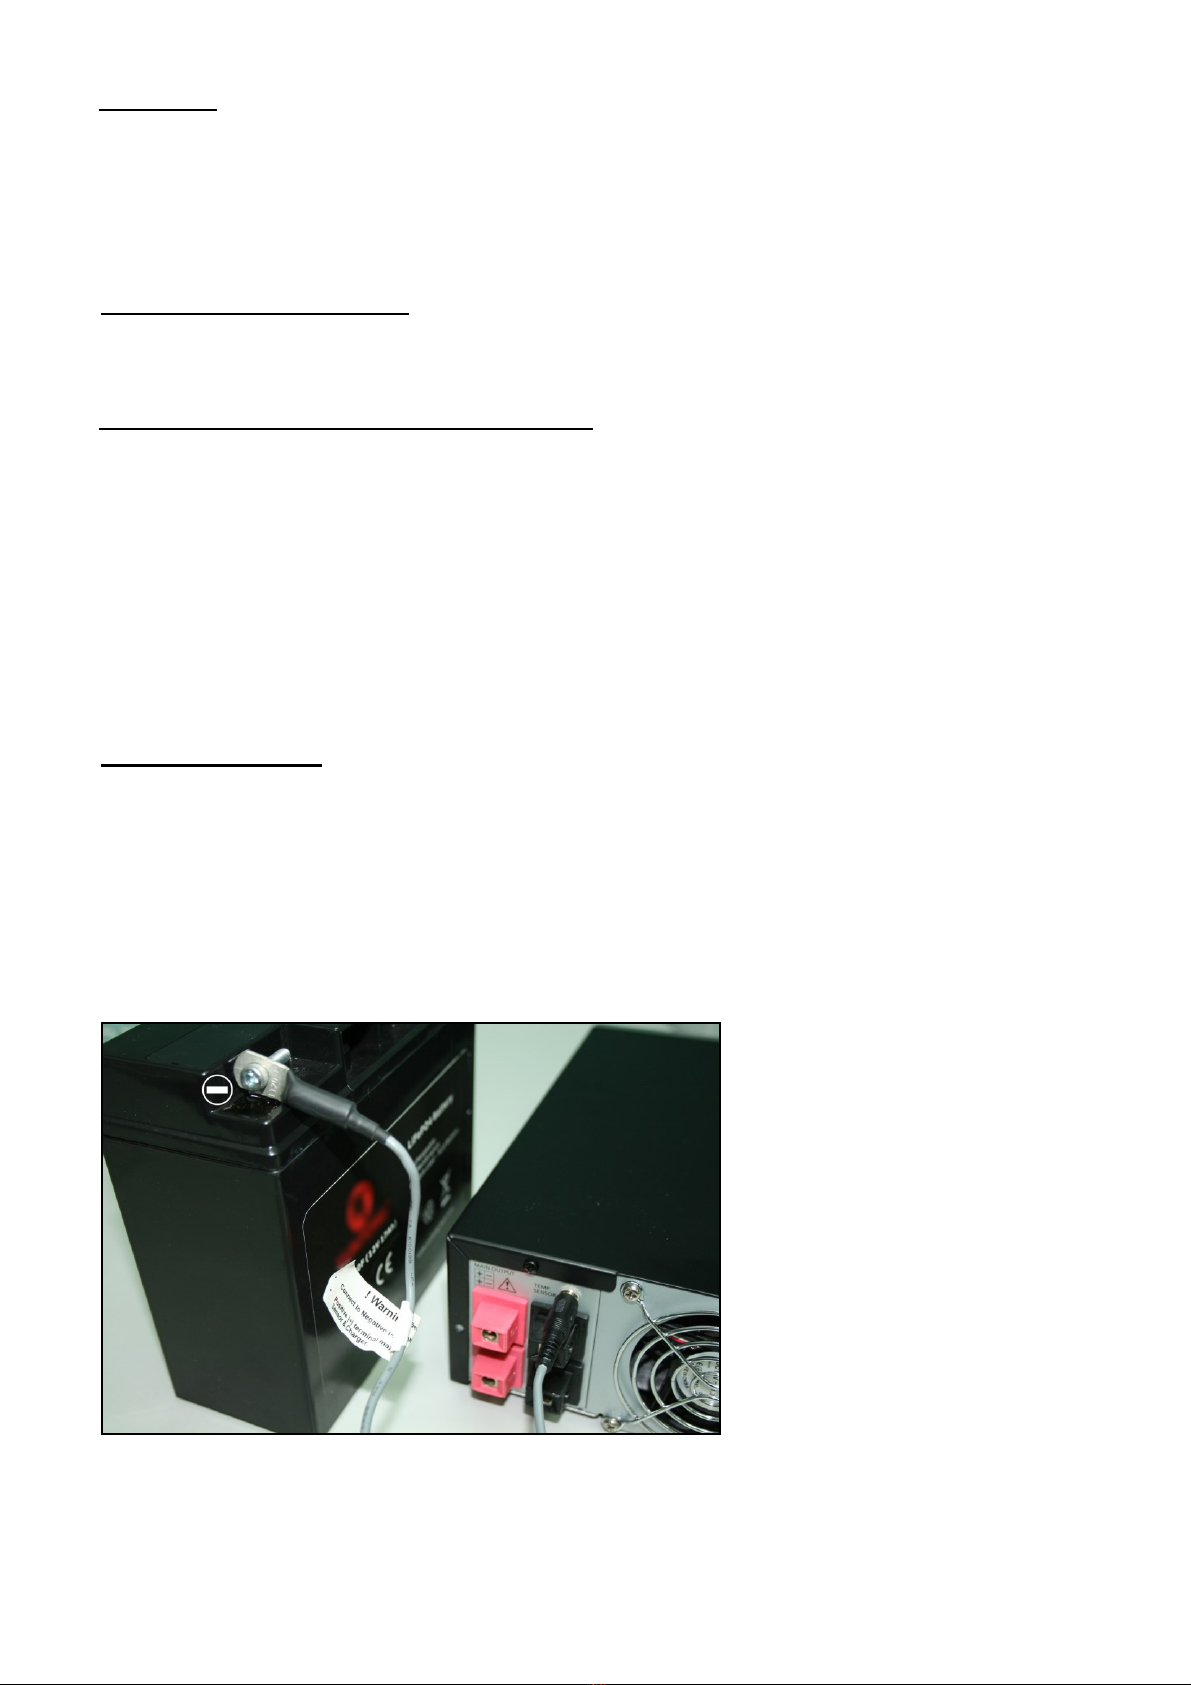
E. Battery Charger Installation and Connection
Observe the warnings & safety precautions before rushing to install and operate the charger.
Check battery condition, fill up cells for wet battery, clean battery poles.
Secure the battery charger in a well ventilated place, make sure the mounting surface is flat and without soft covering material or
loose paper sheet. The air intake is at the bottom and air outlet at the back. Make sure both intake and outlet are not blocked.
Never place charger on top of battery.
Plug in the AC mains and turn on Power Switch. All the indicators on the front panel will lit up, cooling fan spins at full speed
for 10 seconds by means of Self-Testing.
Charger ON LED and the Float LED should be on green indicating Charger is in good order for charging lead acid battery.
Before connecting or disconnecting the charging cable, turn off the Power Switch and unplug AC cord from the mains.
First connect the Red cable to Positive + terminal of charger and the battery Positive + Pole. Then connect the Black cable to the
Negative –terminal and the Negative –Pole of the battery.
Make sure all the connections are secured and well tighten up, double check on the correct polarity.
Double check again for correct selection of Battery Selection Switch (4) for battery type (default at GEL P-1) and Charging
Current Selection Switch (5) for output current setting (default at 100%)
When install in caravans and similar vehicles, the connection to the supply mains is to be in accordance with national wiring
rules.
When charging automotive batteries:
- The battery terminal not connected to the chassis has to be connected first. The other connection is to be made to the chassis,
remote from the battery and fuel line. The battery charger is then to be connected to the supply mains;
- After charging, disconnect the battery charger from the supply mains. Then remove the chassis connection and then the
battery connection.
Please notice the tightness of the power cables from the power supply to the load. If the cables are not fastened well
enough, the total resistance of the connecting cables will increase, resulting in a huge voltage drop between the terminals
to the load.