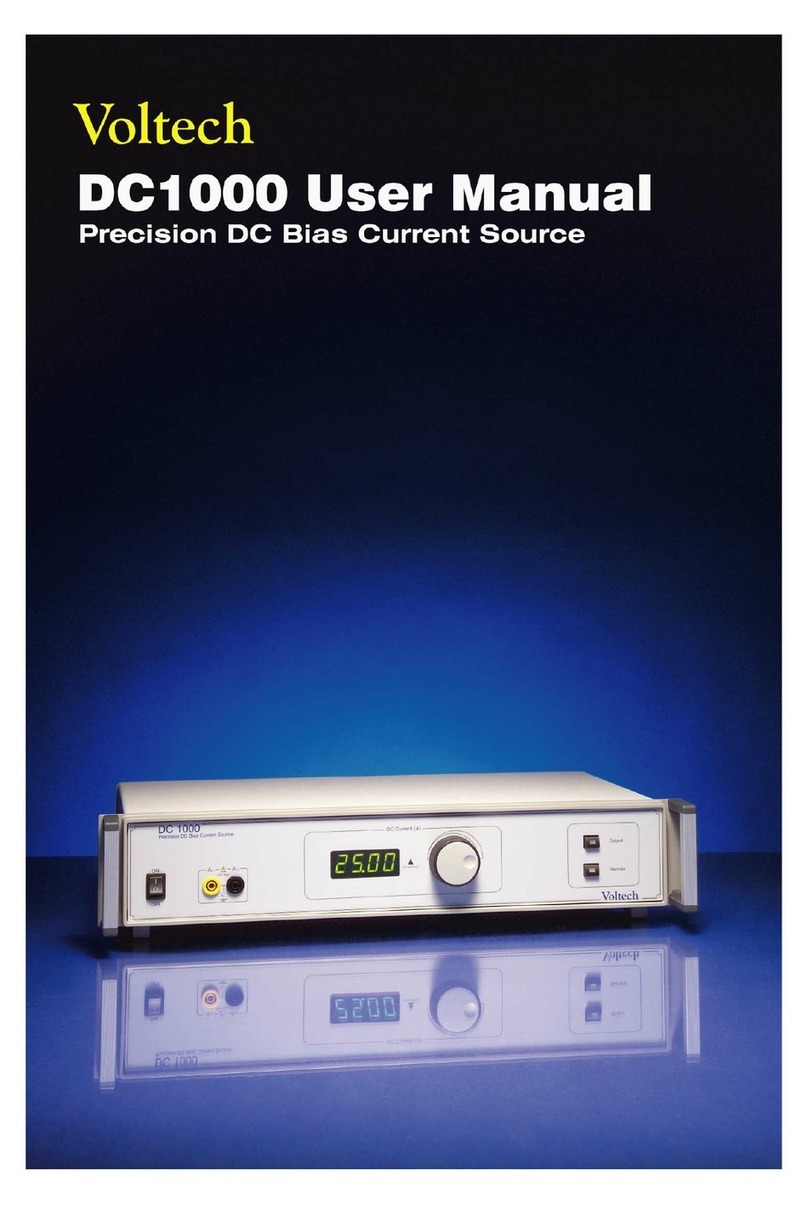
Voltech DC1000A User manual

DC1000A User Manual (98-102 issue 3) 1
VOLTECH INSTRUMENTS
DC1000A Precision DC Bias Current Source
User Manual

DC1000A User Manual (98-102 issue 3) 2
Voltech DC1000A
Precision DC Current Source
User Manual
Thank you for choosing the Voltech DC1000A.
This DC current source should give you many years of reliable use.
Should you experience any difficulty during the set up or use of your Voltech product, please do not
hesitate to contact either your local supplier or one of our main offices.
www.voltech.com
Voltech Instruments 2015. All rights reserved.
No part of this publication may be produced, stored in a retrieval system, or transmitted
in any form, or by means, electronic, mechanical photocopying, recording or otherwise
without prior written permission of Voltech.
98-102 issue 3 - 14 JUN 2016
Voltech Instruments Ltd
66 Innovation Drive • Milton Park
Abingdon • Oxfordshire •
OX14 4RQ
UK
Phone +44(0)1235 861173
Email sales@voltech.com
Voltech Instruments Inc.
12851 Banyan Creek Drive
Fort Myers,
FL 33908
USA
Phone +1 239-437-0494
Email sales@voltech.com

DC1000A User Manual (98-102 issue 3) 3
TABLE OF CONTENTS
1. INTRODUCTION ...................................................................................................................................... 6
1.1. WHAT IS THE DC1000A? .................................................................................................................................... 6
1.2. WHY USE A DC1000A FOR MY TESTING? ................................................................................................................ 6
1.3. WARRANTY ....................................................................................................................................................... 7
1.4. HEALTH & SAFETY .............................................................................................................................................. 9
1.4.1. Health and Safety – English ..................................................................................................................... 9
1.4.2. Hygiène et sécurité - Français ................................................................................................................ 10
1.4.3. Gesundheit und Sicherheit – Deutsch .................................................................................................... 11
1.4.4. Salud y Seguridad - Español ................................................................................................................... 12
1.4.5. Salute e sicurezza - Italiano ................................................................................................................... 13
1.4.6. Gezondheid en veiligheid - Nederlands ................................................................................................. 14
1.4.7. Sundhed og sikkerhed - Dansk ............................................................................................................... 15
1.4.8. Hälsa och säkerhet – Svenska ................................................................................................................ 16
1.4.9. Terveys ja turvallisuus – suomi .............................................................................................................. 17
1.4.10. Zdraví a bezpečnost – čeština ................................................................................................................ 18
1.4.11. Munkavédelem - Magyar ...................................................................................................................... 19
1.4.12. Bezpieczeństwo i higiena pracy - Polski ................................................................................................. 20
1.4.13. Sağlık ve Güvenlik Bilgileri - Türkçe ....................................................................................................... 21
1.5. SAFETY PRECAUTIONS ........................................................................................................................................ 22
1.5.1 Safety Precautions - English ...................................................................................................................... 22
1.5.2 Mesures de sécurité - Français ................................................................................................................. 22
1.5.3 Sicherheitsvorkehrungen – Deutsch ......................................................................................................... 23
1.5.4 Precauciones de Seguridad - Español ....................................................................................................... 23
1.5.5 Precauzioni di sicurezza - Italiano ............................................................................................................. 24
1.5.6 Veiligheidsvoorzorgen - Nederlands ......................................................................................................... 24
1.5.7 Sikkerhedsforanstaltninger - dansk .......................................................................................................... 25
1.5.8 Säkerhetsföreskrifter – svenska ................................................................................................................ 25
1.5.9 Varotoimenpiteet – suomi ........................................................................................................................ 26
1.5.10 Bezpečnostní opatření – čeština ............................................................................................................ 26
1.5.11 Biztonsági óvintézkedések - Magyar ..................................................................................................... 27
1.5.12 Środki ostrożności BHP - Polski .............................................................................................................. 27
1.5.13 Güvenlik Tedbirleri - Türkçe ................................................................................................................... 28
1.6. PACKAGE CONTENTS ......................................................................................................................................... 29
1.7. ACCESSORIES ................................................................................................................................................... 30
2. GETTING STARTED ................................................................................................................................ 32
2.1. FRONT PANEL DESCRIPTION ................................................................................................................................ 32
2.2. REAR PANEL DESCRIPTION .................................................................................................................................. 34
3. USING THE DC1000A WITH A LCR METER ............................................................................................... 36
3.1. CONNECTING MULTIPLE DC1000AS WITH A LCR METER ........................................................................................ 39
3.2. FACTORS TO CONSIDER TO INSURE PROPER MEASUREMENTS WITH A DC1000A AND LCR METER .................................. 41
3.3. CONNECTING A PC TO CONTROL A DC1000A AND LCR METER WITH RS232 ............................................................. 42
3.4. CONNECTING A PC TO CONTROL LCR METER WITH GPIB AND DC1000A WITH RS232 ............................................... 43
4. USING THE DC1000A WITH AN ATI TRANSFORMER TESTER ..................................................................... 44
4.1. CONNECTING THE DC1000A WITH AN ATI (NO PC) ............................................................................................... 44
4.2. CONNECTING MULTIPLE DC1000AS WITH AN ATI (NO PC) ..................................................................................... 45

DC1000A User Manual (98-102 issue 3) 4
5. USING THE DC1000A WITH AN AT5600 AND SAFETY SYSTEM .................................................................. 46
5.1. CONNECTING THE DC1000A WITH AN AT5600 AND SAFETY SYSTEM ........................................................................ 46
5.2. CONNECTING MULTIPLE DC1000A’S WITH AN AT5600 AND SAFETY SYSTEM ............................................................. 47
6. USING THE DC1000A WITH A VOLTECH AT5600 OR ATI AND PC .............................................................. 50
6.1. CONNECTING THE DC1000A WITH AN AT5600 OR ATI AND PC............................................................................... 50
6.2. AT COMPENSATION .......................................................................................................................................... 51
6.3. USING IR, HPDC, HPAC, DCRT, ACRT, DCVB, ACVB TESTS (HIGH VOLTAGE TESTS) ................................................ 52
6.4. USING ILK, SURG, MAGI, STRW, WATT, VOC TESTS ......................................................................................... 53
6.5. PROGRAMMING THE AT TESTS USING THE AT EDITOR ............................................................................................. 54
6.5.1. LSBX – Inductance with External Bias (Series Circuit) ............................................................................ 54
6.5.2. LPBX – Inductance with External Bias (Parallel Circuit) ......................................................................... 56
6.5.3. ZBX – Impedance with External Bias ..................................................................................................... 58
6.5.4. Editor – High Terminal Conflict .............................................................................................................. 60
7. RS232 COMMUNICATION...................................................................................................................... 61
7.1. PIN OUT ......................................................................................................................................................... 61
7.1. COMMANDS .................................................................................................................................................... 61
8. STATUS CODES ..................................................................................................................................... 65
8.1. ERROR CODES .................................................................................................................................................. 65
8.2. CORRECTING STATUS CODE ERRORS ..................................................................................................................... 65
9. SPECIFICATIONS ................................................................................................................................... 67
9.1. ACCURACY ....................................................................................................................................................... 67
9.2. POWER SUPPLY VOLTAGE ................................................................................................................................... 68
9.3. ENVIRONMENTAL SPECIFICATIONS ........................................................................................................................ 68
9.4. DIMENSIONS .................................................................................................................................................... 68
9.5. INTERFACES ..................................................................................................................................................... 68
9.6. SAFETY INTERLOCK ............................................................................................................................................ 68
9.7. VARIABLE SPEED COOLING FAN ........................................................................................................................... 68
10. SERVICE AND CALIBRATION .................................................................................................................. 69
11. APPENDIX ............................................................................................................................................ 70
11.1. HP4284A MEASUREMENT COMPENSATION WITH A DC1000A ................................................................................ 70
11.2. THE DC1000A - HOW IT WORKS........................................................................................................................ 72
11.2.1. Basic Theory .......................................................................................................................................... 72
11.2.2. Causes of Error ...................................................................................................................................... 72
11.2.3. The Solution ........................................................................................................................................... 75
11.2.4. Advantages ............................................................................................................................................ 77
12. SAFETY AND EMC COMPLIANCE ............................................................................................................ 78

DC1000A User Manual (98-102 issue 3) 5

DC1000A User Manual (98-102 issue 3) 6
1. Introduction
1.1. What is the DC1000A?
The DC1000A is a DC Bias current source that can generate between 0 and 25A. Up to
twenty (20) DC1000A’s can simply be joined together in parallel to produce up to 500A.
The DC1000A can be used with almost any LCR meter and with the AT-series
transformer testers – these products have specific programs for testing using the
DC1000A (LPBX, LSBX, and ZBX).
1.2. Why use a DC1000A for my testing?
The DC1000A is used to characterize wound components that are intended for use in
high current DC power supplies and DC-to-DC converters.
It is used to apply a DC current through the component to be tested, allowing an LCR
meter or Voltech AT-series product to measure the inductance of the component while
the DC bias current is applied.
Unlike a regular DC power supply; the DC1000A minimizes the load (and hence any
measurement errors) on the measuring instrument without the need for additional output
inductors. Regular loading would cause gross errors in the measurement and severely
limit the possible test signal amplitude.
It also maintains an accurate current under variable resistive loads so regular
adjustments are not required.
Additionally, unlike other DC Bias sources from other manufacturers, the Voltech
DC1000A can be used with almost any LCR meter, making it unique amongst all DC
Bias Current Sources. Our patented technique allows the DC1000A to constantly
monitor and trim the current applied, regardless of the LCR model used, making it truly
universal.
This provides the fastest and most reliable DC current testing solution.

DC1000A User Manual (98-102 issue 3) 7
1.3. Warranty
The product is warranted free from material defects in workmanship and/or materials
at the time of delivery to the Customer and that for a period of one year (12 months)
from such time Voltech will repair or replace any Product which does not comply with
this warranty PROVIDED ALWAYS THAT the Company’s liability under this
warranty shall be limited to the repair or replacement of affected Products and is
conditional upon the Customer:-
1. Notifying the Company promptly of any such material defect and in any
event within such period of one year;
2. Returning to the Company the affected Products properly and adequately
packed, carriage or postpaid, within fourteen days of such notification;
3. Having ensured that the Products have not been tampered with, repaired,
modified or altered in any way; and
4. Ensuring that the Products are protected from harm or otherwise properly
cared for and are retained in the possession of the Purchaser.
In the event of a failure as above Voltech will
1. At it’s discretion, repair or replace the faulty unit free-of-charge for a unit
returned to an authorized service center
2. Pay all return shipment charges from the Voltech service center to the
customer.
3. Re-calibrate the unit before dispatch. A certificate of calibration will be issued
as a matter of course.

DC1000A User Manual (98-102 issue 3) 8
LIMITATION OF WARRANTY
The foregoing warranty shall not apply to defects resulting from unauthorized modification
or misuse, or operation outside specification of instrument. No other warranty is expressed
or implied.
Whilst every care has been taken in compiling the information in this publication Voltech
Instruments cannot accept legal liability for any inaccuracies contained herein. Voltech
Instruments has an intensive program of design and development which may well alter
product specification, and reserve the right to alter specification without notice and
whenever necessary to ensure optimum performance from its product range.
It shall be deemed to exclude all other warranties and conditions whether express or
implied and whether arising by common law statute or otherwise.
Voltech reserve the right to waive this benefit in any event where it is clear upon
inspection that the cause of the failure is due to customer misuse.
Voltech will be the sole arbiter in these circumstances.
Because software is inherently complex and may not be completely free of errors, you are
advised to verify your work. In no event will Voltech be liable for direct, indirect, special,
incidental or consequential damages arising out of the use of or inability to use software
or documentation, even if advised of the possibility of such damage. In particular, Voltech
is not responsible for any lost profits or revenue, loss of use of software, loss of data, cost
of substitute software, claims by third parties, or for other similar costs. In no case shall
Voltech's liability exceed the amount of the license fee.
Current Full terms of business can be viewed on Voltech’s website (www.voltech.com) by
selecting “Terms of Business’ at the bottom of the home page

DC1000A User Manual (98-102 issue 3) 9
1.4. Health & Safety
1.4.1. Health and Safety – English
Electrical devices can constitute a safety hazard.
It is the responsibility of the user to ensure the compliance of the installation with
any local acts or bylaws in force.
Only qualified personnel should install this equipment, after reading and
understanding this user’s manual.
These operating instructions should be adhered to. If in any doubt, please contact
your supplier.
PLEASE NOTE:
This equipment is supplied under warranty conditions in
force at the time of purchase from your supplier.
Contact your supplier for details. Any attempt to disable or
modify the unit will render any warranty agreement invalid.
The contents of this user manual are believed to be
accurate at the time of printing. The manufacturer, however,
reserves the right to change the content, product
specification, and performance criteria without notice.
No liability is accepted for the inappropriate, negligent, or incorrect set-up of the
instrument by the user, either by manual or automated means.
CHECK YOUR LINE INPUT VOLTAGE SETTING BEFORE
CONNECTING TO SUPPLY.
A Use a flat-headed screwdriver to pull the fuse drawer
out.
B: Rotate the gray voltage selector to select the correct
voltage for your location

DC1000A User Manual (98-102 issue 3) 10
1.4.2. Hygiène et sécurité - Français
Les appareils électriques peuvent constituer un danger pour la sécurité.
Il incombe à l'utilisateur de vérifier la conformité de l'installation aux lois locales
ou arrêtés municipaux en vigueur.
Seul le personnel qualifié doit installer cet équipement, après avoir lu et assimilé
le manuel de l'utilisateur.
Ces consignes d'utilisation doivent être suivies. En cas de doute, veuillez
contacter votre fournisseur.
REMARQUE :
Cet équipement est fourni dans les conditions de garantie
en vigueur au moment de l'achat auprès de votre
fournisseur.
Pour toutes précisions, contactez votre fournisseur. Toute
tentative de désactiver ou de modifier l'appareil annulera le
contrat de garantie.
Le contenu de ce manuel de l'utilisateur est censé être exact au moment de l'impression.
Toutefois, le fabricant se réserve le droit de modifier le contenu, les caractéristiques du
produit ainsi que les critères de performance sans préavis.
Voltech décline toute responsabilité quant à l'installation inappropriée, négligente ou
incorrecte de l'instrument par l'utilisateur, par des moyens manuels ou automatisés.
VÉRIFIEZ LA TENSION D'ENTRÉE DE VOTRE LIGNE AVANT DE
BRANCHER L'APPAREIL SUR L'ALIMENTATION.
A Utilisez un tournevis à lame plate afin de sortir le
tiroir du fusible.
B: Faites tourner le sélecteur de tensions gris afin de
sélectionner la tension appropriée à votre site.

DC1000A User Manual (98-102 issue 3) 11
1.4.3. Gesundheit und Sicherheit – Deutsch
Elektrogeräte können ein Sicherheitsrisiko darstellen.
Es obliegt dem Benutzer, dafür zu sorgen, dass das Gerät nach den aktuellen
Gesetzen und Vorschriften installiert wird.
Dieses Gerät darf nur von qualifiziertem Personal installiert werden, das dieses
Benutzerhandbuch gelesen und verstanden hat.
Die Anweisungen in diesem Benutzerhandbuch müssen befolgt werden. Im
Zweifelsfall wenden Sie sich bitte an Ihren Lieferanten.
HINWEIS:
Dieses Gerät wird unter Garantiebedingungen geliefert, die
zum Zeitpunkt des Kaufes bei Ihrem Lieferanten gelten.
Zu Details wenden Sie sich bitte an Ihren Lieferanten. Jeder
Versuch der Deaktivierung oder Modifizierung des Geräts
führt zum Erlöschen jeglicher Garantievereinbarungen.
Der Inhalt dieses Benutzerhandbuchs ist nach bestem Wissen zum Zeitpunkt des
Drucks korrekt. Der Hersteller behält sich jedoch das Recht vor, den Inhalt, die
Produktspezifikation und Leistungskriterien ohne Ankündigung zu ändern.
Für eine unsachgemäße, fahrlässige oder falsche Einrichtung des Instruments durch
den Benutzer (manuell oder automatisch) wird keine Haftung übernommen.
PRÜFEN SIE VOR DEM ANSCHLUSS AN DEN NETZSTROM DIE
SPANNUNGSEINSTELLUNG FÜR IHREN LEITUNGSEINGANG.
A: Die Sicherungsschublade mit einem Flachklingen-
Schraubendreher herausziehen.
B: Den grauen Spannungswähler auf die richtige
Spannung für Ihren Standort drehen.

DC1000A User Manual (98-102 issue 3) 12
1.4.4. Salud y Seguridad - Español
Los dispositivos eléctricos pueden constituir un riesgo de seguridad.
Es la responsabilidad del usuario asegurar el cumplimiento de la instalación con
todos los reglamentos y leyes locales vigentes.
Este equipo tiene que ser instalado solo por personal calificado, una vez leídas y
comprendidas las instrucciones en el manual del usuario.
Estas instrucciones de operación tienen que ser cumplidas. Ante cualquier duda,
le rogamos consultar a su proveedor.
ADVERTENCIA:
Este equipo es suministrado bajo condiciones de garantía
vigentes en el momento de la compra en su proveedor.
Contacte a su proveedor para mayores detalles. Todo
intento de inhabilitar o modificar la unidad invalidará el
acuerdo de garantía.
El contenido de este manual del usuario es preciso en el momento de su impresión. No
obstante, el fabricante se reserva el derecho de modificar el contenido, la especificación
del producto, y los criterios de rendimiento sin preaviso.
No se aceptará ninguna responsabilidad por la configuración inadecuada, incorrecta o
negligente del instrumento por el usuario, ya bien sea manual o por medios
automatizados.
COMPRUEBE LA SELECCIÓN DEL VOLTAJE DE ENTRADA ANTES
DE CONECTAR EL EQUIPO A LA RED.
A Use un atornillador de punta plana para extraer la
caja del fusible.
B: Gire el reloj gris selector de voltaje apuntando al
voltaje correcto de su red local.

DC1000A User Manual (98-102 issue 3) 13
1.4.5. Salute e sicurezza - Italiano
I dispositivi elettrici possono costituire un pericolo per la sicurezza.
Spetta all’utilizzatore la responsabilità di garantire la conformità dell’impianto alle
norme e alle direttive locali vigenti in materia.
L’installazione di questo apparecchio deve essere affidata esclusivamente a
personale qualificato dopo attenta lettura e comprensione del presente manuale.
Attenersi alle istruzioni operative riportate in questo manuale. In caso di dubbi,
contattare il proprio fornitore di zona.
NOTA BENE
Questo apparecchio è fornito con condizioni di garanzia
valide al momento dell’acquisto presso il fornitore di zona.
Per informazioni in merito, contattare il proprio fornitore.
Qualunque tentativo di disattivare o modificare l’apparecchio
annulla il contratto di garanzia.
Il contenuto del presente manuale d’uso è ritenuto accurato al momento della stampa. Il
produttore si riserva tuttavia il diritto di modificare il contenuto del manuale, le specifiche
del prodotto e i criteri di rendimento dello stesso senza preavviso.
Il produttore declina qualunque responsabilità qualora l’istallazione del prodotto venga
eseguita in modo inidoneo, negligente o non corretto dall’utilizzatore secondo procedure
manuali o automatiche.
VERIFICARE IL VALORE DELLA TENSIONE DI INGRESSO DELLA
PROPRIA LINEA ELETTRICA PRIMA DI COLLEGARE
L’APPARECCHIO.
A. Usare un cacciavite a punta piatta per estrarre il
cassettino dei fusibili.
B. Ruotare il selettore grigio della tensione per
selezionare la tensione corretta in base alla linea
elettrica usata.

DC1000A User Manual (98-102 issue 3) 14
1.4.6. Gezondheid en veiligheid - Nederlands
Elektrische apparatuur kan een gevaar voor de veiligheid vormen.
Het valt onder de verantwoordelijkheid van de gebruiker om bij de installatie de
naleving van alle van kracht zijnde lokale voorschriften en wetten zeker te stellen.
Deze apparatuur dient na het lezen en begrijpen van deze handleiding voor de
gebruiker alleen door gekwalificeerd personeel te worden geïnstalleerd.
Men dient zich te houden aan deze instructies voor de bediening. Bij twijfel kunt u
contact opnemen met uw leverancier.
N.B.:
Deze apparatuur wordt onder garantievoorwaarden die ten
tijde van de aankoop van uw leverancier van kracht zijn
geleverd.
Neem contact op met uw leverancier voor bijzonderheden.
Na elke poging de eenheid te deactiveren of aan te passen
komt elke garantie te vervallen.
De inhoud van deze handleiding voor de gebruiker is ten tijde van het drukken naar onze
mening nauwkeurig. De fabrikant behoudt echter het recht de inhoud, productspecificatie
en prestatiecriteria zonder waarschuwing te veranderen.
Wij accepteren geen aansprakelijkheid voor het ongepast, nalatig of incorrect opstellen
van het instrument door de gebruiker, hetzij op handmatige of automatische wijze.
CONTROLEER DE INSTELLING VAN UW LIJNINGANGSSPANNING
VOORDAT DE VOEDING WORDT AANGESLOTEN.
A: Gebruik een schroevendraaier met platte kop om
de zekeringlade uit te trekken.
B: Draai de grijze spanningkeuzeschakelaar om de
juiste spanning voor uw locatie te selecteren.

DC1000A User Manual (98-102 issue 3) 15
1.4.7. Sundhed og sikkerhed - Dansk
Elektriske anordninger kan udgøre en sikkerhedsrisiko.
Det er brugerens ansvar at sikre, at installationen overholder lokale love eller
bestemmelser, der er i kraft.
Kun kvalificeret personale må installere dette udstyr, efter at de har læst og
forstået denne brugervejledning.
Denne driftsvejledning skal overholdes. I tvivlstilfælde bedes du kontakte din
leverandør.
BEMÆRK:
Dette udstyr leveres under de garantibetingelser, der er i
kraft på købstidspunktet fra leverandøren.
Kontakt din leverandør for yderligere oplysninger. Ethvert
forsøg på at deaktivere eller ændre enheden vil gøre
garantiaftalen ugyldig.
Indholdet i denne brugervejledning menes at være korrekt på tidspunktet for trykningen.
Producenten forbeholder sig dog retten til at ændre indholdet, produktspecifikationen og
ydeevnekriterierne uden varsel.
Vi påtager os intet ansvar for upassende, uagtsom eller forkert opsætning af
instrumentet af brugeren, hverken manuelt eller automatisk.
KONTROLLÉR DIN LINJEUDGANGENS INDSTILLINGER FOR
INDGANGSSPÆNDING FØR TILSLUTNING TIL FORSYNINGEN.
A: Brug en kærvskruetrækker til at trække
sikringsskuffen ud.
B: Drej den grå spændingsvælger for at vælge den
korrekte spænding for din placering

DC1000A User Manual (98-102 issue 3) 16
1.4.8. Hälsa och säkerhet – Svenska
Elektriska enheter kan utgöra en säkerhetsrisk.
Det är användarens ansvar att se till att installationen efterlever alla gällande
lokala lagar och förordningar.
Endast behörig personal får installera utrustningen efter att ha läst och förstått
den här bruksanvisningen.
De här driftanvisningarna måste följas. Kontakta återförsäljaren om du är osäker.
OBS!
Den här utrustningen levereras under de garantivillkor som
gäller när den köps från återförsäljaren.
Kontakta återförsäljaren för mer information. Alla försök att
inaktivera eller ändra enheten leder till att eventuella
garantiavtal blir ogiltiga.
Innehållet i den här bruksanvisningen anses vara korrekt vid trycktillfället. Tillverkaren
förbehåller sig däremot rätten att ändra innehållet, produktspecifikationen och
prestandakriterier utan föregående meddelande.
Inget ansvar accepteras för olämplig, slarvig eller felaktig konfiguration av instrumentet
av användaren, antingen det gäller manuella eller automatiska tillvägagångssätt.
KONTROLLERA SPÄNNINGSINSTÄLLNINGEN FÖR INGÅNGSLINJEN
INNAN DU ANSLUTER TILL ELFÖRSÖRJNINGEN.
A: Använd en skruvmejsel för att dra ut säkringslocket.
B: Vrid den grå spänningsomkopplaren för att välja rätt
spänning för din plats.

DC1000A User Manual (98-102 issue 3) 17
1.4.9. Terveys ja turvallisuus – suomi
Sähkölaitteet voivat muodostaa turvallisuusuhan.
Käyttäjän vastuulla on varmistaa, että asennus on kaikkien paikallisten säädösten
ja sääntöjen mukainen.
Vain pätevät henkilöt saavat asentaa tämän laitteen tämän käyttöoppaan
lukemisen ja sisäistämisen jälkeen.
Näitä käyttöohjeita on noudatettava. Jos jokin on epäselvää, ota yhteys
tavarantoimittajaan.
HUOMAA:
Tämä laite toimitetaan takuuehdoilla, jotka ovat voimassa
sillä hetkellä, kun laite ostetaan myyjältä.
Pyydä lisätietoja myyjältä. Yritykset poistaa laite käytöstä tai
muokata laitetta mitätöivät kaikki takuusopimukset.
Tämän käyttöoppaan sisällön uskotaan pitävän paikkansa painohetkellä. Valmistaja
pidättää kuitenkin itsellään oikeuden muuttaa sisältöä, tuotemäärityksiä ja
suorituskykykriteerejä ilman erillistä ilmoitusta.
Valmistaja ei ole millään tavoin korvausvelvollinen laitteen sopimattomasta,
huolimattomasta tai virheellisestä käytöstä käyttäjän toimesta manuaalisesti tai
automaattisesti.
TARKISTA LINJAN TULOLIITÄNNÄN JÄNNITEASETUS ENNEN
LIITTÄMISTÄ VERKKOVIRTAAN.
A: Vedä sulakekotelo esiin käyttämällä tasapäistä
ruuvitalttaa.
B: Kierrä harmaata jännitteenvalitsinta ja valitse
alueella käytössä oleva jännite.

DC1000A User Manual (98-102 issue 3) 18
1.4.10. Zdraví a bezpečnost – čeština
Elektrická zařízení mohou představovat bezpečnostní riziko.
Zajištění souladu instalace se všemi platnými místními směrnicemi a nařízeními je
povinností uživatele.
Toto zařízení smí instalovat pouze kvalifikovaní pracovníci po přečtení a
pochopení této uživatelské příručky.
Je třeba dodržovat tyto provozní pokyny. V případě jakýchkoli pochybností
kontaktujte svého dodavatele.
PAMATUJTE:
Toto zařízení se dodává se zárukou, jejíž podmínky jsou
platné v době nákupu od dodavatele.
Podrobnosti se dozvíte od svého dodavatele. Jakýkoli
pokus o deaktivaci či úpravu jednotky zruší platnost záruční
smlouvy.
Obsah této uživatelské příručky je v době tisku považován za přesný. Výrobce si však
vyhrazuje právo bez předchozího upozornění změnit obsah, specifikaci produktu a
kritéria výkonu.
Za nevhodnou, nekvalitní či nesprávnou instalaci zařízení prováděnou uživatelem (ať již
ručně či pomocí automatizovaných prostředků) neneseme žádnou odpovědnost.
PŘED PŘIPOJENÍM ZDROJE NAPÁJENÍ ZKONTROLUJTE
NASTAVENÍ VSTUPNÍHO NAPĚTÍ.
A: Pomocí plochého šroubováku vytáhněte
pojistkovou zásuvku.
B: Otočte šedým voličem napětí na správnou hodnotu
napětí pro vaši oblast.

DC1000A User Manual (98-102 issue 3) 19
1.4.11. Munkavédelem - Magyar
Az elektromos eszközök biztonsági kockázatokat okozhatnak.
A felhasználó kötelezettségei közé tartozik, hogy biztosítsa, a szerelés megfelel
bármilyen hatályos helyi jogszabálynak és rendelkezésnek.
Csak megfelelő szakképesítéssel rendelkező személyzet szerelheti ezt a
készüléket e felhasználói kézikönyv elolvasása és megértése után.
Ezeket az üzemeltetési utasításokat be kell tartani. Bármilyen kétség felmerülése
esetén, kérjük, forduljon a helyi szállítóhoz.
KÉRJÜK, NE FELEDJE:
E készülék a szállítótól való megvásárlása időpontjában
érvényes jótállási feltételek szerint került átadásra.
A részletekért forduljon a helyi szállítóhoz. A készülék
megrongálására vagy módosítására irányuló bármilyen
kísérlet a jótállás elvesztését vonja maga után.
E felhasználói kézikönyv tartalma meggyőződésünk szerint pontos a
kinyomtatása időpontjában. A gyártó azonban fenntartja magának a
jogot a tartalom, a termékspecifikáció és a teljesítmény kritériumok
külön értesítés nélküli módosítására.
Nem vállalunk semmilyen felelősséget a készülék nem megfelelő,
hanyag vagy pontatlan összeállításáért, akár a felhasználó, akár a
kézikönyv vagy automatizált eszközök hibájából.
HÁLÓZATBA VALÓ BEKÖTÉS ELŐTT ELLENŐRIZZE A HÁLÓZATI
TÁPFESZÜLTSÉGET.
A: Lapos csavarhúzóval húzza ki a helyéről a
biztosítót.
B: Fordítsa el a szürke feszültség választó kapcsolót a
helyi megfelelő feszültség kiválasztására

DC1000A User Manual (98-102 issue 3) 20
1.4.12. Bezpieczeństwo i higiena pracy - Polski
Urządzenia elektryczne mogą stwarzać zagrożenie dla bezpieczeństwa.
Obowiązkiem użytkownika jest zapewnienie zgodności instalacji z wszelkimi
obowiązującymi lokalnymi przepisami lub regulaminami.
Niniejsze urządzenie powinno być instalowane wyłącznie przez wykwalifikowany
personel po zapoznaniu się i zrozumieniu niniejszej instrukcji użytkownika.
Należy przestrzegać niniejszych instrukcji obsługi. W razie jakichkolwiek
wątpliwości prosimy skontaktować się z dostawcą.
UWAGA:
Niniejsze urządzenie jest dostarczane na warunkach
gwarancji obowiązujących w chwili jego nabycia u
dostawcy.
W sprawie szczegółowych informacji należy skontaktować
się z dostawcą. Każda próba wyłączenia lub modyfikacji
urządzenia spowoduje unieważnienie umowy gwarancyjnej.
Treść niniejszej instrukcji użytkownika uważa się za dokładną w chwili
druku. Producent zastrzega sobie jednak prawo do zmiany treści,
specyfikacji produktu i kryteriów roboczych bez wcześniejszego
powiadomienia.
Nie przyjmuje się odpowiedzialności za nieodpowiednie, niedbałe lub
nieprawidłowe skonfigurowanie urządzenia przez użytkownika,
niezależnie czy metodą ręczną czy automatyczną.
PRZED PODŁĄCZENIEM DO ZASILANIA NALEŻY SPRAWDZIĆ
USTAWIENIE NAPIĘCIA WEJŚCIOWEGO LINII.
A: Użyć płaskiego śrubokręta do wyciągnięcia oprawy
bezpiecznika.
B: Obrócić szary wybierak napięcia w celu wyboru
prawidłowego napięcia dla lokalizacji użytkownika.
Other manuals for DC1000A
1
Table of contents
Other Voltech Power Supply manuals