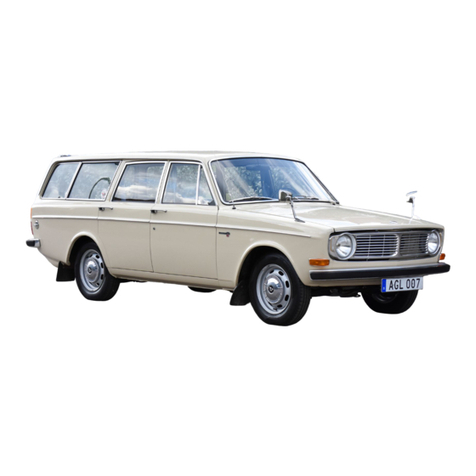
Volvo 164 1973 User manual

V
/ ,
CD
,...
O
~
O '
:>
' ' (
~
<C
::J
Z
<C
:!
en
~
a::
W
Z
r
==
'
O

Personal Information
Name
-
Address
Notice to Owner:
Your
Volvo
has been
built
to
comply
to
all
North
American
safety
and
anti-pollution
regulations
and
evidence
of
this
can
be
seen
from
the
certification
label
attached
to
the
door
opening
sheet
metal
and
on
the
firewall
in
the
engine
compart-
ment.
For
further
information
regarding
these
regulations
,
please
talk
to
your
selling
dealer.
Nearest Volvo Dealer
ear
Information
Name
Type
Designation
..
...
.........
.
Address
Chassis
No.
Tel. No.
...
..
.
......
-
.........
.
...
.
...
. Tel.
No
.
..
...
. .
..
.
...............
.
..
. .
Engine
No. .
..
.
......
. . .
...........
. . . .
Driving
License
No
..
....
. . . . . . .
.......
.
Garage
Manager
.......
...
.
..
..
.
....
. .
License
Plate No. .
.. .. ..
.
......
....
. . . .
Insurance
Company
. . . .
.....
. . . . . . . . . . . Tel. No. .
...
.
....
. . .
.......
. . .
....
. . . .
Ignition
Key No. .
..
.
....
.
....
.
..
. . .
..
.
Insurance
Policy
No. .
...
...
...
. . .
....
.
Door
Key No.
..
...
........
. . . .
..
.
..
.
..
.

z
II
w
c
W
3:
't:I
al
en
Ö
::::I
--
0-
U)
el
al
U
c:
a:
:;
O
O
O
<II
;:
:!::
C
al
't:I
(,)
al
C)
W =
::::s
O
°e
..
;:
c:
I-
Gi
..,
0-
:0
el.
U)
Q.
(,)
c:
c:
0':
OS;
el
02
Ö
(,)
..
::::I
C)
U)
CD
't:I
O O
c:
CD
en
c.
;:
C
>
al
a:
ca
..J
..
O
CD
Q.
O >
al
cC

r
FOREWORD
Before
you
start
driving
your
new
Volvo
please read
through
this
manual
carefully
.
It
contains
all the
information
you need to
be able to
drive
and service
your
vehicle
in the best possible way. By
following
the
instructions
given in
this
manual you
will
find
that
your
Volvo
will
come
up
to
all
the
expectations
concerning
economical
ope-
2
ration and
excellent
performance
that
you
have every
right
to
expect
of
a
top-quality
vehicle.
This
is
not
intended
to
be a
comprehen-
sive
technical
manual and
does
not
claim
to
make
the
reader a
perfect
car
mecha-
nic. It will, however,
show
you
how
to
look
after
your
vehicle so
that
trouble
in
the
fu-
This manual covers all the variants
of
the
Volvo 164, 1973 model.
r
ture
can be avoided. The
better
you
know
your
Volvo, the better service
it
Gan
give
you. Even
for
an
experienced
motorist
it
can
contain
some valuable
information
.
For
a more detalied
mechanical
descrip-
tion
and repair
procedures
, we refer you
to
the
special Service Manual
for
the
car
which
can be purchased
from
the
dealer
.

CONTENTS
FOREWORD 2
SERVICING
General
39
Maintenance
schedule
40
Lubrication
42
Oil
changes
43
Engine
46
.
Electrical
system
51
INTRODUCTION
Power
transmission
56
Volvo
Service
Organization
4
Brakes
56
Warranty
and
Service
Booklet
4
Front
end
56
Service
Inspections
4 Wheels and
tires
57
J
Type
Designations
5
Body
5~
Long-distance
trip
61
Cold
weather
61
Lubricating
chart
72
OPERATING
INSTRUCTIONS
FAULT
TRACING
Instruments
and
controls
6 .
When
the
engine
stalls 63
Interior
and
body
16
.
Starting
and
driving
22
SPECIFICATIONS
Running-in
22
Measurements
and
weights
64
Starting
the
engine
23
Shifting
24
Engine
64
Towing
27
Electrical
system
65
Braking
28
Power
transmission
66
Front
wheel
alignment
67
Wheels
and
tires
67
Capacities
67
Tools
67
,J
TECHNICAL
DESCRIPTION
CONSUMER
INFORMATION
68
Engine
compartment
29
Engine
30
Power
transmission
32
INDEX
74
Front
end and
steering
-
~
35
Electrical
system
36
Brakes
38
WHEN FILLlNG THE
TANK
76
3

INTRODUCTION
VOLVO
Volvo Service Organization
to
get
the
most
out
of
the
invested
capital
represented by a car, it
must
be
looked
after
and
serviced
regularly.
Volvo
has
gone
to
a
great
deal
of
trouble
in
the
de-
sign and
selection
of
material
to
ensure
that
the
car
in
question
only
requires
a
mi-
nimum
of
servicing.
We rely,
however
,
on
your
co-operating
with
regard
to
the
future
maintenance
of
your
vehicle.
To
help
you
with
this
,
Volvo
has
built
up
a
world-wide
service
organization
. All
Volvo
dealers
have specially
trained
personnel
and re-
ceive a
continuous
supply
of
technical
in-
formation
from
the
Volvo
Service
Organi-
zation
conceJning
repairs
and
adjust-
ments. They also have
special
toois,
de-
signed
at
the
Volvo
factory.
Moreover,
all
Volvo
dealers have a
comprehens
ive
stock
of
parts
which
is a
guarantee
that
the
part
you
get
is
genuine
Volvo
.
That
is
why
ou!-
4
dealers
are in
the
best
possible
position
to
give
your
vehicle
first-class
service
con-
cerning
both
maintenance
operations
and
repairs
. You
should
also
refer
to
your
dealer
for
any
information
about
your
Vol-
vo
that
is
not
included
in
this
manual.
Volvo
not
only
has a
workshop
within
easy
reach in
your
own
country,
it
also has a
widely
distributed
service
network
in
other
countries.
Warranty and Service Booklet
A
warranty
and service
booklet
accom-
panies
each
vehicle
when
it is delivered.
This
booklet
contains
a
coupon
entitling
you
to
a service
inspection
after
1500
miles
(2500
km). If
possible,
let
the
dealer
who
supplied
the
vehicle
carry
out
this
service
inspection.
Any
of
our
dealers
,
however,
can
do
this
if
required
.
If
our
guarantee
is
to
apply
, we
make
one
abso-
lute
condition
and
that
is
that
the
above-
mentioned
inspection
is
carried
out
at
roughly
the
mileage
shown
pnd
that
the
vehicle
has been
looked
after
in
accord-
ance
with
the
instructions
given
in
this
manual.
Service Inspections
After
the
1500
miles
(2500
km)
service
in-
spection
has been
carried
out
, you should
come to some arrangement with your
dealer
concerning continued, regular serv-
ice inspections
in
accordance with the
suggestions
made
in
our Service Book.
Thorough
and
regular
servicing
is
of
vital
importance
for
the
performance
and
length
of
life
of
the
vehicle.
Alway
~
use genuine Volvo parts.

@
CD
®
@
MfD
.
BY
VOLVO
GOTliENBURG
SWEDEN
.
AU
G· 72
QW
LB
.
I=~~T
~;
%t
r
ttl
THIS
VE
HICLE
CONFORMS
TO
All
APPUCABLE
nOERAl
MOTOR
VEHICLE
3AfETY
STANOAIUlS
IN
EffiCT
ON
TI1E
DATE
OF
MANUFACTURf
SHOWN
=~ENTNO
/6
-4634
3 - 4
23904
TYPE.
PA55ENG~
CAR
®
a71'~jIrYPT
~
T~~
~
rl
'
fo)V'~n
·
t'i"'"i$f~
·
·
a
@ a4.30!
";Ö;'
J(
I
','!'i!',
INTRODUCTION
Type designations
In
all
correspondence
concerning
your
vehicle
with
the
dealer
and
when
order
..!
ing
;:>arts
,
the
V.I.N. and
engine
number
should
always be
quoted.
1.
Vehicle
type
designation,
code
number
for
color
and
upholstery
: on
bulkhead.
2.
Body
number.
3. V.I.N.
(Vehicle
Identification
Number)
plate
located
at
the
foot
of
the
left
door
post.
The
V.I.N. is
also
stamped
on
right
door
pillar
.
4. Type
designation
, serial
number
and
part
number
of
engine
:
stamped
on en-
gine
left-hand
side
. The final
figures
of
the
part
number
are
stamped
on a
plate
.
The serial
number
then
follows
with
all,
figures
stamped
on
the
block.
5. Type
designation,
serial
number
and
part
number
of
transmission:
under-
neath
transmission
.
6. Final
drive
reduction
ratio,
part
number
and serial
number
: on a
plate
on
left-
hand
side
of
final drive.
5

OPERATING
INSTRUCTIONS
6

INSTRUMENTS
AND
CONTROlS
1.
Air
vent
2.
Headlight switch
3.
Combined instrument
4.
Horn
5.
Ignition switch and steering wheel
lock
6.
Windshield
wiper/washer
controi lever
7.
Air
vent
8.
Clock
9.
Air
vent
10. Glove
locker
11.
Air
vent
12. Parking
brake
13.
Fusebox
(fuse
replacement
, see
page
55)
14.
Fresh-air
controi
15.
Hood
release
handle
16.
Turn
signal
switch
lever,
dimmer
and
mainbeam
flasher
17. Rheostat
for
instrument
panel
lighting
18.
Cigarette
lighter
19. Heater and
ventilation
controls
20. Gear lever
21. Ashtray
22.
Switch,
electrically
heated rear
window
23.
Switch,
emergency
warning
flashers
24. Fan
switch
25.
Switch,
air
conditioner
26. Seat
belt
reminder
light
\'
<
) The i
nstruments
and
controls
are
describ-
ed in
more
detail in
the
following
pages
with
a
reference
to
the
numbers
in
the
picture
opposite.
1,7,9,11
Airvents
Air
is
supplied
to
the
compartment
by
means
of
the
four
air vents.
Air
is
blown
through
these vents by
the
blower
fan
which
is
operated
by means
of
switch
(24).
The vents can be
shut
off
completely
by
turning
the
button
in
the
center
of
each
vent a
1/4
turn
clockwise.
The
vents can
also be adjusted
to
point
to
any
particular
place in
the
compartment.
The
two
outer
vents can even be used
for
demisting
the
front
door
windows.
OPERATINGINSTRUCTIONS
2 Lighting switch
The
headlights
are
operated
by means
of
a
push-pull
type
switch
on
the
dashboard
as
weil
as
a lever (16)
on
the
steering
column
. (
All
the
lights
are
extinguished
when
the
lighting
switch
is
pushed
fully
in.
Pulling
it
out
to
the
half-way
position,
switches
on
the
parking
lights
, and
when
it
is
fully
out,
the
full
or
dipped
headlights
are
switched
on,
depending
on
the
position
of
the
lever
(16).
Since
the
lighting
system is
not
connected
across
the
ignition
switch
,
the
lights
will
function
irrespective
of
whether
the
igni-
tio
n key is in
position
or
not.
Your
car
is
fitted
with
side
marker
lights.
These are
located
on
the
sides
of
the
mud-
guards
and are
switched
on
by
pulling
out
the
switch
knob
forthe
headlamp
lighting.
7

OPERATING
INSTRUCTIONS
A 8 C D E
J K
3 Instrument panel
A
8
C
D
E
F
G
H
I
J
K
L
M
N
O
8
Odometer
Speedometer
Turn
signal
light
Warning
light,
parking
brake
and
brake
circuit
failure
Mainbeam
warning
light
Warning
light,
parking
brake
and
brake
circuit
failure
Turn
signal
light
Warning
light,
oil pressure
Warning
light
, battery
charging
Trip
odometer
Trip
odometer
reset
knob
Revolution
counter
Coolant
temperature
gauge
Warning
light
,
overdrive
Fuel
gauge
L
F G H
M N o
A Odometer
11213141516
The
odometer
shows
the
total
distance
covered in miles.
After
999999
miles
it re-
turns
to
zero and
starts
to
go
round
again.
parking brake and •. •
D, F Warning lights for .
brake circuit failure : • • ..t
___
.....
80th
these
lights
give
a steady red
light
when
the
parking
brake
is
applied
and
the
ignition
is on.
They
also
function
as
warning
lights
should
a
failure
arise in
one
of
the
brake
circuits.
If
the
lights
go
on
during
driving,
the
ear
should
be driven
without
delay
to
a
work-
shop
for
a
check
on
the
brake
system.
Observe due care when driving under
such conditions.
) H Oil pressure warning light I
This
lights
red
when
the
engine
oil pres-
sure
is
too
low. When
the
ignition
is
switch
ed on,
the
light
should
go
on and
then
go
out
again
when
the
engine
starts.
Never
start
driving
until
the
light
goes
out.
If
the
light
goes
on
during
driving,
stop
the
engine
and
find
out
the
reason
for
this. In
most
cases
it
means
thaf
the
oil level is
too
low.
After
hard
driving
it
may
happen
that
the
warning
light
comes
on
when
the
engine
is
idling.
This
is
normal
providing
it goes out again when engine speed is
increased.

I Warning light, battery charging I
This
Iights
red
when
,
the
battery
is
dis-
charging.
Should
it
light
during
driving,
either
there
is some
fault
in
the
electrical
system
or
the
fan belt is
not
sufficiently
tensioned
and is
thus
slipping
on
the
al-
ternator
pulley,
causing
poor
charging.
J Trip odometer
DmBl;4j
The
trip
odometer
measures
distances
of
up
to
maximum
999 miles.
The
window
furthest
to
the
right
shows
tenths
of
a
mile
and is
therefore
useful
for
measuring
short
distances.
K Trip odometer reset knob
II
The
tri
p
odometer
is reset
to
zero
by
push-
ing in
the
knob
.
L Rev counter
The
rev
cOCJnter
indicates
the
engine
speed
per
minute.
The
amber-colored
area
be-
o
tween
5500
and
6000
rpm covers a
tempo-
rary speed
range
and
can be used,
for
ex-
ample,
for
rapid
acceleration.
]he
speed
range
6000-7000
rpm is
marked
in
solid
red and
must
not
be used.
M Coolant temperature
gauge
TEMP
The
temperature
gauge
shows
the
tem-
perature
of
the
coolant
and
thus
indicates
the
working
temperature
of
the
engine.
The
gauge
pointer
should
normally
remain
within
the
green sector.
During
town
driving
and
idling
when
the
weather
is
particularly
warm,
the
tempe-
rature
gauge
pointer
mayenter
the
solid
amber-colored
field.
Should
the
pointer
repeatedly
point
to
the
red field,
the
coolant
and fan
belt
tension
should
be
checked.
OPERATING
INSTRUCTIONS
N Warning lamp, overdrive
r!~\}1
The
lamp
gives
a steady green
light
when
the
overdrive
is engaged.
Concerning
en-
gaging
and
disengaging
overdrive, see
page
24.
TANK
o Fuel gauge -
The
fuel
gauge
is
graduated
"full",
"half",
"reserve",
and
"empty".
The
red
field
be-
tween
"reserve"
and
"empty"
is a
remind-
er
that
the
tank
should
be
filled
. When
the
gauge
pointer
is
on
"reserve",
there
are
approx.
21/2
US
galls/2
Imp.
galls
(8
liters)
in
the
tank
. '
The
gauge
pointer
registers
when
the
ignition
is
switch
ed
on.
~
9

OPERATING
INSTRUCTIONS
4 Horn
The horn
blows
when
the
pad in
the
center
of
the
steering wheel is pushed in and
the
ignition
has been
switched
on.
5 Combined ignition switch and steering
wheellock
The switch has
four
positions:
(O)
Lock-
ing, (1) Intermediate, (2) Driving and (3)
Starting. The key can be taken
out
of
the
lock
only in
the
Locking position.
The
ignition
switch
is
provided
with
a ,buz-
zer
to
remind
the
driver
should
he
forget
to
10
remove
the
ignition
key
when
his
door
is
opened.
Removing
the
key
automatically
locks
the
steering wheel.
-, With
the
key in
the
Intermediate
position,
the
steering wheel is
not
locked
and some
electrical
components
are
switch
ed on.
To
start
the
engine,
turn
the
key
to
the
Starting
position.
This
engages
the
start-
er
motor.
As soon as
the
engine
starts,
release the key
which
automatically
re-
turns
to
the
Driving
position.
If the car is parked in such a way as to
make
it
difficult to uniock the steering
wheel, unlocking
,--
can
be made easier by
slightly turning the steering wheel one way
and then the other.
l
6 Windshield wiper/washer controi lever
The
windshield
wipers
have
two
speeds.
Moving
the
lever
downwards
one
stage
operates
tl1e
wipers
at
normal
speed.
This
speed is
recommended
for
normal
driving
in rain or snow. Pushing
the
lever
down
fully
operates
the
wipers
at
full
speed.
This
is
recommended
only
when
driving
in hea-
vy rain
or
when
driving
at
high
speed in
the
rain.
The
windshield
washer is
switched
on by
moving
the
controi
lever
towards
the
steer-
ing wheel. The
washer
can be used even
when
the
wipers
are
not
switch
ed on.
The
washer
container
is
located
in the en-
gine
compartment
and holds
about
3
1/4
US
pints/2
3/4
Imp.
pints
(1
1/2
litres).

~
8
Clock
The
clock
is operated electrically.
To
reset
it, push in
the
re-setting
knob
and
turn
the
hands.
12
Parking
brake
~.~
,~
The
parking
brake lever is on
the
outside
of
the
driving
seat and operates on
the
rear wheels
only
. When
the
parking
brake
is applied and the
ignition
is on,'
two
red
warning
lights
(3
D,
F)
show
on
the
instru-
ment
panel.
Remember
that
the
footbrake
warning
sys-
tem is also
connected
to
this
light.
Should
.
the
light
show
when
the
parking
brake
is
not
on,
this
may
be
due
to
a
failure
in
one
of
the
brake
circuits.
If
this
is
the
ca
se,
drive
immediately
(but
with
due
care)
to
a
workshop
for
a
check.
\
14
Fresh-air
controi
Pushing
the
controi
forwards
opens
fresh-air
intake vents on
the
driver's
side.
Note
that
the
fan
should
not
be
operating
if
cool
air
is desired
through
this
intake.
OPERATING
INSTRUCTIONS
15
Hood
release
handle
The
hood
is released by
pulling
out
the
handle
situated
to
the
extreme
lett
under
the
dash. This releases
the
hood
which
is
still held
by
the
safety latch.
The
hood
is opened by
inserting
the
fin-
gers
under
the
front
edge
and pressing
up
the
latch
as
shown
in
the
picture.
11

OPERATING
INSTRUCTIONS
Check
that
it
shuts
properly
when closed.
The
location
of
the
hood
when closed can
be adjusted if necessary by
screwing
in or
out
the
rubber
plugs
underneath
the
hood
at
the
front
end and on
the
mudguards
below
the
windshield.
12
16 Turn
signal
lever,
dimmer and
headlight flasher
The lever on
the
left-hand
side
of
the
steering
column
just
below
the
steering
wheel
controls
the
turn
signals,
dipped
headlights
and
headlight
flasher. The lever
has a
stop
point
for
lane
changing.
This
means
that
with
small
swings
on
the
steer-
ing wheel (when, e.g.,
changing
lanes,
passing, etc.) the lever can be moved
up
or
down
to
this
point
and
kept
there. The
right
or
left
signal
will
then start fIash-
ing. When
the
switch
lever is released, it
automatically
returns
to
its
off
position.
For
normal
swings
on
the
steering wheel,
the
lever is moved past
this
stop
point
to
the
end position.
Straightening
up
the
steering wheel
will
return
the
lever
to
its
off
position.
i"
Switching
from mainbeam
to
dipped
beam
and vice versa is carried
out
by
moving
the lever
towards
the steering wheel and
then releasing it. Here the
lighting
switch
(2)
should
be pulled
fully
out.
The lever is also used
for
flashing
with
mainbeams when
the
headlights
are
not
switched
on
. The
headlight
flasher is
switch
ed
0/1
by
moving
the
lever
towards
the
steering wheel and
it
remains
switch-
ed
on
until
the
lever is released.
17 Rheostat for instrument
panel lighting -
Rotate
knob
clockwise
to
turn
on panel
light
and
counterclockwise
to
dim
it.

18
Cigarette
lighter
•
To
use
the
cigarette
lighter, push it in. The
lighter
releases
automatically
when
it
at-
tains
sufficient
heat.
r-f'-
19
Heater/ventilation
controls
The
heating
system in
this
car
is a
combi-
ned
warm
air
and fresh
air
system. Ven-
tilation
can be
obtained
with
or
without
built-in
air
conditioning.
The
heating
sys-
tem
is
mainly
regulated by
the
controis
on
the
controi
panel in
front
of
the
shift
lever
and also by
the
four
air
vents,
1,
7,
9,
11
on
the
dash.
The
controi
TEMP regulates
the
tempera-
ture
of
the
incoming
air.
To
increase heat,
turn
TEMP
clockwise
(WARM), and
for
cooler
air
turn
counter-
clockwise
(COOL).
The
controi
FAN operates
the
blower
at
three
different
speeds. (It
should
be re-
membered
that
the
maximum
blower
speed is
primarily
intended
to
be used in
combination
with
air
conditioning.)
OPERATINGINSTRUCTIONS
With
the
help
of
the
three push buttons,
FLOOR, DEF. and REC, standard ven-
tilation
adjustments
can be made as
fol-
lows:
No
buttons
pushed
in:
No
air
to
floor
and
little
defroster
effect. However,
air
can also
be
obtained
through
the
four
air
vents.
Only
FLOOR
pushed
in:
Full
air
flow
to
front
and rear
flo
or,
little
defroster.
Only
DEF
pushed
in: No
air
to
floor.
Full defroster.
Push
button
REC
(Recirculation)
is
inten-
ded
to
be
used
in
combination
with
air
conditioning
(extra
equipment)
and
silould
not
be
used
for
heating
up.
13

OPERATING
INSTRUCTIONS
To
get
maximum temperature
rapidly
adjust
TEMP
fully
clockwise
FAN
to
position
2
(only
in
extreme
cases
does
position
3 need
to
be
used)
Only
FLOOR
pushed
in.
Air
can be
distributed
to
the
upper
part
of
the
compartment
by
means
of
the
air
vents.
However
,
this
gives less
defroster.
To
avoid
or
rapidly
remove
mist
inside
the
windows
adjust:
TEMP
fully
clockwise
FAN
to
position
2
(only
in
extreme
cases
does
position
3 need
to
be used)
Only
DEF
pushed
in.
For
best
defroster
effect,
the
middle
air
vents
should
be
closed
and
the
outer
ones
half
open
(for
demisting
the
side
win-
dows).
When
about
to
start
a
car
covered
with
snow,
any
snow
over
the
air
intake
to
the
heater
should
be removed
to
avoid
misting.
14
25 Air Conditioner
The
air
conditioning
is
operated
by means
of
the
ordinary
controls
for
the
heater
and
ventilation
system
as
weil
as
the
switch
marked
Air Cond on
the
controi
panel.
Pushing
in
the
lower
part
of
the
switch
starts
the
air
conditioner
compressor
(of
course
the
car
engine
must
be
running).
To operate the air conditioning:
Switch
on
the
compressor
with
Air Cond.
Adjust
TEMP
to
desired
temperature.
For
rapid
cooling
of
warm
air
turn
TEMP
fully
counterclockwise
.
For
rapid
cooling,
push
in REC. When
a
suitable
temperature
has been
obtained,
REC
does
not
need
to
be
pushed
in.
Select
suitable
blower
speed
with
FAN.
The
best
cooling
effect
is reached by keep-
ing
car
windows
fully
closed
and
with
none
of
the
push
buUons
FLOOR
or
DEF
push-
ed in.
Most
of
the
cooled
air
will
then
enter
the
compartment
through
the
four
air
vents on
the
dash. These
should
then
be
fully
open
.

A
good
tip:
For
rapid
removal
of
mist
on
the
inside
of
the
windows,
the
air
condi-
tioning
can
suitably
be used even at
tem-
peratures
when
cooling
is
not
normally
desired.
This
is
done
by
pushing
in Air
Cond, by
pushing
in REC and by sett-
ing FAN
to
position
3.
Adjust
to
the
desired
temperature
with
TEMP.
Let the
air
conditioning run
for
several mi-
nutes each month, even during the winter-
time, in
order
to lubricate the compressor
seais.
21
Ashtray
To
empty
the
ashtray,
pull
it
straight
out
all
the
way
while
pressing
down
the
tongue
inside.
22 Switch for electrically
heated
rear window
In
order
to
obtain
a
clear
rearview
during
cold
and
damp
weather,
the
car
is
fitted
with
an
electrically
heated rear
window.
Heating is
provided
by
wires
on
the
inside
of
the
rear
window.
Avoid placing anything
near
the wires that might
damage
them.
The
heating
is
switched
on by
pushing
in
the
lower
part
of
the
switch.
This
lights
up
a
warning
lamp
mounted
in
the
switch.
Pushing
in
the
upper
part
of
the
switch
switches
off
the
heating.
Switch
off
the
heating
when
the
rear
win-
dow
is
clear
of
mist
and ice in
order
not
to
overload
the
b,attery
unduly.
""I
23 Switch for emergency
warning flashers
All
four
emergency
warning
lights
start
flashing
when
the
lower
part
of
the
switch
is
pushed
in. A
warning
lamp
mounted
in
the
switch
blinks
in
unison
with
them.
This
warning
light
is
not
wired
across
the
ignition
and
therefore
functions
irrespec-
tive
of
whether
the
ignition
is
switched
on
or
not.
Pushing
in
the
switch
again
puts
out
the
flasher
lights.
The
emergency
warning
lights
should
only
be used
when
the
car
must
be
stopped
where
there
is
danger
to
other
traffic.
Note
that
regulations
concerning
the
use
of
these
lights
may vary
from
place
to
place.
OPERATING
INSTRUCTIONS
26
Seat
belt reminder light I
This
light
goes
on and a signal
starts
buz-
zing
if
the
car
is
driven
without
the
seat
belts
being
fastened
on
the
driver
and
front-seat
passenger.
The
reminder
light
and
warning
buzzer
are
wired
via a
contact
in
the
transmission
and
function
only
when
the
ignition
is
switched
on
and
one
of
the
speeds
1-4
(manual
transmission)
and
1,
2,
D
(automatic
trans-
mission)
are engaged.
The
light
goes
out
and
the
buzzer
stops
buzzing
when
the
driver
and
the
front-seat
passenger
fasten
their
seat belts in
the
locks
between
the
seats.
15

OPERATING
INSTRUCTIONS
INTERIOR
AND
BODY
Front seats
Lumbar support
The
fron
t seats are provided wi
th
an ad-
justable
l
umba
r
suppo
rt. This is operated
by means of the
knob
on the right side of
the backres
t.
To tension the
lumbar
su
p-
po
rt, and thus exert
more
pressure against
the small of the back,
turn
the
knob
cloc
k-
wise
, "
FIRM"
and to relieve the pressure
against the small of the back,
turn
the
knob
an
ti-clockwise, "SOFT
".
16
Backrest adjustment
The f
ront
seat
backrest
is adjusted
with
the lever
on
the
outside
of
the
backrest
(see picture).
Lift
up
the
lever,
adjust
i
to
the desired angle, and
lock
the backrest
there.by
pushing
down
the lever.
The backrest can be
folded
~
backwards
to
a
com
f
ortable
rest or repose angle.
Length and
he
ig
ht adjustment
dri
ver
's
sea
t
The
driver
's seat can be adjusted
for-
wards-backwards
by
lifting
knob
A
up-
wards. Exert leverage
with
your
feet on the
floor
and slide
the
seat
to
the desired
po-
sition.
Adjustment
is made
vertically
by
lifting
catch B
upwards
and then setting the seat
to
one
of
the
four
height
positions.
If
ne-
cessary,
the
seat can then be adjusted
longitudinally
.
The car is deliverea
with
the seat adjusted
for
a person
of
normal
height.
For
any
furth-
er
adjustment
of
the
height
mechanism
,
the
bolt
(C) must
first
be removed.

~
Length and height adjustment
front passenger's seat
The
front
passanger's seat can be
adjust-
ed
forwards-backwards
by pressing
down
latch D
on
the
outside
of
the
seat. Verti-
caliy
the
seat is
adjustable
to
three
dIf-
ferent
positions.
Remove
the
seat
cushion
to
get
to
the
bolts
in
the
seating
bracket.
Remove
the
two
bolts
holding
the
seating
frame
to
the
seating brackets. Place
the
frame
in
the
desired
position
and
refit
the
bolts
in
the
suitable
holes.
In
connection
with
this
adjustment
,
it
may
be
desirable
or
nece~sary
to
adjust
the
inclination
angle
of
the
entire
seat.
This
is
done
with
the
eyelet
bolt
at
the
front
under
the
seat fr·ame. Remove
the
bolt
which
goes
through
the
eyelet
screw
and
fold
the
seat backwards.
Then
release
the
locknut
in
the
flo
or
of
the
car
and
adjust
the
eye-
let
screw
to
the
desired
position.
Re-lock
securely
the
eyelet
screw
with
the
locknut.
OPERATING
INSTRUCTIONS
Head restraints
The
front
seats are
provided
with
adjust-
able head restraints. If
the
head restraint
is
to
fulfil
its
function
properly,
it is
im-
portant
that
it is
correctly
adjusted,
that
is,
it
supports
against
the
head and
against
the
neck.
To
adjust
slacken
the
plastic
nuts
on
the
head
restraints
retainers.
After
adjusting
lock
the head
restraints
by
turn-
ing
the
plastic
nuts
clockwise.
17

OPERATING
INSTRUCTIONS
Seat
belts
Always use
the
seat
belt
for
all types
of
driving
.
Remember
that
it is
possible
even in
slow
city
traffic
to
incur
serious
injury
from
sudden,
unexpected
stopping.
Now
and again
check
that
the
bolts
anchor-
ing
the
belt
are
properly
tightened
and
that
the
belt
is in
good
condition.
Water
mixed
with
some
mild
synthetic
washing
agent
can be used
for
cleaning
the
bel
t.
As
the seat belts lose much of their strength J
when exposed to violent
stret~hing,
they
should be replaced after collision, even
though they may appear to be undamaged.
18
Never
modify
or
repair
the
belt on
your
own,.
but
have
this
done
by a
Volvo
workshop.
Your
car
is
fitted
with
automatically
retract-
ing
inertia
seat belts.
To
fasten
the
belt, pull
out
the
strap
slowly
_
(with
right
hand
for
belt
on
left-hand
side,
with
left
hand
for
belt
on
right-hand
side)
to
pre
iY
ent
the
mechanism
from
locking.
Normally
the
belt
roller
is
"uniocked".
The
roller
will
lock
automatically
if
pulled
out
quickly,
or
if
the
car brakes
or
inclines
to
an
angle
greater
than
10-15
°
or
when
tak-
ing a bend
rather
sharply.
The
practical
design
of
the
belt
makes
it
very easy
to
use. Place
the
belt
with
one
strap over
the
lap and
the
other
across
the
shoulder
-
chest
and fasten it by
pushing
the
buckle
tongue
into
the
slot
of
the
lock-
A
ing
device
located
between
the
front
seats.
A clearly
audible
clicking
sound
indicates
that
the
belt is locked. Make
sure
that
those
parts
of
the
belt
against
the
body
are
not
twisted.
The
belt
is released
from
the
lock
by
pushing
in
the
square
red
button
on
the
lock. Always
make
a
habit
of
letting
the
belt
roller
pull
in
the
belt
strap
when
the
belt is unfastened.
If
the
belts can
not
retract
fully,
this
may
be
due
to
the
fact
that
they are
twisted
in-
side
the
cover
casing.
This
is remedied by
pulling
out
the
belt
fully and then
allow-
ing it
to
be
drawn
into
the
casing.
I
Table of contents
Other Volvo Automobile manuals

Volvo
Volvo 2007 S80 User manual

Volvo
Volvo S40 - ANNEXE 244 Quick start guide

Volvo
Volvo XC60 Twin Engine 2020 User manual

Volvo
Volvo XC70 - ANNEXE 808 User manual

Volvo
Volvo C30 - ANNEXE 798 User manual
Volvo
Volvo XC90 - ANNEXE 951 User manual

Volvo
Volvo 164 User manual

Volvo
Volvo S40 2008 S40 User manual

Volvo
Volvo C30 - ANNEXE 798 User manual

Volvo
Volvo S60 2018 User manual

Volvo
Volvo XC90 - ANNEXE 951 User manual

Volvo
Volvo V50 2004 User manual

Volvo
Volvo 850 Owner's manual

Volvo
Volvo 2008 C30 User manual

Volvo
Volvo 2011 V50 User manual

Volvo
Volvo C30 - ANNEXE 798 User manual

Volvo
Volvo V60 User manual

Volvo
Volvo S90 2018 User manual

Volvo
Volvo XC90 - ANNEXE 951 User manual

Volvo
Volvo 2008 V70 User manual