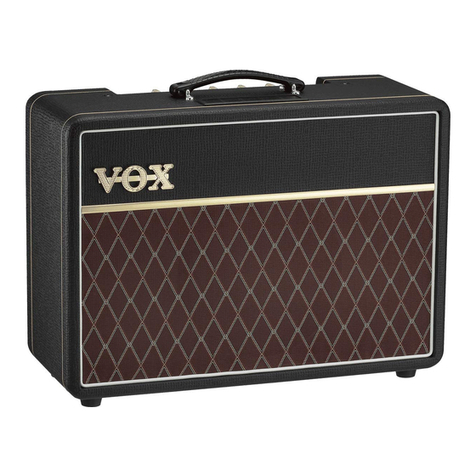
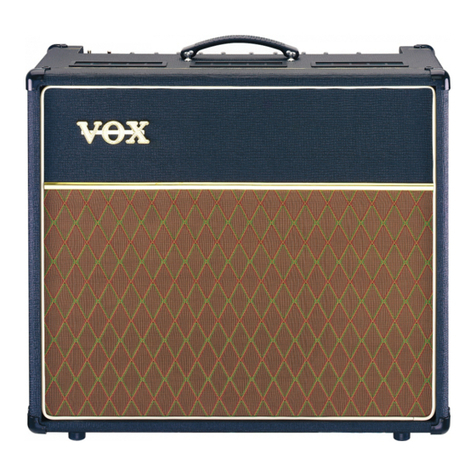
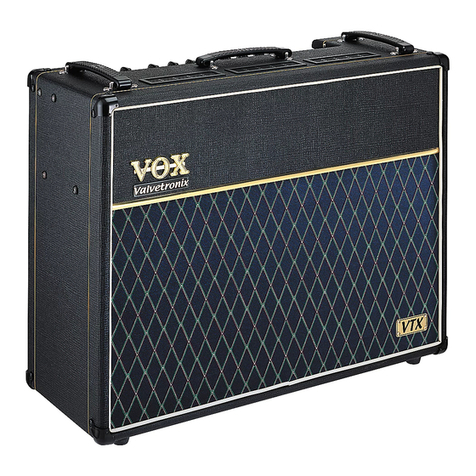
Vox AC30HW60 User manual

E F G J 1


3
English
Introduction .....................................5
Operation Manual ...........................6
Specification ...................................10
Français
Introduction .....................................12
Mode d’emploi .................................13
Fiche technique ..............................17
Deutsche
Vorweg .............................................19
Bedienungsanleitung .....................20
Technische Daten ...........................24
日本語
はじめに
.............................................27
各部の名称と機能
................................28
仕様
...................................................33

4
Thank you for purchasing the VOX AC30HW60/AC15HW60
Guitar Amplifier. To help you get the most out of your new
instrument, please read this manual carefully.
IMPORTANT SAFETY INSTRUCTIONS
•Read these instructions.
•Keep these instructions.
•Heed all warnings.
•Follow all instructions.
•Do not use this apparatus near water.
•Mains powered apparatus shall not be exposed to dripping
or splashing. No objects filled with liquids, such as vases
or drinking glasses, shall be placed on the apparatus.
•Clean only with dry cloth.
•Do not block any ventilation openings. Install in
accordance with the manufacturer’s instructions.
•Do not install near any heat sources such as radiators, heat
registers, stoves, or other apparatus (including amplifiers)
that produce heat.
•WARNING—This apparatus shall be connected to a mains
socket outlet with a protective earthing connection.
•Do not defeat the safety purpose of the polarized or
grounding-type plug. A polarized plug has two blades
with one wider than the other. A grounding type plug has
two blades and a third grounding prong.
The wide blade or the third prong are provided for your
safety. If the provided plug does not fit into your outlet,
consult an electrician for replacement of the obsolete
outlet. (for USA and Canada)
•Protect the power cord from being walked on or pinched,
particularly at plugs, convenience receptacles, and the
point where they exit from the apparatus.
•Only use attachments/accessories specified by the
manufacturer.
•Unplug this apparatus during lightning storms or when
unused for long periods of time.
•Turning off the power switch does not completely isolate
this product from the power line.
•Keep the power plug easily accessible. Do not install this
equipment far from a power outlet and/or power strip.
•Refer all servicing to qualified service personnel. Servicing
is required when the apparatus has been damaged in any
way, such as power-supply cord or plug is damaged,
liquid has been spilled or objects have fallen into the
apparatus, the apparatus has been exposed to rain or
moisture, does not operate normally, or has been dropped.
•Do not install this equipment in a confined space, such as a
moving box or other enclosure.
•Excessive sound pressure from earphones and headphones
can cause hearing loss.
•Use only with the cart, stand, tripod, bracket, or table
specified by the manufacturer, or sold with the apparatus.
When a cart is used, use caution when moving the cart/
apparatus combination to avoid injury from tip-over.
•The ventilation should not be impeded by covering the
ventilation openings with items, such as newspapers,
table-cloths, curtains, etc.
•No naked flame sources, such as lighted candles, should
be placed on the apparatus.
The lightning flash with arrowhead symbol,
within an equilateral triangle, is intended to
alert the user to the presence of uninsulated
“dangerous voltage” within the product’s
enclosure that may be of sufficient magnitude
to constitute a risk of electric shock to persons.
The exclamation point within an equilateral
triangle is intended to alert the user to the
presence of important operating and
maintenance (servicing) instructions in the
literature accompanying the product.
* All product names and company names are the trademarks
or registered trademarks of their respective owners.
Notice regarding disposal (EU only)
When this “crossed-out wheeled bin” symbol is
displayed on the product, owner’s manual, battery,
or battery package, it signifies that when you wish to
dispose of this product, manual, package or battery
you must do so in an approved manner. Do not
discard this product, manual, package or battery
along with ordinary household waste. Disposing in
the correct manner will prevent harm to human health and
potential damage to the environment. Since the correct
method of disposal will depend on the applicable laws and
regulations in your locality, please contact your local
administrative body for details. If the battery contains heavy
metals in excess of the regulated amount, a chemical symbol
is displayed below the “crossed-out wheeled bin” symbol on
the battery or battery package.

5
Introduction
60 years? 60 years! 2017 Marks 60 years since VOX was created back in Dartford by Dick Denney and Tom Jen-
nings. It makes us proud to be part of this history and to carry on the legacy that was left behind by our forefathers.
As a celebration of our 60th Anniversary we have produced something we’re sure both Dick and Tom would be
proud of…
a Limited Edition UK made Hand-wired AC30 and AC15!
Choosing from the most revered amps in our history, we have recreated a 1964 AC30/6 with Top Boost and a 1957
AC15/4 with the oh so sweet sounding EF86 Normal channel.
The 6 input AC30WH60 features 3 channels, Normal, Brilliant (Top Boost) and Vib/Trem. The Normal Channel has
a Volume control, whilst the Brilliant Channel features a Volume control, Treble and Bass Tone controls. The Vib/
Trem channel features a Volume control, Vib/Trem switch and a Speed switch. The Vib/Trem effect can be disabled
with the included “Egg” footswitch.
The 4 input AC15HW60 features 2 channels, Normal and Vib/Trem. The Normal Channel has a Volume control and
Brilliance switch. The Vib/Trem channel features a Volume control, Vib/Trem switch and a speed switch. The Vib/
Trem effect can be disabled with the included “Egg” footswitch.
The VOX Vib/Trem channel remains true to the original designs from way back in the 60’s, and both amplifiers are
painstakingly designed and hand-crafted right here in our UK factory.
There has been no compromise... from Baltic Birch ply cabinet construction, to beautiful hand wiring, to UK made
transformers. This is the ultimate tribute to the amplifiers that have made it possible for future generations to hear
and feel the VOX sound.
We have no doubt that these will join their grandfathers in the VOX hall of fame.
Enjoy!
VOX R&D Team

6
Operation Manual
AC30HW60 Front Panel
INPUT Jack Sockets
1. VIB/TREM INPUT
Guitar input jacks for the VIB/TREM channel. The ‘HIGH’ input will give you more gain and output volume
whereas the ‘LOW’ input will be quieter and have more clean headroom.
2. NORMAL INPUT
Guitar input jacks for the NORMAL channel. The ‘HIGH’ input will give you more gain and output volume
whereas the ‘LOW’ input will be quieter and have more clean headroom.
3. BRILLIANT INPUT
Guitar input jacks for the BRILLIANT channel. The ‘HIGH’ input will give you more gain and output volume
whereas the ‘LOW’ input will be quieter and have more clean headroom.
VIBRATO Controls
4. SPEED Control
This controls the speed of the Vibrato/Tremolo effect. There are 3 settings, All the way left is Slow, Middle is
medium speed and all the way right is fast speed.
5. VIB TREM Control
This controls whether the effect is Vibrato (Pitch Modulation) or Tremolo (Amplitude modulation). All the way
left is Vibrato and all the way right is Tremolo.
NOTE!
Pop noise may occur when switching between Vibrato and Tremolo.
VOLUME Controls
6. VIB/TREM VOLUME Control
This controls the VIB/TREM channel pre-amp volume. Turn clockwise for more gain.
7. NORMAL VOLUME Control
This controls the NORMAL channel pre-amp volume. Turn clockwise for more gain.
8. BRILLIANT VOLUME Control
This controls the BRILLIANT channel pre-amp volume. Turn clockwise for more gain.
NOTE!
Because of the nature of the design of this amplifier, it may take a few minutes until the circuit
becomes stable after the power is turned on. Some noise might occur during this time but it soon disappears.

7
TONE CONTROLS
9. TREBLE Control
This controls the high frequencies in your sound—from soft and smooth when turned down (counter clock-
wise) to bright and cutting when cranked (clockwise) and all points in-between.
NOTE!
The TREBLE Control only works with the BRILLIANT Channel.
10. BASS Control
This controls the low frequencies in your sound—from thin and light when turned down (counter clock- wise)
to warm and heavy when turned up full (clockwise) and all points in-between.
NOTE!
The BASS Control only works with the BRILLIANT Channel.
11. CUT Control
This circuit is placed in the power amp as opposed to the pre-amp section like the TREBLE and BASS con-
trols. What this does is the opposite of what you may expect. Turning it clockwise will decrease the higher fre-
quencies. Use in conjunction with the TREBLE control to fine tune the high end of your sound.
OUTPUT Section
12. POWER Switch
This is the ON/OFF switch for the amplifier. Please ensure the amplifier is switched off and unplugged be-
fore being moved.
NOTE!
Pop noise may occur if you turn off the power.
AC15HW60 Front Panel
INPUT Jack Sockets
1. VIB/TREM INPUT
Guitar input jacks for the VIB/TREM channel. The ‘HIGH’ input will give you more gain and output volume
whereas the ‘LOW’ input will be quieter and have more clean headroom.
2. NORMAL INPUT
Guitar input jacks for the NORMAL channel. The ‘HIGH’ input will give you more gain and output volume
whereas the ‘LOW’ input will be quieter and have more clean headroom.

8
VIBRATO Controls
3. SPEED Control
This controls the speed of the Vibrato/Tremolo effect. There are 3 settings, All the way left is Slow, Middle is
medium speed and all the way right is fast speed.
4. VIB TREM Control
This controls whether the effect is Vibrato (Pitch Modulation) or Tremolo (Amplitude modulation). All the way
left is Vibrato and all the way right is Tremolo.
NOTE!
Pop noise may occur when switching between Vibrato and Tremolo.
VOLUME Controls
5. VIB/TREM VOLUME Control
This controls the VIB/TREM channel pre-amp volume. Turn clockwise for more gain.
6. NORMAL VOLUME Control
This controls the NORMAL channel pre-amp volume. Turn clockwise for more gain.
NOTE!
Because of the nature of the design of this amplifier, it may take a few minutes until the circuit
becomes stable after the power is turned on. Some noise might occur during this time but it soon disappears.
TONE CONTROLS
7. BRILLIANCE Control
This controls how bright the NORMAL channel sounds, this is achieved by cutting the low frequencies rather
that boosting the high frequencies.
NOTE!
This only affects the NORMAL Channel.
8. CUT Control
This circuit is placed in the power amp as opposed to the pre-amp section like the TREBLE and BASS con-
trols. What this does is the opposite of what you may expect. Turning it clockwise will decrease the higher fre-
quencies. Use in conjunction with the TREBLE control to fine tune the high end of your sound.
OUTPUT Section
9. POWER Switch
This is the ON/OFF switch for the amplifier. Please ensure the amplifier is switched off and unplugged be-
fore being moved.
NOTE!
Pop noise may occur if you turn off the power.

9
Rear Panel
1. POWER OUTPUT jacks
This is where you can hook up an extension or external speaker cabinet(s) if desired.
16 OHM Speaker jack
Use this to connect the AC30HW60/AC15HW60 to internal speaker or any 16 ohm Cabinet.
8 OHM Speaker jacks
Use these to connect the AC30HW60/AC15HW60 to one 8 ohm Cabinet, or internal speaker and 16 ohm
Cabinets.
WARNING!
To ensure that your system works correctly, you must observe the following points.
a) If using a 16ohm extension cabinet, both the internal speaker and the external cabinet must be con-
nected to the 8 ohm jacks.
b) Don’t connect a speaker whose rated input capacity is less than 30 watts (for AC30HW60) or 15 watts
(AC15HW60). The speaker may be destroyed if you ignore this caution—not recommended!
c) You must use a speaker cable to connect an external speaker. Don’t use a shielded cable like the one
you use to connect a guitar to an amp.
d) You must turn off the power before connecting the speaker cable. Connecting the cable while the power
is turned on may damage your amp.
e) When turning the power on, the speaker(s) need to be connected or damage to the amplifier can occur.
NOTE!
It is recommended that all audio cables (with the exception of the speaker lead), used to connect to
the AC30HW60/AC15HW60 are of a high quality, screened type. These should not exceed 10 metres in
length.
2. FOOT SWITCH jack
This is where you connect the included “Egg” Foot Switch to switch the VIB/TREM Effect On and OFF.
3. MAINS INPUT connector
This is where the supplied, detachable Mains (power) cord is connected. The specific mains input voltage rat-
ing that your amplifier needs to run at is located on the rear panel of your amplifier. Before making any con-
nections or powering up the amplifier, make sure the correct voltage is set. If you have any doubt, refer to
your local VOX dealer.

10
Specification
AC30HW60:
AC15HW60:
*Specifications and appearance are subject to change without notice for improvement.
· Operating conditions 0°C–+35°C (no condensation)
· Dimensions (W x D x H) 703 x 263 x 575 mm / 27.68 x 10.35 x22.64 inches
· Weight 33.5kg / 73.85lbs.
· Output power 30 Watts RMS into 8/16 Ohms
· Tube complement 5 x ECC83/12AX7, 1 x ECC82/12AU7, 4 x EL84, 1 x GZ34
· Speakers 2 x 12” 8 Ohm Celestion Alnico Silver
· Inputs VIB/TREM INPUT Jack (HIGH and LOW), NORMAL INPUT Jack (HIGH
and LOW), BRILLIANT INPUT Jack (HIGH and LOW), FOOT SWITCH
Jack
· Outputs 3 x POWER OUTPUT Jacks
· Included items Power cord, Owner's manual, “Egg” foot switch, Dust cover
· Operating conditions 0°C–+35°C (no condensation)
· Dimensions (W x D x H) 533 x 278 x 575 mm / 20.98 x 10.94 x 22.64 inches
· Weight 24.0kg / 52.91lbs.
· Output power 15 Watts RMS into 8/16 Ohms
· Tube complement 1 x EF86, 3 x ECC83/12AX7, 1 x ECC82/12AU7, 2 x EL84, 1 x EZ81
· Speakers 1 x 12” 16 Ohm Celestion Alnico Silver
· Inputs VIB/TREM INPUT Jack (HIGH and LOW), NORMAL INPUT Jack (HIGH
and LOW), FOOT SWITCH Jack
· Outputs 3 x POWER OUTPUT Jacks
· Included items Power cord, Owner's manual, “Egg” foot switch, Dust cover

11
Merci d’avoir choisi l'amplificateur de guitare AC30HW60/
AC15HW60 de VOX. Afin de pouvoir exploiter au mieux
toutes les possibilités offertes par l’instrument, veuillez lire
attentivement ce manuel.
CONSIGNES IMPORTANTES DE SÉCURITÉ
•Veuillez lire ces consignes.
•Conservez ces consignes.
•Tenez compte de tous les avertissements.
•Suivez toutes les instructions.
•N’utilisez pas ce produit à proximité d’eau.
•Un produit branché au secteur ne peut pas être exposé à
des gouttes ou des éclaboussures. Ne placez aucun
conteneur de liquide (vase, verre) sur le produit.
•Nettoyez le produit avec un chiffon sec uniquement.
•N’obstruez aucun orifice d’aération. Installez le produit
conformément aux consignes du fabricant.
•Ne l’installez pas à proximité de sources de chaleur
comme des radiateurs, des bouches d’air chaud, des poêles
ou d’autres appareils générateurs de chaleur
(amplificateurs compris).
•AVERTISSEMENT—Ce produit doit être branché à une
prise secteur disposant d’une connexion de sécurité à la
terre.
•Ne supprimez pas la sécurité offerte par la fiche polarisée
ou dotée d’une broche de terre. Une fiche polarisée dispose
de deux lames dont une plus large que l’autre. Une fiche
avec broche de terre dispose de deux lames (ou broches) et
d’une broche de terre. La lame plus large ou la troisième
broche est conçue pour votre sécurité. Si la fiche fournie ne
s’adapte pas à votre prise de courant, consultez un
électricien pour faire remplacer cette ancienne prise. (Pour
les États-Unis et le Canada)
•Protégez le cordon d’alimentation pour éviter qu’il ne soit
piétiné ou abîmé notamment à la hauteur des fiches, des
rallonges et au point de connexion du produit.
•Utilisez exclusivement des fixations ou accessoires
spécifiés par le fabricant.
•Débranchez cet appareil en cas d’orage ou s’il doit rester
inutilisé durant une période assez longue.
•Le fait de couper l’interrupteur n’isole pas complètement
le produit de la source de courant.
•Maintenez un accès facile à la prise d’alimentation.
N’installez pas ce produit trop loin d’une prise secteur et/
ou d’un multiprise.
•Pour tout dépannage ou entretien, veuillez consulter un
service ou un technicien qualifié. Il est impératif de faire
appel à un technicien qualifié si l’appareil a été endommagé
d’une quelconque façon, notamment, si le cordon
d’alimentation ou la fiche est endommagée, si du liquide
s’est renversé ou si des objets sont tombés dans l’appareil, si
l’appareil a été exposé à la pluie ou à l’humidité, s’il ne
fonctionne plus normalement ou s’il est tombé.
•N’installez pas ce produit dans un espace confiné comme
un flightcase ou autre meuble de ce type.
•Une pression sonore excessive en provenance d’oreillettes
ou d’un casque peut entraîner une perte auditive.
•Utilisez cet appareil exclusivement avec un chariot, stand,
pied, support ou table du type spécifié par le constructeur
ou livré avec l’appareil. Si vous utilisez un chariot, soyez
prudent lors de son déplacement afin d’éviter que le
produit ne bascule et ne blesse quelqu’un.
•Veillez à ce qu’aucun objet comme des journaux, des
tentures, une nappe, etc. ne bloque les orifices de
ventilation.
•Ne posez jamais aucune source de flamme nue, telle
qu’une bougie allumée, sur l’appareil.
Le symbole d’éclair dans un triangle
équilatéral est destiné à avertir l’utilisateur
de la présence d’une tension dangereuse
non isolée au sein du produit. Cette tension
est suffisante pour constituer un risque
d’électrocution.
Le point d’exclamation dans un triangle
équilatéral avertit l’utilisateur de la
présence d’importantes consignes de
manipulation ou d’entretien dans la
documentation accompagnant ce produit.
* Tous les noms de produits et de societes sont des marques
commerciales ou deposees de leur detenteur respectif.
Note concernant les dispositions (Seulement EU)
Quand un symbole avec une poubelle barrée d’une
croix apparait sur le produit, le mode d’emploi, les
piles ou le pack de piles, cela signifie que ce
produit, manuel ou piles doit être déposé chez un
représentant compétent, et non pas dans une
poubelle ou toute autre déchetterie
conventionnelle. Disposer de cette manière, de
prévenir les dommages pour la santé humaine et les
dommages potentiels pour l’environnement. La bonne
méthode d’élimination dépendra des lois et règlements
applicables dans votre localité, s’il vous plaît, contactez
votre organisme administratif pour plus de détails. Si la
pile contient des métaux lourds au-delà du seuil
réglementé, un symbole chimique est affiché en dessous
du symbole de la poubelle barrée d’une croix sur la pile ou
le pack de piles.

12
Introduction
60 ans? 60 ans! 2017 marque les 60 ans de VOX, fondée à Dartford par Dick Denney et Tom Jennings. Nous
sommes fiers de faire partie de cette histoire et de poursuivre cette formidable aventure démarrée par nos prédé-
cesseurs.
Pour fêter dignement ce 60e anniversaire, nous avons créé un produit qui aurait fait à n’en pas douter la fierté de
Dick et Tom…
Une édition limitée de l’AC30 et de l’AC15, câblée à la main au Royaume-Uni!
Nous inspirant des modèles d’ampli les plus légendaires qui ont jalonné notre histoire, nous avons recréé un
AC30/6 avec circuit Top Boost de 1964 et un AC15/4 avec le son phénoménal de son canal Normal à lampe EF86
de 1957.
L’AC30WH60 à 6 entrées offre 3 canaux: Normal, Brilliant (Top Boost) et Vib/Trem. Le canal Normal dispose d’une
commande Volume et le canal Brilliant d’une commande Volume et de commandes de timbre (Treble et Bass). Le
canal Vib/Trem comporte une commande Volume, un commutateur Vib/Trem et une commande Speed contrôlant
la vitesse de l’effet. L’effet de vibrato/trémolo peut être activé et coupé via le commutateur au pied inclus et joliment
surnommé “Egg” en raison de sa forme rappelant un œuf.
L’AC15HW60 à 4 entrées offre 2 canaux: Normal et Vib/Trem. Le canal Normal dispose d’une commande Volume
et d’un commutateur Brilliance. Le canal Vib/Trem inclut une commande Volume, un commutateur Vib/Trem et une
commande Speed contrôlant la vitesse de l’effet. L’effet de vibrato/trémolo peut être activé et coupé via le commu-
tateur au pied inclus et joliment surnommé “Egg” en raison de sa forme rappelant un œuf.
Le canal VOX Vib/Trem est fidèle au design des modèles originaux des années 1960, et tant l’élaboration rigou-
reuse que la fabrication artisanale de ces deux amplis se font dans notre usine ici au Royaume-Uni.
Nous n’avons fait aucun compromis, qu’il s’agisse de la construction du caisson en contreplaqué de bouleau bal-
tique, du câblage réalisé à la main (de maître) ou des transformateurs “Made in the UK”. C’est tout simplement
notre vibrant hommage à ces amplificateurs qui ont permis aux générations futures de découvrir et de ressentir le
son VOX.
Nous sommes sûrs que leur nom ira résonner avec celui de leurs ancêtres dans le “Hall of Fame” de VOX.
Bon amusement!
L’équipe R&D de VOX

13
Mode d’emploi
Panneau avant de l’AC30HW60
Prises d’entrée INPUT
1. VIB/TREM INPUT
Prises d’entrée guitare pour le canal VIB/TREM. L’entrée ‘HIGH’ génère davantage de gain et de volume de
sortie, tandis que l’entrée ‘LOW’ est de niveau plus ‘sage’ et offre davantage de réserve de son clair.
2. NORMAL INPUT
Prises d’entrée guitare pour le canal NORMAL. L’entrée ‘HIGH’ génère davantage de gain et de volume de
sortie, tandis que l’entrée ‘LOW’ est de niveau plus ‘sage’ et offre davantage de réserve de son clair.
3. BRILLIANT INPUT
Prises d’entrée guitare pour le canal BRILLIANT. L’entrée ‘HIGH’ génère davantage de gain et de volume de
sortie, tandis que l’entrée ‘LOW’ est de niveau plus ‘sage’ et offre davantage de réserve de son clair.
Commandes VIBRATO
4. Commande SPEED
Contrôle la vitesse de l’effet de vibrato/trémolo. Cette commande offre 3 vitesses différentes: lente (à fond à
gauche), intermédiaire (position centrale) et rapide (à fond à droite).
5. Commande VIB TREM
Cette commande permet de choisir entre l’effet de vibrato (modulation de hauteur) ou trémolo (modulation d’ampli-
tude). À fond à gauche, cette commande sélectionne l’effet Vibrato; à fond à droite, elle active l’effet Tremolo.
REMARQUE!
Vous pourriez remarquer un craquement quand vous alternez entre les effets Vibrato et Tremolo.
Commandes VOLUME
6. Commande VIB/TREM VOLUME
Cette commande contrôle le volume du préampli du canal VIB/TREM. Tournez la commande à droite pour
augmenter le gain.
7. Commande NORMAL VOLUME
Cette commande contrôle le volume du préampli du canal NORMAL. Tournez la commande à droite pour
augmenter le gain.

14
8. Commande BRILLIANT VOLUME
Cette commande contrôle le volume du préampli du canal BRILLIANT. Tournez la commande à droite pour
augmenter le gain.
REMARQUE!
En raison du design même de cet amplificateur, il se pourrait qu’il faille plusieurs minutes pour
que le circuit se stabilise après la mise sous tension. Vous pourriez remarquer du bruit après la mise sous
tension, mais il disparaîtra rapidement.
Commandes TONE
9. Commande TREBLE
Contrôle la plage de l’aigu de votre son: tournée à gauche, elle produit un son doux et rond; tournée à droite,
elle génère un son cinglant et brillant (avec toutes les variations sonores intermédiaires).
REMARQUE!
La commande TREBLE fonctionne uniquement avec le canal BRILLIANT.
10. Commande BASS
Contrôle la plage du grave de votre son: tournée à gauche, elle produit un émincé et léger; tournée à fond à
droite, elle génère un son à la fois chaud et lourd (avec toutes les variations sonores intermédiaires).
REMARQUE!
La commande BASS fonctionne uniquement avec le canal BRILLIANT.
11. Commande CUT
Ce circuit est incorporé dans l’ampli de puissance, contrairement aux commandes TREBLE et BASS de la section
préampli. Cette commande produit l’effet inverse de ce que vous pourriez anticiper. Tournée à droite, cette com-
mande atténue l’aigu. Utilisez-la en conjonction avec la commande TREBLE pour peaufiner l’aigu de votre son.
Section OUTPUT
12. Commutateur POWER
Utilisez-le pour mettre l’ampli sous tension/hors tension. Vérifiez que l’amplificateur est hors tension et
débranché du secteur avant de le déplacer.
REMARQUE!
Vous pourriez remarquer un craquement quand vous mettez l’amplificateur hors tension.
Panneau avant de l’AC15HW60
Prises d’entrée INPUT
1. VIB/TREM INPUT
Prises d’entrée guitare pour le canal VIB/TREM. L’entrée ‘HIGH’ génère davantage de gain et de volume de
sortie, tandis que l’entrée ‘LOW’ est de niveau plus ‘sage’ et offre davantage de réserve de son clair.

15
2. NORMAL INPUT
Prises d’entrée guitare pour le canal NORMAL. L’entrée ‘HIGH’ génère davantage de gain et de volume de
sortie, tandis que l’entrée ‘LOW’ est de niveau plus ‘sage’ et offre davantage de réserve de son clair.
Commandes VIBRATO
3. Commande SPEED
Contrôle la vitesse de l’effet de vibrato/trémolo. Cette commande offre 3 vitesses différentes: lente (à fond à
gauche), intermédiaire (position centrale) et rapide (à fond à droite).
4. Commande VIB TREM
Cette commande permet de choisir entre l’effet de vibrato (modulation de hauteur) ou trémolo (modulation d’ampli-
tude). À fond à gauche, cette commande sélectionne l’effet Vibrato; à fond à droite, elle active l’effet Tremolo.
REMARQUE!
Vous pourriez remarquer un craquement quand vous alternez entre les effets Vibrato et Tremolo.
Commandes VOLUME
5. Commande VIB/TREM VOLUME
Cette commande contrôle le volume du préampli du canal VIB/TREM. Tournez la commande à droite pour
augmenter le gain.
6. Commande NORMAL VOLUME
Cette commande contrôle le volume du préampli du canal NORMAL. Tournez la commande à droite pour
augmenter le gain.
REMARQUE!
En raison du design même de cet amplificateur, il se pourrait qu’il faille plusieurs minutes pour
que le circuit se stabilise après la mise sous tension. Vous pourriez remarquer du bruit après la mise sous
tension, mais il disparaîtra rapidement.
Commandes TONE
7. Commande BRILLIANCE
Cette commande règle la clarté du son du canal NORMAL. Ce réglage s’effectue en atténuant le grave plutôt
qu’en accentuant l’aigu.
REMARQUE!
La commande BRILLIANCE fonctionne uniquement avec de canal NORMAL.
8. Commande CUT
Ce circuit est incorporé dans l’ampli de puissance, contrairement aux commandes TREBLE et BASS de la
section préampli. Cette commande produit l’effet inverse de ce que vous pourriez anticiper. Tournée à droite,
cette commande atténue l’aigu. Utilisez-la en conjonction avec la commande TREBLE pour peaufiner l’aigu
de votre son.
Section OUTPUT
9. Commutateure POWER
Utilisez-le pour mettre l’ampli sous tension/hors tension. Vérifiez que l’amplificateur est hors tension et
débranché du secteur avant de le déplacer.
REMARQUE!
Vous pourriez remarquer un craquement quand vous mettez l’amplificateur hors tension.

16
Panneau arrière
1. Prises POWER OUTPUT
Ces prises permettent de brancher une enceinte d’extension ou des enceintes externes.
Prise 16 OHM pour haut-parleur
Permet de brancher l’AC30HW60/AC15HW60 à son haut-parleur interne ou à toute enceinte de 16 ohms.
Prises 8 OHM pour haut-parleur
Permettent de brancher l’AC30HW60/AC15HW60 à une enceinte de 8 ohms, au haut-parleur interne ou à
des enceintes de 16 ohms.
AVERTISSEMENT!
Pour que votre système fonctionne correctement, respectez les points suivants.
a) Quand vous utilisez une enceinte d’extension de 16 ohms, vous devez veiller à connecter le haut-parleur
interne et l’enceinte externe aux prises 8 OHM.
b) Ne branchez pas d’enceinte dont la capacité d’entrée nominale est inférieure à 30W (pour l’AC30HW60)
ou 15W (pour l’AC15HW60). Si vous ignorez cette précaution, vous risquez d’endommager irrémédiable-
ment le haut-parleur. Prudence!
c) Vous devez utiliser un câble d’enceinte pour brancher une enceinte externe. Ne vous servez pas de
câbles blindés comme ceux utilisés pour brancher une guitare à un ampli.
d) Mettez l’ampli hors tension avant de brancher le câble d’enceinte. Brancher le câble sans mettre l’ampli
hors tension pourrait endommager ce dernier.
e) La ou les enceintes doivent être branchées avant la mise sous tension de l’ampli, sans quoi ce dernier
risque d’être endommagé.
REMARQUE!
Tous les câbles audio (à l’exception du câble d’enceinte) utilisés pour la connexion à
l’AC30HW60/AC15HW60 doivent être de qualité supérieure et de type blindé. Leur longueur ne peut pas
dépasser 10 mètres.
2. Prise FOOT SWITCH
Branchez ici le commutateur au pied fourni pour activer et couper l’effet VIB/TREM.
3. Prise MAINS INPUT
Branchez ici le cordon d’alimentation secteur fourni avec l’ampli. La tension appropriée pour alimenter votre
amplificateur est indiquée sur son panneau arrière. Avant d’effectuer toute connexion et de mettre l’ampli
sous tension, vérifiez que la tension est correcte. En cas de doute, contactez votre revendeur VOX.

17
Fiche technique
AC30HW60:
AC15HW60:
*Les caractéristiques et l’aspect du produit sont susceptibles d’être modifiés sans avis préalable en vue d’une
amélioration.
· Conditions de fonctionnement
0°C~+35°C (sans condensation)
· Dimensions (L x P x H) 703 x 263 x 575mm
· Poids 33,5kg
· Puissance de sortie 30W RMS sous 8/16Ω
· Lampes 5 x ECC83/12AX7, 1 x ECC82/12AU7, 4 x EL84, 1 x GZ34
· Haut-parleurs Celestion Alnico Silver 2 x 12” 8Ω
· Entrées Prises VIB/TREM INPUT (HIGH et LOW), Prises NORMAL INPUT (HIGH
et LOW), Prises BRILLIANT INPUT (HIGH et LOW), Prise FOOT SWITCH
· Sorties 3 prises POWER OUTPUT
· Livré avec Cordon d’alimentation, Manuel d’utilisation, Pédale “Egg”, Housse anti-
poussière
·
Conditions de fonctionnement
0°C~+35°C (sans condensation)
· Dimensions (L x P x H) 533 x 278 x 575 mm / 20.98 x 10.94 x 22.64 inches
· Poids 24,0kg
· Puissance de sortie 15W RMS sous 8/16Ω
· Lampes 1 x EF86, 3 x ECC83/12AX7, 1 x ECC82/12AU7, 2 x EL84, 1 x EZ81
· Haut-parleurs Celestion Alnico Silver 1 x 12” 16Ω
· Entrées Prises VIB/TREM INPUT (HIGH et LOW), Prises NORMAL INPUT (HIGH
et LOW), Prise FOOT SWITCH
· Sorties 3 prises POWER OUTPUT
· Livré avec Cordon d’alimentation, Manuel d’utilisation, Pédale “Egg”, Housse anti-
poussière

18
Vielen Dank, dass Sie sich für einen AC30HW60/AC15HW60
Gitarrenverstärkers von VOX entschieden haben. Bitte lesen
Sie sich diese Anleitung vollständig durch, um bei der
Bedienung alles richtig zu machen.
WICHTIGE SICHERHEITSHINWEISE
•Bitte lesen Sie sich die Hinweise durch.
•Bewahren Sie diese Hinweise auf.
•Befolgen Sie alle Warnungen.
•Führen Sie alle Anweisungen aus.
•Verwenden Sie das Gerät niemals in der Nähe von Wasser.
•Ein netzgespeistes Gerät darf niemals Regen- oder
Wassertropfen ausgesetzt werden. Außerdem darf man
keine Flüssigkeitsbehälter wie Vasen, Gläser usw. auf das
Gerät stellen.
•Reinigen Sie es nur mit einem trockenen Tuch.
•Versperren Sie niemals die Lüftungsschlitze. Stellen Sie
das Gerät nur den Herstelleranweisungen entsprechend
auf.
•Stellen Sie das Gerät niemals in die Nähe von
Wärmequellen wie Heizkörper, Öfen bzw. Geräte
(darunter auch Verstärker), die ausgesprochen heiß
werden.
•WARNUNG—Dieses Gerät darf nur an eine geerdete
Steckdose angeschlossen werden.
•Versuchen Sie niemals, die Erdung des Netzkabels zu
umgehen. Ein polarisierter (englischer) Stecker weist zwei
unterschiedlich breite Stifte auf. Ein geerdeter Stecker ist
hingegen mit drei Stiften versehen. Der Erdungsstift dient
Ihrer Sicherheit. Wenn der beiliegende Stecker nicht in Ihre
Steckdose passt, bitten Sie einen Elektriker, diese zu
ersetzen. (Für die USA und Kanada.)
•Sorgen Sie dafür, dass das Netzkabel nicht gequetscht
wird (was vor allem in der Nähe des Steckers passieren
kann) und dass man nicht darüber stolpern kann.
•Verwenden Sie nur Halter und Ständer, die ausdrücklich
vom Hersteller empfohlen werden.
•Lösen Sie im Falle eines Gewitters oder wenn das Gerät
längere Zeit nicht verwendet werden soll, den
Netzanschluss.
•Auch nach dem Ausschalten bleibt die Netzverbindung
dieses Gerätes bestehen.
•Sorgen Sie dafür, dass man den Netzstecker jederzeit
problemlos erreichen kann. Stellen Sie das Gerät niemals
weit von der Steckdose/Anschlussleiste entfernt auf.
•Überlassen Sie alle Wartungsarbeiten einem qualifizierten
und befugten Techniker. Das ist z.B. notwendig, wenn das
Produkt Schäden aufweist (z.B. beschädigtes Netzkabel,
Eintritt von Flüssigkeit oder Fremdkörpern, wenn das
Gerät im Regen gestanden hat), sich nicht
erwartungsgemäß verhält oder hingefallen ist.
•Dieses Gerät darf sich während des Betriebs nicht in einem
geschlossenen Behälter/einem Flightcase befinden.
•Ein hoher Schalldruck kann bei Verwendung von
Ohrhörern bzw. eines Kopfhörers zu einem bleibenden
Hörschaden führen.
•Verwenden Sie nur Wagen, Ständer, Halterungen usw.,
die vom Hersteller vertrieben oder empfohlen werden. Bei
Verwendung eines Wagens ist darauf zu achten, dass er
während des Transports nicht umkippt.The battery shall
not be exposed to excessive heat such as sunshine, fire or
the like.
Der Blitz in einem gleichwinkligen Dreieck
bedeutet, dass das Gerät nicht-isolierte
Spannungen erzeugt, die einen Stromschlag
verursachen können.
Das Ausrufezeichen in einem
gleichwinkligen Dreieck soll den Anwender
auf wichtige Bedienhinweise aufmerksam
machen, die in der beiliegenden
Dokumentation enthalten sind.
* Alle Produkt- und Firmennamen sind Warenzeichen oder
eingetragene Warenzeichen der betreffenden Eigentümer.
Hinweis zur Entsorgung (Nur EU)
Wenn Sie das Symbol mit der „durchgekreuzten
Mülltonne“ auf Ihrem Produkt, der dazugehörigen
Bedienungsanleitung, der Batterie oder dem
Batteriefach sehen, müssen Sie das Produkt in der
vorgeschriebenen Art und Weise entsorgen. Dies
bedeutet, dass dieses Produkt mit elektrischen und
elektronischen Komponenten nicht mit dem
normalen Hausmüll entsorgt werden darf. Für Produkte
dieser Art existiert ein separates, gesetzlich festgelegtes
Entsorgungssystem. Gebrauchte elektrische und
elektronische Geräte müssen separat entsorgt werden, um
ein umweltgerechtes Recycling sicherzustellen. Diese
Produkte müssen bei benannten Sammelstellen abgegeben
werden. Die Entsorgung ist für den Endverbraucher
kostenfrei! Bitte erkundigen sie sich bei ihrer zuständigen
Behörde, wo sie diese Produkte zur fachgerechten
Entsorgung abgeben können. Falls ihr Produkt mit
Batterien oder Akkumulatoren ausgerüstet ist, müssen sie
diese vor Abgabe des Produktes entfernen und separat
entsorgen (siehe oben). Die Abgabe dieses Produktes bei
einer zuständigen Stelle hilft ihnen, dass das Produkt
umweltgerecht entsorgt wird. Damit leisten sie persönlich
einen nicht unerheblichen Beitrag zum Schutz der Umwelt
und der menschlichen Gesundheit vor möglichen
negativen Effekten durch unsachgemäße Entsorgung von
Müll. Batterien oder Akkus, die Schadstoffe enthalten,
sind auch mit dem Symbol einer durchgekreuzten
Mülltonne gekennzeichnet. In der Nähe zum
Mülltonnensymbol befindet sich die chemische
Bezeichnung des Schadstoffes. Cd oder NiCd steht für
Cadmium, Pb für Blei und Hg für Quecksilber.

19
Vorweg
60 Jahre? 60 Jahre! 2017 begeht VOX den 60. Jahrestag seiner Gründung in Dartfort durch Dick Denney und Tom
Jennings. Wir sind stolz, Teil dieser Geschichte zu sein und das Vermächtnis unserer Gründerväter fortzuführen.
Zur Feier unseres 60-jährigen Jubiläums präsentieren wir ein Produkt, auf das Dick und Tom sicherlich stolz wären: eine limitierte Serie
handgewickelter,
in Großbritannien produzierter AC30 und AC15!
Ausgehend von den bekanntesten Amps in unserer Geschichte haben wir einen 1964er AC30/6 mit Top Boost und
einen 1957er AC15/4 mit dem wunderbar weich klingenden EF86-Normal-Kanal neu aufgelegt.
Der AC30WH60 mit 6 Eingängen bietet 3 Kanäle: Normal, Brilliant (Top Boost) und Vib/Trem. Der Normal-Kanal
verfügt über einen Lautstärkeregler, der Brilliant-Kanal über einen Lautstärkeregler sowie Treble- und Bass-Regler.
Der Vib/Trem Kanal verfügt über einen Lautstärkeregler, einen Vib/Trem Wahlschalter und einen Speed-Wahl-
schalter Mit dem im Lieferumfang enthaltenen „Egg“-Fußschalter kann der Vib/Trem Effekt deaktiviert werden.
Der AC15HW60 mit 4 Eingängen bietet 2 Kanäle: Normal und Vib/Trem. Der Normal-Kanal verfügt über einen
Lautstärkeregler und Brilliance-Schalter. Der Vib/Trem Kanal verfügt über einen Lautstärkeregler, einen Vib/Trem
Wahlschalter und einen Speed-Wahlschalter Mit dem im Lieferumfang enthaltenen „Egg“-Fußschalter kann der
Vib/Trem Effekt deaktiviert werden.
Der VOX Vib/Trem Kanal ist anhand der Originalschaltpläne aus den 60ern verdrahtet, beide Verstärker sind sorg-
fältig verarbeitet und in unserer Fabrik in Großbritannien von Hand gefertigt.
Und das, ohne Kompromisse einzugehen: von der Gehäusekonstruktion aus baltischem Birkensperrholz bis hin
zur schönen Handverdrahtung und den Trafos „made in UK“. Damit leisten wir den ultimativen Tribut an die Ver-
stärker, die den grandiosen VOX-Sound über viele Generationen hinweg so beliebt gemacht haben.
Da hegen wir keine Zweifel—dereinst in der VOX-Ruhmeshalle einen Platz neben ihren Ahnen einnehmen wer-
den.
Viel Spaß!
Ihr VOX R&D Team

20
Bedienungsanleitung
AC30HW60 Bedienfeld
INPUT-Buchsen
1. VIB/TREM INPUT
Gitarreneingänge für den VIB/TREM-Kanal Der HIGH-Eingang bietet höheren Gain für hohe Lautstärken, der
LOW-Eingang mit seinem geringeren Eingangspegel mehr Headroom für cleane Sounds.
2. NORMAL INPUT
Gitarreneingänge für den NORMAL-Kanal Der HIGH-Eingang bietet höheren Gain für hohe Lautstärken, der
LOW-Eingang mit seinem geringeren Eingangspegel mehr Headroom für cleane Sounds.
3. BRILLIANT INPUT
Gitarreneingänge für den BRILLIANT-Kanal Der HIGH-Eingang bietet höheren Gain für hohe Lautstärken,
der LOW-Eingang mit seinem geringeren Eingangspegel mehr Headroom für cleane Sounds.
VIBRATO-Regler
4. SPEED-Regler
Zur Regelung der Geschwindigkeit des Vibrato/Tremolo-Effekts. Es gibt 3 Einstellungen: links für langsam,
mittig für mittleres Tempo und rechts für schnell.
5. VIB TREM-Regler
Durch Drehen nach links wird das Vibrato (Tonhöhenmodulation) aktiviert, durch Drehen nach rechts das
Tremolo (Amplitudenmodulation).
ACHTUNG!
Beim Umschalten zwischen Tremolo und Vibrato kann ein Knacken zu hören sein.
VOLUME-Regler
6. VIB/TREM VOLUME-Regler
Zur Regelung des Vorverstärkerpegels des VIB/TREM-Kanals. Drehen im Uhrzeigersinn erhöht den Gain.
7. NORMAL VOLUME-Regler
Zur Regelung des Vorstufenpegels des NORMAL-Kanals. Drehen im Uhrzeigersinn erhöht den Gain.
8. BRILLIANT VOLUME-Regler
Zur Regelung des Vorstufenpegels des BRILLIANT-Kanals. Drehen im Uhrzeigersinn erhöht den Gain.
ACHTUNG!
Aufgrund der Konstruktion dieses Verstärkers kann es einige Minuten dauern, bis die Schalt-
kreise nach dem Einschalten stabil sind. In dieser Zeit kann ein wenig Rauschen auftreten, das aber bald ver-
schwindet.
This manual suits for next models
1
Table of contents
Languages:
Other Vox Musical Instrument Amplifier manuals

Vox
Vox AC30CC1 User manual

Vox
Vox VX II User manual

Vox
Vox AmPlug AC30 User manual

Vox
Vox AC15CC1 Custom Classic User manual

Vox
Vox AC15VR User manual

Vox
Vox AC30CC1 User manual

Vox
Vox SIGNATURE Series User manual

Vox
Vox AmPlug AC30 User manual

Vox
Vox Brian May MV50 Series User manual

Vox
Vox AC10C1 User manual
Popular Musical Instrument Amplifier manuals by other brands

Mesa/Boogie
Mesa/Boogie Three Channel Dual & Triple Rectifier Solo... owner's manual

Acoustic
Acoustic B200H user manual

ORANGE
ORANGE CR120C owner's manual

Demeter Amplification
Demeter Amplification TGA-3 user guide

Zoom
Zoom FIRE-36 Operation manual

Richie Kotzen
Richie Kotzen VICTORY RK100 Limited Edition user guide