Vremi Agent of Change User manual

Compost Bin | 1
Compost Bin
Agent
of Change
This Is A Manual.

Compost Bin | 3
SAVE THESE INSTRUCTIONS
For Outdoor Use Only
In the event this product malfunctions, or you believe
it is defective, please contact Customer Service at
Vremi.com/chat, 1 (646) 490-9904 or suppor[email protected]
and hold onto the defective product (pending further
instruction). A defective product should be clearly marked or
stored where it cannot be used by mistake. Failure to keep
the product in its original quality from the time of receipt may
impede Vremi’s ability to correct any legitimate problem and
may limit the extent to which Vremi may provide recourse.
Important Safety Instructions
Read the following instructions carefully and keep them for future use.
While using this product, basic safety precautions should always be followed to
reduce the risk of injury. Follow these instructions:
· For outdoor use only.
· This product should be assembled by an adult.
· Keep children and pets away while assembling this product.
· Do not let children climb on or play with this product.
· Always use this product on a stable, firm ground.
· Do not use this product if any parts are missing, damaged, or worn out.
· Do not overtighten the fasteners.

4| Compost Bin Compost Bin | 5
Parts Overview Installation
F
Tighten Bolt (F) to attach Panel C to both Side Panels (A).
Note: The arrows
on the Panel C
indicates the
direction of
sliding out the
doors. They do
not indicate for
assembling the
Panel C.
Important Note:
To tighten the Bolt (F) during assembly, insert the Bolt into the screw hole on the panel, hold a
Nut between fingers to reach the Bolt under the panel, then tighten the Bolt outside using the
Allen key (J) with the other hand. You could also use a wrench to hold the Nut.
F
Bolt and Nut
(For Panel Assembly)
56 Pcs
G
Bolt and Nut
2 Pcs
H
Plastic Cap
2 Pcs
I
Wrench
1 Pc
J
Allen Key
1 Pc
aa
Axle Rod
1 Pc
A
Side Panel
2 Pcs
B
Middle Panel
7 Pcs
C
Door Panel
1 Pc
D
Access Door
2 Pcs
E
Divider Panel
1 Pc
STEP 1
bb
2 Pcs
cc
2 Pcs
dd
2 Pcs
STAND PARTS

6| Compost Bin Compost Bin | 7
Installation
STEP 2
STEP 3
Use Bolt (F) to fix the Middle Panels B in sequence. Tighten the bolts and nuts firmly.
After the 3th Panel B is attached, insert Divider E into the chamber. Make sure that the Divider E is
inserted into the slot properly, otherwise it will affect the sealing effect of the divided chambers.
After dividing, the arrows on the Divider E and Panels B should be in the same divided chamber.
The arrows should be in the
same divided chamber.
Installation
STEP 4
STEP 5
bb
cc
cc
bb
dd dd
Fix the last Panel B. Slide the upper edge of the last Panel B under the edge of the other assembled
Panel B, then tighten the bolts.
Assemble the Stand as shown in the figure below.

8| Compost Bin Compost Bin | 9
Installation
STEP 6
STEP 7
aa
G
Pass the Axle Rod (aa) through the compost bin chamber. Insert the plastic caps at the two ends of
the Axle Rod.
Insert Bolt (G) into the holes on the Axle Rod and the Stand, then tighten the nuts to assemble the
compost bin to the Stand.
Installation
STEP 8
STEP 9
Slide the two Doors (D) into the compost bin.
Now the assembly of your compost bin has been completed.

10 | Compost Bin Compost Bin | 11
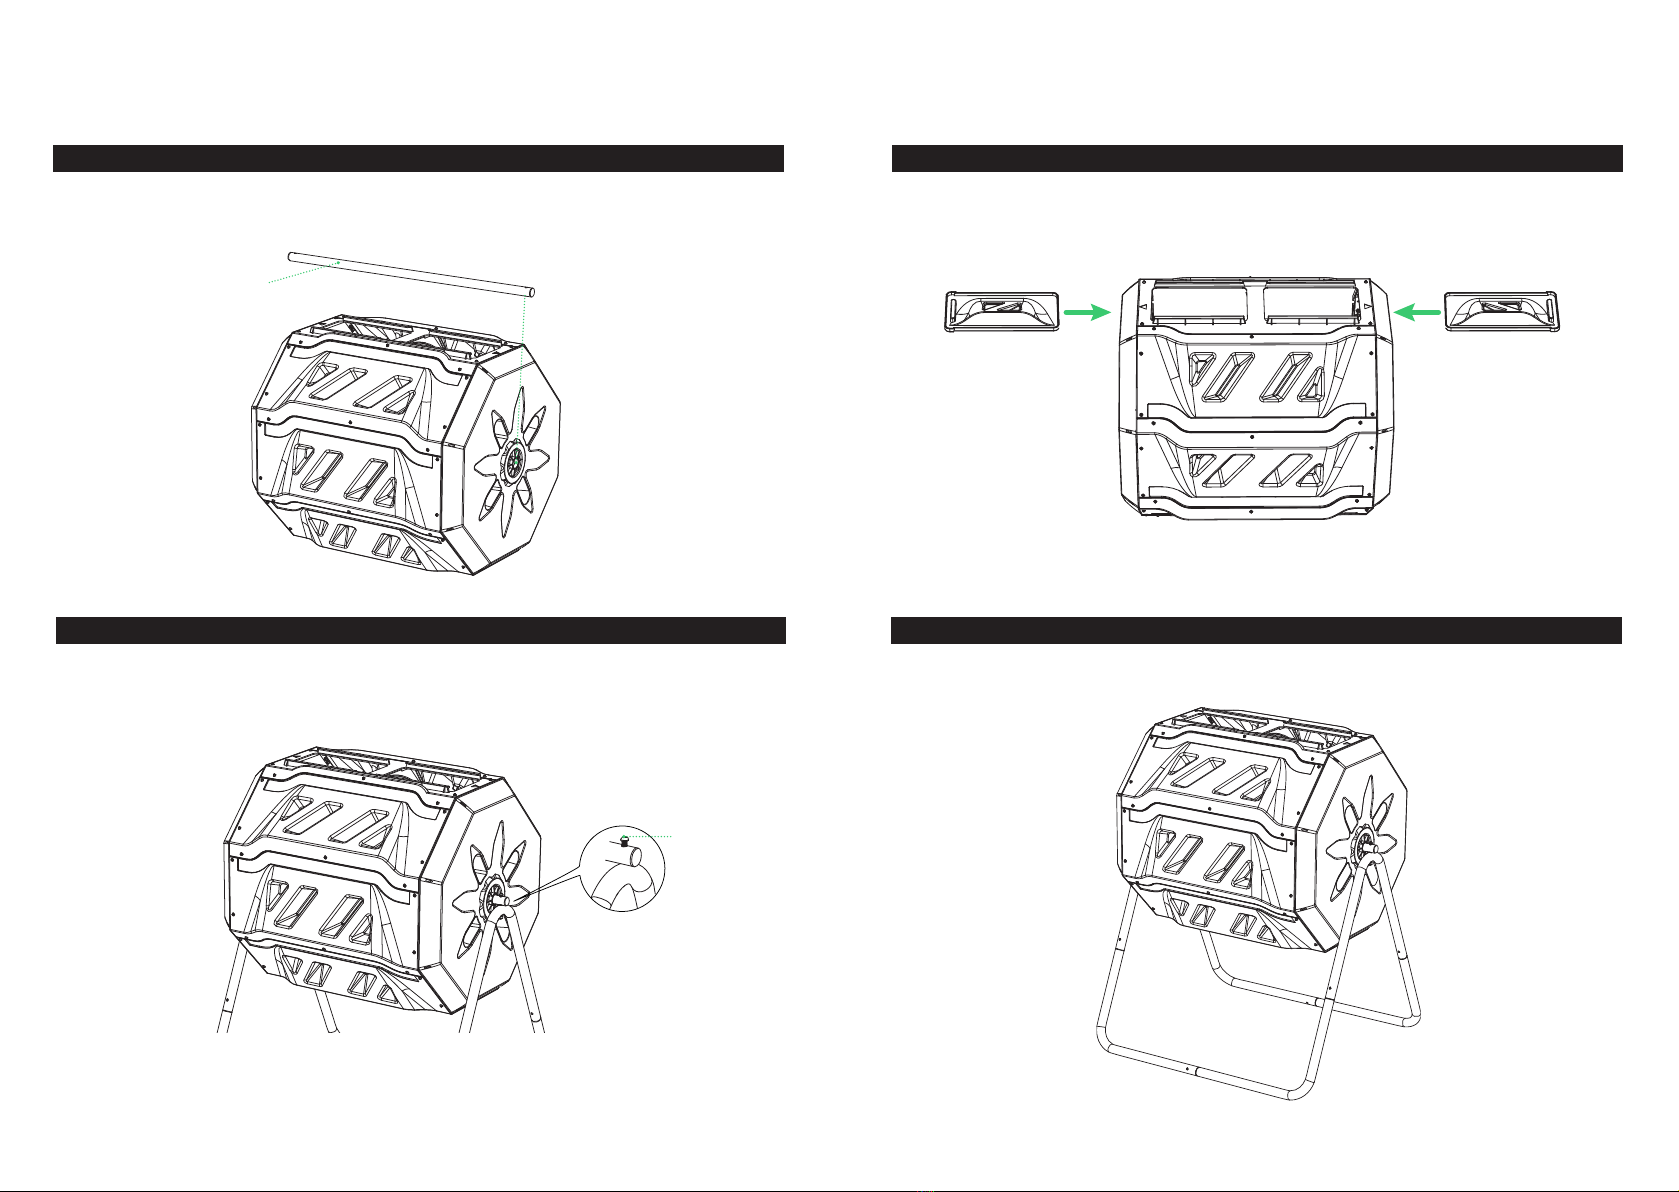
1. Place the compost bin on a flat and well-drained ground with enough space for tumbling.
Make sure the location gets some sunlight. If the compost gets too cold, this will slow down the
composting process.
2. Select proper materials for composting. Organic matter such as sticks, leaves, grass clippings and
food can break down into compost. Do not put glass, plastic, or metal into the compost bin as
they will not break down. Fats, meat, and bones are also not appropriate for composting.
3. Cut up the materials as this will help speed up the composting process. Drain off the kitchen
scraps as it will also be good for the composting.
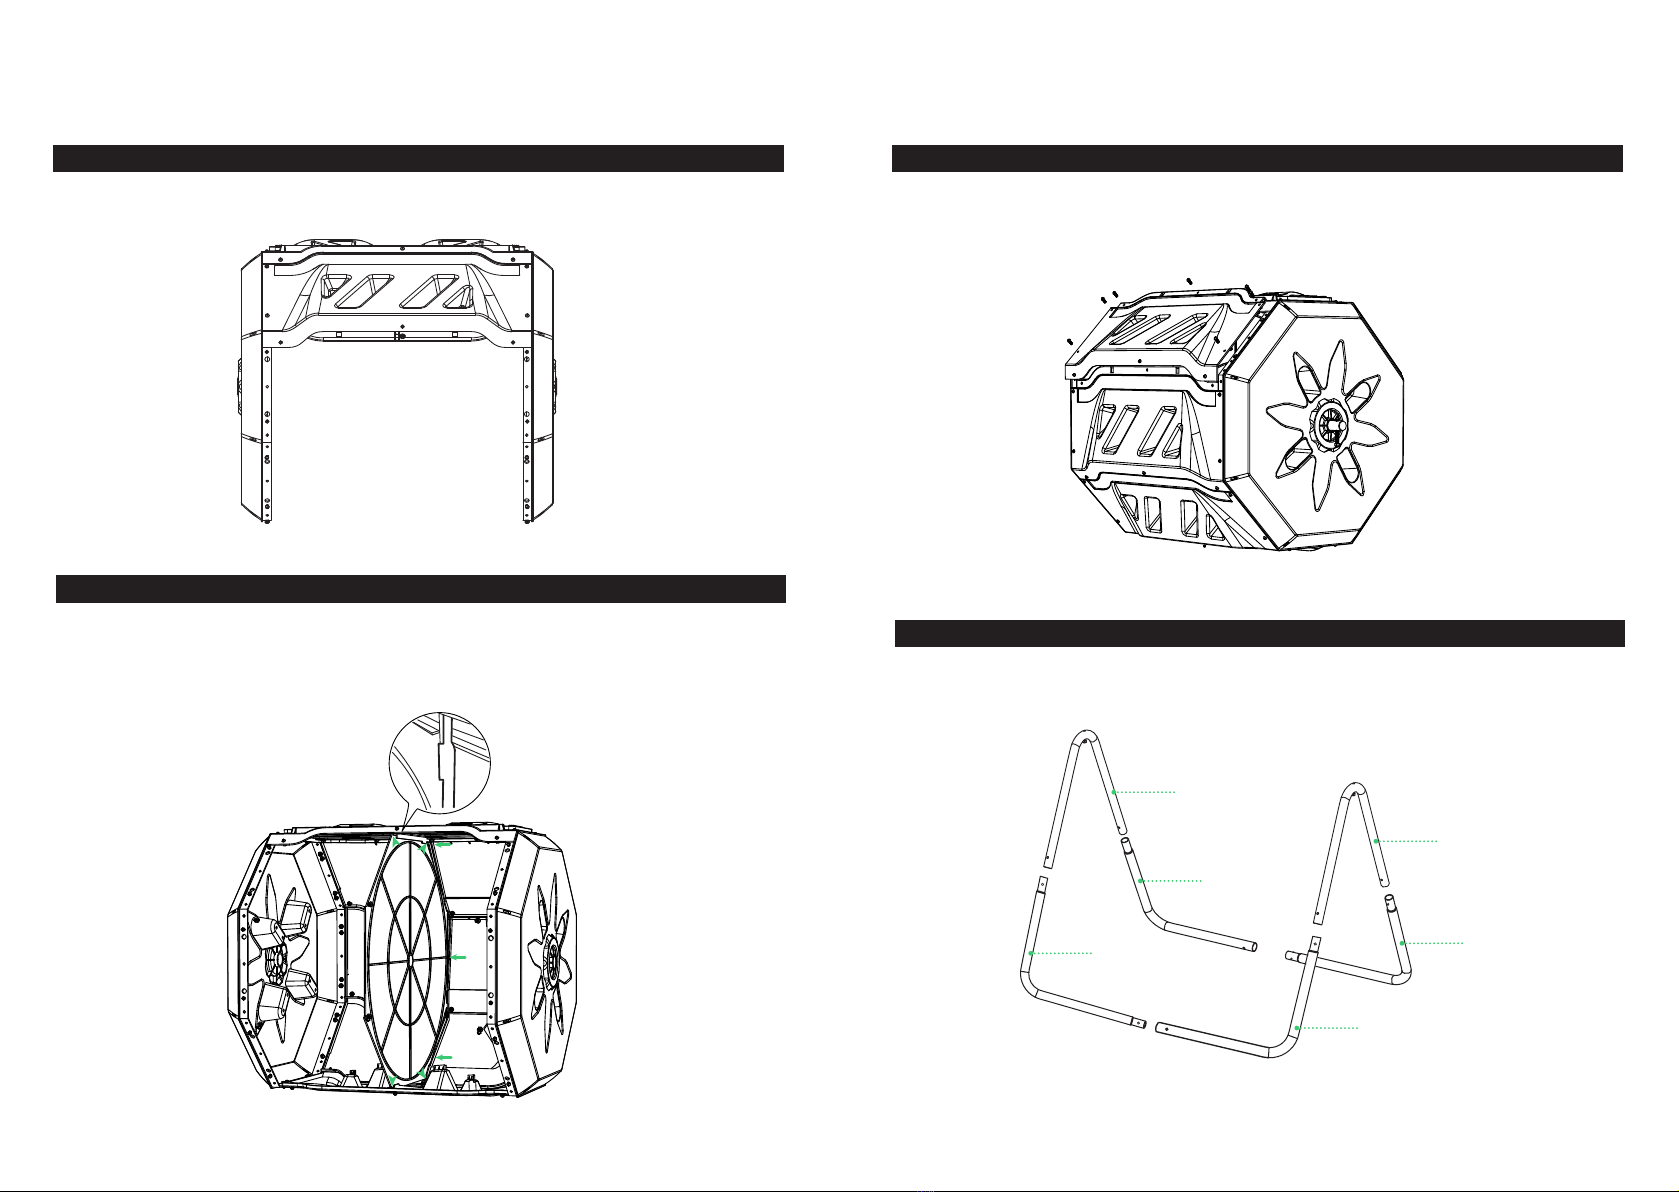
4. Control the composting in batches. Your compost bin has two separate chambers. First, stack the
material in only one chamber. Do not add new materials to the other chamber until chamber 1 is
full.
5. Turn the compost bin 5 to 10 times every 3 days to mix the materials and keep the composting
process active. Depending on the materials, it will take about 2-3 months to finish composting. To
empty the cured batch, turn the compost bin and open the corresponding door.
Use Your Compost Bin
This manual covers all items with the model number:
Keep all plastic bags away from children.
Warranty Information
Vremi offers a 12-month warranty on all of our products purchased new and unused from Vremi LLC or an
authorized reseller, with an original proof of purchase and where a defect has arisen, wholly or substantially, as
a result of faulty manufacturing, parts or workmanship during the one-year warranty period. The warranty does
not apply where damage is caused by other factors, including but without limitation to: (a) normal wear and tear;
(b) abuse, mishandling, accident or failure to follow operating instructions; (c) exposure to liquid or infiltration of
foreign particles; (d) servicing or modification of the product other than by Vremi. These are our general terms for
the warranty service, but we always urge our customers to reach out to us with any issue, regardless of warranty
terms. If you experience an issue with a Vremi product, please contact us at [email protected], and we will do
our best to resolve it for you.
VRM040714N
Warning
vremi.com/chat
CHAT WITH US
1 (646) 490-9904
CALL US
EMAIL US
Drop Us A Line

12 | Compost Bin
vremi.com/chat support@vremi.com 1 (646) 490-9904Questions?
This manual suits for next models
1
Table of contents