Congratulations on your purchase of the VRX Racing 4WD electric cars.
This 1/8th scale model has been factory assembled and all electrics installed and set up to make it the easiest possible.
introduction to the sport of driving RC cars.
.
Safety Precautions and Warnings
You are responsible for operating this model such that it does not endanger yourself and others, or result in damage to the
product or the property of others.This model is controlled by a radio which is possibly subject to interference which can cause
momentary loss of control so it is advisable to always keep a safe distance to avoid collisions and injury.Age Recommendation:
14years or over.This is not a toy.This product is not intended for use by children without direct adult supervision.
Needie Nose Pllers
尖嘴钳
Body Reamer
车壳绞刀
Wire Cutters
钢丝钳
No need to pre-drill precise holes(1mm to 15mm)can be drilled
可以对预钻的孔准确地钻1mm-15mm
Hex Wrench
六角扳手
Hex Wrench
十字套筒
Sharp Hobby knife
美工刀
ROUND CUTTER
For trimming bodies
剪刀
用于修剪车壳
Awl
锥
Differential Grease
差速油
Grease
润滑油
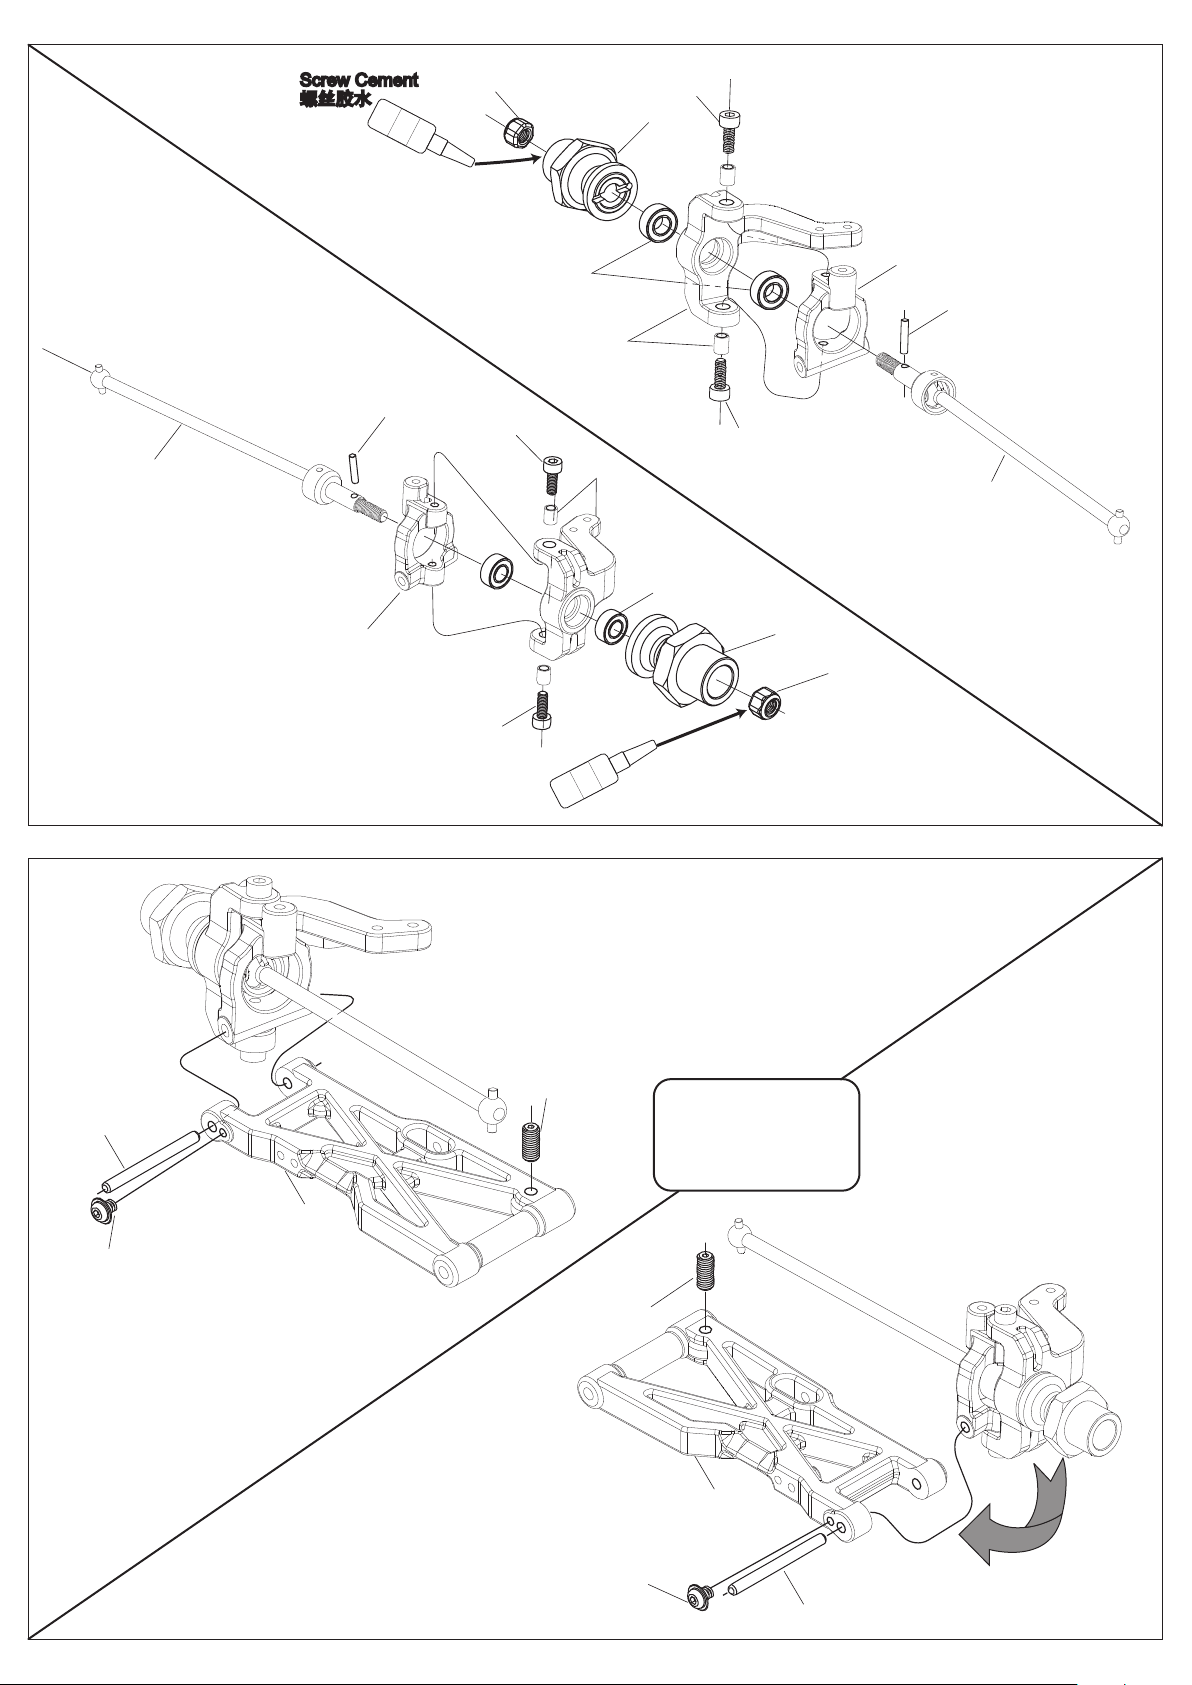
Screw Cement
螺丝胶水
Instant Glue
瞬间胶水
2.0Φ
2.5Φ
WARNNING: Read the ENTIRE instruction manual to become familiar with the features of the product before operating.Failure
to operate the product correctly can result in damage to the product, personal property and serious injury.This is not a toy and
must be operated with caution and common sense. Failure to operate this product in a safe and responsible manner could result
in damage, injury or damage to other property.This product is not intended for use by children without direct adult supervision.It
is essential to read and follow all the instructions and warnings in the manual, prior to assembly,set-up or use, in order to operate
correctly and avoid damage and serious injury
Carefully follow these directions and warnings, plus those any additional equipment associated with the use of this model,
chargers, ESC and motors, radio etc.
Never operate your model with low transmitter batteries.
Always operate your model in an open area away from cars, traffic or people.
Never operate the model in the street or in populated areas.
Always keep the vehicles in direct line of sight, you cannot control what you cannot see!
Keep all chemicals, small parts and anything electrical out of the reach of the children.
Avoid water exposure, moisture causes damage to electronics and may result in the loss of control or permanent damage.
Avoid injury from high speed rotating parts, gears and axles etc.
Novices should seek advice from more experienced people to operate the model correctly and meets its performance potential.
Exercise caution when using tools and sharp instruments.
Do not put fingers or any objects inside rotating or moving parts.
Take care when carrying out repairs or maintenance as some parts may be sharp.
Do NOT touch equipment such as motor electronic speed control and battery, immediately after using your model because
they can generate high temperatures.
Always turn on your transmitter before you turn on the receiver in the car Always turn off the receicer before turming your
transmitler off.
.
Keep the wheels of the model off the ground, keep your hands away from the wheels when checking the operation of the radio
equipment.
Prolong motor life by preventing overheat conditions. Undue motor wear can result from frequent turns, rapid change of
direction forwards/backwards, continuous stop/starts, pushing/pulling objects, driving in deep sand and tall grass, or driving
continuously up hill.