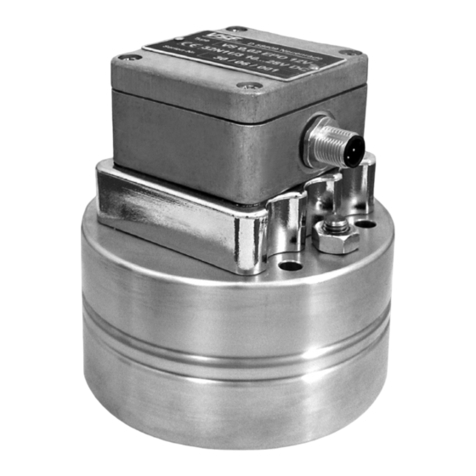
vse VSI+ High Definition Flow Meter User manual

Solutions for Fluid Technology
OPERATING MANUAL
for flow meters of the product line “VSI+ High Definition Flow Meter“
1011
10110
11011

TABLE OF CONTENTS
Page
1. Important information and legal notices .........................................3
2. General function description of flow meter ...................................... 4
3. General discription ......................................................... 4
4. Flow meter selection ........................................................ 4
5. Declaration of conformity .................................................... 4
6. General conditions for initial start-up ........................................... 4
7. Maximum operating pressure ................................................. 5
8. Information on EU Directive 2014/68/EU on pressure equipment ...................5
9. Flow meter range ........................................................... 6
10. Assembly of the flow meter .................................................. 6
11. Cleaning and flushing of pipe lines before initial start-up .......................... 7
12. Filtering of liquid .......................................................... 7
13. Flow meters with high definition .............................................. 8
14. Settings of the preamplifier .................................................12
15. Pulse filtering ............................................................13
16. Indicating leds ...........................................................13
17. Technical specifications of preamplifier .......................................14
18. Plug assignment of preamplifier ............................................. 14
19. Maintenance, service life and warranty ....................................... 15
20. Storage, return and disposal ................................................ 15
21. Technical specifications VSI 0.04 – VSI 2 .....................................16
22. Flow response curves VSI 0.04 – VSI 2 .......................................17
23. Dimensions VSI 0.04 – VSI 2 ...............................................18
24. Dimensions supplates AP.0.2 – 1 ...........................................19
25. Type key. ...............................................................20
26. Plug assignment .........................................................21
27. Connection diagram ......................................................22
28. Certificate of Non-Objection ...............................................23
The current publication of this operating instruction supersedes all information from pre-
vious publications. VSE reserves the right to make changes and substitutions. VSE is not
liable for any printing errors. Reproduction, including excerpts, is permitted only after
written approval by VSE. VSE reserves the right to modify technical data at any time.
Last revised: 10/2021

3
Operating manual–no.: E04-07-69-002 vers. 5
1. IMPORTANT INFORMATION AND LEGAL NOTICES
Dear customer, dear user,
This operating instruction for volume sensors of the “VSI+ High Definition Flow Meter” series by VSE Volumen-
technik GmbH (VSE) contains information required to properly install and commission the flow meter for the intended
purpose.
Any installation, commissioning, operation, maintenance and testing may only be carried out by trained and authorized
personnel. The operating instructions must be read and followed carefully to ensure a trouble-free, proper and safe
operation of the flow meter. In particular, the safety instructions are essential.
These operating instructions must be kept safe and accessible for the authorized personnel at all times. At no time
should contents of the operating instructions be removed. A missing manual or missing pages must be replaced
immediately if lost. The operating instructions can be requested at any time from VSE or downloaded from our website
www.vse-flow.com. The operating instructions must be passed on to each subsequent user of the flow meter.
This operating instruction is not subject to any modification service by VSE. VSE reserves the right to make technical
changes at any time without notice.
VSE makes no warranties, express or implied, with respect to commercial qualities and suitability for a particular
purpose.
VSE accepts no liability for damage and malfunctions resulting from operating errors, failure to observe these operating
instructions, improper installation, commissioning or maintenance as well as improper use of the flow meter.
The opening of the flow meter is absolutely not permitted. After an unauthorized opening or rebuilding as well as
after a single, incorrect connection of the flow circuits of the flow meter, the warranty as well as the product liability by
VSE expire.

4
1. The process fluid
Is the flow meter suitable for the medium?
Is the fluid viscous or abrasive?
Is the fluid contaminated or is there solid matter in the fluid?
Which granular size does the solid matter possess and can it block the meter?
Does the fluid have fillers or other additional material?
Is it necessary to install a pre-switched hydraulic filter?
Are the pipe lines clean and free of assembly residues such as swarf, weld chips?
Is the tank clean and is it ensured that no extraneous materials can get into the pipe line system from the tank?
Is the fluid often changed and is sufficient flushing performed in this case?
Are the pipe lines and the entire system completely deaerated?
Are the fluid and the cleaning agent compatible with the seals?
Flow meters made by VSE Volumentechnik GmbH measure the volume
flow of liquids according to the toothed wheel principle. A pair of very
precisely adjusted toothed wheels in the housing constitutes the meter.
A signal pick-up system registers meter rotation free of contact and
tooth by tooth. In flow meters of high resolution (VSI), each tooth is out-
put as a multiple of digital pulses, depending on interpolation setting.
The gaps within the teeth of the meter wheels, form meter chambers in
the areas, in which they are completely enclosed by the housing walls;
these chambers digitalise liquid flow depending on their chamber volume.
The liquid flow within one meter rotation of a tooth division is divided
by the set interpolation factor. This gives the volume measurement per
pulse (Vm) and is defined in cm3/pulse. It identifies the constructional
size of a flow meter (e.g. VSI 1/16).
3. GENERAL DISCRIPTION
Please follow all instructions in this operating manual; only this ensures
trouble-free operation of the flow meters. VSE is not liable for any
damage ensuing from not following of these instructions.
Opening the devices during the term of warranty is only authorised
after consultation and approval of VSE.
4. FLOW METER SELECTION
The correct selection (version) of type and constructional size is crucial
for a trouble-free and safe operation of the flow meters. Owing to
the great number of various applications and flow meter versions, the
technical specifications in the VSE catalogue material are of a general
nature. Performance of the flow meter depends on type, size and meter
range and on the liquid that is to be measured. Please consult VSE for
an exact description..
5. DECLARATION OF CONFORMITY
Flow meters of the “VSI” product line are tested for their electroma-
gnetic compatibility and interference transmission in terms of the law
on electromagnetic compatibility and correspond to the legal prescrip-
tions enforced by EMC directives. They may not be operated inde-
pendently and are to be connected via cable to a power source and
supply digital electric signals for electronic evaluation. A declaration
of conformity is submitted for all flow meters, which you can request if
you require.
Since the electromagnetic compatibility of the total measuring system
depends on cable layout, correct connection of protective shielding
and each single connected device. You must ensure that all componen-
ts correspond to the electromagnetic compatibility directives and that
the electromagnetic compatibility of the total system, machine or plant
is assured.
All flow meters are tested according to the valid, legally prescribed
electromagnetic compatibility directives and possess the CE-certifica-
tion. The EC-declaration of conformity is the CE-label attached to all
flow meters.
6. GENERAL CONDITIONS FOR INITIAL START-UP
Before assembly and before initial start-up, you have to note the fol-
lowing properties and aspects of the corresponding characteristics
of your system, so that a trouble-free and safe operation is possible.
2. GENERAL FUNCTION DESCRIPTION OF FLOW METER

5
2. The hydraulic properties of the system
Is the max. operating pressure of the system lower than the max. permitted operating pressure of the flow meter?
Is the max. fall of pressure ∆p (on flow meter) below the max. permitted fall of pressure?
Does an excessively great fall in pressure ∆p occur on the flow meter at max. flow (e.g. with higher viscosity)?
Does the flow range of the flow meter (depending on viscosity) correspond to the provided flow?
Note that flow range decreases the greater the viscosity!
Does the temperature range of the flow meter correspond to the provided max. temperature of the medium?
Is the cross section of the pipe line large enough and are the falls in pressure in the system not excessive?
Is the hydraulic connection (supply and reverse flow) correctly connected and leak-proof?
Has the pump sufficient power to operate the system?
A blocked flow meter can stop the flow. Is a pressure control valve / bypass provided in the system?
7. MAXIMUM OPERATING PRESSURE
Before assembling the flow meter, you have to test that the max.
operating pressure of the system does not exceed the max. permitted
operating pressure of the flow meter. Meanwhile, observe the top
pressures that can occur, when operating the system.
3. Electronic evaluation and electrical safety
Have you selected the optimal flow meter and is this equipped with the appropriate preamplifier?
Does the power supply voltage of the flow meter correspond to the provided voltage?
Is the power supply voltage supplied by the mains or evaluation device sufficiently steady?
Does the output of the power supply voltage correspond to the required power output?
Has the electric connection been installed based on the enclosed connection plan?
Is the cable protected by a shield?
Is there a connection of the cable protective shielding via the round plug to the housing of the flow meter?
Is the flow meter connected firmly to the earth conductor PE or is the cable protective shield connected to ground GND?
Is the cable laid interference-free and is the installation secured from input of interference pulses?
Is the round plug of the connection cable firmly screwed together with the plug of the flow meter?
Are the wires on the evaluation device correctly and properly connected?
Is there a potential difference between the earth conductor PE on the flow meter and the earth conductor PE
on the evaluation device?
Does a correcting lead have to be laid to eliminate the potential difference between the flow meter and the evaluation device?
Does the entire system correspond to the directives of the electromagnetic compatibility laws (EMC)?
Have all local valid regulations, applicable directives, guidelines and background conditions of the
electromagnetic compatibility laws been maintained and observed?
Systems that can lead to personal injury through malfunction or failure are to be equipped with the appropriate safety devices.
The functioning of these safety devices is to be checked at regular intervals!
The following operating pressures are permitted depending on flow
meter version:
Flow meter in grey cast iron version pmax = 315 bar/4500 psi
Flow meter in stainless steel version pmax = 450 bar/6500 psi
Flow meter in special version pmax = 700 bar/10100 psi
Important:
Please consult VSE for all operating pressures > 450 bar / 6500 psi and for special versions.
8. INFORMATION ON EU DIRECTIVE 2014/68/EU ON PRESSURE EQUIPMENT
In terms of Article 2, No. 5 of the directive named above, VSE volume
sensors are so-called “pressuremaintaining components“ and this direc-
tive thereby relates to them. VSE volume sensors must thereby comply
with the technical requirements named in Section 4 of the directive in
accordance with Article 4, Paragraph (1d), Piping according to Para-
graph (1c). Typically, the fluids measured fall into Group 2 in accord-
ance with Article 13, Paragraph (1b). The volume sensors sold by VSE
do not comply with the limit values defined under Article 4, Paragraph
(1a). The technical requirements on volume sensors from VSE are there-
fore limited to the criteria defined in Article 4, Paragraph (3). That me-
ans that the devices must be designed and manufactured in accord-
ance with the good engineering practices prevailing in the member
state. We hereby confirm this. The paragraph also states that these
units may not bear the CE label named in Article 18. A CE declaration
of conformity is therefore not issued in accordance with 2014/68/EU.
The CE label of our volume sensors refers to Directive 2014/30/EU.

6
10. ASSEMBLY OF THE FLOW METER
The flow meter should be mounted on an easily accessible location,
so that dismantling for cleaning the meter presents no problem. Since
flow meters can work in any installation position and flow direction, you
can mount it on any location of your system. Take care, when installing
the flow meter that liquid always remains in the flow meter, even at
system standstill and that it can never run empty. The outflow of the flow
meter should therefore always show a certain back pressure, since this
clamps the flow meter firmly in the liquid column (the meter supports
itself through this on the liquid column) and the pipe line cannot run
empty. In critical cases or when the pipe line is at standstill or standby
and can run empty, we recommend installing an extra non-return valve
in the outflow line.
Flow meters of the “VSI” product line can be mounted directly onto a
block or into the pipe line using four screws. Always select large cross
sections for the hydraulic supply and return flow respectively for the
entire pipe line system (if possible). This lowers the fall in pressure and
the flow rate in the total system.
VSE supplies subplates for all flow meters of the “VSI” product line; they
have various pipe threads and side or rearside connection. Depending on
the provided conditions, the installed pipe line, the pipe cross section or
pipe thread, the operator can choose the suitable sub-plate and incorpo-
rate this into the system or machine without additional reductions.
The flow meter is screwed onto the block or subplate with four DIN 912
cheese head screws. The screws are to be evenly pretensed crosswise with
the following torques.
When changing the fastening screws you must take great care that the
screws are of property class 10.9 and 12.9.
Important:
Make sure that the specified maximum permitted operating pressure of the flow meter cannot be exceeded,
whatever the operating mode of the system. Note the flow meter range that is dependent on the viscosity
of the fluid to be measured.
Important:
Make sure that the flow meter is always completely filled both in inflow and outflow and
that the outflow has a little back pressure. This prevents the meter being damaged by a sudden
and steep increase of flow and at the same time improves measurement accuracy.
Flow meter size
(cast iron and 1.4305)
Torque
VSI 0.04; VSI 0.1; VSI 0.2 15 Nm
VSI 0.4; VSI 1; VSI 2 35 Nm
Table 1: Torque of fastening screws
Please note the special instructions for mounting sizes VSI 4 and VSI 10
(see appendix)
9. FLOW METER RANGE
The flow meter range specified in the flow meter data sheet (Qmin
– Qmax) refers to the testing fluid “hydraulic oil“ with a viscosity of
21 mm²/s at a temperature of 20°C. For this flow meter range, VSE
specifies measurement accuracy of up to 0.3 % of the measurement
value and a repetition accuracy of 0.05 %.
For fluids of lower viscosity (< 21 mm²/s) measurement accuracy dete-
riorates, while for fluids of higher viscosity (> 21 mm²/s) it can improve.
Also note, however, that the flow meter range is restricted in case of
higher viscosity (see “Technical specifications“).
Rückschlagventil
Tank
Volumensensor
Fig. 1: Flow meter installation with non-return valve
Non-return valve
Flow meter
Tank

7
12. FILTERING OF LIQUID
Strongly contaminated fluids or extraneous material in the fluid can
block, damage or even destroy the flow meter. Always install an appro-
priate filter for these cases in front of the flow meter to prevent damage
to the flow meter. The necessary filtering depends on size, bearing sys-
tem and model of flow meter.
Important:
Please flush out the pipe lines and the tank thoroughly, to prevent contamination within the flow meter.
Important:
When mounting the flow meter, you must take great care that the seals are not damaged and correctly placed
in the hydraulic connections oft the flow meter. Wrongly installed or damaged seals lead to leakage redundancy,
which may have dire consequences. Please make sure that flow meters with EPDM seals do not come into
contact with oil and greases on a mineral oil basis. These fluids can decompose the seals. The yellow plastic
plugs in the hydraulic connections of the flow meter protect the meter against dirt and contamination during
storage and shipping. Before mounting the flow meter you have to remove these plugs so that in- and
outflow is free and open.
11. CLEANING AND FLUSHING OF PIPE LINES BEFORE INITIAL START-UP
Before initial start-up of the flow meter, you must flush and clean the
whole system. Contaminated fluid can effect the correct function of the
flow meter or seriously damage the meter.
After preparing and connecting up the system pipes, you must first ca-
refully flush and clean the whole pipe line system and the tank. To do
this, you have to mount a diversion plate onto the block or subplate
instead of the flow meter, so that the fluid can flow through the diver-
sion plate and all extraneous material (e.g. swarf, metal chips, etc.)
can be flushed out without obstruction. Use a fluid as cleansing agent,
which is compatible with the fluid being used later and which does not
cause un-desirable reactions. You can consult the suppliers and manu-
facturers of the fluid or contact VSE for the corresponding information.
VSE supplies bypass plates for all VSI-flow meter sizes. Flow meters
are measurement pick-up systems made with high-level precision. They
have a mechanical meter consisting of two toothed wheels, which is
adapted to the housing with narrow slots. Even the tiniest damage to
the toothed wheels and bearings can cause a measurement error. So
always make sure that no extraneous material gets into the meter and
that the fluid flowing through is always free from dirt and contamina-
tion. After the system has been carefully flushed out and no extraneous
material is in the pipe line, you can mount the flow meter and com-
mence the initial start-up.
Flow meter size Filter meter size for ball bearings
VSI 0.04 / 0.1 10 µm
VSI 0.2 / 0.4 20 µm
VSI 1 / 2 50 µm
Table 2: Pre-switched Filter
For information on filter size for flow meters with plain bearings, in spe-
cial version, or with specially adjusted meter tolerances, please consult
VSE Volumentechnik GmbH.
Important:
A blocked flow meter can stop the flow. You must provide a control valve / bypass for the system.

8
The measuring volume of the flow meter is determined by the mechani-
cally displaced liquid volume within a tooth gap and the set interpola-
tion. It is calculated from the size of the flowmeter and the set division
factor or interpolation factor IPF. Vm = Vm*/ IPF (see Figure 2)
The IPF is selectable in different steps up to a maximum of 128, where-
by the resolution is adapted to the specific application in order to achie-
ve the most precise flow or volume measurements (see table 3).
The output of the two 90° phase-shifted pulse signals via two channels
also enables an edge evaluation (see figure 3).
With this feature the following applications in particular can be rea-
lized:
Measuring, controlling and regulating in the lower flow range
Measuring controlling and regulating in zero flow
Measuring, controlling and regulating in both flow directions
Measuring, controlling, dosing and filling of small volume
13. FLOW METERS WITH HIGH DEFINITION
0°
45°
90°
135°
180°
225°
270°
315°
360°
pulse signal from channel 1
pulse signal from channel 2
zero signal pulse (zero pulse)
one measurement value
interpolation factor IPF = 8
Vm* = Vm/ 8
1/2 Vm *
1/4 Vm*
pulse signal from channel 1 without interpolation
pulse signal from channel 2 without interpolation
0°
45°
0°
180°
360°
90°
270°
1 Vm*
1
1
Division of a single pulse into 360°.
All other signal pulses can be regarded in this way.
Evaluation electronics recognise flow direction from the channel offset of 90°.
Each individual pulse flank is offset 90° and has a value of 1/4 Vm*.
22.5°
11.25°
33.75°
1.pulse
12 345678
Fig. 2: Signal emission of the preamplifier with interpolation
(interpolation factor 8)
Fig. 2 shows the resolution of the volume measurement Vm with an in-
terpolation factor of 8. This resolves each volume measurement into
eight individual part volumes. A pulse on the signal output of channel
1 or channel 2 thus has a value of Vm* = Vm / 8 = 1/8 Vm per pulse.
In double evaluation (flank evaluation of one channel) this results in a
value of 1/2 Vm* = Vm / 16 = 1/16 Vm and for quadruple evaluation
(flank evaluation of both channels) the result is a value of 1/4 Vm* =
Vm / 32 = 1/32 Vm per flank.
Evaluation electronics can recognise flow direction from signals offset
90°. Hence you can program a resolution of 4 to 64 angular steps per
volume measurement Vm
(see fig. 3). The frequency multiplication “f*”
lies between 1 and 16 (see table 3).

9
Interpolation
factor
Imp/VmMax. resolution
(evaluation of
signal flanks)
Resolution Vm*
(volume
measurement Vm*)
[ml]
Max. resolution
(angle degrees)
Frequency fmax*
1 1 4 Vm / 4 90° fmax x 1
4 4 16 Vm /16 22,5° fmax x 4
8 8 32 Vm /32 11, 2 5° fmax x 8
10 10 40 Vm /40 9° fmax x 10
16 16 64 Vm /64 5,625° fmax x 16
32 32 128 Vm /128 2,8125° fmax x 32
64 64 256 Vm /256 1,40625° fmax x 64
128 128 512 Vm /512 0,703125° fmax x 128
Table 3: Interpolation factor and resolution
Only the marked lines are illustrated in the diagram of fig. 3
Alternatively, the interpolation factors 2, 3, 5, 12, 24, 50, 100 can also be set (from software version 1B). See page 14.
Column 1: Selectable interpolation factor IPF.
Column 2: Pulses per volume measurement Vm.
Column 3: Maximum resolution of the signal flanks. The signal flanks of channels 1 and 2 are evaluated.
Column 4: Volume measurement Vm* resulting from the maximum resolution of the signal flanks.
Column 5: Maximum resolution in angle degrees at resolution of signal flanks.
Column 6: Maximum frequency fmax* at maximum flow Qmax and programmed interpolation factor IPF
In practice, the maximum flow Qmax of the flow meter is seldom run, so that a lower frequency can be calculated.
The maximum frequency is then calculated according to the following formula:
fmax
^ Maximum frequency of the flow meter signals
Qmax
^ Maximum flow attained in the case of application described here
IPF Programmed interpolation factor
Vm Volume measurement of the flow meter
Example: Flow meter VSI 1/10… max. flow the system can be run on at a maximum
Q
max
^ = 40 l/min = 666.667 ml/sec; IPF = 10; Vm = 1 ml/pulse; fmax
^ = 6666.67 Hz = 6.66667 kHz
At max. flow Qmax
^ = 40 l/min, the flow meter VSI 1/10… outputs a frequency of fmax
^ = 6666.67 Hz.
fmax^ =(Qmax^) •IPF Formula 1
Vm

10
Fig. 3: Interpolation of the volume measurement Vm
Vm / 1
Vm / 4
Vm / 8
Vm / 16
channel
2. channel
1. channel
2. channel
channel
2.
1.
channel
1. channel
2. channel
0° 180°45° 90° 135° 225° 270° 315° 360°/0° 45° 90° 135° 180°
22,5°
0°
22.5°
5,625°
11.25°
16.875°
If the resolution is sixteen-fold, this gives
a recognition of 22.5° (360° / 16)
This results in a resolution of 5.625° (22.5° / 4)
when evaluating the flanks of channel 1 and 2
The highest resolution permits recognition of a
measurement volume of 1 / 512 Vm.
one measurement volume Vm
360° angle degrees
1
1
.
.
pulse
2.
2
3
.
.
pulse
4.
3
5
.
.
pulse
6.
4
7
.
.
pulse
8.
1.
3. 1. 2. 4. 5. 6. 7. 8. 9. 10 11 12 13 14 15 16
1. 2.
{
{
{
{
1. pulse
Important:
Test the connected evaluation electronic system as to whether it can process the maximum frequency fmax*
of the flow meter. Check the data from the following table for the relevant flow meter, or calculate the
maximum frequency data fmax° with formula 1.
At initial start-up of the system, you have to program the volume
measurement Vm* or the correct K-factor (see table 4, column 4) in
your evaluation electronics as parameter value (e.g. multiplier). The
evaluation electronics then multiply every pulse the flow meter outputs
by the volume measurement Vm* and thus calculates the flow and the
volume. For flow meters with high resolution, the parameter value vo-
lume measurement Vm* is dependent on volume measurement Vm (see
table 4, column 2) and on the programmed interpolation factor IPF
(see table 4, column 3). Please consult this first of all for the volume
measurement Vm* or the K-factor and program this value as parameter
into your evaluation electronics.
The maximum flow rates with the corresponding frequencies are listed
in columns 4 and 8 of table 4.

11
Table 4: Volume measurement and max. frequency at high resolution
Flow
meter
Vol. measurement
Vm
Interpol.
IPF*
Vol. measurement Vm*
(ml/pulse)
K-Faktor*
(Imp/l)
Qmax fmax fmax*
(Hz)
VSI
0.04… 0.04 ml/Imp
10.04 25000
4 l/min
(= 4 000 ml/min
= 66.67 ml/s)
1,666.7 Hz
1666.7
40.01 100000 6666.8
80.005 200000 13333.6
10 0.004 250000 16667
16 0.0025 400000 26667.2
32 0.00125 800000 53334.4
64 0.000625 1600000 106668.8
128 0.0003125 3200000 120000 (2.25l/min)*
VSI 0.1… 0.1 ml/Imp
10.1 10000
10 l/min
(= 10 000 ml/min
= 166.67 ml/s)
1,666.7 Hz
1666.7
40.025 40000 6666.8
80.0125 80000 13333.6
10 0.01 100000 16667
16 0.00625 160000 26667.2
32 0.003125 320000 53334.4
64 0.0015625 640000 106668.8
128 0.00078125 1280000 120000 (5.625l/min)*
VSI 0.2… 0.2 ml/Imp
10.2 5000
18 l/min
(= 18 000 ml/min
= 300 ml/s)
1,500 Hz
1500
40.05 20000 6000
80.025 40000 12000
10 0.02 50000 15000
16 0.0125 80000 24000
32 0.00625 160000 48000
64 0.003125 320000 96000
128 0.0015625 640000 120000 (11.25l/min)*
VSI 0.4… 0.4 ml/Imp
10.4 2500
40 l/min
(= 40 000 ml/min
= 666.7 ml/s)
1,666.7 Hz
1666.7
40.1 10000 6666.8
80.05 20000 13333.6
10 0.04 25000 16667
16 0.025 40000 26667.2
32 0.0125 80000 53334.4
64 0.00625 160000 106668.8
128 0.003125 320000 120000 (22.5l/min)*
* The maximum output frequency is limited at 120,000 Hz.
Alternatively, the interpolation factors 2, 3, 5, 12, 24, 50, 100 can also be set (from software version 1B). See page 14.
VSI 1… 1 ml/Imp
1 1 1000
80 l/min
(= 80 000 ml/min
= 1 333.3 ml/s)
1.333,3 Hz
1333.3
40.25 4000 5333.2
80.125 8000 10666.4
10 0.1 10000 13333
16 0.0625 16000 21332.8
32 0.03125 32000 42665.6
64 0.015625 64000 85331.2
128 0.0078125 128000 120000 (56.25l/min)*
VSI 2… 2 ml/Imp
1 2 500
150 l/min
(= 150 000 ml/min
= 2 500 ml/s)
1, 250 Hz
1250
40.5 2000 5000
80.25 4000 10000
10 0.2 5000 12500
16 0.125 8000 20000
32 0.0625 16000 40000
64 0.03125 32000 80000
128 0.015625 64000 120000 (112.5l/min)*

12
The settings are made with the DIP switches located in the lower right
corner of the preamplifier housing (see Figure 4). With these the corre-
sponding interpolation factor IPF (bit 1 to 3) can be selected, the direc-
tion inversion (bit 4) and the activation/deactivation of the pulse filter
(bit 5). A description of the settings is shown in figure 5. The settings
can be modified at any time during operation.
For activating the alternative IPFs, the DIP switches 1-3 must be set to
„OFF“. Then, with the button constantly pressed, the corresponding al-
ternative IPF from Figure 5 must be set via the three DIP switches. An
enabled or set alternative IPF, is indicated by the green LED flashing
at 2-second intervals. The alternative IPFs are available from software
version 1B.
The standard description
is also located in the lid of
the preamplifier housing
so that the settings can be
changed directly on site.
14. SETTINGS OF THE PREAMPLIFIER
Fig. 5: Settings
Important:
Take ESD preventive measures to prevent electrostatic discharge while working
on the preamplifier electronics.
Fig. 4: Preamplifer electronics
Table 4: Volume measurement and max. frequency at high resolution
Example of flow meter “VSI 0.1/10 …”
1. Column Flow meter, version VSI and size 0.1 VSI 0.1...
2. Column Physical volume measurement Vm
(corresponds to the volume measurement Vm at interpolation factor IPF* = 1)
Vm = 0.1 ml/Imp
3. Column Interpolation factor IPF* = hardware programmed IPF* = 10
4. Column Volume measurement Vm* Vm* = 0.01 ml/Imp
5. Column K-factor*; reciprocal value of volume measurement Vm* K-factor* = 100,000 Imp/l
6. Column Maximum flow Qmax of the flow meter Qmax= 10 l/min
7. Column Maximum frequency fmax at interpolation factor IPF = 1 (see column 2)
(corresponds to the volume measurement Vm at interpolation factor IPF = 1)
fmax = 1,666.7 Hz
8. Column Maximum frequency fmax* at programmed interpolation factor (see column 3) fmax* = 16,666.7 Hz
Vm = physical volume measurement (size) of the flow meter (volume per tooth and per tooth gap)
Qmax = max. flow (test conditions)
fmax = max. frequency at Qmax fmax = Qmax / Vm
IPF* = programmable interpolation factor
* = all characters marked with * refer to IPF*
Vm* = interpolated volume measurement Vm* = Vm / IPF* ; K-factor* = 1 / Vm*
fmax* = max. interpolated frequency at Qmax fmax* = Qmax / Vm*

13
Fig. 7: Indicating LEDs of the preamplifier board
Fig. 6: Pulse filtering principle
15. PULSE FILTERING
16. INDICATING LEDS
Oscillations in fluid systems manifest themselves through constant
forward and backward movements of the liquid column, which is also
detected by the pair of toothed wheels or meter and converted into
proportional electronic pulses or edge sequences. Depending on the
application, oscillations or vibrations can occur during the flow rest
phases or discontinuous flows. The pulses generated during the oscial-
lation phase can be incorrectly interpreted by the downstream evalua-
ting unit or controller, which can be very distracting for the respective
operating process.
The signal filtering function of the internal electronics continuously off-
sets these generated edges during the rapid forward and backward
movements of the meter measuring unit. The signals at the channel out-
puts are also suppressed at the same time until the internal offset is
equalized or the initial position of the meter measuring unit has been
reached again (see Fig. 6).
The filter memory contains a rotational movement over 8 teeth of the
meter.
If this movement of 8 teeth is exceeded, the pulses are output in the cor-
responding direction, which is then automatically stored as preferred
direction.
The LEDs of the electronics give information about the corresponding
states of the outputs and . This includes certain operating and error
conditions (see table 6 and 7).
The LEDs provide information about the corresponding status of the
outputs (high / low) and indicate operating and error conditions (see
tables 6 and 7).
The two orange LEDs near to the wire connections indicate the states
of the outputs, which can be used to check the activity flow / standstill.
The green LED signals the general ON/OFF operating status and the
red LED signals an error (see Figure 7).
Preferred direction
Opposite direction
Preferred direction
Q
U
t
t
Signal output without filtering
Signal output with filtering
1
2
1
2
Filtering deactivationFiltering activation
1
2
3
4
5
6
7
8
9
10
11
12
13
14
16
15 17
18 20
19 21
22 24
23 25
26
27
28
29
30
31
32 31
30
29
28
27
26
25
24
23
22
21
20
19
18
16
17 15 13
14 12 10 8
911 7
6
5
4
3
2
1
0
Operating status
Operation ON /
Output active
2 sec. Operation ON / alternative
IPF active / Output active
/ Signal error, Sensor error

14
16
Fig. 4 shows the plug assignment of the preamplifier. As you can see,
this plug has five pins, the outer four assigned exactly as the ones in
standard preamplifiers. In addition to the power supply and signal out-
put of channel 1 and 2, there is a fifth pin, which emits the zero signal.
As a rule, only the four outer pins are needed to evaluate the flow meter
signals; pin assignment is therefore the same as standard preamplifiers.
For this reason you can use a normal 4-wired connection cable for the
connection of the flow meter. But please make sure that the shielding
of the cable is laid on the plug side onto the metal housing of the plug.
The cable shielding should always be laid continuously as far as the
flow meter and not interrupted in cross connectors or branch sockets.
Lay the connection cable as directly as possible from the evaluating de-
vice to the flow meter, since interruptions are always a potential source
of error.
The flow meter should be connected electrically with the earth conduc-
tor PE. This is normally secured by the earthed pipe lines.
If there are potential differences between the preamplifier hou-
sing and the earth conductor PE of the evaluating electronics,
you have to lay a correcting earth.
PLUG ASSIGNMENT OF PREAMPLIFIER
Important:
Only use well-shielded cables for the connection cable, with a wire cross section of
≥ 4 or 5 x 0.25 mm2. Please make sure that the housing of the round plug is metallic and that it has
a connection to the shielding.
Important:
Please make sure that no extra inductive elements are connected in the power supply of the
flow meter, such as contactors, relays, valves etc. These components are potential sources of
interference which generate high interference pulses, when switched and can interfere with the
functioning of the flow meter, although this complies with the electromagnetic compatibility
directives (especially if the inductive elements are not provided with an adequate protective circuit).
Working life is dependent on operating conditions and thus the specific properties of the devices,
limited through wear, corrosion, deposits or age. The operator is responsible for regular control,
maintenance and recalibration. Any indication of a malfunction or damage prohibits any further use.
On request, we can supply you with a borrowed device for the duration of repair or overhauling.
We advice to a yearly control and recalibration.
MAINTENANCE
pin 1
power supply
U = 10 – 28 V DC
pin 4
digital signal
2. channel
pin 3
power supply
GND (-U = 0 V)
pin 2
digital signal
1. channel
Top view of plug
metal housing connected
with the shielding and the
earth conductor PE
Fig. 4: Flange plug installed in the preamplifier housing of the flow meter
b
b
Click to buy NOW!
P
D
F
-
X
C
h
a
n
g
e
V
i
e
w
e
r
w
w
w
.
d
o
c
u
-
t
r
a
c
k
.
c
o
m
Click to buy NOW!
P
D
F
-
X
C
h
a
n
g
e
V
i
e
w
e
r
w
w
w
.
d
o
c
u
-
t
r
a
c
k
.
c
o
m
17. TECHNICAL SPECIFICATIONS OF PREAMPLIFIER
Fig. 8 shows the plug assignment of the preamplifier.
The pin assignment of the connector pins is compatible with all VS(I)
preamplifier versions. The common 4 or 5-wired connection cables can
still be used to connect the volume sensor.
Please note that the shielding of the cable on the connector side is con-
nected to the metal housing of the connector.
The cable shielding should always be laid continuously as far as
the flow meter and not interrupted in cross connectors or branch
sockets. Lay the connection cable as directly as possible from the eva-
luating device to the flow meter, since interruptions are always a poten-
tial source of error.
In order to prevent interference either the shield should be connected
to ground GND or to a protective earth conductor (PE). Alternatively
the flow meter must be connected electrically to earth (PE). This is ge-
nerally ensured with the grounded pipelines. This is normally secured
by the earthed pipe lines.
If there are potential differences between the preamplifier housing and
the earth conductor PE of the evaluating electronics, you have to lay a
correcting earth.
18. PLUG ASSIGNMENT OF PREAMPLIFIER
Fig. 8: Flange plug installed in the preamplifier housing of the flow meter
Pickup sensor 2 x AMR-sensor (sine and cosine signals)
Configuration automatically
Resolution Selectable standard 1, 4, 8, 10, 16, 32, 64, 128; alternative 2, 3, 5, 12, 24, 50, 100 (from SWV. 1B)
Frequency up to 120kHz
Signal outputs Channel A, Channel B
Channel A and B Two signal outputs for emitting the digital flow sensor signals; between channel A and channel B there is a channel
offset of 90°
Flow direction Recognition of flow direction from channel offset of the signals from channel A to channel B. On request also available
with separate direction signal,direction can be changed by a switch of the preamplifier electronics
Outputs 3 current limiting and short-circuit-proof push-pull output stages (channel A, channel B); driver current approx. 200 mA
at 24 V power supply; small saturation voltage up to 30 mA load current; short switching times; reverse voltage protec-
tion by integrated free-run diodes against Vb and GND; temperature protection switching with hysteresis; outputs are of
high impedance in case of error; ESD protected
Error messages Electronics error (e.g. defective interpolator); sensor error (e.g. sensor break-off); configuration necessary
Operating voltage Vb= 8 . . . 28 VDC
Current comsumption Ino load = approx. 40 mA (@24V DC); total current consumption depending on loading of outputs

15
Important:
Only use well-shielded cables for the connection cable, with a wire cross section of ≥ 4 x 0.25 mm².
Please make sure that the housing of the round plug is metallic and that it has a connection to the shielding.
Important:
Please make sure that no extra inductive elements are connected in the power supply of the flow meter,
such as contactors, relays, valves etc. These components are potential sources of interference which
generate high interference pulses, when switched and can interfere with the functioning of the flow meter,
although this complies with the electromagnetic compatibility directives (especially if the inductive
elements are not provided with an adequate protective circuit).
19. MAINTENANCE, SERVICE LIFE AND WARRANTY
20. STORAGE, RETURN AND DISPOSAL
Depending on the operating conditions, the service life and therefore
the specific properties of the units are limited by wear, corrosion, de-
posits or ageing. The operator is responsible for regular inspection,
maintenance and recalibration. Any observation of a malfunction or
damage prohibits further use. On request, we can provide you with a
loan unit for the duration of the overhaul. We recommend an annual
check and recalibration. Under normal operating conditions, the ser-
vice life is 10,000 hours.
The warranty period is 12 months.
Temporary storage
All VSE flow meters are supplied with sealing plugs and in suitable pack-
aging for all destinations and modes of transport to ensure optimum pro-
tection. The flow meters should always be stored in their original foam
packaging or transport box.
The units must not be exposed to temperatures below -20°C or above
+60°C and must be protected from moisture and its effects.
Return
1.
The flow meter must be properly cleaned by the customer before be-
ing returned to prevent the risk of poisoning/contamination by harm-
ful, explosive and other high-risk pumped media for humans and the
environment.
2.
If media have been conveyed whose residues with atmospheric
humidity lead to corrosion damage or ignite on contact with oxy-
gen, the flow meter must be additionally neutralised and thoroughly
cleaned with anhydrous, inert gas to dry.
3.
The return of the flow meter must always be accompanied by a fully
completed declaration of no objection (see section 28, page 23).
All applied safety and decontamination measures must be indicated
.
4.
When returning the flow meter, it must be packed in accordance with
the applicable logistics standards and sealed with sealing plugs.
Disposal
VSE actively promotes environmental awareness and has an operational
management system that meets the requirements of ISO 9001:2015. The
impact on the environment and people should be minimised during the
production, storage, transport, use and disposal of our products and
solutions.
•
Collect rinsing liquid as well as residual liquid and dispose of it in
accordance with the statutory provisions and regulations.
•
Wear protective clothing and protective mask/+ goggles if necessary.
Materials must be disposed of properly as follows:
•
Metal
•
Plastics
•
Electronic components
•
etc.
When disposing of the materials, ensure that the waste-relevant rules and
regulations of the respective country of destination are observed!

16
Size Measuring range
l/min
Frequency
Hz
Pulse value
cm3/pulse
K-factor
Imp/liter
VSI 0.04 0.004 … 4 1.667 * IPF … 1,666.67 * IPF 0.04 / IPF 25,000 * IPF
VSI 0.1 0.01 … 10 1.667 * IPF … 1,666.67 * IPF 0.1 / IPF 10,000 * IPF
VSI 0.2 0.02 … 18 1.667 * IPF … 1,500.00 * IPF 0.2 / IPF 5,000 * IPF
VSI 0.4 0.03 … 40 1.250 * IPF … 1,666.67 * IPF 0.4 / IPF 2,500 * IPF
VSI 1 0.05 … 80 0.833 * IPF … 1,333.33 * IPF 1 / IPF 1,000 * IPF
VSI 2 0.1 … 120 0.833 * IPF … 1,000.00 * IPF 2 / IPF 500 * IPF
21. TECHNICAL SPECIFICATIONS VSI 0.04 / IPF – VSI 2 / IPF
Selectable interpolation factors standard IPF: 1; 4; 8; 10; 16; 32; 64; 128; alternative IPF: 2, 3, 5, 12, 24, 50, 100 (from SWV. 1B)
Measurement accuracy up to 0.3 % of measurement value (with viscosity > 20 mm2/s)
Repetition accuracy ± 0.05 % under the same operating conditions
Material Cast iron EN-GJS-400-15 (EN 1563) or
Stainless steel 1.4305
Meter bearing Ball bearings or steel plain bearings (medium-dependent)
Seals FPM (standard), NBR, PTFE, EPDM, silicon, FVMQ
Max. operating pressure Cast iron EN-GJS-400-15 (EN 1563) 315 bar / 4500psi
Stainless steel 1.4305 450 bar / 6500 psi
Medium temperature –40°C … + 120°C (–40°F … 248°F)
Ambient temperature –20°C … + 50°C (–4°F … 122°F)
Viscosity range 1 … 100,000 mm2/s
Installation position any
Flow direction any
Running noise max. 72 db(A)
Power supply voltage 8 up to 28 volts/DC
Pulse output 2 current limiting and short-circuit-proof output stages
low signal: 0 = GND; high signal: 1 = Ub -1
Channel offset 90° ± 5° max.
Pulse-width repetition rate 1/1 ± 5% max.
Preamplifier housing Aluminium
Protection type IP 65

17
22. FLOW RESPONSE CURVES VSI 0.04 – VSI 2
VSI 0,04 VSI 0,1
VSI 0,2 VSI 0,4
VSI 1VSI 2
Flow resistance ∆pFlow resistance ∆p Flow resistance ∆p
Flow Q
Flow Q
Flow Q
Flow Q
Flow Q
Flow Q
VSI 0.1VSI 0.04
VSI 0.4VSI 0.2
VSI 2VSI 1

18 23. DIMENSIONS VSI 0.04 – VSI 2
Dimensions in mm
Gewicht
Size
VSI
A B C D E øG H K L M N O-ring
GG
kg
E
kg
0.04 100 80 83 M6 11. 5 9106.5 59 70 40 20 11 x 2 2.8 3.4
0.1 100 80 85 M6 9 9 108.5 61 70 40 20 11 x 2 2.8 3.4
0.2 100 80 85 M6 9.5 9108.5 61 70 40 20 11 x 2 3.0 3.7
0.4 115 90 87. 5 M8 11. 5 16 111. 5 63.5 80 38 34 17.96 x 2.62 4.0 5.0
1130 100 92 M8 12.5 16 115 . 5 68 84 72 34 17.96 x 2.62 5.3 6.8
2130 100 109 M8 15 16 132.5 85 84 72 34 17.96 x 2.62 6.7 8.4
Weight
View X
View X
Stainless steel version
Connection diagram
Housing without milled edge
Cast iron version
Connection diagram
O-ring
Cast iron version
Plug position for
VSI 0.04 to VSI 0.4
Earth
Centring bore hole
Centring bore hole
Plug position for VSI 1/VSI 2
M12 x 1
M12 x 1

19
Size
VSI
Connection
thread
G
FøH A B C D E L Thread / depth
M
Weight
kg
0.04
0.1
0.2
G 1/4“
G 3/8“
G 1/2“
35
20
80 90 40 70
26
100 M6/12 1.8
23 30
28 38
0.4 G 1/2“ 35 28 90 100 38 80 46 115 M8/15 2.7
G 3/4“ 40 33 52
1
2
G 1/2“ 35 28
100 110 72 84
46
130 M8/15 3.6G 3/4“ 40 33 52
G 1“ 55 41 55
Connection position, side
Flow meter
Subplate
C
A
D
B
G
ØH
F
C
A
D
L
G
F
M../.. zur Befestigung der Platte
L
D
C
B
D
A
C
E
E
F
F
G
Anschlussplatten AP.
Anschlussbild
Volumensensor
Anschlussbild
Volumensensor
Anschlussbild
Volumensensor
Anschlussbild
Volumensensor
M../.. zur Befestigung der Platte
G
M../.. zur Befestigung der Platte
Connection drawing
Flow Meter
M../.. for fixing the subplate
Flow Meter
Connection drawing
M../.. for fixing the subplate
24. DIMENSIONS SUPPLATES AP.0.2 – 1
only for AP . 4 U...
C
A
D
B
G
ØH
F
C
A
D
L
G
F
M../.. zur Befestigung der Platte
L
D
C
B
D
A
C
E
E
F
F
G
Anschlussplatten AP.
Anschlussbild
Volumensensor
Anschlussbild
Volumensensor
Anschlussbild
Volumensensor
Anschlussbild
Volumensensor
M../.. zur Befestigung der Platte
G
M../.. zur Befestigung der Platte
Connection position below
Flow meter
Subplate Connection drawing Connection drawing
Flow Meter Flow Meter
M../.. for fixing the subplate M../.. for fixing the subplate

20 25. TYPE KEY
VSI 0,2 / . . . . G P O 1 2 V - 4 2 R 1 1 / X
Size
Interpolation (not applicable for VS series)
Material
Type of connection
Gear surface coating
Instruments bearing (factory-set to the application)
Instrument toleranz (factory-set to the application)
Type of seal
Pick-up system
No. of pick-up
Signal output
Preamplifier
Connection
Series
X Change code, factory definition
1
5
4 pin M12-connector
5 pin. M12-connector
1 integrated
R 8…28V DC (VV - AMR standard)
2 2 pick-ups
4 AMR - sensor
V
P
T
E
B
S
Q
FPM (Viton) standard
NBR (Perbunan)
EPDM
EPDM-41B8
silicon
FVMQ
1
2
3
4
5
reduced tolerances
normal tolerances (standard)
increased tolerances
tolerance steel-sleeve bearing
increased tolerance steel-sleeve bearing
1
2
3
5
6
7
9
ball bearing
bronze sleeve bearing
steel sleeve bearing
hard metal sleeve bearing
angular ball bearing
sleeve bearing plasma nitrided
O
C
without surface coating (standard)
dynamant- surface coating (C-surface coating)
P
R
Subplate
pipe connection
G
E
X
A
H
EN GJS-400-15 (5.3106)
stainless steel 1.4301 / 1.4305 (V2A)
stainless steel 1.4404 / 1.4571 (V4A)
aluminium
EN GJS-600-3 (5.3021) (high-pressure)
* n impulses per tooth gap volume
example: VS 0.2 imp. 16
V
m
= V
z
/ n
V
m
= 0.2cm³ / 16 = 0.0125cm³
VSI 0.04
VSI 0.1
VSI 0.2
VSI 0.4
VSI 1
VSI 2
tooth gap volumeVz = 0.04ml
tooth gap volumeVz = 0.1ml
tooth gap volumeVz = 0.2ml
tooth gap volumeVz = 0.4ml
tooth gap volumeVz = 1ml
tooth gap volumeVz = 2ml
Vm = measuring volume
Vz = tooth gap volume
spindle bearing
PTFE (Teflon)
Example
Table of contents
Other vse Measuring Instrument manuals
Popular Measuring Instrument manuals by other brands

Oldham
Oldham MX 52 installation manual

Indu-Sol
Indu-Sol EmCheck ISMZ I user manual

bluelab
bluelab Commercial trunchelon nutrient meter Care and use guide

KNX
KNX JUNG 23066REGHE operating instructions

Chauvin Arnoux
Chauvin Arnoux AEMC Digital FlexProbe 400D-6 user manual

Hansen
Hansen VPIF Specifications, Applications, Service Instructions & Parts

Kimo
Kimo SDA user manual

Endress+Hauser
Endress+Hauser Solimotion FTR16 operating instructions

Ametek
Ametek Drexelbrook 505-1320 Series Installation and operating instructions

Lumel
Lumel N30H User Manual & Quick Start

Martin Lishman
Martin Lishman IMPACTRACK user guide

Katronic Technologies
Katronic Technologies KATflow 150 operating instructions