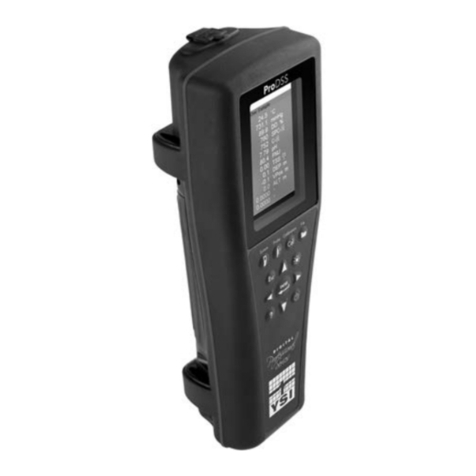
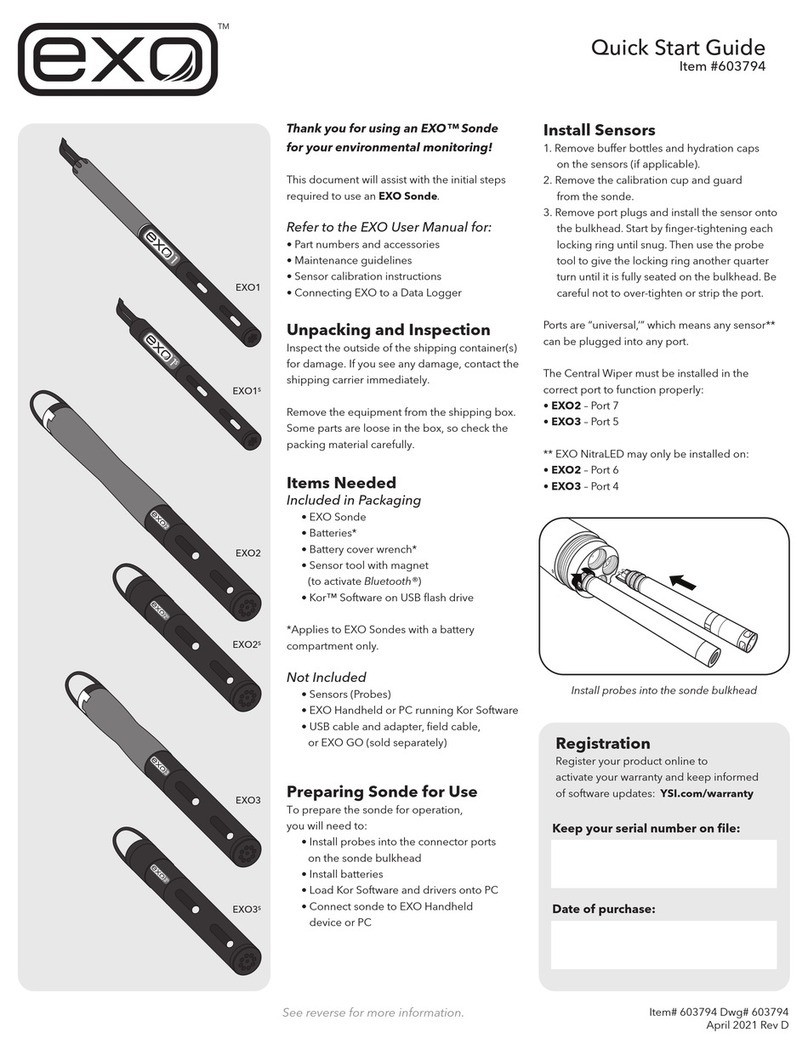
YSI ProDSS Use and care manual

YSI ProDSS Meter Calibration and Routine Maintenance
K:\Streamkeepers\Communication\Website\To load onto Web\ProDSS calibration.docx
1
YSI ProDSS calibration and routine maintenance rev 5/29/2018
General info
1
Pressure (Barometer) calibration
4
Conductivity calibration
5
DO calibration
7
pH calibration
11
Turbidity calibration
14
Temperature calibration check
16
References
16
These procedures are to be performed by Streamkeepers staff or trained volunteers. Check
and/or calibrate all parameters at least prior to every quarterly monitoring session, and it’s also a
good idea to check calibrations during the month-long monitoring window. If the instrument is
used between seasonal sampling months, additional checking and/or calibration is recommended.
For further details about frequency of calibrations/checks, see “Equipment Calibration &
Calibration-Check General Information.”
Be sure the primary reference standards used in the office for calibration are within their
expiration dates (last day of listed month). The ProDSS will automatically store calibration
information into a GLP (good lab practices) file. This includes what was calibrated, who
calibrated it, and when it was calibrated.
Calibration checks and QC criteria: All calibration checks are tied to QC criteria specified in
the Quality Assurance Project Plan (QAPP) for either Streamkeepers or whichever special
investigation is being conducted. Where check results do not meet QC criteria, data gathered for
the parameter(s) in question with that sensor since the time of the last calibration or check must
be qualified per QAPP specifications. It’s important to notify program staff when calibration
checks do not meet QC criteria.
Prior to calibrating:
•Make sure all sensors, sensor guard, and calibration cup are clean. If possible, use a
dedicated sensor guard and calibration cup, used for calibration purposes only. For proper
cleaning procedures, see the ProDSS Assembly & Maintenance protocol. Make sure the
sensor guard is in place before installing the calibration cup.
•Fill the calibration cup with a moderate amount of water and rinse the sensor guard and
sensors by gently shaking the sealed cup. Discharge the water and repeat if necessary.
•Below is a schematic of the calibration cup (note the different fill lines), and a picture of the
sensor tips. You may need to reference this image during calibration.

YSI ProDSS Meter Calibration and Routine Maintenance
K:\Streamkeepers\Communication\Website\To load onto Web\ProDSS calibration.docx
2
General Rules about ProDSS Calibration
•Buffer solutions must not exceed expiration or “use by after opening” dates. Solutions are
good until the last day of the month listed. Use expired buffers for rinses.
•For best results, rinses should generally consist of three water and then three buffer rinses.
•Anytime you’re having a problem with calibration, it’s a good idea to reset the handheld unit
to Factory Defaults and start all over again.
•One case of the above is if you get a message saying, “Results questionable—the calibration
may produce inaccurate readings. Accept anyway?” Do NOT accept the calibration. That
message indicates an issue with the probe or sensor cap, or an out of range calibration that
was accepted previously. First, reset the probe’s calibration back to factory default to delete
the out-of-range calibrations. Then, check the probe in its calibration reference solution—the
reading should be pretty close to the reference value. Recalibrate, and hopefully you won’t
see a “Results Questionable” message.
•The “Post Cal Value” at the bottom of the screen should be the same as the top calibration
value that you choose, and the yellow line on the graph should reflect this value, remaining
straight throughout the calibration.
•After you’ve hit the “Calibrate” button and the calibration is accepted, check to see that the
value then showing up on the meter is very close to the “Calibration Value” that you’d set. If
not, you may have to redo the calibration.
•When you’re done calibrating everything, plug the handheld into a computer with KorDSS
software loaded, and Kor should be set to automatically download all the data. If it doesn’t:
oCheck the settings to make sure that automatic GLP download has been selected.
oOtherwise, the GLP files may have become corrupted in the handheld. You may have to
delete all the GLP files from the handheld and re-calibrate to get the GLP data to
download successfully.
•Once the data have been downloaded, a green bar should appear across the bottom indicating
that all components of the most recent calibrations were good. If not:
oOrange is a warning that, although calibrations were successful, one or more of the
sensors might be getting close to the edge of acceptable electronic-response range. Click
on the “QC Score” button in the lower-right corner to see which sensors have warnings. It
Temperature sensor

YSI ProDSS Meter Calibration and Routine Maintenance
K:\Streamkeepers\Communication\Website\To load onto Web\ProDSS calibration.docx
3
may be appropriate to perform more extensive cleaning (see ProDSS Assembly and
Maintenance protocol) or to order a new pH or DO sensor tip.
oRed is a notice that one or more calibrations have failed and that data will be
compromised unless problems are addressed and problematic sensors recalibrated. It’s
imperative to address this situation. You can first try to reset the probe’s calibration back
to factory defaults to delete the out-of-range calibrations and then check the probe in its
calibration reference solution—the reading should be pretty close to the reference value.
If that is the case, try recalibrating. If that doesn’t work, perform more extensive cleaning
(see ProDSS Assembly and Maintenance protocol), order a new pH or DO sensor tip, try
fresh calibration reference solutions, or call YSI.
Button Navigation Tips
•If the screen has darkened, any key stroke will brighten it, but the key will not execute.
•To get to a prior screen, try pressing the left arrow first; if that doesn’t work, press “Esc”.
•When navigating with the Up/Down/Left/Right arrows, when you reach the end of the
screen, if you keep going, it will circle back around to the other side.
Calibration Data Sheets and Meter Login
Full calibration/checks of the ProDSS involve three data sheets, available on our website:
•Pressure/Conductivity/DO
•pH/Turbidity
•Temperature (which also involves our stand-alone thermometers)
In each case, fill out the top part of the calibration data sheet, then fill out the other parts as you
go along.
On the meter, hit the CAL button, then highlight USER ID using the up/down arrows, then:
•If your initials aren’t already there, choose “Add new” and add them. Navigate to the letters
you want with the arrow keys, then hit the ENTER key for each one. When you’re done,
navigate to the “ENTER” box on the screen and hit ENTER. Then go to the next step.
•If your initials are already there, choose your initials and ENTER, then ENTER again where
it says SELECT[your initials].
Then hit ESCAPE and hit the CAL button again to get to the calibration menus.

YSI ProDSS Meter Calibration and Routine Maintenance
K:\Streamkeepers\Communication\Website\To load onto Web\ProDSS calibration.docx
4
PRESSURE (BAROMETER) CALIBRATION
The YSI ProDSS has a built-in barometer that has been factory calibrated and rarely needs to be
recalibrated. The accuracy of the barometer is essential for dissolved oxygen calibration. Before
and after each season, check the barometer readings for accuracy by testing against a weather
station. (There is a station outside the Clallam County maintenance shop, with a console at the
same elevation in the foyer next to the County Road Engineer’s office.) RECORD on data
sheet the weather station location, the weather station barometric pressure reading to 0.01
inches Hg, and the ProDSS barometer reading to 0.01 inches Hg. If the ProDSS’s barometer
does not match the value of the weather station within QAPP specs of ± 0.05, it will need
recalibration.
Calibration:
1. Barometer units should be in inHg. If not, first note what the settings are and notify program
staff. Then select the Probe button, then Display, then Barometer, and choose inHg.
2. RECORD the pre-calibration reading.
3. Select the Calibration button , enter User ID, and select Barometer.
4. Select Calibration Value, then enter the “true” barometric pressure by pressing Enter, then
the value, then Enter again.
5. Select Accept Calibration.
6. Indicate successful calibration on your data sheet.

YSI ProDSS Meter Calibration and Routine Maintenance
K:\Streamkeepers\Communication\Website\To load onto Web\ProDSS calibration.docx
5
CONDUCTIVITY CALIBRATION
Equipment Needed:
•Purified water
•Mild solution of dish soap and tap water
•Cleaning brush found in maintenance kit
•Conductivity standard solution *Check date if opened. The solution expires one month
after opening. If expired, get new solution. NEVER REUSE CALIBRATION SOLUTION.
DOCUMENTING PRIOR CALIBRATION STABILITY:
1. RECORD the date, your initials, season, and conductivity standard strength on the
conductivity calibration data sheet.
2. Conductivity units should be in µS/cm. If not, first note what the settings are and notify
program staff. Then select the Probe button, then Display, then Conductivity, then
Specific Conductance, and choose SPC µS/cm.
3. Thoroughly rinse the calibration cup with a small amount of conductivity standard solution
and then discard.
4. Fill the pre-rinsed calibration cup with the conductivity solution to the second fill line (225
mL).
5. Carefully immerse the sensors (with sensor guard on) into the cup, making sure the solution
is above the vent holes on the side of the conductivity sensor. To remove bubbles, gently
rotate the sensors, or move the sensors up and down. Allow at least one minute for
temperature equilibration.
6. From the Run Screen, RECORD the pre-calibration conductivity reading. QAPP specs
are ± 5% of standard.
CALIBRATING SPECIFIC CONDUCTANCE:
Cleaning Procedures:
1. Remove the sensor guard. NOTE: Be careful when handling this sensor; the tip has a
temperature sensor that is fragile.
2. Dip the sensor’s cleaning brush (included with the maintenance kit) in clean water and insert
it at the top of the channels, as far down as it will go. Scrub back and forth 15-20 times.
3. If deposits have formed on the electrodes, repeat the process with a mild solution of dish
soap and water.
4. If build-up is still present on the electrodes, soak the sensor in white vinegar for up to an
hour. You can either soak the entire bulkhead or take off the Conductivity sensor and soak it
separately. Be sure to rinse everything off very well with tap water, and then clean with the
brush and a mild soap and water solution.
5. Rinse the probe in clean tap water thoroughly, then gently pat dry with Kimwipes.
6. Replace the sensor guard.

YSI ProDSS Meter Calibration and Routine Maintenance
K:\Streamkeepers\Communication\Website\To load onto Web\ProDSS calibration.docx
6
Conductivity Calibration Steps
1. Thoroughly rinse the calibration cup and sensors with a small amount of conductivity
standard solution and then discard.
2. Fill the calibration cup with the conductivity solution to the second fill line (225 mL).
3. Carefully immerse the sensors (with sensor guard on) into the cup; make sure the solution is
above the vent holes on the side of the conductivity sensor. To remove bubbles, gently rotate
the sensors, or move the sensors up and down. Allow at least one minute for temperature
equilibration.
4. Confirm stabilization by watching the readings on the screen; if µS/Cm has not significantly
changed in 40 seconds, the sensor is stable.
If Conductivity reading does not stabilize after 40 seconds:
•Gently rotate the sensor, or remove/reinstall the calibration cup to make sure that no air
bubbles are in the conductivity cell.
•If the actual measurement data is about 1/2 of the expected calibration value, the conductivity
sensor is not completely submerged. Add more calibration standard to the calibration cup.
5. Select the calibration button , enter User ID, select Conductivity, then select Specific
Conductance.
6. Select “Calibration Value” at the top of the screen; enter the value of the calibration solution
bottle; it will say something like “1,000 µS/cm @25°C”. (Note: µS/cm = micromhos =
umhos, where mhos = 1/ohms.)
The “Post Cal Value” at the bottom of the screen should be the same as the top calibration value
that you chose, and the yellow line on the graph will reflect this value, remaining straight
throughout the calibration. You don’t want to see an impossible value, like 1000 units during a
pH cal—that would indicate that something was wrong.
7. After confirming stabilization, press Accept Calibration. A message will appear:
“Calibration Successful”.
If you get calibration error messages, check for proper sensor immersion, verify that the
calibration solution is fresh and that the correct value has been entered into the ProDSS, and/or
try re-cleaning the sensor (refer to the Maintenance protocol for detailed cleaning techniques for
the conductivity sensor).
8. The meter should now be calibrated. For added assurance, you can rinse the probe in purified
water, blow off all the water with compressed air, and take a reading in air only. It should be
≤1 µS/cm. If not, repeat calibration steps.
9. RECORD the post-calibration conductivity reading on the data sheet.
10. Rinse the sensors and calibration cup with clean water.

YSI ProDSS Meter Calibration and Routine Maintenance
K:\Streamkeepers\Communication\Website\To load onto Web\ProDSS calibration.docx
7
DISSOLVED OXYGEN CALIBRATION
Check Settings
Dissolved oxygen % units should be in DO % L (local) on one line and DO mg/L on the next. If
not, first note what the settings are and notify program staff. Then select the Probe button,
then Display, then ODO, and select both DO% and DO mg/L. Then select Escape and then the
Probe button again, then Setup, then ODO, and select Local DO but not LDS.
Post-Monitoring Session DO Check Procedure
DO 100% Water-Saturated-Air drift check:
This is the same test performed in the field to assess sensor drift. Drift checks that are out of
spec indicate a possible need to qualify prior data and to recalibrate the sensor. Also, by
comparing this drift check to those recorded in the field, you get an “apples to apples”
comparison of how much and when the sensor has drifted since its last calibration.
1. Make sure the sensors and calibration cup have been rinsed thoroughly. (You can use the
clean sensor guard and calibration cup which are kept in the office, but then you won’t have
an “apples to apples” comparison to field data.)
2. Make sure there are no water droplets on the sensor cap or temperature sensor. With a
Kimwipe or lint-free cloth, carefully wipe off any large droplets from the DO sensor tip and
the temperature sensor by inserting the Kimwipe through the open slots in the sensor guard.
If large droplets cannot be removed by wiping them away through the guard, remove the
sensor guard to get to the sensors. Note that the temperature sensor does not need to be
completely dry; drying the sensor at its base is hard to do and is not necessary.
3. Pour a small amount of clean water (1/8th inch) gently down the side of the calibration cup.
4. Gently insert the sensor and guard into the calibration cup and partially tighten the calibration
cup to the bulkhead.
NOTE: Do not fully tighten the cup; atmospheric venting is required for accurate
calibration. Make sure the DO and temperature sensors are not submerged in water.
5. Set the unit aside with sensors pointing down and wait 5 to 15 minutes for complete air
saturation.
6. Wait for the unit to stabilize to these criteria: During a period of 2 minutes, both DO%L and
Temp (°C) stay within ± 0.1 of their initial readings.
7. Per QAPP specs, in Local DO% mode, the meter should read 100% ±2%.
8. RECORD the time and the water temp, barometric pressure, DO Sat %, DO mg/L, and
Specific Conductance readings.
9. Check the values you’ve recorded against the theoretical oxygen solubility of water at your
temperature, pressure, and conductivity, using the USGS DO tables or calculator on the Web.
The DO mg/L value you recorded should be within 0.2 mg/L of the theoretical value.
10. If the sensor doesn’t pass these tests, simply note that on your data sheet. The critical tests of
the sensor will be the Air-Saturated-Water and Winkler tests (following).

YSI ProDSS Meter Calibration and Routine Maintenance
K:\Streamkeepers\Communication\Website\To load onto Web\ProDSS calibration.docx
8
DO 100% Air-Saturated-Water drift check:
This is considered by USGS to be a superior benchmark to water-saturated air (Rounds et al.,
2013), and therefore it is one of the tests we use to confirm sensor stability and accuracy.
Equipment needed:
•1 or 2 large 5-gallon plastic bucket(s) - depends on method used below
•Purified water, lint-free tissues for cleaning
•Aquarium air pump and aeration stone
Prepare calibration bucket:
•Method 1 (air stone--preferred)
1. Fill a bucket with water in the lab.
2. Place bucket on the counter.
3. Place the aeration stone on the bottom of the bucket and turn on pump.
4. Loosely cover the bucket and set aside for a minimum of one hour (preferably overnight).
•Method 2 (pouring back and forth)
1. Fill one of the buckets with water in the lab.
2. Pour this water into the other bucket and repeat 20 times.
3. Place bucket on the counter.
4. Let this water sit with a loose lid on it until the following day. If the temperature does not
change, it will stabilize and remain at 100% oxygenation.
Procedure:
1. Move the air stone to one side of the bucket and wait for the bubbles to clear on the other
side. Then place the probe, with the cup off but the guard on, in the other side of the bucket.
Tap the guard at an angle against the side of the bucket to dislodge any air bubbles from the
probes.
2. Wait for the readings to stabilize: no change in DO Sat % or Temp for 40 seconds.
3. RECORD the time and the water temp, barometric pressure, DO Sat %, DO mg/L, and
Specific Conductance readings.
4. In DO% mode, the meter should read 100% ±2%.
5. Check the values you’ve recorded against the theoretical oxygen solubility of water at your
temperature, pressure, and conductivity, using the USGS DO tables or calculator on the Web.
The DO mg/L value you recorded should be within 0.2 mg/L of the theoretical value.
6. If the meter doesn’t pass, you can try to retest. If it fails again, data from the previous
sampling period (back to the last calibration) may need to be qualified per the Quality
Assurance Plan governing the sampling. Or you can test via a Winkler titration (next
section).
7. If performing Winkler side-by-side testing, it’s a good idea at this point to set up the zero-
saturation solution described later in the section entitled “DO Zero-Point Calibration,”
because this solution has to sit for a while after being mixed.
8. See separate “Winkler Titration Side-By-Side Testing” procedure. This procedure is not
required by our current QAPP but is useful as an additional check. To test the calibration of
the instrument, the instrument’s reading should differ from the Winkler reading by no more
than the nominal accuracy of the ProDSS (± 0.2) added to the nominal accuracy of the
Winkler titration (± 0.2 per Hallock and Ehinger 2003).
9. Another way that Streamkeepers does Winkler titration side-by-side testing is by sampling
side-by-side with the WA Dept. of Ecology when they do their monthly ambient sampling in
Clallam County.
YSI ProDSS Meter Calibration and Routine Maintenance
K:\Streamkeepers\Communication\Website\To load onto Web\ProDSS calibration.docx
9
Pre-Monitoring Session DO Calibration Procedures
The DO sensor should have already been inspected for cleanliness, but if the sensor is visibly
dirty, refer to the Assembly & Maintenance protocol for proper cleaning procedures. If more
than a third of the black paint on the sensor face is missing, the sensor must be replaced.
DO Zero-Point Calibration
Equipment Needed:
•Sodium sulfite powder or 0.8% solution
•Purified water, lint-free tissues for cleaning
•Face shield, gloves, lab apron
1. Put on personal protective equipment.
2. If you don’t have pre-mixed solution: Using a 1000 mL graduated cylinder, make a solution
using ~6g sodium sulfite/750 mL DI water. Stir to dissolve and allow to sit for > 60 min.
3. Place DO probe in the sodium sulfite solution, or if you have two meters, pour the processed
solution into each meter’s calibration cup to the second line and insert the probe. If the DO%
Local does not read < 3% DO, the solution may have been mixed incorrectly or not have sat
long enough. If it continues to read > 3%, notify program staff; very-low DO readings taken
in the field may need to be qualified. Wait for stabilization and RECORD the pre-
calibration reading.
4. Select the calibration button , enter User ID, then select ODO, then Zero.
5. Confirm stabilization by watching the Actual Readings on the screen; if DO% and Temp
remain within ± 0.1 for 2 minutes, the sensor is stable.
6. After observing stabilization, press Enter to Accept Calibration.
7. A message will appear stating, “Important: A Zero calibration MUST be followed by a DO
% or mg/L calibration.” Press Enter again.
8. You will see “Calibration Successful!” at the bottom of the next screen. Circle the "Y" on
the data sheet. If you get don't get the "Calibration Successful" acknowledgement, try
recalibrating. RECORD the DO%.
9. Rinse the probe thoroughly with DI water before placing it back in the calibration cup - this
is important or it could interfere with future calibrations.
DO 100% Air-Saturated-Water calibration:
1. Place the probe in the bucket of prepared water as far away from the running air stone as you
can place it.
2. Confirm stabilization by watching the actual readings on the screen; if DO% and Temp
remain within ± 0.1 for 2 minutes, the sensor is stable.
3. Select the calibration button , enter User ID, then select ODO, and then DO%.
(Calibrating in DO% automatically calibrates the mg/L measurements.)
4. After observing stabilization, press Accept Calibration. “Calibration Successful!” will be
displayed on the screen. RECORD calibration success and the post-calibration reading
on the data sheet. NOTE: If you see a calibration error message, verify the barometer
reading and inspect the sensor cap. Clean and/or replace the sensor cap as needed (see
“Failing Sensor Cap” section below or the separate Maintenance document).

YSI ProDSS Meter Calibration and Routine Maintenance
K:\Streamkeepers\Communication\Website\To load onto Web\ProDSS calibration.docx
10
Post-Calibration and Periodic DO Drift Check
DO 100% Water-Saturated-Air calibration check:
(Instructions are at start of Post-Monitoring Session DO Check Procedure.)
It is a good idea to perform this check after having calibrated the DO sensor, as well as from time
to time in between calibrations, in order to test the correlation between the air-saturated water
and water-saturated air reference environments and whether the meter is drifting unacceptably.
See procedure described above. If it fails to meet the guidelines, it should be checked in air-
saturated water and recalibrated if needed.
Signs of a Failing DO Sensor Cap
If you note any of the following, the DO sensor cap may need replacement:
•More than one third of the black paint is missing from the face of the sensor.
•Unusually slow response.
•Unstable readings in a stable environment.
•Failure to hold its calibration for a reasonable time period (nominally one month).

YSI ProDSS Meter Calibration and Routine Maintenance
K:\Streamkeepers\Communication\Website\To load onto Web\ProDSS calibration.docx
11
pH CALIBRATION
Equipment Needed:
•Purified water
•Kimwipes
•pH 4, 7 and 10 buffer solutions
Perform a 3-point calibration of the pH meter before every monitoring session. Anytime a new
lot number of buffer is put into use, calibrate the instrument with the new lot and check the old
lot to compare the results; RECORD these results on the calibration data sheet.
A breakdown of the calibration screen for pH.
Check settings
pH units should be in pH. If not, first note what the settings are and notify program staff. Then
select the Probe button, then Display, then ISE, and select pH.
RECORD lot numbers and expiration dates of pH 7, 4 & 10 calibration standards.
Set the midpoint (pH buffer 7)
1. Rinse sensors once with distilled water, once with old buffer solution, and twice with new
solution. To rinse, fill cup ~2”, attach cup to unit and lightly shake the unit while tilting it
back and forth. Shake and tilt the unit until all sensors and guard have been rinsed.
2. Fill the calibration cup with the buffer 7 solution to the first fill line (170 mL)
3. Carefully immerse the unit into the calibration cup, and tap the side of the unit until any air
bubbles are removed.
4. Allow the sensor to stabilize (doesn’t vary by more than 0.01 for 2 min.). If the reading won’t
stabilize, the pH sensor cap may need replacement.
5. Press the calibration button , enter User ID, select pH, and then select Calibration Value.
This is an internally-adjusted value that comes from
the sensor. It does not have to match the calibration
value at the top of the screen. You just don’t want
to see an impossible value, like 1000 units during a
pH cal—that would indicate that something was
wrong with your probe.

YSI ProDSS Meter Calibration and Routine Maintenance
K:\Streamkeepers\Communication\Website\To load onto Web\ProDSS calibration.docx
12
6. Enter the pH buffer value that corresponds to the temperature value that you can see under
Actual Readings (e.g., 21.2°C in the above picture). This value can be found on the bottle of
most pH buffers (e.g., the value of most pH 7 buffer solution at 20 °C is 7.02).
7. Confirm stabilization by watching the actual readings on the screen; if pH remains within ±
0.01 for 2 minutes, the sensor is stable.
8. After observing stabilization, RECORD the pre-cal reading and temperature, last
calibration date, and mVs, then press Accept Calibration. A message will appear:
“Calibration Successful”. Circle “Y” under “Recalibrated?”
If you see a “Results Questionable” message during the pH calibration, even though the
readings looked OK, and if the probe stabilization in stream water has been slower than usual,
there may be bacterial contamination in the probe’s reference junction. You can clean this by
soaking the sensing end of the probe in a 1:1 bleach and water solution for 20-60 minutes. Be
sure to remove the probe from the ProDSS bulkhead and plug the empty port (bleach will
damage the other probes). After the bleach soak, rinse and then soak the pH probe in tap water
for 20-60 minutes to remove any remaining bleach residue. If this procedure does not resolve
the error message or performance problems, the pH sensor cap may need replacement.
A note about pH millivolts (mV):
Millivolts (mV) are a way to troubleshoot calibration problems; they can help identify if the
buffer solutions are bad or the sensor needs replacing. Below is the desirable range for mVs in
the designated buffers:
Buffer 7: -50 to +50 mV
Buffer 4: +165 to 185 above buffer 7 mV value
Buffer 10: -165 to -185 below buffer 7 mV value
If you are outside or even near these thresholds during calibration, try the following:
--If the sensor looks fouled, rinse it and the calibration cup with clean water, or perform the
cleaning procedures described in the ProDSS Assembly and Maintenance protocol.
--If the sensor looks clean, try the bleach soak described above.
--To rule out that the buffer is bad, get a fresh buffer, rinse the sensor with a small amount of
buffer and re-calibrate.
--If mVs are still not within desirable ranges but the instrument calibrated successfully, the
sensor can still be used, but it may be showing signs of age, so it would be prudent to order a
fresh pH sensor cap to have on hand; pH sensors have a 1-2 year life expectancy, and you can
check the date on the sensor or its long-term storage bottle.
9. A second message will then appear: “Ready for cal point 2.” You are now ready to calibrate
with the next buffer solution.
DO NOT back out to the “Run” screen by hitting the left arrow button or the Esc button. If
you don’t finish the three point calibration, the unit will register this as a one point
calibration and you will have to start over again with the pH calibration.
Set the lower point (pH buffer 4)
1. Rinse sensors once with distilled water, once with old buffer solution, and twice with new
solution. To rinse, fill cup ~2”, attach cup to unit and lightly shake the unit while tilting it
back and forth. Shake and tilt the unit until all sensors and guard have been rinsed.
2. Fill the calibration cup with buffer 4 solution to the first fill line (170 mL)
3. Carefully immerse the unit into the calibration cup, and tap the side of the unit until any air
bubbles are removed.
4. Observe the mV and wait for stabilization (pH doesn’t vary by more than 0.01 for 2 min.).

YSI ProDSS Meter Calibration and Routine Maintenance
K:\Streamkeepers\Communication\Website\To load onto Web\ProDSS calibration.docx
13
5. Enter the pH buffer value that corresponds to the buffer temperature reading (value should be
located on pH buffer bottle)
6. Confirm stabilization by watching the actual readings on the screen; if pH remains within ±
0.01 for 2 minutes, the sensor is stable.
7. After observing stabilization, RECORD the pre-cal reading and temperature, last
calibration date, and mVs, then press Accept Calibration. A message will appear:
“Calibration Successful”. Circle “Y” under “Recalibrated?”
8. A message will appear “Ready for cal point 3.” If doing a 3-point calibration, proceed to
“Setting the upper point” below; if you are doing a 2-point calibration, select Finish
Calibration and proceed to the next calibration parameter.
DO NOT back out to the “Run” screen by hitting the left arrow button, or the Esc button. If
you don’t finish the three point calibration, the unit will register this as a two point
calibration and you will have to start over again with the pH calibration.
Set the upper point (pH buffer 10)
1. Rinse sensors once with distilled water, once with old buffer solution, and twice with new
solution. To rinse, fill cup ~2”, attach cup to unit and lightly shake the unit while tilting it
back and forth. Shake and tilt the unit until all sensors and guard have been rinsed.
2. Fill the calibration cup with buffer 10 solution to the first fill line (170 mL)
3. Carefully immerse the unit into the calibration cup, allow at least one minute for temperature
stabilization.
4. Check for any air bubbles on the sensor tip, if any are present, tap the side of the unit until
the bubbles are removed.
5. Observe the mV and wait for stabilization (doesn’t vary by more than 0.01 for 2 min.).
6. Enter the pH calibration value that corresponds to the buffer temperature reading (value may
be located on pH buffer bottle)
7. Confirm stabilization by watching the actual readings on the screen, if pH remains within ±
0.01 for 2 minutes, the sensor is stable.
8. After observing stabilization, RECORD the pre-cal reading and temperature, last
calibration date, and mVs, then press Accept Calibration. A message will appear:
“Calibration Successful”. Circle “Y” under “Recalibrated?”
9. Rinse the sensors and calibration cup with clean water.
The date and time of calibration will be stored in the GLP file. For sensor storage, refer to the
Short Term Storage or Long Term Storage sections below.
Always check amounts and dates for all pH buffer solutions to ensure there is enough for
the next calibration check. If not, notify staff.

YSI ProDSS Meter Calibration and Routine Maintenance
K:\Streamkeepers\Communication\Website\To load onto Web\ProDSS calibration.docx
14
TURBIDITY CALIBRATION
Equipment needed:
•NIST-traceable “Zero standard” and/or laboratory-purified water
•Certified, laboratory-supplied 4000 NTU formazin stock suspension. This keeps best in a
refrigerator, but a closed room-temperature cabinet is sufficient to meet shelf-life
requirements.
•2- 500-mL volumetric flasks, Class A
•1- 100-mL volumetric flask, Class A
•1- 50-mL volumetric flask, Class A
•Personal protective equipment: tightly sealing safety goggles, gloves, protective clothing
Prepare formazin working suspensions of 800 and 80 NTU as follows:
A. Never pour anything back into the 4000 NTU stock suspension bottle, and cap and store
immediately after pouring to avoid contamination.
B. Dilutions are ideally made with certified 0 NTU water, but laboratory-purified water
should be sufficient as long as it’s <0.5 NTU.
C. Prepare 500 mL of 800 NTU formazin working suspension by transferring 100 mL of
4000 NTU formazin stock suspension into a 500 mL volumetric flask. Dilute to the mark
with turbidity-free water; swirl or gently invert to mix.
D. Prepare 500 mL of 80 NTU formazin working suspension by transferring 50 mL of the
800 NTU working suspension you’ve made into another 500 mL volumetric flask. You
may want to use a small beaker to transfer the 800 NTU working suspension into the 50
mL flask, and if you overshoot the mark, it may be easiest to use a small pipette to
remove solution from the flask. Then transfer from the 50 mL flask into the 500 and
carefully dilute to the mark with turbidity-free water; swirl or gently invert to mix.
Discard any solution left over in beakers or pipettes; do not return them to their source
containers.
E. When finished for the day, you may discard these solutions into the sanitary sewer
system, per the City of Port Angeles waste treatment facility, or you may store them
where other chemicals are stored (see below).
Calibration steps:
NOTE: When calibrating turbidity, the first point must be zero. The following describes a 3-
point calibration, but note that if you get negative readings in the field, it’s a sign that there
were problems with the zero point set. You can re-do the zero point set without having to redo
the upper points.
1. Turbidity units should be in FNU. If not, first note what the settings are and notify program
staff. Then select the Probe button, then Display, then Turbidity, and select Turbidity
FNU.
2. Clean the sides of the sensor with a toothbrush and a mild dish detergent solution if needed.
Clean the sensing window with a non-abrasive, lint-free cloth, carefully avoiding scratches.
If necessary, use a mild solution of dish soap and water. Gently pat dry with Kimwipes.
Rinse the sensors and calibration cup 2-3 times with distilled or clean tap water; shake
vigorously.
3. Replace the sensor guard on the bulkhead; it must be installed for proper calibration.

YSI ProDSS Meter Calibration and Routine Maintenance
K:\Streamkeepers\Communication\Website\To load onto Web\ProDSS calibration.docx
15
1st calibration point: zero NTU
4. Rinse the sensors and calibration cup with ~2” of “zero standard” or deionized water. Shake
off the unit and cup after rinse.
5. SLOWLY pour the deionized water or “zero standard” down the side of the cup (like you’re
pouring a beer), to just past the first fill line (170 mL). Immerse the sensors and the guard
into the cup at a slight angle, and visually inspect to make sure there are no air bubbles on the
face of the turbidity sensor.
6. Select the calibration button , enter User ID, then select Turbidity.
7. Select Calibration Value and enter 0.0 (if it isn’t already).
8. Confirm stabilization by watching the actual readings on the screen; if the readings don’t
change by > ±0.1 FNU for 40 seconds, the sensor is stable.
9. After observing stabilization, RECORD the pre-calibration reading, then press Accept
Calibration. “Ready for cal point 2” will be displayed in the message area; you are now
ready to calibrate the second point.
DO NOT back out to the “Run” screen by hitting the left arrow button, or the Esc button,
unless you only intend to re-set the zero point. If you don’t finish the entire calibration
procedure, the unit will register this as a one point calibration and you will have to start over
again if you intend to do a 2- or 3-point calibration.
10. Empty and shake off the probe, and dab water off of the turbidity sensor with a Kimwipe.
You can use the same Kimwipe to dry as much of the bulkhead and cup as possible.
2nd calibration point: 80 NTU
11. Fill the cup ~2” with 80 NTU solution; on the first rinse, it’s OK to use used solution that’s
less than a month old. Screw in the bulkead and rinse by gently shaking the unit while tilting
it back and forth until all sensors and guard have been rinsed. If you’re calibrating more than
one meter, you can pour from the first into the second, etc.
12. Do a second rinse, this time with fresh solution. You can transfer from one meter to the next.
13. SLOWLY pour fresh 80 NTU solution down the side of the cup to just past the first fill line
(170 mL).
14. Check Calibration Value at top of screen and change to 80 FNU if needed.
15. Confirm stabilization by watching the actual readings on the screen; if the readings don’t
change by > ±0.5% (i.e., 0.4 FNU for an 80 NTU solution) for 40 seconds, the sensor is
stable.
16. After observing stabilization, RECORD the pre-calibration reading, then press Accept
Calibration.
17. You can transfer this solution to the next meter, etc.
3rd calibration point: 800 NTU
18. “Ready for cal point 3” will be displayed in the message area. Follow directions similar to
those above, using the 800 NTU solution you’ve made.
Finishing
19. When finished, you may save the leftover formazin solutions. The 800 NTU solution should
be good for more than a year, and the 80 NTU solution should be good for a month.
20. Rinse the sensors and calibration cup with distilled or clean tap water and proceed to next
calibration activity.

YSI ProDSS Meter Calibration and Routine Maintenance
K:\Streamkeepers\Communication\Website\To load onto Web\ProDSS calibration.docx
16
TEMPERATURE CALIBRATION CHECK
Temperature is calibrated at the factory and cannot be recalibrated, but needs to be checked
before and after each monitoring session. Follow procedures in separate “Temperature
Calibration Check” procedure, which covers multiple instruments. QAPP specs for the
thermistor-type temperature sensors are ± 0.2 °C at both lower and upper ranges.
REFERENCES
Hallock, D. and W. Ehinger. 2003. Quality Assurance Monitoring Plan: Stream Ambient Water
Quality Monitoring. Olympia, WA: WA State Dept. of Ecology, Pub. No. 03-03-200, April
2003.
Rounds, S.A., Wilde, F.D., and Ritz, G.F. 2013. Dissolved oxygen (ver. 3.0): U.S. Geological
Survey Techniques of Water-Resources Investigations, book 9, chap. A6, sec. 6.2,
http://water.usgs.gov/owq/FieldManual/Chapter6/6.2_v3.0.pdf.
Sadar, Mike. 2003. Turbidity Standards. Technical Information Series Booklet No. 12. The
Hach Company.
WA Dept. of Ecology, Environmental Assessment Program. N.d. Hach LDO Calibration,
Measurement, and Maintenance Procedures.
YSI Inc. 2009. The Dissolved Oxygen Handbook.
Other manuals for ProDSS
6
Table of contents
Other YSI Measuring Instrument manuals

YSI
YSI Model 52 User manual

YSI
YSI 550 DO User manual

YSI
YSI 2700D User manual

YSI
YSI SonTek FlowTracker User manual

YSI
YSI 1500 Sport User manual

YSI
YSI EcoSense DO200A User manual

YSI
YSI EcoSense DO200 User manual

YSI
YSI EcoSense ORP15A User manual

YSI
YSI 550A User manual

YSI
YSI Professional Plus User manual