WACO VC1803 User manual

VDH-RE-1803-N06L
VC1803

IMPORTANT SAFEGUARDS....................................................................................................................................................................... 3
IMPORTANT - GROUNDING METHOD................................................................................................................................................. 4
ELECTRICAL CONNECTIONS.................................................................................................................................................................... 4
SOME NOTIONS ON HUMIDITY ............................................................................................................................................................. 5
PARTS AND FEATURES............................................................................................................................................................................... 5
CHOOSING A LOCATION ......................................................................................................................................................................... 9
STORE AND CLEAN....................................................................................................................................................................................10
TROUBLESHOOTING...................................................................................................................................................................................11
WICHTIGE SICHERHEITSVORKEHRUNGEN .........................................................................................................................................14
WICHTIG - ERDUNGSMETHODE............................................................................................................................................................15
ELEKTRISCHE ANSCHLÜSSE.....................................................................................................................................................................16
EINIGE HINWEISE ZUR LUFTFEUCHTIGKEIT........................................................................................................................................16
BAUTEILE UND EIGENSCHAFTEN ..........................................................................................................................................................17
AUSWAHL EINES AUFSTELLORTS..........................................................................................................................................................21
AUFBEWAHRUNG UND REINIGUNG....................................................................................................................................................22
FEHLERBEHEBUNG.....................................................................................................................................................................................23
PODSTAWOWE ŚRODKI OSTROŻNOŚCI...........................................................................................................................................27
BEZPIECZEŃSTWO ELEKTRYCZNE .......................................................................................................................................................29
CZĘŚCI I FUNKCJE......................................................................................................................................................................................29
WYBÓR LOKALIZACJI................................................................................................................................................................................33
UTRZYMANIE...............................................................................................................................................................................................34
ROZWIĄZYWANIE PROBLEMÓW .........................................................................................................................................................36

•The appliance is not intended for use by persons (including children) with reduced physical, sensory or mental
capabilities, or lack of experience and knowledge, unless they have been given supervision or instruction
concerning use of the appliance by a person responsible for their safety.
•This appliance is designed for normal household use.
•Children should be supervised to ensure that they do not play with the appliance.
•FOR EUROPEAN MARKET ONLY: This appliance can be used by children aged from 8 years and above and
persons with reduced physical, sensory or mental capabilities or lack of experience and knowledge If they have
been given supervision or instruction concerning use of the appliance in a safe way and understand the hazards
involved.
•Children shall not play with the appliance.
•Cleaning and user maintenance shall not be made by children without supervision.
•Keep the appliance and its cord out of reach of children aged less than 8 years.
•Disconnect the appliance from its power source during service and when replacing parts.
•Warning: before obtaining access to terminals all supply circuits must be disconnected.
•lf the supply cord is damaged, it must be replaced by the manufacturer, its service agent or a similarly qualified
person in order to avoid a hazard.
•Disconnect the power supply before cleaning and maintenance.
•The appliance shall not be installed in the laundry.
•Do not use this unit for functions other than those described in this instruction manual.
•If the power cord becomes worn or damaged, the cord should only be replaced by a qualified service technician
using genuine replacement parts.
•Make sure the plug is plugged firmly and completely into the outlet. It can result in the risk of electric shock or
fire.
•Do not plug other appliances into the same outlet, it can result in the risk of electric shock.
•Do not disassemble or modify the appliance or the power cord, it can result in the risk of electric shock or fire. All
other services should be referred to a qualified technician.
•Do not place the power cord or appliance near a heater, radiator, or other heat source. It can result in the risk of
electric shock or fire.
•This unit is equipped with a cord that has a earthed wire connected to an earthed pin or grounding tab. The plug
must be plugged into a socket that is properly installed and earthed. Do not under any circumstances cut or
remove the earthed pin or grounding tab from this plug.
•The unit should be used or store in such way that it is protected from moisture e.g. condensation, splashed water,
etc. Unplug unit immediately if this occurs.
•Always transport your appliance in a vertical position and place on a stable, level surface during use. If the unit is
transported laying on its side it should be stood up and left unplugged for 6 hours.
•Always use the switch on the control panel to turn the unit on or off, and do not start or stop operation by
plugging in or unplugging the power cord. It can result in the risk of electric shock.
•Do not press the buttons on the control panel with anything other than your dry and clean fingers.

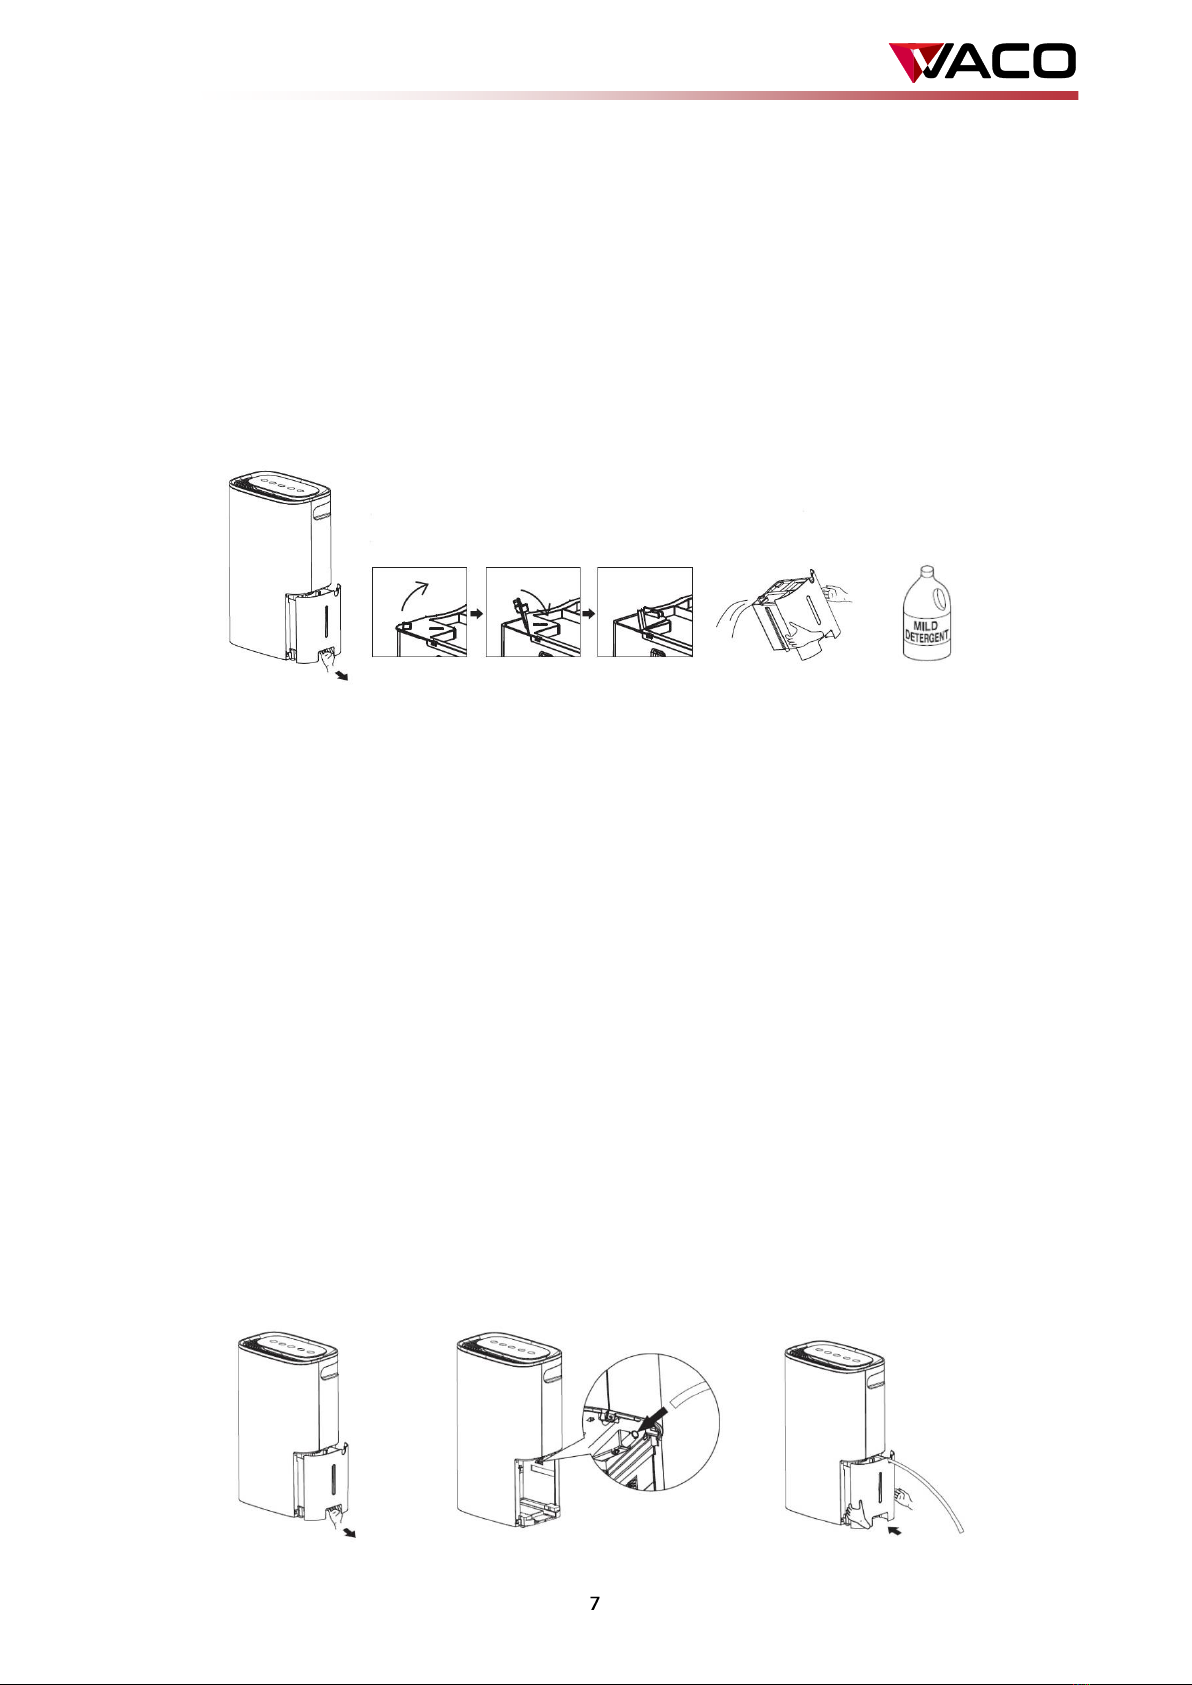
•Do not use hazardous chemicals to clean or come into contact with the unit. To prevent damage to the surface finish, use
only a soft cloth to clean the appliance. Do not use wax, thinner, or a strong detergent. Do not use the unit in the presence of
inflammable substance or vapour such as alcohol, insecticides, gasoline, etc.
•Young children should be supervised to ensure that they do not play with, operate or climb on the appliance.
•If the appliance is making unusual sounds or is emitting smoke or an unusual odour, unplug it immediately.
•Do not clean the unit with water. Water can enter the unit and damage the insulation, creating a shock hazard. If water enters
the unit, unplug it immediately and contact Customer Service.
•Be sure all accessories are removed from the packing before use.
•To avoid possible cuts, avoid contacting the metal parts of the appliance when removing or reinstalling the filter. It can result
in the risk of personal injury.
•Do not block the air inlet or outlet of the appliance. Reduced air flow will result in poor performance and could damage the
unit.
•Always grasp the plug when plugging in or unplugging the appliance. Never unplug by pulling on the cord. It can result in the
risk of electrical shock and damage.
•Install the appliance on a sturdy, level floor capable of supporting up to 50kg (110Ibs). Installation on a weak or uneven floor
can result in the risk of property damage and personal injury.
•Close all doors and windows to the room for most efficient operation.
•GWP: R410A: 2088, R134a: 1430, R290:3
This product is factory equipped with a power supply cord that has a three-pronged grounded plug. It must be plugged into a
mating grounding type receptacle in accordance with the National Electrical Code and applicable local codes and ordinances. If
the circuit does not have a grounding type receptacle, it is the responsibility and obligation of the customer to exchange the
existing receptacle in accordance with the National Electrical Code and applicable local codes and ordinances. The third ground
prong should not, under any circumstances, be cut or removed. Never use the cord, the plug or the appliance when they show
any sign of damage. Do not use your appliance with an extension cord unless it has been checked and tested by a qualified
electrical supplier. Improper connection of the grounding plug can result in risk of fire, electric shock and/or injury to persons
associated with the appliance. Check with a qualified service representative if in doubt that the appliance is properly grounded.
Before plugging the appliance into the mains socket, check that:
•The mains power supply corresponds to the value indicated on the rating plate on the appliance.
•The power socket and electrical circuit are adequate for the appliance.
•The mains socket matches the plug. If this is not the case, have the plug replaced.
•The mains socket is adequately earthed. Failure to follow these important safety instructions absolves the manufacturer of all
liability.
Important information for correct disposal of the product in accordance with EC Directive 2002/96/EC.
At the end of its working life, the product must not be disposed of as urban waste. It must be
taken to a special local authority differentiated waste collection centre or to a dealer providing
this service. Disposing of a household appliance separately avoids possible negative
consequences for the environment and health deriving from inappropriate disposal and enables
the constituent materials to be recovered to obtain significant savings in energy and resources.
As a reminder of the need to dispose of household appliances separately, the product is marked
with a crossed-out wheeled dustbin.

Air always contains a certain amount of water in the form of vapour. This determines the level of humidity in an
atmosphere. The capacity of the air to hold water vapour increases with temperature. This is why in our homes, as
soon as the temperature decreases, the vapour contained in the air condenses, as is evident on the colder surfaces
in the room, such as the windows, walls etc. The purpose of a dehumidifier is to remove the excess moisture from
the air, avoiding the damage caused by condensation.
Experts have established that the optimum environmental conditions for our wellbeing and for the home are
obtained between 40% and 60% relative humidity. With very low temperatures, you are recommended to heat the
room even minimally. This considerably increases the dehumidifying power of the appliance. With heating, the
condensation formed by the water vapour on windows and other cold surfaces evaporates into the air to be
collected by the dehumidifier. Air leaving the dehumidifier is usually about 1°C-2°C warmer than room temperature.
1. Air outlet
2. Control panel
3. Handles
4. Water tank
5. Water level window
6. Drainage hole
7. Air inlet
8. Power cord
9. Drainage pipe

1. First partially pull out the power cord for space to remove the tank.
2. Pull out the water tank, remove the cover, take out power cord and drainage pipe.
3. Turn back the cover, and re-install the water tank again.
1) When first operating the dehumidifier, run it in Continuous mode for 24 hours.
2) Power On and Off - Press the POWER button once to manually turn the unit on. Press the POWER button
again to turn the unit off.
3) Fan button - Press the Fan button to cycle through the different fan speeds: High and Low
The fan speed operating can be distinguished by the fan speed indicators on the control panel.
4) Humidity selection - Press the humidity button to choose the desired relative humidity in the room. The
humidity is cycle display "70%-60%-50%-40%".
5) Mode selection - press the Mode button to choose from modes: Dehumidify, Turbo, Dry, Continuous. The
corresponding indicator will light up.
6) Time - To program the unit to automatically turn on or off, press Timer button to cycle choose "2h -4h - 8h -
off ".
Defrost indicator
Timer indicator
Turbo mode
indicator
Mode button
Dehumidify mode
indicator
Humidity
button
Low fan speed
indicator
Fan button
Tank Full indicator
Power On/Off
Timer button
Dry mode
indicator
Continiuous mode
indicator
Humidity
indicator
High fan speed indicator

NOTE: Fan will continue to run even when the compressor is off. This is normal and allows the unit to circulate air
and operate more efficiently
7) Water Tank Full —When the water tank is full of water, the unit will automatically shut off, make a beeping
noise, and the water Tank Full Indicator will light up. The dehumidifier will not function until the water tank is
emptied and placed back inside the unit. The water tank should be cleaned every few weeks to prevent the
growth of mould, mildew and bacteria. Use a mild detergent to clean the water tank. Once clean, completely
dry the water tank and place it back inside the dehumidifier.
Attention:
Before emptying the water tank.
Open the corner of the tank cover and fix it into unit to empty the water. After emptying the water, replace the
cover and fix it back into unit.
NOTE: Hold water tank with both hands when emptying.
NOTE: When the water tank is full or removed from the machine, the compressor will turn off, but the fan will
continue to run for a few minutes. This is completely normal. The dehumidifier will not be removing moisture from
the air at this time.
NOTE: When removing moisture from the air, the dehumidifier will exhaust warm air from top.
NOTE: Do not place a full water tank on the floor, because the bottom is uneven.
8) Defrost Indicator - When the defrost indicator light is on, that means the unit is running the defrost program.
When the temperature of the room is too low, there will be frost on the heat- exchanger, and the unit will auto
run the defrost program. At that time, the compressor is turned off, and the fan continues to run, until the frost
disappears. When the defrost program has finished, the compressor will turn on again, and the defrost
indicator will turn off. If the indicator is flashing, that means the sensor has failed, please call Customer Service.
9) Continuous drainage
Water can be automatically emptied by attaching a hose to the continuous drainage port in the unit. This will
allow the unit to run continuously (depending on the selected humidity level) without having to empty the
water tank. To drain, simply attach the drainage pipe attached.
—Place the unit on a level surface.
—Pull out the water tank.
—Push the drainage pipe on the port in the unit.
—Reinstall the water tank back into the unit, make sure the pipe is in the notch of the water tank.

When you use the drainage pipe, please reference the picture below.
IMPORTANT NOTES:
Placing the dehumidifier on an uneven surface or improper hose installation may result in water filling up the water
tank and causing the unit to shut off. Empty water tank if shutoff occurs, then check dehumidifier location and hose
for proper setup. The tank must be in place and securely seated for the dehumidifier to operate.
MAIN FEATURE
Dehumidify mode
-Press the Mode button to choose Dehumidify mode.
-The Dehumidify mode indicator will light up on the control panel.
-Press the Fan button to choose High or Low fan speed, the corresponding fan speed indicator will light up.
-Press the Humidity button to cycle choose (70% - 60% - 50% - 40%) desired room humidity.
Turbo mode
-Press the Mode button to choose Turbo mode.
-The Turbo mode indicator will light up on the control panel.
-In this mode, fan speed is high and cannot change, the humidity is set at 30% and all humidity indicators are off.
Clothes Drying Mode
-Press the Mode button to choose Dry mode.
-The Dry mode indicator will light up on the control panel.
-In this mode, fan speed is high and cannot change, the humidity is set at 15% and all humidity indicators are off.
-In this mode, the Timer function cannot be used. If Dry mode is chosen, after 24 hours it will change to
Dehumidify mode if there is no operation.
Continuous mode
-Press the Mode button to choose Continuous mode.
-The Continuous mode indicator will light up on the control panel.
-In this mode, the humidity is set at 15% and all humidity indicators are off.
-Press the Fan button to choose High or Low fan speed, the corresponding fan speed indicator will light up.
-In this mode, the Timer function cannot be used.

Timer
-To program the unit to automatically tum on, press the Timer button when the unit is standby.
-Press Timer button to cycle between “2h - 4h - 8h –off”
-Press the Timer button, the “2h” indicator will flash. Within 5 seconds press the Timer button again to cycle
between “2h - 4h - 8h - off “. In 5 seconds if the Timer button is not pressed, the Timer Auto on is active, and
corresponding indicator will light up.
-When Timer auto start up is active, press the Timer button to cancel timer.
-To program the unit to automatically turn off, press the Timer button when the unit is on.
-Press the Timer button to cycle between “2h - 4h - 8h –off”
-Press the Timer button, the “2h” indicator will flash. Within 5 seconds press the Timer button again to cycle
between “2h - 4h - 8h - off”. In 5 seconds if the Timer button is not pressed, the Timer Auto off is active, and
corresponding indicator will light up.
-When Timer auto off is active, press the Timer button to cancel timer.
A dehumidifier operating in a living room will have little or no effect in drying out an adjacent enclosed storage
area, such as a closet, unless there is adequate circulation of air in and out of the area.
•Do not use outdoors.
•This dehumidifier is intended for indoor use only. Place the dehumidifier on a smooth, level floor surface that is
strong enough to support the unit with a full water tank of water.
•Allow at least 45cm of airflow on all sides.
•Place the dehumidifier in an area where the temperature will not fall below 5°C.
•Use the dehumidifier in cooking, laundry, bathing and dishwashing areas that have excess moisture. Place the
dehumidifier away from a clothes dryer.
•Use the dehumidifier to prevent moisture damage anywhere books or valuables are stored.
•Use the dehumidifier in a basement to help prevent moisture.
•The dehumidifier must be operated in an enclosed area to be most effective.
•Close all doors, windows and other outside openings to the room.

Note: Make sure power is off and the power cord is not plugged into an electrical outlet prior to performing any
maintenance on the unit.
Clean or Replace Filter —Refer to Operating Instructions Clean Filter section.
Cleaning the Unit Housing
1) Keep the unit from being exposed directly to the sun to prevent colour fading and deterioration.
2) Clean the surface with a damp cloth and dry it with a soft towel.
Storing the unit for an extended period of time or transporting the unit
1) Clean or replace filter —refer to operating instructions.
2) Unplug the unit.
3) Empty any excess water.
4) The unit should be stored in a cool dry place when not used.
Clean filter
If the filter is dirty, air circulation is compromised and the efficiency of the dehumidifying decreases. It is therefore
good practice to clean the filter at regular intervals. The frequency depends on the duration and conditions of
operation.
If the unit is used constantly or systematically, you are recommended to clean the filter once a week.
The filter is housed in the intake grille as below.
Use a vacuum cleaner to remove dust accumulations from the filter. If it is very dirty, immerse in warm water and
rinse a number of times. The water should never be hotter than 40°C. After washing, leave the filter to dry then
attach the intake grille to the unit.

CAUTION: DO NOT OPERATE THE DEHUMIDIFIER WIHOUT THE FILTER
NOTE: Do not clean filter in dishwasher
The device can be equipped with an IONISING HEPA FILTER installed in the air inlet, visible after removing the air
inlet grille as below. Do not wash this filter in water.
BEFORE CALLING FOR SERVICE
Before you call for service, review this list. It may save you time and expense. This list includes common occurrences
that are not the result of a defect in workmanship or materials.
Problem
Possible Causes
Solutions
Dehumidifier does
not start
•The Dehumidifier is unplugged
•Make sure the dehumidifier's plug is
pushed completely into the outlet.
•The fuse is blown/circuit box breaker is
tripped
•Check the house fuse/circuit breaker box
and replace fuse or reset breaker.
•Dehumidifier has reached its present level
or the water tank is full.
•The dehumidifier automatically turns off
when either condition occurs. Change to a
lower setting or empty the water bucket
and replace properly.
•Water tank is not in the proper position.
•The water tank must be in place and
securely seated for the dehumidifier to
operate.
•Power Failure
•There is a protective time delay (up to 3
min) to prevent tripping of the compressor
overload. For this reason, the unit may not
start normal dehumidification for 3min,
after it is powered back on.
Dehumidifier runs
too much
•The area to be dehumidified is too large
•The capacity of your dehumidifier may not
be adequate for the room size.
•Doors and windows are open
•Close all doors and windows to the
outside
Frost appears on the
coils
•The dehumidifier has recently been turned
on or the room temperature is too low
•This is normal. Frost will usually disappear
within 60 minutes.
Controls cannot be
set
•The compressor will turn off and the fan
will automatically continue to run for
approximately3 minutes at a fixed setting.
•This is normal. Wait approximately 3
minutes and set the fan speed at the
desired level.
•Air is moving through the unit.
•This is normal.

Dehumidifier does
not dry the air as it
should
•Not enough time allowed for unit to
remove moisture.
•When first installed, allow at least 24 hours
to maintain the desired dryness.
•Airflow is restricted.
•Make sure there are no curtains, blinds, or
furniture blocking the front or back of the
dehumidifier. See the CHOOSING A
LOCATION section.
•Dirty filter.
•See the CLEAN FILTER section.
•The Humidity Control may not be set low
enough.
•For drier air, choose lower humidity
desired in the room, or set dry mode or
continuous mode.
•Doors and windows may not be closed
tightly.
•Check that all doors, windows, and other
openings are securely closed.
•Clothes dry may be the room
•Install the dehumidifier away from the
dryer. The dryer should be vented outside
the room.
•Room temperature is too low.
•Moisture removal is best at higher room
temperatures. Lower room temperatures
will reduce the moisture removal rate. This
model is designed to operate at
temperatures above 5°C.
Water on the floor
•Hose connection may be loose.
•Check the hose connection. See the
CONTINUOUS MODE Section.
•Hose is attached but not draining.
•Disconnect the hose if using the water
tank, or place the hose near a drain.
WARRANTY
Dear Customer,
All our products are subject to strict quality control before they are sold. However, if the device does not work as it
should, we sincerely regret it. In this case, we kindly request you to contact our customer service. Our employees
will be happy to help.
This device has a warranty period of 2 years from the date of purchase. During the warranty period, the
manufacturer accepts full responsibility for failures that are obviously due to material or construction defects. If such
defects occur, the device will be repaired or replaced as necessary. The warranty period of 2 years does not start at
this moment again, but it continues until 2 years after the date of purchase. The guarantee is provided on the basis
of a proof of purchase. The warranty will not be valid when the damage to the appliance is caused by wrong use,
not following the instructions or repairs executed by a third party.
The warranty and liability of the supplier and manufacturer lapse automatically in the following cases:
If the instructions in this manual have not been followed.
In case of incorrect connection, e.g. too high or too low voltage.
In case of improper, rough or abnormal use.
In case of insufficient or incorrect maintenance.
In case of repair or alteration of the device by the consumer or unauthorized third parties.
If the customer used parts or accessories that are not recommended or provided by the manufacturer.

Luftentfeuchter
VC1803
Bedienungsanleitung
Mateko Sp. z o.o.
ul. Przyleśna 17A
Michałów-Grabina
05-126 Nieporęt

•Das Gerät ist nicht für den Gebrauch durch Personen (einschließlich Kinder) mit eingeschränkten physischen,
sensorischen oder geistigen Fähigkeiten oder mangelnden Erfahrungen und Kenntnissen bestimmt, es sei denn,
sie werden von einer für ihre Sicherheit verantwortlichen Person überwacht oder angeleitet.
• Das Gerät wurde für den gewöhnlichen Haushaltsgebrauch entwickelt.
•Kinder sollten beaufsichtigt werden, um sicherzustellen, dass sie nicht mit dem Gerät spielen.
•NUR FÜR DEN EUROPÄISCHEN MARKT: Dieses Gerät ist für den Gebrauch durch Kinder ab 8 Jahren und
Personen mit eingeschränkten körperlichen, sensorischen oder geistigen Fähigkeiten oder ohne Erfahrung und
Wissen geeignet, sofern sie beaufsichtigt oder über den sicheren Umgang mit dem Gerät angeleitet werden und
die damit einhergehenden Gefahren verstehen.
•Kinder dürfen nicht mit dem Gerät spielen.
•Reinigungsarbeiten und Benutzerwartungen dürfen von Kindern nur unter Aufsicht durchgeführt werden.
•Bewahren Sie das Gerät und sein Kabel außerhalb der Reichweite von Kindern unter 8 Jahren auf.
•Trennen Sie das Gerät während der Wartung und beim Austausch von Teilen von der Stromquelle.
•Achtung: Vor dem Zugriff auf die Klemmen müssen alle Versorgungskreise getrennt werden.
•Ein beschädigtes Netzkabel muss vom Hersteller, dessen Kundendienst oder einer ähnlich qualifizierten Fachkraft
ersetzt werden, um Gefahrensituationen zu vermeiden.
•Trennen Sie die Stromversorgung vor der Reinigung und Wartung.
•Das Gerät darf nicht in der Waschküche installiert werden.
•Verwenden Sie dieses Gerät nicht für andere als die in dieser Bedienungsanleitung beschriebenen Funktionen.
•Wenn das Netzkabel abgenutzt oder beschädigt ist, sollte das Kabel nur von einem qualifizierten Servicetechniker
mit Originalersatzteilen ausgetauscht werden.
•Stellen Sie sicher, dass der Stecker fest und vollständig in die Steckdose eingesteckt ist. Es besteht die Gefahr
eines elektrischen Schlags oder Brandes.
•Schließen Sie keine anderen Geräte an dieselbe Steckdose an, da dies zu Stromschlägen führen kann.
•Nehmen Sie das Gerät und das Netzkabel nicht auseinander und modifizieren Sie sie nicht, da dies zu
Stromschlägen oder Bränden führen kann. Alle anderen Servicedienstleistungen sollten von einem qualifizierten
Techniker ausgeführt werden.
•Stellen Sie das Netzkabel oder das Gerät nicht in der Nähe von Heizlüftern, Heizkörpern oder anderen
Wärmequellen auf. Es besteht die Gefahr eines elektrischen Schlags oder Brandes.
•Dieses Gerät ist mit einem Kabel ausgestattet, dessen geerdeter Draht mit einem geerdeten Stift oder einer
Erdungslasche verbunden ist. Der Stecker muss in eine Steckdose gesteckt werden, die ordnungsgemäß installiert
und geerdet ist. Unter keinen Umständen den geerdeten Stift oder die Erdungslasche von diesem Stecker
abschneiden oder entfernen.
•Das Gerät sollte so verwendet oder gelagert werden, dass es vor Feuchtigkeit wie z. B. Kondenswasser,
Spritzwasser usw. geschützt ist. Bei Auftreten sofort den Netzstecker ziehen.
•Transportieren Sie Ihr Gerät immer in senkrechter Position und stellen Sie es während des Gebrauchs auf eine
stabile, ebene Oberfläche. Wird das Gerät auf der Seite liegend transportiert, sollte es danach in die richtige
Position gebracht und 6 Stunden lang nicht an das Stromnetz angeschlossen werden.

•Verwenden Sie immer den Schalter am Bedienfeld, um das Gerät ein- oder auszuschalten. Starten oder stoppen
Sie den Betrieb nicht, indem Sie das Netzkabel ein- oder ausstecken. Es besteht die Gefahr eines elektrischen
Schlags.
•Drücken Sie die Tasten auf dem Bedienfeld nur mit Ihren trockenen und sauberen Fingern.
•Verwenden Sie keine gefährlichen Chemikalien, um das Gerät zu reinigen und lassen Sie es auch nicht damit in
Kontakt kommen. Um eine Beschädigung der Oberfläche zu vermeiden, reinigen Sie das Gerät nur mit einem
weichen Tuch. Verwenden Sie kein Wachs, Verdünner oder ein starkes Reinigungsmittel. Verwenden Sie das
Gerät nicht in der Nähe von brennbaren Substanzen oder Dämpfen wie Alkohol, Insektiziden, Benzin usw.
•Kleine Kinder sollten beaufsichtigt werden, um sicherzustellen, dass sie nicht mit dem Gerät spielen, es bedienen
oder darauf klettern.
•Wenn das Gerät ungewöhnliche Geräusche macht oder Rauch oder einen ungewöhnlichen Geruch abgibt,
ziehen Sie sofort den Netzstecker.
•Reinigen Sie das Gerät nicht mit Wasser. Wasser kann in das Gerät eindringen und die Isolierung beschädigen,
was zu einer Stromschlaggefahr führen kann. Wenn Wasser in das Gerät eindringt, ziehen Sie sofort den
Netzstecker und wenden Sie sich an den Kundendienst.
•Stellen Sie sicher, dass alle Zubehörteile vor der Verwendung aus der Verpackung genommen wurden.
•Um mögliche Schnittverletzungen zu vermeiden, vermeiden Sie es, die Metallteile des Geräts zu berühren, wenn
Sie den Filter entfernen oder wieder anbringen. Es besteht Verletzungsgefahr.
•Blockieren Sie nicht den Lufteinlass oder -auslass des Geräts. Reduzierter Luftstrom führt zu schlechter Leistung
und könnte das Gerät beschädigen.
•Fassen Sie immer den Stecker an, wenn Sie das Gerät ein- oder ausstecken. Ziehen Sie niemals den Netzstecker,
indem Sie am Kabel ziehen. Es besteht die Gefahr eines elektrischen Schlags oder einer Beschädigung des Geräts.
•Installieren Sie das Gerät auf einem stabilen, ebenen Boden, der bis zu 50 kg tragen kann. Die Installation auf
einem schwachen oder unebenen Boden kann zu Sach- und Personenschäden führen.
•Schließen Sie alle Türen und Fenster, um den effizientesten Betrieb zu erreichen.
•GWP: R410A: 2088, R134a: 1430, R290:3
Dieses Produkt ist werksseitig mit einem Netzkabel ausgestattet, das über einen dreipoligen geerdeten Stecker
verfügt. Er muss in eine passende geerdete Steckdose in Übereinstimmung mit den geltenden örtlichen
Vorschriften und Verordnungen eingesteckt werden. Wenn der Stromkreis keine geerdete Steckdose hat, liegt es
in der Verantwortung und Verpflichtung des Kunden, die vorhandene Steckdose in Übereinstimmung mit den
geltenden örtlichen Vorschriften und Verordnungen auszutauschen. Der dritte Erdungsstift sollte unter keinen
Umständen abgeschnitten oder entfernt werden. Verwenden Sie niemals das Kabel, den Stecker oder das Gerät,
wenn sie Anzeichen von Schäden aufweisen. Verwenden Sie Ihr Gerät nicht mit einem Verlängerungskabel, es sei
denn, es wurde von einem qualifizierten Elektroinstallateur geprüft und getestet. Ein unsachgemäßer Anschluss des
Erdungssteckers kann zu Feuer, Stromschlag und/oder Personenschäden führen. Wenden Sie sich an einen
qualifizierten Kundendienstvertreter, wenn Sie Zweifel haben, ob das Gerät ordnungsgemäß geerdet ist.

Bevor Sie das Gerät in die Netzsteckdose einstecken, überprüfen Sie Folgendes:
•Die Netzspannung entspricht dem auf dem Typenschild des Gerätes angegebenen Wert.
•Eignen sich die Steckdose und Stromversorgung für das Gerät?
•Passt die Netzsteckdose zum Stecker? Ersetzen Sie den Stecker, wenn dies nicht der Fall ist.
•Ist die Netzsteckdose ordnungsgemäß geerdet? Die Nichtbeachtung dieser wichtigen Sicherheitshinweise
entbindet den Hersteller von jeglicher Haftung.
Wichtige Informationen für die richtige Entsorgung des Produkts in Übereinstimmung mit der EG-Richtlinie
2002/96/EC.
Am Ende seiner Verwendungsdauer, darf das Produkt nicht wie Siedlungsabfall
entsorgt werden. Es muss zu einer speziellen lokalen Sammelstelle für Abfalltrennung
oder zu einem Händler, der einen solchen Service bereitstellt, gebracht werden. Das
separate Entsorgen eines Haushaltsgeräts vermeidet mögliche negative Auswirkungen
auf die Umwelt und Gesundheit, die durch unsachgemäße Entsorgung entstehen, und
ermöglicht die Wiederherstellung der Ausgangswerkstoffe, um Energie- und
Ressourceneinsparungen zu erreichen. Als Erinnerung an die Notwendigkeit,
Haushaltsgeräte separat zu entsorgen, ist das Produkt mit einer durchgestrichenen
rollbaren Mülltonne gekennzeichnet.
Luft enthält immer eine bestimmte Menge Wasser in Form von Dampf. Dies bestimmt die Höhe der Luftfeuchtigkeit
in einer Atmosphäre. Die Fähigkeit der Luft, Wasserdampf zu halten, steigt mit der Temperatur an. Das ist der
Grund, warum in unseren Häusern, sobald die Temperatur abnimmt, der in der Luft enthaltene Dampf kondensiert.
Dies wird dann auf den kälteren Oberflächen im Raum, z. B. den Fenstern, Wänden usw., sichtbar. Der Zweck eines
Entfeuchters ist das Entfernen der überschüssigen Feuchtigkeit aus der Luft, um Schäden durch Kondensation zu
vermeiden.
Experten haben festgestellt, dass die optimalen Umweltbedingungen für unser Wohlbefinden und für unsere
Häuser zwischen 40 % und 60 % relativer Luftfeuchtigkeit erreicht werden. Bei sehr niedrigen Temperaturen
empfiehlt es sich, den Raum nur minimal zu beheizen. Dies erhöht die Entfeuchtungsleistung des Gerätes erheblich.
Bei Erwärmung verdampft die durch den Wasserdampf an Fenstern und anderen kalten Oberflächen gebildete
Kondensation in die Luft, die durch den Entfeuchter gesammelt wird. Die Luft, die den Entfeuchter verlässt, ist
normalerweise etwa 1 °C bis 2 °C wärmer als die Raumtemperatur.

1. Luftaustritt
2. Bedienfeld
3. Griffe
4. Wassertank
5. Wasserstandsanzeige
6. Ablauföffnung
7. Lufteinlass
8. Netzkabel
9. Ablaufschlauch
1. Ziehen Sie zuerst das Netzkabel teilweise heraus, um den Tank zu entfernen.
2. Ziehen Sie den Wassertank heraus, entfernen Sie die Abdeckung, nehmen Sie das Netzkabel und den
Ablaufschlauch heraus.
3. Setzen Sie die Abdeckung wieder auf. Setzen Sie dann den Wassertank wieder ein.

1) Wenn Sie den Entfeuchter zum ersten Mal in Betrieb nehmen, lassen Sie ihn 24 Stunden lang im Dauerbetrieb
laufen.
2) Ein- und Ausschalten –Drücken Sie die POWER-Taste einmal, um das Gerät manuell einzuschalten. Drücken
Sie die POWER-Taste erneut, um das Gerät auszuschalten.
3) Lüftertaste – Drücken Sie die Lüftertaste, um durch die verschiedenen Lüfterstufen zu schalten: Hoch und
niedrig
Die Lüftergeschwindigkeit wird durch die Lüftergeschwindigkeitsanzeigen auf dem Bedienfeld angezeigt.
4) Einstellen der Luftfeuchtigkeit –Drücken Sie die Taste zum Einstellen der Luftfeuchtigkeit, um die gewünschte
relative Luftfeuchtigkeit im Raum zu wählen. Die Luftfeuchtigkeit wird mit einer zyklischen Anzeige angezeigt:
„70 % - 60 % - 50 % - 40 %“.
5) Modusauswahl –Drücken Sie die Mode-Taste, um zwischen den Modi zu wählen: Entfeuchten, Turbo,
Trocknung, Dauerbetrieb. Die entsprechende Anzeige leuchtet auf.
6) Zeit –Um das Gerät automatisch ein- oder auszuschalten, drücken Sie die Timer-Taste, um zwischen „2 h - 4 h
- 8 h - aus“ zu wählen.
HINWEIS: Der Lüfter läuft auch bei ausgeschaltetem Kompressor weiter. Dies ist normal und ermöglicht dem Gerät,
die Luft zirkulieren zu lassen und effizienter zu arbeiten.
7) Wassertank voll –Wenn der Wassertank voll ist, schaltet sich das Gerät automatisch ab, gibt ein Piepton aus
und die Anzeige „Wassertank voll“ leuchtet auf. Der Entfeuchter funktioniert erst, wenn der Wassertank entleert
und wieder in das Gerät eingesetzt wurde. Der Wassertank sollte alle paar Wochen gereinigt werden, um das
Wachstum von Schimmel, Mehltau und Bakterien zu verhindern. Reinigen Sie den Wassertank mit einem
milden Reinigungsmittel. Lassen Sie den Wassertank nach der Reinigung vollkommen trocknen und setzen Sie
ihn dann wieder in den Luftentfeuchter ein.
Achtung:
Vor dem Leeren des Wassertanks.
Öffnen Sie die Ecke der Tankabdeckung und befestigen Sie sie am Gerät, um das Wasser zu entleeren. Nachdem
der Tank geleert wurde, bringen Sie die Abdeckung wieder an und setzen den Tank wieder in das Gerät ein.
Abtauanzeige
Timer-Anzeige
Anzeige für den
Turbomodus
Modus-Taste
Anzeige für den
Entfeuchtungsmodus
Anzeige für niedrige
Lüftergeschwindigkeit
Lüfter-Taste
Anzeige „Wassertank voll“
Ein/Aus
Timer-Taste
Anzeige für den
Wäschetrocknungsmodus
Anzeige für maximale
Lüftergeschwindigkeit
Taste zum
Einstellen der
Luftfeuchtigkeit
Luftfeuchtigkeitsanzeige
Anzeige für
Dauerbetrieb

HINWEIS: Halten Sie den Wassertank beim Entleeren mit beiden Händen fest.
HINWEIS: Wenn der Wassertank voll ist oder aus dem Gerät entfernt wird, schaltet sich der Kompressor aus, aber
der Lüfter läuft noch einige Minuten weiter. Das ist völlig normal. Der Entfeuchter wird dabei keine Feuchtigkeit aus
der Luft entfernen.
HINWEIS: Beim Entfernen von Feuchtigkeit aus der Luft lässt der Luftentfeuchter warme Luft von oben ab.
HINWEIS: Stellen Sie keinen vollen Wassertank auf den Boden, da der Boden des Tanks uneben ist.
8) Abtauanzeige –Wenn die Abtauanzeige leuchtet, bedeutet dies, dass das Gerät das Abtauprogramm ausführt.
Wenn die Temperatur des Raums zu niedrig ist, wird Frost auf dem Wärmetauscher gebildet. Das Gerät startet
dann automatisch das Abtauprogramm. Der Kompressor wird dann ausgeschaltet und das Gebläse läuft weiter,
bis der Frost verschwindet. Wenn das Abtauprogramm beendet ist, schaltet sich der Kompressor wieder ein
und die Abtauanzeige erlischt. Wenn die Anzeige blinkt, bedeutet dies, dass der Sensor ausgefallen ist. Bitte
wenden Sie sich an den Kundendienst.
9) Kontinuierlicher Wasserablauf
Das Wasser kann automatisch entleert werden, indem ein Schlauch an die Ablauföffnung am Gerät
angeschlossen wird. Dadurch kann das Gerät im Dauerbetrieb (abhängig von der gewählten Luftfeuchtigkeit)
laufen, ohne dass Sie den Wassertank leeren müssen. Zum Ablassen setzen Sie einfach den Ablaufschlauch ein.
—Stellen Sie das Gerät auf eine ebene Fläche.
—Ziehen Sie den Wassertank heraus.
—Stecken Sie den Ablaufschlauch in den Anschluss am Gerät.
—Setzen Sie den Wassertank wieder in das Gerät ein und vergewissern Sie sich, dass sich der Schlauch in der
Kerbe des Wassertanks befindet.
Wenn Sie den Ablaufschlauch benutzen, beachten Sie bitte die folgenden Abbildungen.

WICHTIGE HINWEISE:
Wenn Sie den Entfeuchter auf eine unebene Oberfläche stellen oder den Schlauch nicht richtig installieren, kann
dies dazu führen, dass Wasser in den Wassertank läuft und das Gerät abschaltet. Entleeren Sie den Wassertank,
wenn sich das Gerät abschaltet. Überprüfen Sie dann die Position des Luftentfeuchters und den Schlauch, um eine
ordnungsgemäße Installation zu gewährleisten. Der Tank muss richtig eingesetzt sein und festsitzen, damit der
Entfeuchter betrieben werden kann.
HAUPTEIGENSCHAFTEN
Entfeuchtungsmodus
- Drücken Sie die Modus-Taste, um den Entfeuchtungsmodus auszuwählen.
- Die Anzeige für den Entfeuchtungsmodus leuchtet auf dem Bedienfeld auf.
- Drücken Sie die Lüfter-Taste, um die Lüftergeschwindigkeit auf hoch oder niedrig einzustellen. Die entsprechende
Lüftergeschwindigkeitsanzeige leuchtet auf.
- Drücken Sie die Taste zum Einstellen der Luftfeuchtigkeit, um die gewünschte Luftfeuchtigkeit im Raum
auszuwählen (70 % - 60 % - 50 % - 40 %).
Turbomodus
- Drücken Sie die Modus-Taste, um den Turbomodus auszuwählen.
- Die Anzeige für den Turbomodus leuchtet auf dem Bedienfeld auf.
- In diesem Modus ist die Lüftergeschwindigkeit auf hoch und die Luftfeuchtigkeit auf 30 % eingestellt und alle
Luftfeuchtigkeitsanzeigen sind ausgeschaltet.
Wäschetrocknungsmodus
- Drücken Sie die Modus-Taste, um den Wäschetrocknungsmodus auszuwählen.
- Die Anzeige für den Wäschetrocknungsmodus leuchtet auf dem Bedienfeld auf.
- In diesem Modus ist die Lüftergeschwindigkeit auf hoch und die Luftfeuchtigkeit auf 15% eingestellt und alle
Luftfeuchtigkeitsanzeigen sind ausgeschaltet.
- In diesem Modus kann die Timer-Funktion nicht verwendet werden. Wenn der Wäschetrocknungsmodus
ausgewählt ist, wechselt das Gerät nach 24 Stunden in den Entfeuchtungsmodus, wenn kein Bedienvorgang
ausgeführt wird.
Dauerbetrieb
- Drücken Sie die Modus-Taste, um den Dauerbetrieb auszuwählen.
- Die Anzeige für den Dauerbetrieb leuchtet auf dem Bedienfeld auf.
- In diesem Modus ist die Luftfeuchtigkeit auf 15 % eingestellt und alle Luftfeuchtigkeitsanzeigen sind ausgeschaltet.
- Drücken Sie die Lüfter-Taste, um die Lüftergeschwindigkeit auf hoch oder niedrig einzustellen. Die entsprechende
Lüftergeschwindigkeitsanzeige leuchtet auf.
- In diesem Modus kann die Timer-Funktion nicht verwendet werden.
Table of contents
Languages:
Other WACO Dehumidifier manuals
Popular Dehumidifier manuals by other brands

INVENTOR
INVENTOR PR1-30XL user manual

Singer
Singer SDHM-16L-55DIA instruction manual

Xpelair
Xpelair everdri 10 E instruction manual

Novita
Novita ND 390-i Operating instructions & warranty application

S&P
S&P MD Installation, operation and maintenance manual

Santa Fe
Santa Fe OASIS105 Installation & operation instructions