WAHL&ROSS DETAILS User manual

Hand Sanitising Dispenser
Instruction Manual

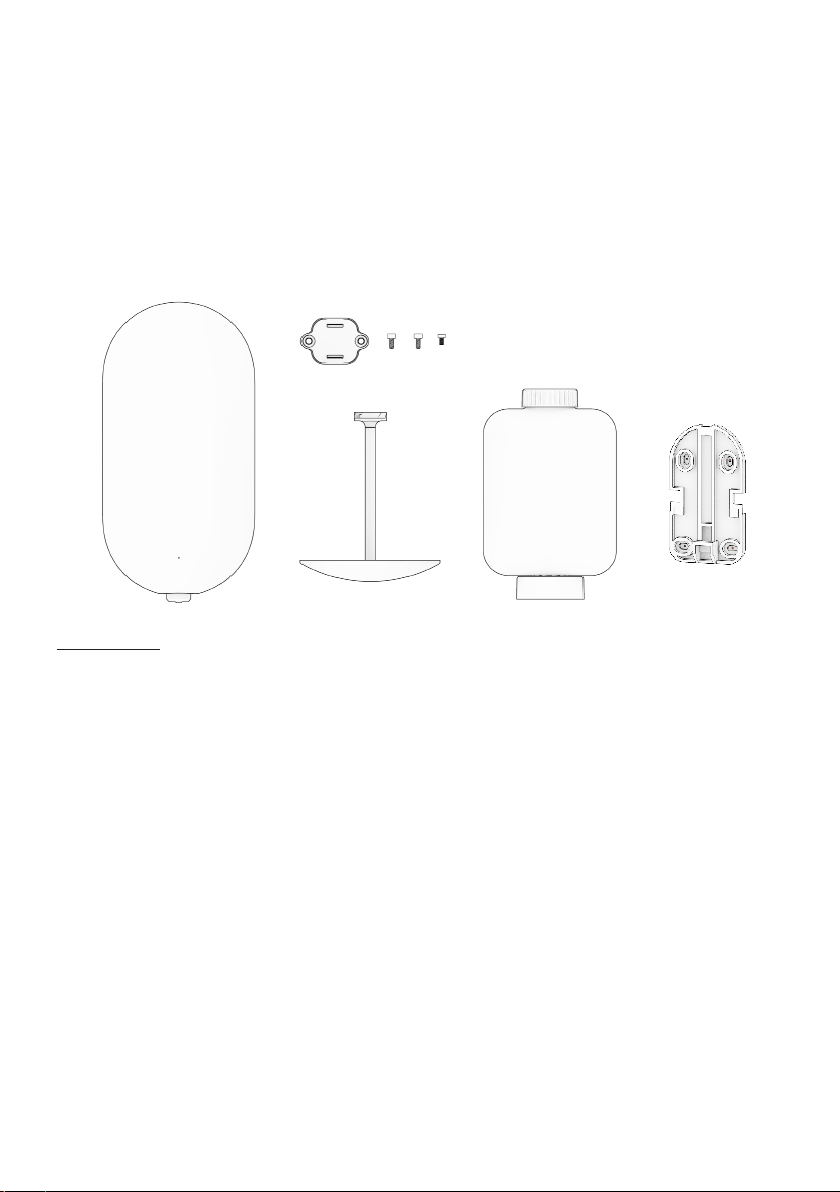
• Remove any packaging material and promotional labels or stickers before using the
dispenser for the first time.
• Do not place the dispenser near a heat source.
• Do not place the dispenser in direct sunlight.
• Do not place the dispenser in a fire escape.
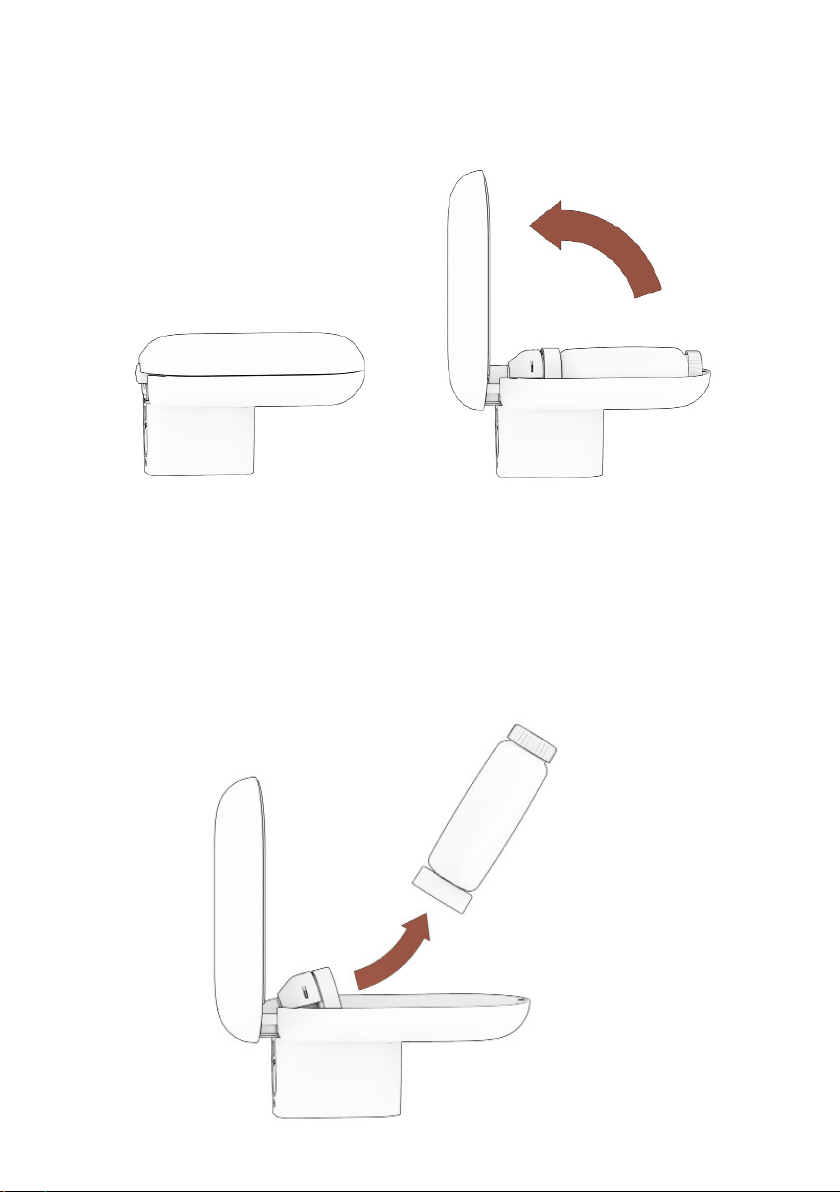
• Do not fill with anything other than handsanitising liquid.
• Do not use outdoors.
• Do not lay down or tilt the dispenser when liquid is inside as it can potentially damage
the product.
• Only place or store in temperatures between 10°and 27° Celcius
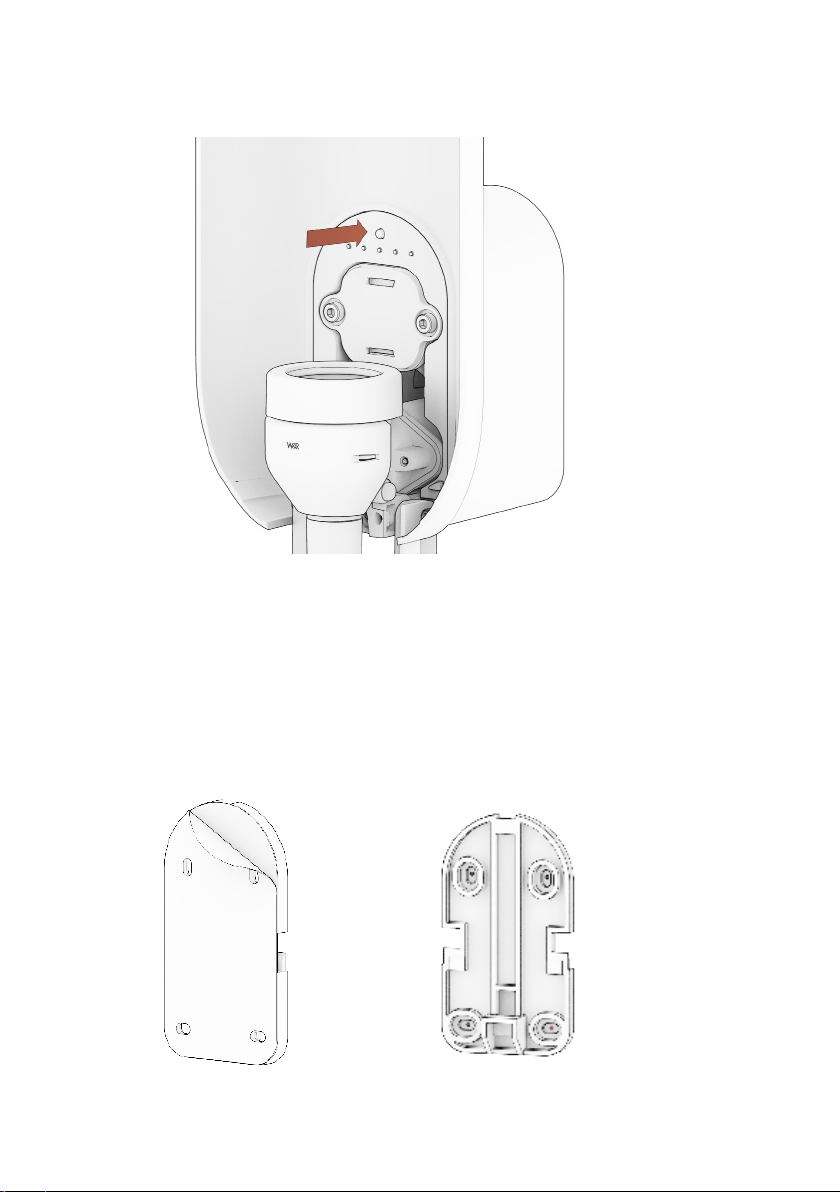
Power Supply 4x1.5V AA batteries (Not Included)
For best performance and longer battery life we recommend the use of:
Energizer Ultimate Lithium Batteries:
https://www.energizer.com/batteries/energizer-ultimate-lithium-batteries
Model: Details Touch Free Dispenser
Material/Finish Front: Aluminium or Oak Wood
Matierial/Finish Back: ABS
Class III: This appliance is designed to be supplied from a separated extra-low
voltage (SELV) power source. The voltage from a SELV supply is low enough that
under normal conditions a person can safely come into contact with it without
risk of electrical shock.
Thank You!
We at Details by Wahl&Ross would like to thank you for your purchase!
We hope that you will love and look after your product. Should you need help with your
product or do you require spare parts please contact us. customercare@details.dk
Patent Pending
Danish Design
Made in Denmark
Please carefully read all instructions before operating and save for future reference.
Technical Data
Important Safeguards

1. In The Box
• Dispenser housing
• refillable bottle
• driptray
• battery door
• security screws
• wall mount bracket
• 2x Hex bits
Not Included
• 4x AA batteries
• liquid hand sanitiser
If wall mounting you will also need:
• Pencil,
• Spirit level
• 4x wall plugs
• 4x wall screws
• drill
2. Care Instructions
Exterior can be whiped down with a soft cloth wringed in luke warm water with a gentle
colourless diswashing liquid. All other parts can be cleaned by hand using warm water
and a gentle dish washing liquid. Do not use abrasive cleansers, pads or cloths which can
scratch the surface. Do not clean any of the parts or accessories in the dishwasher.

3. Setting Up
4. Remove the bottle
Place dispenser on level surface and open cover.
Note! The dispenser will turn o when the lid is open.

5. Insert 4x AA Batteries with direction as shown below
(Not included).
6. Screw on battery door

8. Adhesive Mounted (Glass, Tiles etc)
Only mount on clean, smooth and even surfaces, do not mount on gaps or
grout. Clean mounting surface thoroughly. Mark position on wall using a spirit
level. Peel away the adhesive tape cover and press the backplate hard against
wall for 20 seconds.
Allow 24 hours for glue to cure before mounting dispenser!
7. Turn on & Dispensing Volume button
Turn on: Push and hold until lights flash fast. Dispensing Volume Setting: Push
to change dosage setting. 1 light = low dosage / 5 lights = high dosage

9. Wall Mounting
Create level marks on the wall using a spirit level. Level the backplate and mark the
holes. Pre-drill and use wall plugs and screws appropriate to the wall.
Screw backplate onto the wall.
10. Stand Mount (Stand Sold Seperately)
Peel o sticker and mount backplate to stand aligning holes. Insert and tighten
screws supplied with stand.

11. Stand Assembly (Stand Sold Seperately)
Align the pole with the hole in the plate.
Insert provided screw and tighten with Allen key size 4.

12. Mount the product onto the backplate on the wall
13. Secure to backplate
Insert provided screw to keep dispenser securely mounted to wall or stand
Position approx 1 cm above the backplate and push down gently.

14. Attach driptray by twisting 90° Clockwise
15. Insert screw to secure driptray.

16. Filling
17. Fill bottle with liquid hand sanitiser.
Place bottle on flat surface and remove lid.

18. Securely fasten lid on refill bottle then press bottle down into
dispenser pump.
19. Close front cover to power on and prime the pump. Test with
hand until liquid is dispensed.

20. Top Up
21. Refill & Swap
Bottles can be refilled or topped up in position.
Bottles can be refilled remotely and replace the empty bottles.

Large numbers of bottles can be refilled ideal for hospitality, hotels and large
businesses.
For enquiries regarding custom refill stations please contact us hello@details.dk
Pro Tip*
For fast bulk refill we recommend you set up a Refill Station

Environmental Information
“Electrical and electronic equipment (EEE) contains materials, components and substances
that may be hazardous and present a risk to human health and the environment when
waste electrical and electronic equipment (WEEE) is not handled correctly.
Equipment marked with the above crossed-out wheeled bin is electrical and electronic
equipment. The crossed-out wheeled bin symbol indicates that waste electrical and
electronic equipment should not be discarded together with unseparated household
waste, but must be collected separately.
For this purpose all local authorities have established collection schemes under which
residents can dispose waste electrical and electronic equipment at a recycling centre or
other collection points, or WEEE will be collected directly from households. More detailed
information is available from the technical administration of the relevant local authority.
Users of electrical and electronic equipment must not discard WEEE together with
household waste. Residents must use the municipal collection schemes to reduce adverse
environmental impacts in connection with disposal of waste electrical and electronic
equipment and to increase opportunities for reuse, recycling and recovery of waste
electrical and electronic equipment”.
If you one day need to dispose of this product please do so in an environmentally friendly
manner.

Details by Wah&Ross
Bygmarken 26
DK-3520 Farum
customercare@details.dk
Manufacturer:
Wahl&Ross ApS
Bygmarken 26
DK-3520 Farum
Patent Pending
Designed and Developed In Denmark
Made in Denmark
IB: D1-11-21
Table of contents