Waldbeck 10031078 User manual

Technische Daten
Sicherheitshinweise
Inhalt
• Überprüfen Sie, ob die Spannungsversorgung im Haushalt mit der Nennspannung auf
dem Typenschild des Gerätes übereinstimmt. Überprüfen Sie die Strombelastbarkeit
der Stromversorgung.
• Diese Bedienungsanleitung bietet genaue Informationen über die Funktion und den
richtigen Gebrauch dieses Gerätes. Lesen Sie die Bedienungsanleitung sorgfältig, um
die Sichereinheit des Anwender und des Geräts zu gewährleisten.
• Halten Sie das Gerät von Kindern und Personen und hilosen Personen fern.
• Halten Sie das Gerät von Orten mit hohen Temperaturen und Feuer fern. Halten Sie
das Gerät während der Benutzung von Orten fern, wo es leicht wegrutscht, umkippt
oder in der der Nähe eines Beckens auf die Seite fällt.
• Wenn das Gerät schadhaft ist, versuchen Sie nicht, das Gehäuse eigenständig zu ö-
nen, sondern wenden sich an den Kundendienst.
• Nicht im Regen verwenden.
Artikelnummer 10031078 10031079
Stromversorgung 220-240 V~ 50 Hz
Leistungsaufnahme 1400 W
Technische Daten . . . . . . . . . . . . . . . . . . . . . . . . . 2
Sicherheitshinweise . . . . . . . . . . . . . . . . . . . . . . . . 3
Gerätebeschreibung . . . . . . . . . . . . . . . . . . . . . . . . 4
Benutzung . . . . . . . . . . . . . . . . . . . . . . . . . . . . 5
Fehlerbehebung . . . . . . . . . . . . . . . . . . . . . . . . . . 6
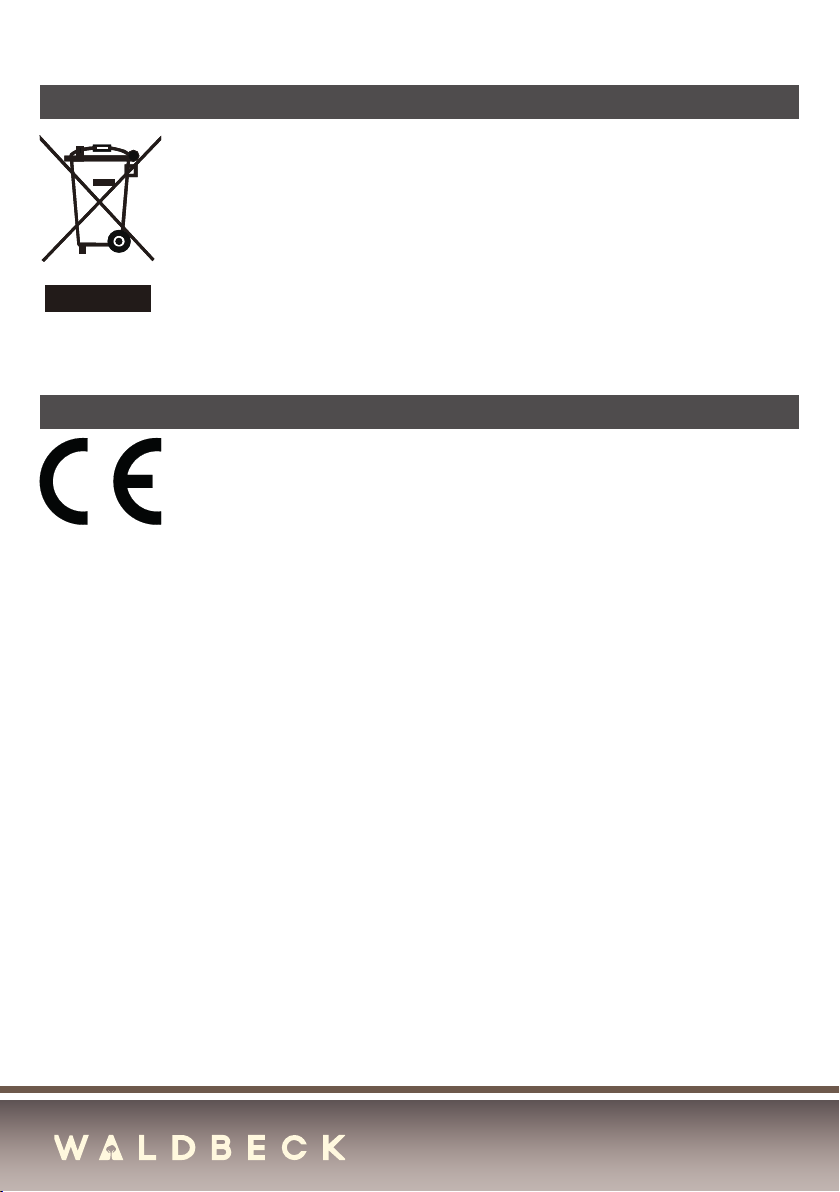
Entsorgung . . . . . . . . . . . . . . . . . . . . . . . . . . . . 7
Konformitätserklärung . . . . . . . . . . . . . . . . . . . . . . . 7
1
Sehr geehrter Kunde,
Wir gratulieren Ihnen zum Erwerb Ihres Gerätes. Lesen Sie die folgenden Anschluss- und
Anwendungshinweise sorgfältig durch und befolgen Sie diese, um möglichen technischen
Schäden vorzubeugen. Für Schäden, die durch Missachtung der Sicherheitshinweise und un-
sachgemäßen Gebrauch entstehen, übernehmen wir keine Haftung.

Gerätebeschreibung
1 Vierteiliges Kunststorohr
2 Motorgehäuse auf Behälter
3 Filterschwamm
4 Fugenüse
5 Vliesbeutel
6 Saugschlauch
7 Ablaufschlauch
8 Universaldüse
1
2 3 4
5
6
7
8
2

Benutzung
Vor der Inbetriebnahme
Überprüfen Sie nach dem Entgegennehmen der
Lieferung, ob die Verpackung beschädigt ist. Ö-
nen Sie die Verpackung und entnehmen Sie das
Gerät.
Das Gerät zusammensetzen
1. Überprüfen Sie beim Zusammensetzen des
Auslassschlauchs die beiden Enden des
Schlauchs. Verbinden Sie die Seite ohne
Gummischicht innen mit dem Gerät.
2. Das Saugrohr verbinden und anschließen
(Bild 1).
3. Den Beutel einsetzen (Bild 2).
4. Den Filterschwamm einsetzen (Bild 4).
Das Gerät starten
1. Drücken Sie den Schalter, legen Sie den
Schlauch und die Handdüse in den Teich, um
den Betrieb zu starten.
2. Nach dem Start, beginnt das Gerät automa-
tisch Wasser zu ziehen und abzulassen. Das
Wasserziehen dauert 30 Sekunden und das
Ablassen des Wassers 35 Sekunden.
3. Nachdem der Saugvorgang abgeschlossen
ist, schalten Sie das Gerät aus und ziehen
den Netzstecker. Nehmen Sie den Verbin-
dungsschlauch ab und legen Sie die ache
Saugdüse in die Halterung für das Zubehör
(Bild 3).
4. Waschen Sie den Beutel und den Filter-
schwamm mit Wasser, wenn Sie das Gerät
reinigen.
Bild 1
Bild 2
Bild 3
Bild 4
3

Fehlerbehebung
Fehler Grund Empfohlene Handlung
Die Rotation des Motors ist
defekt.
Der Netzstecker ist nicht
ordnungsgemäß einge-
steckt.
Stecken sie den Netzste-
cker fest in die Steckdose
und stellen Sie sicher, dass
die Steckdose unter Strom
steht.
Der Ein/Aus-Schalter des
Gerätes ist ausgeschaltet.
Schalten Sie das Gerät ein.
Der Schlauchanschluss
steckt nicht im Anschluss
über dem Gerät.
Schließen Sie den Schlauch-
anschluss oben an und
schalten Sie den Strom-
schalter am Schlauchgri
ein.
Die Saugleistung ist
schwach.
Die Düse, der Schlauch, der
Anschluss sind verstopft.
Entfernen Sie die Verstop-
fung.
Das Gerät ist voll mit
Schmutz oder Staub.
Entfernen Sie den Schmutz
und den Staub.
Der Filterschwamm oder
der Beutel sind verstopft.
Waschen Sie den Filter-
schwamm und den Beutel.
Der Anschlussschlauch ist
nicht gut verbunden.
Schließen Sie den Schlauch
noch einmal richtig an.
Das Luftvolumen des Gris
ist voll aufgedreht.
Stellen Sie den Schalter für
das Luftvolumen auf AUS.
4

Entsorgung
Konformitätserklärung
Bendet sich die linke Abbildung (durchgestrichene Mülltonne auf Rädern)
auf dem Produkt, gilt die Europäische Richtlinie 2002/96/EG. Diese Produkte
dürfen nicht mit dem normalen Hausmüll entsorgt werden. Informieren Sie
sich über die örtlichen Regelungen zur getrennten Sammlung elektrischer
und elektronischer Gerätschaften. Richten Sie sich nach den örtlichen Re-
gelungen und entsorgen Sie Altgeräte nicht über den Hausmüll. Durch die
regelkonforme Entsorgung der Altgeräte werden Umwelt und die Gesundheit
Ihrer Mitmenschen vor möglichen negativen Konsequenzen geschützt. Mate-
rialrecycling hilft, den Verbrauch von Rohstoen zu verringern.
Hersteller: Chal-Tec GmbH, Wallstraße 16, 10179 Berlin.
Dieses Produkt entspricht den folgenden Europäischen Richtlinien:
2006/42/EG (Maschinenrichtlinie)
2014/30/EU (EMV)
2011/65/EU (RoHS)
5

Technical Data
Safety Instructions
Contents
• Please check whether the local supply voltage meets the voltage value indicated on
the product or not before rst use.
• And check carrying capacity of power supply.
• This operation manual provides detailed information on the function and correct use
instruction of this cleaner, please read this manual carefully for the safety of user and
machine.
• Keep it away from children or person without self-care ability.
• Keep the machine away from the place of high temperature or re and keep it away
from the place where the machine is easy to slip, tilt or turn on its side near the pool
when the machine is in use.
• When the machine has a fault, please do not dismantle the machine privately, but
send o the formal repair point for repair.
• Please do not use in the rain.
Item number 10031078 10031079
Power supply 220-240 V~ 50 Hz
Power input 1400 W
Technical Data . . . . . . . . . . . . . . . . . . . . . . . . . . . 6
Safety Instructions. . . . . . . . . . . . . . . . . . . . . . . . . 6
Appliance Description . . . . . . . . . . . . . . . . . . . . . . . 7
Operation . . . . . . . . . . . . . . . . . . . . . . . . . . . . . 8
Troubleshooting . . . . . . . . . . . . . . . . . . . . . . . . . . 9
Disposal Considerations . . . . . . . . . . . . . . . . . . . . . 10
Declaration of Conformity . . . . . . . . . . . . . . . . . . . . 10
6
Dear Customer,
Congratulations on purchasing this equipment. Please read this manual carefully and take
care of the following hints on installation and use to avoid technical damages. Any failure
caused by ignoring the items and cautions mentioned in the operation and installation instruc-
tions are not covered by our warranty and any liability.

Appliance Description
1 Plastic four-section pipe
2 Motor housing
3 Filter sponge
4 Flat nozzle
5 Non-woven bag
6 Suction hose of automatic control
machine
7 Water outlet pipe
8 Hand nozzle
1
2 3 4
5
6
7
8
7

Operation
Before operation
Check whether the machine package is damaged
or not after receiving the product, then open and
take out the machine, and assemble as shown in
the gure.
Assembling the machine
1. Please note, check two ends of the pipe while
assemble the water outlet pipe, and connect
the side without a rubber sheet inside with
the complete machine.
2. The connecting mode of automatic control
suction pipe is as shown in gure 1.
3. The bag assembly mode and position are as
shown in gure 2.
4. The lter sponge assembly mode and posi-
tion are as shown in gure 4.
Operation
1. Press the switch button, extend the hose and
hand nozzle to the pool for suction and then
start to work.
2. The machine of automatic type will automati-
cally draw and drain water after started, the
water drawing time is 30s, and water drain-
ing time is 35s.
3. After nishing suction, turn o the power
switch, and pull out the plug. Dismantle.
4. Wash the bag and lter sponge with water
while clean the complete machine.
Fig. 1
Fig. 2
Fig. 3
Fig. 4
8

Troubleshooting
Fault Cause Suggested action
Motor has fault of rotation.
Check whether the power
plug is rmly inserted in the
socket or not.
Insert the plug in the sock-
et again and guarantee the
power socket to be on.
Check whether the pow-
er switch of the cleaner is
turned on or not.
Turn on the power switch.
Check whether a small plug
on the hose is inserted in
the socket above the ma-
chine head or not. And turn
on the power switch on the
hose handle (only for the
manual control type).
Insert the small plug, and
turn on the power switch on
the hose handle.
Suction is weakened.
Check whether the nozzle,
hose and connecting pipe
are blocked or not.
Remove blockage in time.
Check whether the dirt and
dust is full or not.
Discard dirt and dust.
Check whether the nozzle,
hose and connecting pipe
are blocked or not.
Wash the lter sponge and
bag.
Check whether the connect-
ing pipe is connected well or
not.
Install the connecting pipe
again.
Check whether the handle
air volume switch is fully
turned on or not.
Turn o the air volume
switch button.
9

Disposal Considerations
Declaration of Conformity
According to the European waste regulation 2012/19/EU this symbol on the
product or on its packaging indicates that this product may not be treated
as household waste. Instead it should be taken to the appropriate collection
point for the recycling of electrical and electronic equipment. By ensuring
this product is disposed of correctly, you will help prevent potential negative
consequences for the environment and human health, which could otherwise
be caused by inappropriate waste handling of this product. For more detailed
information about recycling of this product, please contact your local council
or your household waste disposal service.
Producer: Chal-Tec GmbH, Wallstraße 16, 10179 Berlin. Germany
This product is conform to the following European Directives:
2006/42/EC (Machine Directive)
2014/30/EU (EMC)
2011/65/EU (RoHS)
10

Fiche technique
Consignes de sécurité
Sommaire
• Vériez que la tension de votre secteur correspond bien à celle qui est indiquée sur la
plaque signalétique de l’appareil. Vériez aussi l’ampérage de l’alimentation.
• Ce mode d’emploi présente des informations précises sur les fonctions et l’utilisation
conforme de cet appareil. Lisez attentivement le mode d’emploi pour garantir la sécu-
rité de l’utilisateur et de l’appareil.
• Tenez l’appareil à l’écart des enfants et des personnes non autonomes.
• Tenez l’appareil à l’écart des lieux avec de fortes températures ou du feu. Pendant le
fonctionnement, tenez l’appareil à l’écart des lieux glissants, là où l’appareil pourrait
se renverser facilement, ou à côté d’un bassin.
• Lorsque l’appareil est endommagé, n’essayez pas d’ouvrir de votre propre chef le
boîtier, mais adressez-vous au service client.
• Ne pas utiliser sous la pluie.
Numéro d'article 10031078 10031079
Alimentation 220-240 V~ 50 Hz
Puissance consommée 1400 W
Fiche technique . . . . . . . . . . . . . . . . . . . . . . . . . 11
Consignes de sécurité . . . . . . . . . . . . . . . . . . . . . . 11
Description de l‘appareil . . . . . . . . . . . . . . . . . . . . . 12
Utilisation . . . . . . . . . . . . . . . . . . . . . . . . . . . . 13
Résolution des problèmes . . . . . . . . . . . . . . . . . . . . 14
Recyclage . . . . . . . . . . . . . . . . . . . . . . . . . . . . 15
Déclaration de conformité . . . . . . . . . . . . . . . . . . . . 15
11
Chère cliente, cher client,
Toutes nos félicitations pour l’acquisition de ce nouvel appareil. Veuillez lire attentivement les
instructions suivantes de branchement et d’utilisation an d’éviter d’éventuels dommages.
Le fabricant ne saurait être tenu pour responsable des dommages dus au non-respect des
consignes de sécurité et à la mauvaise utilisation de l’appareil.

Description de l‘appareil
1 Tube de plastique en 4 parties
2 Boîtier du moteur sur la cuve
3 Eponge ltre
4 Buse courante
5 Sac tissé
6 Tuyau d‘aspiration
7 Tuyau d‘évacuation
8 Buse universelle
1
2 3 4
5
6
7
8
12

Utilisation
Avant la mise en route
Après avoir réceptionné la livraison, vériez le
bon état du colis. Ouvrez le colis et retirez l’ap-
pareil.
Assembler l‘appareil
1. En réassemblant le tuyau d’évacuation, vé-
riez les deux extrémités du tuyau, les deux
extrémités Du tuyau. Branchez l’extrémité
sans couche de caoutchouc à l’intérieur de
l’appareil.
2. Connectez le tube d’aspiration et verrouil-
lez-le.
3. Installez le sac (schéma 2).
4. Installez le ltre éponge (schéma 4).
Démarrer l‘appareil
1. Appuyez sur l’interrupteur, posez le tuyau et
la buse dans l’étang pour démarrer l’utilisa-
tion.
2. Au démarrage, l’appareil commence auto-
matiquement à aspirer et à évacuer de l’eau.
L’aspiration de l’eau dure 30 secondes et
l’évacuation de l’eau dure 35 secondes.
3. A la n du processus d’aspiration, éteignez
l’appareil et débranchez-le du secteur en dé-
branchant la che. Retirez le tuyau connec-
teur et posez la buse d’aspiration plate sur le
support des accessoires (voir schéma 3).
4. Nettoyez le sac et le ltre éponge à l’eau
lorsque vous nettoyez l’appareil.
1
2
3
4
13

Résolution des problèmes
Défaut Cause Gestion recomman-
dée
Le moteur tourne mal.
La che est mal enfoncée. Branchez convenablement
la che dans la prise et as-
surez-vous que la prise est
bien alimentée.
Le bouton de marche/arrêt
de l’appareil est sur arrêt.
Allumez l’appareil.
Le branchement n’est pas
connecté au branchement
au-dessus de l’appareil.
Branchez la connexion du
tuyau en haut de l’appareil
et mettez sur marche l’in-
terrupteur situé sur la poi-
gnée du tuyau.
La puissance d'aspiration
est faible.
La buse, le tuyau ou le
branchement sont bouchés.
Retirez ce qui les bouche.
L’appareil est plein d’impu-
retés et de saletés.
Retirez les poussières et les
saletés.
Le ltre éponge ou le sac
sont bouchés.
Lavez le ltre éponge et le
sac.
Le tuyau n’est pas bien
branché.
Rebranchez le tuyau pour
qu’il soit correctement pla-
cé.
Le volume d’air du manche
est à fond ouvert.
Mettez l’interrupteur de vo-
lume d’air sur ARRÊT.
14

Recyclage
Déclaration de conformité
Le pictogramme ci-contre apposé sur le produit signie que la directive eu-
ropéenne 2012/19/UE s’applique (poubelle à roues barrée d’une croix). Ces
produits ne peuvent être jetés dans les poubelles domestiques courantes.
Renseignez-vous concernant les règles appliquées pour la collecte d’appa-
reils électriques et électroniques. Conformez-vous aux réglementations lo-
cales et ne jetez pas vos anciens produits avec les ordures ménagères. Le
respect des règles de recyclage des vieux produits aide à la protection de
l’environnement et de la santé de votre entourage contre les conséquences
négatives possibles. Le recyclage des matériaux aide à réduire l’utilisation
des matières premières.
Fabricant : Chal-Tec GmbH, Wallstraße 16, 10179 Berlin.
Ce produit est conforme aux directives européennes suivantes :
2006/42/CE (directives sur les machines)
2014/30/UE (CEM)
2011/65/UE (RoHS)
15
This manual suits for next models
1
Table of contents
Languages:
Other Waldbeck Vacuum Cleaner manuals