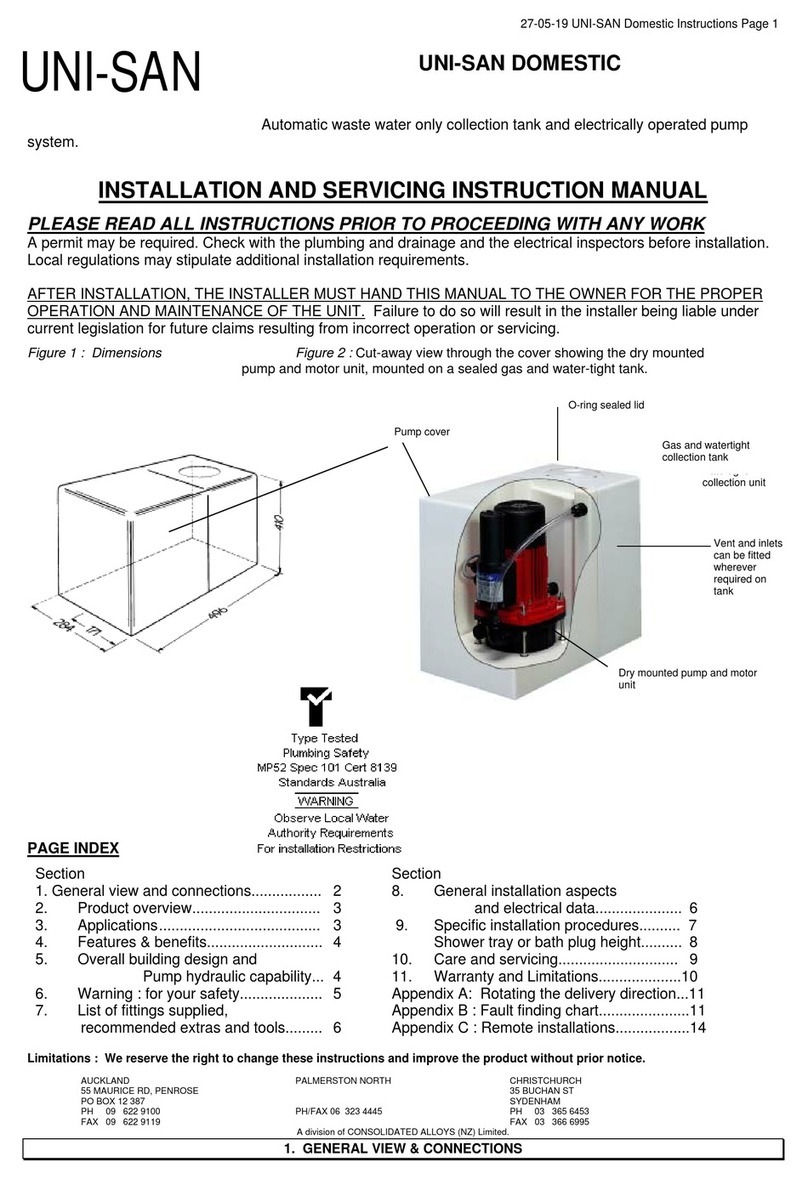
Attention: technical advices for discharge pipework
-The discharge pipe must not be kinked.
- A vertical lift must be made before the horizontal run at the start of the piperun (Fig.
4).
- Horizontal pipe runs must have a minimum fall of 1:100 (10mm per meter) up to the
discharge point (1% gradient).
E.g. Discharge point 2 metres above unit and length of discharge pipe 10 metres
then the height of the vertical lift must be minimum 2.1 metres
- It is recommend predisposing a drain-off point to allow the discharge pipework to
be drained down before any service work.
- If the discharge pipework runs to a level considerably lower than the unit, the resul-
tant syphoning effect can suck out the water seal in the unit and in the appliances
connected to it, causing a bad odour emission. In this case of installation to solve
the problem it’s recommended to install an air admittance valve at the highest point
of the pipe run (Fig. 5).
- If the discharge pipe has external stretches, the pipe must be adequately lagged to
avoid the possibility of freezing.
- Any elbow in the routing of the discharge pipe will create friction loss (roughly 50
cm per elbow to be deducted from the vertical pumping specification).
- To avoid friction losses always use smooth bends (OR 2 X 45 degrees bends
together) and not 90 degree elbows.
5. ELECTRICAL INSTALLATION
The electrical installation should be carried by a qualifies person
The unit should be connected to a fully earthed electrical supply
6. COMMISSIONING THE UNIT
The unit can be tested only after the complete installation (plumbing and electrical
installations).
When flushing the toilet the motor of the unit should run from 5 to 10 seconds to
clear the waste (the motor discharge time is variable as its performances depend by
the routing of the discharge pipe).
If it runs for more than 20 seconds, disconnect the electrical plug and wait about 10
seconds before to reconnect. If also after the reconnection the unit is continuing to
run for more than 20 seconds, you have to disconnect the electrical plug and to
check that the discharge pipe is clear and not kinked. Flush all others appliances
connected to the unit checking that all seals, and connections are watertight.
7. USAGE PRECAUTIONS AND WARNINGS
- This appliance is for domestic use only and is only be used as a secondary
unit not a primary unit i.e. there must be an alternative gravity flow system
available to the users of this pump package.
NB: The Sanismart should not be used in a permanent dwelling as the only
discharge point if this is the application then we suggest a larger package
unit be used (contact Wallace Pumps for more information)
- The appliance can discharge exclusively organic residuals and toilet paper
coming from a toilet and wastewater coming from all domestic appliances.
Do not throw foreign bodies inside the toilet or in the others appliances
connected to the unit, they will damage the product (like for example: cotton,
sanitary towels, condoms, wet wipes, plastic or wood or metal parts, food or
others residuals, etc.).
-
Children and all persons with reduced physical, sensory or mental
capabilities, or lack of experience and knowledge, cannot use the product
unless they have been given supervision or instruction concerning use of
the appliance by a person responsible for their safety.
- Do not use the devices connected to the appliance if the electricity supply is
not available.
- The appliances connected to the unit should not have leakage of water
(toilet cistern or any other sanitary appliance who doesn’t close perfectly) as
in this case the motor will activate repeatedly and uselessly to discharge
water. Moreover in case of lack of electricity the water will overflow from the
toilet or from the appliance connected to the unit and positioned at the
lowest level.
- If away for a long period (holidays or others occasions) it is recommended to
turn off the main water supply.
- Solvents and other chemicals products can damage the device.
- In case of heavy duty work, the motor thermal protector will automatically
stop the unit if the motor is overheating. In this case unplug the plug from
the socket-outlet, then plug it again after 30-60minutes and the appliance
will restart working normally.
8. MAINTENANCE
DISCONNECT THE ELECTRICAL POWER SUPPLY, BEFORE ATTEMPTING
ANY WORK ON THE UNIT.
The device does not need any particular maintenance.
This unit is fitted with an active carbon filter and does not require an external
venting. This filter has to be changed every year. Please check with your local
authorities as this unit may require external venting


