Wally MILK User manual

manual
wally milk

EN
wally milk
certications available:
Operating Manual V1.0 - 05/2021
MAN.26.1
La Marzocco S.r.l.
Via La Torre 14/H
Località La Torre
50038 Scarperia e San Piero
(Firenze) - ITALIA
www.lamarzocco.com
T: +39 055 849 191
F: +39 055 849 1990
Original instructions veried by the
manufacturer
Scan QR Code to view the complete
Software Programming Guide available on
the techcenter website.
Printed on recycled paper.
NB-0017
page 3
page 8
page 10
page 13
page 15
page 16
Chapters
1. General Warnings and Safety Specications
2. Denition of Available Models
3. Installation
4. Operation
5. Maintenance and Periodic Cleaning Operations
6. De-commissioning and Demolition
page 187. Software Programming Guide

EN
3
1. General Warnings and Safety Specications
1) Important safeguards
• The weighted sound
pressure level of the
machine is lower than
70dBA.
• Use, cleaning and
maintenance of this
appliance are realized by
people (including children
more than 8 years of age)
with reduced physical,
sensory or mental
capabilities, or lack of
experience and knowledge,
as long as they have been
given supervision or
instructions concerning
the use of the appliance
by a person responsible
for their safety and if they
understand dangers.
• Children should be
supervised to ensure that
they do not play with the
appliance.
• Keep the appliance and
its cord out of the reach of
children less than 8 years
of age.
WARNING
This appliance is for professional
use only and should be installed
in locations where its use and
maintenance is restriced to
trained personnel. Children are
forbidden to operate or play with
the appliance.
WARNING
The appliance must be placed in
a horizontal position on a counter
higher than 80 cm from the
ground.
CAUTION
As already mentioned in
the preceding notes, the
manufacturer shall not be held
responsible for damage to
objects, animals and/or people
whenever the machine has not
been installed according to the
instructions contained in this
manual, and is not used to do
what it was designed for (i.e.
preparing coffee and hot drinks).
WARNING
This appliance is not suitable
for outdoor use. Jets of water
should not be used to clean the
machine, nor should it be placed
where water jets are used.

EN
4
2) This operating manual
is an integral and essential
part of the product and
must be supplied to users.
Users are asked to read
the enclosed warnings and
cautions carefully, as they
provide valuable information
concerning safety during
installation, operation and
maintenance. This manual
must be kept in a safe
place and be available for
consultation to new and
experienced users alike.
3) Ensure product’s integrity
by inspecting the packaging,
making sure it presents no
signs of damage which might
have affected the enclosed
machine.
4) Check the machine’s
integrity after having carefully
removed the packaging.
Note: In case of doubt, do not go on
any further and contact your dealer
or retailer immediately. They will
send out specialized personnel
authorized to perform service on
the appliance.
5) Packaging (boxes, plastic
bags, foam parts and whatever
else) must not be left around
within easy reach of children,
due to the potential danger it
represents, nor be discarded
in the environment.
6) Check to see that data on
the rating plate corresponds
to those of the main electrical
supply which the machine
will be hooked up to.
7) The equipment must be
installed to comply with the
applicable federal, state or
local electrical and plumbing
codes. The installation
also must comply to the
manufacturer’s instructions,
and must be performed by
qualied and authorized
personnel.
8) Incorrect installation may
cause injury/damages to
people, animals or objects,
for which the manufacturer
shall not be held responsible.
9) Safe electrical operation of
this device will be achieved
only when the connection to
the power outlet has been
completed correctly and
in observance of all local,

EN
5
national, and international
electrical codes and safety
regulations, and particularly
by grounding the unit.
Make sure grounding has
been done properly as it
represents a fundamental
safety requirement. Ensure
qualied personnel check
such connection.
10) Furthermore, you must
ensure that the capacity of the
available electrical system is
suitable for the maximum
power consumption indicated
on the appliance.
11) We do not recommend
using adapters, multiple
plugs and/or extension cords.
If you cannot avoid using
them, make sure that they are
exclusively of the kind which
conforms to local, national,
and international electrical
codes and safety regulations,
being careful not to exceed
the power and current ratings
indicated on such adapters
and extension cords.
12) This device must be used
exclusively for the functions it
has been designed and built
for. Any other application is
inappropriate and dangerous.
The manufacturer shall not be
held responsible for any damages
caused by improper and/or
irrational use.
This appliance should not be
installed in kitchens.
13) Using any electrical
device requires that certain
fundamental rules be
observed. In particular:
• do not touch the device
with wet or humid hands
and feet;
• do not use the device
while having no shoes on
your feet;
• do not use extension cords
in bath or shower rooms;
• do not unplug the device
from the power outlet
by pulling on the power
supply cable;
• do not expose the device to
atmospheric agents (rain,
sun, etc.);
• do not allow children or
untrained people to use
this device;
• do not clean the control
panel with a wet cloth since
it is not watertight.

EN
6
14) Before carrying out any
maintenance and/or cleaning
operations, turn the main
switch, which is located on
the front left of the machine,
to the “0” or “OFF” position,
and disconnect the machine
from the electrical network
by unplugging the cord or
by switching off the relative
circuit breaker. For any
cleaning operation, follow
exclusively the instructions
contained in this manual.
15) In case the machine is
operating in a faulty manner
or breaks down, disconnect
it from the electrical
network (as described in the
preceding point) and close
the water supply valve. Do not
attempt to repair it. Contact
a qualied and authorized
professional to perform any
repair. Any repairs must
be performed exclusively
by the manufacturer or by
an authorized centre using
only original parts. Non
compliance with the above
could compromise the safe
operation of the appliance.
16) You should plan to
make use of an omnipolar
connector during installation,
as required by local, national,
and international electrical
codes and regulations.
17) In order to avoid dangerous
overheating problems, it
is recommended that the
power supply cable be fully
unfurled.
18) Do not obstruct air intake
and exhaust grilles and, in
particular, do not cover the
cup warmer tray with cloths
or other items.
19) The machine’s power
supply cable must not be
replaced by users. In case the
power supply cable becomes
damaged, shut off the
machine and disconnect the
machine from the electctrical
network by switching off the
relative circuit breaker and
close off the water supply;
to replace the power supply
cord, contact qualied
professionals exclusively.
20) These instructions are also
available in an alternative
format on a website

EN
7
http://techcenter.lamarzocco.com.
21) The machine should be
placed on a at counter
and must be placed in
settings with the following
temperatures:
Minimum room temperature:
5°C/41°F;
Maximum room temperature:
32°C/89°F.
22) If the machine has
been temporarily housed
in settings with a room
temperature of less 0°C/32°F,
the machine must be placed
in a warmer environment in
order to gradually defrost the
hydraulic system prior to use.
23) Steam pressure supply
must be between 0.14 and
0.17 MPa.
24) This machine is designed
only for preparing coffee and
hot drinks.
A
B
C
25) Common Dimensions, Weights, and
Features
WEIGHT [kg]
A
B
C
wally milk
A [mm] 225
10
323
489
B [mm]
C [mm]

EN
8
2. Denition of Available Models
Fig. 1 - Model wally
1Main Switch
2Oscillating Platform
3Removable Drain Tray
4Temperature Sensor
5Steam Button
6Digital Display
7Programming Encoder
8Proximity Sensor
9Steam Wand
10 Braided Hose for Steam
For additional information on electronics,
keypads, and software programming,
please see the section titled Software
Programming your appliance.
1
7
6
2
Legend
3
4
5
9
8
10
WARNING
Do not soil the lower area of the
sensor when handling the wand.
Failure to observe this warning
may affect the operation of the
appliance.

EN
9
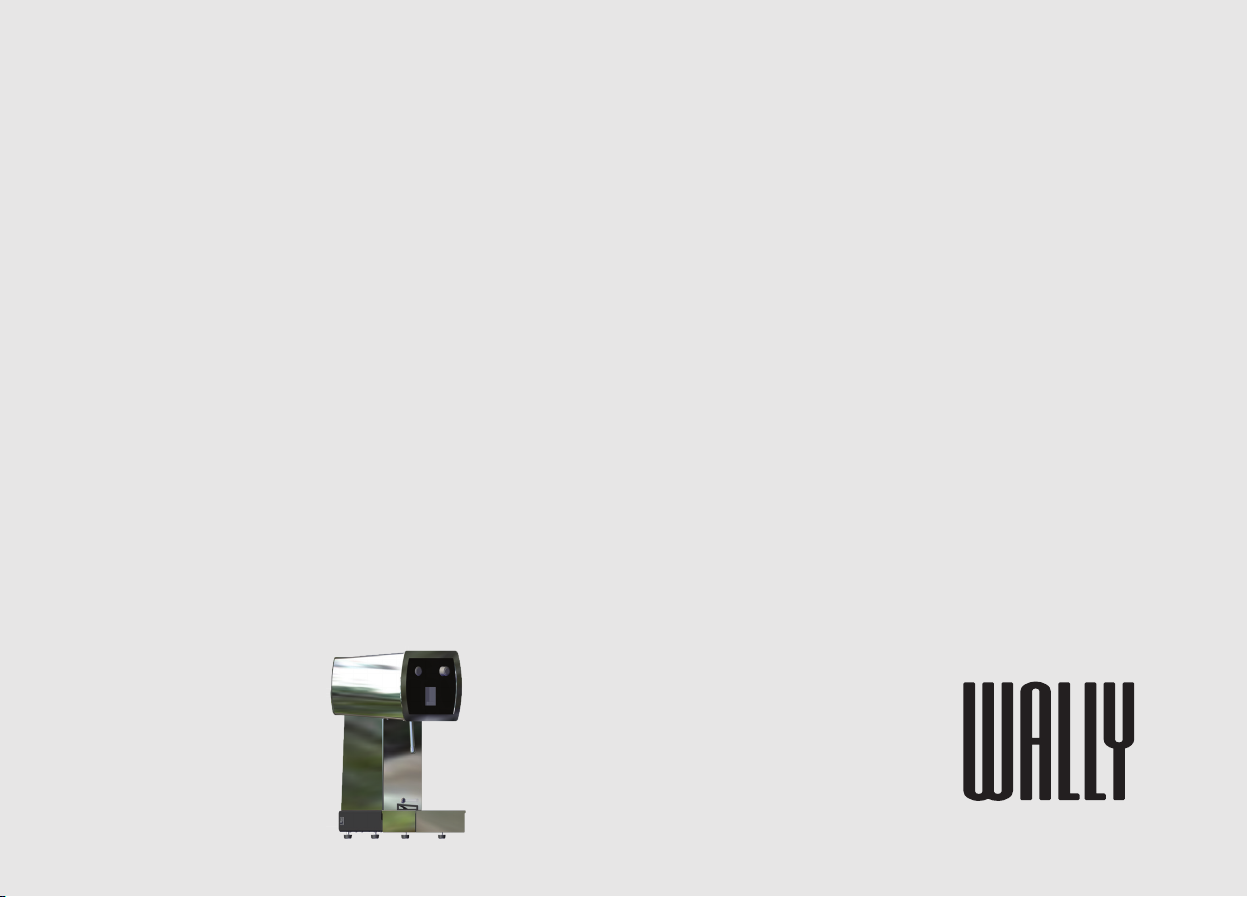
1) General Description
The machine is available in a single
version. To operate the machine, it must
be connected to a steam source using the
specic connection tube. Do not use tubes
other than the one provided.
The main components that make up the
machine are:
• Steam wand;
• Platform;
• Drip tray;
• Supply tube;
• Discharge duct.
Remove machine from packaging
1) Ensure product’s integrity by inspecting
the packaging, making sure it presents
no signs of damage which might have
affected the enclosed machine.
2) Check the machine’s integrity after
having carefully removed the packaging.
Packaging (boxes, plastic bags, foam parts
and whatever else) must not be left within
easy reach of children, due to the potential
danger it represents, nor be discarded in
the environment.
2) Description of the various parts
• Steam wand
The steam wand is the component that
allows the exit of the uid. Do not touch
the wand when the machine is operating.
Although equipped with “performance
touch” technology, the wand could cause
burns as a result of a contact.
To ensure proper functioning over time
and always provide high-quality beverages,
it is recommended to clean frequently the
wand.
• Platform
The platform is the area in which to place
the pitcher. During the frothing operation,
the platform will tilt to allow the foam to
homogenise and obtain the best quality of
the foam. Do not touch the pitcher or the
platform during the frothing phase. The
platform can be removed for cleaning.
• Removable drain tray
When the machine is operating or during
cleaning, there may be accidental spills
of liquids. The drip tray allows containing
liquids to avoid they get in contact with
machine parts or that they end up on the
counter. The drip tray can be removed to
clean it in an easy manner.
• Exterior cover
The exterior consists of painted and
stainless sheet steel panels. To provide
good aesthetics, to optimize ergonometrics
for the operator and to reduce the chance
of damage to a minimum.
• Machine CE plate:
• Machine ETL plate:
• Machine KC plate:
MPa MPa
°C
WALLY MILK
220-240V 50-60 Hz
WA000000
45 05/20
0,12 0,2
134STEAM
MPaMPa
°C
WALLY MILK
220-240V 50-60 Hz
WA000000
45 05/20
0,12 0,2
134STEAM
MPaMPa
°C
WALLY MILK
220V 60 Hz
0,12 0,2
134
45
WA000000
05/20

EN
10
3. Installation
WARNING
At each installation, the
appliance should be equipped
with a new set of tubes for
plumbing and related gaskets.
WARNING
Before making any electrical
connections make sure that
the two strain relief connectors
are rmly secured to the body
of the appliance in order to
prevent inadvertent stress on
the power cables.
WARNING
This appliance should not be
installed in kitchens.
WARNING
Hazardous voltage disconnect
from power supply before
servicing.
WARNING
The manufacturer declines any
responsibility for any event
leading to liability suits whenever
grounding has not been
completed according to current
local, national, and international
regulations and electrical codes,
or other electrical parts have
been connected improperly.
WARNING
This appliance is not intended
for use by persons (including
children) with reduced physical,
sensory or mental capabilities,
or with lack of experience and
knowledge, unless they have
been given supervision or
instruction concerning the use
of the appliance by a person
responsible for their safety.
WARNING
- U.S.A. and CANDA only - Do not
connect to a circuit operating
at more than 150V to ground on
each leg.
WARNING
For the best result we
recommend using the supplied
Wally pitchers.

EN
11
WARNING
This appliance is not suitable
for outdoor use. Jets of water
should not be used to clean the
appliance, nor should it be placed
where water jets are used.
WARNING
In order to prevent cracks or
leakage: do not store or install
the appliance in places where
in boiler or hydraulicsystem to
freeze.
WARNING
Ensure the correct connection
of the supply tube. Improper
installation can cause the
malfunction of the machine and
may damage persons, animals
or property.
WARNING
During the lifecycle of the
machine, do not handle
improperly the connection tube
nor bring it near sharp objects
or objects that can cause the
breakage of the same. The
breach of this requirement
may cause damage to persons,
animals or property.
WARNING
It is recommended to replace
the connection pipe every ve
years, even if the machine
remains unused.
WARNING
Do not use a tube other than the
one provided with the machine.
The breach of this requirement
may cause damage to persons,
animals or property.
Note:
• The drinking water mains valve and
the circuit breakers for the electrical
system need to be located in the most
convenient position for the operator to
access them easily and quickly.
• This machine complies with the
standard 61000-3-11.

EN
12
1) Steam connection
Connect the supply pipe of the steam
source to the machine, ensuring the
mechanical seal of the terminal ttings
with thread 1/4” gas (BSP). If necessary,
use the adapter 1/4”-1/8” gas (BSP).
Ensure that the machine operates in a
correct manner, it is recommended to
use a source that supplies steam under
pressure between 0.14 and 0.17 MPa
(1.4 and 1.7 bar).
2) Electrical connections
Connect the appliance to a power supply
that is rated in accordance with the serial
plate on the appliance.
3) Waste water drain connection
The connection of the drain of the machine
must be realized thanks to the plastic tube
included in the supply. Connect one end of
the plastic tube to the tting of the drain
pipe under the machine, by means of the
quick connection. Connect the other end
to a suitable drain water recovery system.
If the above system is not available, and
if acceptable according to the local rules,
drain liquids can be collected in a suitable
bucket and any extensions of the drain
pipe shall use tubes in PVC and adequate
tube fasteners.

EN
13
4. Operation
1) Turning the appliance on
Turn on power by pressing the main power
switch. The main power switch may be
found on the left rear of the machine.
2) Pitcher
Fill the pitcher and place it on the
platform, ensuring that the edge of the
pitcher touches the walls positioned on
the platform.
WARNING
The appliance must not be dipped
in, nor splashed with, water in
order to clean it. For cleaning
operations, please follow the
instructions listed below very
carefully.
WARNING
This
appliance
is designed only
for preparing hot drinks.
WARNING
To avoid the risk of injury, do not
open the brew chamber during
the brew process.
WARNING
During frothing, the platform
will tilt. Do not interfere with the
motion of the platform to prevent
machine damage and improper
milk frothing.
WARNING
You can use pitchers other than
those supplied, as long as their
outer surface is painted.
WARNING
Maintain the temperature sensor
in a good state of cleanliness.
Dirt deposited on the sensor may
compromise the operation of the
machine.
WARNING
Maintain the ultrasound distance
sensor in a good state of
cleanliness. Dirt deposited on
the sensor may compromise the
operation of the machine.

EN
14
3) Select the desired program
Select the desired program by means of
the encoder.
4) Steaming milk
Press the activation button and wait for
milk frothing.
The delivery may not start if correct
frothing parameters are not respected.
Make sure the milk temperature in the
pitcher is not greater than 25°C (77°F).
Also make sure that the pitcher contains
an adequate level of milk. An excessive or
insufcient amount can lead to improper
operation of the machine. The temperature
of the milk reaches almost 60/65°C
(140/149°F).
Be careful not to allow liquid to overow in
order to avoid severe burns.
Once the milk is frothed and the wand has
returned to the upper point, it is possible
to drain. Press and hold the activation
button for the desired time for wand drain.
It is possible to drain once after each
frothing.
Programming
Encoder

EN
15
1) Cleaning the drain collector
Remove the drain tray grill at least twice
a week and clean, pull out the water drain
collector and clean it thoroughly. Inspect
and clean also the drain box and remove
any leftover grounds.
2) Cleaning the body
Wipe the stainless steel surfaces with a
soft, non abrasive cloth in the direction of
the glazing marks, if any. Do not use any
alcohol or solvents whatsoever on painted or
imprinted parts in order not to damage them.
3) Cleaning the steam nozzles
Steam nozzles must be cleaned
immediately after use with a damp cloth
and by producing a short burst of steam
so as to prevent the formation of deposits
inside the nozzles themselves, which may
alter the avor of other drinks to be heated.
IMPORTANT
If the appliance has not been used for
more than 8 hours or, in any case, after
long periods of being idle, in order to use
the appliance to its full potential it is
necessary to perform some cleaning cycles
before brewing beverages as follows:
- Being careful to avoid burns, turn
on each steam wand for at least one
minute.
If the appliance is not going to be used
for long periods of time, it is advisable to
follow these safety indications:
- Disconnect or interrupt the steam
connection via a mains tap.
- Disconnect the appliance from the
electrical mains.
5. Maintenance and Periodic Cleaning Operations
WARNING
The appliance must be installed
so that qualied technical
presonnel can easily access it for
eventual maintenance.
WARNING
Jets of water should not be used to
clean the machine, nor should it be
placed where water jets are used.
WARNING
This appliance is for professional
use only and should be installed
in locations where its use and
maintenance is restriced to
trained personnel.
WARNING
The appliance must not be dipped
in, nor splashed with, water in order
to clean it. For cleaning operations,
please follow the instructions listed
below very carefully.
WARNING
In order to prevent cracks or
leakage: do not store or install
the appliance in places where
temperature may cause water in
boiler or hydraulic system to freeze.
WARNING
If the above-mentioned instructions
are not adhered to the manufacturer
cannot be held responsible for
damage to persons or things.

EN
16
6. De-commissioning and Demolition
1) De-commissioning and demolition
Start by setting the main switch to the “0”
or OFF position.
Disconnecting from the power outlet
Disconnect the appliance from the
electrical network by switching off the
associated circuit breaker or circuit
protection device. Remove the power
supply cord from the power connection.
Disconnecting from the water system
Disconnect the steam pipe. Remove the
reinforced plastic tubing on the drain
connection.
At this point, the appliance may be
removed from the bar, being very careful
not to drop it or squash your ngers.
The appliance is made out of various
materials and therefore, if you do not
intend to put it back in service, it must
be taken to a special disposal company
which will select the materials which can
be recycled and discard the others.
Current regulations make it illegal to
discard such machine by leaving it on
public grounds or on any private property.
Recycling notice: Warning for the protection of the
environment.
Used Electrical and electronic waste
contains hazardous but also valuable
and scarce materials which should be
recovered and recycled properly. We kindly
ask that you contribute to the protection of
the environment and natural resources by
delivering used equipment to the relevant
recycling locations if such locations are
available in your country.

EN
17

EN
18
7. Software Programming Guide “Barista” Programming
+-
PUSH
Recipe
Steaming
Manual
Steaming
Manage
Recipes
Machine
Conguration
page 28
+-
page 22
+-
Language
ENGLISH
page 30
+-
Temperature Units
CELSIUS
page 31
Pitcher Size
AUTODETECT
page 32
Exit
Menu
page 33
Recipe
Steaming
Manual
Steaming
Manage
Recipes
Machine
Conguration

EN
19
“Barista” Programming

EN
20
“Technical” Programming
+-
PUSH
Recipe
Steaming
Manual
Steaming
Manage
Recipes
Machine
Conguration
page 28
+-
Language
ENGLISH
page 34
page 22
+-
Temperature Units
CELSIUS
page 35
+-
Full Access
Mode
ENABLED
page 36
+-
Pitcher Size
AUTODETECT
page 37
Press and hold the Encoder Knob for 5 seconds.
Recipe
Steaming
Manual
Steaming
Manage
Recipes
Machine
Conguration
Table of contents