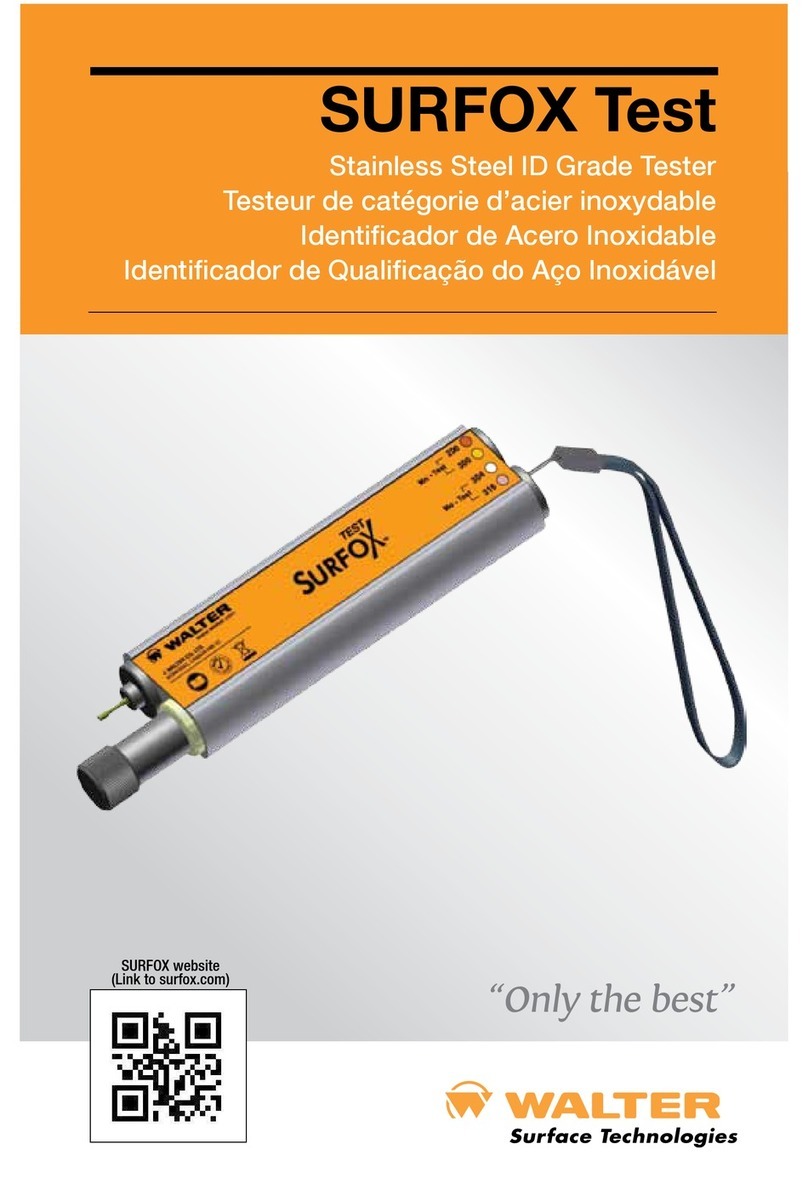
Walter SURFOX User manual

SURFOX
Stainless steel passivation tester
OWNER’S MANUAL
Testeur de passivation pour l’acier inoxydable
GUIDE DE L’UTILISATEUR
Téster para pasivación del acero inoxidable
MANUAL DEL USUARIO
Analisador de Passivação
MANUAL DO PROPRIETÁRIO
SURFOX website
(Link to surfox.com)


Owner’s manual 3
Table of contents
Table of contents
1. Tool overview 5
2. Tool features 5
2.1 Components (Fig. 1, page 4) 5
2.2 Technical data 5
2.3 Included in the kit 5
3. Battery installation 6
4. Refill replacement 6
5. Tip replacement 7
6. SURFOX passivation tester functions 7
6.1 Switch 7
6.2 Language setting 8
6.3 Date / time setting 8
6.4 User id / password setting 8
6.5 Calibration 8
6.6 Free test 9
6.7 Quality control 9
7. How to use the probe to verify the passivation
of stainless steel 10
8. SURFOX passivation tester software 12
8.1 Software installation 12
8.2 Hardware installation 12
8.3 Software use 13
8.3.1 Quality control data download 13
8.3.2 Deleting tests - user id 13
8.3.3 Test export 13
9. Disposal 13
Version française 15
Versión española 27
Versão portuguaise 39

4
Fig. 1
1
3 (rear)
11
13
6
412
5
2
10
7
8
9
SURFOX Stainless steel passivation tester
SERIAL NUMBER / NUMÉRO DE SÉRIE :
YEAR OF CONSTRUCTION / ANNÉE DE CONSTRUCTION : 2012
ATTENTION
Read the instructions carefully before use. This manual contains infor-
mation concerning proper and safe use of testing device. The manual is an
integral part of the device and must be kept throughout the entire service life of
the device for future consultation.

Owner’s manual 5
SURFOX Stainless steel passivation tester
1. Tool overview
SURFOX PASSIVATION TESTER is an electrochemical testing device that pro-
vides a numeric value of the quality of the protective chromium passive layer on
stainless steel. The device provides within seconds a stable and precise value
related to the state of the passivation process.
2. Tool features
2.1 Components (Fig. 1, page 4)
2.2 Technical data
2.3 Included in the kit
1. EXTERNAL UNIT
2. TEST PROBE
3. Battery box (Rear side)
4. 4 pin connector on external unit
5. 4 pin connector on test probe
6. 4 pin cable
7. Refilling cartridge cap/ Cap
placement
8. Testing tip
9. Cap
10.Ground tip
11.USB cable
12.USB port
13.Calibration plate
u 4 PIN connection cable
u USB Cable
u Calibration control plate
u Software CD
u Owner’s manual
u Carrying case
SURFOX PASSIVATION TESTER is built in compliance with
established EU safety standards and bears the CE mark.
MODEL SURFOX PASSIVATION TESTER
Supply voltage 6 V
Tool weight 230 g
Tool dimension (mm) 156 x 40 x 20

6
SURFOX Stainless steel passivation tester
3. Battery installation
1. Unscrew the cover of the battery box compartment.
2. Insert/replace the batteries (4x AA 1,5 V).
3. Close the cover of the battery compartment.
NOTE: Batteries are included with the tester.
4. Refill replacement
1. Unscrew the cap (7) of the cartridge compartment.
2. Remove and replace the cartridge by a new one.
3. Screw the cap (7) back on the compartment. (Fig. 2)
Attention: Ensure the cap is screwed on properly to avoid the evaporation of
the electrolytic solution.
WARNING: Wear gloves during the operation to avoid
direct contact between the electrolyte solution and
the skin.
Fig. 2

Owner’s manual 7
SURFOX Stainless steel passivation tester
5. Tip replacement
Replace the tip when worn or dirty by following the instructions below.
1. Remove the cartridge as described in section 4.
2. Remove the white tip as shown in the image (Fig. 3).
3. Insert the new tip into the cartridge.
4. Insert the cartridge in its compartment.
5. Screw back onto the compartment (7) (Fig. 2).
WARNING: Wear gloves during the operation to avoid
direct contact between the electrolyte solution and
the skin.
Fig. 3
6. SURFOX passivation tester functions
6.1 Switch
Turn on the external unit of the passivation tester by pressing and holding down
the POWER button for two seconds. The tester will light up and the main menu
will appear.
Turn the unit off pressing and holding down the POWER button for two seconds.
NOTE: It is possible to return to the main menu by pressing MENU button on
the external unit.

8
SURFOX Stainless steel passivation tester
6.2 Language setting
To set the language menu, from the main menu, select
SETTINGS and press 4, scroll using the arrow keys to
LANGUAGE and press 4.
The following languages are available:
u English
u French
u German
Select the desired language and press 4 to confirm.
6.3 Date / time setting
To set the date and time, from the main menu, select
SETTINGS and press 4, using the arrow keys to scroll
to DATE and / or TIME and press 4. To set the value,
use the numeric keys on the keyboard and press 4 to
confirm.
NOTE: The date and time set appears in the quality
control report.
6.4 User id / password setting
To set the User ID, from the main menu, select
SETTINGS and press 4,using the arrow keys to scroll
to USER and press 4; to set the value use the numeric
keys on the keyboard and press 4 to confirm. Then,
choose and enter password; to set the value use the
numeric keys on the keyboard and press 4 to confirm.
6.5 Calibration
It is recommended, especially before a QC session,
to verify the calibration of the instrument.
To access the calibration control function, from the main
menu, select SETTINGS and press 4; scroll with the ar-
rows to the CALIBRATION selection and place the probe
on the calibration plate supplied, then press 4.
A 5 seconds calibration test will start, after which there
will be an OK message confirming proper calibration.

Owner’s manual 9
SURFOX Stainless steel passivation tester
In the eventuality that the calibration cannot be completed, a message to verify
the cartridge and/or tip; CHECK TIP / REFILL will be displayed.
The loss of the calibration can be in fact caused by two factors:
u Exhaustion of the electrolyte contained in the refill (see section 4 – Refill
replacement)
u Pollution of the tip (e.g. If you performed a test on a piece of dirt) (see
section 5 – Tip replacement)
It is recommended to perform the calibration test after a prolonged storage
period.
6.6 Free test
The Free Test function allows to make a passivation
test without saving the data in memory. To access this
feature, from the main menu, select NEW TEST (press
4) and then FREE TEST (press 4).
Position the probe on the test piece and press 4 to
begin the test.
After pressing 4 the test will start and a graphic bar will
show the progression of the test (duration: 15 seconds).
After testing, the display shows the numeric value of the quality of the passive
layer of stainless steel between a maximum value (GOOD) and totally not
passive (BAD).
Press 4 to return to the FREE TEST section or press MENU to return to main menu.
6.7 Quality control
From the main menu, select NEW TEST (press
4
) and
subsequently QUALITY CONTROL (press
4
).
To access the quality control function, you must login
using their username / password, previously recorded
in the Settings section. (see section 6.4 User ID /
Password setting)
Once logged in, you are prompted to enter PROJECT
No., which will remain stored during tests of the current session. Enter the
project No and press
4
(Note: the field can be left blank, pressing the
4
key).
Enter the SERIAL No. This data will be stored for the current test (the field can
be left blank, press
4
); after testing, the instrument will return to main window,

10
giving you the possibility to enter another serial number. To change the value,
press
4
and enter the data using the keyboard.
Insert the SERIAL No and press
4
, and position the probe on the test piece and
press
4
to begin testing.
After pressing
4
the test will start and a graphic bar will show the progression of
the test (Duration: 15 seconds).
After testing, the display shows the numeric value of the quality of the passive
layer of stainless steel between a maximum value (GOOD) and a “not passive”
(BAD).
Press 4 to return to SERIAL No to maintain the current session and the Project
No – or press the MENU button to end the session and return to the main menu.
NOTE: The tester has 50 memory blocks; once all the available cells are used,
to perform a new QC test, it will be necessary to clear the memory by following
the steps (see section 8.3.2 – Deleting Tests – User ID).
SURFOX Stainless steel passivation tester
7. How to use the probe to verify the
passivation of stainless steel
1. Connect the probe to the external unit using the 4 pin cable supplied (Fig. 4).
2. Unscrew the tip protector and place it on the refilling cartridge compartment
cover (Fig. 5).
Fig. 4
Fig. 5

Owner’s manual 11
SURFOX Stainless steel passivation tester
Fig. 6
For optimal results clean the area to be tested to remove residue and
dust, to keep the tip of the test probe clean.
3. Place the tip of the test probe on the area to be tested and the ground in
contact with metal.
4. Maintain the contact in position for the entire duration of the test (Fig. 6).
5. After testing, remove any residual electrolyte solution from the test area, using
a humid cloth.
N.B.: Typical values are +0.10 or higher for an AISI 304, for a carbon
steel (not stainless) - 0.55
NOTICE: It is well known that where a welding process occurred the heat treat-
ment altered the passivation of the stainless steel, forming a layer of non protec-
tive oxides, slug and iridescence. It is not recommended to use the tester in this
area, without prior cleaning, as they may cause false results due to the dielectric
behaviour of the non protective oxides and slug, risking to irreparably pollute the
tip and therefore distort the subsequent readings.

12
SURFOX Stainless steel passivation tester
8. SURFOX passivation tester software
SURFOX passivation tester can be connected to a PC with USB cable, allowing
the download of recorded data.
Before connecting the external unit to the computer, install the software supplied.
8.1 Software installation
Insert the supplied CD in the computer. The installation will automatically begin
through the AutoRun function. If this feature is disabled, simply open the folder
contained on the CD and click on the file “Installer”.
Follow the onscreen instructions.
After installation, the software will start automatically, confirming the proper
installation.
NOTE: in some cases (with Windows 7) a message may appear mentioning
to keep the installation as performed or reinstall according to the Windows
settings.
Select “This program installed correctly”.
8.2 Hardware installation
Connect the external unit to the USB port of the computer using the USB cable
supplied.
The tester will automatically turn on and driver installation will start.
To download the data from the hardware click on the Test button in the program
installed on the computer.

Owner’s manual 13
SURFOX Stainless steel passivation tester
8.3 Software use
Click on the icon on the desktop or select the program from Start menu to
open the program.
Connect the external unit to the USB port using the USB cable supplied.
The tester will automatically turn on and after a few seconds will activate
the function keys on the software screen, in the boxes “Read”, “Reset” and
“Export”.
8.3.1 Quality control data download
To download the Quality Control test, click on “TEST” in the “Read” box.
The transfer of all the tests stored in memory will begin.
8.3.2 Deleting tests – user id
To delete the tests performed, click on “TEST” in the “Reset” box.
To delete user ID and their passwords from the memory of the unit, click
on “USER” in the “Reset” box.
8.3.3 Test export
It is possible to export the downloaded data to a .pdf file, to save the
document in your files or to print it.
To save the files, click on “PDF” in the “Export” box.
NOTE: Once saved, the file will automatically open in the PDF reader.
9. Disposal
IMPORTANT: PROTECT THE ENVIRONMENT!
Housing: Dispose as regular waste.
Spent refill: The disposal of special waste must be in compliance with the
regulations in force.
Obsolete tools: With reference to CE2002/96 directive (WEEE), the
user must separate the electrical and the electronic components
and dispose them in the appropriate authorized collection centers
or give them back as they are to the seller, when a new purchase
is made.
Questions? CANADA: 1 888 592-5837 •USA: 1 866 592-5837


Guide de l’utilisateur 15
Table des matières
Table des matières
1. Aperçu de l’outil 17
2. Informations sur l’outil 17
2.1 Composantes (Fig. 1, page 4) 17
2.2 Données techniques 17
2.3 Inclus dans la trousse 17
3. Installation des piles 18
4. Remplacement de la cartouche 18
5. Remplacement de la pointe 19
6. Fonctions du testeur de passivation 19
6.1 Interrupteur 19
6.2 Sélection de la langue 20
6.3 Réglage de la date et de l’heure 20
6.4 Création de l’identifiant et du mot de passe 20
6.5 Calibrage 20
6.6 Test libre 21
6.7 Contrôle de la qualité 21
7. Comment utiliser la sonde pour vérifier la
passivation de l’acier inoxydable 22
8. Logiciel de test pour la passivation 24
8.1 Installation du logiciel 24
8.2 Installation du matériel 24
8.3 Utilisation du logiciel 24
8.3.1 Téléchargement des données de
contrôle de la qualité 25
8.3.2 Destruction des tests – identifiant 25
8.3.3 Exportation de tests 25
9. Les déchets 25

16
Fig. 1
1
3 (à l’arrière)
11
13
6
412
5
2
10
7
8
9
Testeur de passivation pour l’acier inoxydable
SERIAL NUMBER / NUMÉRO DE SÉRIE :
YEAR OF CONSTRUCTION / ANNÉE DE CONSTRUCTION : 2012
SOYEZ ATTENTIF
Lisez bien ces directives avant d’utiliser ce produit. Ce guide contient
des informations portant sur l’utilisation appropriée et sécuritaire de l’outil.
Le guide fait partie intégrante de l’outil; il doit être conservé pendant toute sa
durée de vie pour des consultations futures.

Guide de l’utilisateur 17
Testeur de passivation pour l’acier inoxydable
1. Aperçu de l’outil
Le TESTEUR DE PASSIVATION SURFOX est un appareil de test électrochi-
mique qui fournit une valeur numérique pour évaluer la qualité de la couche de
protection passive de chrome présente sur l’acier inoxydable. L’appareil est
en mesure de fournir une valeur précise et stable en quelques secondes pour
évaluer l’état du processus de passivation.
2. Informations sur l’outil
2.1 Composantes (Fig. 1, page 16)
2.2 Données techniques
2.3 Inclus dans la trousse
1. UNITÉ DE CONTRÔLE
2. SONDE DE TEST
3. Boîtier de piles (à l’arrière)
4. Connecteur à 4 broches de
l’unité de contrôle
5. Connecteur à 4 broches de la
sonde de test
6. Câble à 4 broches
7. Capuchon de la cartouche de
recharge/Emplacement du
capuchon
8. Pointe de test
9. Capuchon
10.Pointe de mise à la terre
11.Câble USB
12.Port USB
13.Plaque de calibrage
u TESTEUR DE PASSIVATION
SURFOX
u Câble à 4 broches
u Câble USB
u Plaque de contrôle du calibrage
u CD du logiciel
u Guide de l’utilisateur
u Boîtier de transport
LE TESTEUR DE PASSIVATION SURFOX est fabriqué en
conformité avec les normes de sécurité établies par l’UE et a
obtenu la certification CE.
MODÈLE TESTEUR DE PASSIVATION SURFOX
Tension électrique 6 V
Poids de l’outil 230 g
Dimensions de l’outil (mm) 156 x 40 x 20

18
Testeur de passivation pour l’acier inoxydable
3. Installation des piles
1. Dévissez le couvercle du boîtier de piles.
2. Insérez ou remplacez les piles (4x AA 1,5 V).
3. Refermez le couvercle du boîtier de piles.
REMARQUE: Les piles sont comprises à l’achat du testeur.
4. Remplacement de la cartouche
1. Dévissez le capuchon (7) du compartiment de la cartouche.
2. Retirez la cartouche et insérez-en une nouvelle.
3. Revissez le capuchon (7) sur le compartiment. (Fig. 2)
Prenez garde: Veillez à ce que le capuchon soit revissé correctement pour
éviter toute évaporation de la solution électrolytique.
AVERTISSEMENT: Prenez soin de porter des gants pour
éviter tout contact cutané avec la solution électrolytique.
Fig. 2

Guide de l’utilisateur 19
Testeur de passivation pour l’acier inoxydable
5. Remplacement de la pointe
Remplacez la pointe lorsqu’elle est usée ou sale; conformez-vous aux
directives suivantes.
1. Retirez la cartouche comme décrit à la Section 4.
2. Retirez la pointe blanche; reportez-vous à la figure 3.
3. Insérez une nouvelle pointe dans la cartouche.
4. Insérez la cartouche dans son compartiment.
5. Revissez le capuchon (7) sur le compartiment. (Fig. 2)
Fig. 3
6. Fonctions du testeur de passivation
6.1 Interrupteur
Pour démarrer l’unité de contrôle du testeur de passivation, appuyez sur le
bouton de démarrage (POWER) et tenez-le enfoncé pendant deux secondes.
Le testeur démarrera et le menu principal s’affichera.
Pour arrêter l’unité de contrôle du testeur de passivation, appuyez sur le bou-
ton de démarrage (POWER) et tenez-le enfoncé pendant deux secondes.
REMARQUE: Vous pouvez retourner au menu principal en appuyant sur la
touche MENU de l’unité de contrôle.
AVERTISSEMENT: Prenez soin de porter des gants pour
éviter tout contact cutané avec la solution électrolytique.

20
Testeur de passivation pour l’acier inoxydable
6.2 Sélection de la langue
Pour définir la langue du menu, sélectionnez PARAMÈTRES
(SETTINGS) à partir du menu principal et appuyez sur
le 4, naviguez jusqu’à LANGUE (LANGUAGE) en utilisant
la touche de direction (flèche) et appuyez sur le 4.
Les langues d’utilisation suivantes sont offertes:
u Anglais, Français et Allemand
Sélectionnez la langue désirée et appuyez sur le 4 pour
confirmer votre choix.
6.3 Réglage de la date et de l’heure
Pour régler l’heure et la date de l’appareil, sélectionnez
PARAMÈTRES (SETTINGS) dans le menu principal et
appuyez sur le 4; faites défiler l’écran jusqu’à DATE ou
HEURE (DATE/TIME) en utilisant la touche de direction
(flèche) et appuyez sur le 4; utilisez le clavier numérique
pour régler les valeurs et appuyez sur le 4 pour confirmer
votre action.
REMARQUE: La date et l’heure apparaissent sur le
rapport de contrôle de la qualité.
6.4 Création de l’identifiant et du mot de passe
Pour créer l’identifiant, sélectionnez PARAMÈTRES (SET-
TINGS) dans le menu principal et appuyez sur le 4; faites
défiler l’écran jusqu’à UTILISATEUR (USER) en utilisant
la touche de direction (flèche) et appuyez le 4; utilisez le
clavier numérique pour saisir la valeur de l’identifiant et
appuyez sur le 4 pour confirmer votre action. Choisissez
maintenant un mot de passe et saisissez-le en utilisant le
clavier numérique, puis appuyez sur le 4 pour confirmer
votre action.
6.5 Calibrage
Nous recommandons de vérifier le calibrage de votre
outil, surtout si vous êtes sur le point de procéder à une
session de contrôle de la qualité.
Pour atteindre la fonction de contrôle du calibrage sélectionnez
PARAMÈTRES (SETTINGS) dans le menu principal et appuyez
sur le
4
; faites défiler l’écran jusqu’à l’option du CALIBRAGE
(CALIBRATION) en utilisant la touche de direction (flèche);
placez la sonde sur la plaque de calibrage et appuyez sur le
4
.
Un test de calibrage de cinq secondes sera lancé; un message
«OK» s’affichera pour confirmer un calibrage adéquat.
Table of contents
Languages:
Other Walter Test Equipment manuals