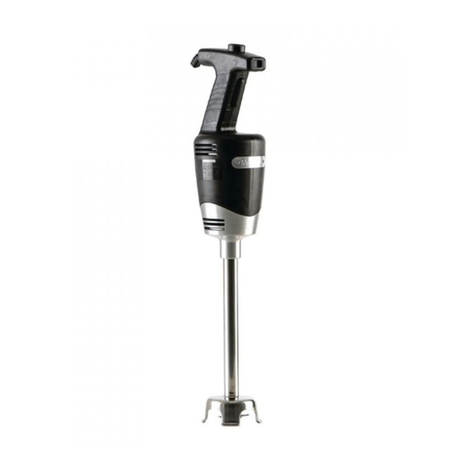
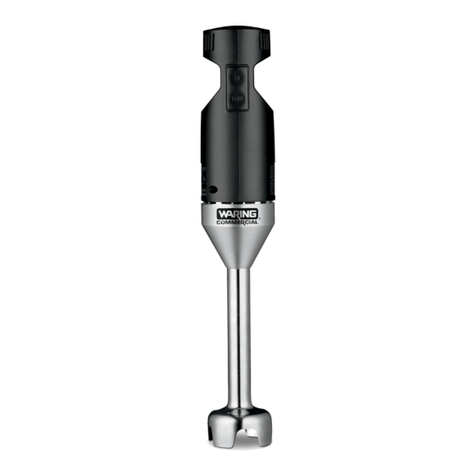
Waring Quik Stik Plus WSB40ARG User manual

For your safety and continued enjoyment of this product, always read the instruction book carefully before using.
Afin que votre appareil vous procure en toute sécurité des années de satisfaction, lisez toujours soigneusement le
livret de directives avant de l’utiliser.
Para su seguridad y para seguir disfrutando de este producto durante años, siempre lea las instrucciones cui-
dadosamente antes de usarlo.
Voor uw veiligheid en ononderbroken gebruik moet vóór gebruik van dit product het instructieboekje altijd
zorgvuldig worden gelezen.
Zu Ihrer eigenen Sicherheit und um sich möglichst lange an diesem Produkt erfreuen zu können, sollten Sie diese
Anleitung vor Gebrauch sorgfältig lesen.
Per la sicurezza dell’utente, e per garantire la durata del prodotto, si prega di leggere attentamente questo libretto
d'istruzioni prima di utilizzare l’apparecchio.
Operation Manual
Manuel d’utilisation
Instrucciones
De Uso
Gebruikshandleiding
Bedienungsanleitung
Manuale di utilizzo
QUIK STIK PLUS
™
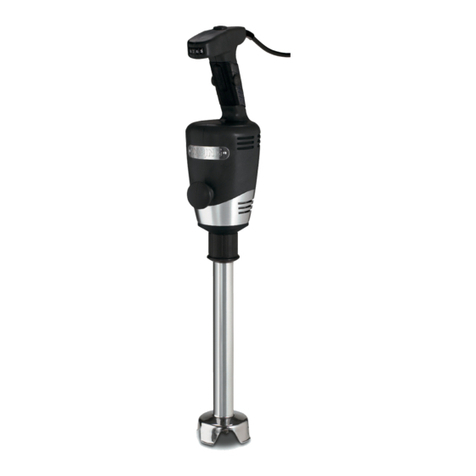
IMMERSION BLENDER
QUIK STIK PLUS
™
MÉLANGEUR À MAIN
QUIK STIK PLUS
™
BATIDORA DE MANO
QUIK STIK PLUS™STAAFMIXER
FRULLATORE AD IMMERSIONE QUIK STIK PLUS
™
WSB40ARG


3
IMPORTANT SAFEGUARDS
When using an electrical appliance, basic safety precautions should always be
followed, including the following:
READ ALL INSTRUCTIONS.
1. To protect against risk of electrical shock, do not put motor base, cord
or plug in water or other liquid. The blade guard and shaft of this
appliance have been designed for submersion into water or other
liquids. Never submerge any other portion of this unit in any liquid.
2. This product is not intended for use by persons (including children)
with reduced physical, sensory or mental capabilities, or lack of experi-
ence and knowledge unless they have been given supervision or instruc-
tion concerning use of the appliance by a person responsible for their
safety. Children should be supervised to ensure that they do not play
with the appliance.
3. Unplug from outlet when not in use and before cleaning.
4. Keep hands, hair, clothing, and utensils away from blade and mixing
container while operating the Waring
®
Quik Stik Plus
™
Immersion
Blender to prevent the possibility of severe injury to persons and/or
damage to the Immersion Blender. A spatula may be used but must
be used only when the unit is not operating. Avoid contacting
moving parts.
5. Do not operate any appliance with a damaged cord or plug or after
the appliance malfunctions, or is dropped or damaged in any manner.
Return the appliance to the nearest Waring authorized service facility
for examination, repair, electrical or mechanical adjustment.
6. The use of accessory attachments not recommended or sold by
Waring for this specific model may result in fire, electric shock or
personal injury.
7. Do not use outdoors.
8. Do not let any cord hang over the edge of the table or counter.
Do not let cord contact hot surfaces, including stovetop.
9. Do not place on or near a hot gas or electric burner, or in a
heated oven.
10. Blade is SHARP. Handle carefully.
11. When mixing liquids, especially hot liquids, use a tall container or make
only small quantities at a time to reduce spillage and possibility
of injury.
SAVE THESE
INSTRUCTIONS

BEFORE YOU BEGIN
NOTE: Always unplug the Waring®Quik Stik Plus™
Immersion Blender
before cleaning the metal blade.
Before using the Quik Stik Plus
™
,
Waring
suggests that you wipe the unit
with a clean, damp cloth to remove any dirt or dust. Place the metal blade
end of the hand blender under running water to rinse it. Dry thoroughly with
a soft absorbent cloth. Read all instructions completely for detailed operating
procedures.
NOTE: OPERATING CYCLE: 1 MIN. ON/3 MIN. OFF. Do not operate
immersion blender for more than one minute continuously.
INTENDED USE
The Waring
®
Quik Stik Plus
™
Immersion Blender is intended for use
in restaurants, large kitchens and small companies when mixing and
liquefying. You can operate directly in the pot to mix everything from
soups, stews, creams and salad dressings to pancake mixes, pastes, sauces,
mayonnaise and much, much more. For nurseries or for special diets use the
Quik Stik Plus
™
to prepare purées of vegetables, porridge, fruit creams, etc.
OPERATION
1. Plug unit into outlet.
2. Plunge the Immersion Blender into the pot. DO NOT SUBMERGE
MORE THAN ¾ OF THE SHAFT LENGTH.
3. The Immersion Blender has 2 switches. The safety switch is located on
the top of the handle and the power trigger switch is located on the inner
handle. To start unit, press the safety switch and the power trigger switch
simultaneously. The safety switch will need to be pressed only once to
start the unit. You do not need to hold down the safety switch for the unit
to continue running; the unit will remain on as long as the power trigger
switch is depressed.
4. Select the desired speed, Hi or Low, by using the switch on the top handle.
5. Angle the Immersion Blender slightly and start to stir only when the blade
is immersed. Keep the blade off the bottom of the pot so that ingredients
will not be sucked up by the vortex action.
4
This plug has 2 oblique, flat blades
without ground pin connection.
Align the blades with the recep-
tacle and insert plug. Ensure that
the plug is fully inserted into the
receptacle.
TYPE I PLUG – 2 PRONG
(ArgentinA, AustrAliA)

5
6. Remove the Immersion Blender from the pot only after blender has come
to a complete stop.
NOTE: Always unplug Immersion Blender after each use. Keep the
appliance out of reach of children.
• To prevent splattering, be careful never to remove the Immersion Blender
from liquid while in operation.
• When a recipe calls for ice, use crushed ice (not whole cubes) for
best results.
NOTE: If a piece of food becomes lodged in the protective guard surround-
ing the metal blade, follow the safety instructions noted below:
1. Release the power button and unplug the unit from the electrical outlet.
2. Once the power source has been disconnected, use a spatula to carefully
remove the food lodged in the blade guard. Avoid injury. The blade is
sharp. DO NOT USE YOUR FINGERS TO REMOVE LODGED
OBJECTS.
3. After the lodged food has been removed, plug the unit back into its power
supply and continue processing.
CLEANING INSTRUCTIONS
THE QUIK STIK PLUS
™
IMMERSION BLENDER MUST BE
CLEANED AND DRIED ACCORDING TO THE FOLLOWING
INSTRUCTIONS AFTER EACH USE.
For Food Service Applications
• Wash, rinse, and sanitize the stainless steel portion of the Quik Stik
Plus
™
prior to initial use, after each use, or whenever it will not be used
again within a period of 1 hour.
• Clean and sanitize the plastic motor housing prior to initial use and
after each use.
• Washing solutions based on non-sudsing detergents, and chlorine-based
sanitizing solutions having a minimum chloride concentration of 100
PPM are recommended.
The following washing, rinsing, and sanitizing solutions, or their equivalents,
may be used.
DILUTION
SOLUTION PRODUCT IN WATER TEMPERATURE
Washing Diversey Wyandotte 4 Tbls./Gallon Hot 115°F (46°C)
Diversol BX/A
Or CX/A
Rinsing Plain Water Warm 95°F (35°C)
Sanitizing *Clorox
®
Institutional 1 Tbl./Gallon Cold 50-70°F (10°-21°C)
Bleach
*Clorox
®
is a registered trademark owned by the Clorox Company.

6
• In repetitive use applications, frequent cleaning will prolong life.
To wash and sanitize the Quik Stik Plus
™
:
1. Rinse the exterior and interior stainless steel portion of the Quik Stik
Plus
™
under running water. Scrub and flush the exterior and interior
stainless steel portion to dislodge and remove as much food residue as
possible.
2. Wipe down the exterior of the plastic housing and the stainless steel
portion of the Quik Stik Plus
™
with a soft cloth or sponge dampened
with the washing solution.
3. Immerse approximately ¾ of the length of the stainless steel portion in
a container of the washing solution and run for two (2) minutes on High.
4. Repeat steps two (2) and three (3) using clean rinse water in place of the
washing solution.
NOTE – IMPORTANT
IN ORDER TO MINIMIZE THE POSSIBILITY OF SCALDING,
TEMPERATURE OF THE WASHING SOLUTION AND RINSE
WATER MUST NOT EXCEED 115°F (46°C).
5. Wipe down the exterior of the plastic housing and the stainless steel
portion of the Quik Stik Plus
™
with a soft cloth or sponge dampened
with the sanitizing solution.
6. Immerse approximately ¾ of the length of the stainless steel portion in a
container of the sanitizing solution and run for two (2) minutes on High.
7. DO NOT RINSE AFTER SANITIZING IS COMPLETE.
Allow to air dry before use.
NOTE
DO NOT IMMERSE PLASTIC MOTOR HOUSING IN WASHING
SOLUTION, RINSE WATER, OR SANITIZING SOLUTION.
PREVENT LIQUID FROM RUNNING INTO PLASTIC HOUSING
BY WRINGING ALL EXCESS MOISTURE FROM CLOTHS OR
SPONGES BEFORE USING THEM.

7
7
WARRANTY
For Waring products sold outside of the U.S. and Canada, the warranty
is the responsibility of the local importer or distributor. This warranty
may vary according to local regulations.
WARNING: This warranty is VOID if appliance is used on Direct
Current (D.C.)
WARING COMMERCIAL
314 Ella T. Grasso Ave.
Torrington, CT 06790

8
IMPORTANTES
CONSIGNES DE SÉCURITÉ
Lorsque vous utilisez des appareils électriques, vous devez toujours
demesures de sécurité élémentaires, parmi lesquelles les suivantes :
LISEZ TOUTES LES INSTRUCTIONS
1. Afin d’éviter le risque de choc électrique, ne placez pas le bloc-moteur,
le cordon ou la fiche de cet appareil dans l’eau ou tout autre liquide.
Le système de lame et l’axe de l’appareil sont conçus pour être plongés
dans l’eau et autres liquides. N’immergez jamais les autres éléments de
l’appareil.
2. Cet appareil ne devrait pas être utilisé par des enfants ou des personnes
souffrant d’un handicap physique, mental ou sensoriel ou ne sachant pas
l’utiliser, à moins que la personne responsable de leur sécurité leur ait
donné les instructions nécessaires ou les supervise.
3. Débranchez l’appareil lorsque vous ne l’utilisez pas et avant de le
nettoyer.
4. Afin de réduire le risque de blessures graves et afin de ne pas
endommager le mixeur, gardez les mains, les cheveux, les vêtements et
les ustensiles de cuisines éloignés de la lame et du récipient de mélange
pendant que le mixeur est en marche. Vous pouvez utiliser une spatule,
mais seulement si l’appareil est éteint. Évitez de toucher les éléments
en mouvement.
5. N’utilisez jamais cet appareil ou tout autre appareil électrique si le
cordon d’alimentation ou la fiche sont endommagés, s’il ne fonctionne
pas correctement, s’il est tombé, s’il est abîmé ou s’il est tombé dans
l’eau. Amenez-le ou envoyez-le à un service après-vente autorisé afin
qu’il soit inspecté, réparé ou révisé.
6. N’utilisez que les accessoires recommandés par le fabricant. L’utilisation
d’autres accessoires pourrait provoquer un incendie, un choc électrique
ou une blessure.
7. N’utilisez pas cet appareil à l’air libre.
8. Ne laissez pas le cordon électrique pendre au bord d’une table ou d’un
plan de travail ou toucher une surface chaude.
9. Ne placez pas l’appareil sur ou près d’un brûleur électrique ou à gaz ou
dans un four chauffé.
10. Les lames sont AFFILÉES. Manipulez l’appareil avec précaution.
11. Lorsque vous mélangez un liquide, particulièrement s’il s’agit d’un
liquide chaud, utilisez un grand récipient pour éviter que le mélange
déborde ou que vous vous blessiez.
CONSERVEZ CES DIRECTIVES
AVANT DE COMMENCER
Important : Débranchez toujours l’appareil avant de nettoyer la
lame en métal.
Nous vous recommandons de nettoyer votre appareil à l’aide d’un linge
humide avant de l’utiliser pour la première fois. Pour nettoyer la lame en
métal, rincez-la sous l’eau courante puis séchez-la à l’aide d’un linge propre,
doux et absorbant. Lisez les instructions avec soin avant d’utiliser cet appareil.
NOTE : Le cycle d’utilisation de cet appareil est d’1 minute, pour
3 minutes de repos. Ne pas opérer l’appareil en continu pendant
plus d’une minute.
GUIDE D’UTILISATION
Le Mélangeur à Main Quik Stik Plus
™
de Waring
®
est destiné à l’usage
des restaurants, des grandes cuisines ou des petites compagnies. Il est conçu
pour le mélange et la liquéfaction des soupes et sauces et peuvent s’utiliser
directement dans la marmite. Utilisez votre Mélangeur à Main pour
préparer les soupes de poissons, les ragoûts, les crèmes, les sauces pour
salade, les préparations pour crêpes et gâteaux, les pâtes, les sauces, la
mayonnaise et beaucoup d’autres encore. Le Mélangeur à Main est
également idéal pour préparer les repas pour bébés ou les repas de régime :
purées, gruaux, purée de carottes crues, crèmes de fruits etc.
OPÉRATION
1. Branchez l’appareil dans une prise de courrant.
2. Plongez le Mélangeur à Main dans la marmite ou le récipient. NE
SUBMERGEZ PAS PLUS DES ¾ DE LA LONGUEUR DE L’AXE.
3. Le Mélangeur à Main a deux interrupteurs : l’interrupteur de sécurité
(situé sur le dessus de la poignée) et l’interrupteur Marche/Arrêt. Pour
allumer l’appareil, appuyez simultanément sur les deux interrupteurs.
Vous n’avez pas besoin d’appuyer sur l’interrupteur de sécurité plus
d’une fois. Pour maintenir l’appareil en marche, relâchez l’interrupteur
de sécurité et continuez d’appuyer sur l’interrupteur Marche/Arrêt.
4. Réglez l’appareil à la vitesse voulue à l’aide de la commande de vitesse
située sur le dessus de la poignée. Deux vitesses sont disponibles : basse
(LO) et haute (HI).
Prise dotée de deux broches plates obliques,
sans broche de mise à la terre. S’assurer que
la prise est bien insérée dans la prise murale.
PRISE DE TYPE I
À 2 BROCHES
(Argentine, AustrAlie)

10
5. Penchez l’appareil légèrement et commencez à mélanger en gardant
la lame au fond de la marmite. Le liquide sera aspiré dans la lame par
l’effet vortex.
6. Retirez l’appareil de la marmite une fois qu’il est complètement arrêté.
NOTE : Débranchez toujours l’appareil après utilisation. Gardez-le hors de
portée des enfants.
• Pour éviter les éclaboussures, ne retirez jamais l’appareil du liquide alors
qu’il est en marche.
• Quand une recette inclut de la glace, utilisez de la glace pilée au lieu
de glaçons pour de meilleurs résultats.
IMPORTANT : Suivez les instructions suivantes si des aliments
se coincent dans le protège-lame.
1. Relâchez l’interrupteur Marche/Arrêt et débranchez l’appareil de la
prise de courrant.
2. Délogez les aliments coincés avec précaution à l’aide d’une spatule.
La lame est très coupante. NE DÉLOGEZ PAS LES ALIMENTS
COINCÉS AVEC LES DOIGTS.
3. Rebranchez l’appareil et continuez à mélanger.
DIRECTIVES DE NETTOYAGE
SUIVEZ LES INSTRUCTIONS SUIVANTES POUR NETTOYER
VOTRE MÉLANGEUR À MAIN APRÈS CHAQUE UTILISATION :
Applications alimentaires
• Lavez, rincez et désinfectez les pièces en acier inoxydable avant d’utiliser
l’appareil pour la première fois, après chaque utilisation, et chaque fois
que l’appareil n’a pas été utilisé pendant plus d’une heure.
• Nettoyez et désinfectez le bloc-moteur avant d’utiliser l’appareil pour
la première fois et après chaque utilisation.
• Nous recommandons l’utilisation de solutions de nettoyage à base de
détergent non émulsionnant et de solution désinfectante à base de
chlore avec une concentration minimum de 100 parties par million.
Vous pouvez utiliser les solutions suivantes ou leur équivalent.
PROPORTIONS
SOLUTION PRODUIT DE DILUTION TEMPÉRATURE
Nettoyage Diversey Wyandotte 4 cuillères à Chaude 46°C (115°F)
Diversol BX/A ou CX/A soupe par gallon
Rinçage Eau claire Tiède 35°C (95°F)
Désinfectant * Clorox®1 cuillère à Froide 50-70°C
Eau de javel ordinaire soupe par gallon (10-21°F)
* Clorox®est une marque déposée par Clorox Company.
• Le nettoyage régulier de votre appareil prolongera sa durée de
fonctionnement.

11
Pour laver et désinfecter l’appareil:
1. Rincez l’intérieur et l’extérieur des pièces en acier inoxydable sous l’eau
courante. Frottez-les puis nettoyez-les à grande eau pour déloger les
résidus alimentaires.
2. Essuyez l’extérieur du bloc-moteur et les pièces en acier inoxydable
à l’aide d’un linge propre ou d’une éponge imprégnée de solution de
nettoyage.
3. Immergez environ ¾ de l’axe en acier inoxydable dans la solution de
nettoyage et mettez le mixeur en marche. Laissez-le fonctionner à pleine
vitesse pendant 2 minutes.
4. Pour rincer, répétez les étapes 1 et 2 en utilisant de l’eau claire au lieu
d’une solution de nettoyage.
NOTE - IMPORTANT
AFIN D’ÉVITER LES RISQUES DE BRÛLURE, LA TEMPÉRATURE
DE LA SOLUTION DE NETTOYAGE ET DE L’EAU DE RINÇAGE
NE DEVRAIT PAS DÉPASSER 46°C (115°F).
5. Essuyez l’extérieur du bloc-moteur et les pièces en acier inoxydable
à l’aide d’un linge propre ou d’une éponge imprégnée de solution
désinfectante.
6. Immergez environ ¾ de l’axe en acier inoxydable dans la solution
désinfectante et mettez le mixeur en marche. Laissez-le fonctionner
à pleine vitesse pendant 2 minutes.
7. NE RINCEZ PAS L’APPAREIL APRÈS L’AVOIR DÉSINFECTÉ.
Laissez-le sécher à l’air libre avant de l’utiliser.
IMPORTANT
N’IMMERGEZ JAMAIS LE BLOC-MOTEUR DANS LA SOLUTION
DE NETTOYAGE, L’EAU DE RINÇAGE OU LA SOLUTION
DÉSINFECTANTE. ESSOREZ BIEN L’ÉPONGE OU LE LINGE
AVANT D’ESSUYER L’APPAREIL AFIN D’ÉVITER QUE DU
LIQUIDE PÉNÈTRE DANS LE BLOC-MOTEUR.
GARANTIE
La garantie des produits Waring® vendus en dehors des États-unis et du
Canada est à la charge de l’importateur ou du distributeur local et peut
varier suivant les normes locales.
Avertissement – Brancher cet appareil sur Courant Direct (C.D.)
annulera la garantie.
Waring Commercial
314 Ella T. Grasso Avenue
Torrington, CT 06790
www.waringproducts.com

12
MEDIDAS DE SEGURIDAD
IMPORTANTES
Cuando se usan aparatos eléctricos, siempre se deben tomar precauciones
básicas de seguridad, entre las cuales las siguientes:
LEA TODAS LAS INSTRUCCIONES.
1. Para minimizar el riesgo de choque eléctrico, no coloque el bloque
motor, el cable o la clavija en agua u otro líquido. Sólo la cuchilla y
el eje son sumergibles. No sumerja ninguna otra parte del aparato en
líquido.
2. Personas (incluso niños) con capacidades físicas, mentales o sensoriales
reducidas, o personas que no sepan utilizar este aparato no deberían
utilizarlo, a menos que la persona responsable por su seguridad esté pre-
sente o le haya dado instrucciones relativas al uso del mismo.
3. Desconecte el aparato cuando no lo use y antes de limpiarlo.
4. Para prevenir el riesgo de herida grave o daño al aparato, siempre
mantenga las manos, el cabello y los utensilios alejados de la cuchilla
y del recipiente cuando el aparato esté encendido. Se puede usar una
espátula únicamente cuando el aparato está apagado. Evite tocar los
elementos en movimiento.
5. No opere este aparato ni algún otro que tenga el cordón o la clavija
dañados, después de que hubiese funcionado mal o que se hubiese
caído o dañado de cualquier forma. Devuelva el aparato a un centro
de servicio autorizado para su revisión, reparación o ajuste.
6. Sólo use accesorios recomendados por el fabricante para uso con este
modelo. El usar otros accesorios podría provocar un incendio, un
choque eléctrico o una herida.
7. No use este aparato en exteriores.
8. No permita que el cordón cuelgue del borde del mesón o de la mesa
ni que haga contacto con superficies calientes.
9. No coloque el aparato sobre o cerca de un quemador a gas o eléctrico
caliente ni en un horno calentado.
10. La cuchilla es FILOSA. Manipule el aparato con sumo cuidado.
11. Al mezclar líquidos, especialmente líquidos calientes, utilice un
recipiente alto o procese pequeñas cantidades a la vez para reducir
el riesgo de salpicadura o quemadura.
CONSERVE ESTAS
INSTRUCCIONES

13
ANTES DE EMPEZAR
IMPORTANTE: Siempre desconecte el aparato antes de limpiar la
cuchilla de metal.
Le aconsejamos que limpie el aparato con un paño húmedo antes de usarlo
por primera vez. Limpie la cuchilla en agua corriente, luego séquela con un
paño limpio, suave y absorbente. Lea las instrucciones cuidadosamente antes
de usarlo.
NOTA: El ciclo de operación de este aparato es de 1 minuto para
3 minutos de descanso. No lo use en forma continua durante más
de un minuto.
GUÍA DE USO
La Batidora de Mano Quik Stik Plus
™
de Waring
®
ha sido diseñada para
realizar los trabajos de mezcla y licuefacción de los restaurantes, cocinas
grandes y pequeñas compañías. Puede usarse directamente en la olla para
preparar sopas, cremas, salsas, aliños, masa líquida, mayonesa y mucho más.
También es perfecta para preparar comida de dieta o comida para bebé: purés
de vegetales o de frutas, cremas de frutas, etc.
MODO DE EMPLEO
1. Enchufe el cable en un tomacorriente.
2. Meta la cuchilla en el recipiente o la olla. NO SUMERJA MÁS DE
LOS ¾ DEL EJE EN EL LÍQUIDO.
3. La licuadora tiene dos interruptores: el interruptor de seguridad
(situado encima del mango) y el interruptor paro/marcha (situado en
la parte delantera del mango). Para encender el aparato, oprima ambos
interruptores simultáneamente. Para mantener el aparato en marcha,
afloje el interruptor de seguridad y siga oprimiendo el interruptor de
paro/marcha.
4. Escoja la velocidad deseada, alta (HI) o baja (LO), usando el botón de
velocidad ubicado encima del mango.
Enchufe con dos patas planas oblicuas, sin
polo de tierra. Asegúrese de que el enchufe
esté debidamente insertado en la toma de
corriente.
ENCHUFE DE TIPO I
CON 2 PATAS
(ArgentinA, AustrAliA)

14
5. Incline ligeramente el aparato y empiece a mezclar los alimentos.
Mantenga la cuchilla en el fondo del recipiente o de la olla. Los
alimentos serán atraídos hacia la cuchilla por el efecto vórtice.
6. Espere que la cuchilla se haya detenido totalmente antes de sacar el
aparato del líquido.
NOTA: Desconecte el aparato inmediatamente después de usarlo.
Manténgalo fuera del alcance de los niños.
• Para reducir las salpicaduras, nunca remueva el aparato del líquido
mientras está funcionando.
• Cuando una receta utiliza hielo, le recomendamos que use hielo picado
(en vez de cubitos de hielo) para lograr resultados óptimos.
IMPORTANTE: Siga las instrucciones siguientes para remover
alimentos trabados en la cuchilla o la cubierta protectora.
1. Afloje el interruptor de paro/marcha y desconecte el aparato.
2. Desaloje los alimentos trabados con una espátula. NO LOS DESALOJE
CON LOS DEDOS.
3. Vuelva a enchufar el aparato y siga procesando.
INSTRUCCIONES DE LIMPIEZA
SE DEBE LAVAR Y SEQUAR EL APARATO DESPUÉS DE CADA USO,
SEGÚN LAS INSTRUCCIONES SIGUIENTES.
Aplicaciones alimenticias
• Lave, enjuague, sanee y seque las partes de acero inoxidable antes de
usar el aparato por primera vez, y cada vez que no ha sido usado durante
más de una hora.
• Limpie y sanee el bloque motor antes de usar el aparato por primera vez
y después de cada uso.
• Le recomendamos que use soluciones limpiadoras con detergentes
no emulgentes y soluciones desinfectantes con cloro, usando una
concentración mínima de 100 PPM.
Se pueden usar las soluciones siguientes o sus equivalentes:
DILUCIÓN EN
SOLUCIÓN PRODUCTO AGUA TEMPERATURA
Para limpiar Diversey Wyandotte 4 cucharadas Caliente 46°C (115°F)
Diversol BX/A o CX/A por 3,80L
Para enjuagar Agua pura Tibia 35°C (95°F)
Para sanear * Clorox®u otra 1 cucharada Fría 10-21°C
marca de cloro por 3,80L
(50-70
°F)
* Clorox®es una marca registrada por Clorox Corporation

15
• El limpiar regularmente el aparato prolongará su vida útil.
Cómo limpiar y sanear el aparato:
1. Enjuague las partes de acero inoxidable (eje y cuchilla) en agua
corriente, restregándolas para remover un máximo de residuos.
2. Limpie la parte externa del bloque motor con un paño suave o una
esponja humedecida con solución limpiadora.
3. Sumerja ¾ del eje de acero inoxidable en un recipiente lleno de
solución limpiadora y haga funcionar la batidora a velocidad alta
durante 2 minutos.
4. Repita los pasos 2 y 3, usando agua limpia en vez de solución
limpiadora.
NOTA – IMPORTANTE
PARA EVITAR LOS RIESGOS DE QUEMADURA, LA
TEMPERATURA DE LA SOLUCIÓN LIMPIADORA Y DEL AGUA
NO DEBERÍA EXCEDER 46°C (115°F).
5. Limpie el bloque motor con un paño suave o una esponja humedecida
con solución para sanear.
6. Sumerja ¾ del eje de acero inoxidable en un recipiente lleno de
solución para sanear y haga funcionar la batidora a velocidad alta
durante 2 minutos.
7. NO ENJUAGUE EL EJE Y LA CUCHILLA DESPUÉS DE
SANEARLOS. Permita que sequen al aire.
NOTA
NO SUMERJA EL BLOQUE MOTOR EN SOLUCIÓN LIMPIADORA,
AGUA O SOLUCIÓN PARA SANEAR. TUERZA LA ESPONJA O
EL PAÑO ANTES DE USARLO PARA EVITAR QUE LÍQUIDO
PENETRE ADENTRO DEL BLOQUE MOTOR.
GARANTÍA
La garantía de los productos vendidos fuera de los Estados Unidos y de
Canadá es la responsabilidad del importador o del distribuidor local y
puede variar según las regulaciones locales.
Advertencia – Conectar este aparato a una toma de Corriente Directo
(C.D.) cancelará la garantía.
Waring Commercial
314 Ella T. Grasso Avenue
Torrington, CT 06790
www.waringproducts.com

16
BELANGRIJKE
VEILIGHEIDSMAATREGELEN
Bij gebruik van een elektrisch huishoudapparaat moeten de
veiligheidvoorzorgsmaatregelen te allen tijde gevolgd worden,
inclusief de volgende:
LEES ALLE INSTRUCTIES.
1. Ter bescherming tegen elektrische schok moet het voetstuk met
de motor, het netsnoer of de stekker nooit met water of andere
vloeistoffen in aanraking komen. De bladbescherming en schacht
van dit huishoudapparaat zijn zodanig ontworpen dat zij in water of
andere vloeistoffen ondergedompeld kunnen worden. Geen enkel ander
onderdeel van dit apparaat moet ooit in om het even welke vloeistof
ondergedompeld worden.
2. Dit apparaat mag niet worden gebruikt door personen (inclusief kin-
deren) met verminderde fysieke, zintuiglijke of geestelijke capaciteiten
of zonder voldoende ervaring en kennis, tenzij zij onder toezicht werken
of instructies hebben gekregen over het gebruik van het apparaat door
iemand die de verantwoording voor hun veiligheid draagt.
3. Trek de stekker uit het stopcontact wanneer het apparaat niet wordt
gebruikt en voordat u het schoonmaakt.
4. Houd tijdens het gebruik van de Waring
®
Quik Stik Plus
™
staafmixer uw handen, haar, kleding en keukengerei weg van het blad
en de mengbeker om de kans op ernstig letsel voor gebruikers en/of
beschadiging van de staafmixer te voorkomen. U kunt een spatel
gebruiken, maar alleen wanneer het apparaat niet in gebruik is. Raak
geen bewegende onderdelen aan.
5. Een huishoudapparaat met een beschadigd netsnoer of beschadigde
stekker mag nooit gebruikt worden, en ook niet wanneer het apparaat
slecht werkt, u het hebt laten vallen of het op de een of andere manier
beschadigd geraakt is. Retourneer het apparaat naar het dichtstbijzijnde
erkende Waring-servicecentrum voor inspectie, reparatie of elektrische
of mechanische bijstelling.
6. Het gebruik van accessoires/hulpstukken die niet door Waring voor dit
specifieke model aanbevolen of verkocht worden kan brand, elektrische
schok of persoonlijk letsel tot gevolg hebben.
7. Niet buitenshuis gebruiken.
8. Laat het netsnoer niet geheel of gedeeltelijk over de rand van de tafel of
het aanrecht hangen, en laat het snoer niet in aanraking komen met hete
oppervlakken, inclusief die op het fornuis.
9. Niet op of in de nabijheid van hete gas- of elektrische branders of in een
hete oven plaatsen.
10. Het blad is SCHERP: hanteer hem voorzichtig.

17
11. Voor het mengen van vloeistoffen (vooral hete vloeistoffen) moet u een
hoge beker gebruiken of slechts kleine hoeveelheden tegelijk maken, om
morsen en mogelijk letsel te voorkomen.
BEWAAR DEZE INSTRUCTIES
VOORDAT U BEGINT
NB: Voordat u het metalen blad gaat schoonmaken moet u eerst
de stekker van de Waring® Quik Stik Plus™ staafmixer uit het
stopcontact trekken.
Voordat u de Quik Stik Plus™ gaat gebruiken, beveelt Waring aan dat u het
apparaat eerst met een schone, vochtige doek afveegt om alle vuil of stof te
verwijderen. Houd het uiteinde met het metalen blad van de handmixer onder
stromend water om het af te spoelen. Grondig met een zachte absorberende
doek afdrogen. Lees alle instructies volledig voor de gedetailleerde
gebruiksprocedures.
NB: DE WERKCYCLUS IS 1 MINUUT AAN /3 MINUTEN UIT. De
staafmixer niet langer dan één minuut ononderbroken gebruiken!
BESTEMD GEBRUIK
De Waring® Quik Stik Plus™ staafmixer is bestemd voor gebruik in
restaurants, grote keukens en in kleine bedrijven voor het mengen en
vloeibaar maken. U kunt het apparaat rechtstreeks in de pan gebruiken
om alles te mengen zoals soep, stamppot, crèmes en slasaus tot en met
pannenkoekenbeslag, pasta’s, saus, mayonaise en nog veel meer. Voor crèches
of voor speciale diëten gebruikt u de Quik Stik Plus™ voor het maken van
puree van groentes, havermoutpap, fruitcrèmes, enz.
Deze stekker heeft 2 schuine, platte pennen
zonder aardpen. Houd de stekker zo dat de
pennen zich op de juiste plaats bevinden.
Zorg ervoor dat de stekker volledig in het
stopcontact steekt.
TYPE I-STEKKER –
2 PENNEN
(Argentinië, AustrAlië)

18
WERKING
1. Steek de stekker in het stopcontact.
2. Steek de staafmixer in de pan. NIET MEER DAN ¾ LENGTE VAN
DE SCHACHT IN DE PAN INBRENGEN.
3. De staafmixer heeft twee schakelaars. De veiligheidsschakelaar
bevindt zich bovenaan de handgreep, en de stroomschakelaar zit op
de handgreep zelf. Om het apparaat te starten drukt u gelijktijdig op de
veiligheidsschakelaar en de stroomschakelaar. Om het apparaat te starten
hoeft de veiligheidsschakelaar slechts één keer ingedrukt te worden. U
hoeft de veiligheidsschakelaar niet ingedrukt te houden om het apparaat
gaande te houden: het blijft werken zo lang de stroomschakelaar
ingedrukt blijft.
4. Selecteer de gewenste snelheid: hoog of laag, met gebruikmaking van de
schakelaar op de bovenhandgreep.
5. Breng de staafmixer onder enigszins een hoek in en begin niet eerder
te roeren dan wanneer het blad ondergedompeld is. Het blad moet
de bodem van de pan niet raken, zodat de ingrediënten niet door de
wervelwerking omhoog worden gezogen.
6. Haal de staafmixer niet eerder uit de pan totdat de mixer volledig
gestopt is.
NB: De stekker van de staafmixer moet na elk gebruik altijd uit het
stopcontact worden getrokken. Houd het apparaat buiten het bereik van
kinderen.
• Om spatten te voorkomen moet u ervoor zorgen de staafmixer nooit uit
een vloeistof te verwijderen terwijl hij nog werkt.
• Wanneer er ijs in een recept gebruikt wordt, moet u voor de beste
resultaten gestampt ijs gebruiken (geen blokjes).
NB: Voor het geval er een stukje voedsel om de beschermkap rondom
het metalen blad vastgeraakt is, volgt u de hieronder vermelde
veiligheidsinstructies:
1. Laat de stroomschakelaar los en trek de stekker van het apparaat uit
het stopcontact.
2. Nadat de stroom uitgeschakeld is, gebruikt u een spatel om het in de
beschermkap vastgeraakte voedsel voorzichtig te verwijderen. Vermijd
letsel: het blad is scherp. GEEN VINGERS GEBRUIKEN OM
VASTGERAAKTE VOORWERPEN TE VERWIJDEREN.
3. Nadat het vastgeraakte voedsel verwijderd is sluit u het apparaat
opnieuw aan en gaat u verder met de voedselverwerking.
SCHOONMAAKINSTRUCTIES
DE QUIK STIK PLUS
™
STAAFMIXER MOET NA ELKE

19
GEBRUIK VOLGENS DE ONDERSTAANDE INSTRUCTIES
SCHOONGEMAAKT EN GEDROOGD WORDEN.
Voor opdientoepassingen voor voedsel
• Was, spoel en ontsmet het roestvrijstalen gedeelte van de Quik Stik
Plus
™
vóór het eerste, en daarna na elk gebruik of wanneer het
apparaat niet binnen een uur opnieuw gebruik gaat worden.
• Reinig en ontsmet de plastic motorbehuizing vóór het eerste, en daarna
na elk gebruik.
• Op niet-schuimende detergentia gebaseerde wasmiddelen en op
chloor gebaseerde ontsmettingsmiddelen met een minimale
chloride-concentratie van 100 dpm (delen per miljoen) worden
aanbevolen.
De volgende was-, spoel- en ontsmettingsmiddelen of daaraan gelijkwaardige
middelen kunnen gebruikt worden.
VERDUNNING
OPLOSSING PRODUCT IN WATER TEMPERATUUR
Wassen Diversey Wyandotte 4 eetl. /3,8 liter Heet, 46 °C
Diversol BX/A
of CX/A
Spoelen Leidingwater Warm, 35 °C
Ontsmetten *Clorox®1 eetl./3,8 lite Koud, 10°-21 °C.
commercieel
bleekmiddel
*Clorox®is een gedeponeerd handelsmerk, waarvan de Clorox Company de eigenaar is.
• Bij herhaalde gebruikstoepassingen verlengt regelmatig schoonmaken
de gebruiksduur.
De Quik Stik Plus™ wassen en ontsmetten:
1. Spoel de binnenste en buitenste roestvrijstalen gedeelten van de
Quik Stik Plus™ onder stromend water. De binnenste en buitenste
roestvrijstalen gedeelten boenen en uitspoelen, voordat u zoveel
mogelijk voedselresten losmaakt en verwijdert.
2. Veeg de binnenkant van de plastic behuizing en het roestvrijstalen
gedeelte van de Quik Stik Plus™ met een zachte doek of een met het
water met wasmiddel vochtig gemaakte spons.
3. Dompel ongeveer ¾ van de lengte van het roestvrijstalen gedeelte
onder in een bak met het wasmiddel, en laat het twee (2) minuten lang
op de hoogste stand werken.
4. Herhaal stap twee (2) en stap drie (3) met schoon water, in plaats van
het water met wasmiddel.

20
LET OP – BELANGRIJK
OM DE KANS OP VERBRANDING TOT EEN MINIMUM
TE BEPERKEN MOET DE TEMPERATUUR VAN DE
WASMIDDELOPLOSSING EN HET SPOELWATER NIET HOGER
ZIJN DAN 46 °C.
5. Veeg de buitenkant van de plastic behuizing en het roestvrijstalen
gedeelte van de Quik Stik Plus™ af met een zachte doek of met een met
het water met ontsmettingsmiddel vochtig gemaakte spons.
6. Dompel ongeveer ¾ van de lengte van het roestvrijstalen gedeelte onder
in een bak met het ontsmettingsmiddel, en laat het twee (2) minuten
lang op de hoogste stand werken.
7. NIET SPOELEN TOTDAT DE ONTSMETTING VOLTOOID
IS. Vóór gebruik in de lucht laten drogen.
OPGELET
DOMPEL DE PLASTIC MOTORBEHUIZING NIET ONDER IN
HET WATER MET HET WASMIDDEL, HET SPOELWATER OF
HET WATER MET HET ONTSMETTINGMIDDEL. ZORG ERVOOR
DAT ER GEEN VLOEISTOFFEN IN DE PLASTIC BEHUIZING
BINNENDRINGEN DOOR VÓÓR GEBRUIK ALLE OVERTOLLIGE
VLOEISTOF UIT DE DOEKEN OF SPONZEN TE WRINGEN.
GARANTIE
Voor buiten de Verenigde Staten en Canada verkochte Waring-
producten is de garantie de verantwoordelijkheid van de plaatselijke
importeur of distributeur. Deze garantie kan volgens de plaatselijke
voorschriften verschillen.
WAARSCHUWING: Deze garantie is ONGELDIG indien het
apparaat op gelijkstroom (DC) gebruikt wordt.
Waring Commercial
314 Ella T. Grasso Avenue
Torrington, CT 06790 VS
Table of contents
Languages:
Other Waring Blender manuals

Waring
Waring MMB145 User manual

Waring
Waring 800ES User manual

Waring
Waring Torq 2.0 TBB145S6 User manual

Waring
Waring PRO MX1000R User manual

Waring
Waring Ellipse User manual

Waring
Waring CB15V User manual

Waring
Waring PRO MEGAMIX HPB300 User manual

Waring
Waring MMB Series User manual

Waring
Waring WSB40 User manual

Waring
Waring BB145 Series User manual

Waring
Waring 24CB9EC User manual

Waring
Waring Mx series User manual

Waring
Waring Mx series User manual

Waring
Waring 4 Litre Blender User manual

Waring
Waring Xtreme MX1300XTX User manual

Waring
Waring RB70 User manual

Waring
Waring Mx series User manual

Waring
Waring BIG STIX WSB50E User manual

Waring
Waring WPB User manual

Waring
Waring PRO MX1000R User manual