Waring PC1000 Series User manual

DIGITAL WINE
CHILLER & WARMER
PC1000 Series
For your safety and continued enjoyment of this product,
always read the instruction book carefully before using.

2
WINE CHILLER & WARMER
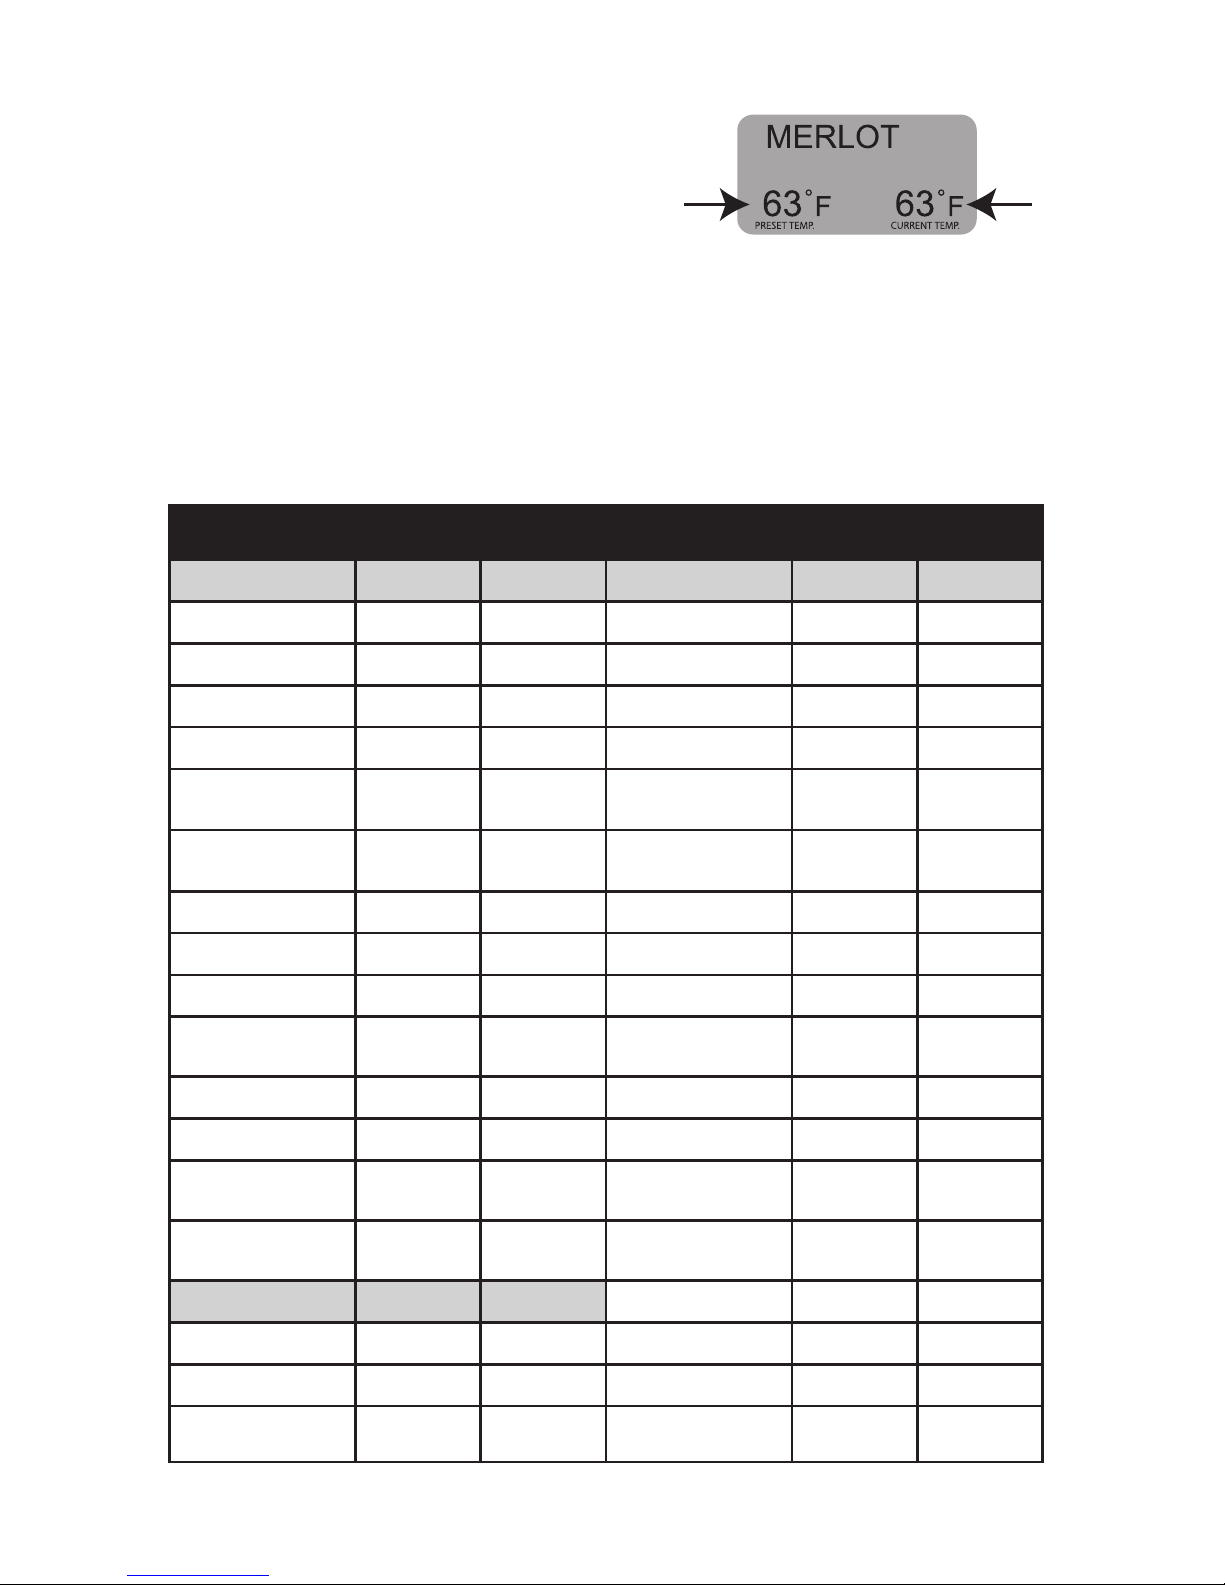
The Waring™Wine Chiller & Warmer has an internal database of
33 red, white and champagne wines. Simply select your wine from
the large backlit LCD screen and the chilling or warming begins.
An indicator beep will let you know when your wine has reached
optimum temperature for serving.
Serve wine at the perfect temperature – every time!
IMPORTANT SAFEGUARDS
All the safety and operating instructions should be read,
adhered to and followed before the unit is operated.
1. READ ALL INSTRUCTIONS.
2. Unplug from outlet when not in use, before putting on or
taking off parts and before cleaning. This appliance is not
recommended for use by children.
3. This unit should not be used by or near children, or
individuals with certain disabilities.
4. Use this unit only for its intended use as described in this
manual.
5. Unplug this unit during lightning storms or when not in use.
6. Never drop or insert an object into any opening.
7. Protect the power cord from being walked on or pinched,
particularly at plug outlets, convenience receptacles and
the point where it exits the unit.
8. Do not allow cord to touch hot surfaces. Wrap cord loosely
around the unit when storing.
9. The unit should be situated away from direct sunlight or heat
sources such as radiators, electric heaters, heat registers,
stoves, or other units (including ampliers) that produce heat.
Avoid placing on top of stereo equipment that
radiates heat.
10. Never block the air opening of the unit with materials such as
clothing, plastic bags or papers, or place it on a soft
surface such as a bed or couch, where the air openings
may be blocked.

3
11. Do not overload electrical outlet. Use only the power source as
indicated.
12. Do not carry this unit by cord or use cord as handle.
13. Never operate this unit if it has a damaged cord or plug, if it is
not working properly, or if it has been dropped or damaged or
dropped into water. If the unit’s power supply cord or plug is
damaged, do not attempt to x it yourself.
14. To avoid the risk of electric shock, do not disassemble
or attempt to repair the unit. Incorrect repair can cause
risk of electric shock or injury to persons when unit is used.
15. Do not operate in the presence of explosive and/or
ammable fumes.
16. Do not operate your appliance in an appliance garage or under
a wall cabinet. When storing in an appliance garage, always
unplug the unit from the electrical outlet. Not doing so could
create a risk of re, especially if the appliance touches the walls
of the garage or the door touches the unit as it closes.
17. For a cord-connected or direct plug-in power unit, do not use
an extension cord.
18. For a cord-connected or direct plug-in power unit, do not install
or use within 10 feet of a pool.
19. For a cord-connected or direct plug-in power unit, do not use in
a bathroom.
SAVE THESE INSTRUCTIONS
FOR HOUSEHOLD USE ONLY

4
DANGER
To reduce the risk of electric shock, burns, re or injury:
1. Always unplug the unit from the electrical outlet immediately
after using.
2. Do not use while bathing or in a shower.
3. Do not place or store unit where it can fall or be pulled into a tub
or sink.
4. Do not place in or drop into water or other liquid.
5. Do not reach for unit that has fallen into water. Unplug it
immediately.
6. Care should be taken so that objects do not fall and liquids are
not spilled onto the unit.
CAUTION
• TO REDUCE THE RISK OF ELECTRIC SHOCK, DO NOT
REMOVE COVER OR BACK. THERE ARE NO USER-
SERVICEABLE PARTS INSIDE.
• TO REDUCE THE RISK OF FIRE OR ELECTRIC SHOCK, DO
NOT EXPOSE THIS UNIT TO WATER OR MOISTURE.
The lightning ash with arrowhead symbol within an
equilateral triangle is intended to alert the user to the
presence of uninsulated dangerous voltage within the
unit’s enclosure that may be of sufcient magnitude to
constitute a risk of electric shock.
The exclamation point within an equilateral triangle is
intended to alert the user to the presence of important
operating and maintenance (servicing) instructions in
the literature accompanying the unit.
This appliance us for 120 volts only and should not be used with a
converter.

5
PARTS & ASSEMBLY
1. Power adapter
2. Adapter input
3. LCD Screen
4. – Power
5. – Press to scroll up
6. – Press to scroll down
7. SELECT – Press to select
or set
8. Door
9. Chilling plates
10. Lighted viewing window
11. Fan system
12. Drip tray
1
2
3
9
5
8
10
11
12
6
7
4

6
VIEWING WINE TEMPERATURE IN
FAHRENHEIT OR CELSIUS
1. With the unit off, press POWER BUTTON and SELECT
simultaneously for approximately one second. “Fahrenheit”
appears on the display.
2. Press or to select Fahrenheit or Celsius.
3. Press SELECT to save your selection.
The unit shuts off automatically.
OPERATING INSTRUCTIONS
1. Place the wine chiller/warmer on a at surface where it will not
be knocked over.
2. Plug the power adapter into the adapter input on the back of the
housing and plug the other end into an electrical outlet.
3. Open the door and place the bottle in between the chilling
plates. Close the door.
4. To turn the unit on, press and hold the POWER BUTTON for
a few seconds until the LCD screen illuminates and you hear a
beep.
5. “Wine Library” will appear on the LCD screen. Press SELECT.
6. Scroll through the wine library using the up and down arrows
and press SELECT once you see the category of wine you wish
to chill or warm.
7. Scroll through the list of wine varieties and press SELECT once
you see the type that you wish to chill or warm. The LCD display
will read chill. Select chill or scroll up to select warm.
8. The current temperature of the wine will appear in the bottom
right corner of the LCD screen within a minute for chilling and
about 5 minutes for warming.
9. When the chilling/warming
cycle is complete, the unit will
beep and the LCD screen will
read “CHEERS!” The fan
system will maintain the set
temperature until the unit is
manually turned off. Press
POWER BUTTON to turn it off.
*Chilling time will be affected by the ambient
room temperature.
SELECT

7
Two conditions remain:
1. The bottle is left in the unit
over a period of time. The wine
chiller/warmer will cycle to
maintain the preset temperature,
which means the current temperature
will uctuate slightly within 3-4 degrees.
2. If the bottle is removed from the wine chiller/warmer and
then put back into the wine chiller/warmer after a few minutes,
the unit will display “CHEERS” and will cycle on/off to maintain
the preset temperature until the unit is turned off.
SELECT
Wine TemperaTure Guide
White Wine
Temp. (°F) Temp. (°C)
Red Wine
Temp. (°F) Temp. (°C)
BORDEAUX 43 6 BEAUJOLAIS 54 12
CHABLIS 46 8 BORDEAUX 63 17
CHARDONNAY 48 9 BURGUNDY 61 16
CHENIN BLANC 46 8 CABERNET 63 17
ICE WINE 43 6 CABERNET
SAUVIGNON 64 18
PINOT GRIGIO 48 9 CHATEAUNEUF
DU PAPE 63 17
POUILLY FUISSE 46 8 CHIANTI 57 14
SAUTERNE 50 10 MALBEC 63 17
RIESLING 46 8 MERLOT 63 17
SAUVIGNON
BLANC 45 7 PINOT NOIR 59 15
SOAVE 41 5 RHONE 63 17
SEMILLON 48 9 RIOJA 54 12
WHITE TABLE
WINE 43 6 SANGIOVESE 59 15
WHITE
ZINFANDEL 45 7 SHIRAZ 64 18
Champagne
Temp. (°F) Temp. (°C)
VALPOLICELLA 57 14
ASTI 43 6 RED ZINFANDEL 59 15
CHAMPAGNE 45 7
SPARKLING
WINE 45 7

Trademarks or service marks of third parties used herein are
the trademarks or service marks of their respective owners.
©2014 Waring Consumer Products
150 Milford Road
East Windsor, NJ 08520
www.waringpro.com
Printed in China
PC1000 IB
14WR005863
IB-12550
CLEANING & MAINTENANCE
Always disconnect the power adapter from the main housing before
cleaning.
Carefully remove the drip tray from the back of the main housing. Empty
the drip tray and rinse it with clean water. Be sure that it is completely dry
before replacing.
To clean the housing, wipe with a non-abrasive damp cloth, then dry. Do
not use abrasive cleaning agents.
Any other servicing should be provided be an Authorized Service
Representative.
TROUBLESHOOTING
Touchpad control power button is very sensitive to touch. If you accidently
touch the power button before plugging in the wine chiller/warmer it may
take approximately 10-20 seconds to turn the unit on after it has been
plugged in.
approximaTe ChillinG Times
Set
Temperature
Cooling Time at
70˚F Room Ambient
Temperature *
Set
Temperature
Cooling Time at
70˚F Room Ambient
Temperature *
64˚ F/18˚ C 10 -12 minutes 50˚ F/10˚ C 42-46 minutes
63˚ F/17˚ C 12-14 minutes 48˚ F/9˚ C 50-60 minutes
61˚ F/16˚ C 16 -20 minutes 46˚ F/7˚ C 60 -70 minutes
59˚ F/15˚ C 18 -22 minutes 45˚ F/7˚ C 70-80 minutes
57˚ F/13˚ C 22-26 minutes 43˚ F/6˚ C 75-85 minutes
54˚ F/12˚ C 28-32 minutes 41˚ F/5˚ C 90-100 minutes
*Actual chilling/warming time will depend on room ambient temperature, the initial temperature of the wine,
the bottle size (as related to surface contact area to the interior of the chilling plates), and volume of the wine bottle.
If wine is stored at or above 72°, the chilling process may take longer but will be quicker and more accurate
than if chilled in the refrigerator. For best results, store wine at 55°.
Table of contents
Other Waring Wine Cooler manuals