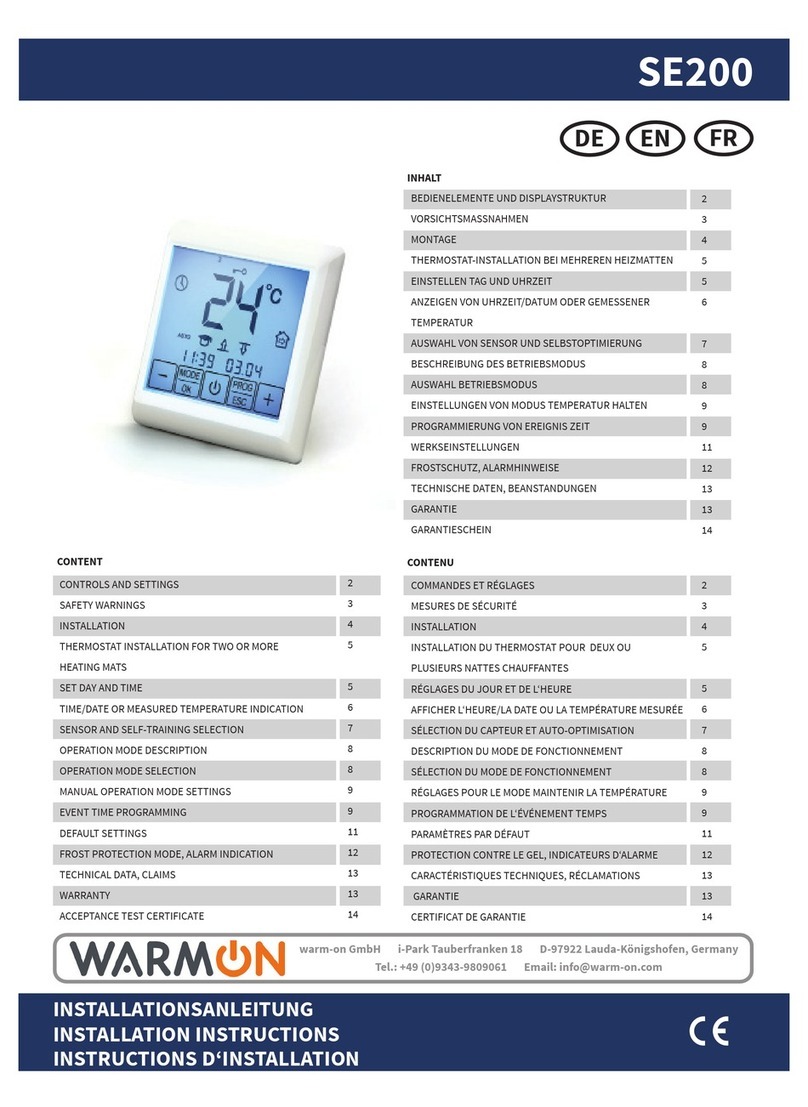
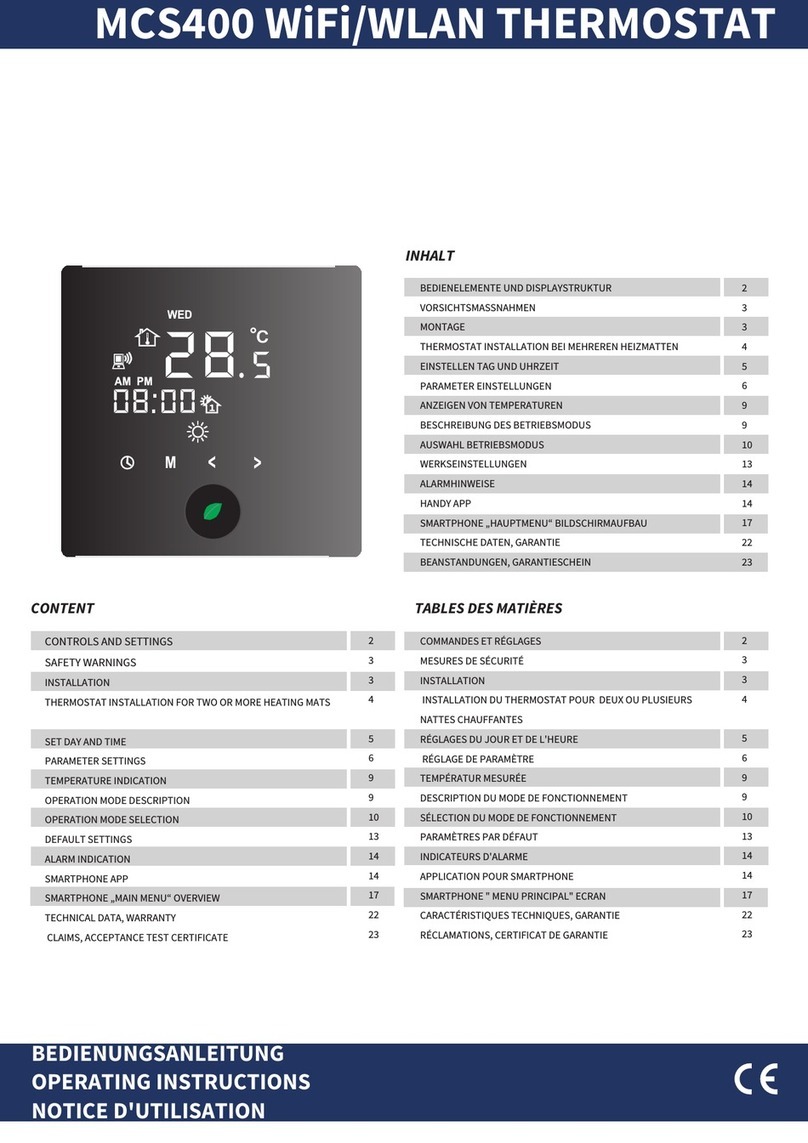
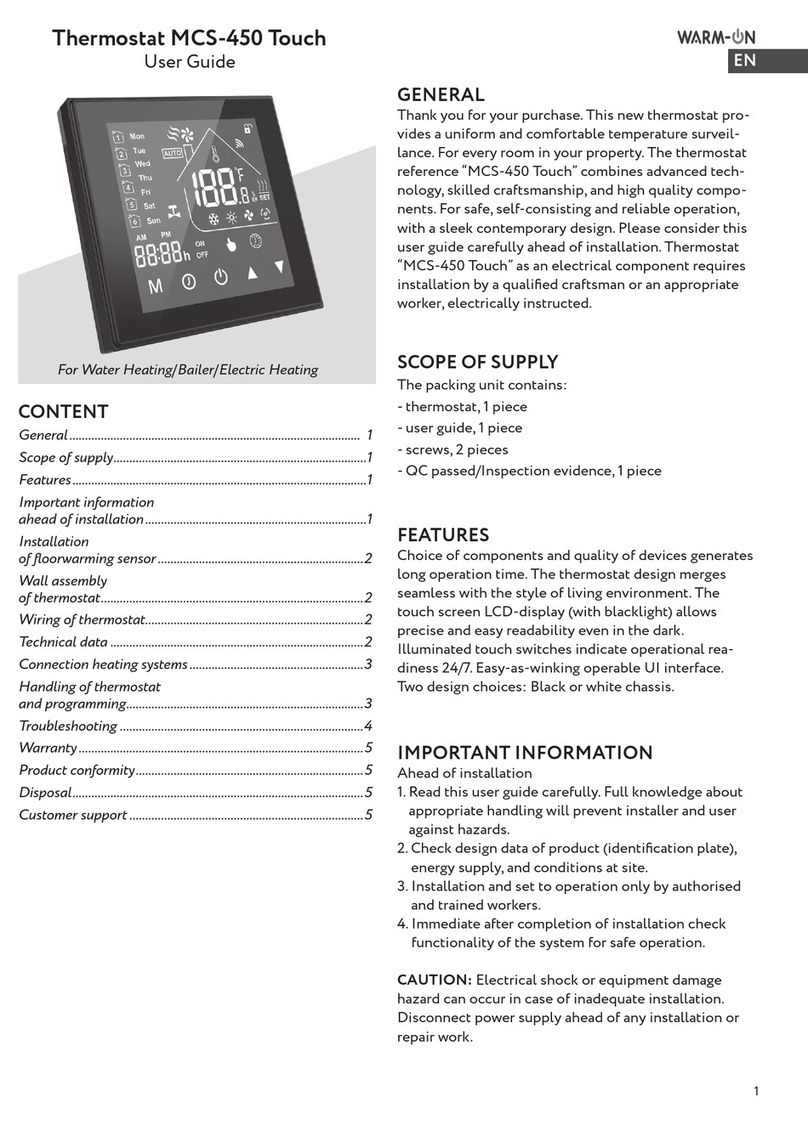
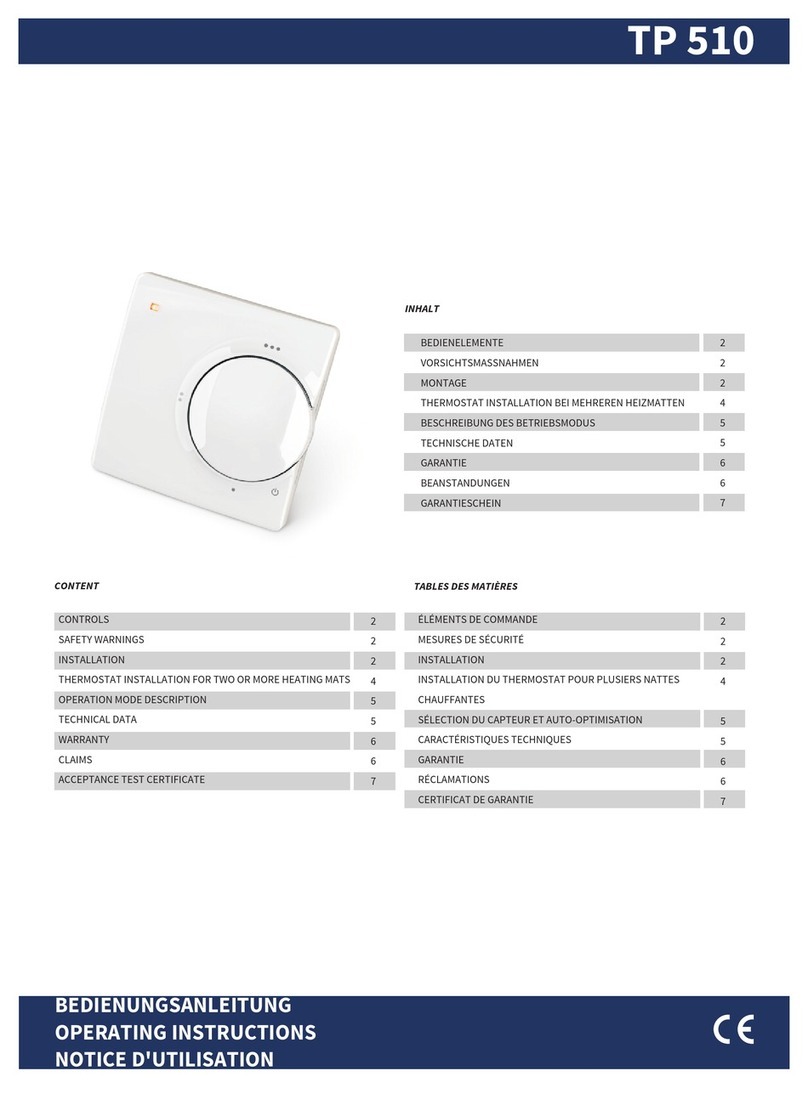
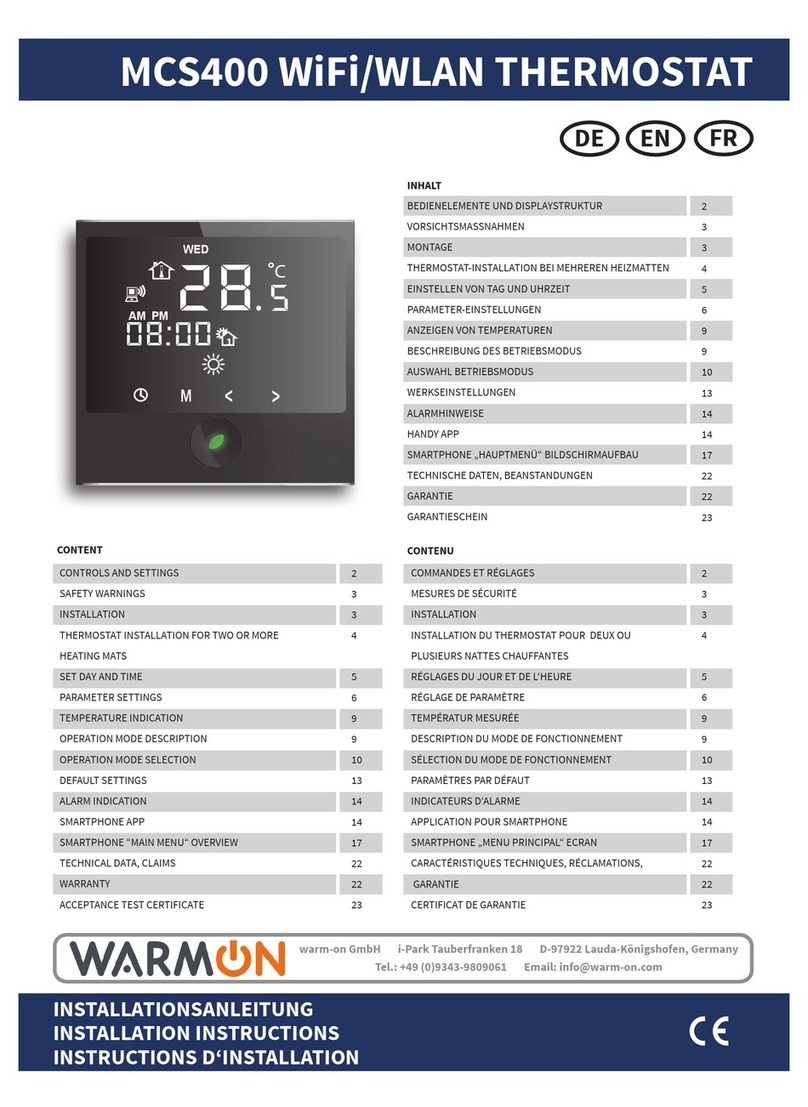
Warmon MCS 450 WIFI User manual

EN
1
Thermostat MCS 450 WIFI
User Guide
For Water Heating/Boiler/Electric Heating
FEATURES
Design
1. Convenient operation creates convenient life.
2. Fashion design Ыends in with апу decor.
3. Touch Screen display with backlight is easy to read,
even in the dark.
4. Bright buttons always remind you about attendance.
5. Easy UI interface could Ье used even Ьу child.
6. Options: Blасk and white housing.
Function and convenience
1. Remote control Ьу Tuya-Арр.
2. 0,5°С accuracy keeps temperature within set level.
3. Data storage when switched off.
4. 5+2 six programmable periods maximise comfort
and economy.
5. Create a thermostat group to centralize control
6. lntegrated with Amazon Alexa, Google Assistant,
etc.
Links for connection:
https://play.google.com/store/apps/details?id=com.
tuya.smart&hl=de&gl=US
https://play.google.com/store/apps/details?id=com.
tuya.smartlife&hl=de&gl=US
7. Chosen languages will synchronise with your time
zone, position.
8. No Limit for number of controlled rooms and sup-
port Smart Scene.
9. Connection between smartphone and thermostat
can be realised via WLAN.
IMPORTANT INFORMATION
AHEAD OF INSTALLATION
Your manufacturer provides with this product, the
Thermostat MCS-450 WiFi Touch, an electronic device,
based on its construction of the current standards, di-
rectives and general requirements (state of the art) have
been developed is.
1. Read these instructions carefully. Ignoring the advices
can damage the product or cause а hazardous condi-
tion.
2. Check the ratings given in the instructions and on the
product to make sure the product is suitable for your
application.
3. Employ only qualified workers for installation and set
to operation.
4. After installation is complete, check out product
operation as provided in these instructions.
CAUTION: Electrical Shock ог Equipment Damage
Hazard. Can shock individuals or reduce equipment
lifetime. Disconnect power supply before manipulation.
GENERAL
Thank you for your purchase. Your new thermostat will
provide uniform and comfortaЫe temperature control
throughout every room in your property. We bring toge-
ther technology, craftsmanship and the highest quality
materials to provide you with а safe reliaЬle product
combined with sleek contemporary design. Please read
this installation/programming manual for comprehensive
instructions installing and operating your thermostat.
Ensure an appropriate, qualified person for thermostat
installation. Fulfilling requirements of skilled worker and
related standards.
SCOPE OF SUPPLY
Thermostat – 1 рiece
User Guide – 1 рiece
Floor sensor – 1 рiece
Screws – 2 pieces
QC Passed – 1 piece
CONTENT
General ..............................................................................................1
Scope of supply ...............................................................................1
Features ...........................................................................................1
Important information ahead of installation ..........................1
Assembly of floorwarming sensor ...............................................2
Technical data ..................................................................................2
Wall assembly of thermostat........................................................2
Connection heating system...........................................................2
Operation ..........................................................................................3
WiFi-connection..............................................................................4
Programming of thermostat..........................................................6
Child-proof lock...............................................................................7
Troubleshooting tips .......................................................................7
Warranty ............................................................................................8
Product conformity..........................................................................8
Disposal..............................................................................................8
Customer support ............................................................................9
2
TECHNICAL DATA
Power Supply: 95V … 240 V AC, 50-60 Hz
Current load 16 A (electrical heating)
Set temperature +5°C … +35°C
Ambient temperature 0°C … +45°C
Ambient humidity 5 … 95 RH (non-condensing)
Power consumption <1,5 W
Protection Class: IP 20
Dimensions 86x86x14 mm
Compliance CE
Set the energy supply to
power-off. Separate the
backside of the thermos-
tat from display.
Utilize the screws which
come together
with the unit for installing
the backside on the wall.
Observe the advice as
shown in WIRING and
CONNECTION HEA-
TING SYSTEMS.
Insert the backside into
termination box.
Position the front part
(LCD-display) back on the
backside and latch.
The installation is finis-
hed.
CONNECTING HEATING SYSTEMS
For the electrical wiring of the thermostat and heating
system skilled workers or instructed personnel is
required. This is indispensable necessary for the
electrical connection to energy supply. The attainment
of national, international or regional regulations is
presupposed. Check ahead of wiring the compatibility
between product features and status of e.g. energy
supply and safety.
In case of more than one heating unit will be connec-
ted to thermostat, the assembly of a separate termina-
tion box for junction of cold lead-in cables is required.
For operating one heating unit: Direct connection to
thermostat “MCS-450 WiFi Touch”.
The two leads are connected to terminals 1 and 2.
Energy supply (brown, blue) on terminals 3 and 4. Earth
leads of heating system and energy supply are directly
connected by separate terminal clamp (not scope of
delivery).
The leads of floortemperature sensor are terminated
on terminal 5 and 6 (no polarity). In case of two or
more heating systems to be connected to thermostat,
WALL ASSEMBLY OF THERMOSTAT
DIMENSIONS
ASSEMBLY OF FLOORTEMPERATURE
SENSOR
The floortemperature sensor needs to be inserted in
a ductwork (Ø16 mm) according to EN 61386-1. The
sensoring point needs to be positioned centrical
between two heating cable runs. Distance to heating
cable: 20mm. Choose position for placing thermostat
“MCS-450 WiFi Touch”. Install a terminal box for flush
mounting. Lead cable for energy supply of thermostat
into this box. Cable type: E.g. NYM-J, 3 x 1.5 mm², acc. to
EN 13501-6 and EN 60032-1-2. This connection requires
a separate fuse for nominal current 10/16 A (depending
on system size) and earth leakage current braker (LCB)
with 30 mA release current. During Installation, the
ductwork should not be kinked or pressed. The sensor
should be able to move easily.

EN
3
3H=30cm
2
1
OPERATION
Display
Lock
Week
Mode PowerClock Up Down
Heatng On
Period
Тime
Timing-
On/Off
Floor Temp.
SetTemp.
Energy saving
ProgrammaЫe
Manual
Network
PROGRAMMING OF THERMOSTAT
1. Power On/off: Press „ “, for setting to operation/
shut-off.
2. Change of operational mode. Switch between “Ma-
nual/Program/ECO” by touching „ “ ”-key. Choosing
“Manual” displays „ “ on the bottom of the LCD-
display. „ “ is displayed in case of “Program” mode.
The
„ “ symbol appears when choosing “ECO” mode.
3. Set temperature und time cannot be changed when
using modes “ECO” and Program. Changing the
values requires move to mode “Manual” (touch “M”-
key). In this mode, press „ “and „ “ and choose the
required temperature. Press and hold „ “ key for 5
seconds. This allows change between °F and °C.
4. Adjusting/Setting the time
Touch the icon „ ”, to set minute, hour, and week-
day Ьу using „ “and „ “. Press „ ” onсе more to
confirm and exit.
5. Locking your Thermostat
Press and hold „ “and „ “ 5 seconds to lock/un-
lock your thermostat (child-proof lock).
6. Setting program profiles
When Wi-Fi connection is made, your thermostat
will automatically accept the program schedule
made via the АРР on your device (see below for
detailed instructions). То set the program profiles
through your thermostat (NOT via your smartphone/
taЫet) simply follow the instructions as below:
Note: For program profiles “Manual/Program/ ECO”
choice done by touching „ ” key. Touch „ ” key
four times to enter the setting (first three are for
current time and week).
Use „ “and „ “ to adjust each value, and then press
„ ” to exit program mode.
introduce heating system leads into separate termina-
tion box. Connect same-coloured insulated wires on
terminals. Employ one cable (e.g. NYM-J) for connecting
heating systems with thermostat. Terminate on terminals
3 (neutral) and 4 (phase). Earth leads of heating system
and energy supply are directly connected by separate
terminal clamp (not scope of delivery). Energize tempo-
rarily energy supply for identification of phase (L) and
neutral (N). Switch off immediately after measurement
for safety reason!

4
WIFI-CONNECTION
Step 1: Download your АРР
Two apps for WIFI connection are available.
“Tuya Smart Works” should work here as an example.
Scan QR-code for Tuya Smart App. Alternatively look
into App Store or Google Play for further download.
Step 2: Register your account
Open „Тuуа Smart“, log in or register your account with
your mobile number or e-mail address. Туре in the
verification code sent to your mobile or mail box, then
use your login password. Save your password for further
access to your app and settings.
Default setting for program schedule
Period
Working days
(Monday to
Friday) Saturday Sunday
Time Temp. Time Temp. Time Temp.
Period 1 06:00 20 °C 06:00 20 °C 06:00 20 °C
Period 2 08:00 15 °C 08:00 20 °C 08:00 20 °C
Period 3 11:30 15 °C 11:30 20 °C 11:30 20 °C
Period 4 13:30 15 °C 13:30 20 °C 13:30 20 °C
Period 5 17:00 22 °C 17:00 20 °C 17:00 20 °C
Period 6 22:00 15 °C 22:00 15 °C 22:00 15 °C
7. Checking the Temperature of Floor Sensor
Press and hold the „ “ for five seconds to display
the temperature of floor temperature sensor. If the
temperature display does not show a plausible value
or reports an error, check the connection of the
temperature sensor (loose/missing connection). If
necessary, replace the temperature sensor.
8. Setting the Advanced Features
Turn off the thermostat, press „ “and „ ” buttons
at the same time for 5 seconds to enter the advan-
ced features setting, press „ “button for function
selection, press „ “and „ “, to adjust individual
functions.
AII high level option settings will take effect auto-
matically after restarting the thermostat.
Code Function Setting and options Default
1Tempe-
rature Com-
pensation
-9 °C to +9 °C (for internal
sensor) -1
2Tempe-
rature
Deadzone 1–5 °C 1
3Button
Locking
00:All buttons are locked
except power button.
01:All buttons are locked. 01
4Sensor
Types
In: Internal Sensor ( to cont-
rol ог limit the temp.)
Ou: Only external sensor
In: In, Internal/External,
Internal sensor
AL
5Min. Set
Temp. 5–15 °C 05
6Мах. Set
Temp 15–45 °C 35
7Display
Mode
00: Display both set temp.
and room temp.
01: Display set temp. only 00
8
LowTempe-
rature
Protection
Setting
0–10 °C 00
9
High Tem-
perature
Protection
Setting
25–70 °C 45
AEconomy
Mode 00: Non-energy saving mode
01: Eneгgy saving mode in 0
B
Tempera-
ture range
Economy
Modus
0–30 °C 20
„Tuya Smart“ QR-Code „Smart Life“ QR-Code

EN
5
Step 3: Wi-Fi connection operation
Note: The thermostat supports two pairing modes,
selectable according to present operational situation.
EZ pairing mode: EZ mode allows for rapid networking,
with high performance requirements for WiFi signal
strength, routers, mobile phones, or management de-
vices, as shown below. EZ pairing allowed for simple and
automated networking.
After turn-off of thermostate, press/hold „ “ key for 10
seconds. Fast flashing of „ “ shows change to pairing
mode. Open Tuya-App, click “Add Device”, choose
“Small Home Appliance” and select “Thermostat WiFi”.
In case of opening Bluetooth on smartphone, thermos-
tat will be detected automatically (see figure 6). Choose
appropriate network and enter password. Click on “next”
for achieving automatic connection status. Finally com-
plete WiFi-connection of thermostat.
Figure 1
Figure 4
Figure 2
Figure 5
Figure 3
Figure 6
АР pairing mode is the manual selection of the
network. AP pairing is commonly used in home and
business WiFi networks, where the user needs to know
the network credentials to connect.
After turning off the thermostat, press and hold the
„ “ button for 10 seconds, when the „ “ icon fast
flash, press and while the „ “ button for another
10seconds, the
„ “
-icon appears, that stands for the
thermostat and enters into АР pairing mode.
Open “Tuya-App”, click “Add Device”, and choose
“Small Home Appliance”. Select “Thermostat (WiFi)”,
choose the suitable WiFi network, and enter the pass-
word. Click on “next”, recognise “Confirm the indicator
is blinking slowly”, click “next”, followed by “go to
connect”. The Smartphone will automatically enter
WiFi setting interface. Choose the WiFi signal “Smart-
Life-xxx”, reopen Tuya-App to achieve an automatic
connection state. Finally complete WiFi connection of
the thermostat.

6
Figure 7
Figure 10
Figure 8
Figure 13
Figure 11 Figure 14
Figure 9
Figure 12 Figure 15
PROGRAMMING OF THERMOSTAT
After a successful connection, the thermostat setting
interface will appear as shown in figure 13. You can make
relevant settings according to your requirements.
1. Press symbol “Power on/off” (1) for setting unit to
operation. Proceed same way for turning off.
2. Mode switch key” (2) for choice between “Manual/
Program/ECO” profile.
3. Timer on/off (3)
4. Setting” (4) for choosing Advanced Features.
5.Move the dial (5) with finger on ring forward/ backward
for temperature setting. Set value indicated in the
center.
Settings
In figure 13, click the „ “ to express the setting inter-
face.

EN
7
Figure 16
Figure 19
Figure 17
Figure 20
Figure 18
Figure 21
Weekly program
Settings available: Weekdays (Monday … Friday).
Enter the operating time and temperature acc. to re-
quirements. 6 periods (time/temperature) can be set as
shown in figure 15.
Proceed these steps for settings on Saturday/Sunday
simultaneously.
Finally click “save” for saving the settings.
Child-proof lock
Setting this mode blocks all keys against changes.
ЕСО mode
ECO-Mode is disabled (default). Activating this mode
via “advanced features”. Touch M-key on thermostat for
choosing between “Manual/Program/ECO” profiles. See
figure 13. Click the „ “ >” key for entering advanced
features interface as shown in figure 16.
Device information can be changed as shown in figure
17. Third-party-control can be added (Amazon Echo or
Google Home) see figure 18.
Share device as expressed in figure 19 and 20.
Creation of group pictured in figure 21.
TROUBLESHOOTING TIPS
Nr. Malfunction Corrective action
1Power turned on, no dis-
play reaction.
Check terminals bet-
ween LCD-panel and
power unit box. Safely
connected?
2Display performs, but no
output. Replace LCD panel or
power unit box.
3Room temperature devia-
tes from setting.
Proceed temperature
calibration (item 1 in
"Advanced Features").
4"E2" displayed on Tuya
App operated inter-face.
Open "Advanced Func-
tion" and set "Sensor
Type" to "Internal
Sensor".

8
WARRANTY
The manufacturer (Shenzhen Zhouqiao smart
technology Co., LTD) guarantees the proper function
and technical design based on the state of the art
at the time of printing of this user manual. Valid for
proper handling, installation, and commissioning.
Therefore, we grant a warranty of 2 years from the
date of purchase/invoice.
This covers defects that are due to non-conforming
manufacture. Improper handling, damage by third
parties, faulty installation and general consequential
damage exclude the company from providing a
guarantee.
PRODUCT CONFORMITY
This declaration confirms, that the thermostat
reference MCS-450 WiFi Touch is compliant with
European Directives 2014/53/EU (RED),
2014/30/EU (EMC), 2006/66/EC (Batteries/
Accumulators), and 2012/19/EU (legacy device).
DISPOSAL
Disposal regulations acc. to Directive 2002/96/CE
Defective electrical units never dispose in
household waste! In case of mal- or non-function
of system, those need to be disposed separately.
Please require public discharge point from your
urban administration or district authority.
Only this will guarantee proper recycling and
environment protection. Reason for special
marking of the equipment.
Dispose the equipment correctly sorted.
Cardboard and paper in wastepaper reuse,
plastic foils in plastic recycling.
Releasing of toxic liquids of gases into
atmosphere is forbidden!
No disposal of electrical devices in consu-
mer waste. Use specific collection points.
Please require public discharge point
from your urban administration or district
authority. In case of disposal in dumps or
burrows, danger develops by leaking of
hazardous substances into groundwater,
returning into food chain, and endangering
your health.
WARNING

EN
9
CUSTOMER SUPPORT
IMPORTER: warm-on GmbH, i_Park Tauberfranken 18,
97922 Lauda-Königshofen, Germany
Tel. +49 (0) 9343-9809061 (customer support)
MANUFACTURER: Shenzhen Zhouqiao smart technology Co.,
LTD, Room 502, Building 2, Fufengda Industrial Building, Fuyong
Street, Baoan, Peoples Republic of China.
The information in this document corresponds to the current
state of knowledge in the company.
AUTHORISED MERCHANT:
warm-on.fr/GammaSwiss SA, Rue Galilée 6,1400
Yverdon-les-Bains, Suisse
+33 0800 922 980 (Сustomer support)
Changes, errors, and misprints do not justify any claims for dama-
ges from the company.
Claims are regulated by GTC of the seller.
We reserve the right to make technical changes without prior
notice.
HYPERLINK
http://www.warm-on.com
www.bodenheizung -24.de
www.warm-on.fr

10
Thermostat MCS-450 WIFI
Mode d‘emploi
CARACTÉRISTIQUES
Design
1. Fonctionnement pratique facilitant votre quotidien
2. Design moderne s’intégrant facilement à tous les
environnements.
3. Ecran tactile rétro-éclairé facile à lire, même dans
l’obscurité.
4. Touches lumineuses faciles à distinguer
5. Interface utilisateur facile à utiliser
6. Boîtier : disponible en blanc ou noir.
FONCTIONNALITÉS
1. Commande à distance sur smartphone via l’applica-
tion Tuya
2. Précision de 0,5°С permettant de maintenir la tempé-
rature définie
3. Sauvegarde des données lorsque l’appareil est éteint
4. 6 périodes programmables pour les 5 jours de la
semaine et 2 périodes pour le week-end, permettant
d’optimiser votre confort et votre consommation
d’énergie.
5. Possibilité de contrôler plusieurs thermostats simul-
tanément
6. Fonctionne avec Amazon Alexa, Google Assistant,
etc.
7. Les langues choisies se synchronisent selon votre
position.
8. Possibilité de contrôler un nombre illimité de pièces,
compatible avec Smart Scene
9. La connection entre le smartphone et le thermostat
est possible par WIFI.
Introduction ..................................................................................... 10
Contenu de la livraison ................................................................. 10
Caractéristiques .............................................................................. 10
Remarques importantes avant l’installation............................11
Installation de la sonde de température au sol....................... 11
Spécifications techniques ..............................................................11
Montage mural du thermostat ..................................................... 11
Connexion du système de chauffage ......................................... 12
Fonctionnement .............................................................................. 12
Connexion WiFi .............................................................................. 13
Programmation du thermostat.................................................... 15
Sécurité enfants............................................................................... 16
Résolution des problèmes..............................................................17
Garantie .............................................................................................17
Conformité du produit....................................................................17
Elimination ........................................................................................17
Support client .................................................................................. 18
SOMMAIRE
INTRODUCTION
Nous vous remercions de votre achat.
Votre nouveau thermostat assurera une régulation
uniforme et et confortable dans toutes les pièces de
votre habitation. Le «MCS-450 WiFi Touch» combine
design moderne, technologie de pointe, savoir-faire et
composants de haute qualité permettant un fonctionne-
ment autonome et fiable. Veuillez lire attentivement ce
manuel d’utilisation avant de procéder à l’installation.
Le thermostat «MCS-450 WiFi Touch» est un appareil
électrique qui doit être installé par une personne quali-
fiée dans le domaine de l’électricité.
CONTENU DE LA LIVRAISON
Thermostat – 1 pièce
Manuel d’utilisation – 1 pièce
Sonde de température au sol – 1 pièce
Vis – 2 pièces
Contrôle qualité– 1 pièce
Pour plancher chauffant électrique /
hydraulique / chaudière

FR
11
DIMENSIONS
INSTALLATION DE LA SONDE
DE TEMPÉRATURE AU SOL
La sonde de température du sol doit être insérée dans un
tube (Ø16 mm) conformément à la norme EN 61386-1. La
sonde doit être positionnée entre deux câbles chauffants, à
25 mm du câble chauffant et elle ne doit jamais toucher le
câble chauffant. Déterminer l’emplacement du thermostat
«MCS-450 WiFi Touch». Installer la boîte d’encastrement
et introduire le câble d’alimentation du thermostat dans
le boîtier. Exemple de type de câble : NYM-J, 3 x 1,5 mm²,
conforme aux normes EN 13501-6 et EN 60032-1-2. La
protection est assurée par un disjoncteur automatique
(10/16 A) combiné à un disjoncteur différentiel (courant de
commutation : 30mA).
Le tube ondulé (Ø16mm) destiné à recevoir la sonde de
température au sol ne doit pas être pressé/plié pendant
l’installation. La sonde doit pouvoir être introduite et
retirée facilement.
INFORMATIONS IMPORTANTES
avant l’installation
Le thermostat MCS-450 WiFi Touch est un appareil
électronique développé et fabriqué selon les normes
en vigueur et selon des standards de qualité haut-de-
gamme.
1. Lire attentivement ce manuel de l’utilisateur pour
éviter tout danger lors de l’installation et de l’utili-
sation.
2. Contrôler les caractéristiques techniques du produit
(plaque signalétique), l’alimentation et les condi-
tions de fonctionnement sur le lieu d’installation.
3. L’installation et la mise en service doivent être
effectués par un professionnel qualifié.
4. Immédiatement après l’achèvement de l’installation,
le fonctionnement et la sécurité électrique doivent
être contrôlés.
ATTENTION: une installation incorrecte peut entraî-
ner un choc électrique entraînant des conséquences
telles que des blessures corporelles ou pouvant en-
dommager les systèmes. Mettez l’appareil hors tension
lors de l’installation ou en cas de réparation.
SPÉCIFICATIONS TECHNIQUES
Tension 240V AC, 50–60Hz
Courant max. 16A (chauffage électrque)
Plage de réglage de la
température +5°C … +35°C
Plage de température
ambiante 0°C … +45°C
Humidité d`air 5 … 95 % (sans condensation)
Consommation de
courant <1,5 W
Protection IP 20
Dimensions 86×86×14 mm
Conformité CE
Couper l’alimentation.
Séparer la face arrière et
l’écran du thermostat.
Fixer la face arrière du
thermostat au mur à l‘aide
des vis fournies.
Insérer la face arrière dans la
boîte d’encastrement confor-
mément aux indications de la
section BRANCHEMENT DU
THERMOSTAT et CONNE-
XION DES SYSTÈMES DE
CHAUFFAGE.
Remettre l‘écran sur la face
arrière du thermostat,
puis verrouiller l’ensemble.
L‘installation est terminée.
MONTAGE MURAL DU THERMOSTAT

12
CONNEXION DU SYSTÈME DE CHAUFFAGE
La connexion électrique du thermostat et du système
de chauffage doit être impérativement effectuée par
un électricien professionnel. Le respect des réglemen-
tations nationales, internationales ou régionales en
vigueur est requis.
Avant de procéder à la connexion, vérifier la compatibi-
lité entre les caractéristiques du produit, l’alimentation
électrique et les conditions de sécurité.
Pour le fonctionnement d’une seule unité de chauffage :
Connexion directe au thermostat.
Connecter les deux fils de la liaison froide aux bornes 1
et 2. Brancher la tension d’alimentation (marron, bleu)
aux bornes 3 et 4. Connecter les fils de terre du système
de chauffage et de l’alimentation ensemble au boîtier de
dérivation (non fourni).
Les fils de la sonde de température du sol se connectent
sur les bornes 5 et 6 (sans polarité).
Si deux systèmes de chauffage ou plus doivent être
connectés au thermostat, installer un boitier de dériva-
tion pour la jonction des deux liaisons froides. Connec-
ter les câbles isolés de même couleur aux bornes 1 et 2.
Alimenter le système de chauffage en le branchant sur
les bornes 3 (neutre) et 4 (phase) par le câble d’alimen-
tation du thermostat (par exemple, NYM-J).
Connecter les fils de terre du système de chauffage et
de l’alimentation en énergie avec une pince à bornes
séparée (non comprise dans la livraison). Brancher tem-
porairement l’alimentation pour identifier la phase (L)
et le neutre (N). Pour des raisons de sécurité, éteindre
l’appareil immédiatement après ce contrôle.
3H=30cm
2
1
FONCTIONNEMENT
Ecran
Thermostat
verrouillé/déverrouillé
Jour de la semaine
Mode Heure On/Off Réglage de la
température
En chauffe
Calendrier
Temps
Timer
On/Off
Température du sol
Réglage de la température du sol
Mode: ECO
Mode: Programme
Mode: Manuel
Connexion Wi-Fi
INSTALLATION
Pour monter le thermostat, vous pouvez utiliser un boîtier
d‘encastrement de 60 mm ou 86 mm . Retirez d‘abord le
couvercle arrière du thermostat
1. ON / OFF: Appuyer sur le symbole „ “, pour éteindre
ou allumer.
2.
Mode de fonctionnement (Manuel/Programme/ECO):
Appuyer sur la touche „ “ pour passer d’un mode à
l’autre. Le symbole en bas de l’écran LCD indique le
mode sélectionné „“ indique le mode Manuel, „ “
indique le mode Programme,
„ “ indique le mode ECO
3.
Réglage de la température:
En mode ECO et Programme, la température ne peut
pas être réglée à l‘aide des touches fléchées. Pour mo-
difier la température, vous devez le faire directement
dans le mode programme ou passer en mode manuel.
En mode Manuel, vous pouvez modifier la température
avec les touches fléchées. Pour passer de °F à °C,
appuyez sur la touche „“ pendant 5 secondes.
.
4. Réglage de l‘heure:
Pressez la touche „ ” puis réglez l‘heure et le jour
de la semaine à l‘aide des touches fléchées. Pressez à
nouveau sur „ ” pour confirmer et quitter.
5. Verrouillage du thermostat (sécurité enfants):
Pour activer ou désactiver le verrouillage des touches,
presser simultanément les symboles „ “ et „ “ pen-
dant 5 secondes.
6. Configuration des programmes:
Lorsque la connexion Wi-Fi est établie, votre ther-
mostat accepte automatiquement le programme
établi via l’application sur votre smartphone (voir
ci-dessous pour des instructions détaillées). Pour
configurer vos programmes via votre thermostat (PAS
via votre smartphone/ tablette) il suffit de suivre
les instructions ci-dessous. Note : Pour choisir le
programme souhaité, pressez la touche „ ”. Pressez
ensuite quatre fois la touche „ ” pour entrer dans

FR
13
le réglage (les trois premières fois pour l‘heure et
la semaine en cours). Utilisez les flèches „“et
„“ pour régler chaque valeur, puis appuyez sur „ ”
pour quitter le mode programme.
Réglage de l‘heure standard en mode Programme
Période Lundi … Vendredi Samedi Dimanche
Heure Temp Heure Temp Heure Temp
1 06:00 20 °C 06:00 20 °C 06:00 20 °C
2 08:00 15 °C 08:00 20 °C 08:00 20 °C
3 11:30 15 °C 11:30 20 °C 11:30 20 °C
4 13:30 15 °C 13:30 20 °C 13:30 20 °C
5 17:00 22 °C 17:00 20 °C 17:00 20 °C
6 22:00 15 °C 22:00 15 °C 22:00 15 °C
7. Vérification de la température de la sonde de sol:
Pour afficher la température de la sonde de sol, appuy-
er sur la touche „ “ pendant 5 secondes. Si l‘affichage
de la température n‘indique pas une valeur plausible
ou signale une erreur, vérifiez la connexion de la sonde
de température (connexion lâche/manquante). Le cas
échéant, remplacez la sonde de température.
8. Réglages avancés:
Pour ouvrir le menu „Avancé“, éteindre le thermostat,
puis appuyer simultanément sur les touches „ “et
„“ pendant cinq secondes. Pour choisir une fonc-
tion, presser la touche „ “et appuyer sur les touches
„“et „ “ pour faire votre choix. Tous les réglages
choisis seront automatiquement activés immédiate-
ment après le redémarrage du thermostat.
Code Fonction Paramètres et options
Valeur
stan-
dard
1Compensation de
la température de-9 °C à +9 °C (capteur intégré) -1
2Hystérésis 1 °C à 5 °C 1
3Verrouillage
00: Toutes les touches sont
bloquées (sauf alimentation).
01: Toutes les touches sont
bloquées.
01
4Types de capteurs
In: Capteur interne (pour contrô-
ler ou limiter la température)
Ou: Capteur externe uniquement
AL: Capteur interne / externe
(Capteur interne pour contrôler la
température, le capteur externe
pour limiter la température)
AL
5Température Min. 5 °C à 15 °C 05
6Température Max. 15 °C à 45 °C 35
7Mode d‘affichage
00:Affichage de la température
de la pièce et du sol
01: Affichage de la température
programmée
00
8Température
basse 0 °C à 10 °C 00
9
R
é
glage limitation
de température
25 °C à 70 °C 45
AMode Économie
d`
é
nergie
00: Mode d`économie d‘énergie
désactivé
01: Mode d`économie d‘énergie
activé
0
BPlage de tempé-
rature. Mode Éco-
nomie d‘énergie 0 °C à 30 °C 20
CONNEXION WIFI
Étape 1: Télécharger une application
Deux applications applications sont disponibles. A titre
d’exemple c’est l’application « Tuya Smart Works » qui
est présentée. Scanner le code QR Tuya Smart App
ci-dessous ou télécharger l’application directement
dans App Store ou Google Play.
Étape 2: Enregistrement de votre compte.
Ouvrez „Tuya Smart“, connectez-vous ou enregistrez
votre compte avec votre numéro de téléphone portable
ou votre adresse e-mail. Saisissez le code de vérification
envoyé à votre mobile ou votre boite email, puis défi-
nissez votre mot de passe pour accéder à l’application
et aux paramètres.
Étape 3: Connexion Wi-Fi.
Vous avez le choix entre deux modes d’appairage EZ
et AP. Appairage EZ: L’appairage EZ permet une mise
en réseau simple et automatisée. La procédure est la
suivante : Eteignez le thermostat, appuyez sur „ “et
„ “ clignote, l’appareil entre en mode appairage EZ.
Ouvrez l’application «Tuya», cliquez sur «Ajouter un
appareil», sélectionnez «Petit appareil électroména-
ger», puis «Thermostat (Wi-Fi)». Lorsque le Bluetooth
„Tuya Smart“ QR-Code „Smart Life“ QR-Code

14
Figure 1
Figure 4
Figure 2
Figure 3
de votre smartphone est activé, il détecte automatique-
ment le thermostat (figure 6). Sélectionnez le réseau
WiFi approprié et entrez le mot de passe. Cliquez sur
«suivant» pour que la connexion se fasse automatique-
ment. Le thermostat est connecté au Wi-Fi.
Appairage AP: L’appairage AP est la sélection ma-
nuelle du réseau. L’appairage AP est couramment utilisé
dans les réseaux Wi-Fi domestiques et professionnels,
où l’utilisateur a besoin de connaître les informations
d’identification du réseau pour se connecter. La procé-
dure est la suivante : Eteignez le thermostat, appuyez
sur „ “et „ “ pendant 10 secondes. Lorsque le symbole
„ “, clignote, l’appareil entre en mode appairage AP.
Ouvrez l’application «Tuya, cliquez sur «Ajouter un
appareil », sélectionnez «Petit appareil électroménager».
Sélectionnez « Thermostat Wi-Fi » puis le réseau Wi-Fi
approprié et entrez le mot de passe. Cliquez sur
«Suivant», vérifiez que le voyant clignote lentement,
cliquez sur «Suivant», puis cliquez sur «Aller à la
connexion», votre téléphone entrera automatiquement
dans l’interface des paramètres Wi-Fi. Sélectionnez
le signal Wi-Fi“SmartLife-xxxx», puisuvrez à nouveau
l’application «Tuya» pour entrer dans un état de
connexion automatique, terminez la connexion Wi-Fi
du thermostat.
Figure 5 Figure 6

FR
15
Figure 7
Figure 10
Figure 8
Figure 11
Figure 9
Figure 12
Programmation du thermostat
Une fois la connexion réussie, il entrera dans l’interfa-
ce de réglage du thermostat, comme illustré sur la figu-
re13. Vous pouvez effectuer des réglages pertinents en
fonction de vos besoins.
1. Allumer/Eteindre: ON/OFF.
2. Touche «Programme»: Manuel, Programme ou ECO.
3. Touche «Timer»: Contrôle de la minuterie
4. Touche « Setting » : Paramètres avancés
5. Touche température. Faire glisser votre doigt en
avant ou en arrière sur le cercle pour contrôler
manuellement la température. La valeur définie
s’affiche au centre.
6. PARAMETRES : Cliquez sur l’icône „ “ pour accé-
der à l’interface de réglage (Fig.13).
Figure 13

16
Figure 14 Figure 15
Programme Semaine
Vous pouvez programmer la semaine du lundi au ven-
dredi puis paramétrer les heures/températures selon
vos besoins quotidiens. Vous pouvez définir 6 périodes
(temps et température), comme illustré à la figure 15.
Répétez les étapes ci-dessus pour définir samedi-di-
manche. Enregistrez les réglages pour que l’application
les transfère au thermostat.
Verrouillage enfant
Cette fonction permet de verrouiller les boutons du
thermostat
Mode ECO
Le mode ECO est désactivé par défaut. Si vous souhaitez
utiliser cette fonction, veuillez accéder aux fonction-
nalités avancées pour l’activer. Appuyez ensuite sur la
touche „ ““ du thermostat pour basculer entre les
modes «Manuel / Programme / ECO».
Dans la figure 13, cliquez sur l’icône „ “ pour accéder
à l’interface de la fonction Avancée. Comme le montre
la figure 16. Vous pouvez modifier les informations sur
le périphérique, comme illustré à la figure 17; Il est
possible d’ajouter une application tierce (Amazon Echo
ou Google Home, comme illustré à la figure 18. Partage
d’appareils comme indiqué sur les figures 19, 20. Figure
21 : Création d’un groupe.
Figure 16 Figure 17
Figure 19
Figure 20
Figure 18
Figure 21

FR
17
CONFORMITÉ DU PRODUIT
Cette déclaration confirme que le thermostat MCS-450
WiFi Touch est conforme aux Directives européennes
2014/53/EU (RED), 2014/30/EU (EMC), 2006/66/EC
(piles/accumulateurs), et 2012/19/EU (précédent modè-
les).La déclaration de conformité est disponible sur le
lien suivant:
https://warm-on.fr/media/pdf/1d/d8/aa/MCS-450_WIF_
DECLARATION_OF_CONFORMITY.pdf
TRAITEMENT DES DECHETS
Instructions d‘élimination conformément à la DIRECTI-
VE 2002/96/CE
Ne jamais jeter les appareils électriques défectueux
dans les déchets de consommation non triés. Les
appareils défectueux doivent être éliminés séparément.
Informez-vous auprès des autorités locales compétentes
sur les points de collecte dédiés.
C‘est la seule façon de garantir un recyclage adéquat
pour la protection de l‘environnement.
ELIMINATION
Éliminez l‘emballage en fonction de son
type. Mettez le carton dans le bac dédié
aux papiers et emballages, et les feuilles
d‘aluminium dans le bac des recyclables.
Il est strictement interdit de rejeter le
fluide réfrigérant dans l‘atmosphère!
Ne pas jeter les appareils électriques avec
les déchets municipaux non triés, mais uti-
liser des installations de collecte séparée.
Contactez votre administration locale pour
obtenir des informations sur les systèmes
de collecte disponibles. Si les appareils
électriques sont jetés dans des décharges
ou des dépotoirs, des substances dangereu-
ses peuvent s‘infiltrer dans la nappe phréa-
tique et dans la chaîne alimentaire, nuisant
ainsi à votre santé et à votre bien-être.
Simple Dépannage
No. Erreur Résolution
1L’alimentation est branchée
mais sans affichage
Vérifiez si les bornes
entre l’écran LCD et le
boitier d’alimentation
sont desserrés
2Affichage de sortie ne
fonctionne pas
Utiliser un nouvel
écran ou un nouveau
boitier d’alimentation
3La température ambiante
est différente de la réalité
Effectuer l’étalonnage
de la température dans
l’article 1 des fonction-
nalités avancées
4"E2" s’affiche sur l’interface
de fonctionnement de
l’application Tuya
Entrez dans la fonction
avancée et réglez le
„Type de capteur“ sur
„Capteur interne“
GARANTIE
Le fabricant (Shenzhen Zhouqiao smart technology
Co., LTD) garantit la conformité du produit avec la
description de la conception, en supposant que les
instructions de montage et d‘utilisation soient respec-
tées. Période de garantie - 2 ans à compter de la date
d‘achat.
La garantie couvre les défauts d’une fabrication non
conforme. Les manipulations incorrectes, ou tout type
de défaut non lié à la responsabilité du fabricant ne
sont pas garantis.
La garantie est valable sur présentation de la preuve
d‘achat/ facture.
WARNING

18
SERVICE CLIENT
REVENDEUR AUTORISÉ: warm-on.fr / GammaSwiss SA,
Rue Galilée 6, 1400 Yverdon-les-Bains, Suisse
Tel.: +33 0800 922 980 (Service clientèle)
Toutes les informations sont correctes et fiables au mieux de nos
connaissances.
Les modifications, les erreurs et les fautes d‘impression
ne justifient aucune demande de dédommagement. La
responsabilité est limitée aux conditions générales de vente
(CGV) du vendeur.
Nous nous réservons le droit de procéder à des modifications
techniques sans préavis.
www.warm-on.com | www.bodenheizung -24.de | www.warm-on.fr
FABRICANT: Shenzhen Zhouqiao smart technology Co.,LTD.
Room 502, Building 2, Fufengda Industrial Building, Fuyong Street,
Baoan.
IMPORTATEUR: warm-on GmbH, i_Park Tauberfranken 18,
D-97922 Lauda-Königshofen, Germany
Tel. +49 (0) 9343-9809061 (Service clientèle)

DE
19
Thermostat der Serie
MCS-450 WIFI touch
Benutzerhandbuch
Für Warmwasser/Boiler/Elektrofußbodenheizung
EINFÜHRUNG
Vielen Dank für Ihr Vertrauen in unsere Produkte.
Dieses neue Thermostat bietet Ihnen eine komfortable
Möglichkeit der Temperaturregelung in jedem einzelnen
Raum Ihres Gebäudes.
Wir vereinigen in diesem Produkt Hochtechnologie,
Handwerkserfahrung und hochqualitative Bauteile, zur
Schaffung eines verlässlichen Produktes mit anspre-
chendem Design.
Lesen Sie bitte diese umfangreiche Bedienungsanleitung
mit Programmierhinweisen sorgfältig durch. So erreichen
Sie einen sicheren Betrieb Ihres Heizsystems.
Erlauben Sie die Installation und die Inbetriebnahme
nur durch Fachkräfte oder technisch-unterwiesenes
Personal.
LIEFERUMFANG
Thermostat – 1 Stück
Bodensensor – 1 Stück
Schrauben – 2 Stück
Benutzerhandbuch – 1 Stück
QC passed – 1 Stück
BESONDERE MERKMALE
BESONDERE MERKMALE
1. Einfacher Betrieb für sicheren Betrieb.
2. Das Design passt sich nahtlos in die Umgebung ein.
3. Bedieneroberfläche mit Berührungstasten und Hinter-
grundbeleuchtung: Sehr gute Lesbarkeit.
4. Beleichtete Tasten signalisieren Betriebsbereitschaft.
5. Einfaches Benutzer-Interface: Kinderleichte Be-
dienung.
6. Optionen: Schwarzes oder weißes Gehäuse.
FUNKTIONEN UND KOMFORT
1. Fernbedienbar mit der Tuya-App.
2. Hohe Genauigkeit der Regelung (+/- 0,5°C).
3. Datenpufferung bei Stromausfall.
4. 6 programmierbare Arbeitsbereiche an 7 Tagen für
maximalen Komfort.
5. Zusammenfassung von Heizsystemen an einem Ther-
mostaten (zentrale Überwachung)
6. Verbindung zu Amazon Alexa, Google Assistant, u.a.
Links für die Verbindung:
https://play.google.com/store/apps/details?id=com.
tuya.smart&hl=de&gl=US
https://play.google.com/store/apps/details?id=com.
tuya.smartlife&hl=de&gl=US
7. Sprachauswahl entsprechend Zeitzone, Standort
möglich.
8. Keine Begrenzung der Anzahl überwachter Räume
und „Smart Scene“-Überwachung.
Die Verbindung zwischen dem Smartphone und dem
Thermostaten erfolgt über das WLAN.
INHALT
Einführung ....................................................................................... 19
Lieferumfang .................................................................................... 19
Besondere Merkmale..................................................................... 19
Wichtige Hinweise vor der Installation....................................20
Installation des Bodentemperaturfühlers................................20
Technische Daten ...........................................................................20
Wandeinbau des Thermostats ....................................................20
Anschluss Heizsysteme .................................................................22
Einstellungen/Betrieb des Thermostaten ................................22
WiFi-Verbindung ............................................................................22
Programmierung des Thermostaten..........................................24
Kindersicherung ..............................................................................25
Fehlersuche (FAQ).........................................................................26
Garantie ............................................................................................26
Produktkonformität........................................................................26
Entsorgung........................................................................................26
Kundendienst...................................................................................27

20
WICHTIGE HINWEISE
vor der Installation
Ihr Hersteller stellt mit diesem Produkt, dem Thermos-
taten MCS-450 WiFi Touch, ein elektronisches Gerät
bereit, dessen Konstruktion auf der Grundlage der aktu-
ellen Normen, Richtlinien und allgemeinen Anforderun-
gen (Stand der Technik) entwickelt worden ist.
1. Lesen Sie diese Anleitung sorgfältig durch. Die
Nichtbeachtung der Hinweise können zu Funktions-
störungen führen, oder gefährliche Betriebszustände
erzeugen.
2. Prüfen Sie die Anschlußwerte des Systems entspre-
chend den Angaben in der Anweisung, in Verbindung
mit den Bedingungen am Einsatzort.
3. Beauftragen Sie nur qualifizierte Handwerker für die
Installation und die Inbetriebnahme.
4. Nach der Fertigstellung prüfen Sie alle Funktionen und
stellen Sie einen sicheren Betrieb sicher.
ACHTUNG: Es besteht die Gefahr eines Stromschlags
oder einer Beschädigung des Heizsystems. Gefahr des
Personenschadens. Die Lebensdauer kann beeinflusst
werden! Vor Montage oder Austausch ist die Energiever-
sorgung abzuschalten!
TECHNISCHE DATEN
Stromversorgung: 95–240V AC, 50–60Hz
Stromlast max.: 16A (elektrische Heizung)
Einstelltemperaturbereich: -5°C ... +45°C
Umgebungstemperatur: 0–45 °C
Luftfeuchtigkeit: 5–95 % RH (nicht konden-
sierend)
Lagerungstemperatur: -5–45 °C
Stromverbrauch: <1,5 W
Gehäusematerial: PC + ABS
Schutzklasse: IP 20
Tasten: Kapazitive Touch-Tasten
Abmessungen: 86×86×14 mm
Kennzeichen: CE
Schalten Sie die Energie-
zuführung spannungslos.
Trennen Sie die hintere
Abdeckung des Thermos-
taten vom Display.
Verwenden Sie zur Monta-
ge des Unterteils in der
Unterputzdose die bei-
gefügten Schrauben.
Beachten Sie die Hinweise
unter “Verdrahtung”, um
die Verkabelung durchzu-
führen.
Bringen Sie Gehäuse-
oberteil und Unterteil
zusammen, die Installation
ist abgeschlossen.
WANDEINBAU DES THERMOSTATS
Der Thermostat ist zum Einbau in eine Unterputzdose
(Euro) der Größe 60 mm oder 86 mm geeignet.
Der Thermostat MCS-450 WiFi Touch ist für den Ein-
bau in einer Unterputzdose vorgesehen. In diese ist
die Energieversorgung für das Thermostat einzuführen.
Zum Beispiel Typ NYM-J (EN 13501-6/EN60332-1-2).
Die Energieversorgung ist mit einem Sicherungsautomat
(10A/16A) sowie einem FI-Schutzschalter (30mA) abzu-
sichern. Dieser Anschluß ist separat mit einer Absiche-
rung entsprechend des Nennstroms der Beheizung zu
versehen (10A/16A).
Außerdem erfordert die Installation einen Fehlerstrom-
Schutzschalter (FI) mit Schwellstrom 30mA. Das Wellrohr
zur Aufnahme des Temperaturfühlers darf während der
Installation nicht gedrückt oder geknickt werden.
Der Sensor muss sich leicht einführen und herausziehen
lassen.
DIMENSIONEN
INSTALLATION
des Bodentemperaturfühlers
Bodenfühler fixieren.
Die Fühlerleitung des Thermostats muss in einem
separaten Leerrohr (Ø16mm) nach EN 61386-1 verlegt
werden. Der Bodentemperaturfühler ist mittig zwischen
den Heizleitungen fest zu montieren. Ein Kontakt mit
Heizleitungen ist zu vermeiden! Halten Sie einen Min-
destabstand von ca. 2 cm zu dem Heizleiter ein!
Table of contents
Languages:
Other Warmon Thermostat manuals

Warmon
Warmon MCS400 User manual

Warmon
Warmon TP 510 User manual

Warmon
Warmon SE200 User manual

Warmon
Warmon TP520 User manual

Warmon
Warmon AC3082 User manual

Warmon
Warmon MCS400 User manual

Warmon
Warmon MCS-450 Touch User manual

Warmon
Warmon MCS400 User manual

Warmon
Warmon TP520 User manual

Warmon
Warmon TP520 User manual
Popular Thermostat manuals by other brands

Aprilaire
Aprilaire 8710 Safety & installation instructions

BERNSTEIN
BERNSTEIN ET-81W Assembly instructions

Danfoss
Danfoss TP5E User instructions

Automation Correct
Automation Correct Coal-trol Digital TS2BL quick start guide

LockStateConnect
LockStateConnect LS-90 Operation guide

Carrier
Carrier DEBONAIR 33CS Installation and operating instructions