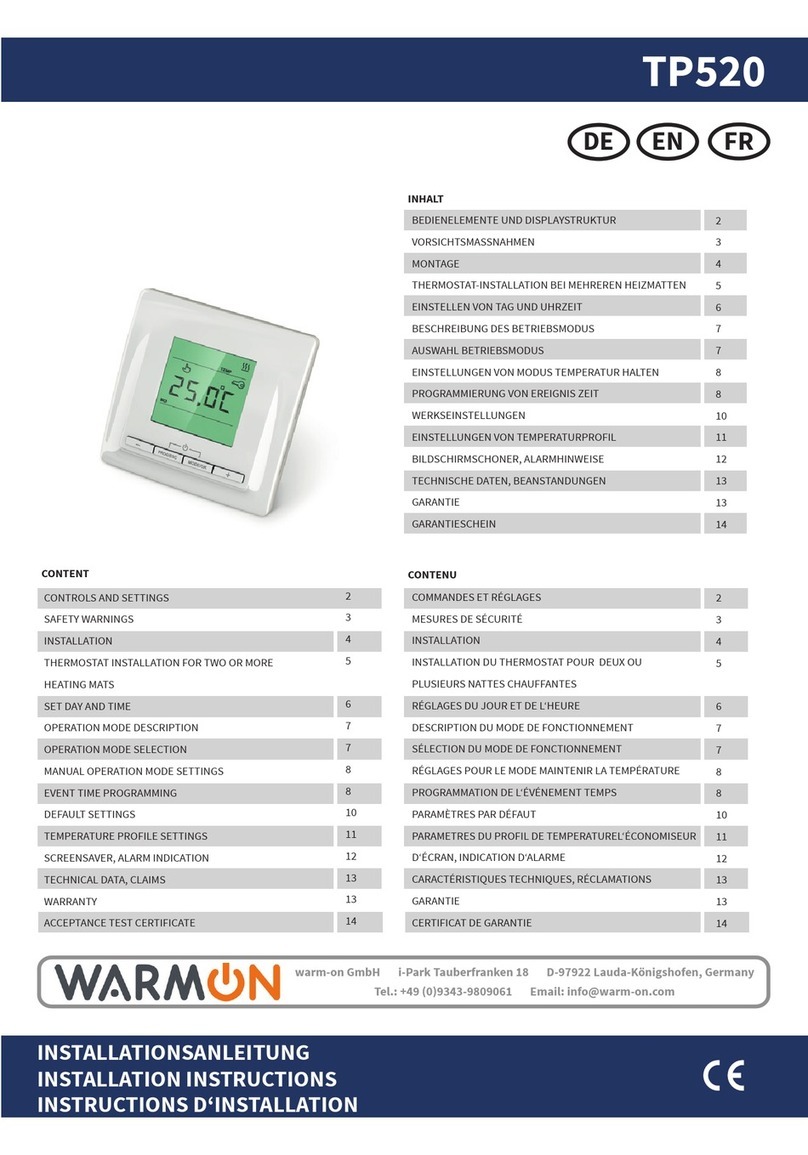
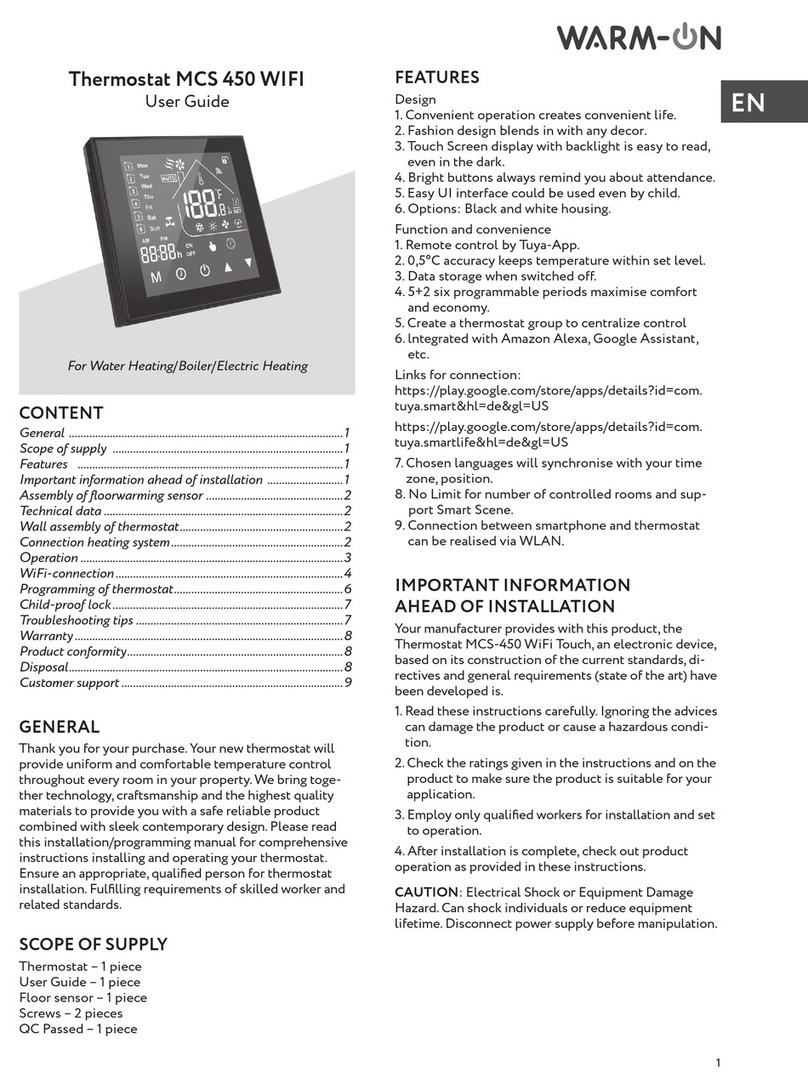
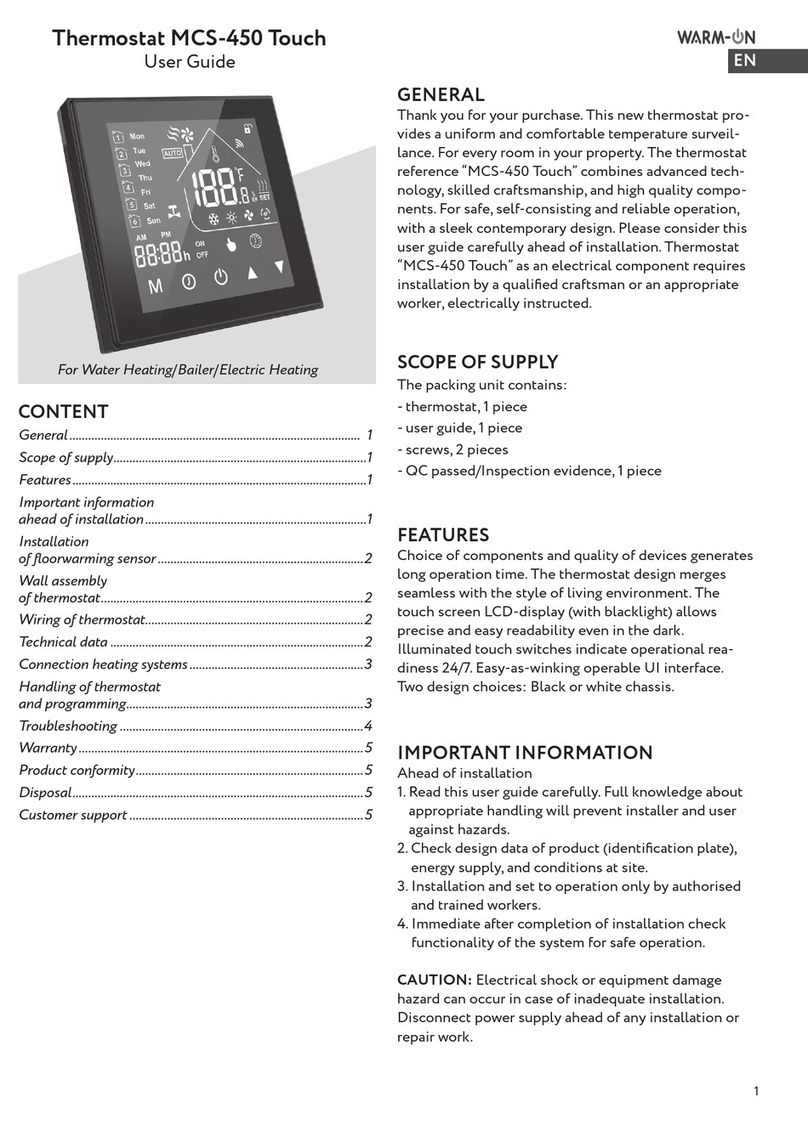
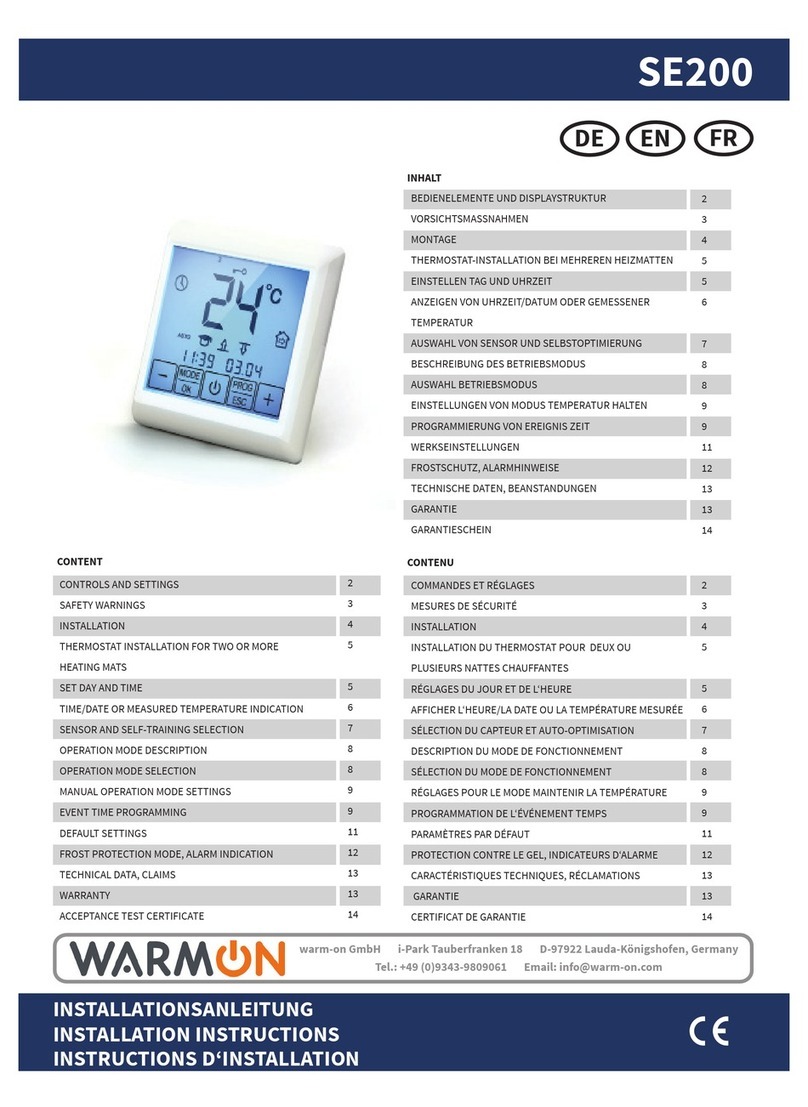
Warmon MCS400 User manual

MCS400 WiFi/WLAN THERMOSTAT
INHALT
BEDIENELEMENTE UND DISPLAYSTRUKTUR
VORSICHTSMASSNAHMEN
MONTAGE
THERMOSTAT INSTALLATION BEI MEHREREN HEIZMATTEN
EINSTELLEN TAG UND UHRZEIT
PARAMETER EINSTELLUNGEN
BETRIEBSMODUS
TECHNISCHE DATEN, GARANTIE
BEANSTANDUNGEN, GARANTIESCHEIN
ANZEIGEN VON TEMPERATUREN
AUSWAHL BETRIEBSMODUS
WERKSEINSTELLUNGEN
ALARMHINWEISE
HANDY APP
SMARTPHONE „HAUPTMENU“ BILDSCHIRMAUFBAU
BESCHREIBUNG DES
2
3
3
4
5
6
9
9
10
13
14
14
17
22
23
CONTENT TABLES DES MATIÈRES
CONTROLS AND SETTINGS
SAFETY WARNINGS
INSTALLATION
THERMOSTAT INSTALLATION FOR TWO OR MORE HEATING MATS
SET DAY AND TIME
PARAMETER SETTINGS
TEMPERATURE INDICATION
OPERATION MODE DESCRIPTION
OPERATION MODE SELECTION
DEFAULT SETTINGS
ALARM INDICATION
SMARTPHONE APP
SMARTPHONE „MAIN MENU“ OVERVIEW
TECHNICAL DATA, WARRANTY
CLAIMS, ACCEPTANCE TEST CERTIFICATE
2
3
3
4
5
6
9
9
10
13
14
14
17
22
23
COMMANDES ET RÉGLAGES
MESURES DE SÉCURITÉ
INSTALLATION
INSTALLATION DU THERMOSTAT POUR DEUX OU PLUSIEURS
NATTES CHAUFFANTES
RÉGLAGES DU JOUR ET DE L'HEURE
RÉGLAGE DE PARAMÈTRE
TEMPÉRATUR MESURÉE
DESCRIPTION DU MODE DE FONCTIONNEMENT
SÉLECTION DU MODE DE FONCTIONNEMENT
PARAMÈTRES PAR DÉFAUT
INDICATEURS D'ALARME
APPLICATION POUR SMARTPHONE
SMARTPHONE " MENU PRINCIPAL" ECRAN
CARACTÉRISTIQUES TECHNIQUES, GARANTIE
RÉCLAMATIONS, CERTIFICAT DE GARANTIE
2
3
3
4
5
6
9
9
10
13
14
14
17
22
23
BEDIENUNGSANLEITUNG
OPERATING INSTRUCTIONS
NOTICE D'UTILISATION
1
234
°C
MON TUE WED THU FRI SAT SUN
M
<>
1
234
°C
MON TUE WED THU FRI SAT SUN
M
<>
1
234
°C
MON TUE WED THU FRI SAT SUN
M
<>
1
°C
WED
M
<>
AM PM

1
234
°C
MON TUE WED THU FRI SAT SUN
M
<>
2
Montag
Dienstag
Mittwoch
Donnerstag
Freitag
Samstag
Sonntag
ECONOMY (+10...+21 °C)
WLAN Verbindung
Das Theromostat ist Gesperrt
Uhrzeit 12/24 Stunden
Programmbetrieb (+5...+35 °C)
zeigt Bodentemperatur / Parameter Einstellung
Heizung AN
Thermostat und heizung EIN/AUS, Einstellungsmodus
verringert den entsprechenden Wert
erhöht den entsprechenden Wert
erscheint, wenn die Bodentemperatur angezeigt wird
Ereignis AUFWACHEN
Ereignis GEHEN
Ereignis KOMMEN
Ereignis SCHLAFEN GEHEN
Luft Temperatur
erscheint, wenn die Lufttemperatur angezeigt wird
1
2
3
4
5
6
7
8
9
10
11
12
13
14
15
MON
TUE
WED
THU
FRI
SAT
SUN
Wird keine Taste gedrückt, schaltet sich die Tastensperre nach 40
Sekunden automatisch ein.
BEDIENELEMENTE UND DISPLAYSTRUKTUR
CONTROLS AND SETTINGS
COMMANDES ET RÉGLA
2
1
3
4
5
6
7
8
9
10
12
14
13
15
M
AM PM
11
1
2
3
4
<
>
°C
AM PM
AM PM
Lundi
Mardi
Mercredi
Jeudi
Vendredi
Samedi
Dimanche
Mode économique
Connexion Wifi
Le thermostat est verrouillé
Systéme horaire sur 12/24 heures
Mode programmation (+5 °C à +35 °C)
Température du sol / réglages de paramètre
Chauffage allumé
Thermostat et chauffage marche/arrêt ; paramètre
diminue la valeur concernée
augmente la valeur concernée
Apparaît lorsque la température du sol est affichée
Évènement RÉVEIL
Évènement PARTIR
Évènement ARRIVER
Évènement COUCHER
Température de l'air
Apparaît lorsque la température De l'air est affichée
1
2
3
4
5
6
7
8
9
10
11
12
13
14
15
MON
TUE
WED
THU
FRI
SAT
SUN
M
1
2
3
4
<
>
°C
AM PM
Monday
Tuesday
Wednesday
Thursday
Friday
Saturday
Sunday
economy operation (+10...+21 °C)
WiFi connection
thermostat is locked
12/24 hour time
programm mode (+5...+35 °C)
show floor temperature / choose setting parameters
heating ON
thermostat and heating ON/OFF, parameter settings
decrease the values
increase the values
appears when floor temperature is shown
WAKE UP Event
LEAVING HOME Event
COMING HOME Event
GOING TO SLEEP Event
air temperature
appears when air temperature is shown
1
2
3
4
5
6
7
8
9
10
11
12
13
14
15
MON
TUE
WED
THU
FRI
SAT
SUN
M
1
2
3
4
<
>
°C
AM PM
InfrarotAnnäherungssensor
Das Thermost erkennt, wenn ein menschliches Annähern in einem Abstand von
5cmundautomatischschaltet
sich das Hintergrundlicht ein. Wenn sich der Mensch entfernt oder keine
Änderung erfolgt ist, geht das Display innerhalb von 20 Sekunden wieder in den
Standby-Modus.
Infraredapproachingsensor
The thermostat can detect a humans body approach when the distance is
within 5 cm and automatically turn on the display backlight . When the human
body leaves or no changes are made, the display will go into standby within 20
seconds.
Infrarougealaprochedelasonde
Le thermostat peut détecter un corps humain s'approcher lorsque la distance
est à 5 cm et allume automatiquement le rétro-éclairage de l'écran. Lorsque le
corps humain est parti ou aucun changement n'est effectué, l'affichage se met
enmodeveilledansles20secondes.

Die Installation ist ausschließlich durch eine Elektrofachkraft sorgfältig nach den Regeln DIN-VDE auszuführen. Andernfalls erlischt die Garantie. Trennen
Sie die Leitungen von der Spannung bevor Sie einen Thermostat installieren, überprüfen oder austauschen. Es dürfen nur Kunststoffunterputzdosen für die
Installation des Thermostats eingesetzt werden. Stellen Sie während der Installation des Wellrohrs und nochmals vor der Verlegung des Estrichs sicher,
dass der Sensor in einen Wellrohr verlegt ist und im Bedarfsfall wieder herausgenommen werden kann.
VORSICHTSMASSNAHMEN
Only qualified electricians are allowed to work on electrical connections and the electric supply of the device according to national laws and regulations.
Otherwise the warranty invalidates. Switch off power from all wiring before installing, testing or replacing the thermostat. Only use electrical plastic wall
mounting boxes for the thermostat installation. Ensure that the sensor can be placed into and removed from the corrugated tube (Ø16mm); once during
installationofthetubingandagainbeforeinstallationof the floor finish!
SAFETY WARNINGS
Seuls des électriciens spécialisés sont autorisés à effectuer l'installation conformément aux normes DIN-VDE. Dans le cas contraire, la garantie ne sera plus
valable. Coupez l'alimentation de tous les câbles avant d'installer, de tester ou de remplacer le thermostat. Utilisez uniquement des prises encastrées en
plastique pour installer le thermostat. Assurez-vous pendant l'installation de la tuyauterie puis avant d'effectuer le revêtement de sol que le capteur
peutêtreplacédansletubeondulé(Ø16mm)etégalementenêtreretiré.
MESURES DE SÉCURITÉ
MONTAGE
INSTALLATION
INSTALLATION
Bodenfühler fixieren
Die Fühlerleitung des Thermostats muss in einem separaten Leerrohr nach
EN 61386-1 verlegt werden. Der Bodenfühler sollte in der Mitte von zwei
Heizleitungen verlegt werden.
Verlegen Sie den Kaltleiter (Netzanschlussleitung) seitlich bis zur
Anschlussdose und kreuzen Sie hierbei nicht den Heizleiter! Halten Sie
einen Mindestabstand von ca. 2 cm zu dem Heizleiter ein! Für das
elektronische Thermostat sollte an der ausgewählten Stelle eine
handelsübliche Unterputzdose mit 230 V AC Netzanschlussleitung aus dem
Hausnetz vorhanden sein. Ein Fehlerstromschutzschalter (30 mA) ist
vorzusehen. Stellen Sie während der Installation des Wellrohrs und
nochmals vor der Verlegung des Estrichs sicher, dass der Sensor in
einen Wellrohr verlegt ist und im Bedarfsfall wieder herausgenommen
werden kann.
SensorInstallation
Ensure that the sensor
canbeplacedintoandremovedfromthecorrugated tube (Ø16mm); once
during installation of the tubing and again before installation of the floor
finish!
The floor temperature sensor cable has to be placed into a seperate
corrugated tube according to EN 61386-1. The sensor should be placed
centrally between the heating conductor. Route the heating mat cold lead
through the second corrugated tubing. Do not cross the cold lead over, or
place closer than about 2 cm to the mat heating wires! A standard plastic
round recessed electrical box with 230 VAC power supply should be available
at the chosen thermostat location. A ground fault circuit breaker (30 mA)
should be used for the 230 VAC heating mat circuit.
Installationducapteurdesol
Assurez-vous
pendant l'installation de la tuyauterie puis avant l'installation du
revêtement de sol que le capteur peut être placé dans le tube ondulé et
égalementenêtreretiré.
Le câble du capteur de température du sol doit être placé dans un tube
ondulé séparé conformément à la norme NF EN 61386-1. Le capteur doit être
installé à équidistance de deux conducteurs chauffants. Posez la résistance
CPT en parallèle jusqu'à la boîte de jonction et ne la faites pas se croiser avec
le corps conducteur ! Conserver une distance minimale de 2 cm entre les deux
!Pourlethermostat électronique, une prise encastrée courante avec un câble
d'alimentation de 230 V AC au réseau domestique doit être présente. Un
disjoncteur à courant de défaut (30 mA) doit être prévu.
S1 N
S2 NLoad L
Sensor
Sensor
Capteur
Last (Heizung)
Load (Heating)
Charge (chauffage)
2
1
t
230 VAC
3
4
34
THERMOSTAT INSTALLATION BEI MEHREREN HEIZMATTEN
THERMOSTAT INSTALLATION FOR TWO OR MORE HEATING MATS
INSTALLATION DU THERMOSTAT POUR PLUSIEURS NATTES CHAUFFANTES
Installationsplan
1 Elektronisches Thermostat,
Zuleitung NYM 3 x 1,5 mm² zur
Verteilung
2 Wellrohr für Temperaturfühler
(Bodenfühler) oder Kaltleiter.
Beide dürfen nicht zusammen in einem
Rohr verlegt werden
3 Unterputzdose (bei mehreren Heizmatten,
die zu einem führen, ist eine
separate Unterputzdose )
Thermostat
erforderlich
Installations drawing
1 Electronic t
2
3
hermostat,
power supply distribution cable
NYM 3 x 1,5 mm²
Corrugated tubes for the temperature
sensor and the cold lead.(Both are not
be installed inside the same tube)
Recessed electrical box (only necessary
for two or more heating mats to one
thermostat).
to
Electrical box
for two or more
heating mats
(30 cm height)
3
Plan d'installation
1 Thermostat électronique, Câble
d'alimentation NYM 3 x 1,5 mm² pour la
répartition.
2 Tube ondulé pour le capteur (de sol) ou
pour le conducteur froid. Il ne faut pas
les poser dans le même tube.
3 Prise encastrée (si plusieurs nattes
chauffantes sont reliées au même
thermostat, une prise encastrée
séparée est requise).
3
Prise à 30 cm
du sol au cas où
il y a plusieurs
nattes chauffantes

5
EINSTELLEN TAG UND UHRZEIT
SET DAY AND TIME
RÉGLAGES DU JOUR ET DE L'HEURE
1
2
°C
MON
M
<>
2
3
2
°C
MON
M
<>
2
°C
MON
M
<>
4
2
°C
MON
M
<>
5
6
2
°C
M
<>
7
WED
2
°C
MON
M
<>
2
°C
M
<>
WED
Thermostat einschalten.
Switch on the thermostat.
Allumer le thermostat.
Stundeneinstellen.
Set hour.
Réglage des heures.
Minuteneinstellen.
Set minutes.
Réglage des minutes.
Tageinstellen.
Set day.
Réglage du jour.
Drücken Sie das "Uhr"-Symbol und
die Uhr fängt an zu blinken.
Tapp the clock symbol and the
hour will start blinking.
Appuyer sur le symbole de la
montre et l'heure va commencer a
clignoter
Drücken Sie das "Uhr-Symbol und
die Minuten starten zu blinken.
Tapp the clock symbol and the
minutes will start blinking.
Appuyer sur le symbole de la
montre et les minutes vont
commencer a clignoter
Drücken Sie das "Uhr"-Symbol und
der Wochentag startet zu blinken.
Tapp the clock symbol and the
weekday will start blinking.
Appuyer sur le symbole de la
montre et les jours de semaine
vont commencer a clignoter
Innerhalb von Sekunden sind die
Einstellungen gesichert und der
Tag hört auf zu blinken
Within seconds the settings are
saved and the day stops blinking.
En quelques secondes le réglage
est enregistré et les jours de
semaine arrête de clignoter

Page 7
6
PARAMETER EINSTELLUNGEN
PARAMETER SETTINGS
FR 14
1
M
<>
2
3
4
Wait for the display to go into
standby. With the display in
standby, press and hold the
button for 3 seconds.
Change the setting.
OF = for low temperature prote-
ction OFF.
On = low temperature protection
On
Die Einstellung für Frostschutz
erscheint:
The setting for low temperature
protection will appear.
Le réglage pour basse température
va apparaitre.
Drücken Sie das " -Symbol" und
die Economy Einstellung erscheint
M
Tapp the symbol and the
Economy settings will appear.
M
Appuyer sur le symbole et le
mode économique va apparaitre.
M
Drücken Sie das " -Symbol" und
die Power ON Einstellungen
erscheinen.
M
Appuyer sur le symbole M et le
réglages de démarrage va
apparaitre.
Warten Sie bis das Display in
"Standby" Modus geht. Dann
drücken Sie die Taste für 3
Sekunden:
Attendez que l'ecran retourne en
mode veille. En mode veille
Appuyer sur le boutton
pendant 3 secondes.
M
<>
Ändern der Einstellung,
OFF= Frostschutz ist ausgeschaltet
ON = Frostschutz ist eingeschaltet
Changement de réglage.
OFF = l'arrêt de la protection de la
basse temperataure
ON = la protection de la basse
temperature est activé
M
<>
°C
M
<>
Change the Economy temperature
setting.
Ändern der Economomy
Temperatur Einstellung
Changer le réglage de la
température economique.
Tapp the symbol and the Power
ON settings will appear.
M
M
<>
°C
M
<>
Change the setting.
00 = auto recovery
01 = without auto recovery
02 = electricity turned on
Ändern der Einstellung
00 = Automatisches Speichern
01 = ohne automatisches Speichern
02 = Strom einschalten
Changements de réglages
00 = Récupération automatique.
01 = Sans Récupération
automatique.
02 = l'électricité est en marche.
M
<>
Seite 7
Drücken Sie das " -Symbol" und
die 12/24 Stunden-Auswahl
erscheint
M
Appuyer sur le symbole M et vous
pouvez choisir le systéme horaire
12/24 heures
Tapp the symbol and the 12/24
hour clock choice will appear.
M
Page 7
3s
7
8
5
6

7
M
<>
Ändern der Einstellung
12 = 12 Stunden System
24 = 24 Stunden System
Change the setting.
12 = twelve hour system
24 = twenty-four hour system
Changer le réglage.
12 = systéme horaire 12 heures.
24 = systéme horaire 12 heures.
Drücken Sie das " -Symbol" und
die Display Standby-Betrieb
Einstellung erscheint
M
Tapp the symbol and the Display
standby timer settings will appear.
M
taper sur le symbole et l'ecran
de veille ava affiché le réglage de
l'heure
M
M
<>
Change the setting.
Time range, 10..20 seconds, before
display will go into standby.
M
<>
M
<>
Drücken Sie das " -Symbol" und
die Display Standby-Betrieb
Einstellung erscheint
M
Tapp the symbol and the
Programm choice settings will
appear.
M
Appuyer sur le symbole et le
choix des paramètres va
apparaitre.
M
Änderung der Einstellung
Zeiteinstellung: 10.. 20 Sekunden
bevor das Display in den Standby-
Modus geht
Changements de réglages.
Intervalle de temps, 10..20
secondes, avant que l'ecran
retourne en mode veillle
M
<>
Änderung der Einstellung auf 01
01: Programm
02: Nicht verwenden
03: nicht verwenden
04: Nicht verwenden
05: Nicht verwenden
Change the setting to 01.
02: Do not use
03: Do not use
04: Do not use
05: Do not use
01: Programm
Changer le réglage de 05 á 01
02 : á ne pas utiliser
03 : á ne pas utiliser
04: á ne pas utiliser
05: á ne pas utiliser
01: Programme
Drücken Sie das -Symbol und der
Selbstlern-Modus wird
eingeschaltet
M
Tapp the symbol and the Self-
lerning settings will appear.
M
Taper sur le symbole M et
l'autoapprentissage va apparaitre
M
<>
M
<>
Change the setting.
OF = self-lerning OFF
On = self-lerning ON
Änderung der Einstellung
OF - Selbstoptimierung ist
ausgeschaltet
On - Selbstlern-Modus ist
eingeschaltet
changements de réglages.
OF = l'autoapprentissage est
éteint.
On = l'autoapprentissage est en
marche.
910
11 12
13 14
15
Page 8
Seite 8
Page 8

8
M
<>
M
<>
Drücken Sie das -Symbol und die
nächste Funktion wird eingeschaltet
M
Tapp the symbol and the next
function will appear.
M
Taper sur le symbole et
l'autoapprentissage va apparaitre
M
This is the amount of time in
minutes that it takes to change the
room temperature +1 °C higher.
Anzeige der Zeit in Minuten für den
Wechsel der Raumtemperatur um
+ 1 °C
C'est la durée en minutes pour
changer la température de la
piéces +1 °C de plus
Drücken Sie das -Symbol und die
Geräteschutz Temperatur
Einstellung erscheint
M
Tapp the symbol and the
Equipment protection
temperature setting will appear.
M
Taper sur le symbole et
l'equipement de protection va
apparaître.
M
M
<>
M
<>
M
<>
Change the setting. Max. settings:
27= for underwood heating
45= for undertile heating
Änderung der Einstellung,
maximale Einstellung:
27 = für Beheizung unter Holz
45 = für Beheizung unter Fliesen
Changements de réglages. Réglage
maximun.
27 = pour les planchers chauffant
éléctrique sous-bois.
45 = pour les planchers chauffant
éléctrique sous carrelage.
Drücken Sie das " -Symbol" und
die Sensorauswahl Einstellung
erscheint
M
Tapp the symbol and the sensor
selection setting will appear.
M
Taper sur le symbole est le
paramétre de la sonde thermique
va apparaître.
M
M
<>
M
<>
M
<>
M
<>
Änderung der Einstellung
01 = nur Luft sensor
02 = nur Boden sensor
03 = beide Sensoren
Ein Fehlercode E2 erscheint auf
dem Display, wenn ein Fehler des
Bodensensors vorliegt oder wenn
kein Bodensensor durch
Einstellung 02 oder 03 verbunden
ist
The display will turn off
automatically and go into the last
known operation mode when the
display does not feel any input
within the previously set display
standby time range.
Das Display schaltet automatisch
ab und geht in die zuletzt bekannte
Betriebsart, wenn das Display
innerhalb der zuvor eingestellten
Disply Standby Zeit keine Eingabe
erhält
L'affichage s'éteint
automatiquement et passe dans le
dernier mode de fonctionnement
connu lorsque l'affichage ne
ressent aucune entrée dans la serie
de temps d'attente d'affichage
précédemment définie.
2
M
<>
WED
Change the setting.
01 = only air sensor
02 = only floor sensor
03 = both sensors
An error code E2 on the main
display will appear if there is a
floor sensor failure or if there is no
floor sensor connected by settings
02 or 03.
Changements de réglages.
01 = Affichage seulement
température ambiante.
02 = Affichage seulement de
température du sol.
03 = les deux
Le code E2 s'affiche sur l'ecran
pour indiquer une erreur ou une
deconnection de sonde dans les
reglages 02 ou 03.
18 19
16 17
20 21
22

9
ANZEIGEN VON TEMPERATUREN
TEMPERATURE INDICATION
TEMPÉRATURE MESURÉE
Die gemessene Lufttemperatur
wird gezeigt, wenn das Display
aktiv ist
The measured air temperature will
be shown when the display is
active.
La température ambiante va
s'affiché des que l'écran est active.
2
°C
M
<>
WED
Um die gemessene Bodentemp-
eratur anzuzeigen, drücken Sie das
Symbol " “M
For the measured floor
temperature to be displayed tapp
the symbol .M
Indique la température diffusé par
le sol taper sur le symbole .M
2
°C
M
<>
WED
1
2
Das Symbol erscheint und
blinkt. Die gemessene
Bodentemperatur wird im Display
angezeigt
The symbol will appear and
blink. The measured floor
temperature will be shown in the
display.
Le symbole s'affiche en
clignotant, la température du sol
apparaitra sur
l'ecran.
2
°C
M
<>
WED
3
Within 10 sec. the display will
return to the measured air
temperature and the symbol
will disappear.
2
°C
M
<>
WED
Innerhalb von 10 Sekunden kehrt
das Display zurück zur gemess-
enen Lufttemperatur und
das Symbol verschwindet
Dans 10 secondes l'ecran affiche la
température ambiante et le
symbole va disparaitre.
BESCHREIBUNG DES BETRIEBSMODUS
Ecomomy Betrieb
Das Thermostat hält konstant die gewünschte Bodentemperatur. Die Temperatur ist regelbar von +10°C bis +21°C.
OPERATION MODE DESCRIPTION
DESCRIPTION DU MODE DE FONCTIONNEMENT
ECONOMY OPEATION
The thermostat constantly maintains the desired floor temperature. The temperature is adjustable from +10°C up to +21°C.
PROGRAMMBETRIEB
In Abhängigkeit von Tageszeit und Wochentag regelt der Thermostat die Heizung auf die für COMFORT oder ECONOMY gewählten
Temperaturen.
automatisch
DieTemperatur ist einstellbar von +5 °C bis +35 °C.
PROGRAM MODE
Depending on time and day of the week the thermostat automatically switches to the COMFORT or ECONOMY temperature profile. The
temperature is adjustable from +5 °C to +35 °C.
MODEPROGRAMMATION
En fonction du moment de la journée ou du jour de la semaine, le thermostat règle le chauffage en fonction des températures sélectionnées en
modeCOMFORT ou ECONOMY. La température peut être réglée de+5°Cà +35 °C.
MODE ÉCONOMIQUE
Le Thermostat maintien la température du sol désiré. Vous pouvez ajuster la tempéture de 10°C jusqu'á 21 °C:

10
Drücken und halten Sie das
Symbol für 2 Sekunden, um den
Modus zu wechseln
Press and hold the symbol for
2 seconds to change the operation
mode.
Maintenez Le symbole appuyée
pendant 2 secondes pour changer
le mode de fonctionnement.
2
°C
M
<>
WED
Das Symbol und die
Einstelltemperatur für den
Economy Betrieb erscheint im
Display
The symbol and set
temperature will appear in the
display for economy operation
mode.
Le symbole et le réglage de
tempéraute vont s'afficher sur
l'écran en mode économique
1
2
AUSWAHL BETRIEBSMODUS
OPERATION MODE SELECTION
SÉLECTION DU MODE DE FONCTIONNEMENT
2s
2
°C
M
<>
WED
Drücken und halten Sie das
Symbol für 2 Sekunden, um den
Modus zu wechseln
Press and hold the symbol for
2 seconds to change the operation
mode.
Appuyée et maintenez le symbole
pendant 2 secondes pour
changer le mode de
fonctionnement.
2
°C
M
<>
WED
Das Symbol verschwindet im
Display und wechselt in den
Programmbetrieb
The symbol will disappear in
the display and change to the
programm mode.
Le symbole va disparaitre de
l'écran et change en mode de
programme
3
4
2
°C
M
<>
WED
2s
°C
PROGRAMMIERUNG VON EREIGNIS ZEIT
EVENT TIME PROGRAMMING
PROGRAMMATION DE L'ÉVÉNEMENT TEMPS
Drücken und halten Sie das
Symbol für 3 Sekunden, um
den Modus zu wechseln
Press and hold the symbol for
3 seconds to enter the programm
operation mode.
Appuyée et maintenez le symbole
pendant 3 secondes pour entré
dans le programme d'utilisation.
2
°C
M
<>
WED
1
3s
EREIGNIS AUFWACHEN
WAKE UP EVENT
ÉVÉNEMENT RÉVEIL
°C
M
<>
2
1
Die Uhrzeit beginnt zu blinken.
Stellen Sie Ihre Zeit mit
Hilfe der oder Taste ein.
Bestätigen Sie Ihre Wahl mit der
Taste.
AUFWACHEN
< >
The clock time begins to blink.
Set your time using the
or button.
Confirm the setting with the
button.
WAKE UP
< >
L'heure se met à clignoter. Réglez
l'heure à l'aide de la touche
< ou > . Confirmez votre sélection
avec la touche .
RÉVEIL
MON
1
°C
M
<>
MON
1

11
3
°C
M
<>
MON
1
4
°C
M
<>
MON
1
Die Minuten beginnt zu blinken.
Stellen Sie Ihre Zeit
mit Hilfe der oder Taste ein.
AUFWACHEN
< >
The minutes begins to blink.
Set your time using the
or button.
WAKE UP
< >
L'heure se met à clignoter. Réglez
l'heure à l'aide de la touche
ou .
RÉVEIL
< >
Bestätigen Sie Ihre Wahl mit der
Taste.
Confirm the setting with the
button.
Confirmez votre sélection avec la
touche .
5
°C
M
<>
MON
1
6
°C
M
<>
MON
1
Bestätigen Sie Ihre Wahl mit der
Taste.
Confirm the setting with the
button.
Confirmez votre sélection avec la
touche .
EREIGNIS GEHEN
LEAVING HOME EVENT
ÉVÈNEMENT PARTIR
2
Stellen Sie Ihre
Temperatur mit Hilfe der oder
Taste ein.
AUFWACHEN
< >
Set your temperature
using the or button.
WAKE UP
< >
Réglez la température au réveil á
l'aide de la touche < ou >.
°C
M
<>
7Die Uhrzeit beginnt zu blinken.
Stellen Sie Ihre Zeit mit Hilfe
der oder Taste ein.
Bestätigen Sie Ihre Wahl mit der
Taste.
GEHEN
< >
The clock time begins to blink.
Set your time using the
or button.
Confirm the setting with the button.
LEAVING HOME
< >
L'heure se met à clignoter. Réglez
l'heure à l'aide de la touche
< ou > . Confirmez votre sélection avec
la touche .
PARTIR
MON
°C
M
<>
MON
22
8 9
°C
M
<>
MON
Die Minuten beginnt zu blinken.
Stellen Sie Ihre Zeit mit
Hilfe der oder Taste ein.
GEHEN
< >
The minutes begins to blink.
Set your time using
the or button.
LEAVING HOME
< >
L'heure se met à clignoter. Réglez
l'heure à l'aide de la touche
ou .< >
PARTIR
Bestätigen Sie Ihre Wahl mit der
Taste.
Confirm the setting with the
button.
Confirmez votre sélection avec la
touche .
10
°C
M
<>
MON
11
°C
M
<>
MON
Bestätigen Sie Ihre Wahl mit der
Taste.
Confirm the setting with the
button.
Confirmez votre sélection avec la
touche .
Stellen Sie Ihre Temperatur
mit Hilfe der oder Taste ein.
GEHEN
< >
Set your
temperature using the or button.
LEAVING hOME
< >
Réglez la température au l á
l'aide de la touche < ou >.
PARTIR
°C
M
<>
MON
22
22

12
EREIGNIS KOMMEN
COMING HOME EVENT
ÉVÉNEMENT ARRIVER
Die Uhrzeit beginnt zu blinken.
Stellen Sie Ihre Zeit mit
Hilfe der oder Taste ein.
Bestätigen Sie Ihre Wahl mit der
Taste.
KOMMEN
< >
The clock time begins to blink.
Set your time using
the or button.
Confirm the setting with the button.
COMINGING HOME
< >
L'heure se met à clignoter. Réglez
l'heure à l'aide de la touche
< ou > . Confirmez votre sélection avec
la touche .
ARRIVER
Die Minuten beginnt zu blinken.
Stellen Sie Ihre Zeit mit
Hilfe der oder Taste ein.
KOMMEN
< >
The clock time begins to blink.
Set your time
using the or button.
COMINGING HOME
< >
L'heure se met à clignoter. Réglez
l'heure à l'aide de la
touche ou .< >
ARRIVER
Bestätigen Sie Ihre Wahl mit der
Taste.
Confirm the setting with the
button.
Confirmez votre sélection avec la
touche .
Bestätigen Sie Ihre Wahl mit der
Taste.
Confirm the setting with the
button.
Confirmez votre sélection avec la
touche .
Stellen Sie Ihre
Temperatur mit Hilfe der oder
Taste ein.
KOMMEN
< >
Set your
temperature using the or
button.
COMINGING HOME
< >
Réglez la température á
l'aide de la touche < ou >.
ARRIVER
°C
M
<>
MON
°C
M
<>
MON
3
°C
M
<>
MON
°C
M
<>
MON
°C
M
<>
MON
°C
M
<>
MON
33
33
33
EREIGNIS SCHLAFEN GEHEN
GOING TO SLEEP EVENT
Évènement COUCHER
4
°C
M
<>
12
Die Uhrzeit beginnt zu blinken.
Stellen Sie Ihre
Zeit mit Hilfe der oder Taste ein.
Bestätigen Sie Ihre Wahl mit der
Taste.
SCHLAFEN GEHEN
< >
The clock time begins to blink.
Set your time using
the or button.
Confirm the setting with the button.
GOING TO SLEEP
< >
L'heure se met à clignoter. Réglez
l'heure à l'aide de la touche
< ou > . Confirmez votre sélection avec
la touche .
COUCHER
MON
°C
M
<>
MON
°C
M
<>
MON
Die Minuten beginnt zu blinken.
Stellen Sie Ihre
Zeit mit Hilfe der oder Taste
ein.
SCHLAFEN GEHEN
< >
The clock time begins to blink.
Set your time
using the or button.
GOING TO SLEEP
< >
L'heure se met à clignoter. Réglez
l'heure à l'aide de la
touche ou .< >
COUCHER
Bestätigen Sie Ihre Wahl mit der
Taste.
Confirm the setting with the
button.
Confirmez votre sélection avec la
touche .
°C
M
<>
MON
44
44
13 14
15 16
17
18 19

13
°C
M
<>
MON
°C
M
<>
MON
Bestätigen Sie Ihre Wahl mit der
Taste.
Confirm the setting with the
button.
Confirmez votre sélection avec la
touche .
Stellen Sie Ihre
Temperatur mit Hilfe der oder
Taste ein.
SCHLAFEN GEHEN
< >
Set your
temperature using the or button.
GOING TO SLEEP
< >
Réglez la température á
l'aide de la touche < ou >.
COUCHER
44
Das Thermostat wechselt in das Ereignis für den nächsten Tag ( Dienstag) - Bitte wiederholen Sie
dieSchritte 2 6 .
AUFWACHEN TUE
-1 für alle anderen Wochentage entsprechend Ihren Vorstellungen
The thermostat will proceed to set up the time for event for the next day of the week ( SDAY) - please
repeat the setting from step 2 - 16 for all other days.
WAKE UP TUE
Le thermostat passe à l'événement pour le jour suivant ( mardi) - Répétez les étapes 2 jusqu'à 16 pour
tous les autres jours de la semaine conformément à vos souhaits.
RÉVEIL TUE
WERKSEINSTELLUNGEN
Zeit
Time
Temps
Temperatur
Temperature
Température
Zeit
Time
Temepartur
Temperature
Température
Temps
7:00
25°C
7:00
25 °C
8:00
25 °C
8:00
25 °C
18:00
25 °C
18:00
25 °C
21:00
25 °C
21:00
25 °C
Montag bis Freitag
Monday to Friday
Du lundi au vendredi
Samstag & Sonntag
Saturday & Sunday
Samedi & dimanche
Ereignis
Tag
DEFAULT SETTINGS
PARAMÈTRES PAR DÉFAUT
Event
Évènement
Day
Jour
Ereignis
Tag
Event
Day
PERSÖNLICHEEINSTELLUNGEN
PERSONALSETTINGS
RÉGLAGES PERSONNELS
Zeit
Time
Temps
Temperatur
Temperature
Température
Zeit
Time
Temepartur
Temperature
Température
Temps
Montag bis Freitag
Monday to Friday
Du lundi au vendredi
Samstag & Sonntag
Saturday & Sunday
Samedi & dimanche
Évènement
Jour
°C
M
<>
4
SUN
1
2
34
1
2
34
20 21

14
ALARMHINWEISE
ALARM INDICATION
INDICATEURS D'ALARME
2
M
<>
WED
2
M
<>
WED
Anzeige im Fall eines BODENSENSOR
FEHLERS.
Appears on display by FLOOR
SENSOR FAILURE.
Affichage en cas d'une ERREUR DU
CAPTEUR DE SOL.
Anzeige im Fall eines RAUMSENSOR
FEHLERS.
Appears on display by ROOM
SENSOR FAILURE.
Affichage en cas d'une ERREUR DU
CAPTEUR AMBIANT.
2
M
<>
WED
Chip Speicherfehler
MEMORY CHIP FAILURE.
Défaillance de la mémoire puce.
2
M
<>
WED
2
M
<>
WED
HI Anzeige für den Fall, dass eine
Temperatur höher als +55°C
erreichtwird.
HI appears on the display when the
atemperature is more than +55°C.
HI indique que la température est
plus haute que 55 °C
LO Anzeige für den Fall, dass eine
Temperaturniedriger ist als +0°C.
LO appears on the display when a
temperatureist lower than +0°C.
LO indique que la température est
plus basse que + 0°C
°C
M
<>
MON
1
HANDY APP
SMARTPHONE APP
APPLICATION POUR SMARTPHONE
iPhone
+
Android
Stellen Sie sicher, dass Ihr Telefon sich mit Ihrer Haus WiFi-Anschluss
verbindet.
Scannen und installieren Sie die APP gemäß Ihrem Smartphone Typ.
Vermerk: Verfügbare APP Sprachen sind Deutsch, Englisch und Chinesisch
Ensure your phone has connected to your home WiFi.
Scan and install the APP according to your Smartphone type.
Note: Available APP languages are German, English and Chinese .
Assurez que votre mobil est connecté a votre wifi.
Scannez et installez l'application selon le type de votre smartphone.
Remarque : l'application est valable uniquement en anglais, allemand
et chinois
1

15
2
Öffnen Sie die App und registrieren
Sie sich direkt bzw. loggen Sie sich
direkt ein.
Open APP and register or log in
directly. Ouvrez l'application enregitrez vous ou
identifiez vous directement.
3
Nach Einloggen, drücken Sie º und
dann wählen Sie Smart Link
After log in, press and then
choose .Smart Link
Aprés connexion, Appuyer sur le symbole
et puis choisissez .Smart Link
WiFi VERBINDUNG
WiFi CONNECTION
CONNEXION WIFI

16
4
Geben Sie den Name von Wifi und das
Passwort ein
Drücken Sie nicht den "CONNECT" Knopf !
Input name from WiFi and Password.
Do not press the CONNECT button! Entrée le nom et le mot de passe de votre WIFI
Ne pas Appuyer sur le boutton CONNECTER.
5
Drücken und Halten Sie den Knopf
" " auf dem Thermostat bis das
Symbol Zu blinken beginnt
M
Press and hold on the thermostat.
until the symbol begins blinking.
M
Appuyée et maintenez M sur le
thermostat le symbole va s'afficher
2
°C
MON
M
<>
AM PM
6Wählen Sie den " " Knopf
auf Ihrem Smartphone
Connect
Choose the button on
your Smartphone.
Connect
Choisir le boutton connécté sur
votre Smatphone.
7
Nach einigen Sekunden wird die
erfolgreiche Konfiguration mit dem
Thermostat angezeigt
After several seconds the successful
configuration with the thermostat will
be shown.
Aprés quelques secondes la configuration du
thermostat va apparaitre.
8
Sie können ein gewähltes Thermostat
drücken und halten, um dieses
individuelle Thermostat zu löschen
oder umzubenennen
You may press and hold a chosen
thermostat in order to delete or rename
the thermostat.
Vous devez Appuyer et maintenez pour
renommer ou supprimer le thermostat.
3s
3s
Umbennen
Löschen
Abbrechen
3s

17
SMARPHONE „HAUPTMENU“BILDSCHIRMAUFBAU
SMARTPHONE “MAIN MENU“OVERVIEW
SMARTPHONE " MENU PRINCIPAL" ECRAN
1
2
31
2
3
1
2
3
1
2
Bildschirm „Einstellungen“öffnen
„Thermostat“öffnen
3
Thermostat hinzufügen
1
2
Display „Settings“open
„Thermostat“open
3
Add new thermosat
1
2
Ecran "paramétres" ouvrir.
Thermostat ouvrir.
3
Ajouter une nouvelle thermostat.
EINSTELLUNGEN
SETTINGS
RÉGLAGE DE PARAMÈTRE
1
2
3
11
1
A
A
B
C
D
E
A
B
C
D
E
A
B
C
D
E
1
1

18
Drücken Sie den Schieberegler um die
Temperatur zwischen °C und °F zu
ändern
Tapp the C/F slider to change the
temperature unit between °C and °F.
Taper le C/F faite glisser le curseur pour
changer la température entre °C et °F
B
Smart Link dient dazu, die Smartphone
APP mit dem WiFi zu verbinden
Used to connect your Smartphone APP
to the WiFi.
vous pouvez l'tiliser en connectant votre
smatphone application au Wifi
C
Die Nutzungsbedingungen öffnen Opens the Terms of Service Ouvrez les termes d'applications
D

19
Ausloggen von der Smartphone APP Logout from your Smartphone APP Déconnectez vous de votre Smatphone.
E
A
B
C
D
Return to „Settings“
Economy operation OFF
Economy operation ON
Change the operation by
tapping on the symbol
Measured air temperature
Heating OFF
Heating ON
A
B
C
D
zurück zu "Einstellungen“
Sparbetrieb AUS
Sparbetrieb EIN
Ändern Sie den Betrieb, indem
Sie auf das Symbol drücken
Gemessene Luft Temperatur
Heizung AUS
Heizung EIN
A
B
C
D
Revenez aux paramétre
Mode économique est éteint.
Mode économique en marche.
Changez l'application en tapant
sur le symbole
les mesures de la température ambiante.
Chauffage est éteint
Chauffage est en marche.
THERMOSTAT EINSTELLUNGEN
THERMOSTAT SETTINGS
LE RÉGLAGES DE THERMOSTAT
2
222
A
B
D
A
B
D
CC
A
B
D
C

20
F
E
F
E
F
E
E
F
Floor temperature setting slide and
set temperature indication
Change the temperature setting by
sliding the button
+
-
Turn ON or OFF the thermostat
and heating
E
F
Bodentemperatur Regelung und
Anzeige Einstelltemperatur
Ändern der Temperatureinstellung
durch Schieben des Reglers
+
-
Thermostat und Heizung EIN
oder AUS
E
F
Réglage de la température de sol et
indication de temérature.
En glissant le boutton vous changez
le réglage de la température.
+
-
Allumer ou éteindre le
chauffage et le thermostat.
VERBINDUNG MEHRERER THERMOSTATE MIT DEM NETZWERK
CONNECTION OF MORE THAN ONE THERMOSTAT WITH THE NETWORK
CONNEXION DE PLUSIEURS THERMOSTATS AVEC LE RÉSEAU.
3
333
1
Um weitere Thermostate zum
Smartphone zuzufügen, drücken Sie
den + Knopf
To add a further thermostats to the
Smartphone press the button.+
Pour ajouter autres thermostats a votre
smartphone appuyez sur le boutton +
2
Geben Sie den Barcode ein oder die Nr.
unter dem Barcode auf der Rückseite
des Thermostats
Type in the scan the bar code or type in
the number located under the bar code
on the back side of the thermostat.
Taper sur scanner le code bar ou taper le
numéro attribué du code bar sur l'arriére
de thermostat
Table of contents
Other Warmon Thermostat manuals

Warmon
Warmon TP 510 User manual

Warmon
Warmon MCS 450 WIFI User manual

Warmon
Warmon MCS400 User manual

Warmon
Warmon TP520 User manual

Warmon
Warmon MCS-450 Touch User manual

Warmon
Warmon TP520 User manual

Warmon
Warmon SE200 User manual

Warmon
Warmon MCS400 User manual

Warmon
Warmon AC3082 User manual

Warmon
Warmon SE200 User manual