Water Furnace IntelliZone2 ZoneStat User manual

Installation Information
Damper Installation
Thermostat Installation
Electrical
Startup Procedures
Wiring Schematic
IM1578EW 07/20
IntelliZone2 Installation Manual
Six Zone Capability
Comfort Zoning System
f
ormation
latio
n
stallati
o
n
dures
m
ati
c
Inte


INTELLIZONE2 INSTALLATION MANUAL
Table of Contents
IntelliZone2 Components . . . . . . . . . . . . . . . . . . . . . . . . . . . . . . . . . . . . . . . . . . . . . . . . . . . . . . . . . . . 4
General Installation Information . . . . . . . . . . . . . . . . . . . . . . . . . . . . . . . . . . . . . . . . . . . . . . . . . . . . . 5
Damper Installation . . . . . . . . . . . . . . . . . . . . . . . . . . . . . . . . . . . . . . . . . . . . . . . . . . . . . . . . . . . . . . . . 6
Electrical Wiring. . . . . . . . . . . . . . . . . . . . . . . . . . . . . . . . . . . . . . . . . . . . . . . . . . . . . . . . . . . . . . . . . . . 9
Thermostat Installation. . . . . . . . . . . . . . . . . . . . . . . . . . . . . . . . . . . . . . . . . . . . . . . . . . . . . . . . . . . . .12
IntelliZone2 Configuration . . . . . . . . . . . . . . . . . . . . . . . . . . . . . . . . . . . . . . . . . . . . . . . . . . . . . . . . . 14
Description of Operation - Package Unit . . . . . . . . . . . . . . . . . . . . . . . . . . . . . . . . . . . . . . . . . . . . 23
Blower Data - Package Unit. . . . . . . . . . . . . . . . . . . . . . . . . . . . . . . . . . . . . . . . . . . . . . . . . . . . . . . . 25
IntelliZone2 CFM Design. . . . . . . . . . . . . . . . . . . . . . . . . . . . . . . . . . . . . . . . . . . . . . . . . . . . . . . . . . . 29
System Startup and Checkout. . . . . . . . . . . . . . . . . . . . . . . . . . . . . . . . . . . . . . . . . . . . . . . . . . . . . . 29
Wiring Schematic. . . . . . . . . . . . . . . . . . . . . . . . . . . . . . . . . . . . . . . . . . . . . . . . . . . . . . . . . . . . . . . . . .31
IntelliZone2 Fault Codes. . . . . . . . . . . . . . . . . . . . . . . . . . . . . . . . . . . . . . . . . . . . . . . . . . . . . . . . . . . 32
IntelliZone2 with 5 Series SAH Air Handler . . . . . . . . . . . . . . . . . . . . . . . . . . . . . . . . . . . . . . . . . . 33
Electrical Wiring . . . . . . . . . . . . . . . . . . . . . . . . . . . . . . . . . . . . . . . . . . . . . . . . . . . . . . . . . . . . 34
Description of Operation with Split/Air Handler. . . . . . . . . . . . . . . . . . . . . . . . . . . . . . . . . 37
SAH 5 Speed ECM Blower Performance Data Option A . . . . . . . . . . . . . . . . . . . . . . . . . . 39
SAH 5 Speed ECM Blower Performance Data Option C . . . . . . . . . . . . . . . . . . . . . . . . . . 41
Split Units Wiring Schematic . . . . . . . . . . . . . . . . . . . . . . . . . . . . . . . . . . . . . . . . . . . . . . . . . 43
IntelliZone2 with 7 Series SVH Air Handler. . . . . . . . . . . . . . . . . . . . . . . . . . . . . . . . . . . . . . . . . . . 47
Electrical Wiring . . . . . . . . . . . . . . . . . . . . . . . . . . . . . . . . . . . . . . . . . . . . . . . . . . . . . . . . . . . . 48
Description of Operation with Split/Air Handler. . . . . . . . . . . . . . . . . . . . . . . . . . . . . . . . . .51
SVH Blower Performance Data. . . . . . . . . . . . . . . . . . . . . . . . . . . . . . . . . . . . . . . . . . . . . . . . 52
Split Units Wiring Schematic . . . . . . . . . . . . . . . . . . . . . . . . . . . . . . . . . . . . . . . . . . . . . . . . . 54
Revision Guide . . . . . . . . . . . . . . . . . . . . . . . . . . . . . . . . . . . . . . . . . . . . . . . . . . . . . . . . . . . . . . . . . . . 56

4
INTELLIZONE2 INSTALLATION MANUAL
IntelliZone2 Components
IntelliZone2 Relay Board (Firmware Version 2.01 or Later)
The IntelliZone2 relay board provides basic relay logic for the damper
operation and serves as a common connection point for all IntelliZone2
thermostats and the heat pump.
IntelliZone2 MasterStat
The IntelliZone2 MasterStat is the master control for the system and has all
of the programming for operation. It is a 4.3 in. communicating color touch
screen device that also functions as a zone thermostat for Zone 1. Optional
remote sensor capability is also available.
IntelliZone2 ZoneStat (Optional)
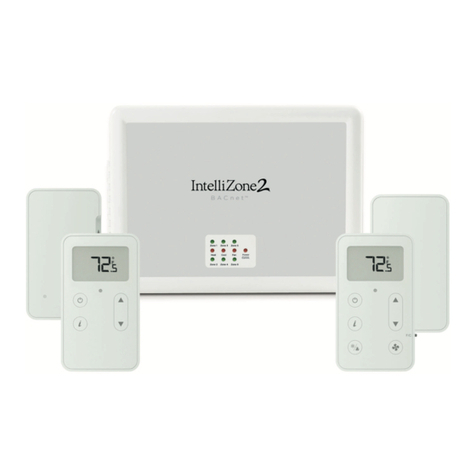
The IntelliZone2 ZoneStat is a zone thermostat option for any of Zones 2
through 6. It has full setback capability and communicates to the
IntelliZone2 system.
IntelliZone2 SensorStat (Optional)
The IntelliZone2 SensorStat is a zone thermostat option for any of Zones 2
through 6. It has full setback capability (through the MasterStat interface
only) and communicates to the IntelliZone2 system.
IntelliZone2 Outdoor Sensor
The IntelliZone2 Outdoor Sensor measures the outdoor temperature and
communicates to the IntelliZone2 system. This temperature is displayed on
the MasterStat, and also used to balance response as well as auxiliary electric
heat use. The Outdoor Sensor is included in every IntelliZone2 kit.
TPCC32U01 (Optional) (Firmware Version 3.01 or Later)
The TPCC32U01 is a 4.3in communicating color touch screen device that
can be used as a zone thermostat for zones 2 through 6. It has full set back
capability and communicates to the IntelliZone2 System.
SensorStat-Remote-Kit (Optional)
The SensorStat-Remote-Kit is an option for an invisible thermostat installation
and communicates with the IntelliZone2 relay panel. The kit will include
the SensorStat Remote, TSU03 (mud in sensor) and wire nuts. This kit will
monitor the zone temperature in zones 2 through 6. All set point adjustments
are made at the MasterStat.

5
INTELLIZONE2 INSTALLATION MANUAL
Safety Considerations
Installing and servicing heating and air conditioning
equipment can be hazardous due to system electrical
components. Only trained and qualified service personnel
should install, repair or service heating and air conditioning
equipment. When working on equipment, observe
precautions in the literature, tags and labels attached to the
unit, and other safety precautions that may apply. Follow all
safety codes. Wear safety glasses and work gloves.
WARNING: Before performing service or
maintenance operations on the system, turn
off main power switches to the indoor unit.
Turn off accessory heater power switch if
applicable. Electrical shock could cause
serious personal injury.
Delivery Information
When the equipment is received, all items should be
carefully checked against the bill of lading to be sure
all crates and cartons have been received. Examine the
contents for shipping damage, removing them from the
cartons if necessary. If any damage is noted, the carrier
should make the proper notation on the delivery receipt,
acknowledging the damage.
General rules to follow when installing a zone
system:
CAUTION: When installing the IntelliZone2 in
a structure with fossil fuel (oil, gas, propane)
appliances, it is important that both supply and
return dampers are used in each zone to avoid
potential back-drafting of fossil-fueled appliances.
• Up to six zones on variable speed, up to four zones
with dual capacity units (two with single-speed units).
• All dampers should be located as close to the main
trunk as possible to limit the amount of pressurized
trunk line and thus limit air leakage.
• No less than three branch runs in a zone to prevent
a single branch obstruction (curtains or clothes etc.)
from affecting unit airflow.
• Insulate and seal around rectangular dampers to
prevent leakage.
• All dampers must be wired with 18-gauge wire.
NOTE: Crimp connections should never be used on
solid conductor wire.
• Ensure that the transformer can handle the power
requirements of the system.
• No more than three dampers per zone.
• Ductboard-mounted dampers should be supported
within six inches of the damper due to the weight and
stress on the ductboard.
General Installation Information
Installation and Design Steps
The IntelliZone2 Comfort Zoning system is to be used
only with heat pumps/air handlers equipped with Aurora
AXB or AHB controls. If the heat pump/air handler does
not have Aurora AXB or AHB controls you must use the
IntelliZone2•24V Comfort Zoning system.
1. Decide which areas of a home or office will comprise
each of the individual zones. A maximum of six
individual zones (four with dual capacity and two with
single-speed equipment) can be chosen.
2. Calculate loads using software or other
recognized methodology.
3. Use software to determine the equipment size and
performance based on the total heating and cooling
demands of the building, not the sum of the individual
zone demands.
4. Find the peak heating and cooling demands and the
peak cfm required for each of the zones.
5. Determine zone design air flow and zone size settings
using IntelliZone2 Design software.
6. Lay out and size the supply air ductwork and dampers.
Care should be taken to avoid under sizing either the
supply air systems, return air systems, or diffusers.
7. Decide where to locate the thermostats.
8. Install the unit and the IntelliZone2 Comfort
Zoning system.
IntelliZone2 Control Panel
Locate the IntelliZone2 panel in an indoor area that
has enough space for service personnel to perform
maintenance or repair. Provide sufficient room to make
electrical connection(s). The IntelliZone2 is not approved
for outdoor installation and, therefore, must be installed
inside the structure being conditioned. Do not locate the
control panel in areas where ambient conditions are not
maintained within 45°F to 95°F and are greater than 75%
relative humidity. The IntelliZone2 control panel should be
mounted on or as close to the unit as possible by using the
sheet metal screws provided. See Figure 1 for mounting
hole locations.
NOTE: IntelliZone2 Relay Panel to be mounted indoors.
Figure 1: IntelliZone2 Relay Panel Mounting
NOTE: Use longer screws (not provided) to penetrate
through drywall into stud.
9.25 in.
6.00 in. 7.75 in.
10.35 in.
Hinge Side
D
epth = 2.00 in. Deep with cover
Wire Access
Wire Access
Mounting Slots

6
INTELLIZONE2 INSTALLATION MANUAL
Six Zone System Representational Layout
Installing Rectangular Dampers in
Metal Ductwork
1. Cut out dimensions A and B as shown in Figure 2 by
using sheet metal snips. NOTE: Dimensions A and B are
listed in the Dimensional Examples table.
2. Use foam insulation tape on the top and bottom of
the zone damper to prevent excessive air bypass. Also
check the cross emboss for excessive air bypass (see
Figure 2).
3. Slide the zone damper into the ductwork making
sure no obstructions will interfere with damper blade
operation.
4. Use the screws provided to mount the damper flange
to the ductwork. Four to six mounting holes are
provided as shown in Figure 3.
5. Use drive cleats or regular duct mounting brackets to
attach ductwork to joist within six inches on both sides
of the damper (see Figure 3).
6. Check damper blade operation for obstructions by
holding the manual release button and rotating the
damper shaft CCW (Open) and CW (Closed) 3 Wire
only as shown in Figure 4.
Damper Installation
Manual release
CW
Closed
CCW
Open
Rotate by hand
Figure 4: Checking Damper Blade for Obstructions
Cross emboss for
duct stiffness may
cause excessive
air bypass
Foam Seal
Foam Tape
(top and bottom)
A
B
3.75”
Figure 2: Foam Taping Zone Damper
Figure 3: Mounting Damper
Mounting Screws
(4 places)
Attach duct/damper
to joist within 6" on
both sides
Dimensional Examples
Damper
Model HWA B
ZDR1024 10 in. 24 in. 10 in. 3.75 in.
ZDR0812 8 in. 12 in. 8 in. 3.75 in.
Premier2
72
72
72
72
72
72
C
e
Cl

7
INTELLIZONE2 INSTALLATION MANUAL
Insulating Rectangular Dampers in
Metal Ductwork
Insulate ductwork as shown in Figure 5. All metal must
be covered. Care must be taken not to obstruct the shaft
from rotating when insulating. Do not insulate the zone
damper actuator.
Installing Rectangular Dampers
in Ductboard
1. Cut out dimensions A and B by using a ductboard
knife. NOTE: Dimensions A and B are listed in the
Dimensional Examples table.
2. A ductboard spacer should be installed on the end
of the damper frame as shown in Figure 7 to prevent
excessive air bypass. For example: A one-inch-thick,
8 in. x 20 in. ductboard and a 8 in. x 20 in. zone
damper would have a one-inch gap at the end of the
frame once it is installed without a ductboard spacer.
Use the piece cut out for installation.
3. Foam insulation tape should be used on the top and
bottom of the zone damper to prevent excessive air
bypass as shown in Figure 7.
4. Slide the zone damper into the ductboard making
sure no obstructions will interfere with damper
blade operation.
5. Tape the damper face flange to the ductboard using
foil tape making sure the damper is secure and air tight
as shown in Figure 8.
6. Support the full length of the ductboard underside
within six inches and on both sides of the damper as
shown in Figure 8.
7. Check the damper blade operation for obstructions
by holding the manual release button and rotating the
damper shaft CCW and CW (see Figure 4).
Damper Installation cont.
Do not insulate zone
damper actuator
Duct wrap insulation
Figure 5: Insulating Rectangular Metal Ductwork
A
B
Duct board
Keep spacer clear
of end bushing
Foam tape
(top and bottom)
Insulate between
actuator and damper
spacer
Figure 7: Taping Zone Damper with Foam Tape
Foil tape damper face
to ductboard
Support the full length of ductboard
underside within 6” of damper
Figure 8: Taping Damper Flange to Ductboard

8
INTELLIZONE2 INSTALLATION MANUAL
Insulating Rectangular Ductboard/
Metal Sleeve
Care must be taken not to obstruct the shaft from rotating
when insulating. Do not insulate the zone damper actuator.
Installing Circular Dampers in Round
Metal Duct
1. Crimp the end of the duct that is the supply air to
damper. Insert into circular damper no more than
1.5 inches.
2. Fasten the duct to the damper with three screws.
Screws installed more than one inch from either end
may obstruct damper blade rotation.
3. Seal completely around the duct with metal duct tape
or mastic to prevent air leakage as shown in Figure 10.
4. Check the damper blade operation for obstructions by
holding the manual release button and rotating damper
shaft CCW and CW (3 wire only). See Figure 4.
5. Support the duct to joist within six inches of the
damper as shown in Figure 9.
Insulating Circular Dampers in Round
Metal Duct
Insulate ductwork as shown in Figure 10. All metal must be
covered to prevent condensation. Care must be taken not
to obstruct the shaft from rotating when insulating. Do not
insulate the zone damper actuator.
Installing Circular Dampers in
Flexible Duct
1. Slide flexible duct two to three inches over the damper
pipe past the damper rib as shown in Figure 11.
2. Fasten duct to damper with a nylon duct strap,
screwing the strap to the pipe to prevent the duct from
slipping off. Screws installed more than one inch from
either end may obstruct damper rotation.
3. Seal completely around the duct with metal duct tape
or mastic to prevent any air leakage.
4. Check the damper blade operation for obstructions by
holding the manual release button and rotating damper
shaft CCW (Open) and CW (Closed) - 3 wire only. See
Figure 4.
5. Support the damper to joist within six inches on both
sides of the damper as shown in Figure 12.
Insulating Damper Actuators
Insulate the damper as shown in Figure 12. All metal must
be covered to prevent condensation. When insulating, care
must be taken not to obstruct the shaft from rotating. Do
not insulate the zone damper actuator.
Damper Installation cont.
Support with wide
steel strap
1-1/2’’or 2’’ if in unconditioned space
Do not insulate
damper actuator
Figure 12: Supporting and Insulating Circular Damper
Flexible duct
Clamp with duct strap. Install screw no farther
than 1” from either end of damper
Slide duct 2-3’’ past
damper end rib
Air Flow
Figure 11: Attaching Flexible Duct to Damper
Three screws sealed
with duct tape or mastic
Manual release button
Air Flow
Figure 9: Taping Round Duct to Circular Damper
Do not insulate
damper actuator
1-1/2" or 2" if in unconditioned space
Support with
wide steel strap
Figure 10: Supporting and Insulating Circular Damper

9
INTELLIZONE2 INSTALLATION MANUAL
Wiring Damper Actuators
All wiring must comply with local and state codes.
Disconnect the power supply before beginning to wire to
prevent electrical shock or equipment damage. All wiring
should be run back to the control panel. Keep wires a
minimum of 12 inches from any high voltage lines. Follow
the damper wiring schematic as shown in Figure 13. Verify
that damper rotation direction is correct. The 3-wire
damper rotation direction is reversible with switch on front
cover.
Figure 13: Damper Actuator Wiring
Electrical Wiring
Wire Nuts Strain Relief
Figure 14: Actuator Wiring
Damper Actuator Wiring Notes
1. Minimum of 18-gauge thermostat wire is recommended.
2. Use wire nuts to connect the thermostat wire to the
actuator wire (solid wire to stranded wire) as shown in
Figure 14.
3. The actuator wiring should be secured using a wire tie to
prevent the wires from being separated (see Figure 14).
3-Wire Damper
Zone 4
Com
Open
Close
G
Minimum
18-gauge wire
(Indicated rotation direction
is valid for switch position ‘0’ )
BlkCOM
Grn
CCW
Red
CW
IntelliZone/IntelliZone2 PCB
2-Wire Damper
Minimum
18-gauge wire
Zone 4
IntelliZone/IntelliZone2 PCB
Com
Open
Close
G
COM Gray
CCW Yellow
Damper Switch
Reverse Rotation
Note:
1. Each zone must have
dampers that match by
manufacturer and type.
2. Each IntelliZone
System must have
dampers that match,
either 2-wire or 3-wire.

10
INTELLIZONE2 INSTALLATION MANUAL
WARNING: All wiring must comply with local
and state codes. Disconnect the power supply
before beginning to wire to prevent electrical
shock or equipment damage.
Mount the transformer onto the side of the unit’s control
box on the 5 Series and on the back of the control box on
the 7 Series by inserting and tightening screws (provided)
into the pre-punched holes. Thread all transformer wires
through the hole with bushing and follow the wiring
schematic for connecting the transformer primary and
secondary leads as shown in Figure 15 (5 Series) and Figure
16 (7 Series).
For zone transformer mounting on split system heat pumps
refer to the Split Section of the manual.
For 208 volt operation, the red and blue transformer wires
must be switched. Use wire nuts only for connections to
thermostat wire.
Transformer Sizing
The heat pump transformer should never be used to power
the zone dampers. Damage to the heat pump or dampers
may occur. Providing adequate transformer power (VA)
to supply the system is an important requirement. Each
IntelliZone2 3-wire damper requires 3.0VA at nominal
voltage and each 2-wire damper requires 7.0VA at nominal
voltage. The standard available transformer is a 75VA
with an integrated circuit breaker (Part # ZTK240). The
Transformer ‘VA’ Calculation table shows a sample sizing
procedure for both the 3-wire and 2-wire dampers that
should be carried out for each installation. If the total VA is
greater than 70VA, then a second 75VA transformer should
be wired in parallel to provide a total power capability
of 150VA. As the ‘VA’ Calculation table shows the 2-wire
damper requires much more VA than the 3-wire damper.
Transformer ‘VA’ Calculation
Zone Number of Dampers
Powered in Zone
3-Wire
Actuator
2-Wire
Actuator
113.07.0
213.07.0
3 2 6.0 14.0
4 3 9.0 21.0
5 2 6.0 14.0
613.07.0
Total VA Draw (10 Dampers) 30.0 70.0
Electrical Wiring cont.
Figure 15: Mounting and Wiring Transformer to Control Box (5 Series shown)
R
C
P18
Damper Power
F1 Damper
Fuse Black/White
5A Fuse
IntelliZone2
Relay Board
Primary Leads
Secondary
Leads
Zone
Transformer
75 VA
(PN) ZTK240
Black
Blue
Red
Yellow
AXB
ABC
PB2

11
INTELLIZONE2 INSTALLATION MANUAL
Wiring IntelliZone2 to the Unit
WARNING: All wiring must comply with local
and state codes. Disconnect the power supply
before beginning to wire to prevent electrical
shock or equipment damage.
Follow the wiring schematic in Figure 17 for unit control
connections. Strip the wires back 1/4 inch (longer strip
lengths may cause shorts) and insert the thermostat wires
into the unit’s connector as shown in Figure 17. Tighten
the screws to ensure tight connections. Use a minimum of
18-gauge thermostat wire for connections.
For wiring IntelliZone2 to split system heat pumps refer to
the Split Section of the manual.
Figure 16: Mounting and Wiring Transformer to Control
Box (7 Series shown)
Figure 17: IntelliZone2 to 5 or 7 Series Control Wiring
Electrical Wiring cont.
A+
R
C
B-
P17 – Heat Pump
+
R
C
-
P7 - Zone
Aurora AXB
Aurora
ABC
5 or 7 Series Heat Pump
R
+
-
C
Harness supplied with IntelliZone2
then wire nut to stat wire
AID Tool
IntelliZone2
Relay Board
Zone Transformer
(mounted on backside
of control box)
R
C
P18
Damper Power
F
1 Damper
Fuse
5A Fuse
IntelliZone2
Relay Board
Black/White
Yellow
Black Blue
Red
Secondary
Leads
Primary
AXB
ABC
PS
Leads
Note: The harness supplied with IntelliZone2 is designed
to plug into the Aurora AXB P7-Zone connection only.
The IntelliZone2 cannot be connected to P7 on the ABC
board.

12
INTELLIZONE2 INSTALLATION MANUAL
Locating the Thermostats
The thermostats must be located in the room or zone that
each controls. Locate a thermostat about five feet above
the floor. Do not locate a thermostat where it may be
exposed to direct sunlight, drafts or direct supply air. Do
not place a thermostat on an outside wall. Follow the same
guidelines that apply with standard thermostat installation.
If two or more rooms are on a single zone, locate the
thermostat in a hallway or area where it can sense the
return air from all rooms.
Thermostat Installation
Figure 18: Four Zone Thermostat Location
Master
Bedroom
Bath
Bath
Bedroom
Bedroom
Kitchen
Living Room
Utility
Room
Dining
Zone 2 Bedrooms
Zone 1 Main Living
Zone 3 Master Suite
Zone 4 Basement
Not
Shown
Family
Room
IntelliZone2 Thermostat

13
INTELLIZONE2 INSTALLATION MANUAL
Thermostat Installation cont.
Mounting and Wiring the Thermostats
Position the thermostat subbase against the wall so that
it is level and the thermostat wires protrude through the
middle of the subbase. Mark the position of the subbase
mounting holes and drill holes with a 3/16-inch bit.
Install supplied anchors and secure base to the wall. Use
4-conductor 18 or 20 AWG thermostat wire unless issues
with EMI are anticipated. In that situation, use 24 AWG
shielded twisted pair cable grounded to “C” terminal on
the relay board end. Strip the wires back 1/4 inch (longer
strip lengths may cause shorts) and insert the thermostat
wires into the IntelliZone2 connector as shown in Figure
19. Tighten the screws to ensure tight connections. The
thermostat has the same type connectors, requiring the
same wiring. Caulk the hole in the wall where the wires
enter the thermostat.
NOTE: See the instructions enclosed in the thermostat for
detailed installation and operation information.
Cleaning the Thermostat Display
Lightly dampen a clean non-abrasive cloth with water or
any non-abrasive household cleaner. To clean, gently wipe
the surface of the thermostat.
NOTE: Do not spray liquids directly on the thermostat.
Figure 19: Wiring the Thermostat to the IntelliZone2
A+
R
C
B-
P14 – Zone 4
A+
R
C
B-
P15 – Zone 5
A+
R
C
B-
Zone 4 Stat
On
3
2
1
Zone 4 code shown
A+
R
C
B-
Zone 5 Stat
On
3
2
1
Zone 5 code shown
ZoneStat
SensorStat
Zone ID must be set for each Zone 2-6. ID can be
confirmed on ZoneStat by pressing cancel button for
5 sec. ID shown on display. See Zone ID Codes.
Zone ID must be set for each Zone 2-6. ID cannot be
confirmed on Zone SensorStat. See Zone ID Codes.
Relay Board
A+
R
C
B-
P11 – Zone 1
MasterStat
DX+
R
C
DX-
Zone 1
MasterStat
MasterStat is
always Zone 1
S1
S2
IntelliZone2
Relay Board
A+
R
C
B-
P16 – Zone 6
DX+
R
C
DX-
S1
S2
Optional
Remote
Sensor
IntelliZone2
Relay Board
MasterStat
TPCC32U01
On
3
2
1
On
3
2
1
On
3
2
1
Zone 4 Zone 5Zone 3
On
3
2
1
Zone 2
On
3
2
1
Zone 6
Zone ID Codes
NOTES:
1) Zone ID must be set for each Zone 2-6. ID can be confirmed on ZoneStat
by pressing cancel button for 5 sec. ID shown on display.
2) Small screw driver can be used to set ID thru protective plastic skin!
3) MasterStat always Zone 1. Zone ID not necessary.
4) TPCC32U01 zone is set through its touchscreen.
(Note 4)
Optional
Remote
Sensor

14
INTELLIZONE2 INSTALLATION MANUAL
IntelliZone2 Configuration
Aurora System and Communication
Configuration of IntelliZone2
Aurora Communication Basics
The Aurora Control functions around the concept of
modularity and intercommunications between these boards.
The communication is a 4 wire ModBus protocol. ModBus
protocol is an open source protocol becoming more popular
with equipment manufacturers for use in HVAC equipment.
The Aurora has one ‘bus’ for the ABC, AXB, AHB, AWL,
VS Drive, EEV, and thermostats.
The AID Tool only plugs
into the ABC AID Tool port, SAH Air Handler AID Tool
port or the AWL (RJ style connector) and will not work
at any other location.
The AXB has 3 other independent
ports for differing protocols; for IntelliZone2, ClimateTalk
Components, and Communicating ECM blower motors.
None of these ports comply with the ModBus protocol set
up for the rest of the Aurora system.
The ModBus communication is accomplished within the
cabinet using shielded and ground cabling. This shield is
most important in 7 Series applications where the VS Drive
component, by its very nature, emits electro-magnetic
interference and can interfere with ModBus communications.
Round ferrite ‘donuts’ can be observed at various locations
to aid in cleaning the communication lines. Each line is
comprised of an R (+24VAC), C (common) and a ‘+’ and ‘-‘
communication line. At times the ‘R’ and ‘C’ lines may not be
connected or needed. The terminals marked ‘+’ and ‘-‘ should
not be switched, although damage may not occur to the
boards, communication is not possible. The communication
voltage and current are small therefore 24 awg wire is
adequate for these communication lines and a shield is not
required but recommended in high EMI environments.
An extra ‘expansion’ connector is available for connecting
other devices onto the main ABC ModBus.
A small LED is located next to each of the communication
ports to aid in evaluating active communication at that specific
port. This is true for each board. The blinking indicates
transmission or receiving communication activity.
Configuring the Aurora for the IntelliZone2
'Adding' the IntelliZone2 to the Aurora system can be
accomplished using the AID Tool via the 'Config Aurora'
screen and scrolling to IntelliZone2 selecting and adding.
As always a 'Y' in the communication column shows that
communication is OK. This will initiate communication
between the IntelliZone2 system and the Aurora AXB/ABC.
Software Versions
Software versions of the IntelliZone2 MasterStat can be
found in the startup screen or in the AID Tool Aurora Config
screen. The software version on the TPCC32U01 can be
found on the settings screen. Firmware can be uploaded
to the MasterStat or TPCC32U01 via the USB port on the
thermostat. Consult your local WaterFurnace representative
or tech service for details.
NOTE: When updating the firmware on the TPCC32U01
each thermostat will need to be updated. Firmware for
the MasterStat and TPCC32U01 are NOT the same. After
the TPCC32U01 firmware is updated to v3.01, or later, go
into the installers screen and select restore defaults. If
you do not restore the default setting the zone will not be
displayed on the TPCC32U01.
Wiring and Configuring the Thermostats/Sensors
The Zone Sensors should be wired with the MasterStat on
Zone 1 using standard 4-wire thermostat cable (if issues
with EMI, shielded cable should be used and grounded at
the ‘–‘ terminal on one end). The other zones should be
added sequentially on the relay board until complete. The
dip switch on the back of each ZoneStat or SensorStat
should be selected for the appropriate zone number; for
instance, Zone 2 stat should be selected using the DIP
switch on the back for ‘off, off, off’.
The TPCC32U01 will auto detect that it is attached to the
IntelliZone2 relay panel and will display the screen below.
Use the up/down arrows ▲▼ to select the zone.
If more than one zone is assigned the same zone number
an error will be displayed on the TPCC32U01 and Master-
Stat. After the initial configuration, to change the zone
numbers enter the configuration mode by holding a finger
over the IntelliZone2 logo in the upper left hand corner of
the Main screen for 5 sec. Select zone number and use the
up/down arrow▲▼ to adjust.
Config Aurora System
Dev Comm Ver
ABC Y X.XX
AXB Y X.XX
Add Device
Remove Device
Back
Option Enter

15
INTELLIZONE2 INSTALLATION MANUAL
A+
R
C
B-
P14 – Zone 4
A+
R
C
B-
P15 – Zone 5
A+
R
C
B-
Zone 4 Stat
On
3
2
1
Zone 4 code shown
A+
R
C
B-
Zone 5 Stat
On
3
2
1
Zone 5 code shown
ZoneStat
SensorStat
Zone ID must be set for each Zone 2-6. ID can be
confirmed on ZoneStat by pressing cancel button for
5 sec. ID shown on display. See Zone ID Codes.
Zone ID must be set for each Zone 2-6. ID cannot be
confirmed on Zone SensorStat. See Zone ID Codes.
Relay Board
A+
R
C
B-
P16 – Zone 6
DX+
R
C
DX-
S1
S2
Optional
Remote
Sensor
IntelliZone2
Relay Board
TPCC32U01
On
3
2
1
On
3
2
1
On
3
2
1
Zone 4 Zone 5Zone 3
On
3
2
1
Zone 2
On
3
2
1
Zone 6
Zone ID Codes
NOTES:
1) Zone ID must be set for each Zone 2-6. ID can be confirmed on ZoneStat
by pressing cancel button for 5 sec. ID shown on display.
2) Small screw driver can be used to set ID thru protective plastic skin!
3) MasterStat always Zone 1. Zone ID not necessary.
4) TPCC32U01 zone is set through its touchscreen.
(Note 4)
IntelliZone2 Configuration cont.
Dual Fuel (Single Speed/Dual Capacity) - When Dual Fuel
is selected for ‘Thermostat Type’ and a ‘W’ call is present
operation will be as follows:
1. The temperature will be controlled by the MasterStat
while other zones are ignored.
2. All zone dampers will open, Y1, Y2, G, W outputs shall
run for 60 seconds. After 60 seconds Y1 and Y2 will be
dropped and output only W and G (if Fan with Heat
Option is selected otherwise G will be dropped).
3. There will be a two minute minimum run time once
Dual Fuel operation has been entered, regardless if
MasterStat heat call has been satisfied.
4. Once the two minute minimum run time expires and
the ‘W’ call is satisfied at the MasterStat then Dual Fuel
operation will be terminated. There will be no down
staging.
5. Once Dual Fuel operation is terminated all zone
dampers will close.
6. There will be a 4 minute time delay once Dual Fuel
operation is terminated before compressor operation
for cooling or heating may begin.
Dual Fuel (Variable Speed not applicable with 7 Series
Indoor Split) - When Dual Fuel is selected for ‘Thermostat
Type’ and a ‘W’ call is present operation will be as follows.
1. The temperature will be controlled by the MasterStat
while other zones are ignored.
2. All zone dampers will open, the current compressor
speed, G and W outputs shall run for 60 seconds. After
60 seconds the compressor will be stopped and output
only W and G (if Fan with Heat Option is selected
otherwise G will be dropped).
3. There will be a two minute minimum run time once
Dual Fuel operation has been entered, regardless if
MasterStat heat call has been satisfied.
4. Once the two minute minimum run time expires and the ‘W’
call is satisfied at the MasterStat then Dual Fuel operation
will be terminated. There will be no down staging.
5. Once Dual Fuel operation is terminated all zone
dampers will close.
6. There will be a 4 minute time delay once Dual Fuel
operation is terminated before compressor operation
for cooling or heating may begin.
Fan with Heat Option (Dual Fuel Applications) - Options
are ON or OFF. This selection determines whether G (fan)
output is to be ON or OFF when W (auxiliary heat) output
is ON.
Thermostat Type
NORMAL/DUAL FUEL
Normal - used for normal operation
Dual Fuel - used on dual fuel systems; needs
outdoor sensor to lockout dual fuel
ZoneStats/SensorStats PCB
MasterStat Configuration

16
INTELLIZONE2 INSTALLATION MANUAL
Staging
The staging screen allows custom selection of staging for
cooling and heating, independently.
The IntelliZone2 system allows separate staging options
for cooling and heating. There are four options for each
mode which are explained below. As an example, staging
for cooling can be set for ‘Normal’ while staging for heating
is set for ‘Faster2’. Allowing heating and cooling staging to
be independent of each other will provide better comfort
all year long. Once the compressor call has been initiated
by a zone, the compressor will be upstaged using one of
the four staging options.
If there are zone(s) that are not keeping up with the
thermostat set point look at changing the staging option
from “Normal” to “Quicker” or “Faster1”.
Single and Dual Staging
Normal - This “as shipped” mode will upstage the blower
and compressor normally.
Quicker - This mode will upstage the blower, compressor
and auxiliary electric heat more expediently than “normal”
mode for increased comfort.
Faster1 - This mode allows for a timed element in
compressor (heating and cooling) and electric heat
(heating) upstaging in 45% and 70% zones for situations in
which ‘Quicker’ upstaging is inadequate. If the heat pump
is already operating in first stage and a 45% or 70% zone
has had a heating or cooling demand for 30 continuous
minutes then second stage will be activated. For heating,
if after another continuous 30 minutes the H3 demand is
still present from a 45% or 70% zone, third stage will be
activated until the zone call is reduced to a H2. Airflow will
increase with compressor staging/EH during this period.
For heating, if the heat pump is already operating in second
stage and a 45% or 70% zone has had a demand for 30
continuous minutes then third stage will be activated until
the demand is reduced to H2. Airflow will be increased to
EH selection during this period.
IntelliZone2 Configuration cont.
Faster2 - This mode allows for a timed element in
compressor (heating and cooling) and electric heat
(heating) upstaging in 45% and 70% zones for situations in
which ‘Faster 1’ upstaging is inadequate. If the heat pump
is already operating in first stage and a 45% or 70% zone
has had a heating or cooling demand for 15 continuous
minutes then second stage will be activated. For heating,
if after another continuous 15 minutes the H3 demand is
still present from a 45% or 70% zone, third stage will be
activated until the zone call is reduced to a H2. Airflow
will increase with compressor staging/EH during this
period. For heating, if the heat pump is already operating
in second stage and a 45% or 70% zone has had a demand
for 15 continuous minutes then third stage will be activated
until the demand is reduced to H2. Airflow will be
increased to EH selection during this period.
Variable Speed Staging
For heating in all staging options below, the total of
the zone demands will determine when auxiliary heat is
energized which could be anywhere from compressor
speed 9 to speed 12. If auxiliary heat is energized while on
compressor speed 9-11 the compressor speed automatically
increases to speed 12. Airflow will increase with
compressor speed/EH during this period.
Normal - This “as shipped” mode will upstage the blower
and variable speed compressor normally.
Quicker - This mode will upstage the blower, compressor
and auxiliary electric heat more expediently than “normal”
mode for increased comfort. Generally the compressor will
be upstaged 1 extra speed more than normal.
Faster1 - This mode allows for a timed element in
compressor and electric heat upstaging in 45% and
70% zones for situations in which quicker staging is not
meeting demand. When an H3 (heating) or C2 (cooling)
demand is initially received the compressor will upstage
two speeds more than normal. After 15 continuous minutes
of an H3 or C2 demand the compressor will upstage one
more compressor speed and will continue to upstage one
compressor speed with every 15 minutes of a continuous
H3 or C2 demand until auxiliary electric heat is energized
for heating or C2 or maximum compressor speed for
cooling.
Faster2 - This mode also allows for a timed element in
compressor and electric heat upstaging in 45% and 70%
zones for situations in which Faster1 is not meeting heating
demand. When an H3 (heating) or C2 (cooling) demand is
initially received the compressor will upstage two speeds
more than normal. After 15 continuous minutes of an H3
or C2 demand the compressor will upstage two more
compressor speeds and will continue to upstage two
compressor speeds with every 15 minutes of a continuous
H3 demand until auxiliary electric heat is energized or
maximum compressor speed for cooling.

17
INTELLIZONE2 INSTALLATION MANUAL
IntelliZone2 Configuration cont.
Zone Configuration
Zone configuration allows the selection of the zone size and
the zone priority. The zone can be selected by touching the
upper right screen text noting the zone. In this way you can
cycle thru all of the active zones to view the configuration.
You must select a zone percentage before you can
configure the next zone. Select “Next Zone” for next zone
configuration.
Zone Percentage
Selecting the zone percentage can also be calculated by
using the IntelliZone2 Design software. This percentage
represents an approximation of the maximum heating or
cooling load percentage of the zone and thus to a certain
extent volume of airflow. The IntelliZone2 allows 0, 25, 45,
and 70% selections. Some general rules to follow in this
selection procedure are as follows:
• Pick the larger percentage (45% or 70%) for major
living areas such as family rooms, etc.
• Pick the smaller percentage for minor living areas such
as dens or bedrooms.
• Pick a larger percentage if more branches are required
than the load indicates due to large area per load (i.e.
unfinished insulated basement).
• The IntelliZone2 Design software should be used to aid
in the selection and calculation of design cfm.
• The IntelliZone2 determines modes as a proportion of
the total demand. A simple example of this to begin
with is a two-zone system in the cooling mode. If each
zone is set at 70% we have the following scenario:
Zone 1 = 50%
Zone 2 = 50%
NOTE: All Zone % calculations are ‘normalized using
the following process: We now must determine what
percentage of the total load each zone represents. To
perform this operation, add the two zones together 70 + 70
= 140. One zone would then be 70/140 or 50%.
The IntelliZone2 then reduces the total demand based
upon thermostat demand. A “Y1” call in the above example
will result in one half of the zone demand in this case 1/2
of 50% for a 25% system demand. A common complaint is
insufficient cooling when only one zone is calling for cooling.
The IntelliZone2 will not initiate a “Y2” output to the unit
until it senses a 50% total system demand (This is when the
IntelliZone2 is set for normal upstaging). If the IntelliZone2 is
set for quicker upstaging it drops the total system demand
required to 40% to initiate a Y2 output.
By this example, it will require a “Y2” call from one zone
(50%) and a “Y1” call from the second zone (25%). This will
give us a total system demand of 50% + 25% = 75%. System
demand for three- and four-zone systems are computed in
the same manner.
Heating demand is determined in the same manner, but
we now have a third stage instead of two for cooling. The
IntelliZone2 assigns values as follows:
Y1 = 40%
Y2 = 80%
Y3 = 100%
We know from the previous example that the IntelliZone2
will initiate a “Y2” output to the compressor when it is set to
normal upstaging and 50% of total demand is needed. It will
issue a “W” call to the unit when there is a 90% total demand.
It is a common assumption that if you have a house with
two zones equally divided each zone should be set at an
equal amount, usually 70%. As can be seen in the above
example, it will take a “Y3” call from one zone as well as a
“Y2” call from the second zone to obtain auxiliary heat.
This is a simple example, but three- and four-zone systems
are calculated in the same manner. Blower speeds are also
assigned upon the percentage of system demand and a
complete understanding of this process is not necessary
for day-to-day decisions. As a serviceman, the temptation
arises, in some instances, to influence the logic of the board
by jumping “Y1” and “Y2”. While this will create a quicker
response, the ductwork of that zone must be capable of
handling the cfm delivered by the unit (i.e., if a “Y2” signal
is given to the unit, can the ductwork handle the total cfm
of the unit).
When setting up a new system remember that if you have
unused zones they must be set to zero. If they are not, the
setting that they have will be included in the total demand
preventing the other zones from operating correctly, as
there will be no inputs on those zones.

18
INTELLIZONE2 INSTALLATION MANUAL
IntelliZone2 Configuration cont.
Abbreviation Definition
bed bedroom
dinrm dining room
gbed guest bedroom
ils in-law suite
grge garage
kit kitchen
liv living
mbed master bedroom
famrm family room
stry story
upstrs upstairs
sunrm sun room
bsmnt basement
lowlv lower level
thrm theater room
exrm exercise room
grtrm great room
recrm recreation room
bonrm bonus room
off office
The IntelliZone2 allows the selection of either comfort
or economy mode in each individual zone to provide
maximum savings in areas that allow it (such as workshops
and basements), while maintaining perfect comfort in the
zones where accurate temperature is most desired (such as
family room, bedrooms and baths).
Zone Priority
Comfort Mode - A single zone call (Y1) for conditioning
will engage the compressor and allow a minimal set point
variation, thus providing ultimate comfort.
Economy Mode - A single zone call (Y1) for conditioning
will be ignored by the IntelliZone2 until either a Y2 call
is initiated from the same zone or another zone calls for
conditioning (Y1). This allows a slightly greater set point
variation than in comfort mode. This setting prevents
less important zones from energizing the compressor
unless it is really needed, thus saving money. As a bonus
in this mode, upon a Y1 call, the IntelliZone2 may try to
precondition the zone with return air from other zones
already satisfied and, in some cases, can preclude the need
for energizing the compressor.
Zone Naming using MasterStat
Press and hold the “Zone” button in the upper right hand
corner to be able to name the zones. There is limited
character size available for the naming. “Z” and the zone
number (Z1-Z6) will always be displayed in front of the
zone name. Below are some recommended abbreviations.
Zone names will only be displayed on the MasterStat.
Naming Zones Using Symphony
The zone names on the Symphony Dashboard and app
can be added/changed using Symphony. When using
Symphony to name the zones it does not populate or
change the names shown on the MasterStat. To add
zone names log into your Symphony Dashboard, click
on “Account” at the top of the dashboard. Click on “Edit
Device”. The number of zones that the IntelliZone2 is
configured for will be shown. Click on the zone and input
the desired zone name. Repeat this for all the zones. Once
completed click “Save Device”
Jane Doe
Zones can also be named using the mobile Symphony app. Go
to the Symphony app. Select the three dots " " in the upper
right-hand corner. Select “Edit Friendly Name”, input the zone
name and select save. To name the next zone select the next
zone by swiping right to left. Repeat this process for all the
zones.
By naming the thermostat you can use Alexa to make changes
to the thermostats. For more information on Alexa refer to the
WaterFurnace Symphony for Alexa user guide.
…

19
INTELLIZONE2 INSTALLATION MANUAL
IntelliZone2 Configuration cont.
Equipment and Number of Zones
The first screen is Equipment and # of Zones. Here the
total number of desired zones and the type of equipment
is selected. Equipment is automatically detected. Press
the up and down arrows until the desired number of
zones appears. The zones should always be installed
sequentially starting with the MasterStat always in Zone 1.
• Single speed equipment is limited to a maximum of
2 zones
• Dual Capacity equipment is limited to a maximum of
4 zones
• Variable speed equipment can have up to the
maximum of 6 zones.
NOTE: If the number of zones selected is less than 6, the
remaining zones will be disabled.
MasterStat Configuration
Once added to the Aurora system, the setup and
configuration mode should be entered at the MasterStat
by holding a finger over the IntelliZone2 logo for 5 sec. The
Configuration and Setup mode will appear automatically.
NOTE: These options are intended to be used by the installer.
End users are not advised to change or modify any of these
settings. Doing so may make your equipment stop working
properly and/or may void the warranty of the zoning system
as well as the equipment connected to the thermostat.
It should be noted that the MasterStat Z2TK troubleshooting
harness can be useful during setup by allowing the temporary
connection of the MasterStat directly at the IntelliZone2 relay
board for ease of configuration or servicing.
P3 – Mas t er St at Lo c a l
C
B-
A+
R
Z2TK Kit
IntelliZone2
Relay Panel
Use the Z2TK Harness to temporarily connect the IntelliZone2 MasterStat
directly to the IntelliZone2 Relay Panel for ease of setup or troubleshooting.
Damper
The Damper screen allows the selection of either 2 wire
(spring open) or 3 wire (power open/power closed) type.
20
INTELLIZONE2 INSTALLATION MANUAL
IntelliZone2 Configuration cont.
Test Mode - In Test mode ‘Central Zone’ mode can be
selected. In Central mode all dampers are opened and
thermostat readings are taken ONLY from the Zone 1
MasterStat. This will approximate operation without a zone
system (all dampers open and IntelliZone2 MasterStat
temperature control) and can be useful during initial
construction of the home or during service etc.
Also in ‘Central Zone’ mode each damper can be
individually cycled off/on to verify operation during
Installation or service. It should be noted that the
MasterStat Z2TK troubleshooting harness can be useful
here by allowing the temporary connection of the
MasterStat directly at the IntelliZone2 relay board for ease
of configuration or servicing.
Aux Heat Lockout - Allows the configuration to lockout
electric heat above a selected outdoor temperature.
The outdoor sensor (OAT) must be installed on the
IntelliZone2 Relay Board. This setting is adjustable in 5°F
increments from NONE to 40°F. This will provide full heat
pump capacity without electric heat above the selected
temperature. When the outdoor temperature drops
below the selected temperature, then electric heat will be
energized when the demand is present.
Zones - Displays the inputs that the Intellizone2 is
receiving.
Status - Displays the outputs that the IntelliZone2 is
sending to the equipment.
Variable Speed Fan Staging (Variable Speed only) -
Variable Speed Fan Staging allows the ability to expand
the blower levels. Options are Normal and Expanded. There
are three airflow speeds assigned to a compressor speed
and the airflow level is determined by the fan demand total
zone %. Normal is the recommended airflow level. Selecting
Expanded will increase the highest airflow level by one level
and decrease the lowest airflow level by one level from
Normal. Not available for single speed or dual capacity
models.
Other manuals for IntelliZone2 ZoneStat
2
This manual suits for next models
9
Table of contents
Other Water Furnace Temperature Controllers manuals