Water Furnace IntelliZone2 MasterStat Operation manual

2
USER GUIDE: INTELLIZONE2 MASTERSTAT COMMUNICATING THERMOSTAT
IG1605EW 02/21
*IG1605EW*
User Guide:
IntelliZone2 MasterStat System
Communicating with Humidity Control Thermostat
IntelliZone2 MasterStat Thermostat
User Information
This thermostat is a wall mounted, low-voltage thermostat
which maintains room temperature by controlling the operation
of a heating and air conditioning system. Batteries are not
required; temperature and mode settings are preserved with
the power off.
This communicating thermostat communicates
via a 4-wire Modbus protocol and will only operate with the
IntelliZone2 and Aurora AXB.
Thermostat Operation
NOTE: Outdoor temperature is only displayed if the outdoor
sensor is installed.
To select a MODE, press the screen button MODE, and then
press the desired operating mode.
OFF
HEAT
COOL
AUTO (heat and cool as needed)
E-HEAT
Heating Set
Point
Time Date Zone Displayed
Outside
Temperature
Room Humidity
Mode &
Comp SPD
Fan Operation
Error Code (If present)
Cooling
Set Point
Room
Temperature
Adjusting Temperature
(Temporary Override in Programmable models)
Press the blue up or down arrow to increase or decrease the
cooling temperature set point. Press the red up or down arrow
to increase or decrease the heating temperature set point.
Depending on the selected mode one or both sets of the
up/down arrows will be selectable.
If a programmed schedule is active, the cancel button will
appear in the lower left hand corner of the screen when
temperature or mode selections are made. Select this button to
cancel any changes that were made.
Menu
Press the Menu button.
NOTE: The humidity function must be enabled by the installer
for it to display on this screen. If your system does not use a
humidifier this function may not be enabled.
Fan Operation
The thermostat can operate the fan in three ways:
AUTO (on only during heating and cooling
operation) (DEFAULT)
CONTINUOUS (always on)
INTERMITTENT (cycles fan)
From the Home screen or Menu Screen, press the Fan button.
Select the operation you desire as described above by pressing
the up and down arrows ▲▼.
Note: Continuous and Intermittent Fan selections are not
recommended when one zone is set for heating mode and
another zone is set for cooling mode. This is due to all zones
having a common return-air system. Air from the zones will mix
and lead to higher amount of run time.
IntelliZone2 MasterStat Communicating with
Humidity Control
In
te
ll
iZ
on
e2
M
as
te
rS
ta
t
Co
mm
un
ic
at
in
g
wi
th

3
USER GUIDE: INTELLIZONE2 MASTERSTAT COMMUNICATING THERMOSTAT
IG1605EW 02/21
*IG1605EW*
Intermittent Fan
Temperature conditions can vary widely between the thermostat
location and the extremities of the space the thermostat serves.
This air stratification problem can be especially pronounced
during mild outdoor conditions when long periods elapse
between space conditioning demands from the thermostat. This
intermittent fan operation can also improve the performance of
air cleaning or special filtration systems that locate the cleaning
or filtration media at the return air side of the fan. If the FAN
hasn’t been on for an hour, the fan will start cycling based on the
times that the user enters in the set up of Intermittent Fan.
To turn intermittent fan on select FAN on the main screen and
then INTERMITTENT, then press OFF next to ON TIME. Press
the up and down arrows ▲▼ on the right hand side to adjust
the fan on time, this is the amount of time you want the fan to
be energized. Default is OFF. Ranges are OFF, or 5-20 minutes
in 5 minute increments. Press the box to the right of OFF TIME
this is the time the fan will be off. Press the up and down arrows
▲▼ on the right hand side to adjust the fan off time. Ranges
are 5-40 in 5 minute increments. Fan ON and OFF cycles will
continue until the fan has been energized by a call for heating or
cooling.
The zones can be selected by touching the upper right screen
text noting the zone. In this way you can cycle through all
the active zones to view and change their configurations. If
intermittent fan operation is desired in more than one zone then
all zones should use the same ON/OFF times otherwise the last
zone that was set will be followed for all zones.
Humidity
The humidity function must be enabled by the installer for this
screen to be visible. If your system does not use a humidifier
then this option may not be enabled. This allows adjustment
of Humidification and Dehumidification settings. Options are
Auto and Manual. Factory default setting for Dehumidification
is “Auto”. Humidification “Auto” is only available if an outdoor
sensor is installed. Manual humidity choices range from 15%
to 50% in 1% increments. Dehumidification choices range from
35% to 65% in 1% increments. For Variable Speed heat pumps,
when “Dehumidification” or “Both” is selected in the Installer
Setup, the Active Dehumidification feature will be enabled.
Active dehumidification (Variable Speed Heat Pumps
Only) will only activate during cooling operation and is based
upon the dehumidification set point of the thermostat being
at least 5% below the actual relative humidity. When in active
dehumidification the room temperature could be overcooled
1.5°F below set point. In this mode you may see increased
energy usage.
Zone
This screen shows the status of the IntelliZone2 system on
one screen. Displayed information includes zone size, priority,
normalized zone size, zone temperature set points, zone temp,
heating or cooling call, and damper open or closed.
From the ‘Zone’ screen, press next. This screen shows the
information the IntelliZone2 system is sending to the Aurora
controls and what the Aurora controls are responding.

4
USER GUIDE: INTELLIZONE2 MASTERSTAT COMMUNICATING THERMOSTAT
IG1605EW 02/21
*IG1605EW*
…
Naming Zones With Masterstat
Press and hold the “Zone” button in the upper right hand corner
to be able to name the zones. There is limited character size
available for the naming. Z* will always be displayed at the
beginning. Below are some recommended abbreviations.
Zone names will only be displayed on the MasterStat.
Abbreviation Definition
bed bedroom
dinrm dining room
gbed guest bedroom
ils in-law suite
grge garage
kit kitchen
liv living
mbed master bedroom
famrm family room
stry story
upstrs upstairs
sunrm sun room
bsmnt basement
lowlv lower level
thrm theater room
exrm exercise room
grtrm great room
recrm recreation room
bonrm bonus room
off office
Naming Zones Using Symphony
The zone names on the Symphony Dashboard and app can
be added/changed using Symphony. When using Symphony
to name the zones it does not populate or change the names
shown on the MasterStat. To add zone names log into your
Symphony Dashboard, click on “Account” at the top of the
dashboard. Click on “Edit Device”. The number of zones that
the IntelliZone2 is configured for will be shown. Click on the
zone and input the desired zone name. Repeat this for all the
zones. Once completed click “Save Device”
Jane Doe
Zones can also be named using the mobile Symphony app.
Go to the Symphony app. Select the three dots “ “ in the upper
right-hand corner. Select “Edit Friendly Name”, input the zone
name and select save. To name the next zone select the next
zone by swiping right to left. Repeat this process for all the
zones.
By naming the thermostat you can use Alexa to make changes
to the thermostats. For more information on Alexa refer to the
WaterFurnace Symphony for Alexa user guide.

5
USER GUIDE: INTELLIZONE2 MASTERSTAT COMMUNICATING THERMOSTAT
IG1605EW 02/21
*IG1605EW*
Programming Your Thermostat
Preset Programming
Preset options will step you through the programming. Simply
select the temperatures and then view the completed program.
Programming a Day or a Series Of Days
After selecting the programming screen, you have the option
of programming everyday, weekdays, weekends, or individual
days. Once you’ve selected a certain day to program, a screen
appears that allows you to set the time, heat setting, cool
setting, and fan operation for each event.
1. From the Program menu, select program ON.
2. Select the number of events each day, 2 or 4.
3. You can program each day differently, or every day the
same or the weekdays or weekends the same.
4. Select Zone in upper right hand corner to change zones.
Steps 2 and 3 will need to be completed for each zone.
Copying a Program From One Day to Another
In the PROGRAM menu, there is an option to COPY. The option
can be used to copy the program from one day to another day.
After COPY is selected, the thermostat will prompt you for which
day to copy from. Next, it will prompt you for which day to copy
the program to. After these selections, it will then confirm what is
being copied to where.
Settings
Set Date and Time
NOTE: If this thermostat is installed with an AWL and AWL
Time Synchronization is enabled then Date and Time will be
updated via the internet and can’t be manually adjusted, only the
Time Format can be changed. If AWL Time Synchronization is
disabled and no AWL is installed then follow the steps below for
setting Date and Time.
1. From the home screen, press Menu, then press Settings,
then press Date/Time
2. Set month/ day/year, by pressing the up and down arrows
▲▼.
3. Set hour: minute, by pressing the up and down arrows ▲▼.
4. Within this menu option, you can change the time displayed
by your thermostat to 24 Hour time (Military Time).
5. If your area observes daylight savings time, select D.S.T.
to ON.
6. Date and Time are now set. You can return to the Main
Menu by pressing the BACK to return to the previous menu.
Security Lockout
This thermostat has the option to set security features to lockout
all MasterStat features.
1. From the home screen, press Menu, then press Settings.
2. Select Security, press ON.
3. Enter Pin Number screen.
4. Select a pin number to lock out the thermostat. Once
you’ve entered the 4-digit pin number, press the OK button
to save the pin.
5. In the event pin number is lost default is 9999
The security lockout settings do not take effect until the
MasterStat goes into sleep mode.
When the MasterStat security lookout is on it does not lockout
the ZoneStat(s) or TPCC32U01. To lockout the TPCC32U01 you
must go through the same Security Lockout procedure as above
for each thermostat.

6
USER GUIDE: INTELLIZONE2 MASTERSTAT COMMUNICATING THERMOSTAT
IG1605EW 02/21
*IG1605EW*
Backlight
Press the up and down arrows ▲▼ to adjust desired backlight
brightness when the thermostat is in active display or in the
sleep display mode. (Default setting is 55% ACTIVE, 10%
SLEEP)
Sound
Adjust the desired sound level of screen buttons when pressed
and the desired sound, either beep, one click, or two clicks.
Background
Select the desired background. This will only change the home
screen background. The Pictures icon button allows loading or
replacing personal photos to the MasterStat, once they have
been formatted, using the photo converter software. The photo
converter software and instructions are available online at
www.auroracontrols.com. Once the photos have been
converted to the correct format and uploaded to the MasterStat
they will run as a slide show after 5 minutes of inactivity (no
screen touches).
Range
30-100%
Range
1-100%
Vacation
From the MENU, press the Vacation button to set vacation
starting date, time, and desired temperature, return date, time.
To cancel this setting, press the CANCEL button.
Press the OK to return to the previous menu.
USB
This screen allows you to import or export the User setting
or Program. Mini USB Adaptor and Flash Drive required.
SuperBoost (Variable Speed Heat Pumps Only)
SuperBoost can be found by pressing menu/settings on the
thermostat. The SuperBoost option temporarily enables a
larger cooling capacity range. Normal cooling mode is limited
to compressor speeds 1-9 and SuperBoost allows compressor
speeds 10-12 if needed. This screen will allow the homeowner
to turn on or off the SuperBoost option. The SuperBoost option
will be enabled, by default, for a 24-hour period of time and then
will automatically be disabled. NOTE: Continuous use of the
SuperBoost could result in overheating the ground loop.
Dealer
The installing dealer’s contact information can be displayed
on this screen. From the main screen, press Menu and then
press Dealer. The dealer will enter this information during
system installation.

7
USER GUIDE: INTELLIZONE2 MASTERSTAT COMMUNICATING THERMOSTAT
IG1605EW 02/21
*IG1605EW*
On Peak (If Installed)
The ‘On Peak’ input is designed to allow utilities to utilize
simple radio controlled switches to control the On Electric
Peak behavior of the Geothermal Heat Pump by changing the
thermostat heating and cooling set points.
Energy Monitor (If installed)
If your heat pump has energy monitoring installed, the energy
consumed can be viewed by pressing the Energy button. There
are three choices to view the energy consumed: Instant, Daily,
and Monthly.
Instantaneous Energy Use screen
Daily Energy Use screen
Monthly Energy Use screen
Yearly Summary screen
Energy Monitoring (If Installed)
To enter your electric utility rate, select KWH cost. The cost can
be set from $0.01 to $2.00. The default cost is $0.10. The total
energy cost for the system will be displayed on the daily and
monthly summary screens

8
USER GUIDE: INTELLIZONE2 MASTERSTAT COMMUNICATING THERMOSTAT
IG1605EW 02/21
*IG1605EW*
AWL Status (If Installed)
Note: If AWL is installed, it is recommended that you enable
both the AWL Time Synchronization and Monitor AWL Status.
This screen displays the AWL firmware revision and provides
the current AWL communication status relating to an Aurora
WebLink (AWL) device. This screen is available whether an AWL
is installed on the system or not.
AWL Time Synchronization - When enabled the AWL will
synchronize the thermostat’s date and time with internet
time servers. This option by default is disabled. NOTE:
setting the proper time zone in the Symphony Portal
is necessary for correct operation.
Monitor AWL Status - When enabled, the thermostat will
monitor the AWL’s RS485, INTERNET, and SERVER
status. The thermostat will display “AWL Comm Err”
when the AWL is not communicating properly with the
Aurora Modbus Network, “AWL Internet Err” when the
AWL is unable to communicate to the symphony Servers.
This option by default is disabled.
CAUTION: To clean the thermostat display, lightly
dampen a clean non-abrasive cloth with water or
any non-abrasive household cleaner. To clean,
gently wipe the surface of the thermostat.
NOTE: Do not spray liquids directly on the
thermostat.
Dual Fuel (Single Speed/Dual Capacity) - When Dual
Fuel is selected for ‘Thermostat Type’ and a ‘W’ call is present
operation will be as follows:
1. The temperature will be controlled by the MasterStat while
other zones are ignored.
2. All zone dampers will open, Y1, Y2, G, W outputs shall
run for 60 seconds. After 60 seconds Y1 and Y2 will be
dropped and output only W and G (if Fan with Heat Option
is selected otherwise G will be dropped).
3. There will be a two minute minimum run time once Dual
Fuel operation has been entered, regardless if MasterStat
heat call has been satisfied.
4. Once the two minute minimum run time expires and the ‘W’
call is satisfied at the MasterStat then Dual Fuel operation
will be terminated. There will be no down staging.
5. Once Dual Fuel operation is terminated all zone dampers
will close.
6. There will be a 4 minute time delay once Dual Fuel
operation is terminated before compressor operation for
cooling or heating may begin.
Dual Fuel (Variable Speed) - When Dual Fuel is selected for
‘Thermostat Type’ and a ‘W’ call is present operation will be as
follows.
1. The temperature will be controlled by the MasterStat while
other zones are ignored.
2. All zone dampers will open, the current compressor speed,
G and W outputs shall run for 60 seconds. After 60 seconds
the compressor will be stopped and output only W and G
(if Fan with Heat Option is selected otherwise G will be
dropped).
3. There will be a two minute minimum run time once Dual
Fuel operation has been entered, regardless if MasterStat
heat call has been satisfied.
4. Once the two minute minimum run time expires and the ‘W’
call is satisfied at the MasterStat then Dual Fuel operation will
be terminated. There will be no down staging.
5. Once Dual Fuel operation is terminated all zone dampers
will close.
6. There will be a 4 minute time delay once Dual Fuel
operation is terminated before compressor operation for
cooling or heating may begin.
9
USER GUIDE: INTELLIZONE2 MASTERSTAT COMMUNICATING THERMOSTAT
IG1605EW 02/21
*IG1605EW*
ZoneStat User Information
Backlight – Backlighting is activated whenever a key is
pressed and remains on for 5 seconds.
Mode Button – Allows selection of modes: Off, Auto, Heat and
Cool. Pressing the mode button moves selection between the
available modes for the zone.
Fan Button -Pressing the FAN button will toggle the fan mode
from auto mode, which runs the fan when a call for heat or cool
occurs, continuous mode, or intermittent fan mode. Continuous
Fan runs the fan continuously in the zone. Intermittent fan mode
allows selection of fan on and off time in the zone.
Pressing the RIGHT and LEFT ARROW buttons toggles
between adjustment of the fan on and fan off times in
intermittent fan mode. In fan on (LEFT ARROW buttons) time
adjustment, “on” will be displayed in the smaller 7-segment area
to the right of the SET icon. In fan off time (RIGHT ARROW
buttons) adjustment, “off” will be displayed in the smaller
7-segment area. Pressing the UP ARROW or DOWN ARROW
buttons in intermittent mode shall adjust the on and off fan times
by 5 minutes at a time. The fan mode may be adjusted for each
zone at the MasterStat as well.
If in programmable mode, adjusting the fan mode or interval
from the current schedule settings will cause the control to enter
a “hold”.
Set Point Display - The set point that can be adjusted with
the up or down buttons is located in the larger segments under
the SET TEMP segment. In AUTO mode, the Set point screen
will display two set points for HEAT and COOL. The set point
that can be adjusted is displayed on the left in larger digits and
the other set point is displayed on the right side in smaller digits.
To switch between the two set points, press the right arrow
button.
Auto Mode Display - When Heating mode is active the HEAT
icon and the triangle next to the HEAT icon are flashing. When
Cooling mode is active the COOL icon and the triangle next to
the COOL icon are flashing.
IntelliZone2 ZoneStat
Heat Mode Display - When Heating mode is active the triangle
next to the HEAT icon is flashing. The HOLD icon is energized if
a temperature override or a fan override is active. A temperature
override is set if the set point is adjusted from the schedule set
point in programmable mode. A fan override is set if the fan
setting is adjusted from the schedule setting in programmable
mode. When Emergency Heat or Auxiliary Heat are active, the
triangle next to the HEAT icon is flashed ON and OFF.
Cool Mode Display -When Cooling mode is active the
triangle next to the COOL icon is flashing. The HOLD icon is
energized if a temperature override or a fan override is active.
A temperature override is set if the set point is adjusted from
the schedule set point in programmable mode. A fan override
is set if the fan setting is adjusted from the schedule setting in
programmable mode.
NOTE: Zone ID can be confirmed on the ZoneStat by pressing
the cancel button for 5 seconds.
NOTE: There is no time adjustment on the ZoneStat. The time
displayed is from the MasterStat setting.
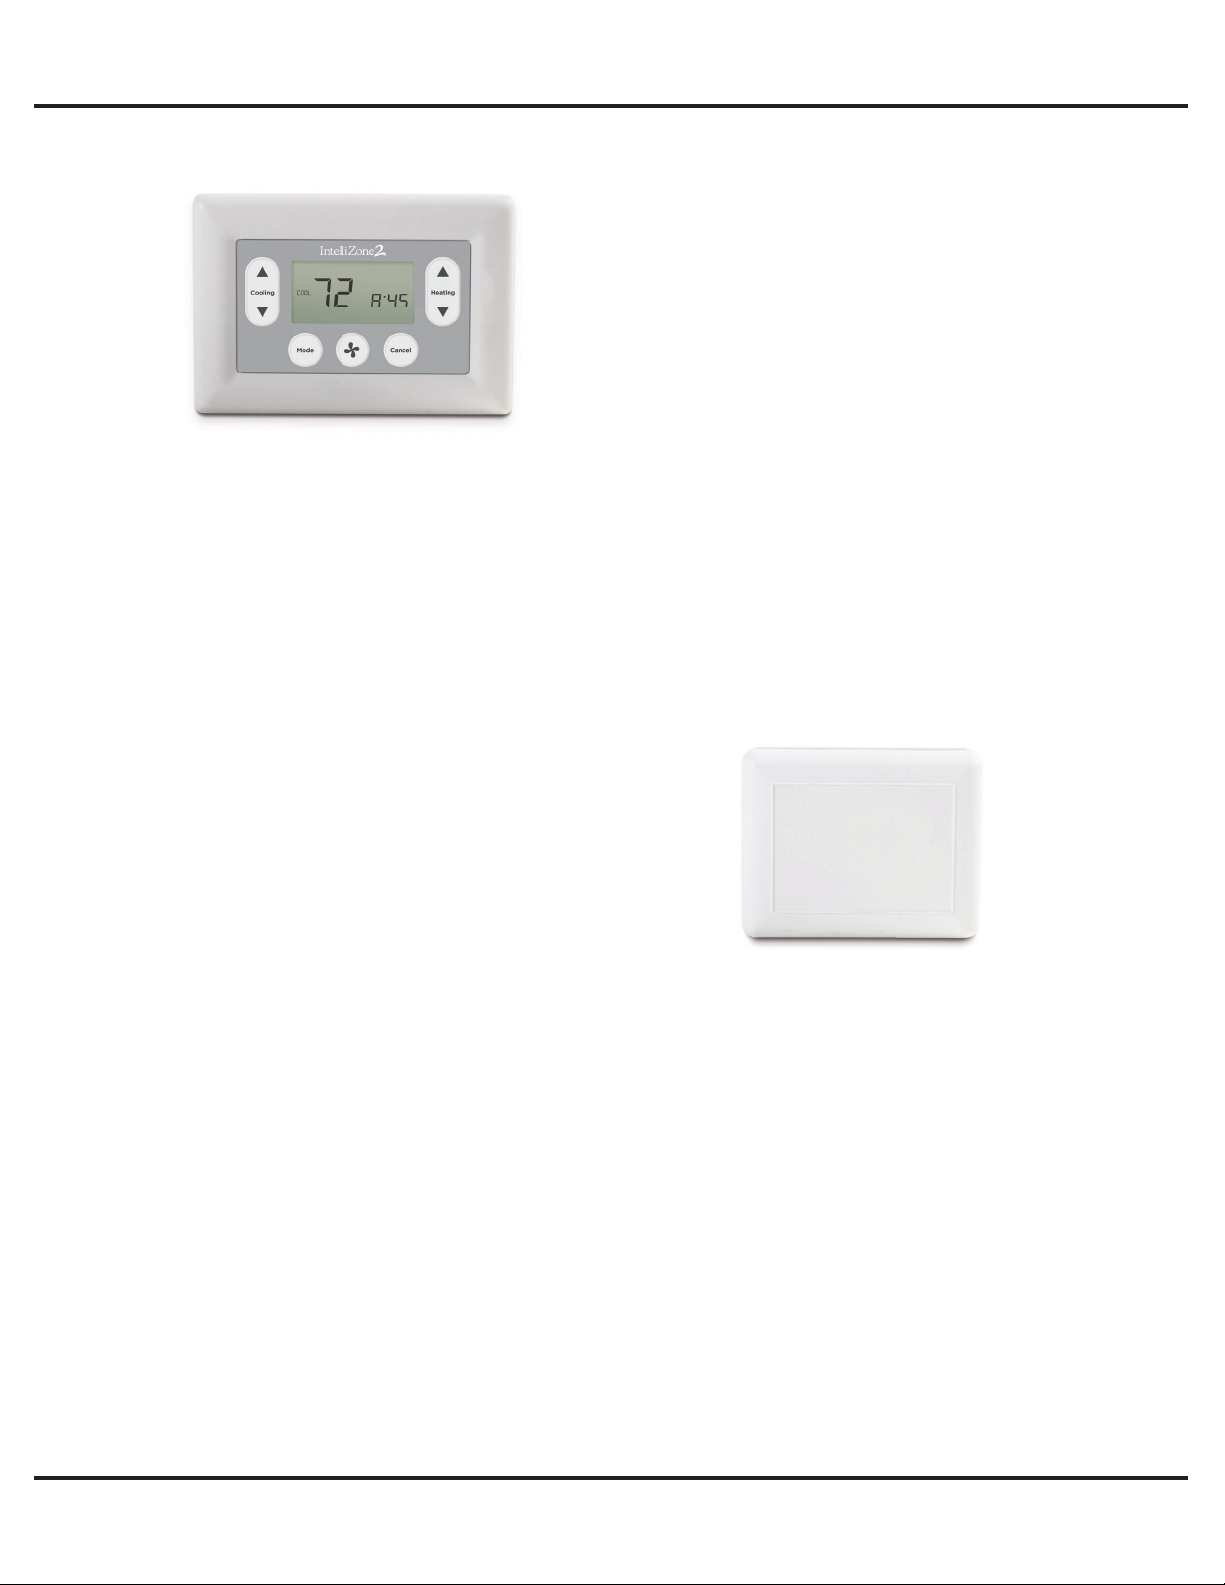
IntelliZone2 SensorStat & SensorStat
Remote-Kit User Information
The SensorStat & SensorStat Remote-Kit is just a temperature
sensor and does not have any adjustment capability.
Adjustments of zones with SensorStat or SensorStar Remote-
Kit will need to be made at the MasterStat. Click in the upper
right hand corner of the MasterStat to access the zone with the
SensorStat or SensorStat Remote-Kit to make adjustments.
IntelliZone2 SensorStat


11
IG1605EW 06/19
*IG1605EW*
©2019 WaterFurnace International, Inc., 9000 Conservation Way, Fort Wayne, IN 46809-9794. WaterFurnace has a policy of continual product research and development and reserves the
right to change design and specifications without notice.
Table of contents
Other Water Furnace Thermostat manuals

Water Furnace
Water Furnace IntelliZone2 ZoneStat User manual

Water Furnace
Water Furnace IntelliZone User manual

Water Furnace
Water Furnace TP32W03 User manual

Water Furnace
Water Furnace TPCC32U01 Manual

Water Furnace
Water Furnace IntelliZone2 MasterStat User manual

Water Furnace
Water Furnace TP32U03 User manual

Water Furnace
Water Furnace TPCM32U03 Manual

Water Furnace
Water Furnace IntelliZone2 MasterStat User manual

Water Furnace
Water Furnace IntelliZone2 ZoneStat Manual

Water Furnace
Water Furnace TPCC32U01 Manual


