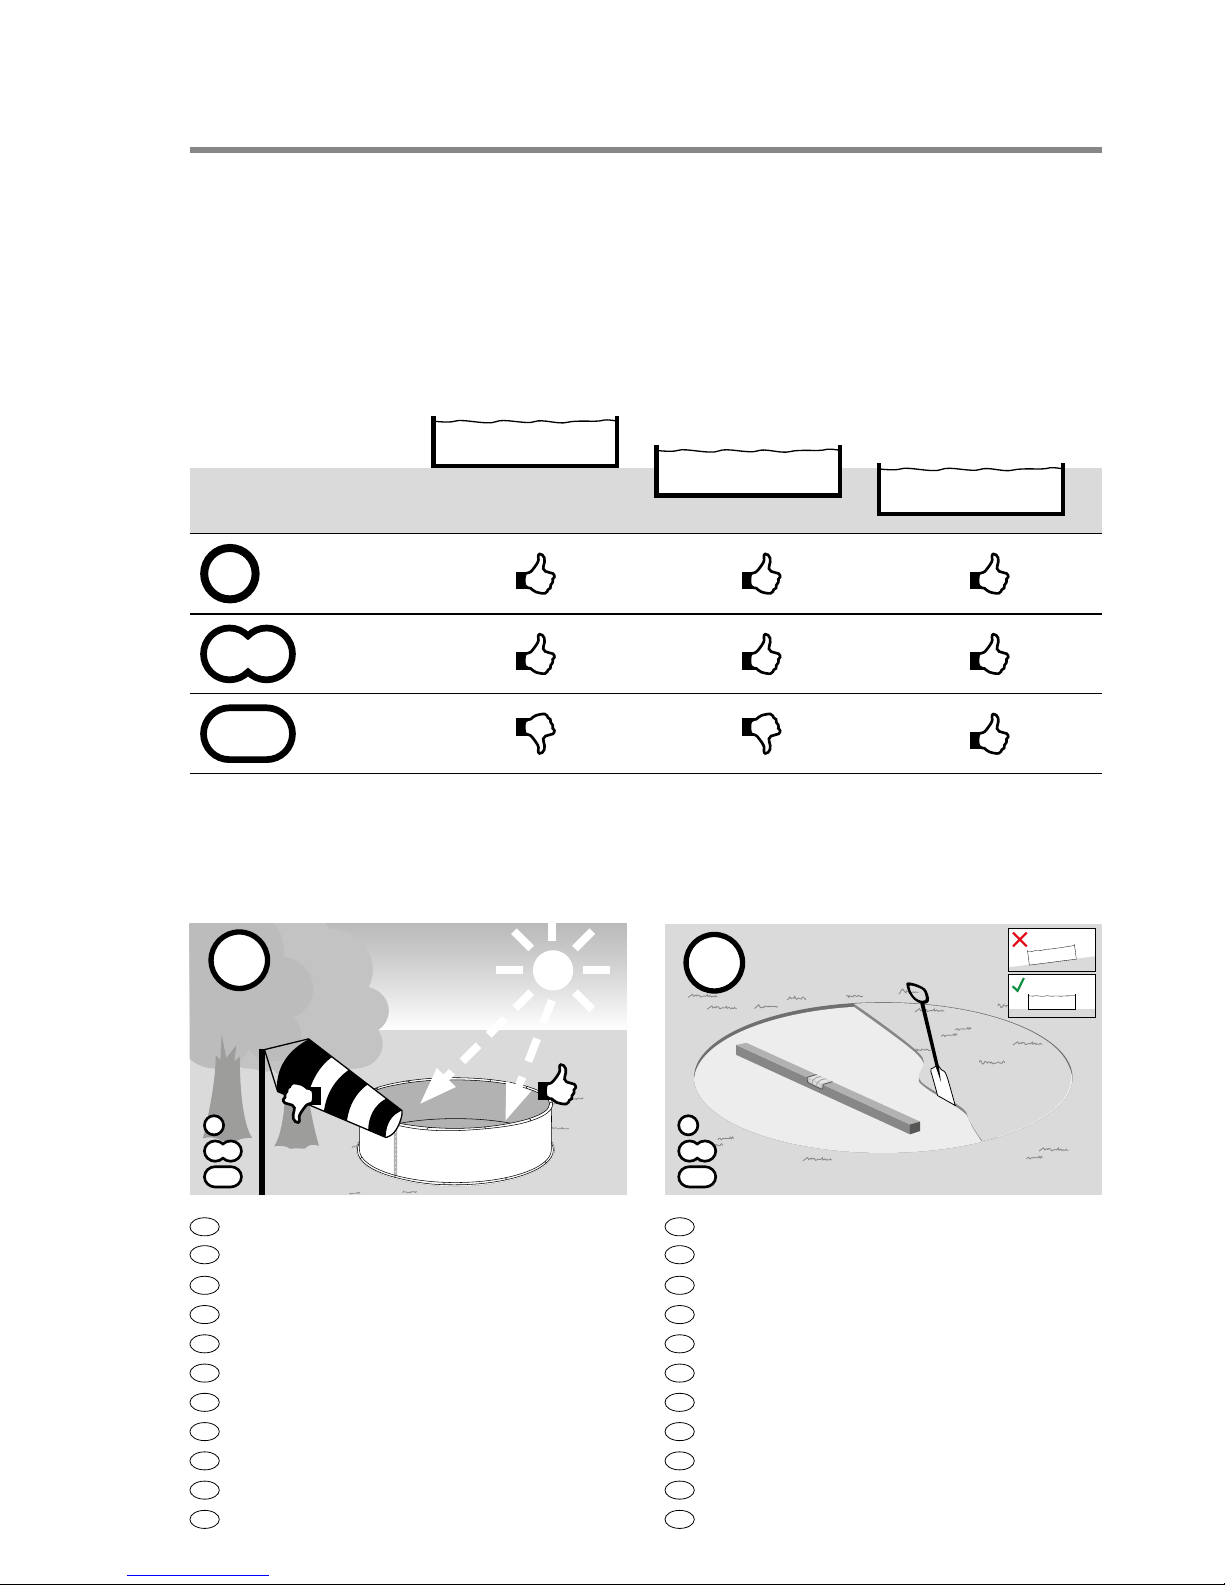
Waterman Basic User manual

Assembly and
Operating Instructions
'Basic' Swimming Pools
English
Please read this manual carefully and
keep it for future reference.

Assembly and Operating Instructions 'Basic' Pools
2
FOR ALL POOL TYPES
1
2
KURZANLEITUNG / QUICK START GUIDE / NOTICE SOMMAIRE / GUIDA RAPIDA
BEKNOPTE HANDLEIDING / KORTFATTAD BRUKSANVISNING / STRUČNÁ
PŘÍRUČKAG / STRUČNÝ NÁVOD / KRATKA NAVODILAG / GYORS ÚTMUTATÓ
MANUAL CU INSTRUCŢIUNI PE SCURT
D
Pool-Standort wählen
UK
Selection of pool location
F
Sélection de l‘emplacement
I
Scegliere il luogo per la piscina
NL
Locatie zwembad kiezen
S
Välja placering för bassängen
CZ
Pool-volba místa
SK
Zvoľte miesto inštalácie bazéna
SI
Izbira mesta za postavljanje bazena
HU
Medence helyének a kiválsaztása.
RO
Selectarea locului de amplasare a piscinei
D
Untergrund vorbereiten
UK
Preparation of the foundation/ground
F
Préparation du terrain
I
Preparare il fondo
NL
Ondergrond voorbereiden
S
Förbereda underlaget
CZ
příprava podkladu
SK
Pripravte podklad
SI
Priprava tal
HU
Felállítási hely előkészítése.
RO
Pregătirea solului de bază

Assembly and Operating Instructions 'Basic' Pools
3
FOR FIGURE-8 SHAPED POOLS
FOR SEMI-INGROUNG/INGROUND INSTALLATION
D
Graben für Stahlträger
UK
Trench for steel girders
F
Creusement pour poutre en acier
I
Scavo per trave d‘acciaio
NL
Greppel voor stalen drager
S
Gräv ett dike för stålbalken
CZ
Vykopat pro ocelový nosníky
SK
Jamy pre oceľové nosníky
SI
Luknje za jeklene nosilce
HU
Acélmerevítő alapja
RO
Gropi pentru montanţii de oţel
A
2.1
D
Schichtweise Betonhinterfüllung
UK
Concrete backlling in layers
F
Remblai en béton par couches
I
Riempimento calcestruzzo a strati
NL
Beton laagsgewijs vullen
S
Fyll på betong i era skikt
CZ
Betonovat po vrstvách
SK
Vo vrstvách zaliať betónom
SI
Postopno v plasteh nanestite beton
HU
Lépcsőzetes betonozás
RO
Turnare beton umplutură laterală în straturi
2.2
D
Erdreich ausheben & Betonplatte gießen
UK
Excavation & Casting a concrete slab
F
Excavation & Coulage de la dalle en béton
I
Eseguire lo scavo e posare la base in calcestruzzo
NL
Grond verwijderen & betonplaat gieten
S
Gräv ur marken & gjut en betongplatta
CZ
Odkopat zeminu vybetonovat základovou desku
SK
Vysadiť zeminu & zaliať betónovú dosku
SI
Zemljo odstranite & vlijte betonsko ploščo
HU
Ássa ki az alapot & készítse el a betonalapot
RO
Excavare sol şi turnare placă beton
2.1
D
Montage der Stahlstützträger
UK
Assembly of steel support beams
F
Montage des jambes de force en acier
I
Montaggio delle travi di sostegno in acciaio
NL
Montage van stalen steun
S
Montera stålbalken
CZ
Montáž ocelových nosníků
SK
Montáž oceľového podperného nosníka
SI
Montaža jeklenih nosilnih stebrov
HU
Acélmerevítő szerelése
RO
Montarea montanţilor de oţel pentru reazem
2.2

Assembly and Operating Instructions 'Basic' Pools
4
English
FOR OVAL POOLS FOR ALL POOL TYPES
D
Stützmauer errichten
UK
Construction of retaining wall
F
Construction d’un mur de soutènement
I
Costruire il muro di sostegno
NL
Steunmuur maken
S
Bygg stödmuren
CZ
Vybudovat opěrnou zeď
SK
Postaviť oporný múr
SI
Naredite podporni zid
HU
Támasztófal építése
RO
Ridicare ziduri susţinere
2.1
D
Vlies und Bodenschienen auslegen
UK
Installation of oor protection eece and seat rails
F
Pose du tapis feutre et des rails d‘assise
I
Posare velo protettivo e proli inferiori
NL
Vlies en bodemrails uitleggen
S
Lägga ut duk och bottenskenor
CZ
uložení vlákniny a dnových kolejnic
SK
Rozložte podložku a dnovú obruč
SI
Postavitev isa in talnih tračnic
HU
Védőfólia és alap sínek elhelyezése.
RO
Amplasarea păturii drenante şi şinelor bazei
3
D
Stahlmantel aufstellen
UK
Installation of steel wall (jacket)
F
Mise en place de la paroi en acier
I
Disporre la lamiera
NL
Stalen mantel opstellen
S
Ställa upp stålmanteln
CZ
stavba ocelového pláště
SK
Postavte oceľový plášť
SI
Postavitev pločevinastega plašča
HU
Fémpalást felállítása.
RO
Amplasarea mantalei de oţel
4
D
Stahlwand verschrauben
UK
Assembly of steel wall
F
Assemblage de la paroi en acier
I
Avvitare la parete
NL
Stalen wand vastschroeven
S
Skruva ihop stålväggen
CZ
ocelovou stěnu spojit šrouby
SK
Zoskrutkujte oceľovú stenu
SI
Vijačenje pločevinastega plašča
HU
Fémfal összecsavarozása.
RO
Înşurubarea peretelui de oţel
5

Assembly and Operating Instructions 'Basic' Pools
English
5
Please observe the detailed instructions
on the following pages.
D
Eine ausführliche Anleitung in Ihrer Sprache steht im Internet
unter http://download.waterman-pool.com für Sie bereit.
F
Une notice d‘utilisation détaillée dans votre langue est disponible
sur le site Internet http://download.waterman-pool.com
I
Potete trovare la descrizione dettagliata nella vostra lingua in
Internet all‘indirizzo http://download.waterman-pool.com
NL
Een uitgebreide handleiding in uw taal staat op internet
onder http://download.waterman-pool.com voor u klaar.
S
En utförlig anvisning på ditt språk nns att ladda ner på Internet
under adressen http://download.waterman-pool.com
CZ
Podrobné pokyny ve vašem jazyce jsou k dispozici na internetu
jsou pro vás připraveny pod http://download.waterman-pool.com
SK
Podrobný návod vo vašom jazyku nájdete na internete
na stránke http://download.waterman-pool.com
SI
celotna navodila v Vašem jeziku najdete na spletni strani
http://download.waterman-pool.com
HU
Részletes útmutató az Ön beszélt nyelvén az interneten
a következő címen http://download.waterman-pool.com áll rendelkezésére.
RO
Un manual cu instrucţiuni detaliate vă stă la dispoziţie pe internet pregătit în
limba dumneavoastră la http://download.waterman-pool.com
FOR FIGURE-8 SHAPED POOLS
D
Montage des Sitzboards
UK
Mounting the seat
F
Montage du siège
I
Montaggio panchina laterale
NL
Montage van de bevestigings-board
S
Montera sittbrädan
CZ
Montáž sedačky
SK
Montáž sedadla
SI
Montaža sedeža
HU
Összekötő, felülő lemez szerelése
RO
Montarea banchetei
6.1
D
Folie und Handlauf einhängen
UK
Attaching the liner and top rail
F
Accrochage du liner et de la margelle
I
Agganciare il liner e il prolo superiore
NL
Folie en reling inhangen
S
Installera folien och hållskenan
CZ
Zavěšení folie a zábradlí
SK
Zaveste fóliu a držadlo
SI
Napenjanje folije in ročaja
HU
Fólia és felső sín behelyezése.
RO
Suspendarea foliei şi barei mână curentă
6

Assembly and Operating Instructions 'Basic' Pools
6
English
ELECTRICAL SAFETY
• The power supply for your
swimming pool must be protected
by means of a residual current
circuit breaker (30 mA).
• Never take electrical equipment into your
swimming pool and never touch them from inside
the water.
• Free-standing lter systems/pumps exceeding 12
volts must be installed with a minimum distance
of 3 m from the pool, and a distance of 3.5 from
the pool for the current source.
• Please observe the DIN VDE 0100 part 702 for
all electrical installations of your pool.
SAFETY OF NON-SWIMMERS
• A permanent, active and watchful supervision
of weak swimmers and non-swimmers by a
competent, skilled adult supervisor is necessary
at all times (it should be remembered that the
greatest risk of drowning is among children under
5 years of age).
• A competent, skilled adult is appointed to monitor
the pool when it is used.
• Weak swimmers or non-swimmers must wear
personal protective equipment when using the
swimming pool.
• If the pool is not used or monitored, all toys must
be removed from the pool and its surroundings to
prevent that children are attracted by these.
SAFETY INSTRUCTIONS AND WARNINGS
The use of a swimming pool kit presumes that the
construction kit complies with the safety regulations
described in the operation and maintenance
manual. To prevent a drowning of children, it is
recommended to secure access to the swimming
pool. The access to the pool is to be secured in
such a way that children under 5 years cannot get
into the pool water unnoticed. You can protect the
pool with a childproof fencing or a childproof cover/
roong of the complete pool, with an additional
alarm system, if desired. Safety devices can
make a pool safer, but never replace a permanent
supervision of children by an adult who can help in
an emergency.
While the pool is used, no equipment
used to access the swimming pool (e.g.
ladders) must be removed. When the
pool is no longer used, ladders must either be
completely removed from the pool or secured in
such a way that unauthorized access is not possible
(for example, we recommend using a safety ladder
with detachable, or foldable and lockable steps).

Assembly and Operating Instructions 'Basic' Pools
English
7
SAFE USE OF THE SWIMMING POOL
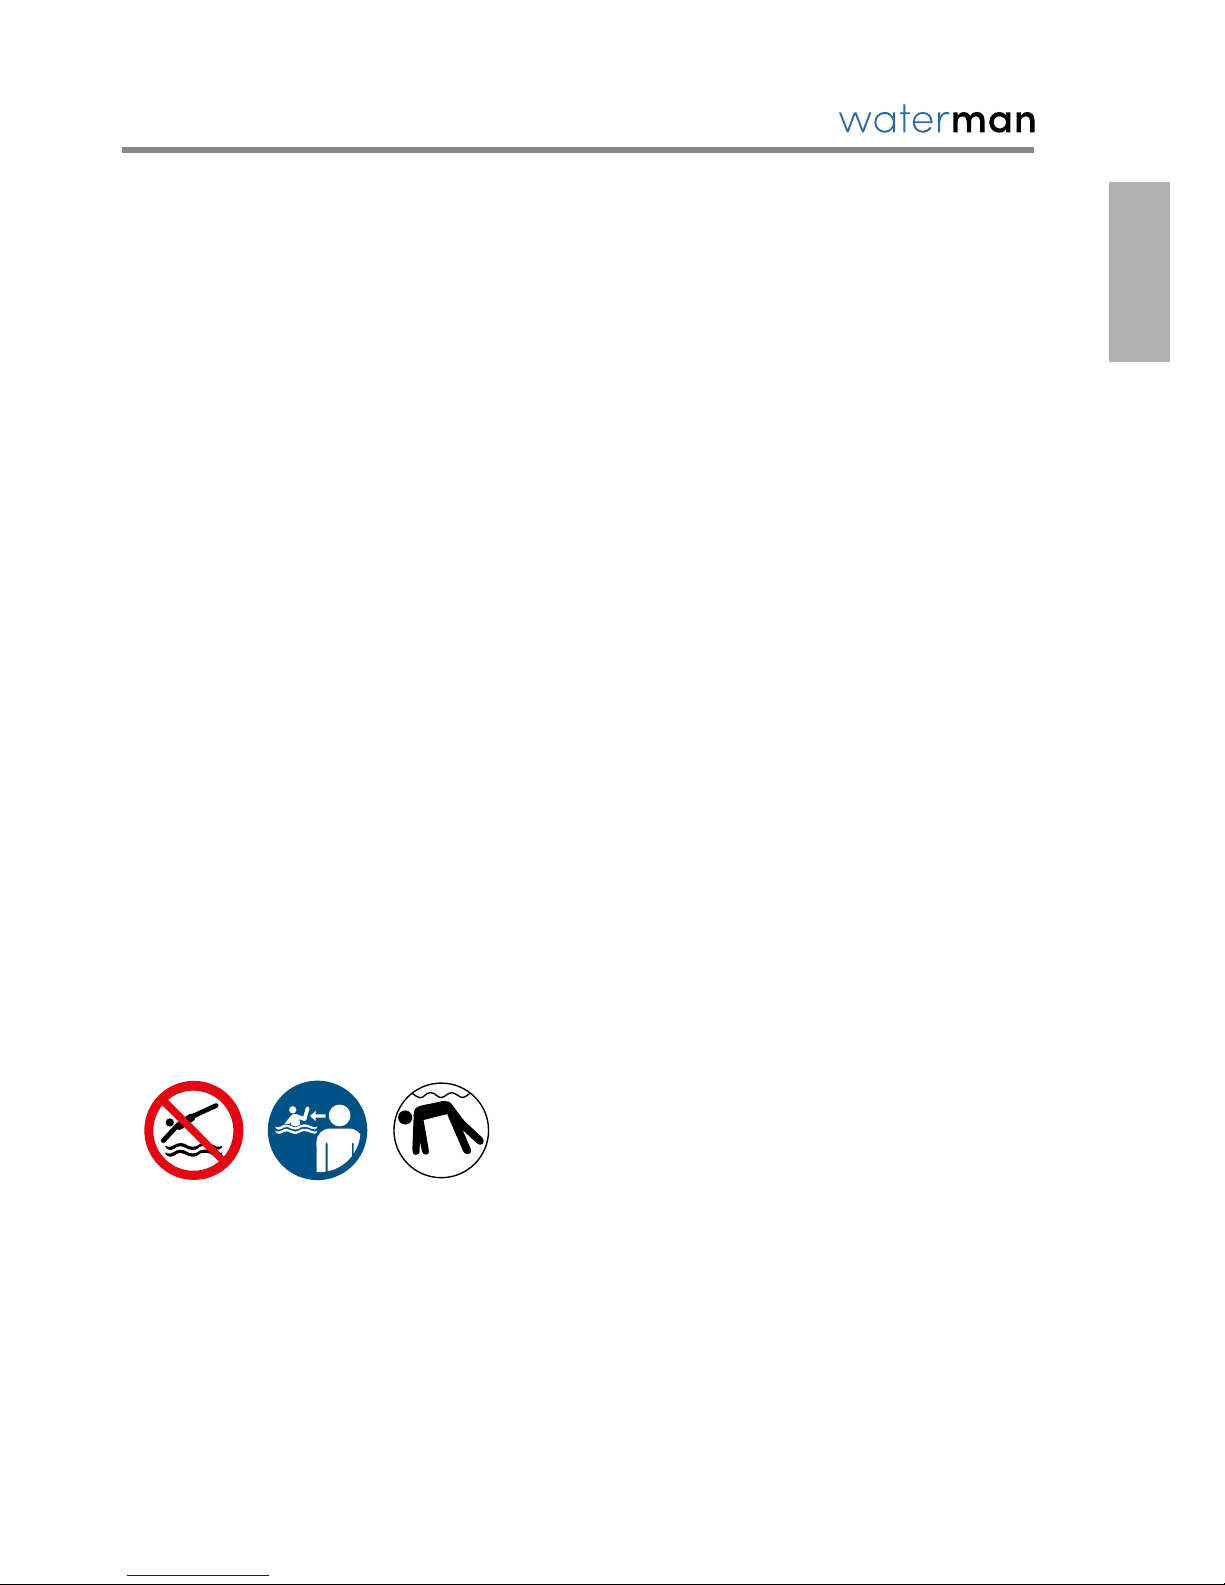
• Dives into the pool are not allowed, never jump
into shallow water (danger of serious injuries or
even death).
• Learn rst aid skills (cardiopulmonary
resuscitation CPR) and refresh your knowledge
regularly. This can make a lifesaving difference in
an emergency.
• All pool users, including children, are to be
instructed what to do in an emergency.
• Remove protecting covers completely before
using the pool, never dive under covers.
• Place the ladder to enter the swimming pool
on a secure, rm oor. Check regularly that all
connections are still rmly and properly xed, and
that there is no damage.
• Never use the swimming pool when under the
inuence of alcohol, drugs, or medication.
• Never mix water treatment chemicals, keep
chemicals for the swimming pool securely closed
and out of the reach of children.
• Never allow swimming alone; children or
non-swimmers may only use the pool under
supervision and, if necessary, with swimming
aids. All users, especially children, are
encouraged to learn how to swim.
• Please use the enclosed safety labels and x
them in a clearly visible place in the area of your
swimming pool (within 2000 mm).
• Place life-saving equipment (bars, safety buoys,
rst aid emergency numbers) near the pool.
• Ensure a regular measurement of pH and
disinfectant levels, since this is the only way you
can prevent the spreading of germs (bacteria,
viruses, etc.) in the water. Please have a shower
before and after swimming. Never enter or jump
into the water when you are overheated.
• Never sit down on the edge of the pool and do
not cause excessive water movement, especially
in case of free-standing pools.
• Avoid running around the swimming pool (danger
of slipping).
• Never allow animals (dogs, cats, sh) to swim in
your swimming pool.
• Never use the pool in the dark or in dangerous
weather (lightning, thunder, thunderstorm).
• Never swim or dive between the ladder and the
pool wall (danger of getting trapped).
• Keep a working phone and a list of emergency
numbers near the swimming pool.
• Never climb directly out of the pool, always use
the ladder. Excessive pressure and kicks against
the pool wall can cause damage to or breakdown
of the swimming pool. Never sit on the basin
edge/top rail.
• Do not use any sharp-edged cleaning devices or
toys, which could damage the lining (inside).
• Check all screw connections on a regular basis
and ensure that there are no sharp-edged
corners or edges on the pool or accessories (e.
g. ladders) that could cause a risk of injury.

Assembly and Operating Instructions 'Basic' Pools
8
English
PURCHASE INFORMATION / TECHNICAL DATA ROUND POOLS
Note:
This pool conforms
to the EN16562-1
standard. It is
supplied as above-
ground pool kit.
F
EB
A
D
C
A
Diameter
(m)
B
Height
(m)
C
Volume
(l)
D
Water
surface
E
Max.
depth of water
F
Max.
outer dimension
Time required
for setup (excl.
concrete)
No. of people
required for setup
3.00 0.90 6,000 7 m² 0.80m
Pool size + 5 cm
2h 2 - 3
3.50 0.90 8,000 9.6 m² 0.80m 2h 2 - 3
4.00 0.90 9,000 12.5 m² 0.80m 2.5h 3
3.00 1.10 7,350 7 m² 1.00m 2h 2 - 3
4.00 1.10 12,850 12.5 m² 1.00m 2.5h 3
5.00 1.10 20,500 19.5 m² 1.00m 3h 3
3.00 1.20 8,000 7 m² 1.10m 2h 2 - 3
3.50 1.20 11,000 9.6 m² 1.10m 2h 2 - 3
4.00 1.20 14,000 12.5 m² 1.10m 2.5h 3
4.20 1.20 15,000 13.5 m² 1.10m 2.5h 3
4.50 1.20 18,000 16 m² 1.10m 2.5h 3
5.00 1.20 22,000 19.5 m² 1.10m 3h 3
5.50 1.20 26,000 23.7m² 1.10m 3h 3

Assembly and Operating Instructions 'Basic' Pools
English
9
PURCHASE INFORMATION / TECHNICAL DATA FIGURE-8 SHAPED POOLS
Note:
This pool conforms
to the EN16562-1
standard. It is
supplied as above-
ground pool kit.
G
FC
A
BE
D
A
Length
(meter)
B
Width
(meter)
C
Height
(meter)
D
Volume
(liters)
E
Water
surface
F
Max.
depth of water
G
Max.
outer dimension
Time required
for setup (excl.
concrete)
No. of people
required for setup
4.70 3.00 1.20 13,000 11.3 m² 1.10m
Pool size +
5 cm
3.5h 3
5.25 3.20 1.20 16,000 14.0 m² 1.10m 3.5h 3
5.40 3.50 1.20 18,000 15.75 m² 1.10m 3.5h 3
6.50 4.20 1.20 25,000 21.5 m² 1.10m 3.5h 3
PURCHASE INFORMATION / TECHNICAL DATA OVAL POOLS
Note:
This pool conforms
to the EN16562-1
standard. It is
supplied as above-
ground pool kit.
G
FC
A
BE
D
A
Length
(meter)
B
Width
(meter)
C
Height
(meter)
D
Volume
(liters)
E
Water
surface
F
Max.
depth of water
G
Max.
outer dimension
Time required
for setup (excl.
concrete)
No. of people
required for setup
4.90 3.00 1.20 14,000 12.5 m² 1.10m
Pool size +
5 cm
3h 3
5.25 3.20 1.20 17,000 15 m² 1.10m 3h 3
6.00 3.20 1.20 19,000 17 m² 1.10m 3.5h 3
6.23 3.60 1.20 21,000 18.5 m² 1.10m 3.5h 3

Assembly and Operating Instructions 'Basic' Pools
10
English
Use Above ground pool, semi-inground pool, inground pool
Assembly kit type Above ground pool kit
Water resistance classication WO: 0 lt
Tools required
for setup:
Straightedge
Water level
Spade / Shovel
Rubber mallet
Vibrating plate, if required
Hack saw
Folding rule
Flat blade screwdriver
10 mm ring spanner
Cord
Peg
Marking spray or bottle of our
Tools necessary for concrete work are not listed.
Material required in addition Floor protection eece
Water care products
Useful accessories Floor vacuum cleaner
Scoop
Protecting cover
Dosing oat
Water tester
Lighting
Enclosed
safety labels
Be aware of
the risks
of diving.
Children must be
supervised by adults
at all times.
Danger.
Risk of
drowning.
Manufacturer: Summerfun Pools S.A.R.L., Rue de Colonel Bouvet, 68530 Buhl/France

Assembly and Operating Instructions 'Basic' Pools
English
11
CHOOSING A LOCATION
Please clarify rst if the selected swimming pool
can be built at the chosen location without a building
permit and without further ofcial formalities. Please
take into account that there must be no pipes (gas,
water, electricity, telephone, etc.) in the installation
area of your new swimming pool. Built-in swimming
pools (inground, semi-inground) must not be
installed in the area of strata water or ground water.
Sunny location: We recommend to select
a location that provides a maximum of solar
radiation per day.
Trees: There should be no trees in the
immediate vicinity of the pool, since they may
cause pollution (foliage, needles, pollen) and
excess shading.
Wind: Use the main wind direction in such a way
that dirt that falls on the water surface is driven
towards the skimmer.
Logistics/neighbours: To operate your
swimming pool, you need electricity (protected
by a residual current circuit breaker), water to
rell, and a sewage connection/sewer pipe. You
should place the pool as close to the house
as possible, if necessary next to the terrace.
However, you should always ensure that
technical problems will not result in damage to
the house (e.g. leaking water owing into the
basement). Be also careful that neighbours are
not disturbed excessively, and ensure that the
site is well protected (privacy), if possible.
CHOOSING THE RIGHT ACCESSORIES
There are number of useful accessories for your
swimming pool, some of which are difcult or
impossible to retrot. This primarily includes all
built-in parts such as oor drain (which contributes
signicantly to an improved water circulation),
additional inlet nozzles, submersible oodlights for
recessed installation, integrated countercurrent
systems, etc. Other components can be installed
later (e.g. solar power system, heat pump, safety
cover, etc.). It is advisable, however, to consider
what you may want to add later at the time when the
pool is initially installed.
Important information to be
observed before assembly
Thank you for purchasing a quality product
from Waterman. Our 'Basic' pools prot from
decades of know-how, which has deepened
over the years. Our production facilities for
these pools are located in the Alsace, close
to the German border. Our employees at our
headquarters in Wendlingen am Neckar (near
Stuttgart) constantly check and further develop
the technology. Please read these instructions
carefully, and do not hesitate to contact us
directly in case of questions.

Assembly and Operating Instructions 'Basic' Pools
12
English
WATER CIRCULATION
Our steel wall pools are delivered as standard with
a skimmer press-cut (suitable for mini-skimmer,
rectangular, approx. 148 x 140 mm) and a 60 mm
round cut for 1 inlet nozzle, which is located approx.
80 cm next to it. Holes for other built-in parts must
be cut/punched on site during the assembly of the
pool.
Depending on the shape of the pool (in particular
for larger oval and gure-8 shaped pools), a second
inlet nozzle can be installed to improve the water
circulation (which may also save water treatment
agents), or you can place the two discharge nozzles
on the the opposite side of the skimmer (with a
T-tting between the two).
FILTER SHAFT
Especially for inground swimming pools it is
advisable to build a lter shaft (e.g. made of bricks).
Advantage: lter system and other technical
components are not visible. It also provides a good
noise insulation, and the lter system is protected
from the weather. However, it is important to provide
a good drainage (including sewer connection) so
that even in the event of an unplanned heavy rainfall
or a defect in the lter system, the lter system/
electrical connections cannot be ushed over. A
good ventilation of the lter shaft prevents corrosion
damage and should be taken into account during the
planning.
PIPING
As standard, our pools are delivered with a 38
mm swimming pool hose. This hose must not be
laid directly in the ground. In case of an inground
installation, we recommend to place this hose in a
conduit. Alternatively, many swimming pool builders
use a xed piping or a 50 mm glued hose. The
advantage of this is that the pipes are more stable,
and the smooth inside and the larger diameter
reduce the ow resistance, which has a positive
effect on lter performance/water ow (contact your
dealer, if necessary/we can also offer an alternative
piping for your pool). When laying the hose or piping
as well as skimmer and inlet nozzles, ensure that
these parts are easily accessible in case of a defect,
so that they can be replaced if necessary.
Skimmer
Inlet nozzles

Assembly and Operating Instructions 'Basic' Pools
English
13
Pool setup (round pools)
Before setting the pool up, check that all required parts are available according to the attached parts list:
Swimming pool
diameter/depth
Pack of prole rails
Top rail Q2
Bottom rail Q2
Liner with
J-hook
Steel wall
with perforation and
2 fastening rails
Screw set and
screw cover
Ground-
ing
kit
Ø 300 cm x 90 cm 1 1 1 1 1
Ø 350 cm x 90 cm 1 1 1 1 1
Ø 400 cm x 90 cm 1 1 1 1 1
Ø 300 cm x 110 cm 1 1 1 1 1
Ø 400 cm x 110 cm 1 1 1 1 1
Ø 500 cm x 110 cm 1 1 1 1 1
Ø 300 cm x 120 cm 1 1 1 1 1
Ø 350 cm x 120 cm 1 1 1 1 1
Ø 400 cm x 120 cm 1 1 1 1 1
Ø 450 cm x 120 cm 1 1 1 1 1
Ø 500 cm x 120 cm 1 1 1 1 1
Ø 550 cm x 120 cm 1 1 1 1 1
THERE ARE 3 DIFFERENT MOUNTING OPTIONS
Above ground / ground level Semi-inground
(Attention, the built-in part of the
pool requires a lean concrete
backll.)
Completely inground
(Possible only with a lean con-
crete backll (20 – 30 cm.) The
pool must always be lled with
water, never leave without water
for a longer period.

Assembly and Operating Instructions 'Basic' Pools
14
English
PREPARATION OF FOUNDATION FOR ROUND POOL
The best substrate for your swimming pool is a
concrete slab (thickness approx. 20 cm), which must
be perfectly level (terraces, paved areas, etc. are
critical/not suitable, since they use slopes).
1. Mark the required oor space by driving a
pole in and drawing a circle with a cord and
marking spray or our bottle.
Alternatively, you can do without a concrete slab in
case of small round pools if you take the following
into account:
2. Remove grass, ground cover/plant cover, and
roots completely.
3. Excavate soil until the ground is perfectly
level (never backll and do not use sand to ll
up). The ground must be perfectly level, with
a max. deviation = 1 cm on the entire oor
space, load bearing capacity of the ground at
least 1.2 tons (with a pool depth 1.20m) or 1
ton (with a pool depth 0.90m).
The pool must be set up on natural ground, never on
a slope. Please compact the ground with a vibrating
plate. The diameter of the installation place for the
pool should exceed the actual pool diameter by
at least 20 cm. In case of an inground installation,
adjust the cord length according to the wall backll
(in case of ground pressure, we recommend a 30
cm lean concrete backll).
Installation oor drain (optional/not included):
You can install a oor drain in addition to the
skimmer. This will result in an improved pool
hydraulics/recirculation of the pool water. When
installing a oor drain a concrete slab is required,
which should ideally be slightly lowered in the
middle, towards the oor drain.
Dimensions swimming pool Length of
cord
300 cm 160 cm
350 cm 185 cm
400 cm 210 cm
500 cm 260 cm
550 cm 285 cm
Use the suction function of the oor drain only when
the pool is not used (no bathers), since otherwise
there is a risk of suction to the oor.

Assembly and Operating Instructions 'Basic' Pools
English
15
INSTALLATION FLOOR PROTECTION
FLEECE
After the foundation has been properly prepared
and the substrate is perfectly level, you must
cover the ground with a synthetic oor protection
eece (not included in the delivery). Please clean
the surface thoroughly once again and remove all
stones/unevenness, which could be dangerous for
the liner.
Place the eece either end-to-end and secure with
double-sided adhesive tape, or allow it to overlap
(i.e. covering the edges). The eece should exceed
the pool dimensions by about 10 cm on the outside
(if no protective eece is used, there is no warranty
on the liner).
ASSEMBLING THE BOTTOM RAILS
The next step is assembling the bottom rail
segments with the connecting tubes.
Please note that the bottom rails must be shortened
to the length of the steel wall.
STEEL WALL SETUP
Do not set the pool up in case of strong winds.
There should be at least 3 people to help so that the
steel wall does not bend/tilt over. To stabilize the
wall during assembly, the top rail segments can be
temporarily attached on the top of the raised steel
wall. Please wear protective gloves as the steel wall
can have sharp edges. Place the steel wall on a
wooden board and carefully roll it apart. Insert the
steel wall into the bottom rails (white side outwards).
It may be helpful to push the bottom rails into the
steel wall from below with a board. Ensure that the
skimmer pre-cut is located at the top of the metal
wall (it becomes visible after having unrolled about 1
meter of the steel wall) is at the top of the steel wall.
Remove the skimmer cut by breaking it away.

Assembly and Operating Instructions 'Basic' Pools
16
English
CONNECTION OF STEEL WALL ENDS (TO BE SCREWED TOGETHER)
The ends of the steel wall overlap, so that the holes
of the two steel wall ends are exactly on top of each
other. Two additional 2 stabilizer bars included to
stabilize the wall. One of these bars must be tted
form the inside and one from the outside (see
image). Insert the screws with screw heads on the
inside of the wall, then attach a washer rst and
then a nut on each screw from the outside (tighten
rmly with a 10 mm ring or fork wrench). To avoid
damage to the liner later on, it is imperative to
cover/pad the screw heads with thick package or
insulation tape (not included in delivery).
Finally, attach the blue protective cover (guardrail)
on the screw heads (plugged in from the outside) so
that the screw ends cannot cause any injury.
Important :
Tighten all screws rmly and check
them regularly. Loose screws may
cause a crack in the steel wall.
GROUNDING THE SWIMMING POOL (EQUIPOTENTIAL BONDING)
Drill a Ø 5 mm hole into the steel wall, just above
the bottom rails. Attach the enclosed grounding kit
(see drawing) and connect the cable to an approx.
30 cm long metal earth spike (not included in
delivery) which you anchor in the ground. In case of
a concrete backll, place the grounding through this
into the ground. In case of above ground pools, drive
the earth spike completely into the ground so that it
cannot cause any injuries.
Attention: According to DIN/VDE regulations,
electrical installations may only be carried out by
authorized specialist companies.
ASSEMBLY OF OTHER COMPONENTS
Before attaching the liner, cut/punch all holes
required for the assembly of other built-in parts
(e.g. second inlet nozzle, oodlights, countercurrent
systems etc.) into the steel wall, carefully remove all
chips and metal parts and protect the cutting areas
with a zinc spray from rust.

Assembly and Operating Instructions 'Basic' Pools
English
17
LINER INSTALLATION/ASSEMBLY:
We recommend unpacking and unrolling the liner
one day before assembly. In this way, wrinkles from
transport are avoided. Handle the liner with utmost
care (never walk on it with shoes, do not drag/pull
over the oor, etc.). The manufacturer does not
assume liability for any mechanical damage that
occurs during assembly. Please also pay attention
to the possible presence of metal chips and residual
dirt, and remove these completely before assembling
the liner.
Please note that the PVC liner of your swimming
pool is made undersized, so there will be no wrinkles
inside the pool later. The liner must therefore be
installed at an outside temperature of about 20 to 25°,
since it is at this temperature that it is most expansible
and exible. The liner must never be placed without
oor protection eece (felt mats), never directly on
polystyrene or other materials, as these may cause
irreparable damage to the liner, for example due to
the removal of plasticizers.
Since the liner is always slightly smaller than the
pool, it is partly necessary to pull the liner with force
to hook it in.Since the liner is always slightly smaller
than the pool, it is partly necessary to pull the liner
with force to hook it in. Do not be afraid to pull it, the
liner has a stretching capacity of over 10%.
First put the liner in the middle of the pool and then
unfold it. In case of gure-8 shaped and oval pools,
begin assembling the liner in the middle and slowly
work your way to both outer sides of the pool. Pay
attention to the vertical liner weld; it must never be in
the area/at the level of components (skimmer, inlet
nozzle, etc.), as otherwise it would not seal properly
at this point.
The liner is now hooked to the top of the steel wall
with the help of the J-bead (this is a reinforcement
bead welded to the top edge of the liner). You can
temporarily x the liner, for example with clothes
pegs, while you are still aligning it.
At rst, ll only the basin only with about 1 to 2 cm
water. After the liner has been installed on the outer
steel wall, check if the water level has increased
evenly everywhere. If this is not the case, the pool
is sloping and it is necessary to adapt/correct the
foundation/subsoil (check this once again when the
pool is completely/partly lled, the soil may partially
settle under the weight of the water).
Next align the liner and push all remaining wrinkles
outwards towards the steel wall. Note that wrinkles
can only be removed if there is a maximum of 3-5 cm
of water in the pool; with a higher level it is no longer
possible to remove wrinkles due to the pressure of
the water.
Use only tap water and never use well water (to avoid
problems with the water quality/brown water).
3 cm
Max.
110 - 140cm

Assembly and Operating Instructions 'Basic' Pools
18
English
ASSEMBLY OF TOP RAIL
(QUALITY Q2):
The quality/nish/design of top rails and bottom
rails is identical for Basic pool. For a round pool,
for example, the delivery includes 2 complete sets,
of which you use one as bottom rails and one as
top rail. They are assembled after the liner has
been installed without wrinkles. The individual top
rail segments are connected with the connecting
sleeves and at the end, just like the bottom rails
before, the last section is cut to the correct length
of the steel wall. Ensure that the individual top rail
segments are tted rmly and correctly together so
no gaps between the segments are visible later on.
Since the Q2 top rail is manufactured with a very
narrow grip to ensure a rm t on the steel wall, we
recommend to carefully tap it together with a rubber
mallet.
ASSEMBLY OF COMPONENTS:
All installation parts (skimmers, inlet nozzles,
headlights, etc.) may only be installed after the
water level has risen to just below the steel wall
cut-out. Otherwise there may be tears in the liner or
leakage may occur if the water level is raised later
on and the liner would be lowered again as a result.
CONCRETE BACKFILL
In case of inground pools, a lean concrete backll
is mandatory (20 cm/for extra pressure by soil = 30
cm). To this end, use a gravel-cement mixture (grain
size 0 to 8) in a ratio of 8:1 earth-moist.
The concrete backll must run along the entire
installation area of the pool, otherwise there is a
danger that the ground soil will press the pool wall
in when replacing the water. First place/glue a
waterproof Styrodur (polystyrene) panel (about 2 cm
thick) from the outside in front of the steel wall (for
thermal insulation and protection of the steel wall),
and then ll in lean concrete in layers in the space
between the basin and the soil. The water level in
the pool should always be about 30 cm higher than
the backll. Under no circumstances compact the
lean concrete or use a concrete pump. Fill layers of
approx. 30 cm with lean concrete, then wait for at
least 1 day (hardening) before lling the next layer.
Ground
Concrete backll
in layers

Assembly and Operating Instructions 'Basic' Pools
English
19
Pool setup (gure-8 shaped pools)
Before setting the pool up, check that all required parts are available according to the attached parts list:
Swimming pool
external dimensions/depth (m)
Pack of prole rails
Top rail Q2 / Bottom rail Q2
Liner
Seat pack
Pair of supports (2-piece)
Base support 2048 mm
with end ange (M33362)
Base support 1738 mm
with angled joint bars (M89315)
Base support 2980 mm
one-piece (M89300)
Screw package and
screw cover strip
Steel wall with perforation
and 2 fastening rails
Grounding kit
4.70 x 3.00 x 0.90 1 1 1 1 1 1 1 1
4.70 x 3.00 x 1.20 1 1 1 1 1 1 1 1
5.40 x 3.50 x 1.20 1 1 1 1 2 1 1 1
6.50 x 4.20 x 1.20 1 1 1 1 2 1 1 1
Also check the length of the supplied steel girders carefully before embedding them in concrete.
THERE ARE 3 DIFFERENT MOUNTING OPTIONS
Above ground / ground level Semi-inground
(Attention, the built-in part of the
pool requires a lean concrete
backll.)
Completely inground
(Possible only with a lean con-
crete backll (20 – 30 cm.) The
pool must always be lled with
water, never leave without water
for a longer period.

Assembly and Operating Instructions 'Basic' Pools
20
English
PREPARATION OF GROUND
FOR FIGURE-8 SHAPED POOLS
The best substrate for your swimming pool is a
concrete slab (thickness approx. 20 cm), which must
be perfectly level (terraces, paved areas, etc. are
critical/not suitable, since they use slopes).
1. Mark the oor space by driving two pegs in at
distance A (see table), and draw two circles
with a cord (length see table) and a marking
spray or our bottle:
We recommend to install your Basic gure-8
swimming pool on a concrete slab with iron
reinforcement (thickness 20 cm). It is imperative that
the ground has a load bearing capacity of at least
1.2t (pool depth 1.20 m) or 1.0t (pool depth 0.90 m).
The ground must be perfectly level, with a maximum
deviation of 1 cm on the entire oor space of the
pool. With larger deviations, you risk the collapse of
the entire pool.
The diameter of the installation area for the pool
should be at least 20 cm larger than the pool size
(see cord length according to table). In case of an
inground installation, adapt the backll of the wall (in
case of pressing soil, we recommend a 30 cm lean
concrete backll). In this case, increase the cord
length by 10 cm (according to table).
It is mandatory to provide a trench with a width of
240 mm and a depth of 255 mm in the middle of the
concrete slab. This is where the steel slab will be
recessed and xed with concrete later. (For length of
the trench, see table on next page.)
The steel girder is ush-mounted into the base
plate (approx. 22.5 cm, up to the height of the xing
straps of the bottom rail connecting pieces).
Dimensions
swimming pool
Cord length
"R"
Distance
"A"
470 x 300 cm 170 cm 170 cm
540 x 350 cm 195 cm 190 cm
650 x 420 cm 230 cm 230 cm
Preparing a level
ground
Inground
pool
Trench for
steel girder
S
R
R
A
Table of contents
Other Waterman Swimming Pool manuals
Popular Swimming Pool manuals by other brands

Plastica
Plastica Self-Build Eco Wooden Pool installation manual

Aquarian Pools
Aquarian Pools Echo PPECH1848 Assembly instructions

Bestway
Bestway Slide-In manual

Intex
Intex Ultra XTR 128933GH owner's manual

Trigano
Trigano SPLASHER 880195-9 Assembly and user's guide

RPI
RPI NATURALIS 01 Assembly instruction guide