1110
SRP-14-GB(V3)
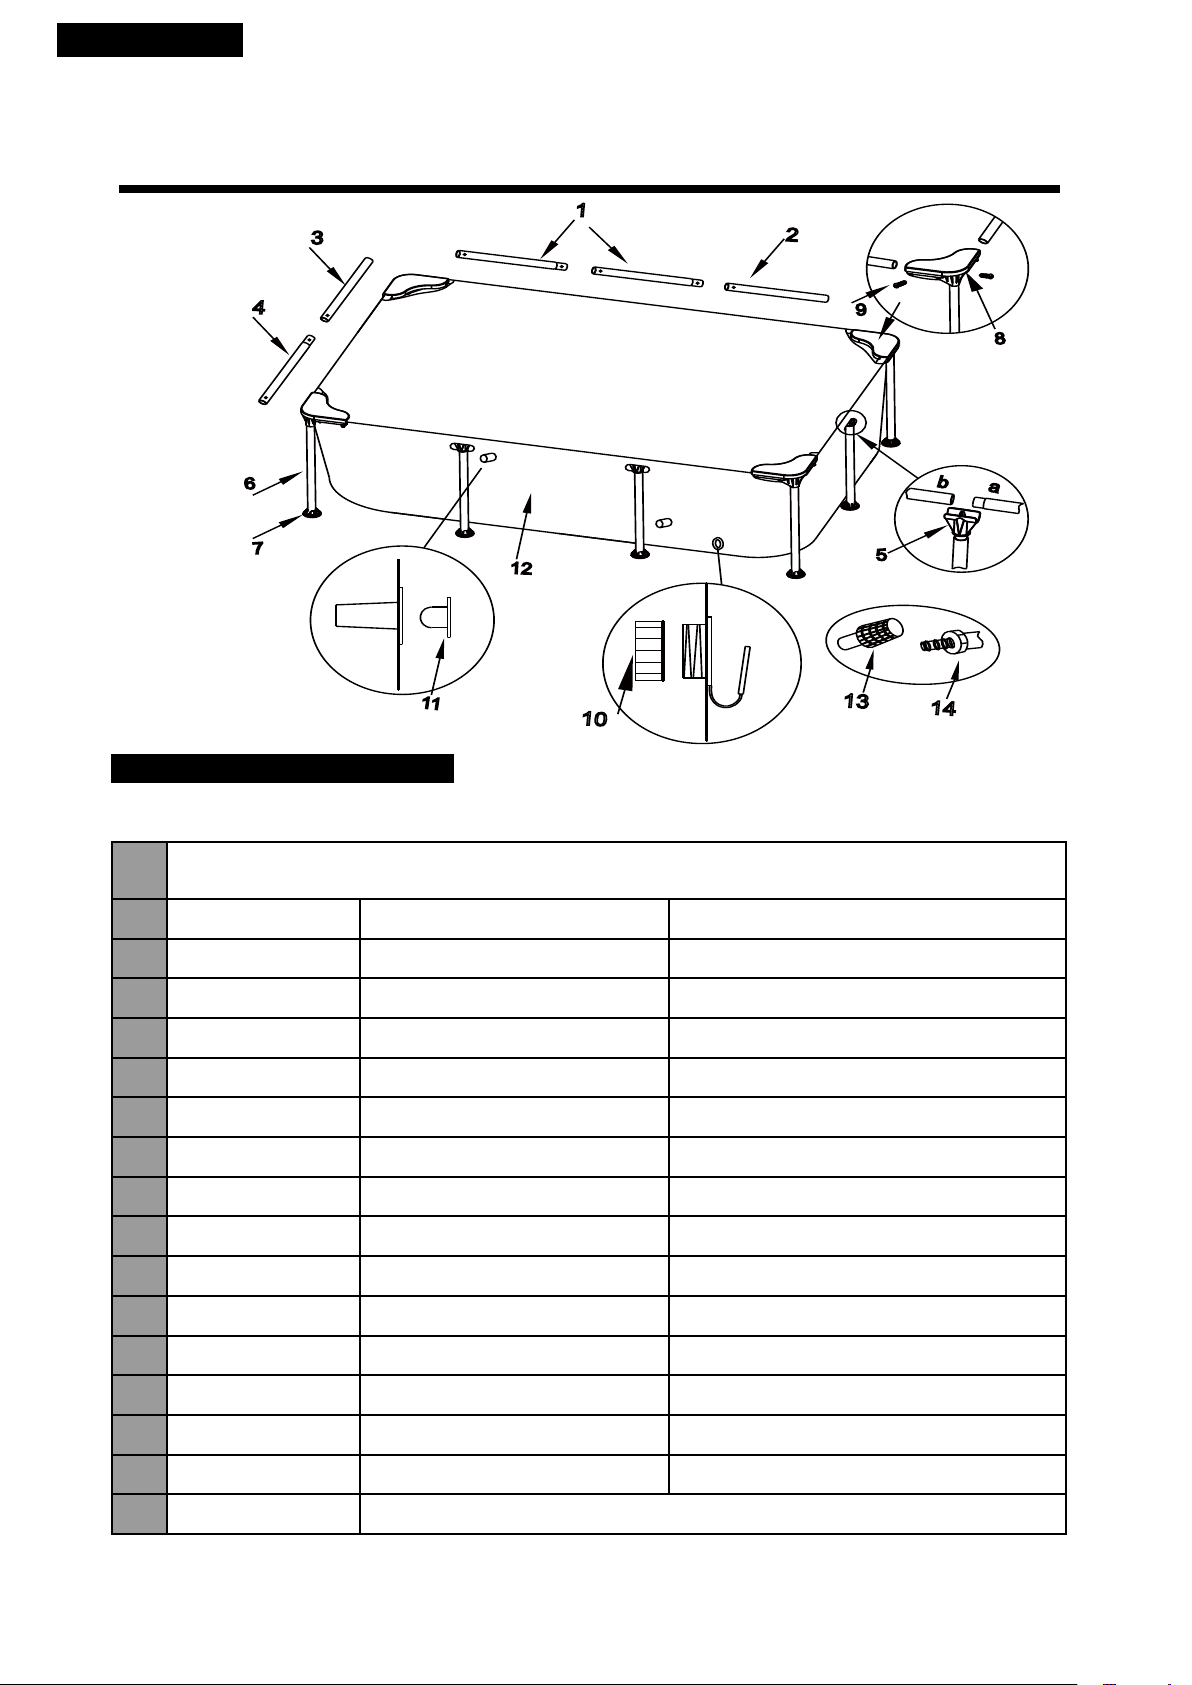
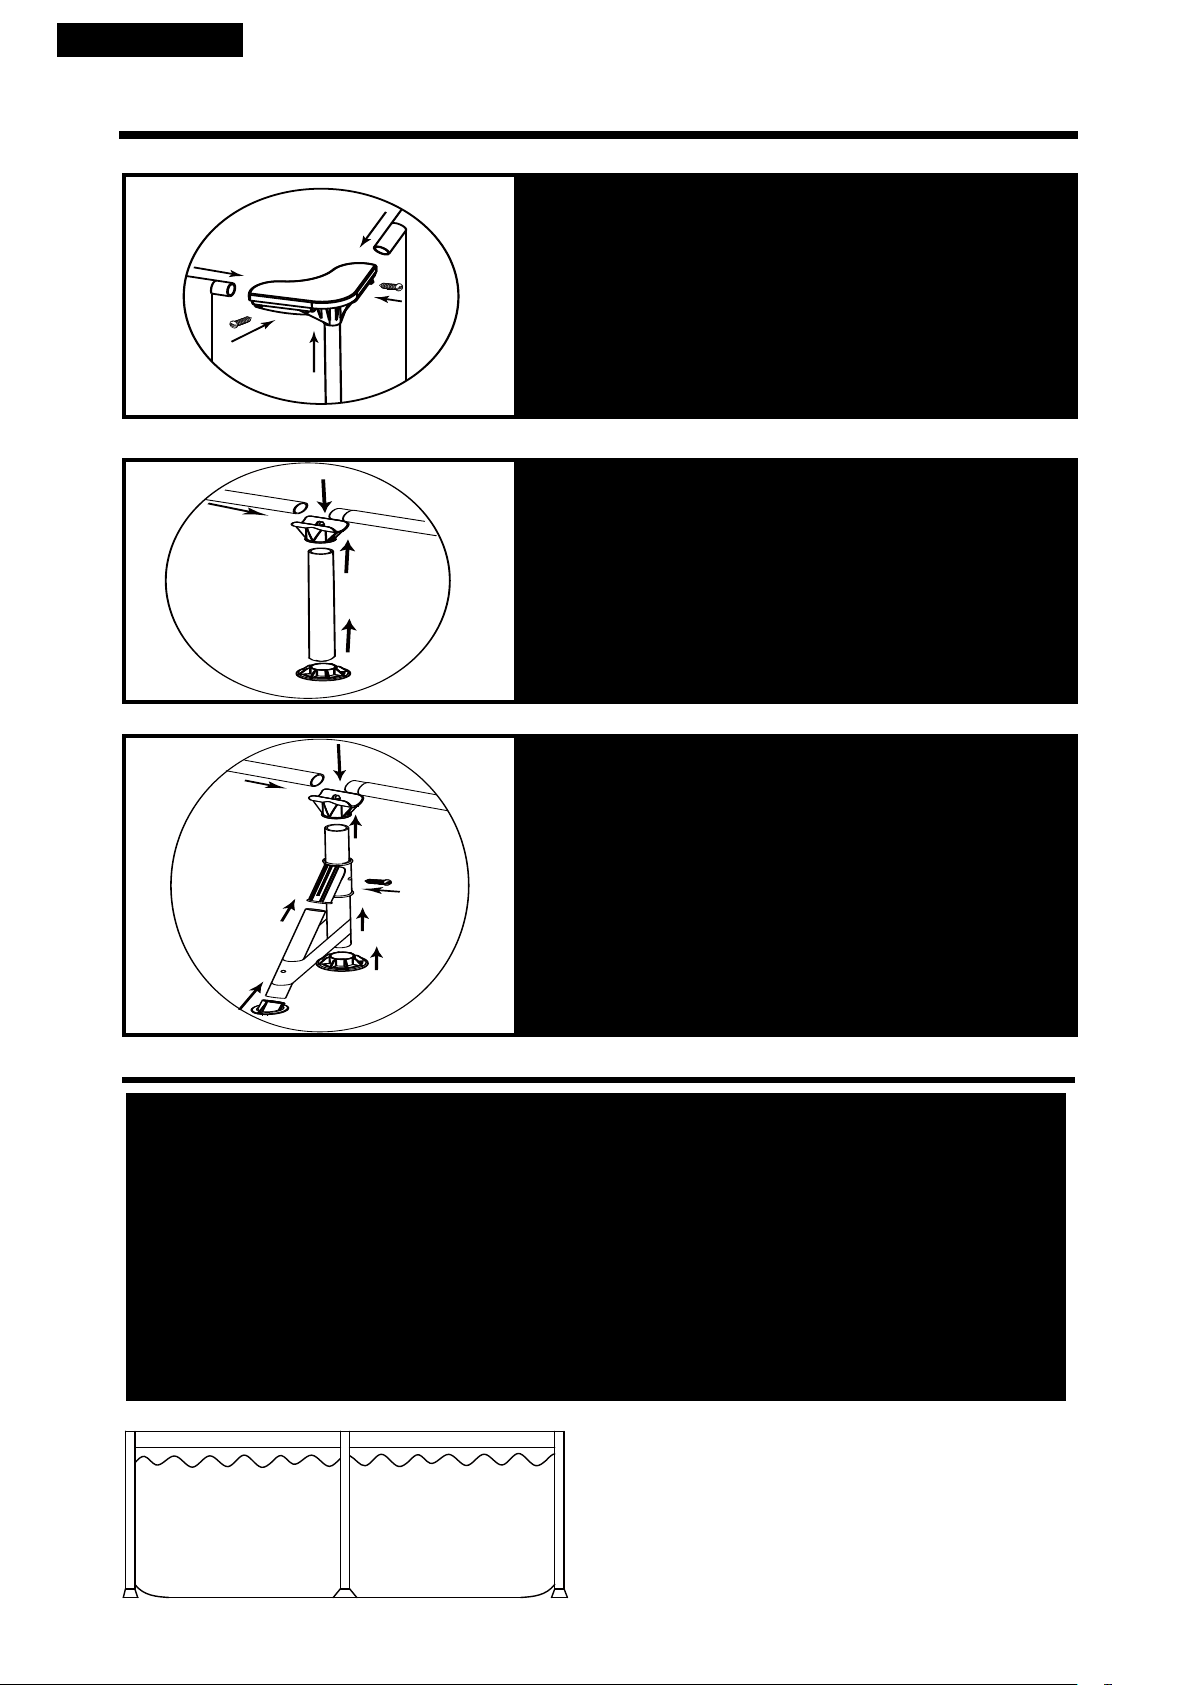
Step4. INSTALL L-JOINT
1. Use the connection end of the L-JOINT to connect the
adjacent horizontal tubes.
2. Use the connection end of the L-JOINT to connect the vertical leg.
(Install the vertical leg cap on the leg before.)
3. Install the screws onto the L-JOINT rmly.
TIP: If you can’t nd the hole on the horizontal tube when you install the
screw, please rotate the horizontal tube until the hole meets the screw.
1. Install the horizontal beams.
2. Install the vertical leg cap onto the leg.
3. Insert the vertical leg into the T-JOINT.
4. Install the T-JOINT onto the connected horizontal beam.
TIP: If you can’t nd the hole on the horizontal tube when you
install the T-JOINT, Please rotate the horizontal tube until the hole
meets T-JOINT.
1. Install the horizontal beams.
2. Install the vertical leg cap and tilted leg cap onto the corroesponding leg.
3. Insert the vertical leg and tilted leg into the Y-JOINT.
4. Install the screw onto the vertical leg and Y-JOINT rmly.
5. Insert the installed vertical leg into the T-JOINT.
6. Install the T-JOINT onto the connected horizontal beam.
TIP: Please rotate the horizontal tube until the hole meets T-
JOINT if you can’t nd the hole on the horizontal tube.
TIP: Please rotate the vertical leg until the hole meets Y-JOINT if
you can’t nd the hole on the vertical leg.
Step5. INSTALL T-JOINT
Step6. INSTALL Y-JOINT(IF APPLICABLE)
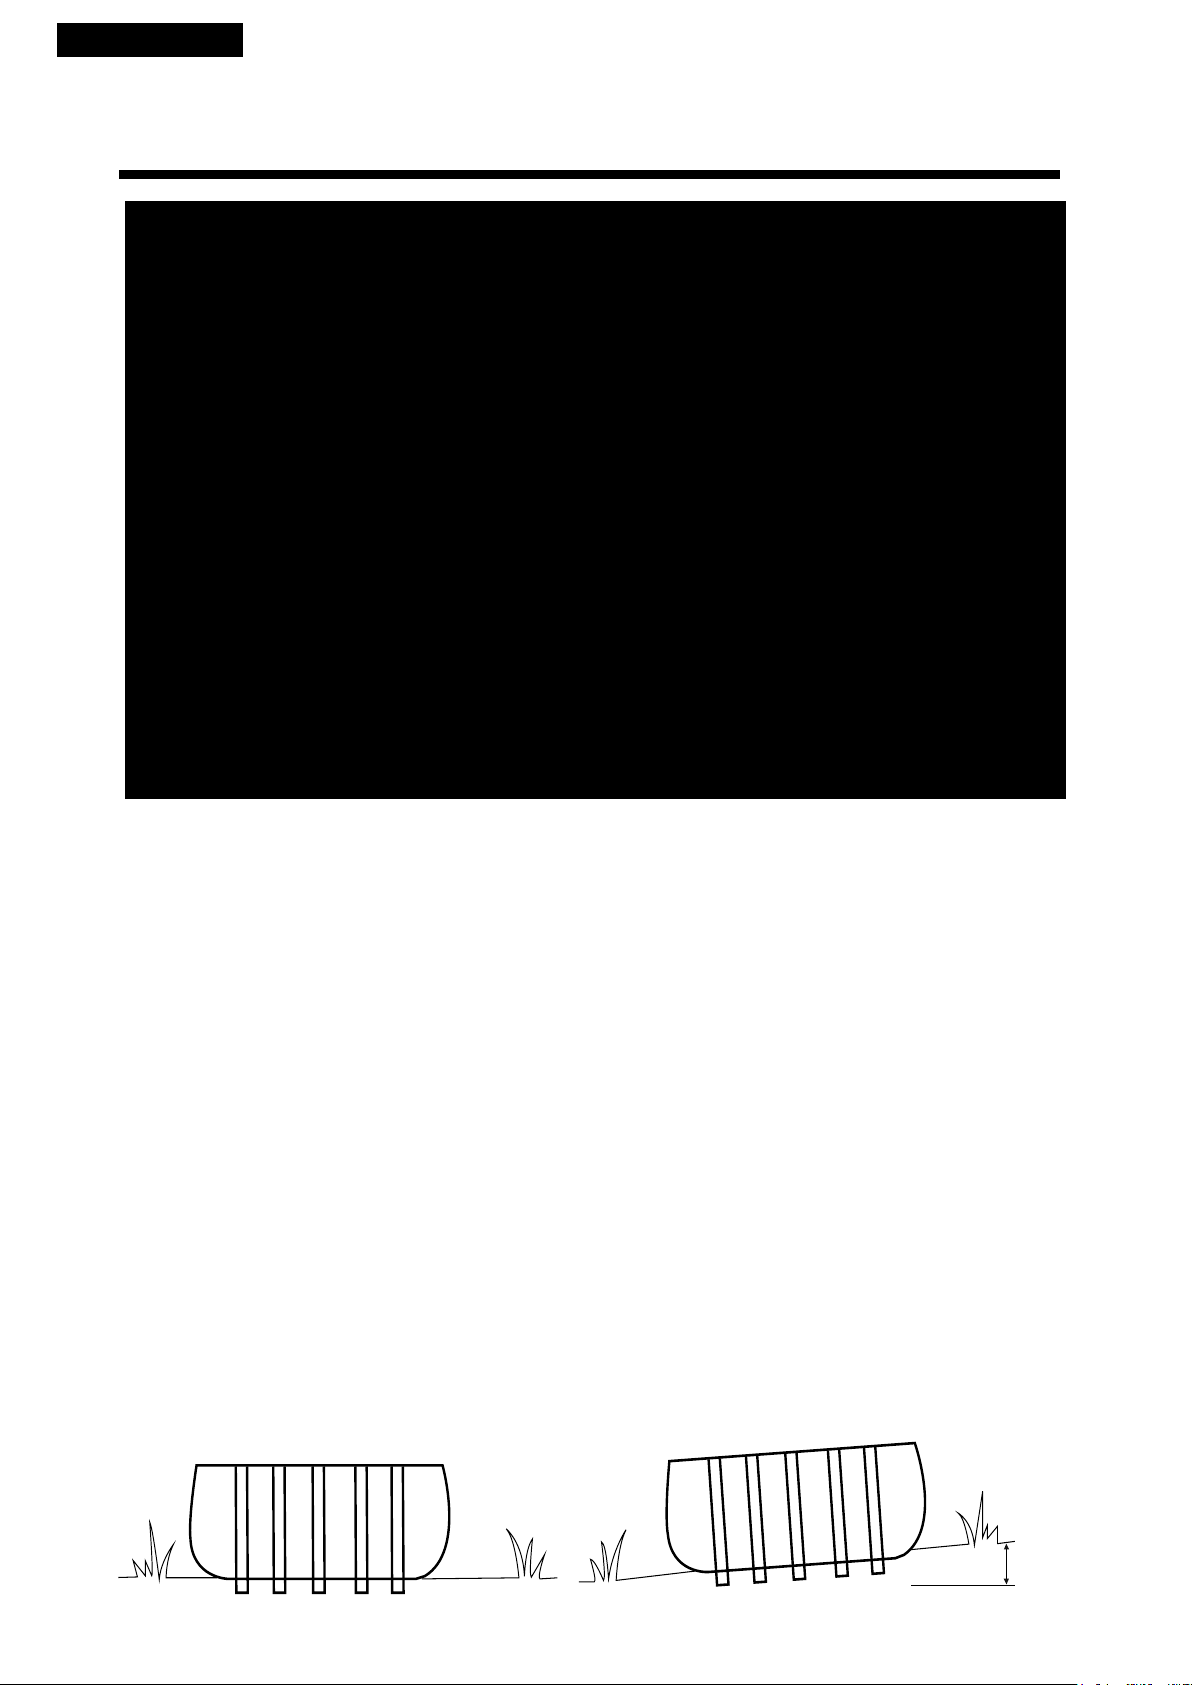
WARNING:
Do not leave pool unattended while lling with water.
WARNING:
If more than 1~2 inches of water collects on any one side before you
start lling in the center.The pool is not level enough, and must be corrected! You
shall pull out the drain plug, release the water completely, disassemble the pool
completely,locate the pool on a plane surface, repeat set up instructiion.
WARNING:
DO NOT OVERFILL as this could cause the pool to collapse.In times of
heavy rainfall you may need to empty some of the water to ensure the level is correct.
PART5-FILL THE POOL WITH WATER
1. Make sure the drain tting is plugged securely and the cap
is in place. Start lling the pool with water. After about 1-inch of
water is on the bottom, stop lling and smooth wrinkles out of the
bottom of the pool. Pull the outer wall out from under the top ring,
all around the bottom of the pool, so that it lls evenly.
2. Contineue lling the pool until water level .
PART4-SET UP THE POOL