Watts PURE WATER PWUV Series User manual

Installation, Operation
and Maintenance Manual
Ultra Violet Disinfection System
Series PWUV
IOM-WQ-PWUV
Important
Please read the entire manual before proceeding with the
installation and startup. Your failure to follow any attached
instructions or operating parameters may lead to the product’s
failure. Water must be prefiltered by a minimum of 5 micron
filtration.
Save manual for future reference.
Series PWUV
PURE WATER
Table of Contents
Installation .............................................2
Specifications ..........................................3
Replacing UV Lamp......................................3
Maintenance Suggestion ..................................3
Operating Conditions.....................................3
Parts List / Unit Drawing ..................................4
Limited Warranty ........................................4
Note: Do not use with water that is microbiologically unsafe or
of unknown quality without adequate disinfection before or after
the system.
2
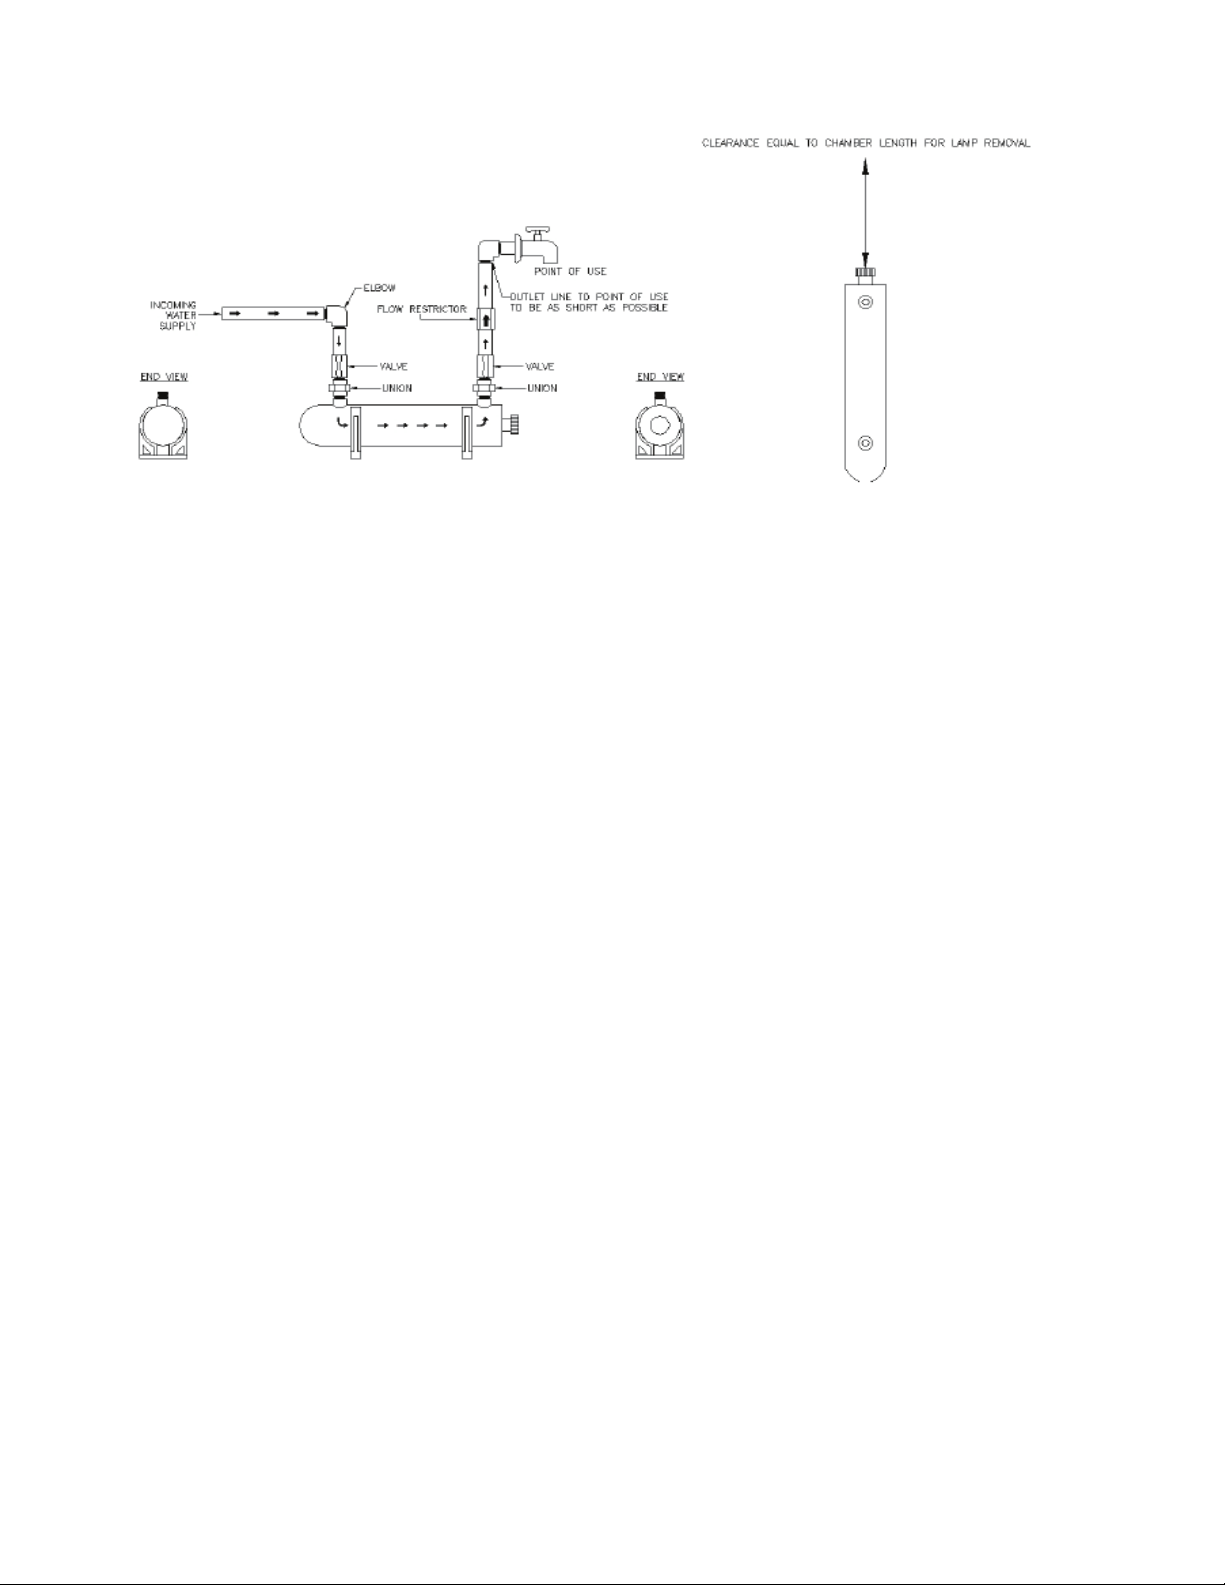
Installation Instructions
1. Install sterilizer equipment in a readily accessible and well lit
location to facilitate inspection and maintenance.
2. Inspect for hidden electrical wiring or plumbing prior to drilling
holes.
3. Attach mounting clips to the wall.
4. Insert chamber through mounting clips.
5. Connect to plumbing.
6. Install quartz sleeve and lamp.
Note: Avoid touching the sides of the quartz sleeve and lamp,
handle by the ends only.
a) Remove the retainer nut.
b) Slide the quartz sleeve into the chamber - closed end first.
c) Slide the O-ring over the open end of the quartz sleeve.
d)Tighten the retainer nut, hand tight.
e) Slide the lamp into the quartz sleeve.
f) Connect the lamp to the plug in transformer.
g) Cover the lamp connection with the vinyl cap.
7. Turn on the water and inspect for leaks. Repair if necessary.
8. a) For 110 VAC Units – Plug the transformer into an electrical
outlet. An electrical outlet protected by a Ground Fault Circuit
Interrupt (GFCI) circuit is recommended.
b) For 220 VAC Units – Obtain the appropriate plug for your type
of receptacle and attach it to the end of the power cord and
plug it in.
Typical Installation

3
Specifications
Notes: Line cord and lamp lead wire omitted for clarity.
Product code Flow rate
(GPM)
PiPe Size diMenSionS
(l X w X H)
electrical SHiPPinG
(lbS.)
PWUV2110 21⁄2" MNPT 18" x 6" x 53⁄8" 110-130 v / 50-60 Hz 6
PWUV2220 21⁄2" MNPT 18” x 6” x 53⁄8"200-250 v / 50-60 Hz 6
PWUV6110 63⁄4" MNPT 251⁄2" x 6” x 53⁄8"110-130 v / 50-60 Hz 7
PWUV6220 63⁄4" MNPT 251⁄2" x 6” x 53⁄8"200-250 v / 50-60 Hz 7
PWUV8110 83⁄4" MNPT 32" x 81⁄4" x 33⁄4"110-130 v / 50-60 Hz 9
PWUV8220 83⁄4" MNPT 32" x 81⁄4" x 33⁄4"200-250 v / 50-60 Hz 9
PWUV12110 12 1" MNPT 411⁄2" x 81⁄4" x 33⁄4"110-130 v / 50-60 Hz 17
PWUV12220 12 1" MNPT 411⁄2" x 81⁄4" x 33⁄4"200-250 v / 50-60 Hz 17
Replacing UV Lamp and Servicing
UV System
Note: Avoid touching the sides of the quartz sleeve and lamp,
handle by the ends only.
Step 1 Disconnect power.
Step 2 Turn water off and open valve downstream of system to
relieve pressure.
Step 3 Remove vinyl cap and unscrew the nut.
Step 4 Carefully withdraw lamp approximately 2 inches from
chamber.
Step 5 While holding lamp end carefully remove lamp socket on
end now exposed.
Step 6 Carefully withdraw lamp from chamber.
Step 7 Carefully remove O-ring from the end of quartz sleeve.
Step 8 Carefully remove quartz sleeve.
Step 9 To reinstall follow Steps 8 through 1 in reverse.
Maintenance Suggestion
To operate the sterilizer properly and attain its maximum efficiency,
the following maintenance is recommended:
1. Quartz sleeve cleaning or replacement:
a) Quartz sleeve is to be cleaned every 6-12 months, clean with
glass cleaner.
b) Quartz sleeve is to be replaced every 24 months.
2. UV lamp replacement is recommended every 8000-9000 hours
of operation (approx. 12 months of continuous service).
CAUTION: Ultraviolet lamp and quartz sleeve are easily dam-
aged. Pay attention when removing or replacing lamp and
quartz sleeve.
Operating Conditions
Maximum Operating Pressure: 125psi (8.9 bar)
Maximum Operating Temperature: 104°F (40°C)
Minimum Operating Temperature: 36°F (2°C)
UV Dose At End Of Lamp Life (1 year or 9,000 Hours): 30mj/cm2
Maximum Iron: Less Than .3 PPM
Maximum Manganese: Less Than .05 PPM
Maximum Turbidity: Less Than 5 NTU
Maximum Hydrogen Sulfide: Less Than .05 PPM
Maximum Hardness: Less Than 7 Grains Per Gallon as CaCO3
Flow
rate
(GPM)
bulb Model ballaSt Model Quartz SleeVe Model
2PWUVBULB2 PWUVBAL2 PWUVQS2
6PWUVBULB6 PWUVBAL6-12 PWUVQS6
8PWUVBULB8 PWUVBAL6-12 PWUVQS8
12 PWUVBULB12 PWUVBAL6-12 PWUVQS12
Replacement Parts
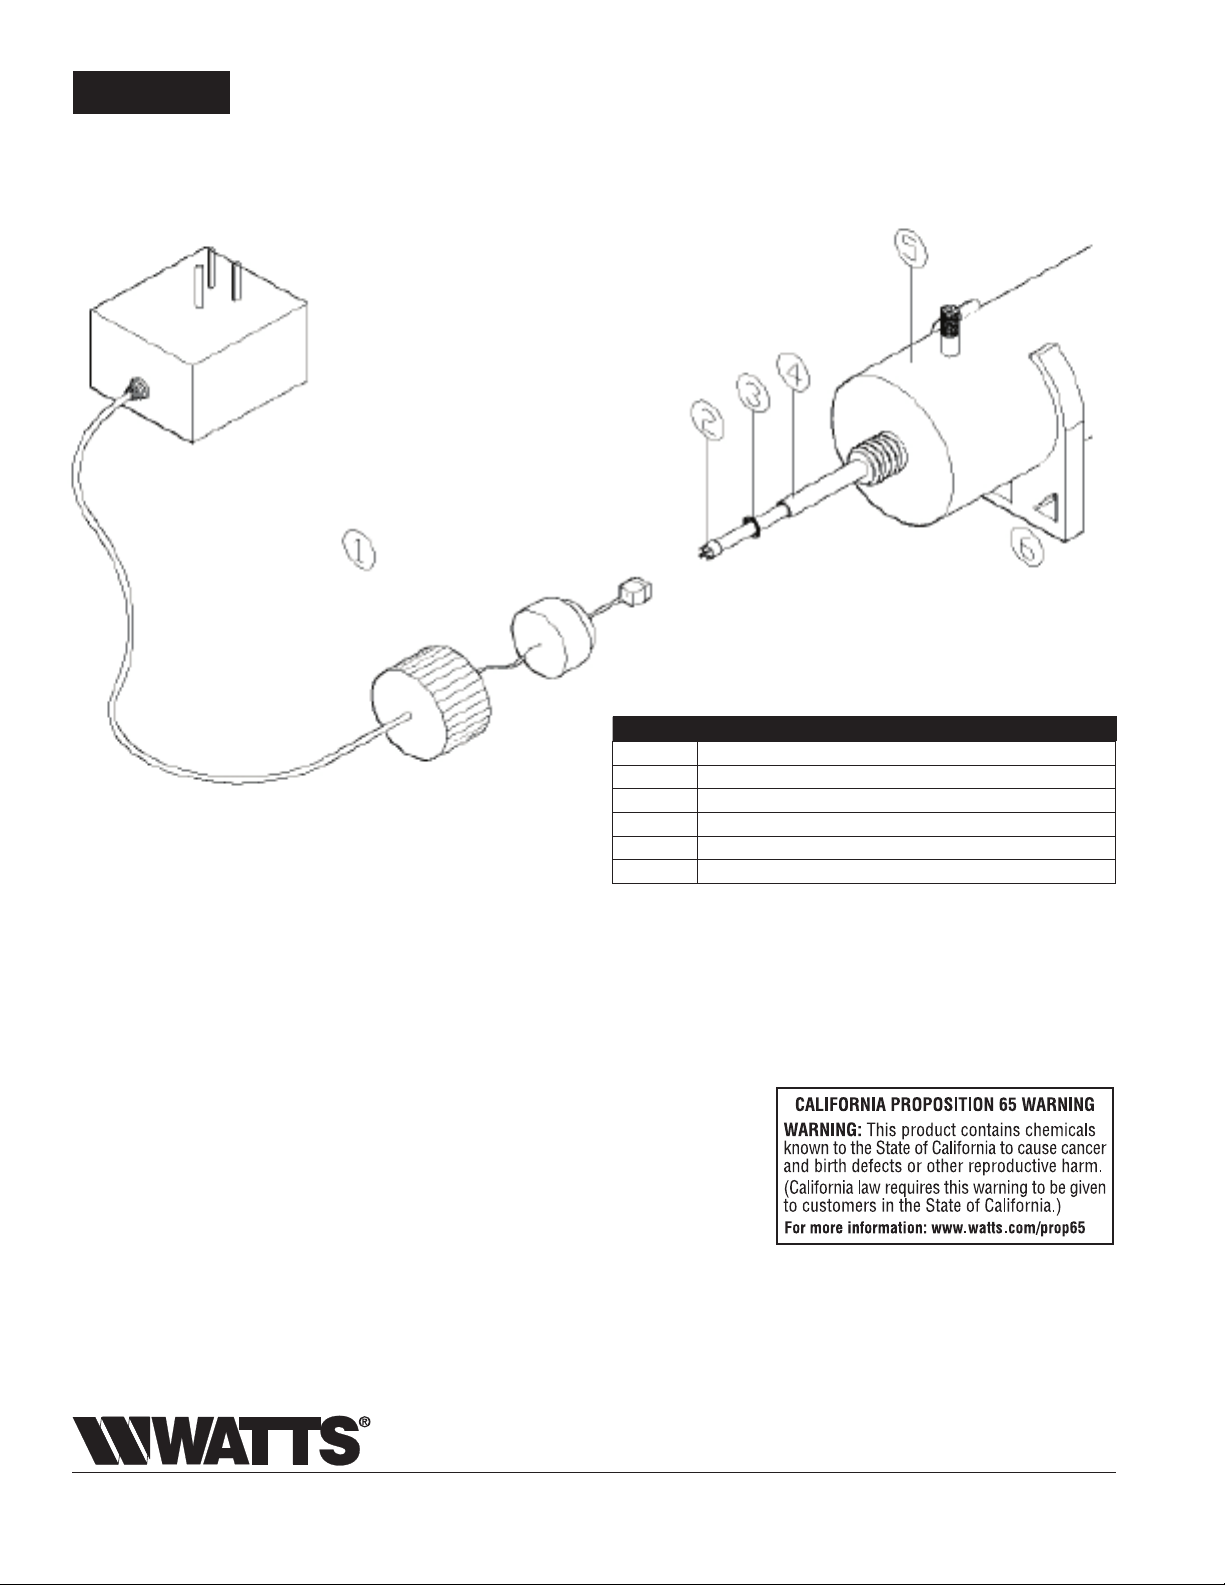
iteM deScriPtion
1Ballast Assembly
2Germicidal Ultraviolet Lamp
3Rubber O-ring
4Quartz Sleeve
5Chamber
6Mounting Clip
Parts List
IOM-WQ-PWUV 1225 EDP# 2915895 © 2012 Watts
USA: Tel. (800) 224-1299 • www.watts.com
Canada: Tel. (888) 208-8927 • www.watts.ca
A Watts Water Technologies Company
liMited warrantY: Certain Watts Pure Water products come with a limited warranty from Watts Regulator Co. Other products may have no warranty or are covered by the original manufacturer’s
warranty only. For specic product warranty information, please visit www.watts.com or the published literature that comes with your product. Any remedies stated in such warranties are exclusive and
are the only remedies for breach of warranty. eXcePt For tHe aPPlicable Product warrantY, iF anY, wattS MaKeS no otHer warrantieS, eXPreSS or iMPlied. to tHe FulleSt eXtent
PerMitted bY aPPlicable law, wattS HerebY SPeciFicallY diSclaiMS all otHer warrantieS, eXPreSS or iMPlied, includinG but not liMited to tHe iMPlied warrantieS oF
MercHantabilitY and FitneSS For a Particular PurPoSe, and in no eVent SHall wattS be liable, in contract, tort, Strict liabilitY or under anY otHer leGal tHeorY, For
incidental, indirect, SPecial or conSeQuential daMaGeS, includinG, witHout liMitation, loSt ProFitS or ProPertY daMaGe, reGardleSS oF wHetHer it waS inForMed about
tHe PoSSibilitY oF SucH daMaGeS.
This manual suits for next models
8
Popular Laboratory Equipment manuals by other brands


Belden
Belden HIRSCHMANN RPI-P1-4PoE installation manual

Koehler
Koehler K1223 Series Operation and instruction manual

Globe Scientific
Globe Scientific GCM-12 quick start guide

Getinge
Getinge 86 SERIES Technical manual

CORNING
CORNING Everon 6000 user manual

Biocomp
Biocomp GRADIENT MASTER 108 operating manual


