WattWheels ALPINE 2019 User manual
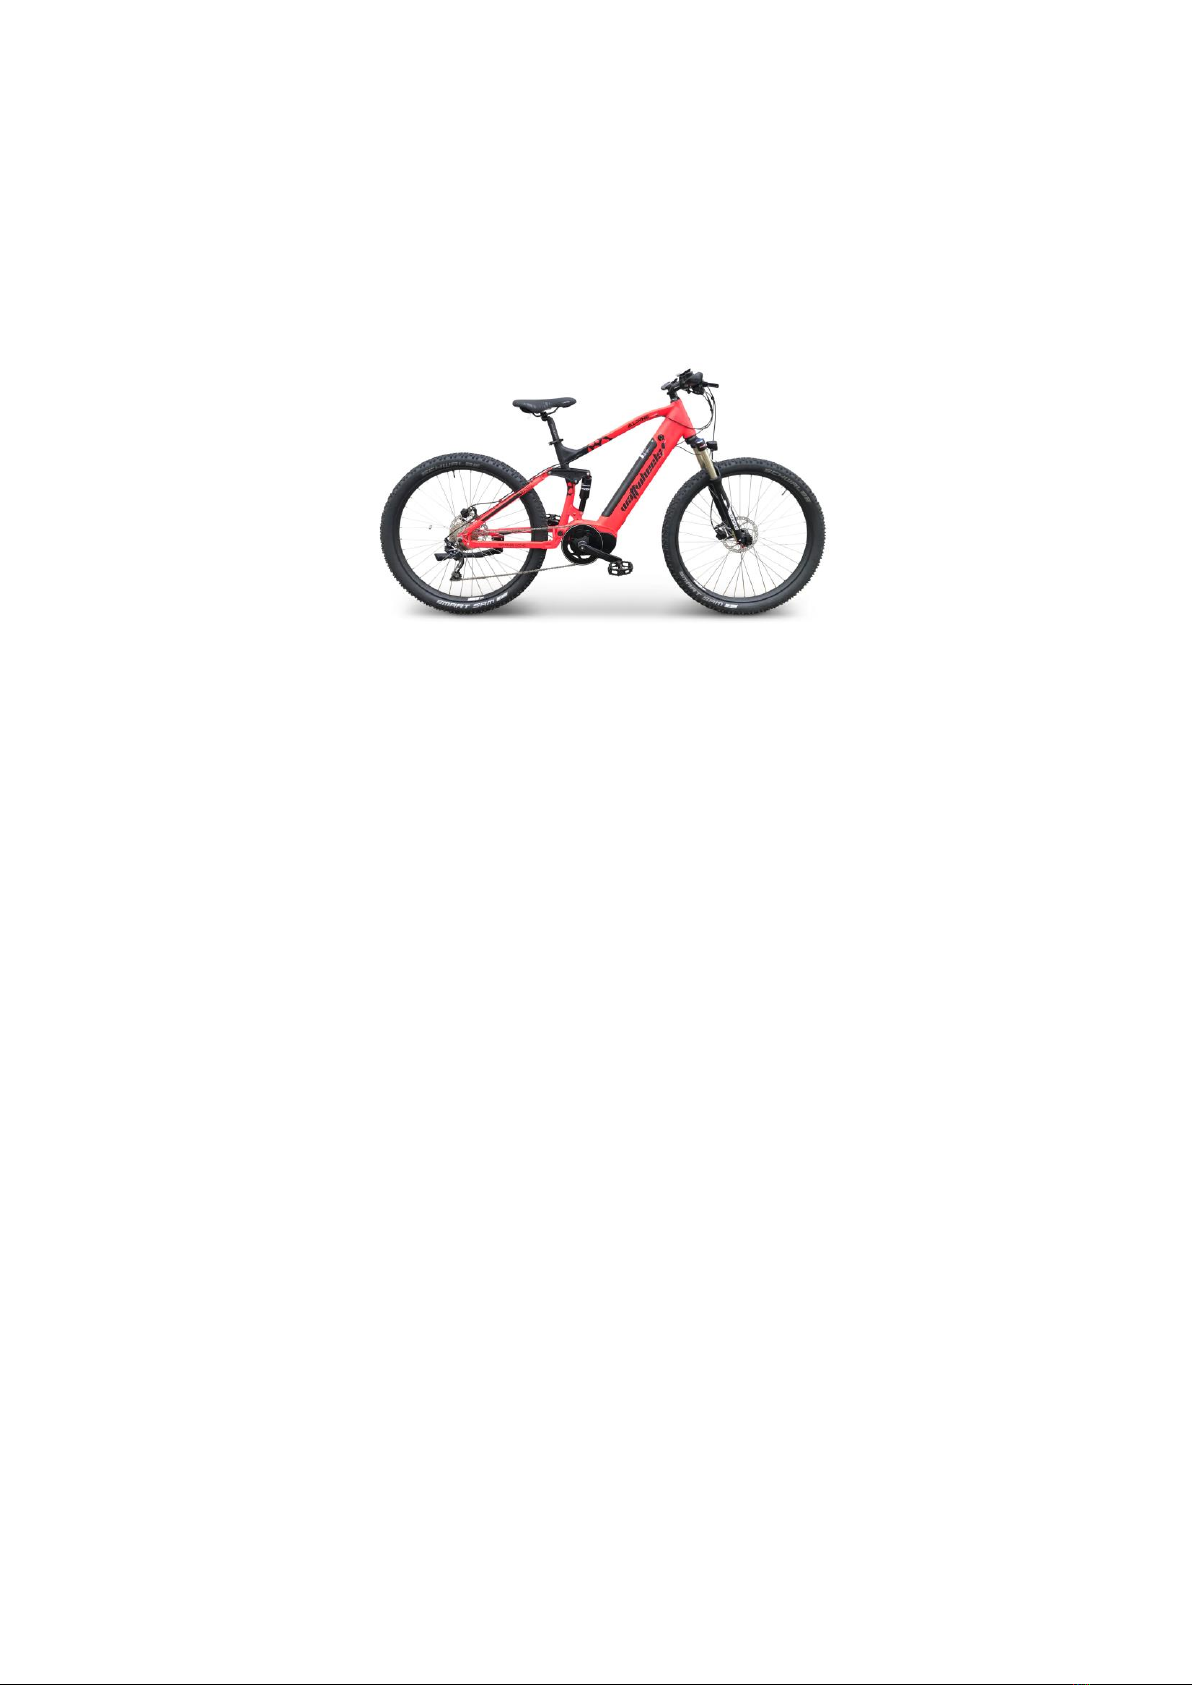
ALPINE ELECTRIC BIKE 2019 MANUAL
Welcome
First off, welcome to the Wattwheels family! We’re so happy to have you on board! You’ve picked a
great model and, in this manual, we’re going to break down the basics to make sure that your bike
remains in top shape and performs to the highest standard.
You’re about to experience the ride of your life. In order to get you out and having fun as quickly and
as safely as possible please read the all the manual carefully, paying close attention to the safety
section.
Also, we highly recommend familiarizing yourself with local laws for e-bikes and the components of
the model that you have before your first ride.
Wattwheels assumes that all persons involved in: using, repairing, maintaining, cleaning, or disposing
of this or any Wattwheels product must have fully read and understood the content and meaning of
these operating instructions.
Additionally, Wattwheels claims no responsibility for any injury or damage resulting in improper use of
any electric bike.
READY TO GET STARTED? LETS RIDE!
USING THIS MANUAL
This manual contains details of the product, its equipment, and information on its operation and
maintenance. Read it carefully and familiarize yourself with the Alpine before using it to ensure a safe
use and prevent tragic accidents. Be sure to retain this manual as your convenient Alpine Electric Bike
information source.
This Manual contains many Warnings and Cautions concerning the safe operation and consequences
in safe setup, operation and maintenance. All information in this manual should be carefully reviewed
and if you have any questions you should contact your local retailer immediately.

Because it is impossible to anticipate every situation or condition which can occur while riding, this
manual makes no representations about the safe use of bicycles under all conditions. There are risks
associated with the use of any bicycle which cannot be predicted or avoided, and which are the sole
responsibility of the rider. You should save this manual, along with any other documents that were
included with your bicycle, for future reference, however all content in this manual is subject to
change or withdrawal without notice. Visit www.wattwheels.co.nz to download the latest version.
Wattwheels makes every effort to ensure accuracy of its documentation and assumes no responsibility
of liability if any errors or inaccuracies appear within. Assembly and first adjustment of your Alpine
Bike requires special tools and skills and it is recommended that this should be done by a trained
bicycle mechanic if possible.
LET’S GET STARTED:
1. COMPLETLEY CHARGE THE BATTERY BEFORE THE FIRST USE
(Red light is on when battery is charging, green when fully charged. Approx. time is around 4-5 hours)
(PLEASE BE CAREFUL NOT TO PRESS THE BRAKES LEVERS WHILE THE FRONT WHEEL IS NOT
INSERTED. DOING SO WILL RESULT IN THE BRAKES PADS CLAMPING TOGETHER, AND YOU WILL NOT
BE ABLE TO INSERT THE FRONT WHEEL WITHOUT BLEEDING THE BRAKES IN WHICH YOU WILL NEED
A BIKE WORKSHOP TO PERFORM)
2. ASSEMBLE THE HANDLEBARS
3. ATTACH THE PEDALS
(Beware: The left-hand pedal has a reverse thread. To tighten, please turn anti-clockwise)
4. ATTACH THE SEAT POST
5. ATTACH THE FRONT MUDGUARD AND ATTACH FRONT LIGHT
6. INSERT THE FRONT WHEEL WITH QUICK RELEASE
7. CHECK ALL SCREWS AND BOLTS ARE TIGHT, SEAT POST THE CORRECT HEIGHT AND BRAKES
WORKING PROPERLY
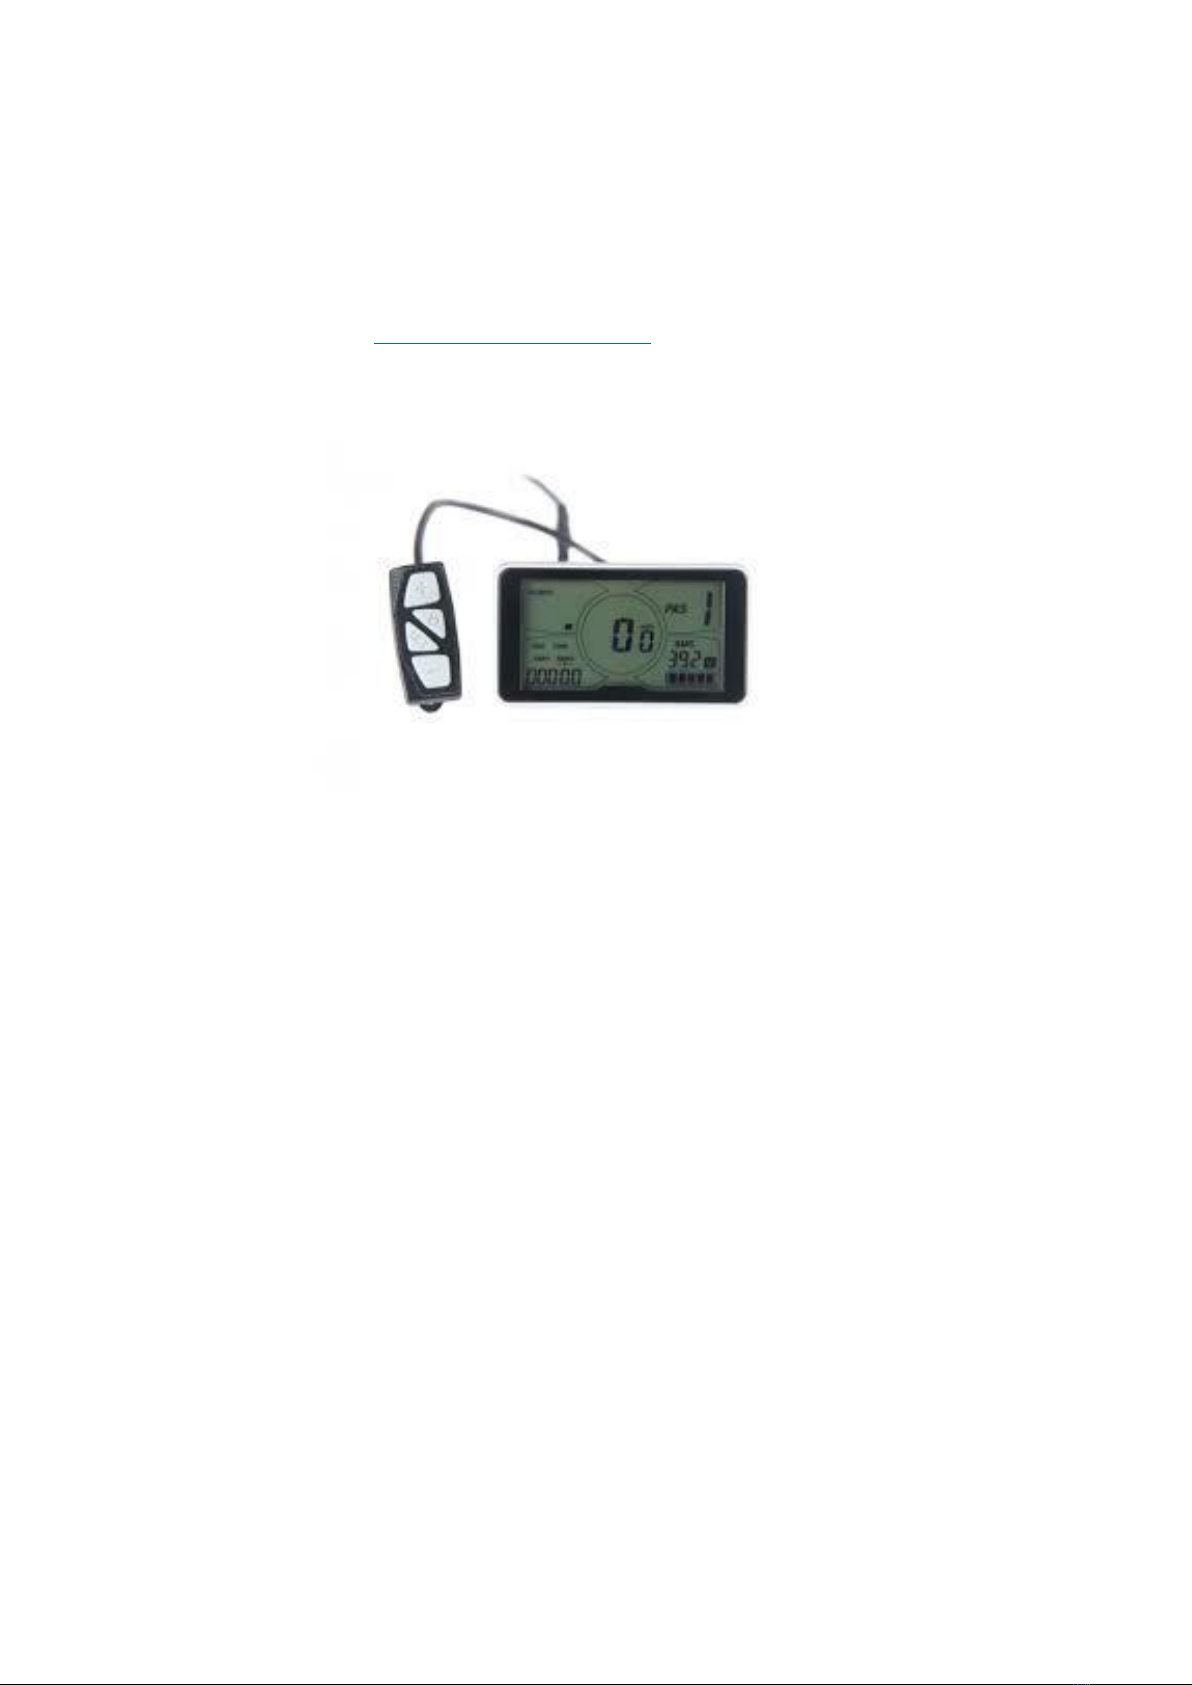
LCD DISPLAY FEATURES
The image shows the various features and information displayed on the wireless remote. The display is
controlled using the 5-button remote mounted on the left side of the handlebar. For more
information on the LCD display and operation please refer to the manual included. This is also on
located on our website at www.wattwheels.co.nz/manuals
LIGHTS
To activate the lights press on the light button located on the keypad. A little icon should appear at
the top of the display indicating the light is on. To turn off , press down the light button again.
BATTERY DISPLAY CAPCITY
The LCD readout on the handlebar of your Alpine Bike features a battery capacity gauge (much like
the fuel gauge on an automobile). It is recommended that users stop operating the bike on electric
once the bike gets near 1%. Remember you can still ride without using the electric motor or display!
THROTTLE
The Throttle is located on the left-hand side of the handlebars in the form of a thumb piece. Please be
aware using the throttle will drain the battery much quicker than normal riding. Also, the throttle is
not designed to climb steep hills. To get the maximum amount of power from the bike on steep
gradients select the highest level of PAS and use the highest gear.
PAS (Pedal assist modes)
Pedal assist modes start from 1 and go up to 5. This can be changed if required. Refer to the Display
manual. PAS level 1 is the first pedal assist level and will give you some slight assistance. The rider
however will still be doing most of the work. As you select the higher levels, the assistance will
increase with level 5 basically doing all the work for you. Using higher levels of PAS will drain the
battery faster. The recommended level is PAS 2-3 to ensure maximum battery life.

BRAKES
The Alpine electric bikes are equipped Tektro hydraulic disk brakes. Please be aware the hydraulic disk
brakes are very powerful, so care is too be taken when braking. The front wheel brake is located on
left hand side with the rear wheel brake on the right. All the brakes are equipped with a cut-out
feature which means if either of the brakes are pressed the motor will automatically cut out.
TYRE PRESSURE
To avoid flats, keep tire pressure at the recommended PSI. On off-road terrain a slightly lower PSI will
provide more grip, but flats can occur.
WARNING Caution should be exercised when inflating tires with compressor air pressure equipment
(e.g. gas stations). Due to the relatively small volume of air required be sure not to overinflate the
tires as this can cause them to burst. Correct tire pressure should be adjusted according to the terrain
within the range of 24 to 60 psi
DRIVING RANGE
The range of your Alpine Bike is the distance the bike will travel on a single full charge of the onboard
battery pack. The range values in this manual are estimates based on expected usage characteristics.
Some of the factors which effect range include changes in elevation, speed, payload, and acceleration,
number of starts and stops and ambient air temperatures. Tire pressure and terrain are also important
variables to consider.
We suggest that you ride conservatively when you first get your Alpine Bike to get to know your bike
and travel routes.
Once you become familiar with the range requirements of your travel routes, and the capabilities of
your Alpine Bikes you can then adjust you riding characteristics if you so desire.
The following table provides general estimates and outlines various factors effecting range and their
combined estimated effects on range. This table is meant to help owners understand the factors that
can increase of decrease range, but Wattwheels makes no claims to the range that individual users
might obtain

Expected Range
Operating Conditions
50 Km
o Hilly Terrain
o Heavy Payload
o Windy
o High Speeds
o High PAS Level
75 Km
o Flat Terrain
o Normal Payload
o Not Windy
o Medium Speeds
o Moderate PAS Level
100+ Km
o Flat Terrain
o Normal Payload
o Not Windy
o Low Pedal Assist Level
ADJUSTING THE SEAT HEIGHT
Use the quick release lever to free the seat post and pull upwards or push downwards to reach
desired height.
Notice: Ensure seat post and seat are properly adjusted before riding. Do not raise the seat post
beyond the minimum insertion marking etched into the seat post tube. If your seat post projects
from the frame beyond these markings, the seat post or frame may break, which could cause you
to lose control and fall. Prior to first use, be sure to tighten the seat clamp properly. A loose seat
clamp or seat post binding bolt can cause damage to the bicycle or can cause you to lose control or
fall. Periodically check to make sure these the seat clamp is properly tightened.
RIDER COMFORT
To obtain maximum comfort, the rider should not overextend his or her arms reach when riding. In
order to obtain the most comfortable riding position and offer the best possible pedaling efficiency,
the seat height should be set correctly in relation to the rider’s leg length. The correct saddle height
should not allow leg strain from over extension, and the hips should not rock from side to side when
pedaling. While sitting on the bicycle with one pedal at its lowest point, place the ball of your foot on
that pedal. The correct saddle height will allow the knee to be slightly bent in this position.

BATTERY & CHARGING
The battery can be either charged by leaving the battery in the bike or by removing it.
To remove the battery, insert the key and lift the lever attached to the battery and pull. This will enable
you to take the battery out of the bike. Insert the keys then press in and turn anti clockwise until the
locking mechanism retracts from the battery mount.
When the battery is on you can see the current charge state by pressing on the button located on top
of the battery. This will give you 4 bars. A full battery will indicate three bars lighting up green and one
red at the bottom.
Removing the battery from the bike when storing it for a long period of time is recommended. In this
case store it in a cool, dry area away from water. The charge left in the battery should be 50%-75% for
long storage times.
Cleaning the battery and battery housing should only be done while disconnected and powered off.
Use a dry rag, and if need be a lightly damp rag.
DO NOT spray with high-pressured water to prevent damage or possible short-circuiting. Only charge
the battery with the supplied charger as others may not function properly, and this increases the
possibility of fire or explosion.
Charging the battery during the day in a dry space with a smoke/fire alarm is recommended, while
placing the battery on a non-flammable surface. Do not store the charger or battery in a wet place or
in direct sunlight.
Lithium-ion batteries are meant to be recharged with 10%-15% of the charge remaining to prevent
damage to the cells. Keep both the battery and charger out of the reach of children and If there
appears to be an issue with the charger or battery, stop use immediately and contact either the
manufacturer or Wattwheels at admin@wattwheels.co.nz

Charging:
•Firstly, insert plug of the charger into charging socket of the battery box.
•Second, Insert the charger into the socket of the home power supply. It shows the power has already
been put through when the indicator lamp of the charger is on.
•It is charging when the indicator light is red. When the light turns from red to green, it indicates that
the battery is fully charged.
•After the green light is on, the charger is in little electric current and “fill slowly mode". It will not be
harmful to the battery if left to charge for a longer period or overnight. We do recommend not
leaving for longer than 48hours if possible
Please don't use the charger of other brands to charge. The electric apparatus contains a high-
pressure circuit.
USEFUL TIPS
While starting or climbing, please ride with feet auxiliary as much as possible, otherwise the energy
consumption will be very high. By doing this it can lengthen the life of battery and motor.
• This specified load of the Electric Bicycle is 120kg, please don't overload.
• While riding if the level of charge shows only one bar is recommended to ride as a normal bike at
this time and charge as soon as you can.
• Close the power and take down the key, while parking.
• The power switch of the LCD panel should be turned off every time making sure the Electric Bicycle
won’t start suddenly and cause accidents.
• Try and reduce braking frequently while riding, in order to save the electric energy.
• Do not turn on the bike when the brake levers are depressed as this will l trigger the faulty brake
sensor and disable the motor.
• Inspect the bolts on a regular basis, to ensure that they are tight and all components are secure.
This is especially important if you are riding in demanding conditions.
As with all bikes pay particular attention to the crank bolts, as they are subject to loosening faster than
any other bolt due to forces.
Regularly check the brake pads, the provided Tektro pads should be replaced if they have:
-Been contaminated
-Have less than .8mm of material
-Cracks or deformation
To replace the brake pads or perform other maintenance take it to a qualified professional at your
local bike shop.
Properly inflate your tyres according to riding conditions. Under-inflated tyres are prone to pinch flats,
especially if riding off-road.

Please don't dismantle and repair parts by yourself, please go to your local bike repair shop. This bike
comes with a full comprehensive warranty (document included) so for any standard repairs please
contact Wattwheels and we will arrange a service agent close to you to look at the bike. We carry
spare parts so anything electrical that a standard bike shop doesn’t have we will ship to you.
BEST PRACTISES FOR EXTENDING BATTERY LIFE
Notice: It is recommended that users pay close attention and ride within the following limitations to
ensure the hub motor does not overheat or become damaged from excessive loading.
o Do not climb hills steeper than 15% in grade.
o Pedal to assist the motor when climbing hills and accelerating from a stop.
o Avoid sudden starts and stops.
o Accelerate slowly.
PARKING, STORAGE & TRANSPORT
Please follow these basic parking, storage and transport tips to ensure your bike is well cared for on
and off the road.
o When pushing the bike manually, turn off the power to avoid accidental acceleration from the
motor.
o It is recommended to park indoors.
o Switch the power off, and any lights to conserve battery. Remove the key from the bike and ensure
the battery is locked to the frame or removed and brought with you for security.
o In public places, your Alpine Bike must be parked in accordance with local rules and regulations.
o If you have to park outdoors in rain, or wet conditions you should only leave your Alpine Bike
outside for a few hours and proceed to park the bike in a dry location afterwards in order to allow all
the systems to dry out. Much like a regular bike, use in wet conditions mandates a more regular
maintenance schedule to ensure your bike does not become rusty, corroded and to ensure all systems
are always working safely.
o Do not park, store, or transport your Alpine Bike on a rack that is not designed for the size and
weight of the bike.
o Wide tyres, as used on Alpine Bikes, cannot fit into all bike racks, please select an appropriate rack
for the width of tyres used on your bike.
o Locking up your bike is recommended to ensure your bike is secure and the chance of theft is
reduced. Alpine
Bikes makes no claims or recommendations on the proper lock hardware or procedures to secure your
bike, but we do recommend you take the appropriate precautions to keep your Alpine Bike safe from
theft.
o When storing your bike or carrying your bike on a rack for transport, you can remove the battery
pack to reduce the weight of the bike and make lifting and loading easier.

SAFETY CHECK
Safety Check
Basic Steps
1. Brakes
o Ensure front and rear brakes work properly.
o Ensure brake pads are not over worn and are correctly positioned in
relation to the rims.
o Ensure brake control cables are lubricated, correctly adjusted and
display no obvious wear.
o Ensure brake control levers are lubricated and tightly secured to the
handlebars.
2. Wheels and Tyres
o Ensure tyres are inflated to within the recommended limits displayed on
the tire sidewalls.
o Ensure ties have tread and have no BULGES OR EXCESSIVE WEAR.
o Ensure rims run true and have no obvious wobbles or kinks.
o Ensure all wheel spokes are tight and not broken.
o Check axle nuts and quick releases to ensure they are tight. If your
bicycle is outfitted with quick release axles, ensure the locking levers are
correctly tensioned and in the closed position.
3. Steering
o Ensure handlebar and stem are correctly adjusted and tightened, and
allow proper steering.
o Ensure the handlebars are set correctly in relation to the forks and the
direction of travel.
4. Chain
o Ensure the chain is oiled, clean and runs smoothly.
o Extra care is required in wet or dusty conditions
5. Bearings
o Ensure all bearings are lubricated, run freely and display no excess
movement, grinding or rattling.
o Check headset, wheel bearings, pedal bearings and bottom bracket
bearings.
6. Cranks and Pedals
o Ensure pedals are securely tightened to the cranks.
o Ensure the cranks are securely tightened and are not bent.
7. Derailleurs
o Check that the derailleur(s) are adjusted and functioning properly.
o Ensure shift and brake levers are attached to the handlebar securely.
o Ensure all brake and shift cables are properly lubricated.
8. Frame and Fork
o Check that the frame and fork are not bent or broken.
o If either are bent or broken, they should be replaced.
9. Accessories
o Ensure all reflectors are properly fitted and not obscured.
o Ensure all other fitting on the bike are properly secured and functioning.
o Ensure rider is earing helmet and any other required riding safety gear.
10. Motor Drive Assembly
and Throttle
o Ensure hub motor is spinning smoothly and the motor bearings are in
good working order.
11. Battery Pack
o Ensure battery is charged before use.
o Ensure there is no damage to battery pack.
o Lock battery to frame and check to see that it is secured.

BASIC TROUBLESHOOTING
Symptoms
Possible Causes
Most Common Solutions
1
It doesn’t work
1. Insufficient battery power
2. Faulty Connections
3. Battery not fully seated in tray
4. Improper turn on sequence
5. Brakes are applied
1. Charge the battery pack
2. Clean and repair connections
3. Install battery correctly
4. Turn on bike with proper sequence
5. Disengage brakes
2
Irregular acceleration
and/or
reduced top speed
1. Insufficient battery power
2. Loose or damaged throttle
1. Charge or replace battery
2. Replace throttle
3
When powered on the
motor does
not respond
1. Loose wiring
2. Loose or damaged throttle
3. Loose or damaged motor plug
wire
4. Damaged motor
1. Repair and or reconnect
2. Tighten or replace
3. Secure or replace
4. Repair or replace
4
Reduced range
1. Low tire pressure
2. Low or faulty battery
3. Driving with too many hills,
headwind, braking,
and/or excessive load
4. Batter discharged for long period
of time without
regular charges, aged or damaged.
1. Adjust tire pressure
2. Check connections or charge battery
3. Assist with pedals or adjust route
4. Replace the battery
5
The battery won’t charge
1. Charger not well connected
2. Charger damaged
3. Battery damaged
4. Wiring damaged
1. Adjust the connections
2. Replace
3. Replace
4. Repair or replace
6
Wheel or motor makes
strange
noises
1. Damaged motor bearings
2. Damaged wheel spokes or rim
3. Damaged motor wiring
1. Replace
2. Repair or replace
3. Repair or replace motor.
ERROR DECTECTION
Your Alpine Bike is equipped with an error detection system integrated into the LCD display
and motor controller. In the case of an electronic control system fault an error code should
display. The error codes are listed in the manual and can help detect what the issue is on the
bike. If your bike has an error code displayed at any time it is recommended that you cease
operation and contact your local dealer or Wattwheels.
FINALLY, WE WOULD LIKE TO SAY THANKS AGAIN AND ENJOY YOUR NEW E-BIKE!
AND PLEASE CONTACT YOUR LOCAL DEALER OR WATTWHEELS IF YOU HAVE ANY
ISSUES OR QUESTIONS.
“POWER TO THE PEOPLE”


LCD-P Instructions
Content
About the User Manual..................................................................................................2
Outlook and Size............................................................................................................2
Material and Color..................................................................................................2
Button Definition...........................................................................................................3
Function Summary.........................................................................................................4
Function Summary..................................................................................................4
Full View Area........................................................................................................5
Normal View Area ..................................................................................................6

www.dapumotors.com
Address:6101 Long Dong Road,Pudong New Area Shanghai,China
Tel:+86 21 58970723-166
Fax:+86 21 58979066
page 1
Normal Operation ..........................................................................................................6
1. ON/OFF ..............................................................................................................6
2. Current Display...................................................................................................6
3. Riding Mode Selection .......................................................................................7
4. Speed Display .....................................................................................................7
5. KM/H & MPH ....................................................................................................7
6. Backlight Indicator..............................................................................................7
7. 6KM/H Work ......................................................................................................8
8. PAS Level Selection............................................................................................8
9. Error Code Indicator...........................................................................................9
10. SET Operation...................................................................................................9
11. Distance Indicator ...........................................................................................11
12. Trip Time Indicator.........................................................................................12
13. Battery Indicator .............................................................................................12
14. Cable Definition..............................................................................................13
15. Auto Sleep After 5 Minutes............................................................................13
Common Problems & Solutions ..................................................................................14
Error Code Table..........................................................................................................14

www.dapumotors.com
Address:6101 Long Dong Road,Pudong New Area Shanghai,China
Tel:+86 21 58970723-166
Fax:+86 21 58979066
page 2
About the User Manual
Dear users:
To ensure better performance of your e-bike, please read through the
LCD-P product introduction carefully before using it. We will inform you
all the details concisely(including hardware installation, setting and
normal operations)when using our display. Meanwhile, the introduction
will also help you solve possible confusion and malfunction.
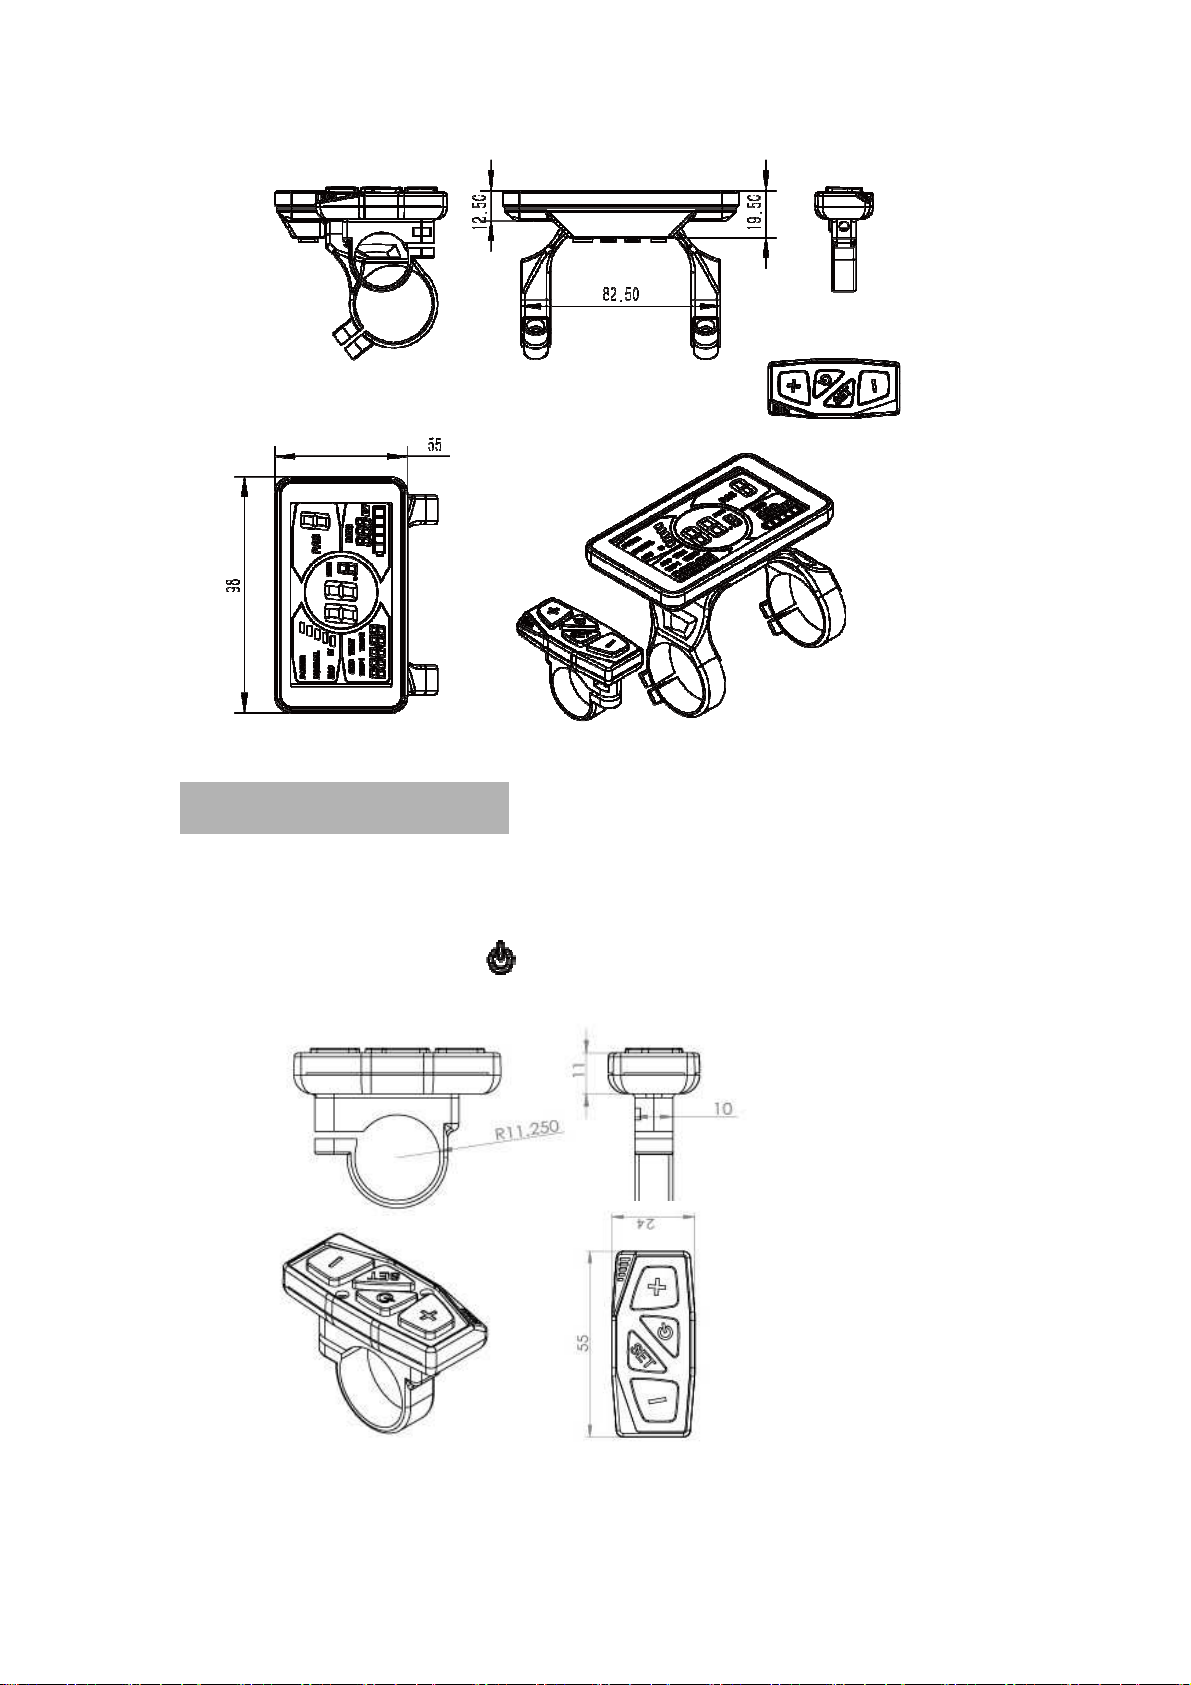
Outlook and Size
Material and Color
LCD-P products are made of black ABS material and the bracket is made
of nylon material. Under the temperature of -20 to 60 , the shell℃
material can ensure normal usage and good mechanical performance of
the products.
Dimension figure (unit: mm)
www.dapumotors.com
Address:6101 Long Dong Road,Pudong New Area Shanghai,China
Tel:+86 21 58970723-166
Fax:+86 21 58979066
page 3
Button Definition
LCD-P has four buttons, including ON/OFF、SET、UP and DOWN
“ON/OFF” names to “ ”, “SET” names to “SET”; “UP” names to
“ +
++
+” and “DOWN” names to “-
--
-”.

www.dapumotors.com
Address:6101 Long Dong Road,Pudong New Area Shanghai,China
Tel:+86 21 58970723-166
Fax:+86 21 58979066
page 4
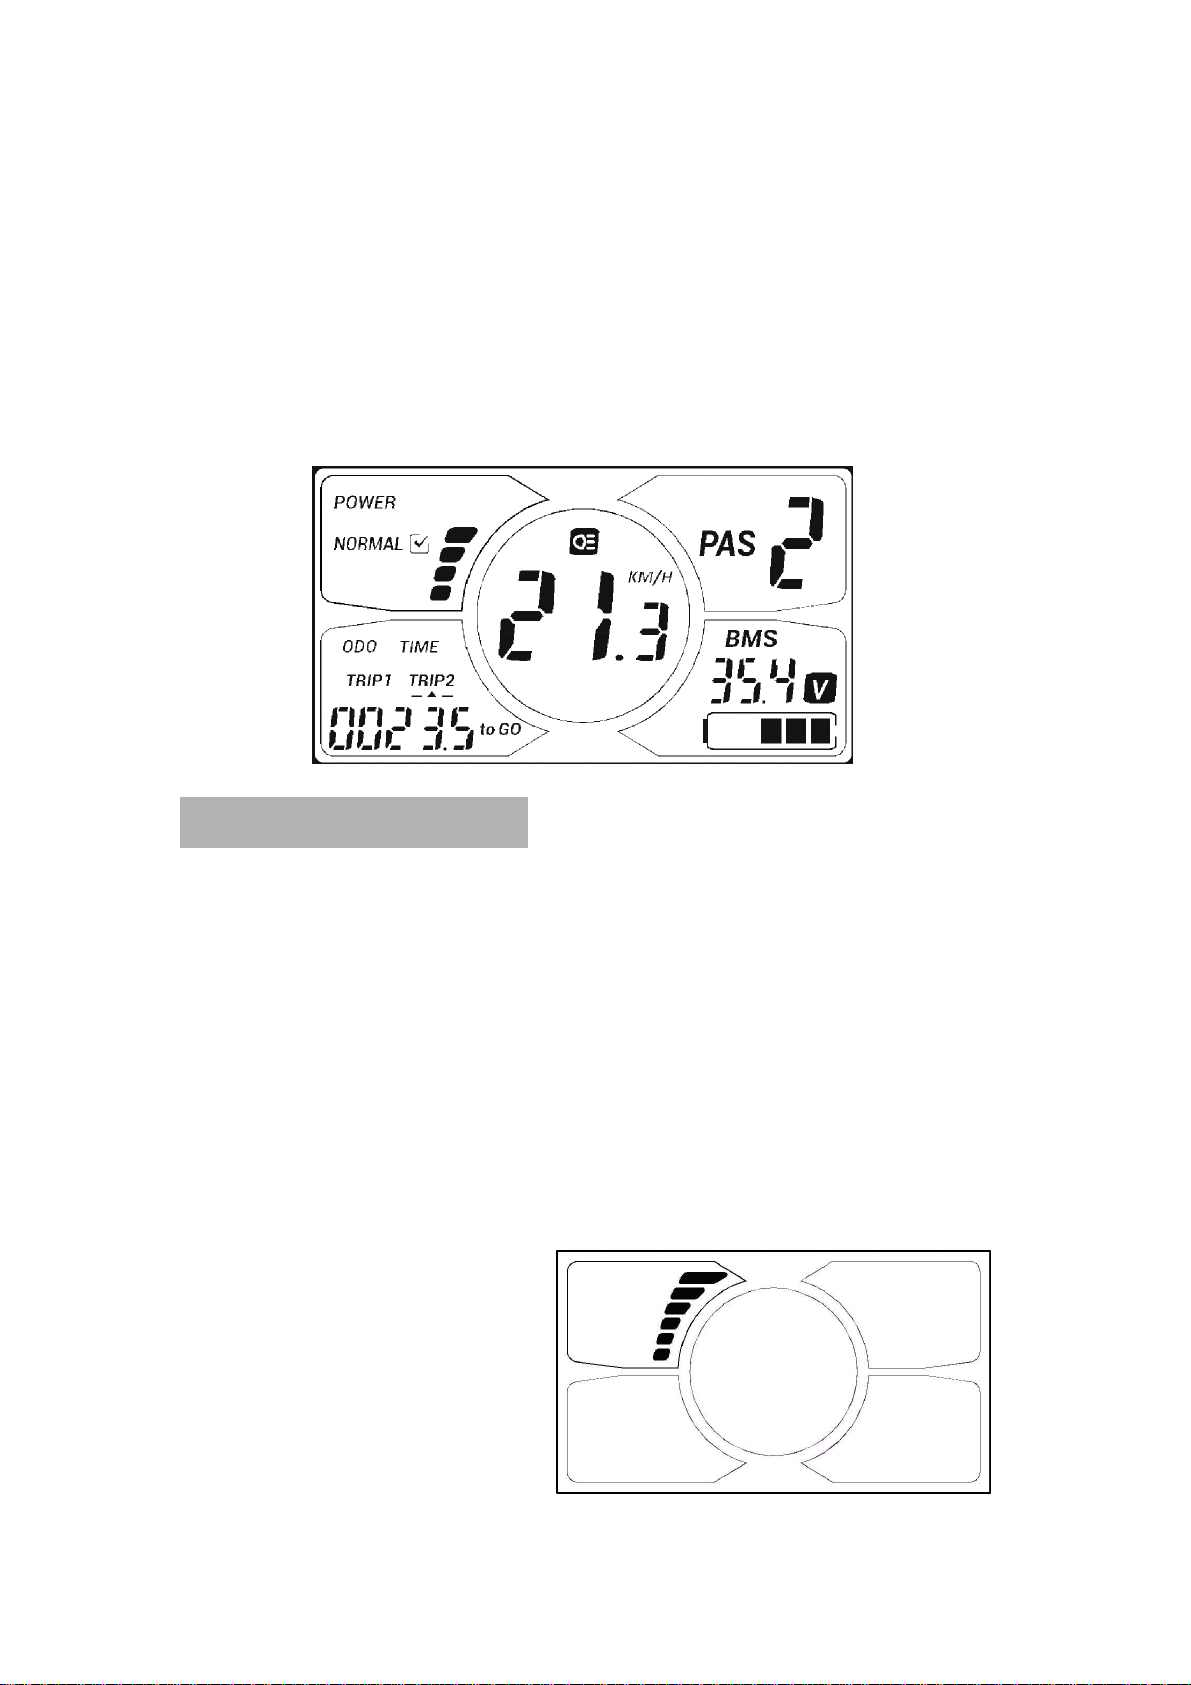
Function Summary
Function Summary
LCD-P provides a wide range of functions and indicators to fit the users’
needs. The indicated contents are as below.
1. ON/OFF
2. Current display
3. Riding mode selection
4. Speed display
5. KM/H & MPH
6. Backlight indicator
7. 6KM/H work
8. PAS level selection
9. Error code indicator
10. SET operation
11. Distance indicator
11.1 Total distance (ODO)
11.2 Trip 1
11.3 Trip 2
11.4 Remaining distance indicator (without this function by default)
12. Trip time indicator
13. Battery indicator
13.1 Battery residual capacity indicator
13.2 Battery voltage
13.3 Battery capacity percentage (without this function by default)
13.4 Battery charging and discharging times (without this function
by default)
14. Cable definition
www.dapumotors.com
Address:6101 Long Dong Road,Pudong New Area Shanghai,China
Tel:+86 21 58970723-166
Fax:+86 21 58979066
page 6
Normal View Area
With the display on ,the default display are riding speed、trip 2、PAS
level、battery indicator as show in fig below. Press SET to switch the
display information.
Normal Operation
1. ON/OFF
Hold ON/OFF and start the display. The display will provide power for
the controller. Hold ON/OFF again to open the backlight. With display
on, press ON/OFF for 3 seconds to turn off the power. With the display
off, there is no battery power consumption. The leakage current is no
more than 2 µA.
※ The panel will go to sleep when the speed is 0 km/h for 5 minutes.
2. Current Display
That represents the discharging
current of the controller
currently, each segment is 2A,
six segments is >=12A.
www.dapumotors.com
Address:6101 Long Dong Road,Pudong New Area Shanghai,China
Tel:+86 21 58970723-166
Fax:+86 21 58979066
page 7
3. Riding Mode Selection
There
is only one default mode on this display now and "power" is the
option. Normal mode is not available
4. Speed Display
The speed display is as below,and user can select KM/H or MPH in
SET3.
5. KM/H & MPH
Select KM/H or MPH for the speed and mileage, display will be the
currently selected units display.
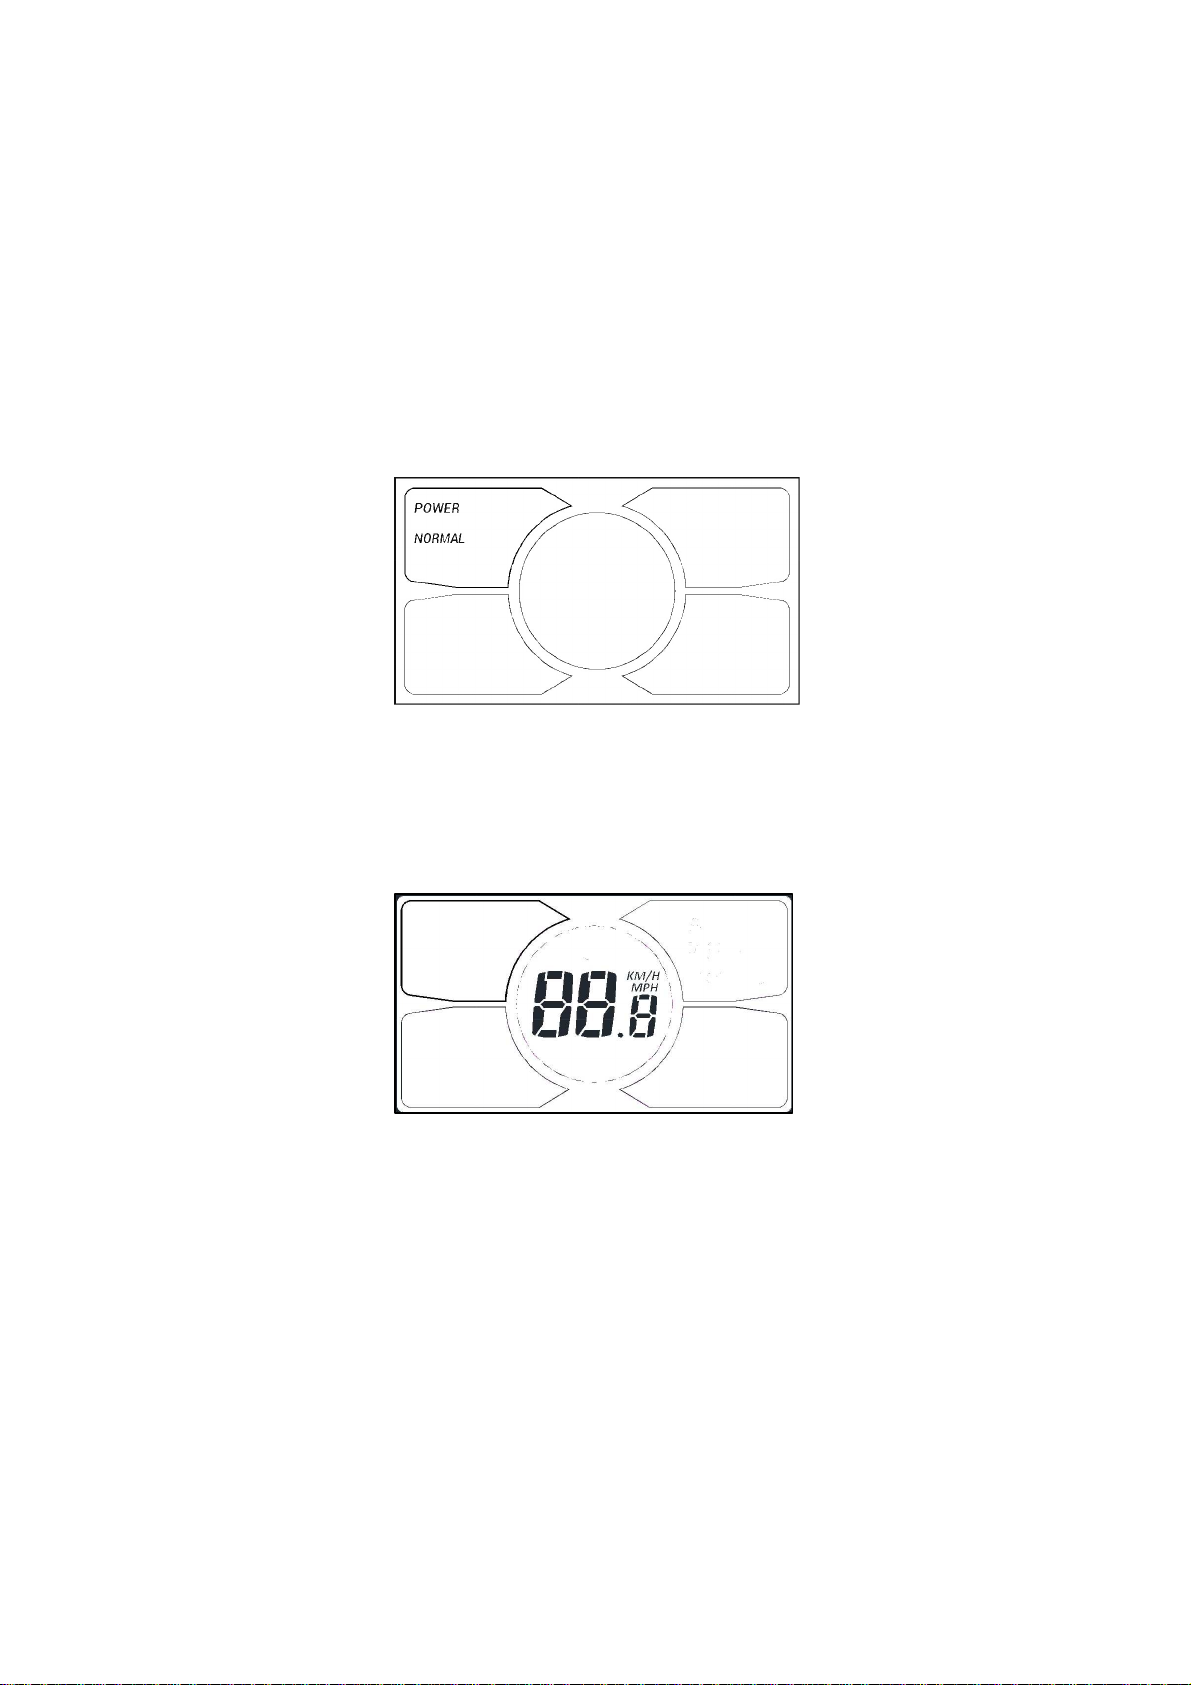
6. Backlight Indicator
With the power on, click the ON/OFF and turn on the backlight. Click it
again and turn off the backlight.
www.dapumotors.com
Address:6101 Long Dong Road,Pudong New Area Shanghai,China
Tel:+86 21 58970723-166
Fax:+86 21 58979066
page 8
※ If the e-bike has headlight, the controller will turn on/off the headlight
at the same time of the backlight on/off (without this function by default)
7. 6KM/H Work
Hold the UP
UP UP
UP for 2 seconds to get in 6km PAS work, and with your
hand off, the 6km PAS work is released. The display is as below.
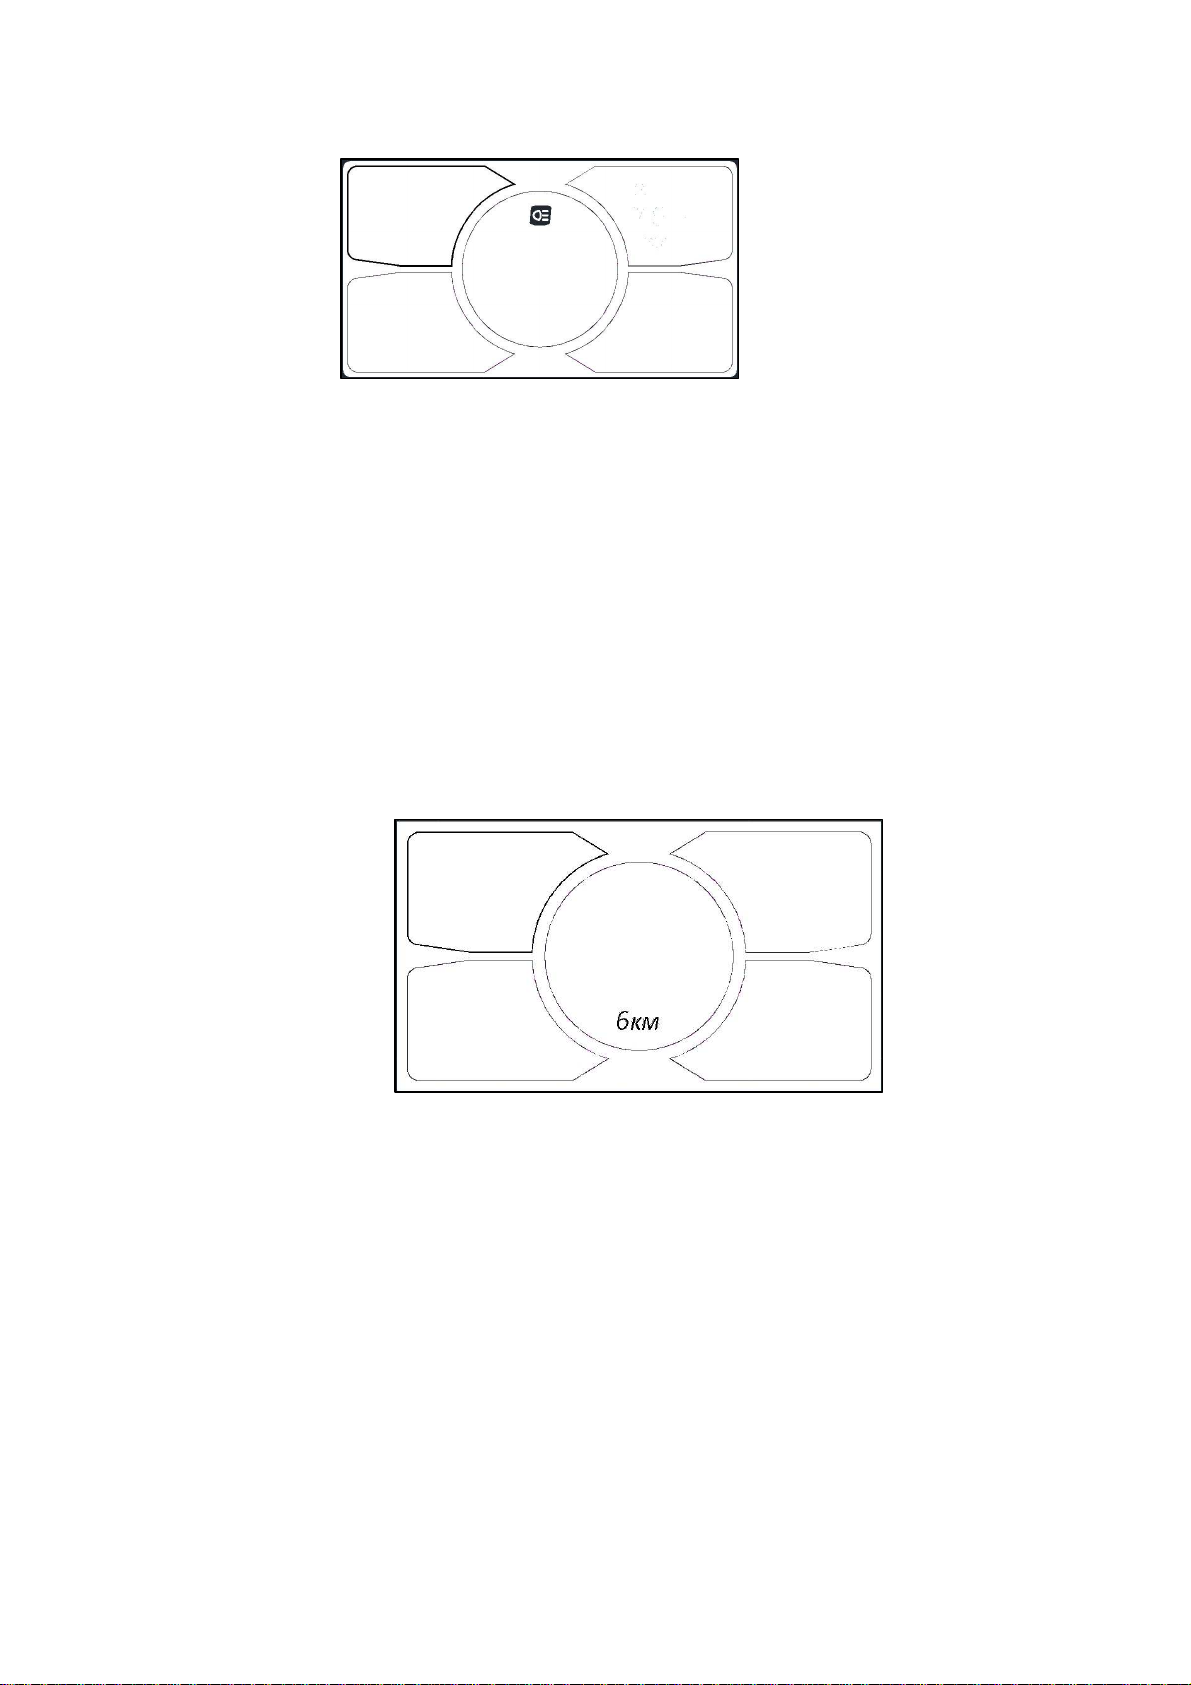
8. PAS Level Selection
Click UP or DOWN to change the stages and output power ratio, the
output power range from level 0 to level 5, the default value is level 0.
www.dapumotors.com
Address:6101 Long Dong Road,Pudong New Area Shanghai,China
Tel:+86 21 58970723-166
Fax:+86 21 58979066
page 9
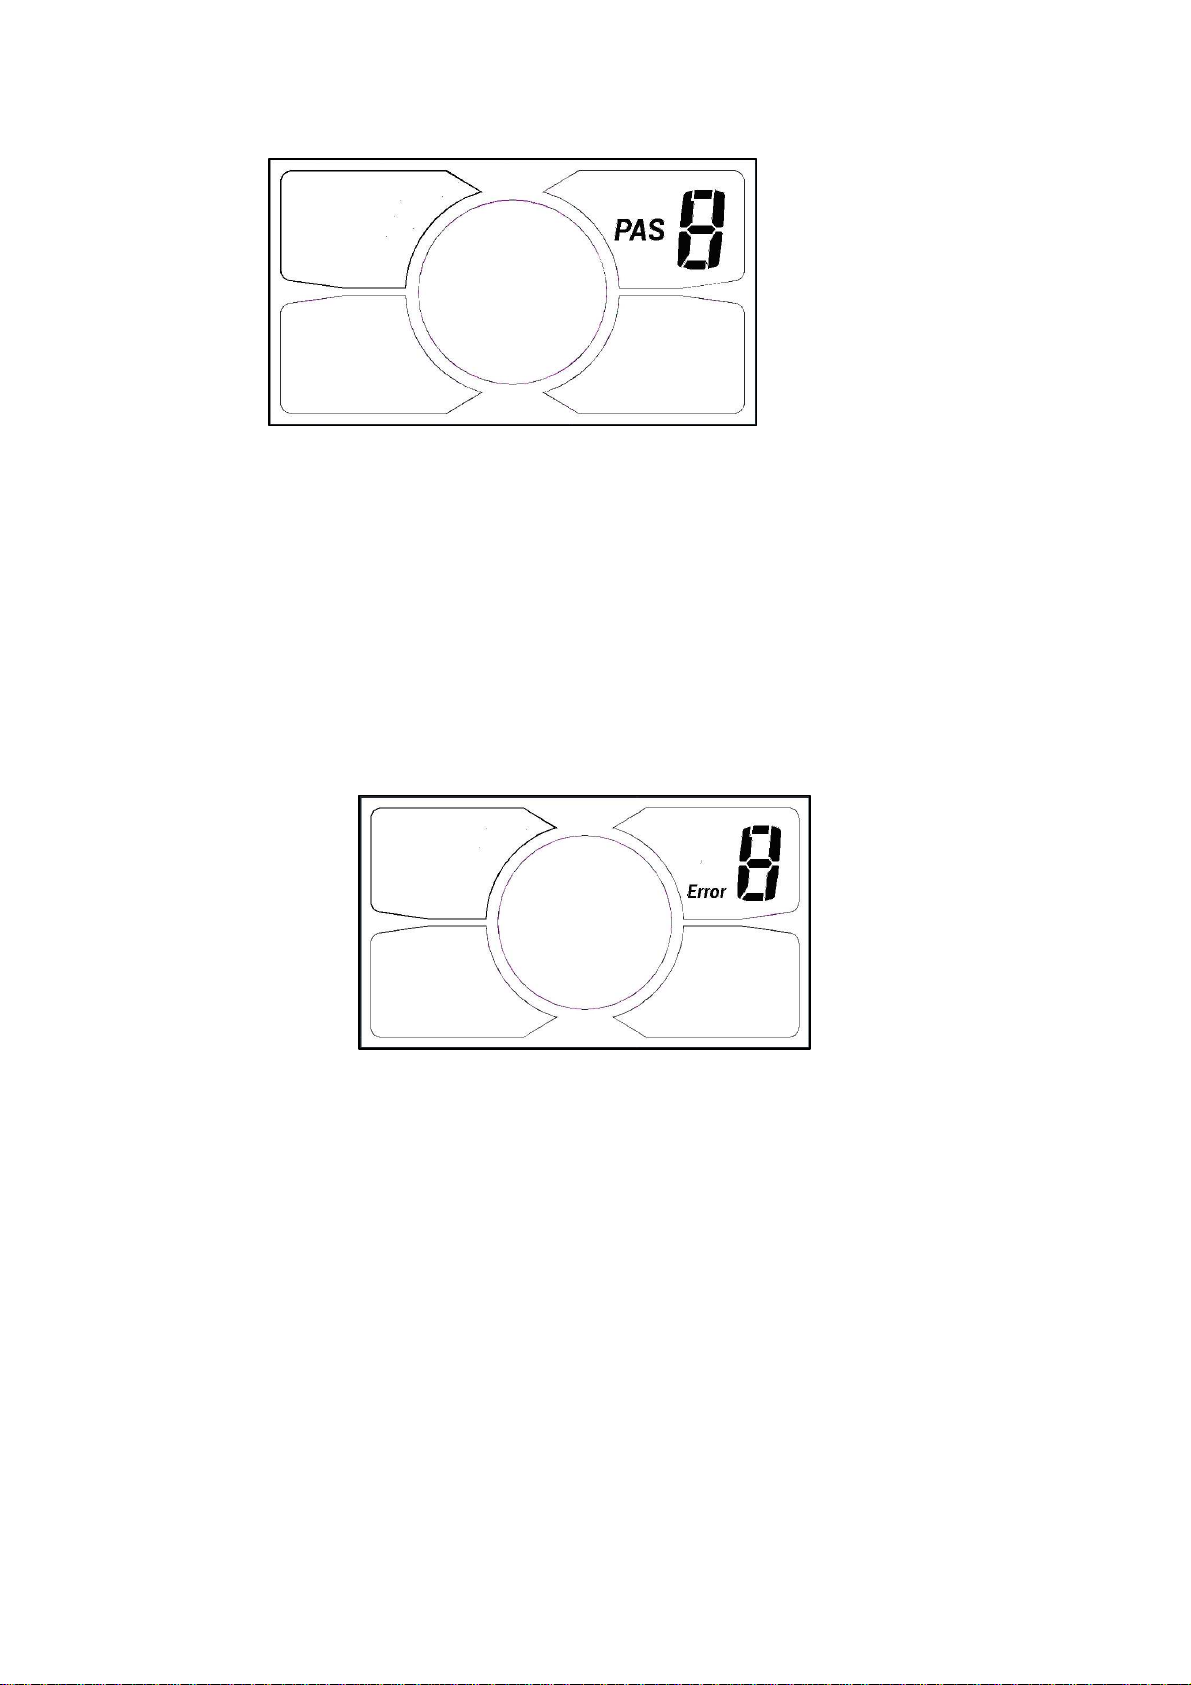
9. Error Code Indicator
If there is something wrong with the electronic control system, the
display will flash at 1 HZ and show the error code automatically.
Different error code is corresponding with different fault information,
please see the last page Error code table for details.
※ Display return to normal only after problem being fixed and
e-bike will not run before fixing the problem.
10. SET Operation
Hold the SET for 2 seconds and enter into the setting interface, then
Number 8 is lighting, the display will flash at 1 HZ. Click the SET
to cycle from 0 to 3 setting interface, press UP or DOWN to select
the wanted parameter, and hold the SET for 1 second to exit.
Table of contents
Other WattWheels Scooter manuals

WattWheels
WattWheels Foldable electric tricycle User manual

WattWheels
WattWheels BIGHORN LS User manual

WattWheels
WattWheels OMNIA User manual

WattWheels
WattWheels BIGHORN HUB 2020 User manual

WattWheels
WattWheels SCOUT LS XT 2018 User manual

WattWheels
WattWheels SCOUT LS 2019 User manual

WattWheels
WattWheels BIGHORN 2019 User manual

WattWheels
WattWheels E-TRIKE XT User manual


