manuals.online logo
Brands
  1. Home
  2. •
  3. Brands
  4. •
  5. Wayfair
  6. •
  7. Indoor Furnishing
  8. •
  9. Wayfair Hall Tree Instruction sheet

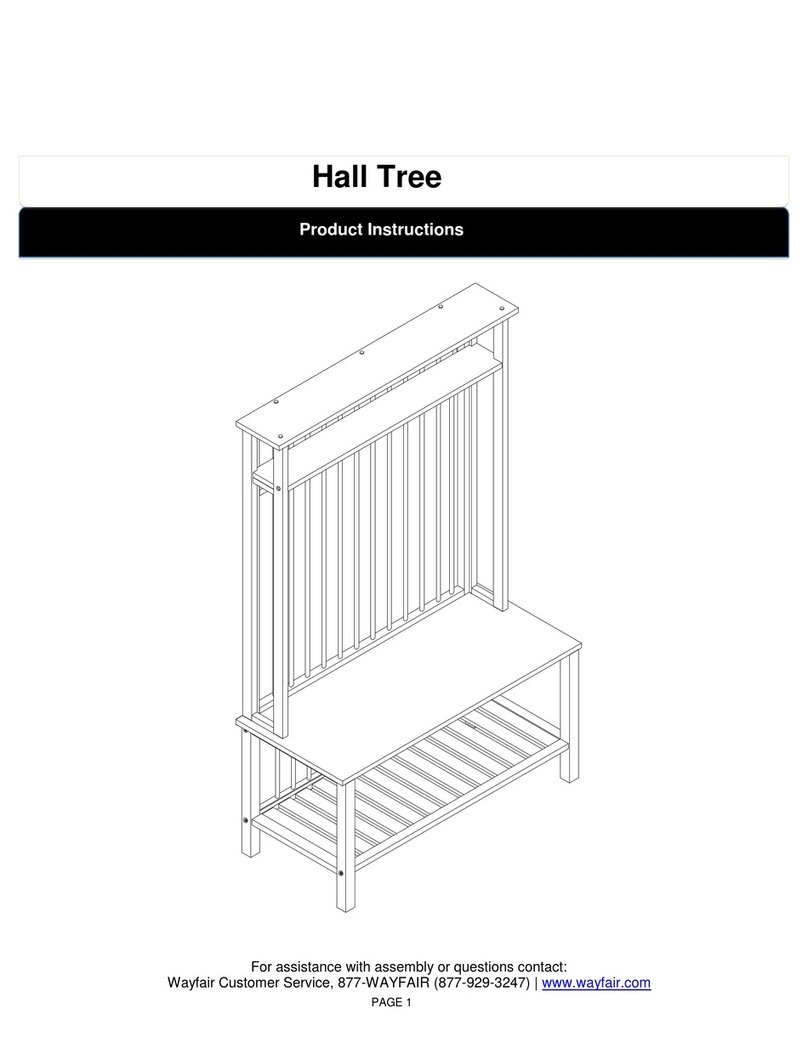
Wayfair Hall Tree Instruction sheet

For assistance with assembly or questions contact:
Wayfair Customer Service, 877-WAYFAIR (877-929-3247) | www.wayfair.com
PAGE 1
Product Instructions for:
Hall Tree
For assistance with assembly or questions contact:
Wayfair Customer Service, 877-WAYFAIR (877-929-3247) | www.wayfair.com
PAGE 2
Before beginning assembly, separate all parts and carefully study the parts diagrams
below. Review all parts and hardware before disposing of any packaging. You may
receive extra hardware with your unit. Call Customer Service for missing hardware.
A: Base (1)
B: Top Panel (1)
C: Wardrobe Left Frame (1)
D: Wardrobe Right Frame (1)
E: Shelf Frame (1)
F: Shelf Panel (1)
G1,G2: Bars (1pc each)
H: Storage Rail (1)
I-L,I-R: Storage Side Frames (1pc each)
J: Long Vertical Bar (2)
K: Storage Front Panel (1)
L: Storage Lid (1)
Parts List
I -L
I -R
G-1 G-2
Hall Tree
For assistance with assembly or questions contact:
Wayfair Customer Service, 877-WAYFAIR (877-929-3247) | www.wayfair.com
PAGE 3
M: Wardrobe Back Panel (1)
N: Storage Back Panel (1)
1: Cam Bolt (35)
2: Wood Dowel Dia. 8x30mm (18)
3: Cam Lock (35)
4: Plastic Cover (27)
5: Flat Head Screw 5/8”L (16)
6: Round Head Screw (Black) 5/8”L (44)
7: Left Safety Lift (1)
8: Right Safety Lift (1)
9: Hinge (2)
10: Hook (4)
11: Round Head Screw (Antique Brass) 5/8”L
(16)
12: Flat Head Screw 1-1/4”L (8)
13: Bracket (4)
14: Screw 1-1/2”L (4)
15: Zip Tie (2)
16: Screw 5/8”L (4)
17: Wall Anchor (4)
For assistance with assembly or questions contact:
Wayfair Customer Service, 877-WAYFAIR (877-929-3247) | www.wayfair.com
PAGE 4
Figure 1
Unpack and lay parts on a clean,
padded surface like a carpet or
blanket. Check that you have all
parts indicated on the front page.
Attach Hinges (9) to the Storage
Lid (L) with Flat Head Screws (5)
as shown in Figure 1.
Tighten Flat Head Screws (5)
using Phillips screwdriver (not
included).
Figure 2
Insert Cam Locks (3) into pre-
drilled holes on Bar (G1).
Screw Cam Bolts (1) into pre-
drilled holes on Shelf Frame (E).
Attach Shelf Frame (E) to Bar
(G1) by inserting Wood Dowels
(2) and Cam Bolts (1) into
corresponding holes until
components (E) and (G1) meet.
Tighten by rotating Cam Locks
(3) clockwise using Phillips
screwdriver.
Assembly Instructions
55
5555
55
L
9
9
Hall Tree
For assistance with assembly or questions contact:
Wayfair Customer Service, 877-WAYFAIR (877-929-3247) | www.wayfair.com
PAGE 5
Figure 3
Insert Cam Locks (3) into
predrilled holes on the unit from
Figure 2 and Bar (G2).
Screw Cam Bolts (1) into
predrilled holes on Wardrobe
Frames (C) & (D). Attach
Wardrobe Frames (C), (D) and
Bar (G2) to the unit from Figure 2
by inserting Wood Dowels (2) and
Cam Bolts (1) into corresponding
holes.
Tighten by rotating Cam Locks (3)
clockwise using Phillips
screwdriver.
Cover Cam Lock (3) holes with
Plastic Covers (4).
Attach Shelf Panel (F) to Shelf
Frame (E) using Wood Dowels
(2) and Cam Bolts (1).
Connect Hooks (10) to bar (G1)
with Screws (11).
Tighten Screws (11) using Phillips
screwdriver.
Figure 4
Insert Cam Locks (3) into
predrilled holes on the unit from
Figure 3.
Screw Cam Bolts (1) into
predrilled holes on Wardrobe
Frames (C) & (D) and Shelf Panel
(F).
Attach Top Panel (B) to the unit
from Figure 3 by inserting Cam
Bolts (1) into corresponding
holes.
Tighten by rotating Cam Locks (3)
clockwise using Phillips
screwdriver.
Cover Cam Lock holes with
Plastic Covers (4)
1
4
F
4
3
44
33
33
1
1
1
1
C
D
B
For assistance with assembly or questions contact:
Wayfair Customer Service, 877-WAYFAIR (877-929-3247) | www.wayfair.com
PAGE 6
Figure 5
Insert Cam Locks (3) into
predrilled holes on Storage Rail
(H).
Screw Cam Bolts (1) into pre-
drilled holes on Storage Side
Frames (I-L,I-R).
Attach Storage Side Frames (I-
L,I-R) to Storage Rail (H) by
inserting Wood Dowels (2) and
Cam Bolts (1) into corresponding
holes. Tighten by rotating Cam
Locks (3) clockwise using Phillips
screwdriver.
Cover Cam Lock (3) holes with
Plastic Covers (4).
Attach Storage Side Frames (I-
L,I-R) to Storage Front Panel (K)
using Wood Dowels (2) and Cam
Bolts (1).
Figure 6
Insert Cam Locks (3) into
predrilled holes on the unit from
the Figure 5.
Screw Cam Bolts (1) into
predrilled holes on Base (A).
Attach the unit from Figure 5 to
Base (A) by inserting Cam Bolts
(1) and Wood Dowels (2) into
corresponding holes. Tighten by
rotating Cam Locks (3) clockwise
using Phillips screwdriver.
Cover Cam Lock (3) holes with
Plastic Covers (4)
2
2
A
1
2
1
1
12111
43
44
3
3
43
For assistance with assembly or questions contact:
Wayfair Customer Service, 877-WAYFAIR (877-929-3247) | www.wayfair.com
PAGE 7
Figure 7
Use Screws (5) to connect
Storage Lid (L) to the unit from
Figure 6.
Connect Safety Lifts (7) & (8) to
Storage Lid (L) and the unit from
Figure 6 using 8 Screws (11).
Tighten Screws (11) using
Phillips screwdriver.
Figure 8
Insert Cam Locks (3) into
predrilled holes on the unit from
the Figure 4. Screw Cam Bolts
(1) into predrilled holes on the
unit from Figure 7.
Attach the unit from Figure 4 to
the unit from Figure 7 by inserting
Cam Bolts (1) and Wood Dowels
(2) into corresponding holes.
Tighten by rotating Cam Locks
(3) clockwise using Phillips
screwdriver.
Cover Cam Lock (3) holes with
Plastic Covers (4).
11
8
For assistance with assembly or questions contact:
Wayfair Customer Service, 877-WAYFAIR (877-929-3247) | www.wayfair.com
PAGE 8
Figure 9
Attach the Back Panels (M) & (N)
to the back of the unit from Figure
8 using 44 Screws (6). Tighten
Screws (6) using Phillips
screwdriver.
Figure10
Use Flat Head Screws (12) to
connect Long Vertical Bars (J) to
the unit from Figure 9. Tighten Flat
Head Screws (12) using Phillips
screwdriver.
6
M
N
5
5
5
5
J
J
For assistance with assembly or questions contact:
Wayfair Customer Service, 877-WAYFAIR (877-929-3247) | www.wayfair.com
PAGE 9
Figure 11
Attach two Brackets (13) to the
back of the unit from Figure 10
with Screws (16). Tighten Screws
(16) using Phillips screwdriver.
Mark two desired locations on the
wall and drill two 3/16" holes.
Insert Anchors (17) into the two
holes on wall as shown. Use a
hammer to insert the Anchors (17)
until they are flush with the wall.
Then attach remaining two
Brackets (13) to the wall using
Screws (14). Tighten Screws (14)
using Phillips screwdriver.
Figure 12
Move this item close to the wall
Brackets (13) and tie
corresponding Brackets (13)
together with Zip Tie (15) as
shown in Figure 12.
Anti-tipping hardware must be
used for this product to avoid
tipping and injury.
Now your Hall Tree is ready for
use!
FURNI TURE FURNI TURE
Wall Wall

Other manuals for Hall Tree

1

Other Wayfair Indoor Furnishing manuals
Wayfair Threeposts TRT-QB-1 Instruction sheet

Wayfair

Wayfair Threeposts TRT-QB-1 Instruction sheet

Wayfair Andover Mills WA1010-OAK Instruction sheet

Wayfair

Wayfair Andover Mills WA1010-OAK Instruction sheet

Wayfair ANDOVER MILLS IDT 2737 Series User manual

Wayfair

Wayfair ANDOVER MILLS IDT 2737 Series User manual

Wayfair zipcode design DD-OC26 Instruction sheet

Wayfair

Wayfair zipcode design DD-OC26 Instruction sheet

Wayfair Zipcode Design DD1125-1-BR Instruction sheet

Wayfair

Wayfair Zipcode Design DD1125-1-BR Instruction sheet

Wayfair CONSOLE TABLE Instruction sheet

Wayfair

Wayfair CONSOLE TABLE Instruction sheet

Wayfair Arm Chair User manual

Wayfair

Wayfair Arm Chair User manual

Wayfair WF281704AA User manual

Wayfair

Wayfair WF281704AA User manual

Wayfair Headboard 54 User manual

Wayfair

Wayfair Headboard 54 User manual

Wayfair ZIPCODE DESIGN 13PW152WHT Instruction sheet

Wayfair

Wayfair ZIPCODE DESIGN 13PW152WHT Instruction sheet

Wayfair Hall Tree Instruction sheet

Wayfair

Wayfair Hall Tree Instruction sheet

Wayfair Bar stool Black bonded leather User manual

Wayfair

Wayfair Bar stool Black bonded leather User manual

Wayfair ANDOVER MULLS TY-138-1BK User manual

Wayfair

Wayfair ANDOVER MULLS TY-138-1BK User manual

Wayfair Headboard Instruction sheet

Wayfair

Wayfair Headboard Instruction sheet

Wayfair Headboard with Studs Instruction sheet
Wayfair

Wayfair Headboard with Studs Instruction sheet

Wayfair CLUB CHAIR / LOUNGE CHAIR Instruction sheet

Wayfair

Wayfair CLUB CHAIR / LOUNGE CHAIR Instruction sheet

Wayfair Bed User manual

Wayfair

Wayfair Bed User manual

Wayfair Eames Frame Chair User manual

Wayfair

Wayfair Eames Frame Chair User manual

Wayfair OTTOMAN Instruction sheet

Wayfair

Wayfair OTTOMAN Instruction sheet

Wayfair CORNER BOOKCASE Instruction sheet

Wayfair

Wayfair CORNER BOOKCASE Instruction sheet

Wayfair Mirrored 1 Drawer Side Table User manual
Wayfair

Wayfair Mirrored 1 Drawer Side Table User manual

Wayfair FDFS2238 User manual

Wayfair

Wayfair FDFS2238 User manual

Wayfair OUTDOOR CONVERSATION SET Instruction sheet

Wayfair

Wayfair OUTDOOR CONVERSATION SET Instruction sheet

Wayfair threeposts DD1338-1-WN-ESO User manual
Wayfair

Wayfair threeposts DD1338-1-WN-ESO User manual

Popular Indoor Furnishing manuals by other brands

Bouclair 9400265 Assembly instructions

Bouclair

Bouclair 9400265 Assembly instructions

PHI VILLA THD9-305-102 Use and care guide

PHI VILLA

PHI VILLA THD9-305-102 Use and care guide

Whalen WSHDFOW manual

Whalen

Whalen WSHDFOW manual

Twin-Star International 26MM9404 instruction manual

Twin-Star International

Twin-Star International 26MM9404 instruction manual

Hoppekids BASIC Assembly instruction

Hoppekids

Hoppekids BASIC Assembly instruction

Tech Craft ABS48 manual

Tech Craft

Tech Craft ABS48 manual

Threshold Marvale TGT70BK Assembly instructions

Threshold

Threshold Marvale TGT70BK Assembly instructions

NORTH STATES 4957 instructions

NORTH STATES

NORTH STATES 4957 instructions

Mocka Mischa Assembly instructions

Mocka

Mocka Mischa Assembly instructions

DRAWER June 230487/MSJUNE3BS01.179 manual

DRAWER

DRAWER June 230487/MSJUNE3BS01.179 manual

Muji WORKING CHAIR Assembly instruction

Muji

Muji WORKING CHAIR Assembly instruction

Hanover NAPLES4PC-WG Assembly instructions

Hanover

Hanover NAPLES4PC-WG Assembly instructions

Tchibo 354221 Assembly instructions

Tchibo

Tchibo 354221 Assembly instructions

caem S50 Operating and maintenance manual

caem

caem S50 Operating and maintenance manual

mr.Kate 5211849COM manual

mr.Kate

mr.Kate 5211849COM manual

Pinolino Natura wide Assembly plan

Pinolino

Pinolino Natura wide Assembly plan

Ovela OVWOL7PCBRA user manual

Ovela

Ovela OVWOL7PCBRA user manual

Moen DN7105 Assembly instructions

Moen

Moen DN7105 Assembly instructions

manuals.online logo
manuals.online logoBrands
  • About & Mission
  • Contact us
  • Privacy Policy
  • Terms and Conditions

Copyright 2025 Manuals.Online. All Rights Reserved.