10
Modes
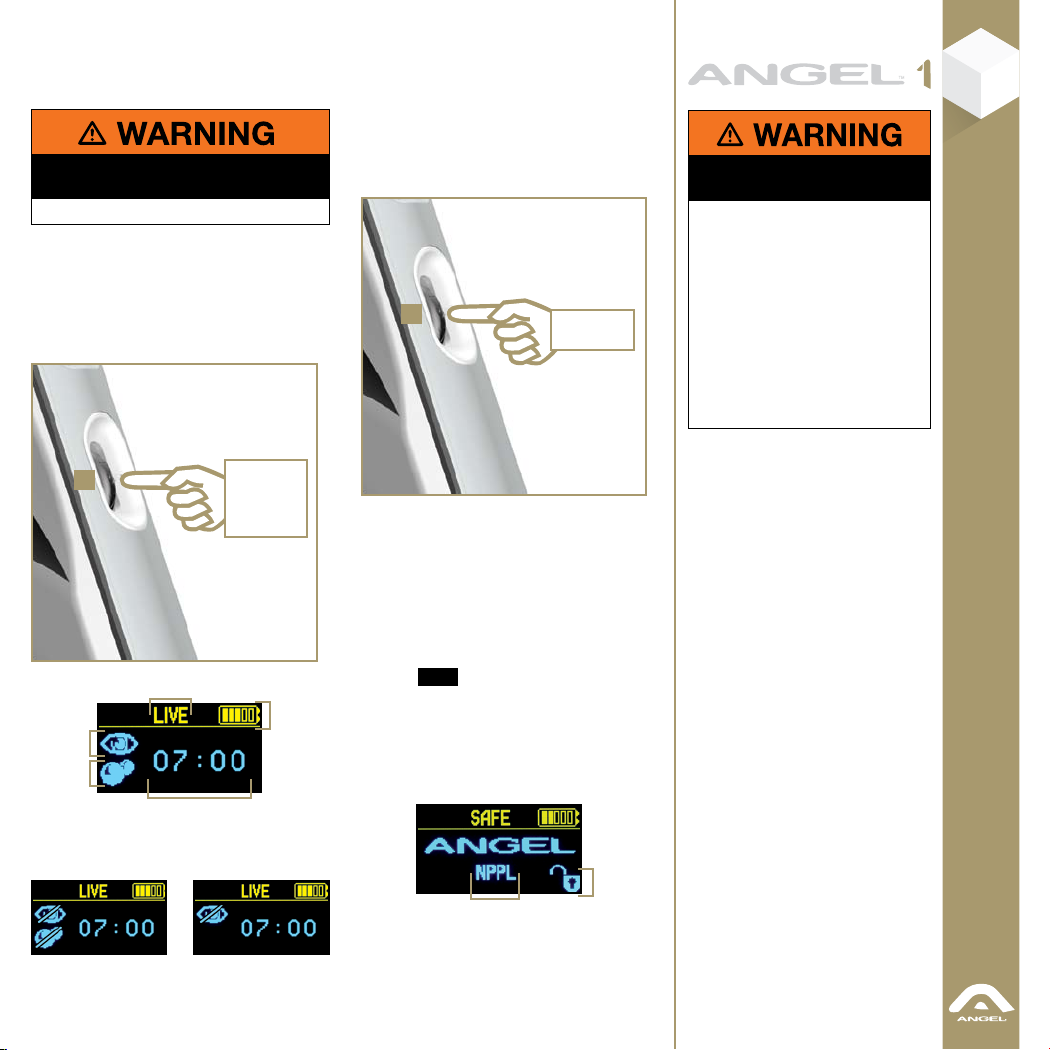
• Ensure that the Angel is switched on.
• Ensure that you are not activating the trigger.
• Push and hold the navigation switch UP or DOWN
for 1.5 seconds.
• The Status menu will be displayed.
• Push the navigation button up to highlight the
iParameters menu.
• Push the navigation switch in to select the
Parameters menu.
• From the Parameters menu select the iMode
feature by pushing the navigation switch inward.
• Scroll up or down through the Mode options by
pushing the navigation switch up or down.
• Once the desired Mode setting has been reached
press the navigation switch inwards to save the
new setting.
• A Saved Mode message will be displayed.
The Parameters menu will be displayed.
Semi Auto
The Angel eyes will default to on whenever the Angel
is made live via the navigation switch.
With the eyes activated the Angel will only fire when
a paintball is present and has been detected by the
Angel eyes.
With the eyes activated the MROF that the Angel will
fire at is limited by the MROF eyes on level.
With the eyes turned off the MROF that the Angel will
fire at is limited by the MROF eyes off level.
The Angel will fire 1 shot for each pull of the trigger.
Break-out and Ramp settings do not function in this
Mode.
NPPL
The Angel eyes will default to on whenever the Angel
is made live via the navigation switch.
With the eyes activated the Angel will only fire when
a paintball is present and has been detected by the
Angel eyes.
With the eyes activated the MROF that the Angel will
fire at is limited by the MROF eyes on level.
With the eyes turned off the MROF that the Angel will
fire at is limited by the MROF eyes off level.
The Angel will fire 1 shot for each pull of the trigger.
Break-out and Ramp settings do not function in this
Mode.
PSP
The Angel eyes will default to on whenever the Angel
is made live via the navigation switch.
With the eyes activated the Angel will only fire when
a paintball is present and has been detected by the
Angel eyes.
The first 3 shots will be fired in semi automatic.
On the 4th shot the Angel will ramp to a pre set
MROF set at 15.4 balls per second, provided that the
user maintains trigger pulls at a rate of or above 5
balls per second.
If the user stops firing for more than 1 second the
initial 3 shots in semi automatic must be re initiated.
Millennium
The Angel eyes will default to on whenever the Angel
is made live via the navigation switch.
With the eyes activated the Angel will only fire when
a paintball is present and has been detected by the
Angel eyes.
The rate of fire will be capped at 15 shots per sec.
Ramping of shots is allowed once 8 BPS is achieved
the Angel may ramp up to 15 BPS only if 8 BPS or
greater is maintained. Once the trigger is released
only 1 additional shot may be discharged.
Additional break-out and ramp settings do not
function in this Mode.
X-Ball/NXL
The Angel eyes will default to on whenever the Angel
is made live via the navigation switch.
With the eyes activated the Angel will only fire when
a paintball is present and has been detected by the
Angel eyes.
MODES
ADHERE STRICTLY TO THESE
AND ALL OTHER SAFETY
INSTRUCTIONS AND GUIDELINES
· Ensure a barrel blocking device is fitted to
the ANGEL.
· Ensure the hopper is removed from the
ANGEL.
· Ensure that there are no paintballs in the
ANGEL.
· SHOULD YOU BE UNSURE AT ANY STAGE YOU
MUST SEEK EXPERT ADVICE.
MODE OPTIONS Page
Semi Auto 10
NPPL 10
PSP 10
Millennium 10
XBall/NXL 10
CFOA 11
Full Auto 11
Demo 11
Custom Semi 11
Break-out 11
Soft Break-out 11
Hard Break-out 11
Ramp 12