WeatherHawk MyMET User manual

815 W 1800 N (435) 750-1840
Logan, UT 84321 USA www.weatherhawk.com
MyMET Wind Meter Manual Version 1.00
English
Deustch
French
Italian
Spanish
Portuguese
Russian
Chinese
Japanese
Arabic


myMET Manual V 1.00 — English
Product Description
Your myMET Hand Held Wind Meter measures wind speed
and air temperature, and calculates wind chill. It then
displays that information on the integral LCD, and transmits
the information in real-time to a BLE iOS or Android device
within range. NOTE: iPhone 4S or later, iPad2 or later, or
Android 4.2 devices are supported. If the display device has
the myMET APP it can display the data, and add additional
information, such as wind direction, user location and
altitude. All of the information can be tagged with an image
and transmitted, using the methods available to the display
device.
Getting Started
Your myMET Hand Held Wind Meter package contains a
myMET, two Lithium CR2032 batteries (installed), and a
lanyard. BATTERIES: The batteries are factory installed.
LANYARD: To install the lanyard, feed the small loop
through the hole at the bottom corner of the case, and
then feed the lanyard through the loop. myMET USE:
Extend myMET to the fully opened position. If using a
tripod, attach it at the bottom of the case. NOTE: The
optional wind vane accessory will align myMET with wind
direction when it is tripod mounted and properly leveled.
Hold myMET at the bottom of the case, away from your
face and body, to avoid getting false readings. Your
myMET sensors are sensitive. For good measurements it is
important that you do not touch, or obstruct, the sensors.
Operating Modes:
Turn myMET on by extending the
meter, or using the power button.
The power button is used when
myMET is extended but the auto-off
function has occurred. You also use
the power button to scroll to display
the desired measurement, or
function. To turn off myMET, push
the wind meter into the case.
Disabling the Power Save mode:
With the myMET on, change power
saving mode to always on mode by
pressing the power button for 3
seconds until “n” appears on the LCD,
then release the power button. The
“APO” icon will disappear from the
LCD while in always on mode.

Changing the Units of Measure:
With the myMET on, change the units of measure by
pressing the power key more than 5 seconds until “SEt”
appears on the LCD and then release the power key. “unt”
then appears on LCD. Under “unt” status, press the power
key to scroll to the desired unit. Wait for 5 seconds and the
meter will return to normal mode using the selected unit of
measure.
Modes
WindSpeed UnitsofMeasure:
myMET measures wind speed in 2
different units of measure: Miles Per
Hour & Meters Per Second. To switch
between units of measure, please
see the “Changing the Units of
Measure” section for instructions.
Wind speed:
Wind speed is only shown in the
selected unit of measure to the first
decimal place.
Temperature Ambient Temperature:
Displays the temperature in
Fahrenheit or Celsius. If Metric
Units of Measure are selected for
wind, then Celsius will be displayed
for temperature.
Wind-Chill:
Temperature is displayed as Wind
Chill when WCl is displayed on the
LCD. Wind Chill is the effective air
temperature on human skin, when
wind speed is considered.
Others Batteryindicator:
The battery icon in the lower left
corner of the LCD indicates the
battery level.
Wireless signal:
The wireless icon in the upper left
corner of the LCD indicates that the
BT4.0 module is functioning.
Backlight
A red backlight provides illumination at night, while
preserving night vision. To turn the backlight off, press the
power key for more than 5 seconds until “SEt” appears on
LCD and then release the power key. “unt” then appears on
LCD. Press the power key longer to change the mode to
“bLE”, Under “bLE” status, press power key to scroll on or
off. Wait for 5 seconds the meter will return to normal
mode with selected status of backlight.

Impeller Replacement:
To replace the impeller, use sharp pliers, or a pin, to
remove the gray colored rubber plug, exposing the
impeller screw. Loosen the screw, but do not
remove it. Rotate the impeller by twisting the
impeller assembly clockwise (viewed from the back
of the wind meter). Install the new impeller and
twist the impeller assembly counter-clockwise.
Tighten the screw and replace the gray colored
rubber plug.
Battery:
To replace the battery, turn the compartment cover
in a clockwise direction to remove it. The battery
will be visible in the battery compartment. Insert
2 new CR2032 lithium battery “+” side facing you.
CR2032 batteries can be purchased anywhere
batteries are sold. NOTE: Different modes have
different effects on the battery life.

Bedienungsanleitung für myMET V 1.00 —
Deutsch
Produktbeschreibung
Der myMET Hand-Windmesser misst die
Windgeschwindigkeit, die Lufttemperatur und berechnet
den Windchill. Anschließend werden diese Daten auf dem
integrierten LCD-Display angezeigt und in Echtzeit an ein
BLE iOS- oder Android-Gerät übertragen. HINWEIS: Die
folgenden Geräte werden unterstützt: iPhone 4S oder
spätere Version, iPad2 oder spätere Version, Android 4.2.
Wenn das Anzeigegerät über die myMET-App verfügt,
können damit die Daten angezeigt und weitere
Informationen, wie etwa die Windrichtung, der Standort
des Benutzers und die Höhenlage hinzugefügt werden. Alle
diese Daten können mit einem Bild festgehalten und
mittels der dem Anzeigegerät zur Verfügung stehenden
Methoden übertragen werden.
Erste Schritte
In der Packung Ihres myMET Hand-Windmessers sind ein
myMET-Gerät, zwei Lithium (CR2032)-Batterien (bereits
eingesetzt) und ein Trageband enthalten. BATTERIEN: Die
Batterien wurden vom Hersteller bereits eingesetzt.
TRAGEBAND: Befestigen Sie das Trageband, indem Sie die
kleine Schlinge durch die Öffnung in der unteren Ecke des
Gehäuses und dann das Band durch die Schlinge führen.
BEDIENUNG DES myMET: Öffnen Sie den
myMET-Windmesser, indem Sie ihn vollständig ausfahren.
Wenn Sie ein Stativ verwenden, montieren Sie das Stativ
am unteren Ende des Gehäuses. HINWEIS: Das optionale
Windfahnen-Zubehör richtet den myMET-Windmesser
entsprechend der Windrichtung aus, wenn er auf einem
Stativ angebracht und korrekt angepasst ist. Halten Sie den
myMET-Windmesser am unteren Ende des Gehäuses und
von Gesicht und Körper entfernt fest, um keine falschen
Messwerte zu erhalten. Die Sensoren Ihres myMET sind
empfindlich. Um exakte Messwerte zu
erhalten ist es wichtig, dass Sie die
Sensoren nicht berühren oder
blockieren.
Inbetriebnahme:
Schalten Sie den myMET-Windmesser
ein, indem Sie das Messgerät
ausfahren oder die Ein-/Aus-Taste
betätigen. Betätigen Sie die
Ein-/Aus-Taste, wenn der
myMET-Windmesser bereits
ausgefahren ist und sich das Gerät
automatisch ausgeschaltet hat. Sie
können die Ein-/Aus-Taste auch zum
Scrollen benutzen, um den

gewünschten Messwert oder die gewünschte Funktion
anzuzeigen. Wenn Sie den myMET-Windmesser
ausschalten möchten, schieben Sie ihn zurück in das
Gehäuse.
Deaktivieren des Stromsparmodus:
Um vom Stromsparmodus zum Dauerbetriebmodus
umzuschalten, schalten Sie den myMET ein und halten Sie
die Ein-/Aus-Taste so lange gedrückt, bis auf dem
LCD-Display der Buchstabe „n“ angezeigt wird (ca. 3
Sekunden), dann die Taste wieder loslassen. Befindet sich
das Gerät im Dauerbetriebmodus, wird das „APO“-Symbol
nicht auf dem LCD-Display angezeigt.
Modi
Windgeschwindigkeit Ändern der Maßeinheiten:
Um die Maßeinheit zu ändern,
schalten Sie den
myMET-Windmesser ein und halten
Sie die Ein-/Aus-Taste so lange
gedrückt, bis auf dem LCD-Display
„SEt“ angezeigt wird (über 5
Sekunden), dann die Taste wieder loslassen. Auf dem
LCD-Display wird nun „unt“ angezeigt. Im Status
„unt“ drücken Sie die Ein-/Aus-Taste, um zur gewünschten
Einheit zu scrollen. Nach 5 Sekunden schaltet das Gerät in
den Normalbetrieb um und benutzt nun die ausgewählte
Maßeinheit.
Temperatur Maßeinheiten:
myMET misst die
Windgeschwindigkeit in zwei
verschiedenen Maßeinheiten: Meilen
pro Stunde + Meter pro Sekunde. Die
Anleitung zum Umstellen der
Maßeinheit finden Sie im Abschnitt
„Ändern der Maßeinheit“.
Windgeschwindigkeit:
Die Windgeschwindigkeit wird nur in
der ausgewählten Maßeinheit bis zur
ersten Stelle nach dem Komma
angezeigt.
Umgebungstemperatur:
Zeigt die Temperatur in Celsius oder Fahrenheit an. Wenn
für die Windgeschwindigkeit metrische Maßeinheiten
ausgewählt wurden, dann wird die Temperatur in Celsius
angezeigt.
Windchill:
Ist auf dem LCD-Display „WCI“ zu sehen, dann wird die
Temperatur als Windchill angegeben. Windchill ist die auf
der Haut gefühlte effektive Lufttemperatur unter
Berücksichtigung der Windgeschwindigkeit.

Sonstiges Batterieanzeige:
Das Batteriesymbol in der unteren
linken Ecke des LCD-Displays zeigt
den Batteriezustand an.
WLAN-Signal:
Das WLAN-Symbol in der oberen
linken Ecke des LCD-Displays zeigt
an, dass das BT4.0-Modul in
Funktion ist.
Hintergrundbeleuchtung:
Durch die rote Hintergrundbeleuchtung ist das LCD-Display
im Dunkeln sichtbar, ohne dass dadurch die Nachtsicht
beeinflusst wird. Zum Abschalten der
Hintergrundbeleuchtung halten Sie die Ein-/Aus-Taste so
lange gedrückt, bis auf dem LCD-Display „SEt“ angezeigt
wird (über 5 Sekunden), dann die Taste wieder loslassen.
Auf dem LCD-Display wird nun „unt“ angezeigt. Halten Sie
die Ein-/Aus-Taste etwas länger gedrückt, um zum
„bLE“-Modus zu wechseln. In diesem Modus können Sie
durch Drücken der Ein-/Aus-Taste die Beleuchtung
entweder ein- oder ausschalten. Nach 5 Sekunden schaltet
das Gerät mit dem gewählten Zustand der
Hintergrundbeleuchtung in den Normalbetrieb um.
Auswechseln des Impellers:
Verwenden Sie zum Auswechseln des Impellers eine spitze
Zange oder eine Nadel, um den grauen Gummistopfen zu
entfernen und die Schraube des Impellers freizulegen.
Drehen Sie die Schraube auf, ohne sie ganz zu entfernen.
Drehen Sie den Impeller, indem Sie den ganzen Bausatz
nach rechts drehen (von der Rückseite des Windmessers
aus gesehen). Montieren Sie den neuen Impeller und
drehen sie den Bausatz nach links. Ziehen Sie die Schraube
an und setzen Sie den Gummistopfen wieder ein.
Batterie:
Zum Auswechseln der Batterie drehen Sie die Abdeckung
des Batteriefachs nach rechts, um sie zu entfernen. Die
Batterie ist nun im Batteriefach sichtbar. Legen Sie zwei
neue CR2032 Lithium-Batterien ein und achten Sie darauf,
dass das „+“-Symbol in Ihre Richtung zeigt. CR2032
Batterien sind überall dort im Handel erhältlich, wo Sie
üblicherweise Batterien kaufen können. HINWEIS: Die
verschiedenen Modi wirken sich unterschiedlich auf die
Batterielebensdauer aus.

Manuel myMET V 1.00 — Français
Description du produit
Votre myMET est un appareil portatif qui mesure la vitesse
du vent et la température de l’air, et calcule l’abaissement
de la température causé par le vent. Il affiche ensuite ces
renseignements sur le LCD intégré et transmet
l’information en temps réel à un BLE iOS ou à un appareil
Android dans un rayon approprié. REMARQUE : l’iPhone 4S
ou ultérieur, l’iPad2 ou ultérieur, ainsi que les appareils
Android 4.2 sont compatibles. Si l’appareil d’affichage
dispose de l’APP myMET, il peut publier les données et
ajouter des renseignements supplémentaires, telles que la
direction du vent, l’endroit où se trouve l’utilisateur et
l’altitude. Tous ces renseignements peuvent être marqués
par une image, puis transmis à l’aide des méthodes
disponibles sur l’appareil d’affichage.
Pour commencer
L’emballage de votre appareil de mesure du vent portatif
myMET contient un myMET, deux piles au lithium CR2032
(installées) et un cordon. PILES : les piles sont installées en
usine. CORDON : pour mettre le cordon, faites passer la
petite boucle dans le trou à l’angle inférieur du boîtier, puis
enfilez le cordon dans la boucle. Utilisation du myMET :
ouvrez complètement le myMET. Si vous utilisez un trépied,
fixez-le au bas du boîtier. REMARQUE : la girouette
optionnelle s’aligne avec la direction du vent quand
l’appareil est monté sur un trépied et placé au bon niveau.
Tenez le myMET par le bas du boîtier, à une certaine
distance de votre visage et de votre corps pour éviter
d’avoir une lecture incorrecte. Les capteurs de votre
myMET sont sensibles. Pour obtenir de bonnes mesures,
il est important de ne pas toucher ni de gêner les
senseurs. Modes de fonctionnement :
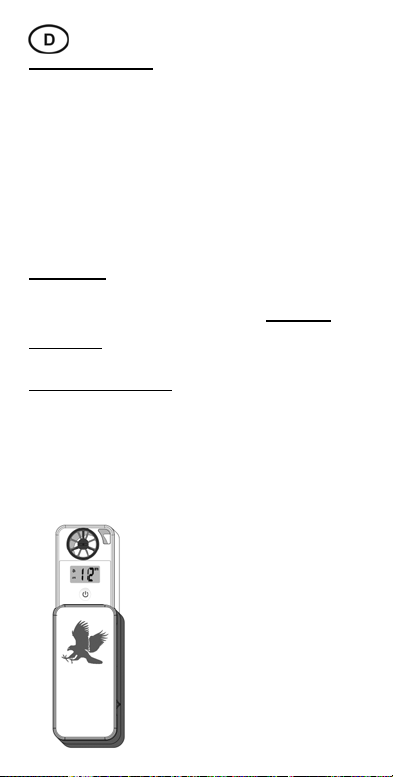
Mettez le myMET en marche en
ouvrant complètement l’appareil de
mesure ou en appuyant sur le bouton
de mise en marche. Vous pouvez
utiliser ce bouton si l’appareil est
complètement ouvert et l’arrêt
automatique a fonctionné. Vous
pouvez aussi vous servir du bouton de
mise en marche pour faire défiler afin
d’afficher les mesures souhaitées et la
fonction. Pour éteindre le myMET,
poussez l’appareil de mesure du vent
dans son étui.
Désactiver le mode Économie
d’énergie :
Quand le myMET est en marche,

passez du mode économique au mode de fonctionnement
permanent en appuyant sur le bouton de mise en marche
pendant 3 secondes jusqu’à ce qu’un « n » apparaisse sur le
LCD, puis relâchez le bouton. L’icône « APO » disparaît du
LCD et l’appareil est en mode permanent.
Changer d’unités de mesure :
Quand le myMET est en marche, changez les unités de
mesure en appuyant sur la touche de mise en marche
pendant plus de 5 secondes jusqu’à ce que « Set »
apparaisse sur le LCD, puis relâchez la touche. « unt »
apparaît sur le LCD. Sous le statut « unt », appuyez sur la
touche de mise en marche pour défiler jusqu’à l’unité
souhaitée. Attendez 5 secondes, puis l’appareil revient au
mode normal en utilisant l’unité de mesure sélectionnée.
Modes
Vitesseduvent Unitésdemesure:
Le myMET mesure la vitesse du vent
avec 2 unités de mesure différentes :
mille par heure et mètre par seconde.
Pour passer d’une unité de mesure à
l’autre, consultez le mode d’emploi à
la section « Changer les unités de
mesure ».
Vitesse du vent :
La vitesse du vent est indiquée
uniquement avec la première
décimale de l’unité de mesure
sélectionnée.
Température Température ambiante :
L’appareil affiche la température en
Fahrenheit ou en Celsius. Si les unités
de mesure métriques sont
sélectionnées pour le vent, la
température sera affichée en Celsius.
Abaissement de la température
causé par le vent :
La température est affichée en
tenant compte du facteur de vent
froid si « WCl » est affiché sur le
LCD. L’abaissement de la
température causé par le froid est la
température de l’air ressentie sur la
peau quand la vitesse du vent est
prise en compte.

Autre Témoind’usuredespiles:
L’icône des piles à l’angle inférieur
gauche du LCD indique le niveau des
piles.
Signal sans file :
Le signal sans fil à l’angle supérieur
gauche du LCD indique que le
module BT4.0 fonctionne.
Rétroéclairage :
Un rétroéclairage rouge fournit de la lumière la nuit, tout
en conservant la vision nocturne. Pour éteindre le
rétroéclairage, appuyez sur la touche de mise en marche
pendant plus de 5 secondes jusqu’à ce que « Set »
apparaisse sur le LCD, puis relâchez la touche. « unt »
apparaît sur le LCD. Appuyez plus longtemps sur la touche
pour passer au mode « bLE ». Sous le statut « bLE »,
appuyez sur la touche de mise en marche pour le
défilement en marche ou éteint. Attendez 5 secondes et
l’appareil revient au mode normal avec le statut de
rétroéclairage sélectionné.
Remplacement de l’impulseur :
Pour remplacer l’impulseur, utilisez une pince fine ou une
aiguille afin d’enlever le capuchon en caoutchouc de
couleur grise et exposer la visse de l’impulseur. Dévissez un
peu la visse sans l’enlever. Faites tourner le rotor de
l’impulseur dans le sens des aiguilles d’une montre (vue de
l’arrière de l’appareil de mesure). Mettez le nouvel
impulseur et vissez son rotor dans le sens contraire des
aiguilles d’une montre. Serrez la visse et remettez en place
le capuchon en caoutchouc de couleur grise.
Piles :
Pour remplacer les piles, tournez le couvercle du
compartiment dans le sens des aiguilles d’une montre afin
de l’enlever. Les piles sont visibles dans le compartiment.
Mettez 2 nouvelles piles en lithium CR2032, le signe « + »
vous faisant face. En général, les piles CR2032 sont faciles à
trouver en magasin. REMARQUE : des modes différents ont
des effets différents sur la durée de vie des piles.

Manuale del myMET V 1.00 – Italiano
Descrizione del prodotto
Il Misuratore del vento manuale myMET misura la velocità
del vento e la temperatura dell’aria, oltre a calcolare il
fattore di raffreddamento. L’apparecchio mostra quindi tali
informazioni sull’LCD integrale e le trasmette in tempo
reale ad un iOS BLE o ad un dispositivo androide che rientra
nella portata. NOTA I dispositivi iPhone 4S o modello
successivo, iPad2 o modello successivo o Android 4.2 sono
tutti supportati. Se il dispositivo a display è dotato di APP
my MET, è possibile visualizzare i dati e aggiungere ulteriori
informazioni, come la direzione del vento, l’ubicazione
dell’utente e l’altitudine. Tutte le informazioni possono
essere contrassegnate con un’immagine e trasmesse,
usando i metodi disponibili sul dispositivo a display.
Operazioni preliminari
Il pacchetto del Misuratore del vento manuale myMET
contiene un myMET, due batterie al litio CR2032 (installate)
e un cordino. BATTERIE Le batterie sono installate in sede
di fabbrica. CORDINO: Per installare il cordino, far passare il
piccolo cappio attraverso il foro sull’angolo inferiore della
custodia e quindi far passare il cordino attraverso il cappio.
UTILIZZO DI myMET: Estendere myMET fino alla posizione
completamente aperta. Se si utilizza un treppiedi,
collegarlo sul fondo della custodia. NOTA L’accessorio a
vano opzionale del vento allineerà myMET alla direzione
del vento, quando il treppiedi viene montato e
correttamente posizionato a livello. Per evitare letture
errate, afferrare myMET sul fondo della custodia,
allontanandolo dal viso e dal corpo. I sensori del myMET
sono sensibili. Per ottenere buone misurazioni, è
importante evitare di toccare o ostruire i sensori.
Modalità operative:
Accendere myMET estendendo il
misuratore o usando il pulsante di
alimentazione. Il pulsante di
alimentazione viene usato quando
myMET è esteso ma la funzione
auto-off è stata attivata. Il pulsante di
alimentazione si utilizza anche per far
scorrere il display fino alla misurazione
o funzione desiderata. Per spegnere
myMET, premere il misuratore del
vento nella custodia.
Disattivazione della modalità di
Risparmio dell’energia:
Con il myMET acceso, passare dalla
modalità di risparmio dell’energia alla
modalità sempre acceso, premendo il

pulsante di alimentazione per 3 secondi, fino a quando la
lettera “n” apparirà sull’LCD, quindi rilasciare il pulsante di
alimentazione. L’icona “APO” sparirà dall’LCD durante la
modalità sempre acceso.
Modifica delle Unità di misura:
Con il myMET acceso, modificare le unità di misura
premendo il tasto di alimentazione per oltre 5 secondi, fino
a quando “SEt” apparirà sull’LCD, e quindi rilasciare il tasto
di alimentazione. Il messaggio “unt” appare quindi sull’LCD.
Nello stato “unt”, premere il tasto di alimentazione per
scorrere fino all’unità desiderata. Attendere per 5 secondi e
il misuratore ritornerà alla modalità normale ed utilizzerà
l'unità di misura selezionata.
Modalità
Velocità del vento Unità di misura:
myMET misura la velocità del vento
in 2 diverse unità di misura: Le Miglia
all’ora e i Metri al secondo. Per
passare da un’unità di misura
all’altra, consultare la sezione
“Modifica delle Unità di misura” per
ottenere istruzioni.
Velocità del vento:
La velocità del vento appare soltanto
nell’unità di misura selezionata con il
primo posizionamento decimale.
Temperatura Temperatura ambiente:
Mostra la temperatura in Fahrenheit
o Celsius. Se sono state selezionate
per il vento le Unità di misura
metriche, allora la temperatura sarà
mostrata in gradi Celsius.
Perdita di calore per ventilazione:
La temperatura viene presentata
come Perdita di calore per
ventilazione quando WCI appare
sull’LCD. La Perdita di calore per
ventilazione è la temperatura
dell’aria effettiva sulla pelle umana,
quando si prende in considerazione
la velocità del vento.

Altri Indicatoredellabatteria:
L’icona della batteria nell’angolo
inferiore sinistro dell’LCD indica il
livello della batteria.
Segnale wireless:
L’icona wireless nell’angolo
superiore sinistro dell’LCD indica che
il modulo BT4.0 sta funzionando.
Retroilluminazione
Una retroilluminazione rossa fornisce la luce durante la
notte, pur preservando la visibilità notturna. Per spegnere
la retroilluminazione, premere il tasto di alimentazione per
oltre 5 secondi fino a quando “SEt” apparirà sull’LCD, e
quindi rilasciare il tasto di alimentazione. Il messaggio “unt”
viene quindi visualizzato sull’LCD. Premere più a lungo il
tasto di alimentazione per passare alla modalità “bLE”,
nello stato “bLE”, quindi premere il tasto di alimentazione
per scorrere su on o off. Attendere per 5 secondi e il
misuratore ritornerà alla modalità normale con lo stato di
retroilluminazione selezionato.
Sostituzione del girante
Per sostituire il girante, usare pinze affilate o un perno,
quindi rimuovere il tappo in gomma di colore grigio ed
esporre la vite del girante. Allentare la vite senza
rimuoverla. Ruotare il girante torcendo il gruppo del
girante in senso orario (visualizzato dal lato posteriore del
misuratore del vento). Installare il ricambio e torcere il
gruppo del girante in senso antiorario. Stringere la vite e
riposizionare il tappo in gomma di colore grigio.
Batteria
Per sostituire la batteria, rimuovere il coperchio del
comparto girandolo in senso orario. La batteria sarà visibile
nel comparto. Inserire 2 batterie al litio CR2032 nuove con
il segno “+” rivolto verso l’utente. I modelli CR2032 al litio
sono disponibili in tutti i negozi che vendono batterie.
NOTA Modalità diverse hanno effetti diversi per quanto
riguarda la durata della batteria.

Manual del usuario para myMET V 1.00 —
Español
Descripción del producto
El medidor portátil myMET mide la velocidad del viento y la
temperatura del aire, además calcula la sensación térmica
del viento. A continuación, muestra dicha información en la
pantalla integral LCD y la transmite en tiempo real a un
dispositivo Android o iOS con Bluetooth de Baja Energía
(BLE, por sus siglas en inglés) dentro de la distancia de
su alcance. NOTA: soporta los iPhone 4S o posterior,
iPad2 o posterior o Android 4.2. Si el dispositivo contiene la
aplicación myMET, puede mostrar los datos y agregar
información adicional como la dirección del viento, la
ubicación del usuario y la altitud. Toda la información se
puede capturar y transmitir en una imagen con los
métodos disponibles en el dispositivo con pantalla.
Para empezar
El paquete con el Medidor de viento portátil myMET
contiene un myMET, dos pilas de litio CR2032 (instaladas) y
un cordón. PILAS: Las pilas han sido instaladas en la fábrica.
CORDÓN: Para colocar el cordón, pase el lazo pequeño por
el orificio de la esquina inferior del estuche y a
continuación pase el cordón por el lazo. CÓMO UTILIZAR
myMET: Extienda myMET hasta que quede totalmente
abierto. En caso de utilizar un trípode, sujételo a la parte
inferior del estuche. IMPORTANTE: El accesorio opcional de
veleta alinea el myMET con la dirección del viento cuando
se ha colocado en un trípode y está adecuadamente
nivelado. Sostenga myMET por la parte inferior del estuche,
y manténgalo alejado de la cara y el cuerpo, para evitar
lecturas falsas. Los sensores del myMET son muy sensibles.
Para obtener una medición correcta, es importante no
tocar ni obstruir los sensores.
Modos de funcionamiento:
Para encender el myMET extienda el
medidor o utilice el botón de
encendido. El botón de encendido se
utiliza cuando myMET está extendido,
pero el dispositivo se ha apagado
automáticamente. También se utiliza
el botón de encendido para
desplazarse por las opciones de la
pantalla y mostrar la medida o función
deseadas. Para apagar myMET,
empuje el medidor de viento dentro
del estuche.
Cómo desactivar el modo de ahorro
de electricidad:
Con el myMET encendido, cambie el

modo de ahorro de electricidad a siempre encendido
pulsando el botón de encendido durante 3 segundos hasta
que aparezca una “n”en la pantalla LCD, a continuación,
suelte el botón de encendido. El icono “APO” desaparece
del LCD mientras se encuentre en el modo de siempre
encendido.
Cómo cambiar las unidades de medida:
Con el myMET encendido, cambie las unidades de medida
pulsando el botón de encendido más de 5 segundos hasta
que aparezca “SEt” en la pantalla y, seguidamente, suelte el
botón. Aparecerá “unt” en el LCD. Mientras el dispositivo
está en “unt”, pulse el botón de encendido para
desplazarse por las distintas opciones hasta la unidad
deseada. Espere 5 segundos hasta que el medidor regrese
al modo normal con la unidad de medida seleccionada.
Modos
Velocidad del viento Unidades de medida:
myMET mide la velocidad del viento
en 2 unidades diferentes: Millas por
hora y metros por segundo. Para
cambiar entre las unidades de
medida, consulte la sección “Cómo
cambiar las unidades de medida” .
Velocidad del viento:
La velocidad del viento se indica
solamente en la unidad de medida
hasta el primer decimal.
Temperatura Temperatura ambiente:
Indica la temperatura en grados
Fahrenheit o Centígrados. Si se
seleccionan las unidades de medida
métricas para el viento, entonces la
temperatura aparecerá en
Centígrados.
Sensación térmica del viento:
La temperatura se mostrará como
sensación térmica del viento cuando
aparezca WCI en la pantalla. La
sensación térmica del viento es el
efecto de la temperatura del aire
sobre la piel de una persona
teniendo en cuenta la velocidad del
viento.

Otros Indicadordepilas:
El icono de pilas en la esquina
inferior izquierda del LCD indica el
nivel de carga de las pilas.
Señal de inalámbrico:
El icono de inalámbrico en la esquina
superior izquierda del LCD indica que
el módulo BT4.0 está funcionando.
Luz posterior
Por la noche, una luz posterior roja proporciona
iluminación, preservando la visión nocturna. Para apagarla,
pulse el botón de encendido durante más de 5 segundos
hasta que aparezca “SEt” en la pantalla y, a continuación,
suelte el botón de encendido. Aparecerá “unt” en el LCD.
Pulse el botón de encendido más tiempo para cambiar el
modo a “bLE”, mientras el dispositivo se encuentre en
modo “bLE”, pulse el botón de encendido para seleccionar
su encendido o apagado. Espere 5 segundos hasta que el
medidor regrese al modo normal con el modo de luz
posterior seleccionado.
Reemplazo del propulsor:
Para reemplazar el propulsor, utilice alicates finos o un
alfiler para quitar el tapón de caucho de color gris que
cubre el tornillo del propulsor. Afloje el tornillo, pero no lo
quite. Rote el propulsor girando la unidad del propulsor en
la dirección de las manillas del reloj (mirando desde la
parte posterior del medidor de viento). Coloque el nuevo
propulsor y gire la unidad del propulsor en dirección
contraria a las manillas del reloj. Apriete el tornillo y vuelva
a colocar el tapón de caucho de color gris.
Pila:
Para reemplazar la pila, gire la cubierta del compartimiento
en la dirección de las manillas del reloj y retírela. Así verá
la pila dentro del compartimiento. Introduzca 2 pilas de
litio CR2032 con el símbolo “+” hacia usted. Las pilas
CR2032 se pueden adquirir en cualquier establecimiento en
el que se vendan pilas. IMPORTANTE: Los distintos
modos afectan la vida útil de las pilas de diferentes
maneras.

Manual myMET Versão 1.00 — Português
Descrição do produto
Seu Anemômetro Portátil myMET mede a velocidade do
vento e a temperatura do ar, e calcula a sensação térmica.
Em seguida, ele exibe essas informações no LCD integral, e
transmite as informações em tempo real para um
dispositivo BLE iOS ou Android dentro do alcance. OBS.:
compatibilidade com dispositivos iPhone 4S ou posteriores,
iPad2 ou posteriores, ou Android 4.2. Se o dispositivo de
exibição tiver o aplicativo myMET, é possível exibir os
dados e adicionar informações como a direção do vento, a
localização do usuário e a altitude. Todas as informações
podem ser sinalizadas com uma imagem e transmitidas
através dos métodos disponíveis para o dispositivo de
exibição.
Introdução
Seu pacote do Anemômetro Portátil myMET contém um
myMET, duas baterias de lítio CR2032 (instaladas) e um
cordão. BATERIAS: As baterias vêm instaladas de fábrica.
CORDÃO: Para prender o cordão, passe o laço pequeno
através do orifício no canto inferior do gabinete e, em
seguida, passe o cordão através do laço. USO DO myMET:
Coloque o myMET na posição totalmente aberta. Se estiver
usando um tripé, fixe-o à parte inferior do gabinete. OBS.:
O acessório opcional de cata-vento alinha o myMET com a
direção do vento quando o dispositivo está montado em
um tripé e bem nivelado. Segure o myMET pelo fundo do
gabinete, longe do rosto e do corpo, para evitar leituras
incorretas. Os sensores do MyMET são sensíveis. Para
assegurar a precisão das mensurações, é importante não
tocar nem obstruir os sensores.
Modos de operação:
Para ligar o myMET, estenda o
medidor ou use o botão de
energia. O botão de energia é
usado quando o myMET é
estendido e quando a função de
desligamento automático
ocorreu. Você também pode
usar o botão de energia para
fazer a rolagem para exibir a
medição ou função desejada.
Para desligar o myMET, empurre
o anemômetro para dentro do
gabinete.

Desativação do modo Economia de Energia:
Com o myMET ligado, para alterar o modo
Economia de Energia para o modo Sempre Ligado,
mantenha pressionado o botão de energia durante
3 segundos, até que "n" seja exibido no LCD e, em
seguida, solte o botão de energia. O ícone "APO"
desaparece do LCD quando o modo Sempre Ligado
estiver ativado.
Alteração das unidades de medida:
Com o myMET ligado, para alterar as unidades de
medida, mantenha pressionado o botão de energia
durante mais de 5 segundos, até que "SEt" seja
exibido no LCD e, em seguida, solte o botão de
energia. Em seguida, “unt” é exibido no LCD. Após a
exibição de “unt”, pressione o botão de energia
para rolar até a unidade desejada. Aguarde 5
segundos para que o medidor retorne ao modo
Normal utilizando a unidade de medida
selecionada.
Modos
Velocidade do vento Unidades de medida:
O myMET mede a velocidade do
vento em duas unidades de medida
diferentes: milhas por hora e metros
por segundo. Para alternar as
unidades de medida, consulte a
seção "Alteração das unidades de
medida" para obter instruções.
Velocidade do vento:
A velocidade do vento somente é
mostrada na unidade de medida
selecionada até a primeira casa
decimal.
Temperatura Temperatura ambiente:
Exibe a temperatura em Fahrenheit
ou Celsius. Se o sistema métrico
estiver selecionado como as
unidades de medida para o vento,
então a temperatura será exibida em
Celsius.
Sensação térmica:
A temperatura é exibida como
Sensação Térmica quando "WCl" é
exibido no LCD. Sensação térmica é a
temperatura efetiva do ar sobre a
pele humana quando a velocidade do
vento é considerada.

Outros Indicadordabateria:
O ícone da bateria no canto inferior
esquerdo do LCD indica o nível da
bateria.
Sinal sem fio:
O ícone sem fio no canto superior
esquerdo do LCD indica que o
módulo BT4.0 está em
funcionamento.
Luz de fundo
A luz de fundo vermelha fornece iluminação à noite,
preservando a visão noturna. Para desligar o myMET,
mantenha pressionado o botão de energia durante mais de
5 segundos, até que "SEt" seja exibido no LCD e, em
seguida, solte o botão de energia. Em seguida, “unt” é
exibido no LCD. Pressione o botão de energia por mais
tempo para alterar o modo para "bLE", e depois pressione
o botão de energia para rolar para a posição ligada ou
desligada. Aguarde 5 segundos para que o medidor retorne
ao modo Normal, com o status selecionado da luz de
fundo.
Reposição do rotor:
Para substituir o rotor, use um alicate afiado ou um alfinete
para remover o tampão de borracha de cor cinza e expor o
parafuso do rotor. Afrouxe o parafuso, mas não o retire.
Para girar o rotor, gire o conjunto do rotor no sentido
horário (visto da parte de trás do anemômetro). Instale o
novo rotor e gire o conjunto do rotor no sentido
anti-horário. Aperte o parafuso e substitua o tampão de
borracha de cor cinza.
Bateria:
Para substituir a bateria, gire a tampa do compartimento
no sentido horário para removê-la. A bateria ficará visível
no respectivo compartimento. Insira 2 baterias novas de
lítio CR2032 com o sinal de mais (+) voltado para você. As
baterias CR2032 podem ser compradas em qualquer local
de venda de baterias. OBS.: Os diferentes modos têm
efeitos diferentes sobre a vida útil da bateria.
Table of contents
Languages:
Other WeatherHawk Measuring Instrument manuals
Popular Measuring Instrument manuals by other brands

Rohde & Schwarz
Rohde & Schwarz R&S SMW-K548 user manual

Emco
Emco V-20 operating manual

Endress+Hauser
Endress+Hauser Micropilot FMR56 technical information

Hanna Instruments
Hanna Instruments HI 93720 instruction manual

Norsonic
Norsonic nor140 Instructional manual

Vanguard Instruments
Vanguard Instruments WRM-10P operating instructions

PCB Piezotronics
PCB Piezotronics 354B33 Installation and operating manual

Rigol
Rigol VB1080 user guide

McCrometer
McCrometer SmartTrax Installation, operation and maintenance manual

Pepperl+Fuchs
Pepperl+Fuchs DPU1100 Series manual

Abbott
Abbott m-PIMA user guide

SEAGUARD
SEAGUARD Sentry multizone instructions