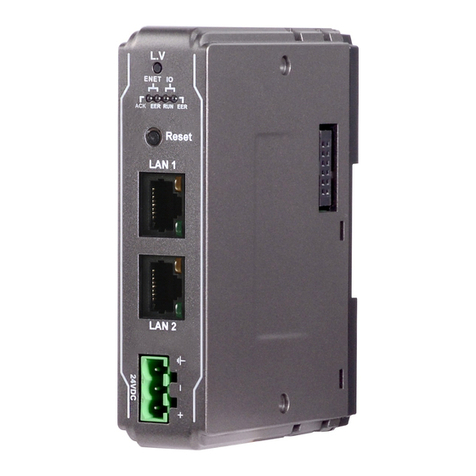
weintek iR-ETN User manual

User Manual
iR-ETN/iR-ETN40R - EtherNet/IP Connection Guide
This guide walks through the steps to connect iR-ETN/iR-ETN40R with PLC.
UM020006E_20221109

Table of Contents
Overview.............................................................................................................................................................. 1
How to Generate EDS File using EasyRemoteIO............................................................................ 1
CODESYS ........................................................................................................................................ 3
Rockwell CompactLogix/ControlLogix ........................................................................................... 9
3.1. Adding a Single iR-ETN ....................................................................................................................... 9
3.2. Adding Multiple iR-ETN.................................................................................................................... 15
Panasonic FP7 .............................................................................................................................. 18
KEYENCE KV Series....................................................................................................................... 22

iR-ETN EtherNetIP Connection Guide
1
Overview
iR-ETN/iR-ETN40R firmware supports EtherNet/IP protocol. In EasyRemote IO software, the
description file (EDS) for EtherNet/IP devices can be generated. By scanning the iR-ETN/iR-ETN40R
devices in EasyRemote IO software, the EDS file can be generated according to the current I/O
configuration. The EDS file can then be imported by PLC or EtherNet/IP Scanner devices to complete
configuration with minimal effort.
Applicable firmware version:
iR-ETN: V1.0.3.0
iR-ETN40R: V1.0.0.1
Applicable EasyRemoteIO version:
iR-ETN: V1.3.2.0 or later
iR-ETN40R: V1.4.3.0 or later
For more information on updating iR-ETN firmware, please see
UM019005E_iR_Series_Firmware_Update_UserManual_eng.pdf
This user manual explains how to generate iR-ETN’s/iR-ETN40R’s EtherNet/IP EDS File, and how to
connect PLC to iR-ETN/iR-ETN40R via EtherNet/IP.
How to Generate EDS File using EasyRemoteIO
For more information on EasyRemoteIO, please see
UM018004E_EasyRemoteIO_UserManual_eng.pdf
Step 1. Launch EasyRemoteIO, click [Automatic scan] to scan network for iR-ETN/iR-ETN40R. The
information of iR-ETN/iR-ETN40R and the connected modules is shown as below.
Step 2. Click [File] » [Export EtherNet/IP EDS] and select the file to export tags.

iR-ETN EtherNetIP Connection Guide
2
Step 3. Select the iR-ETN and click OK.
EDS file is successfully exported.

iR-ETN EtherNetIP Connection Guide
3
CODESYS
This chapter explains how to connect two iR-ETN and iR Remote I/O in CODESYS.
Step 1. In EasyRemoteIO scan and export EtherNet/IP EDS.
Step 2. Open a new project in CODESYS and select a device.
Step 3. Click [Tools] » [Device Repository…].
Step 4. Click [Install…].

iR-ETN EtherNetIP Connection Guide
4
Step 5. Select [EDS and DCF files (*.eds, *.dcf)] and then select the first *.eds file.
Step 6. After importing the file, the iR-ETN is added under EtherNetIP Remote Adapter.

iR-ETN EtherNetIP Connection Guide
5
Step 7. Add an Ethernet device.
Step 8. Assign an interface (Ethernet).

iR-ETN EtherNetIP Connection Guide
6
Step 9. Add an EtherNet/IP Scanner.
*Please note that [Auto-reestablish Connections] must be selected.
Step 10. Add the first iR-ETN.

iR-ETN EtherNetIP Connection Guide
7
Start from step 3 again to add the second iR-ETN’s *.eds file. This will overwrite the *.eds file of the
first iR-ETN.
Add the second iR-ETN.
Step 11. The default iR module setting is shown. Add new parameters in User-Defined Parameters
tab.
The initial values can be set after adding new parameters.

iR-ETN EtherNetIP Connection Guide
8
Step 12. In EtherNet/IP I/O Mapping tab find the IO address and start editing the program.

iR-ETN EtherNetIP Connection Guide
9
Rockwell CompactLogix/ControlLogix
3.1. Adding a Single iR-ETN
Rockwell CompactLogix and ControlLogix can be edited using RSLogix 5000.
Step 1. Open [Tools] » [EDS Wizard] and import iR-ETN’s EDS file.
Import EDS file following the on-screen instructions.

iR-ETN EtherNetIP Connection Guide
10

iR-ETN EtherNetIP Connection Guide
11

iR-ETN EtherNetIP Connection Guide
12
Step 2. Right-click on [Ethernet] and select [Add Module…].

iR-ETN EtherNetIP Connection Guide
13

iR-ETN EtherNetIP Connection Guide
14
Enter iR-ETN’s IP address and device name. The device name will be used in the tags.
Step 3. iR-ETN’s Input/Output Data can be found in the tag.

iR-ETN EtherNetIP Connection Guide
15
Select the corresponding bit when programming.
3.2. Adding Multiple iR-ETN
In Allen Bradley software, each device requires a unique EDS file. To add multiple iR-ETN (each with
different number of I/O), please follow instructions below.
Step 1. Go to [Ethernet] » [Add Module] and add Generic Ethernet Module.

iR-ETN EtherNetIP Connection Guide
16
Step 2. Configure connection parameters for iR-ETN’s EDS file.
*When Assembly Instance only has Input, “Comm Format” must be set to “Input Data – SINT”.
Step 3. Enter iR-ETN’s IP address, name, and description.

iR-ETN EtherNetIP Connection Guide
17
Step 4. Enter RPI. Use the default setting, which is 10 ms (min. RPI support for iR-ETN is 5 ms).
Step 5. When you have finished setting the parameters, you can see iR-ETN’s I/O status in
Controller Tags page. In this example, the first slot of iR-ETN = DM16-P and the second
slot = AI04-TR.

iR-ETN EtherNetIP Connection Guide
18
Panasonic FP7
Panasonic FP7 CPS41E CPU supports EtherNet/IP, please use Control FPWIN Pro 7 software to edit
the program.
Step 1. Use static IP for PLC.
Step 2. Open EtherNet/IP Setting » [EDS File] » [Register...] and import iR-ETN’s EDS file.
Step 3. Right-click on iR-ETN and select [Add to Scan List].
Other manuals for iR-ETN
2
This manual suits for next models
1
Table of contents
Other weintek Conference System manuals