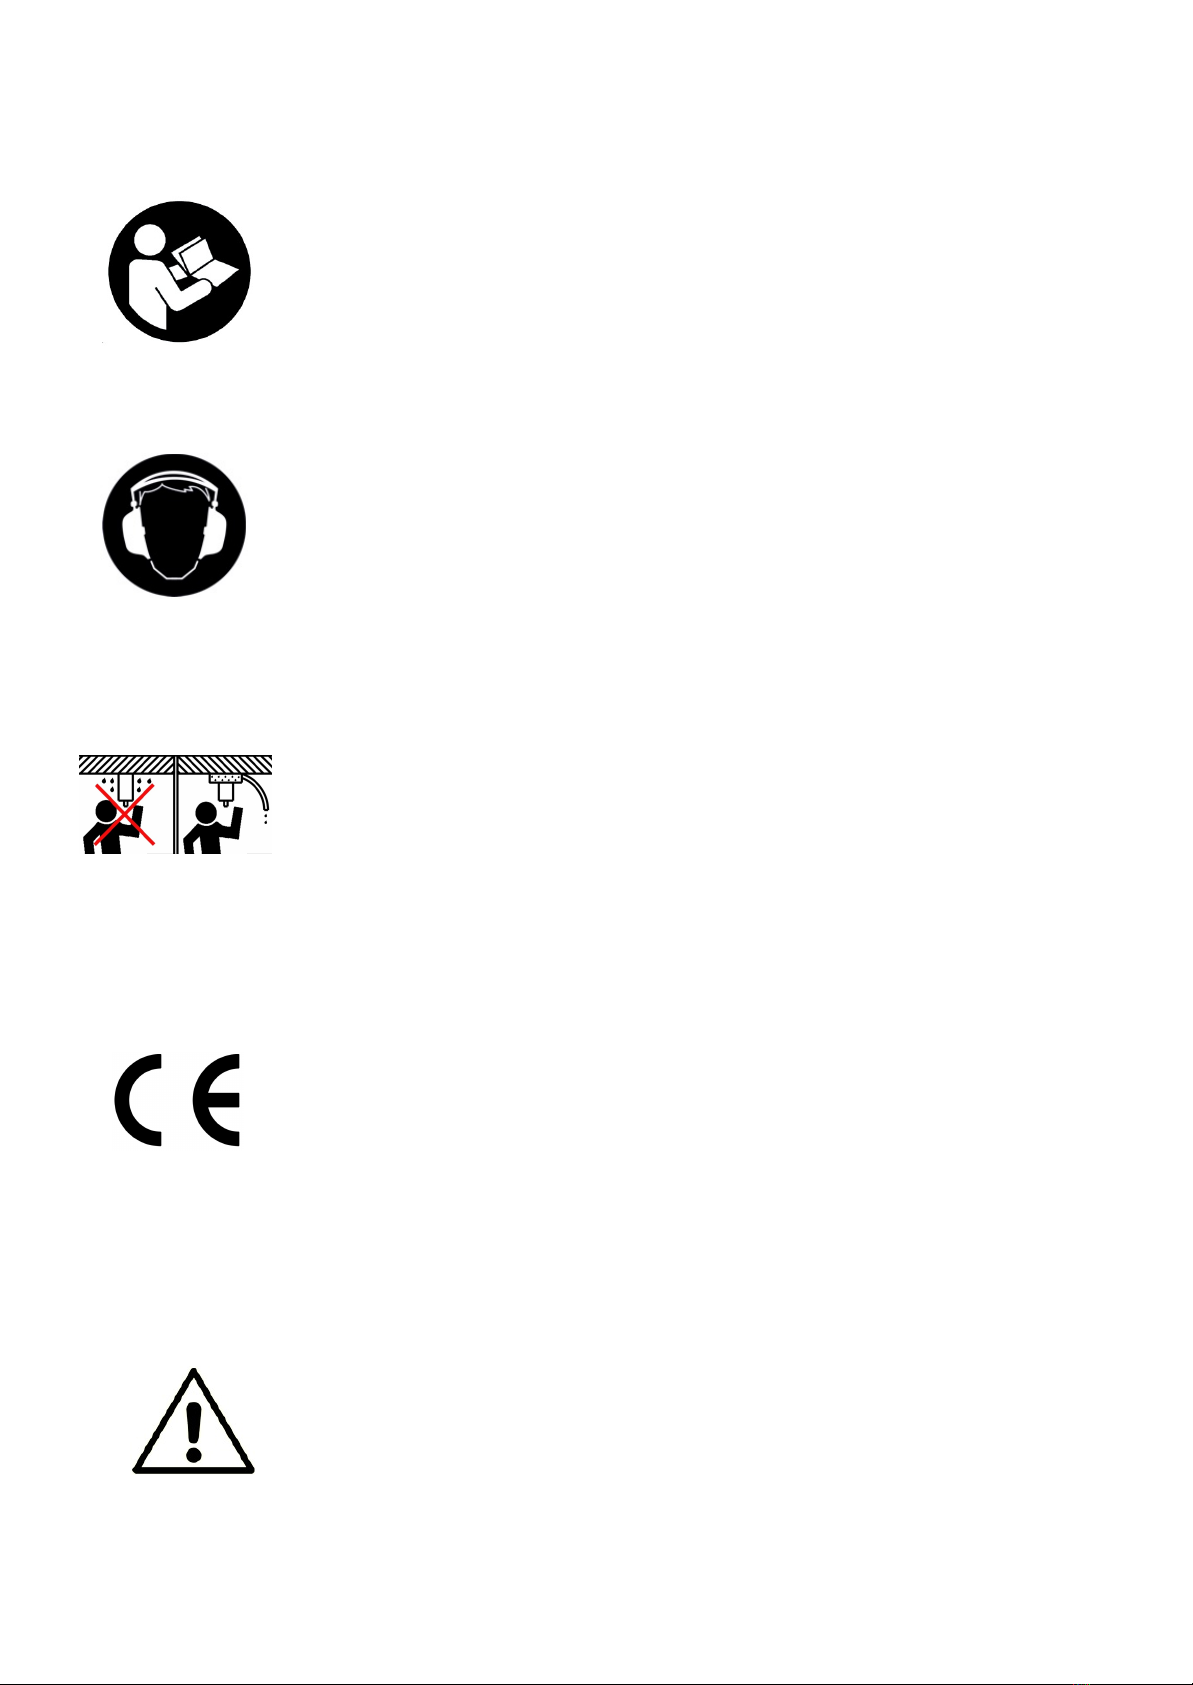
manuals.online logo
Brands
  1. Home
  2. •
  3. Brands
  4. •
  5. Weka
  6. •
  7. Cutter
  8. •
  9. Weka TS40 Anna User manual

Weka TS40 Anna User manual

TS40 Anna
BETRIEBSANLEITUNG....................................................... 1
OPERATINGINSTRUCTIONS.................................................. 9
INSTRUCTIONSDESERVICE................................................ 1 6
ISTRUZIONIDISERVIZIO.................................................... 2 3
INSTRUCCIONESDESERVICIO.............................................. 3 0
BEDRIJFSHANDLEIDING.................................................... 3 7
BETJENINGSVEJLEDNING.................................................. 4 4
BRUKSANVISNING......................................................... 5 1
BRUKSANVISNING......................................................... 5 8
KÄYTTÖOHJE............................................................. 6 5
INSTRUKCJA OBS£UGI. .................................................... 7 2
Ñïðàâî÷íèê ïî ýêñïëóàòàöèè . ............................................... 7 9
WEKA Elektrowerkzeuge
Auf der Höhe 20, D 75387 Neubulach
Telephone: +49 7053 96816-0, Telefax: +49 7053 3138
Internet: www.weka-elektrowerkzeuge.de
Email: weka@weka-elektrowerkzeuge.de
S Y M B O L S
Auf der Maschine - On the machine
Betriebsanleitung vor Inbetriebnahme sorgfältig durchlesen!
Please read operators manual carefully before putting the machine into operation!
Notice d’utilisation à lire attentivement avant la mise en service de la machine!
Leggere la manuale di istruzioni con attenzione prima dell'utilizzo della macchina!
¡Estas instrucciones se deben leer atentamente antes de poner en marcha la máquina!
Voor de ingebruikneming gebruiksanwijzing a.u.b. zorgvuldig doorlezen!
Læs betjeningsvejledningen omhyggeligt inden maskinen tages i drift!
Läs noggrannt igenom denna anvisning innan maskinen tas ibruk!
Les nøye gjennom instruksjonen i denne manualen!
Lue tarkasti tämä ohje ennen koneen käyttöönottoa!
Instrukcja obslugi, prosimy dok³adnie przeczytaæprzed uruchomieniem maszyny!
Ïåðåä ââîäîì âýêñïëóàòàöèþ âíèìàòåëüíî ïðî÷åñòü ñïðàâî÷íèê ïî ýêñïëóàòàöèè!
Tragen Sie beim Arbeiten mit dieser Maschine einen Gehörschutz.
Wear ear protection when working with this machine.
Portez un protège-oreilles lorsque vous travaillez avec cette machine.
Durante il lavoro con questa macchina indossate una protezione dell'udito.
Utilice una protección de los oídos durante los trabajos con la máquina.
Draag bij het werken met deze machine gehoorbescherming.
Husk at bruge lyddæmpende ørebeskyttelse hvis De arbejder med maskinen.
Använd hörselskydd vid användning av denna maskin.
Bruk hørselsvern ved bruk av maskinen.
Koneen kanssa työskennellessä on aina käytettävä kuulosuojaimia.
Podczas wykonywania prac za pomoc¹tego urz¹dzenia nosiæœrodki ochrony s³uchu.
Ïðè ðàáîòå ñýòèìè ìàøèíàìè èñïîëüçóéòå ïðîòèâîøóìíûå íàóøíèêè.
Überkopfbohren nur mit geeigneter Wasserfangeinrichtung.
Overhead drilling only with appropriate water-collecting ring.
Perçage au-dessus de la tête uniquement avec des collecteur d'eau.
Trapanazione sopratesta deve essere effettuata solo con dispositivo di raccolta dell'acqua.
Perforación de techos solamente se debe efectuar con instalación de recolección de agua.
Alleen bovenhands booren met geschikte wateropvangvoorziening.
Boring over hovedet må kun foretages med egnede indretning til opfangning af vand.
Borrning över huvudet får ske endast med vattensamlingsanordning.
Over hodet kjerneboring må kun utføres med egnet vannsamlingsring.
Yli pään poraus on oltava oikeat vedenkeräilylaite.
Wiercenie nad g³ow¹mo¿na wykonywaæwy³¹cznie z odpowiednimi urz¹dzenie do
wy³apywania wody.
Âåðòèêàëüíîå áóðåíèå «ââåðõ ÷åðåç ãîëîâó» òîëüêî ïðè ñîîòâåòñòâóþùåì
îñíàùåíèè äëÿ âîäîñáîðà.
Dieses Produkt entspricht den geltenden EU Richtlinien.
This product is in accordance with applicable EC directives.
Ce produit est conforme aux directives CE en vigueur.
Il presente prodotto è conforme alle vigenti direttive CEE.
Este producto cumple con la directiva CE vigente.
Dit product voldoet aan de geldende CE richtlijnen.
Dette produkt er i overensstemmelse med gældende CE-direktiv.
Denna produkt överensstämmer med gällande EG-direktiv.
Dette produktet er i overensstemmelse med EU direktiver.
Tämä tuote täyttää voimassa olevan Cedirektiivin vaatimukset.
Produkt ten jest zgodny z odpowiednimi dyrektywami EC.
Ýòîò ïðîäóêò ñîîòâåòñòâóåò äåéñòâóþùèì äèðåêòèâàì ÅÑ.
In der Bedienunganleitung - In the operators manual
Sicherheitshinweis, bitte besonders beachten!
Security advise, please take special care!
Instruction de sécurité, a respecter particulièrement, s’il vous plait!
Indicazione di sicurezza, considerare specialmente, per favore!
Estas llamadas de atención se deben atender especialmente!
Gelieve veiligheidsvoorschrift aandachtig te bestuderen!
Sikkerhedsanvisning. Udvis størst mulige forsigtighed!
Säkerhetsförslag, var extra försiktig!
For din egen sikkerhet, vennligst vær ekstra forsiktig!
Turvallisuusohje, ole hyvä ja noudata erityistä huolellisuutta!
Wskazówka bezpieczeñstwa, prosimy zachowaæszczególn¹ostro¿noœæ!
Óäåëèòü îñîáîå âíèìàíèå óêàçàíèÿì ïî òåõíèêå áåçîïàñíîñòè!
9
GBOPERATING INSTRUCTIONS - DIAMOND DISC SAW TS40
Please read these instructions carefully before starting up the machine!
In the WEKA diamond disc saw you have an outstanding quality product with which you will be very satisfied,
provided you use it properly.
1. G E N E R A L S A F E T Y P R E C A U T I O N S
WARNING! Read all safety precautions and instructions. Failures in the compliance with
these safety precautions and instructions can cause electric shock, fire and/or heavy injuries.
Please keep these safety precautions and instructions for the future.
The term “electric tool” used in the safety precautions corresponds to mains operated electric tools (with
mains cord) and to battery operated electric tools (without mains cord).
1) Security of employment
a ) Keep your working area clean and well illuminated. Disorder or unilluminated working
areas can cause accidents.
b ) Do not work in explosive ambiances with the electric tool, in which there are
flammable liquid, gases or dusts. Electric tools generate sparks which can inflame the
dust or vapors.
c ) Keep children and other persons away from the electric tool while using it. When
being distracted, you can lose the control on the device.
2) Electrical safety
a ) The mains plug of the electric tool must fit into the socket. The plug must not be
changed in any kind. Do not use adapter plugs together with earthed electric tools.
Unmodified plugs and fitting sockets reduce the risk of electric shock.
b ) Avoid body contact with earthed surfaces, like tubes, heatings, cookers and
fridges. There is a higher risk of electric shock when your body is earthed.
c ) Keep your electric tool away from rain or wetness. The infiltration of water into an
electric tool increases the risk of an electric shock.
d ) Do not divert the cord from its intended use from carrying or hanging up the
electric tool, or for pulling the plugs from the socket. Keep the cord away from heat,
oil, sharp edges or moving device parts. Damaged or tangled cords increase the risk
of an electric shock.
e ) If you work outside with your electric tool, only use extension cords that are
appropriate for outside use. The use of a extension cord which is appropriate for outside
use reduces the risk of an electric shock.
f ) If the use of the electric tool in humid areas is inevitable, use a ground fault circuit
interrupter (GFCI). The use of a GFCI reduces the risk of an electric shock.
3) Personal safety
a ) Be attentive, pay attention to what you do and go to work with the electric tool with
reason. Do not use an electric tool when you are tired or under the influence of
drugs, alcohol or pharmaceuticals. One moment of carelessness while using an electric
tool can cause serious injuries.
b ) Wear personal protective equipment and always goggles. The wearing of personal
protective equipment, like dust mask, skid-proof shoes, protection helmet or hearing
protection, depending on the kind and use of the electric tool reduces the risk of injuries.
c ) Avoid unintended start up. Make sure that the electric tool is switched off before
connecting it to the mains and/or the battery, picking it up or carrying it. When you
have your finger on the switch while carrying the electric tool or connect the device to the
mains when it is switched on, this can cause accidents.
d ) Remove adjusting tools or wrenches before switching on the electric tool. A tool or
wrench which is located on a turning device can cause injuries.
10
e ) Avoid abnormal posture. Care for safe standing and keep the balance anytime. Do
not work on a ladder. Thus you can control the electric tool better in unexpected
situations.
f ) Wear suitable clothing. Do not wear wide clothing or jewelry. Keep hair, clothing
and gloves away from moving parts. Wide clothing, jewelry or long hair can be caught
by moving parts.
g ) If there is the possibility to assemble a dust exhauster and collecting device, make
sure that these are connected and used correctly. The use of a dust exhauster can
reduce dangers by dust.
4) Use and handling of the electric tool
a ) Do not overload the device. Use the appropriate electric tool for your work. With the
appropriate electric tool you work better and saver in the declared range of performance.
b ) Do not use an electric tool whose switch is damaged. An electric tool which can not
be switched on and off is dangerous and has to be repaired.
c ) Unplug the plug from the socket and/or remove the battery before carrying out
instrument settings, exchanging accessories or put the device aside. This safety
measure avoids the unintended start of the electric tool.
d ) Keep unused electric tools out of reach of children. Do not allow persons to use the
device who are not familiar with it or have not read these instructions. Electric tools
are dangerous if they are used by inexperienced persons.
e ) Maintain electric tools with care. Check if movable parts function correctly and do
not jam, if parts are broken or damaged in that way, that the function of the electric
tool affected. Have damaged parts repaired before using the device. Many accidents
originate from bad maintained electric tools.
f ) Keep the cutting tool sharp and clean. Carefully maintained cutting tools with sharp
edges do jam less and are easier to guide.
g ) Use electric tool, accessory, operation tools, etc. according to these instructions.
Thereby consider the conditions of employment and the work to be done. The use
of electric tools for others than the intended task can result in dangerous situations.
5) Service
a ) Have your tool only repaired by qualified personnel and only with original spare
parts. Thus it is assured that the safety of the electric tool is being obtained.
2. P A R T I C U L A R I N F O R M A T I O N - Please note
1) General
a ) This diamond disc saw is only intended for industrial use and may only be operated
by trained personnel.
b ) Proper use extends only to the sawing of rock, concrete and masonry.
c ) For operation the relevant regulations must be observed.
d ) Power tools must regularly (approx. 6 months) be checked on safety by a specialist
according to BGV A3.
e ) Never deposit the disc saw until the saw blade has come to a complete stop. The
rotating saw blade can get into contact with the surface whereby you may loose control
of the disc saw.
f ) Do not operate the disc saw while you carry it. Your clothes can be captured by
accidental contact with the saw blade.
2) Blade guard and saw blade
a ) Check that the guard of the maschine is correctly fitted and without any cracks or
deformations before starting the machine. The guard always has to be fitted to the
machine during operation.
11
b ) Check that the saw blade is fitted correctly and does not show signs of damage. A
damaged saw blade can cause personal injury.
c ) Only use such saw blades that fulfil all requirements of this disc saw.
d ) Never use a saw blade at a lower speed rating than that menioned on the disc saw
and in this operating instructions. Accessories that turn faster than permitted may be
damaged.
e ) When using a saw blade make sure that it rotates in the direction indicated by the
arrow on the blade. There is an arrow on the machine that indicates the shafts direction
of rotation that the blade is mounted on.
f ) Never use a cutting blade for any other materials than that it was intended.
g ) Do not transport the disc saw with the saw blade fitted. All blades should be
removed from the disc saw after use.
3) Cutting technique
a ) Care for safe standing and keep the balance anytime. Always hold the machine in
a firm grip with both hands.
b ) Check that the blade is not in contact with anything when the machine is started.
c ) Support the work piece in such a way that no unpredictable movement is possible,
and so that the cut remains open while cutting.
d ) Avoid blocking of the saw blade by too high contact pressure, pressure from the
side and too deep cuts. Cut smoothly, allowing the machine to work without forcing or
pressing in the blade. Feed down the machine in line with the blade. Pressure from the
side can cause damage to material and personal injury.
e ) Move the blade slowly forwards and backwards and avoid too deep cuts. This
ensures effective and low-wear cutting.
f ) Never cut above head height.
g ) The guard for the cutting equipment should be adjusted so that spatter and sparks
from the material being cut are then collected up by the guard and led away from
the user.
4) Kickback
The word kickback is used to describe a sudden reaction that causes the disc saw to be kicked
uncontrollable into the direction of the user or away from the user depending on the direction of
rotation. Kickback is caused by blocking of the saw blade. This uncontrollable movement can
cause damages on material and personal injury. A kickback is the result of an incorrect or
improper use of the disc saw.
a ) Always hold the machine in a firm grip with both hands. Bring your body and arms
in a position in which you can control the rebound forces. The operator can control
the rebound and reaction forces by appropriate precautions.
b ) Never get your hand near the rotating saw blade. The saw blade can touch your hand
during a kickback.
c ) Avoid the space in front of and behind of the rotating saw blade. The disc saw is
kicked in the opposite direction of the direction of rotation at the point of blocking.
d ) Work carefully in the area of sharp edges, corners, etc. Avoid the saw blade beeing
kicked back from the work piece and beeing blocked. The rotating saw blade tends
to be blocked at corners and sharp edges or if it is rebounded. This causes a loss of
control or kickback.
e ) Avoid blocking of the saw blade by too high contact pressure. Avoid too deep cuts.
Overstressing of the saw blade increases wear and the liability for blocking and therefore
the possibility of a kickback or break of the abrasive body.
f ) If the saw blade is blocked or if you stop work shut off the machine and keep it still
until the saw blade has stopped completely. Never try to remove the rotating disc
blade out of the cut as long as the saw blade is still moving, otherwise this may
cause a kickback. Detect and eliminate the reasons for blocking.
12
g)Do not switch on the disc saw as long as it is located in the workpiece. Only begin
to move the saw blade in the cut when the saw blade has reached full speed.
Otherwise the saw blade can be blocked, rebounds from the workpiece or causes a
kickback.
h ) Support slabs or big workpieces in order to reduce the risc of a kickback as a result
of a jammed saw blade. Big work pieces can bend under their own weight. The work
piece has to be supported at both sides of the saw blade both near the cut and at the
edge.
i ) Be very careful with “bag cuts” in existing walls or other non-visible areas. The saw
blade can cause a kickback when hitting a gas or water pipe, electric line or another
objects.
3. T E C H N I C A L D E S C R I P T I O N
Your TS40 is a full electrical disc saw which is only to be used for cutting masonry, asphalt, stone and
concrete in industrial usage by trained personnel.
Water is absolutely required for cooling the motor.
The diamond saw blade consists of a prestressed metal disk which is at its circuit fixed with segments
made of a sintered mixture of diamond grains and metal powder.
The sawing process is introduced by dipping the saw blade into the material, which is to be cut. Move
the blade slowly forwards and backwards ober the work piece in order to execute the cut.
The machine may not be used for a different purpose or with a different tool.
3.1 Specifications
Rated Voltage V 230 460
Rated Current A 16 13,5
Power Input W 3700 6500
Power Output W 2700 4800
Frequency - Input Hz 50 - 60
Frequency - Output Hz 930
Speed (full load) 1/min 2500
max. Cutting depth mm 165
Weight - Motor kg 9,4
Tool Fixture - Hole mm 25,4
max. Saw Blade Diameter mm 400
Strength of the saw blade core mm 1,5 - 2,5
Cooling water requirement at full load l/min 1
Water protection class IP 55
3.2 Design
The complete sawing unit consists of the drive unit [1] with switching handle [2], adjustable handle [3]
and adjustable blade guard [4]. A bypass valve [12] which is arrange at the gear is changed when sawing
dry for changing the water flow away from the diamond saw blade. The TS40 is provided electrically via
the frequency converter FU6. TS40 and FU6 are water proof, i.e. on intended use no water can enter
the motor.
3.3 Scope of delivery
Diamond hand saw with blade guard, ball valve and plug nipple, wrench SW 17, face spanner, adapter
cable (CEE-socket/shock-proof plug) and operators manual.
3.4 Noise emissions and vibration (EN 50144)
The typical A-rated sound pressure level is 86 dB(A).
The typical A-weighted sound capacity level is 99 dB.
The typical rated acceleration is 2,5m/s².
13
4. PR EP A R AT I O N
Be convinced that the machine has not been damaged in transit. Check that the nominal voltage is the
same as the voltage indicated on the rating plate.
4.1 Electrical connection
4.1.1 230 ~
Connect the TS40 via the frequency converter FU6 and via the adapter cable only on a properly earthed
shockproof socket. If required useonly highquality extension cords withsufficient cross section.
Up to 200' length - 12AWG
4.1.2 4603 ~
Connect the TS40 via the frequency converter FU6 only on a properly earthed shockproof socket. If
required useonly highquality extension cords with sufficient cross section.
Up to 200' length - 12AWG
Take care that the extension cord is not rolled up on use for reaching a sufficient heat
removal. Consider that the TS40 takes the maximal power from the electrical mains.
Therefore do not connect other users to the concerning fuse, as the mains and the fuse
will then be overloaded. Please take care that the TS40 is only connected to an earthed
16A CEE socket. If you operate the machine at a higher assured socket, you risk in case
of any fault the total burning of the electronic. By the high leakage current the machine
can electrify when touched, if the ground line is not connected correctly. In this case
absolutely disconnect the mains plug immediately and check the ground wire.
TS40 and FU6 can be used at a generator or a transformer provided by the construction site, if following
conditions are kept:
- operating voltage within +5% and –10 % to nominal voltage
- integrated automatic voltage controller with start amplification
-frequency 50– 60Hz; max. 65Hz
-Generator, power output at least:
230V ~ - 4 KW
460V 3~ - 11 KW
Do not use any other devices at the generator/transformator at the same time. The switching on and off
of other devices can cause undervoltage and / or over voltage peaks that can damage the machine.
4.2 Change between 230V~ und 460V ~3P
If you change the operation mode of the disc saw TS40 between 230V~ und 460V~3P the
frequency converter FU6 has to be disconnected for approx. 2 minutes in order to discharge the
intermediate circuit and re-initialize the controller.
4.3 Water connection
Connect the frequency converter via the plug-in nipple [23] to the water supply. The ball valve must at
any time be on the side of the water supply. Now connect the FU6 with the disc saw via a water hose
with a length of approx. 4,2 m (length of the cable).
Attention: water pressure max. 3 bar. Water may only be connected to ball valve, as
otherwise a damage on the casing may appear by upcoming water pressure.
Please use a GARDENA coupling as the connecting piece to the machine and the frequency converter.
This can be obtained from a garden center or builders’ merchant made of plastics. A water coupling of
brass of high quality can be received directly from WEKA.
Use only clean water, as dirty water will considerably disturb the heat exchange on the cooling surface
and thereby the motor can be totally damaged.
Else the seals wear out very quickly.
If water exits of the leakage hole at the gear, the water seals have to be exchanged
immediately. This shoud only be done in an authorized repair station. Attention: Under full
load there are at least 1 l of water per minute required. Open the ball valve after use, so
that the cooling gap can empty. This is mainly required in the cold season - danger of
frost.
14
4.4 Dry cutting and semi-dry cutting
If you intend to cut dry, the motor still has to be cooled sufficiently with water. On top of the gear a valve
[12] is arranged. Turn the grip in the opposite direction of the blade guard and connect a hose (8 mm
outer diameter) to the angle screwing [13] via which the water can flow out. If the valve is opened
partially you are able to cut semi-dry. You just use the amount of water in order to bind the dust.
4.5 Diamond saw blade (Cutting tool)
The saw blade diameter should be 400 mm. Smaller saw blades can be used also, but due to the fixed
circumferential speed these are not so efficient. Bigger diameters must not be used. The hole of the saw
blade has to be 25,4 mm (1"). The strength of the saw blade core shall be in the range of 1,5 - 2,5 mm.
Use only appropriate and well cutting high quality diamond tools. Take care that the diamond segments
overlap sufficiently over the blade body.
4.6 Change the saw blade
In order to remove or change the saw blade, remove the blade guard cover [8] with the face spanner.
Actuate the spindle lock [6] and loosen the hexagon screw [9] at the blade flange [10] simultaneously
with the wrench SW17. Caution, the screw is provided with left-hand thread. Remove the blade
flange and the hexagon screw. Remove the saw blade. Grease the bore of the saw blade and the flange
hub [11], as well as the thread of the hexagon screw after having cleaned this area. Insert the new saw
blade in the blade guard and put it on the flange hub of the spindle. Please proceed in reverse order and
put the blade flange on the spindle. Take care that blade flange and spindle are connected positively and
tighten the hexagon screw counter-clockwise by actuating the spindle lock simultaneously. Arrest the
blade guard cover on the blade guard with the face spinner.
4.7 Change the position of the adjustable handle
In order to change the position of the adjustable handle [3] open the cam lever [7] in a horizontal position.
Adjust the handle in the requested position. Take care that the handle is catched in the requested
position and close the cam lever in a vertical position.
4.8 Change the position of the blade guard
Release the clamping lever [5] at the gear box and change the position of the blade guard in the
requested position. After the required position has been set tighten the clamping lever firmly.
Never work without blade guard.
Handle the blades with care. If single segments are missing or the blade is bad stressed, afflicted with
a fault in concentricity or wobble, dangerous unbalances can arise that can lead to damages on the saw
or can endanger the operator.
Our distributors are specialists for these blades. Please be consulted fully bevor deciding for a saw
blade.
Use the saw blade always in the same turning direction.
5. M A I N T E N A N C E
ATTENTION: Always remove the mains plug from the supply socket before starting
maintenance or repair!
Clean the machine once the sawing work has been completed.
You can sprinkle the machine carefully with a soft jet of water.
Never use a high pressure cleaner or even a steam cleaner.
Damaged cords and plugs have to be repaired or exchanged exclusively in an authorized repair station
(www.weka-elektrowerkzeuge.de).
If water runs out of the overflow-hole on the gear or on a different place, stop the machine immediately
and let it be repaired in an expert workshop.
The same is valid for the gear oil.
Let the water completely flow out of the system especially in the cold seasons - Danger of frost!
15
6. G U A R A N T E E
We will guarantee the WEKA hand saw for 12 months from the day of delivery. During this period we will
rectify material and production defects free of charge. This warranty does not cover normal wear and
tear, overloading, non-compliance with the operating instructions and intervention by unauthorized
persons or the use of parts from other companies.
7. D E C L A R A T I O N O F C O N F O R M I T Y
Description: Diamond hand saw - for cutting in concrete, stone and masonry
Type: TS40 (and versions)
from serial no.: 0110001
We hereby declare under our sole responsibility that this product conforms with the following standards:
EN60204-1, EN55014-1:2006 + A1:2009 + A2:2011, EN55014-2:1997 + Corrigendum 1997 + A1:2001
+ A2:2008, EN61000-3-2:2006 + A1:2009 + A2:2009, EN61000-3-3:2008, but leakage current is #2mA,
EN60745-1, DIN EN 60745-2-22 in accordance to the regulations of directive: 2006/42/EG, 2011/65/EU
and 2004/108/EG.
WEKA Elektrowerkzeuge Neubulach, 12.02.2013
Auf der Höhe 20 Wilhelm Wurster, Owner
D 75387 Neubulach
8. R E C Y C L I N G
According to the European regulation 2002/96/EG we have to take back old machines for
departing them by substance and for recycling (see sign on name plate). Please make sure that
the old tool does not get into the unsorted municipal solid waste, but that they are given back to
us, resp. abroad to our distributors.
Übersetzung der Originalbetriebsanleitung - Subject to change without notice 0713

Other manuals for TS40 Anna

2

Popular Cutter manuals by other brands

Makita DCO181 instruction manual

Makita

Makita DCO181 instruction manual

Peach PC300-01 Operation and safety notes

Peach

Peach PC300-01 Operation and safety notes

Glorious GZ5 Operation manual

Glorious

Glorious GZ5 Operation manual

Tracmaster CAMON TC07 Operating instructions & safety notes

Tracmaster

Tracmaster CAMON TC07 Operating instructions & safety notes

METAWOOD MTTM2000-355 Original instructions

METAWOOD

METAWOOD MTTM2000-355 Original instructions

Reliable XD-EU5 Specification sheet

Reliable

Reliable XD-EU5 Specification sheet

KRUG+PRIESTER EBA 4855 operating instructions

KRUG+PRIESTER

KRUG+PRIESTER EBA 4855 operating instructions

Cricut Expression 2 quick start guide

Cricut

Cricut Expression 2 quick start guide

D-CUT MH-330 Operation manual

D-CUT

D-CUT MH-330 Operation manual

Parkside Performance PPSK 40 A2 instructions

Parkside Performance

Parkside Performance PPSK 40 A2 instructions

Taewoo cuTex TBC-50SH manual

Taewoo

Taewoo cuTex TBC-50SH manual

PRECITEC Lasermatic LightCutter operating instructions

PRECITEC

PRECITEC Lasermatic LightCutter operating instructions

Argo JLS 298 instruction manual

Argo

Argo JLS 298 instruction manual

Makita CC301D instruction manual

Makita

Makita CC301D instruction manual

Husqvarna K 760 OilGuard Operator's manual

Husqvarna

Husqvarna K 760 OilGuard Operator's manual

ARCBRO Stinger-PRO 5100 Series Install manual

ARCBRO

ARCBRO Stinger-PRO 5100 Series Install manual

EINHELL TE-MA 1500 Original operating instructions

EINHELL

EINHELL TE-MA 1500 Original operating instructions

TRI tool 301A user manual

TRI tool

TRI tool 301A user manual

manuals.online logo
manuals.online logoBrands
  • About & Mission
  • Contact us
  • Privacy Policy
  • Terms and Conditions

Copyright 2025 Manuals.Online. All Rights Reserved.