Welch Allyn RetinaVue 700 Manual

Welch Allyn RetinaVue™ 700 Imager
Directions for use
Software version 1.XX

© 2019 Welch Allyn. All rights are reserved. To support the intended use of the product
described in this publication, the purchaser of the product is permitted to copy this
publication, for internal distribution only, from the media provided by Welch Allyn. No
other use, reproduction, or distribution of this publication, or any part of it, is permitted
without written permission from Welch Allyn. Welch Allyn assumes no responsibility for
any injury to anyone, or for any illegal or improper use of the product, that may result from
failure to use this product in accordance with the instructions, cautions, warnings, or
statement of intended use published in this manual.
Software in this product is Copyright 2019 Welch Allyn or its vendors. All rights are
reserved. The software is protected by United States of America copyright laws and
international treaty provisions applicable worldwide. Under such laws, the licensee is
entitled to use the copy of the software incorporated with this instrument as intended in
the operation of the product in which it is embedded. The software may not be copied,
decompiled, reverse-engineered, disassembled, or otherwise reduced to human-
perceivable form. This is not a sale of the software or any copy of the software; all right,
title, and ownership of the software remain with Welch Allyn or its vendors.
This product may contain software known as “free” or “open source” software (FOSS).
Welch Allyn uses and supports the use of FOSS. We believe that FOSS makes our
products more robust and secure, and gives us and our customers greater flexibility. To
learn more about FOSS that may be used in this product, please visit our FOSS website
at http://www.welchallyn.com/opensource. Where required, a copy of FOSS source code
is available on our FOSS website.
For information about any Welch Allyn product, contact Welch Allyn Technical Support:
http://www.welchallyn.com/support.
DIR 80022736 Ver. A
Revision date: 2019-01 This manual applies to the 901103 Fundus Camera
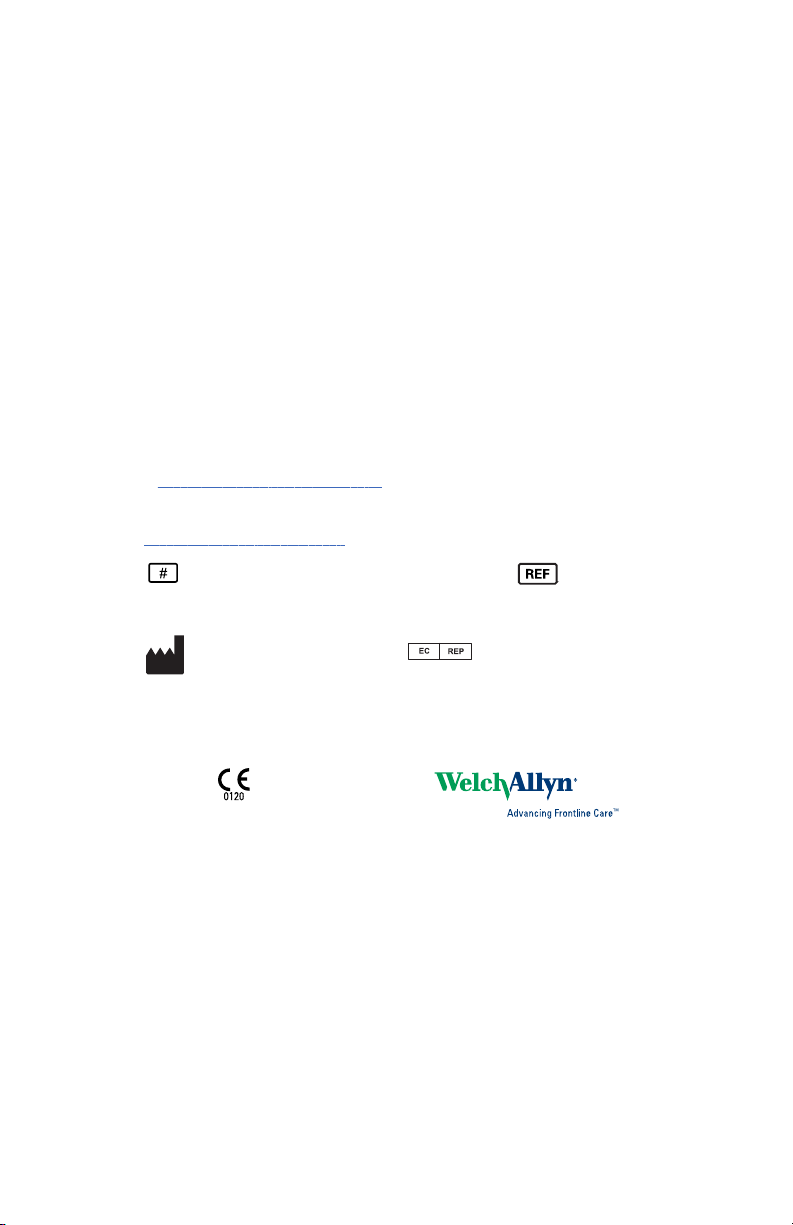
Distributed by Welch Allyn, Inc.
Medimaging Integrated Solution Inc. (MiiS)
1F, No. 7, R&D Rd II, Hsinchu Science Park,
Hsinchu, TAIWAN 30076, R.O.C.
Made in Taiwan
Regulatory Affairs Representative
MedNet GmbH
Borkstrasse 10
48163 Muenster
Germany

Contents
Symbols .......................................................................... 1
Introduction .................................................................... 5
Intended use .................................................................................. 5
About warnings and cautions ......................................................... 5
General warnings, cautions, and notes .......................................... 6
Controls and connectors ................................................................ 9
First time set up of the RetinaVue 700 Imager .......... 11
Unpack the system ...................................................................... 11
Startup .......................................................................................... 15
First time selection of USB connectivity workflow ..................... 18
How to set up the camera, then acquire and submit images –
RetinaVue 700 Imager camera and RetinaVue Network software
application (USB only) ................................................................... 18
First time selection of Wi-Fi connectivity workflow .................... 31
About the Auto and Manual Exam modes ................................... 37
About image quality scores .......................................................... 39
About Exam protocols .................................................................. 40
Face cup ....................................................................................... 43
Using the RetinaVue 700 Imager ................................ 47
Perform an eye exam (wireless workflow) ................................... 47
Perform an eye exam (USB workflow) ......................................... 54
Perform a manual image capture while in Auto exam mode ....... 60
Create a new patient on the RetinaVue 700 Imager (USB) .......... 61
Create a new patient on the RetinaVue 700 Imager (wireless) .... 63
Select or change aclinic on the RetinaVue 700 Imager (wireless
only) .............................................................................................. 66
Select or change aMulti-State clinic on the RetinaVue 700 Imager
(wireless only) .............................................................................. 67
Schedule apatient from the RetinaVue Network Customer Portal
(wireless only) .............................................................................. 69
iii

Search for a patient in the Scheduled Patients list on the RetinaVue
700 Imager (wireless) ................................................................... 75
Search for apatient in the Saved exams list on the RetinaVue 700
Imager (wireless) .......................................................................... 77
Delete an image during an eye exam .......................................... 80
Delete a patient from the RetinaVue 700 Imager ......................... 83
Delete a patient and exam from the RetinaVue 700 Imager ........ 87
Capture additional images using the same protocol .................... 90
Review (USB workflow) ............................................................... 91
Review (Wi-Fi workflow) .............................................................. 93
Update the RetinaVue 700 Imager software ................................ 95
Controls ......................................................................... 99
RetinaVue 700 Imager main Patient screen ................................. 99
Viewing or changing the RetinaVue 700 Imager settings .......... 107
Troubleshooting ......................................................... 117
Maintenance ............................................................... 127
Clean and disinfect ..................................................................... 127
Specifications ............................................................. 129
Device radio ................................................................ 133
General compliance and standards .......................... 137
General radio compliance ........................................................... 138
RetinaVue 700 Imager Accessories ......................... 149
Warranty ..................................................................... 153
iv Contents Welch Allyn RetinaVue™ 700 Imager

Symbols
Documentation symbols
For information on the origin of these symbols, visit http://www.welchallyn.com/
symbolsglossary for the Welch Allyn symbols glossary.
WARNING The warning statements in this manual identify conditions or practices
that could lead to illness, injury, or death. Warning symbols will appear with a grey
background in a black and white document.
Caution The caution statements in this manual identify conditions or practices that
could result in damage to the equipment or other property, or loss of data.
Consult directions for use (DFU). A copy of the DFU is available on this website. A
printed copy of the DFU can be ordered from Welch Allyn for delivery within 7
calendar days.
Meets essential requirements of the European Medical Device Directive 93/ 42/EC.
Power symbols
Power button
Direct current (DC)
Rated power input, DC
Rated power output, DC
1

Fuse
Rechargeable battery
Connectivity symbols
USB
Wireless
Wireless radio symbols
Non-ionizing electromagnetic radiation
Wireless signal strength
• Best (4 bars)
• Good (3 bars)
• Fair (2 bars)
• Weak (1 bar)
• No signal (no bars)
FCC ID The identification number assigned by the Federal Communication Commission
IC ID Industry Canada identification number. The equivalent governing body to the FCC in
the United States
Australian Communications and Media Authority (ACMA) Radio Compliance Mark
(RCM)
Shipping, storing, and environment symbols
Temperature limit
Keep Dry
2Symbols Welch Allyn RetinaVue™ 700 Imager

Separate collection of Electrical and Electronic Equipment. Do not dispose as
unsorted municipal waste.
Fragile
Humidity limitation
Atmospheric pressure limitation
This way up
Stacking limit by number
Recyclable
Miscellaneous symbols
Product Identifier
Reorder Number
Global Trade Item Number
For indoor use only
Type BF applied part
Prescription only or "For Use by or on the order of a licensed medical professional"
Clock; time switch; timer
Serial Number
Authorized Representative in the European Community
Directions for use Symbols 3

Manufacturer
Call for maintenance
Process indicator for activities like connecting to network or connecting to computer
Battery charge level indicators
Device is running on battery and charge is between 75 and 100 percent.
Device is running on battery and charge is below 75 percent.
Device is running on battery and charge is below 50 percent.
Device is running on battery and charge is below 25 percent.
Device is connected to a power supply.
4Symbols Welch Allyn RetinaVue™ 700 Imager

Introduction
Intended use
The RetinaVue 700 Imager (RV700) is a high-resolution ophthalmic camera used
to acquire, save and transmit digital images of the human eye. Anterior and
posterior ocular structures such as the surface of the eye, cornea, and fundus
including retina, macula and optic disc can be imaged. It is a prescription use
only medical device.
No sterility requirements apply to this product.
About warnings and cautions
Warning and caution statements can appear on the RetinaVue 700 Imager
device, the packaging, the shipping container, or in this Directions for use.
The RetinaVue 700 Imager is safe for patients and clinicians when used in
accordance with the instructions and the warning and caution statements
presented in this Directions for use.
Before using the device, you must familiarize yourself with all warnings and
cautions, with the steps to power up the device, and with the sections of this
Directions for use that pertain to your use of the device. Specific warnings and
cautions are also found throughout this manual.
• Failure to understand and observe any warning statement in this manual could
lead to patient injury or illness.
• Failure to understand and observe any caution statement in this manual could
lead to damage to the equipment or other property, or loss of patient data.
5

General warnings, cautions, and notes
WARNING Exposure to the RetinaVue 700 Imager
flash, in rare cases, may contribute to migraines or
temporary visual disturbances, particularly in
patients with a history of light sensitivity or
migraines. Multiple flashes per eye in a single
exam may increase the likelihood of occurrence.
WARNING Clean and disinfect the face cup after
each patient to avoid the risk of cross-
contamination.
WARNING Operating the device in the presence
of a flammable anesthetic mixture with air, oxygen,
or nitrous oxide; in oxygen-enriched environments;
or in any other potentially explosive environment
may cause a fire and explosion hazard.
WARNING Do not use batteries from other
sources. This may result in excessive
temperatures, fire, or explosion.
WARNING To prevent fire or electrical shock, do
not expose the device to rain or moisture.
CAUTION When manually entering patient
information, do not use the same patient identifier
for multiple patients. This may result in inaccurate
data association.
CAUTION Avoid subjecting the device to vibration
or shock.
CAUTION Avoid using the device in a dusty
environment.
CAUTION Keep the power cord away from any
heat source.
CAUTION Do not sterilize the device.
CAUTION All servicing of this equipment is to be
performed by Welch Allyn, Inc. or by a center
approved by Welch Allyn, Inc.
6Introduction Welch Allyn RetinaVue™ 700 Imager

CAUTION This device needs to be installed and
put into service according to the EMC information
provided herein.
CAUTION Portable and mobile RF
communications equipment can affect the
RetinaVue 700 Imager performance.
CAUTION Input overload can occur in proximity to
defibrillator or electrocautery devices.
CAUTION This device is not protected against the
ingress of water and should not be used in the
presence of liquids which may enter the device.
CAUTION Results deleted on the device cannot
be recovered.
CAUTION Do not modify this equipment without
authorization of the manufacturer.
CAUTION Do not use the device in direct sunlight.
Strong ambient light may affect results.
CAUTION Within the patient environment, only
connect the equipment (the RetinaVue 700 Imager)
to computers or laptops that have passed the
safety standard for information technology
equipment IEC 60601-1, EN 60601-1, ANSI/AAMI
ES 60601-1 to ensure the safety of the USB
electrical connection. Outside the patient
environment, only connect the equipment (the
RetinaVue 700 Imager) to computers or laptops
that have passed the safety standard for
information technology equipment IEC 60950-1,
EN 60950-1, UL 60950-1 to ensure the safety of
the USB electrical connection.
CAUTION Do not turn off the device while saving
data from a patient test. Turning off the device
while saving patient data may delete the data.
Directions for use Introduction 7

CAUTION Do not use the device adjacent to or
stacked with other equipment. If the device is
used adjacent or stacked with other equipment,
the device should be observed to verify normal
operation in the configuration in which it will be
used.
CAUTION Do not submerge the device in liquid or
allow liquid to enter the interior of the device.
CAUTION Do not use automatic cleansing
machines or sterilization.
CAUTION Consult the cleaning agent and
germicidal cleaner agent manufacturer instructions
for their proper use and germicidal efficacy prior to
their use.
CAUTION Only use the cleaning or germicidal
cleaner agent types listed or damage may occur.
Note The RetinaVue 700 Imager can be used on patients
with eye implants and intraocular lenses. While the
RetinaVue 700 Imager can be used on patients
with cataracts and other eye opacities, the use of
the RetinaVue 700 Imager may result in a lower
quality image due to the increased reflection of the
flash off the patient's intraocular lens.
8Introduction Welch Allyn RetinaVue™ 700 Imager

Controls and connectors
No. Feature Description
1 Power button • Push button to turn the device on and off.
• Push button to bring the device out of Sleep
mode.
• Push button to launch a dialogue box with three
options:
○Power down
○Sleep
○Cancel
2 LCD touchscreen 6” color LCD touchscreen with a 16x9 aspect ratio. Displays
information for charging, testing, and adjustments to the
device.
3 USB port Data transfer port
4 Charging port and power indicator Connect AC power supply
• When the LED light is green, it indicates that the
device is fully powered.
• When the LED light is orange, it indicates that
the device is in the process of charging.
• When the device is not charging the LED is off.
5 Face cup Blocks ambient light during testing
Directions for use Introduction 9

Bottom
No. Feature Description
5 Face cup Blocks ambient light during testing
6 (Optional) Pedestal mounting Pedestal mounting well and attachment slot
7 Battery cover Covers the battery compartment
Note The two service ports under the battery cover
are for factory use only and are not for
customer use.
8 Wrist or neck strap bracket Wrist or neck strap mounting bracket
10 Introduction Welch Allyn RetinaVue™ 700 Imager

First time set up of the RetinaVue 700
Imager
Use the following topics when setting up the RetinaVue 700 Imager for the first
time.
View images saved to the RetinaVue 700 Imager on the LCD touchscreen. The
images saved on the RetinaVue 700 Imager are encrypted. To view the images
on the PC, install the RetinaVue Network software application. For information
on the RetinaVue Network Software visit www.RetinaVue.com.
Unpack the system
The RetinaVue 700 Imager device is packaged with the following items. Confirm
that all items are included.
Number Item Description
1 RetinaVue 700 Imager device Digital hand-held eye-fundus camera used to
record digital photographs of the fundus of the
human eye and anterior and posterior ocular
11

Number Item Description
structures such as the cornea, lens and fundus
including retina, macula and optic disc.
2 USB cable Connects the device to a computer or laptop to
transfer results.
3 Wall adapter plug and AC power cord Connects the device to the wall adapter plug for AC
charging. Match to region-specific AC wall outlet.
4 Lithium-ion battery Battery
5RetinaVue 700 Imager Directions for
use
This document. The Directions for use (DFU) is also
available on the Welch Allyn web site.
6 Lens cloth RetinaVue 700 Imager lens cloth
If any item is missing, contact Welch Allyn Technical Support:
www.welchallyn.com/service. We recommend that you save the shipping box
and packing materials in case you need to store or ship the system.
Battery installation and replacement
Use the device on battery power once the battery is installed and charged.
Note The battery is charged when the AC power cable is
plugged in to the device and the AC power supply.
Install the battery/replace the battery
Turn the RetinaVue 700 Imager over to access the battery cover and set the
RetinaVue 700 Imager on a flat, clean surface.
12 First time set up of the RetinaVue 700 Imager Welch Allyn RetinaVue™ 700 Imager

WARNING Personal injury risk. Improper handling
of the battery can lead to heat generation, smoke,
explosion, or fire. Do not short-circuit, crush,
incinerate, or disassemble the battery. Never
dispose of batteries in refuse containers. Always
recycle batteries according to national or local
regulations.
WARNING Use only Welch Allyn approved
accessories, and use them according to the
manufacturer’s directions for use. Using
unapproved accessories with the camera can
affect patient and operator safety and can
compromise product performance and accuracy,
and void the product warranty.
1. Use a coin to loosen the screw at the edge of the battery cover.
2. Slide open the battery cover by tilting the cover upward.
3. For first-time setup of the RetinaVue 700 Imager, insert the battery into the
battery compartment.
For battery replacement, remove the existing battery and then insert the new
replacement battery into the battery compartment.
4. Insert the two battery cover tabs into the slots, then push in the tab to close
the battery cover.
Directions for use First time set up of the RetinaVue 700 Imager 13

5. Tighten the screw at the edge of the battery cover.
Note Do not over-tighten the screw.
Connect the power supply to the RetinaVue 700
Imager
1. Locate the power connector charging port on the RetinaVue 700 Imager and
plug the power supply connector plug into the RetinaVue 700 Imager.
CAUTION The power supply connector easily inserts
into the RetinaVue 700 Imager. Using force to connect
the power supply connector plug can damage the device
and will void the warranty.
2. Plug the power cord into an available wall outlet to charge the device. When
the power indicator LED light is orange, it indicates that the device is in the
process of charging.
Note For first time use, the device needs to be charged for 5
hours before use.
14 First time set up of the RetinaVue 700 Imager Welch Allyn RetinaVue™ 700 Imager

Startup
Power
The Power button, located on the upper-left corner of the RetinaVue 700 Imager,
performs multiple functions:
• powers up the RetinaVue 700 Imager
• wakes the RetinaVue 700 Imager from Sleep mode
• opens a dialogue screen with controls to power down, enter Sleep mode, or
to cancel and return to the prior screen, depending on the option you choose
Power up the RetinaVue 700 Imager
The RetinaVue 700 Imager runs a brief diagnostic self-test each time it powers
up.
CAUTION Always use the RetinaVue 700 Imager
with an adequately charged and properly
functioning battery.
1. Press to power up the RetinaVue 700 Imager.
Directions for use First time set up of the RetinaVue 700 Imager 15

As the device is powering up, the RetinaVue 700 Imager displays the
Welch Allyn logo.
2. If this is the first time set up, select your preferred language from the drop-
down list and then touch Next.
3. Touch (up) or (down) to enter, or adjust, the Day, Month, and Year.
4. Touch (up) or (down) to enter, or adjust, the Hour, Minute (Min),
Continent, and Location. Touch Next.
Note Use the radio buttons to select the 24-hour or 12-hour
format.
5. If you want to use the camera in practice mode before registering the camera,
touch Yes - I want to practice.
a. If you want to proceed to registering the camera, touch No - take
me to registration and then touch Next.
16 First time set up of the RetinaVue 700 Imager Welch Allyn RetinaVue™ 700 Imager
Table of contents
Other Welch Allyn Laboratory Equipment manuals
Popular Laboratory Equipment manuals by other brands

Keysight
Keysight 53220A Programmer's reference

Heidolph
Heidolph EKT 3001 instruction manual

NuAire
NuAire LabGard NU-581-400 Operation and maintenance manual

Scilogex
Scilogex SCI-T6-Pro user manual

Codonics
Codonics Horizon Series user manual

Thermo Scientific
Thermo Scientific KingFisher Presto user manual