manuals.online logo
Brands
  1. Home
  2. •
  3. Brands
  4. •
  5. Weslo
  6. •
  7. Exercise Bike
  8. •
  9. Weslo Pursuit 935h User manual

Weslo Pursuit 935h User manual

This manual suits for next models

1

Other Weslo Exercise Bike manuals

Weslo Pursuit 250 Fm Bike User manual

Weslo

Weslo Pursuit 250 Fm Bike User manual

Weslo WLEX31310.1 User manual

Weslo

Weslo WLEX31310.1 User manual

Weslo Pursuit 203 Bike User manual

Weslo

Weslo Pursuit 203 Bike User manual

Weslo Pursuit S 25 Exercise Bike Quick start guide

Weslo

Weslo Pursuit S 25 Exercise Bike Quick start guide

Weslo Pursuit T 169 Bike User manual

Weslo

Weslo Pursuit T 169 Bike User manual

Weslo WLEX1076.0 User manual

Weslo

Weslo WLEX1076.0 User manual

Weslo Pursuit 620s User manual

Weslo

Weslo Pursuit 620s User manual

Weslo Aero A6 Operating and maintenance manual

Weslo

Weslo Aero A6 Operating and maintenance manual

Weslo W&S WLIVEX85610.1 User manual

Weslo

Weslo W&S WLIVEX85610.1 User manual

Weslo Pursuit R 30 Bike Operating and maintenance manual

Weslo

Weslo Pursuit R 30 Bike Operating and maintenance manual

Weslo WLIVEX79210.0 User manual

Weslo

Weslo WLIVEX79210.0 User manual

Weslo WLEX71407.0 User manual

Weslo

Weslo WLEX71407.0 User manual

Weslo Pursuit 3.8 Bike User guide

Weslo

Weslo Pursuit 3.8 Bike User guide

Weslo WLEX31308.0 User manual

Weslo

Weslo WLEX31308.0 User manual

Weslo Pursuit 510 cs User manual

Weslo

Weslo Pursuit 510 cs User manual

Weslo Pursuit T 149 Bike System manual

Weslo

Weslo Pursuit T 149 Bike System manual

Weslo Pursuit 103 Bike Operating and maintenance manual

Weslo

Weslo Pursuit 103 Bike Operating and maintenance manual

Weslo Aero A6 Quick start guide

Weslo

Weslo Aero A6 Quick start guide

Weslo Pursuit 700s User manual

Weslo

Weslo Pursuit 700s User manual

Weslo WLEX08810 User manual

Weslo

Weslo WLEX08810 User manual

Weslo Pursuit 625s Operating and maintenance manual

Weslo

Weslo Pursuit 625s Operating and maintenance manual

Weslo PURSUIT 103 WLEVEX19830 User manual

Weslo

Weslo PURSUIT 103 WLEVEX19830 User manual

Weslo PERSUIT 695i User manual

Weslo

Weslo PERSUIT 695i User manual

Weslo pursuit 525 CS WLEVEX14910 User manual

Weslo

Weslo pursuit 525 CS WLEVEX14910 User manual

Popular Exercise Bike manuals by other brands

BH BLADEZ 200U owner's manual

BH

BH BLADEZ 200U owner's manual

Eco-De ECO-800 Instruction guide

Eco-De

Eco-De ECO-800 Instruction guide

Nautilus Be Strong Commercial Series U916 owner's manual

Nautilus

Nautilus Be Strong Commercial Series U916 owner's manual

NordicTrack Gx 3.1 Bike Manual Del Usuario

NordicTrack

NordicTrack Gx 3.1 Bike Manual Del Usuario

NordicTrack Gx 3.1 Bike Instrukcja obsŁugi

NordicTrack

NordicTrack Gx 3.1 Bike Instrukcja obsŁugi

Tomahawk IC3 manual

Tomahawk

Tomahawk IC3 manual

GPI Sports & Fitness BODYWORX ABX250M manual

GPI Sports & Fitness

GPI Sports & Fitness BODYWORX ABX250M manual

Trixter X-Bike user manual

Trixter

Trixter X-Bike user manual

TOORX BRX85 Instruction

TOORX

TOORX BRX85 Instruction

Matrix KranKcycle user manual

Matrix

Matrix KranKcycle user manual

Matrix IC3 manual

Matrix

Matrix IC3 manual

Sunny Health & Fitness SF-B121021 user manual

Sunny Health & Fitness

Sunny Health & Fitness SF-B121021 user manual

Monark 827E instruction manual

Monark

Monark 827E instruction manual

Stamina 1310 owner's manual

Stamina

Stamina 1310 owner's manual

American Fitness SPR-BK1072A owner's manual

American Fitness

American Fitness SPR-BK1072A owner's manual

Cateye CS-1000 (CYCLO SIMULATOR) Service manual

Cateye

Cateye CS-1000 (CYCLO SIMULATOR) Service manual

BH FITNESS H9158H Instructions for assembly and use

BH FITNESS

BH FITNESS H9158H Instructions for assembly and use

Body Sculpture BC-7220G manual

Body Sculpture

Body Sculpture BC-7220G manual

manuals.online logo
manuals.online logoBrands
  • About & Mission
  • Contact us
  • Privacy Policy
  • Terms and Conditions

Copyright 2025 Manuals.Online. All Rights Reserved.

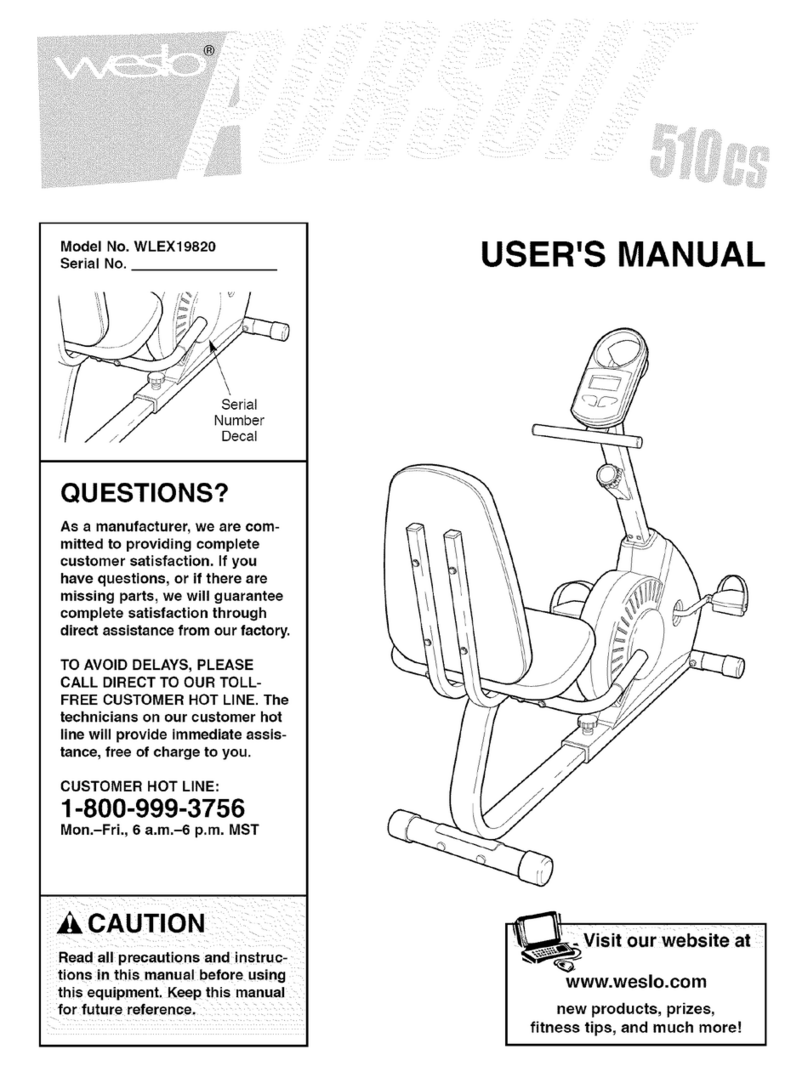
CAUTION
Read all precautions and instruc-
tions in this manual before using
this equipment. Keep this manual
for future reference.
Serial
Number
Decal
UESTIONS?
As a manufacturer, we are com-
mitted to providing complete
customer satisfaction. If you
have questions, or if there are
missing parts, we will guarantee
complete satisfaction through
direct assistance from our factory.
TO AVOID UNNECESSARY
DELAYS, PLEASE CALL DIRECT
TO OUR TOLL-FREE CUSTOMER
HOT LINE. The trained techni-
cians on our customer hot line
will provide immediate assis-
tance, free of charge to you.
CUSTOMER HOT LINE:
1-800-999-3756
Mon.–Fri., 6 a.m.–6 p.m. MST
Model No. WLEX1400BX0
Serial No.
Patent Pending
Write the serial number in the
space above for reference. USER'S MANUAL
Visit our website at
www.weslo.com
new products, prizes,
fitness tips, and much more!
2
TABLE OF CONTENTS
IMPORT NT PREC UTIONS . . . . . . . . . . . . . . . . . . . . . . . . . . . . . . . . . . . . . . . . . . . . . . . . . . . . . . . . . . . . .3
BEFORE YOU BEGIN . . . . . . . . . . . . . . . . . . . . . . . . . . . . . . . . . . . . . . . . . . . . . . . . . . . . . . . . . . . . . . . . . . .4
SSEMBLY . . . . . . . . . . . . . . . . . . . . . . . . . . . . . . . . . . . . . . . . . . . . . . . . . . . . . . . . . . . . . . . . . . . . . . . . . . .5
HOW TO USE THE EXERCISE CYCLE . . . . . . . . . . . . . . . . . . . . . . . . . . . . . . . . . . . . . . . . . . . . . . . . . . . . . .9
M INTEN NCE ND STOR GE . . . . . . . . . . . . . . . . . . . . . . . . . . . . . . . . . . . . . . . . . . . . . . . . . . . . . . . . . .11
CONDITIONING GUIDELINES . . . . . . . . . . . . . . . . . . . . . . . . . . . . . . . . . . . . . . . . . . . . . . . . . . . . . . . . . . . .12
P RT LIST . . . . . . . . . . . . . . . . . . . . . . . . . . . . . . . . . . . . . . . . . . . . . . . . . . . . . . . . . . . . . . . . . . . . . . . . . . .14
EXPLODED DR WING . . . . . . . . . . . . . . . . . . . . . . . . . . . . . . . . . . . . . . . . . . . . . . . . . . . . . . . . . . . . . . . . .15
ORDERING REPL CEMENT P RTS . . . . . . . . . . . . . . . . . . . . . . . . . . . . . . . . . . . . . . . . . . . . . . . .Back Cover
LIMITED W RR NTY . . . . . . . . . . . . . . . . . . . . . . . . . . . . . . . . . . . . . . . . . . . . . . . . . . . . . . . . . . .Back Cover
3
IMPORTANT PRECAUTIONS
WARNING:To reduce the risk of serious injury, read the following important precau-
tions before using the exercise cycle.
1. Read all instructions in this manual before
using the exercise cycle.
2. It is the responsibility of the owner to ensure
that all users of the exercise cycle are ade-
quately informed of all precautions. Use the
exercise cycle only as described in this
manual.
3. Use the exercise cycle indoors on a level
surface. Keep the exercise cycle away from
moisture and dust. Place a mat under the
exercise cycle to protect the floor or carpet.
4. Inspect and tighten all parts regularly.
Replace any worn parts immediately.
5. Keep children under the age of 12 and pets
away from the exercise cycle at all times.
6. The exercise cycle should not be used by
persons weighing more than 250 pounds.
7. Wear appropriate clothing when exercising;
do not wear loose clothing that could
become caught on the exercise cycle.
Always wear athletic shoes when using the
exercise cycle.
8. Always keep your back straight when using
the exercise cycle. Do not arch your back.
9. If you feel pain or dizziness while exercising,
stop immediately and begin cooling down.
10. The pulse sensor is not a medical device.
Various factors, including the user's move-
ment, may affect the accuracy of heart rate
readings. The pulse sensor is intended only
as an exercise aid in determining heart rate
trends in general.
11. The exercise cycle is intended for in-home
use only. Do not use the exercise cycles in
a commercial, rental, or institutional setting.
12. The exercise cycle does not have a free-
wheel; the pedals will continue to move
until the flywheel stops.
WARNING:Before beginning this or any exercise program, consult your physician.
This is especially important for persons over the age of 35 or persons with pre-existing health
problems. Read all instructions before using. ICON assumes no responsibility for personal injury
or property damage sustained by or through the use of this product.
4
BEFORE YOU BEGIN
Thank you for selecting the innovative WESLO®
PURSUIT 935H exercise cycle. The PURSUIT 935H
offers an effective form of low-impact exercise that
offers greater cardiovascular benefits and increased
muscle toning. nd the PURSUIT 935H features
adjustable resistance to let you tailor your exercise to
the level that’s perfect for you.
For your benefit, read this manual carefully before
you use the PURSUIT 935H. If you have additional
questions, please call our Customer Service
Department toll-free at 1-800-999-3756, Monday
through Friday, 6 a.m. until 6 p.m. Mountain Time
(excluding holidays). To help us assist you, please
mention the product model number and serial number
when calling. The model number is WLEX1400BX0.
The serial number can be found on a decal attached
to the exercise cycle (see the front cover of this man-
ual for the location of the decal).
Before reading further, please familiarize yourself with
the parts that are labeled in the drawing below.
Seat Handle
Handlebar
FRONT
Seat
Seat Upright
Wheel Frame Knob
Seat Frame
Backrest
Pedal
Pedal
Strap
Console
Resistance Knob
Handlebar Post
BACK
RIGHT SIDE
5
ASSEMBLY
Place all parts of the exercise cycle in a cleared area and remove the packing materials. Do not dispose of the
packing materials until assembly is completed.
Assembly requires the included tools and your own adjustable wrench and phillips
screwdriver .
PART CHART
Use the drawings below to identify the small parts used in assembly. The number in parenthesis below
each drawing refers to the key number of the part, from the P RT LIST on page 14; the second number refers to
the quantity needed for assembly. Note: Some small parts may have been pre-attached for shipping. If a
part is not in the parts bag, check to see if it has been pre-assembled.
M8 Flat
Washer (51)–8
M10 x 70mm Carriage Bolt (27)–2
M4 x 16mm
Screw (43)–4
M10 x 97mm Hex Head Bolt (12)–2
M8 x 65mm Carriage Bolt (52)–4
M8 x 54mm Carriage Bolt (11)–4
M10 Nylon
Locknut (26)–4
M8 Nylon
Locknut (55)–8
M6 x 16mm
Screw (46)–8
M10 x 25mm Button
Head Screw (53)–3
M10 Split
Washer (54)–3
6
29
12
2
2. Loosen the Frame Knob (29) on the right side of the
Frame (1). Slide out the Seat Frame (2) until it
stops. Tighten the Frame Knob.
1. Carefully slide the Handlebar Post (3) onto the
Frame (1) while pulling the excess Reed Switch
Wire (42) and Resistance Cable (31) up through the
Handlebar Post. ttach the Handlebar Post with
three M10 x 25mm Button Head Screws (53) and
three M10 Split Washers (54). Be careful not to
pinch the Reed Switch Wire or the Resistance
Cable.
1
3
54
54 53
53
31
42
4
3
42
10
33 32
43
43
4. Connect the Reed Switch Wire (42) to the console
wire. Next, attach the Console (33) to the Handlebar
Post (3) with four M4 x 16mm Screws (43). Press
the Resistance Knob (32) onto the Resistance
Control (10). Make sure that the mark on the
Resistance Knob is correctly aligned.
3. The Console (33) requires two “ ” batteries (not
included); alkaline batteries are recommended.
Open the battery door on the back of the Console.
Press two batteries into the Console. Make sure
that the negative (–) ends of the batteries are
touching the springs. Close the battery door.
53
3
Back of
Console
Console
Wire
Battery Door
Batteries
33
1
7
6. ttach the Stabilizer (30) to the Seat Frame (2) with
two M10 x 70mm Carriage Bolts (27) and two M10
Nylon Locknuts (26).
7. ttach the Seat Bracket (63) to the Seat Upright
(64) with four M8 x 65mm Carriage Bolts (52), four
M8 Flat Washers (51), and four M8 Nylon Locknuts
(55).
52
63
55
51
51
64
230
27
6
7
26
26
5. ttach the Seat Upright (64) to the Seat Frame (2)
with four M8 x 54mm Carriage Bolts (11), four M8
Flat Washers (51), and four M8 Nylon Locknuts (55).
Note: It may be helpful to tip the exercise cycle on
its side to attach the Seat Upright.
11
11 64
2
55
51
51
55
5
10. ttach the Backrest (45) to the Seat Upright (64)
with four M6 x 16mm Screws (46).
8
45
46
64
10
12
25
63
25
26
9
9. ttach the Seat Handles (25) to the Seat Bracket
(63) with two M10 x 97mm Hex Head Bolts (12) and
two M10 Nylon Locknuts (26).
8. ttach the Seat (44) to the Seat Bracket (63) with
four M6 x 16mm Screws (46). 44
63
46
8
12
HOW TO USE THE EXERCISE CYCLE
HOW TO ADJUST THE POSITION OF THE SEAT
FRAME
The Seat Frame (2) can be adjusted to the position
that is the most comfortable for you. To adjust the
Seat Frame, first loosen the Frame Knob (29) on the
right side of the Frame. Slide the Seat Frame forward
or backward to the desired position. Tighten the
Frame Knob.
HOW TO ADJUST THE PEDAL STRAPS
To adjust the
right Pedal Strap
(67), first pull the
Pedal Strap off
the adjustment
tab on the pedal.
lign a different
hole in the Pedal
Strap with the
adjustment tab.
Press the Pedal
Strap onto the adjustment tab. djust the left Pedal
Strap (not shown) in the same way.
HOW TO ADJUST THE PEDALING RESISTANCE
The pedaling
resistance can
be adjusted with
the Resistance
Knob (32) locat-
ed on the
Console (33). To
increase the
resistance, turn
the Resistance
Knob clockwise; to decrease the resistance, turn the
Resistance Knob counterclockwise.
djustment
Tab
67
32
33
29
2
8
68 39
11
12. Make sure that all parts are properly tightened before you use the exercise cycle. Note: There may
be some hardware left over after assembly is completed.
9
11. Identify the Left Pedal (39); there is an “L” on the
Left Pedal for identification. Using an adjustable
wrench, tighten the Left Pedal counterclockwise into
the left arm of the Crank (8). Tighten the Right
Pedal (not shown) clockwise into the right arm of the
Crank. Tighten both Pedals as fully as possible.
Important: After using the exercise cycle for one
week, retighten the pedals. For best performance,
the pedals must be kept properly tightened.
djust the Left Pedal Strap (68) to the desired posi-
tion. Press the Left Pedal Strap onto the adjustment
tab on the Left Pedal (39). djust the Right Pedal
Strap (not shown) in the same way.
djustment
Tab
10
DESCRIPTION OF THE CONSOLE
The innovative console features six modes that pro-
vide instant exercise feedback during your workouts.
The upper display will show your current speed, the
elapsed time, the distance you have pedaled, and the
numbers of fat calories and calories you have burned.
The lower display will show your heart rate when the
pulse sensor is used. The modes of the two displays
are described below.
Speed—Displays your pedaling speed, in miles per
hour.
Time—Displays the elapsed time. Note: If you stop
pedaling for ten seconds or longer, the time mode will
pause until you resume.
Distance—Displays the total distance you have ped-
aled, in miles.
Fat Calories—Displays the approximate number of fat
calories you have burned. (See BURNING F T on
page 12.)
Calories—Displays the approximate number of calo-
ries you have burned.
Scan—Displays the speed, time, distance, fat calo-
ries, and calories modes, for 5 seconds each, in a
repeating cycle.
Heart Rate—This mode displays your heart rate when
the pulse sensor is used.
HOW TO OPERATE THE CONSOLE
Note: The console requires two “ ” batteries. See
assembly step 3 on page 6 for battery installation
instructions.
1. To turn on the power, press the on/reset button or
simply begin pedaling. When the power is turned
on, the entire display will appear for two seconds.
The console will then be ready for operation.
2. Select one of the six modes:
Scan mode—
When the power
is turned on, the
scan mode will
automatically be
selected. One
mode arrow will
show that the
scan mode is
selected, and a flashing mode arrow will show
which mode is currently displayed. Note: If a differ-
ent mode is selected, you can select the scan
mode again by repeatedly pressing the mode button.
Speed, time, dis-
tance, fat calo-
ries, or calories
mode—To select
one of these
modes for contin-
uous display,
press the mode
button repeated-
ly. The mode arrows will show which mode is
selected. Make sure that the scan mode is not
selected.
3. To reset the display, press the on/reset button.
4. To measure your
heart rate, stop
pedaling and
place your thumb
on the pulse sen-
sor as shown.
The pulse sensor
is pressure-
activated—fully
press it down. Do not press too hard, or the cir-
culation in your thumb will be restricted, and
your pulse will not be detected. Next, slightly
raise your thumb until the heart-shaped indicator in
the lower display flashes steadily. Hold your thumb
at this level. fter 5 to 10 seconds, three dashes will
appear in the lower display and your heart rate will
be shown. Hold your thumb on the sensor for
another 15 seconds for the most accurate reading.
If the displayed heart rate appears to be too high or
too low, or if your heart rate is not displayed, lift
your thumb and allow the display to reset. Press
down again on the sensor as described above.
Mode rrows
Mode rrow
Mode
Button On/Reset
Button
Lower
Display
Upper
Display