West Bend EGG & MUFFIN TOASTER User manual

1
User’s Guide
EGG &
MUFFIN™
PLEASE KEEP FOR FUTURE REFERENCE AS THIS MANUAL CONTAINS
IMPORTANT INFORMATION
© 2007 West Bend, a Brand of Focus Electrics, LLC.
www.focuselectrics.com
78822_SSegg_manual.indd 1 8/10/07 10:45:05 AM

2
Egg & Muffin Toaster™Parts
QUICK REFERENCE
Toaster
Carriage Lever
Light/Dark
Lever
HeatingTray
Warming Tray
Lid
Steamer Tray
Steam Vent
Poaching Tray
EGG COOKER ASSEMBLY
Measuring Cup/
Egg Piercer
Touch Pad Controls
78822_SSegg_manual.indd 2 8/10/07 10:45:09 AM

3
SAFETY PRECAUTIONS
!WARNING
WARNING: This appliance is not a toy. Close adult supervision is necessary
when used by or near children. Please do not leave this unit unattended with
children. Always unplug this appliance when not in use.
When using electrical appliances, basic safety precautions should always be
followed:
• Read all instructions before using.
• To protect against electrical shock, do not put the cord, plug or the appliance in
water or other liquid.
• Close supervision is necessary when this appliance is used by or near
children.
• Unplug the appliance from outlet when not in use, before putting on or taking
off parts and before cleaning.
• Avoid contact with heated parts.
• Do not operate this appliance with a damaged cord or plug, or after the appli-
ance malfunctions or if the appliance is dropped or damaged in any manner.
If you experience any problems with your machine, unplug it immediately from
the electrical outlet and call Focus Electrics at 1.866.290.1851.
• Do not use accessory attachments not recommended or sold by Focus Electrics
as this may cause re, electric shock or injury.
• Do not use outdoors.
• Do not let the cord hang over the edge of a table or counter.
• Do not let the cord come into contact with hot surfaces, including a stove.
• Do not place on or near a hot gas or electrical burner or in a heated or micro-
wave oven.
• Do not use this appliance for anything other than its intended use.
• Turn off the machine before removing any food from the appliance.
• Do not insert utensils, ngers, or oversized food into the toaster slots.
• Keep hands and utensils out of toaster to reduce the risk of severe injury to
persons or damage to the machine.
• To disconnect, grip plug and pull from wall outlet. Never pull on cord to
disconnect.
HeatingTray
Warming Tray
Lid
Steamer Tray
Steam Vent
Poaching Tray
EGG COOKER ASSEMBLY
Measuring Cup/
Egg Piercer
78822_SSegg_manual.indd 3 8/10/07 10:45:09 AM

4
• Never leave the house while the appliance is on.
• A short cord set is provided to reduce the hazards resulting from
becoming entangled in or tripping over a longer cord.
• Extension cords may be used if care is exercised in their use. The marked electri-
cal rating of the extension cord should be at least as great as the electrical rating
of the appliance. The extension cord should be arranged so that it will not drape
over the counter top where it can be tripped over or pulled by children.
• This appliance has a polarized plug (one blade is wider than the other). To
reduce the risk of electric shock, this plug will t into a polarized outlet only one
way. If the plug does not t fully into the outlet, reverse the plug. If it still does
not t, contact a qualied electrician. Do not modify the appliance plug in any
way.
• To prevent spilling hot liquid, do not move the appliance after the egg cooking
process is started.
• After the egg cooking process is started, do not add water or any other liquid to
the appliance.
• Always operate appliance on a clean at surface.
• Do not operate appliance around combustible materials (i.e. drapes, curtains,
etc.).
• Always operate the appliance with the Egg Cooker Assembly in place.
• Never pour water into the toaster slots.
• Avoid reaching over the Steam Vent or Egg Cooker Assembly when appliance
is in use.
• Do not attempt to operate Egg Cooker without water in the reservoir.
• Do not move the appliance while in use.
• Lift and open the Lid carefully to avoid scalding. Use caution when handling the
Egg Cooker Assembly.
• The Egg Piercer on bottom of measuring cup is sharp. Use care when handling
the Measuring Cup.
• Oversize foods, metal foil packages, or utensils must not be inserted in a
toaster as they may involve a risk of re or elecric shock.
IMPORTANT SAFEGUARDS
78822_SSegg_manual.indd 4 8/10/07 10:45:09 AM

5
• A re may occur if toasters are covered or touching ammable material,
including curtains, draperies, walls , and the like, when in operation.
• Do not attempt to dislodge food when toaster is plugged in.
• The Egg Piercer is sharp. Use care wen handling the Measuring Cup.
Focus Electrics, LLC warrants your new Stainless Steel Egg & Muffin Toaster to be free
from defects 1 year from the date of purchase. During this period, such defects will
be repaired or the product replaced at Focus Electrics’discretion without charge. This
warranty does not cover exterior or interior finish or damage caused by misuse,
accident or negligence.
A purchase receipt or other proof of original purchase date will be required before
warranty service is rendered. Please fill out and return the warranty registration
card located on page 13.
If a problem with this houseware item develops during or after the warranty period,
please contact Focus Electrics, LLC for service.
If service is required:
• Send a brief letter explaining the problem. Be sure to include your name,
address and phone number.
• Most service problems are resolved with the replacement of a part. If this is not
the case, we will give you instructions for returning the unit.
Any appliance submitted for repair must be sent (transportation charges prepaid)
to:
Focus Electrics, LLC
Attn: Customer Service
P. O. Box 2780
West Bend, WI 53095
If you have any questions concerning the use or care of this product, or comments
regarding your experience with the product, please write a letter explaining the
nature of your concern.
WARRANTY
SAVE THESE INSTRUCTIONS.
INTENDED FOR HOUSEHOLD USE ONLY.
IMPORTANT SAFEGUARDS
78822_SSegg_manual.indd 5 8/10/07 10:45:09 AM

6
OPERATION
Toaster Only Function
1. Place appliance on a clean at surface.
2. Place an english mufn, bagel, bread, or croissant into the wide Toasting Slots.
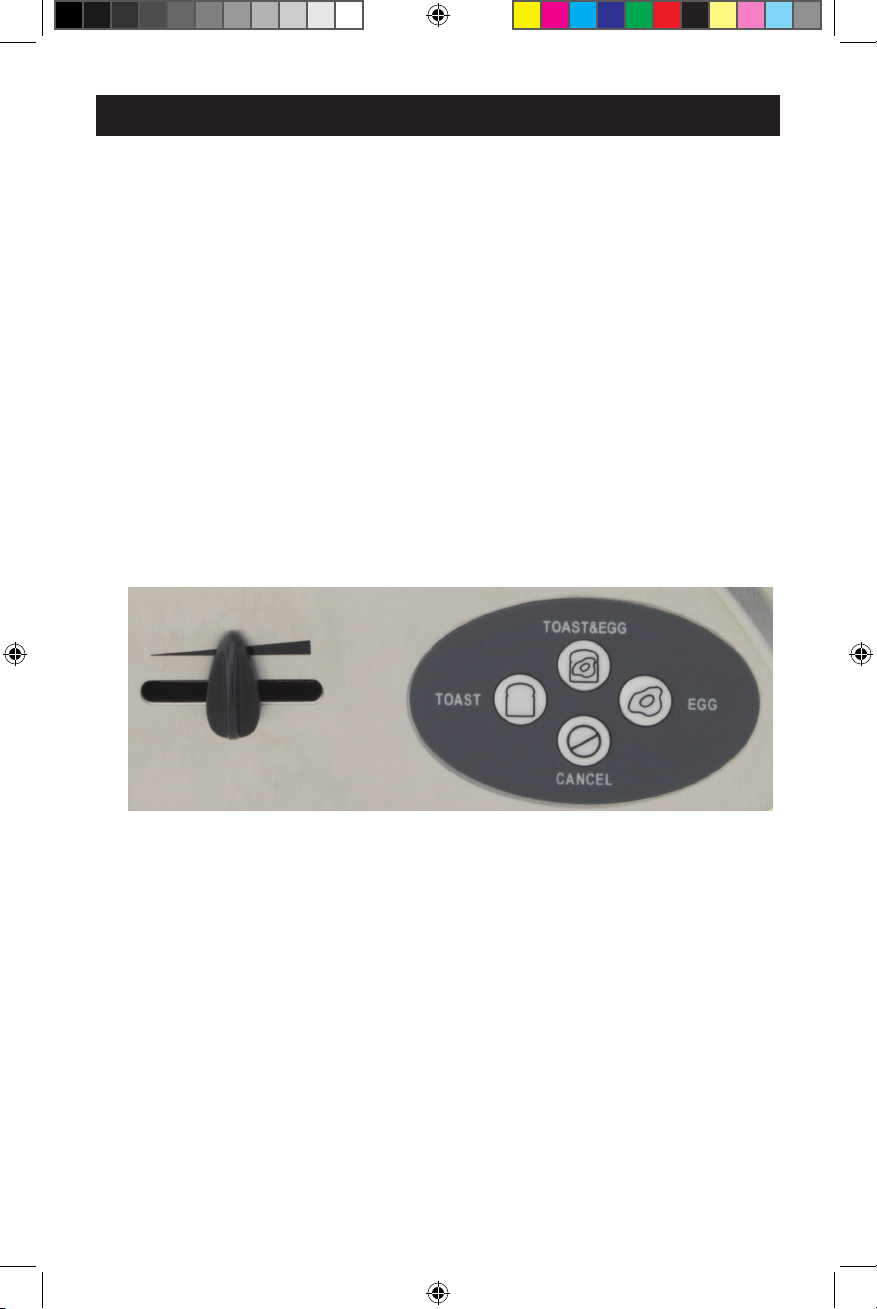
3. Select the desired level of darkness by adjusting the Light/Dark Lever.
4. Push the “toast” button on the Touchpad. The “toast” button will ash blue
indicating the function selected.
5. Press the Carriage Lever down until it locks into position. The “toast” button will
stop ashing and remain illuminated solid blue during toasting cycle.
(Note: Carriage Lever will not stay down if appliance is not plugged in).
6. Upon reaching the pre-selected darkness level of toast, the toast will automatically
“pop up”. The “toast” button light will turn off.
7. To remove the toast from the Toasting Slots, push up on the Carriage Lever
and remove toast.
8. Unplug the appliance after each use.
The Cancel Function – Press the “cancel” button and the toast will “pop up” and
the appliance will turn off immediately. To stop the toasting cycle before it is
nished; press the “cancel” button. Do not pull up on the Carriage Lever to
stop the toasting process.
Warnings
• Toasted food can be hot. Handle with care when taking toasted food out of the
wide Toasting Slots.
• Do not insert any utensils or ngers into the wide Toasting Slots.
• Periodically clean out the Crumb Tray as a build up of bread crumbs may
cause re. Never operate the appliance without the Crumb Tray in place.
• Never place buttered bread or pastries with llings (i.e. jelly lled donuts) or
frostings in toaster, as it may create a re hazard.
Egg Cooking Only Function
Egg Poaching (for breakfast sandwich)
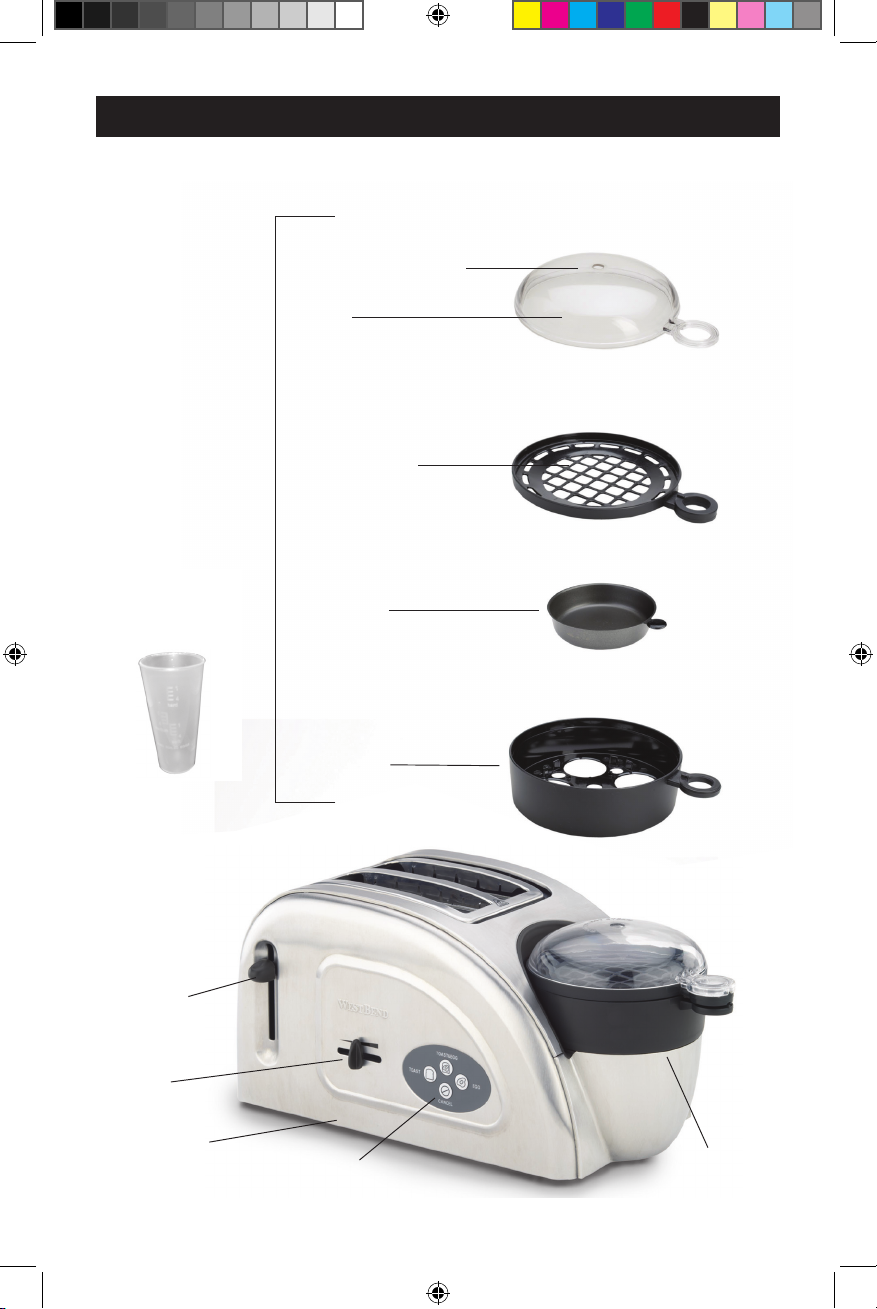
1. Place appliance on a clean at surface and remove Egg Cooker Assembly.
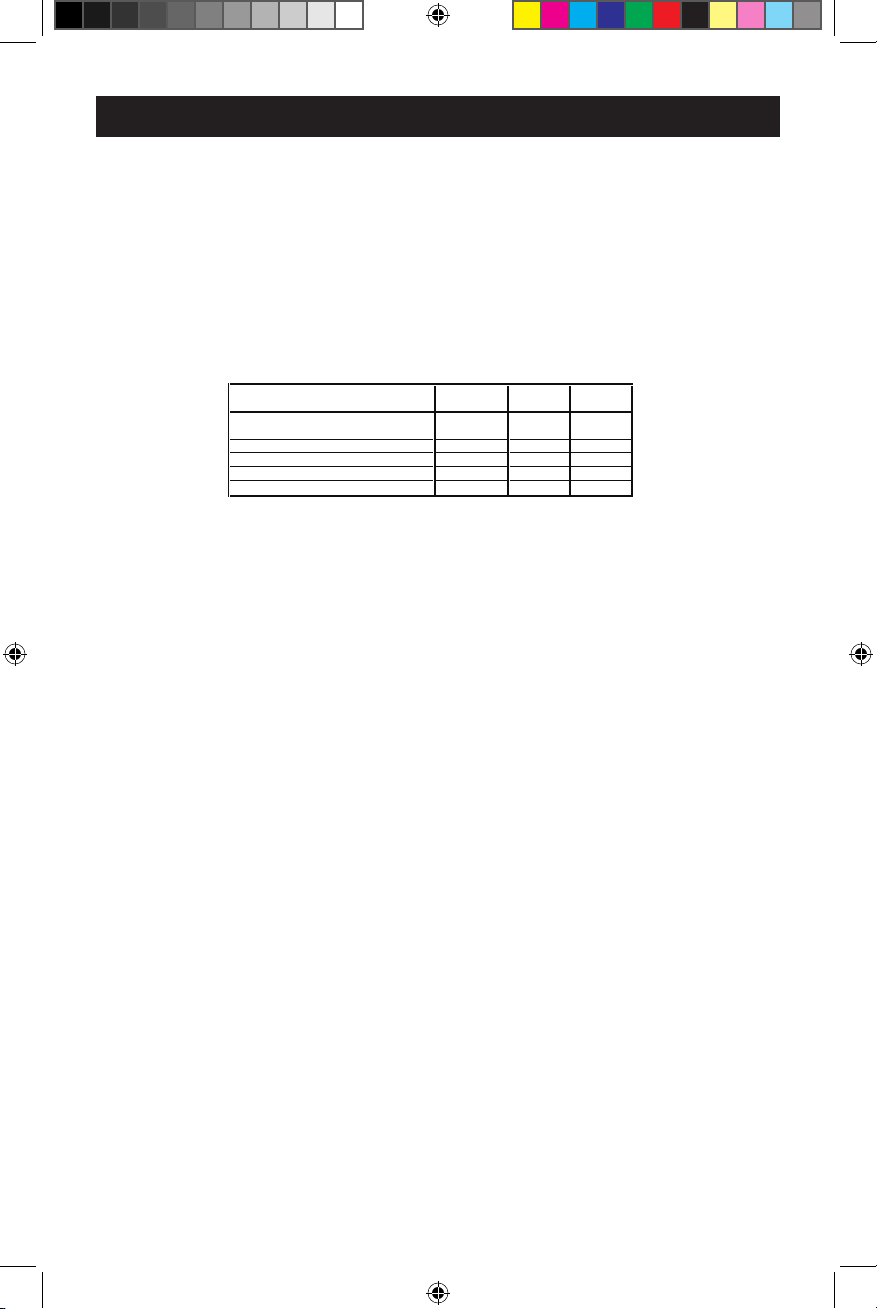
2. Fill Measuring Cup with water to “soft” or “medium” line above the “POACHED
EGG” mark and pour into the Heating Tray, or add 2 to 2 1/2 tablespoons of
water into the Heating Tray. (See Table on Page 7)
3. Place Steamer Tray on top of Heating Tray.
4. Apply non-stick cooking spray to Poaching Tray.
5. Break an egg into the Poaching Tray and place Poaching Tray inside of
Steamer Tray.
6. Break the yolk by poking it with a fork. The egg may also be scrambled.
7. Optional: Place pre-cooked meat on Warming Tray and place on top of
Steamer & Poaching Trays.
8. Place Lid on top of Warming Tray.
9. Plug in the appliance.
10. Push the “egg” button on the Touchpad. The “egg” button will illuminate solid
OPERATION
78822_SSegg_manual.indd 6 8/10/07 10:45:10 AM

7
OPERATION
blue.
11. When poaching is complete the appliance will automatically turn off. The “egg”
button light will no longer be illuminated which signals the appliance has turned
off. Note: the egg cooker timing is a function of the amount of water placed in the
heating tray. The more water used, the longer the appliance will cook.
12. Remove the Steamer Tray, Poaching Tray, Warming Tray and Lid from the
Heating Tray. Caution: Remove trays carefully to avoid scalding
13. Take the Lid off of the Warming and Steamer Trays. Allow the remaining steam
to dissipate.
14. Remove the pre-cooked meat and the poached egg from their respective trays.
Assemble a sandwich or enjoy separately.
15. Unplug the appliance after each use.
The Cancel Function – By pressing the “cancel” button, the egg poacher will auto-
matically turn off.
Warnings
• Use extreme caution when operating the egg poacher as hot steam is released
through the Steam Vent.
• Do not leave the appliance unattended.
• Do not attempt to cook fresh meat products: use only pre-cooked meat products.
Egg Boiling (Hard Boiled Eggs)
1. Place appliance on a clean at surface and remove Lid, Warming Tray, and
Steamer Tray from the appliance.
2. Select the cooked consistency (hard, medium, soft) and the number of eggs to
be cooked, (the appliance can cook up to 4 eggs at a time).
(See Table on Page 8)
3. Add the proper amount of water to the Heating Tray per the number of eggs and
desired consistency. Use the provided Measuring Cup or see attached chart.
4. Rinse the selected amount of eggs. Place the eggs in the Steamer Tray. To
prevent eggs from exploding, puncture each of the eggs, with the Egg Piercer
located on the bottom of the Measuring Cup before placing them in the steamer
tray, hole side up.
5. Place the Steamer Tray, with the eggs, on the Heating Tray.
Consistency of Egg
Tbsp. Water
Soft (Runny Center) 2
Medium (Partially Cooked Center) 2.5
Hard (Fully Cooked Center) 3
Soft Cooked
Medium
Cooked
Hard
Cooked
# of Eggs
Tbsp. Water
Tbsp.
Water
Tbsp.
Water
13.5 4.5 7
23.25 4.25 6.75
32.75 3.75 6.25
42.5 3.5 6
Time to Cook 6-8 Minutes
10-12 minutes
13 - 15 Min
78822_SSegg_manual.indd 7 8/10/07 10:45:10 AM

8
OPERATION
6. Place the Lid on top of the Steamer Tray.
7. Start the machine by pressing the “egg” button. The “egg” button will illuminate
indicating the appliance is cooking.
8. When the eggs are nished the appliance will automatically turn off. The “egg”
button will no longer illuminate indicating the appliance is off.
9. Remove the Steamer Tray and Lid from the Heating Tray. Allow the steam to
dissipate then remove the Lid. Run cold water over the eggs.
10. Unplug the appliance after each use.
11. The eggs are ready. Enjoy!
The Cancel Function – Press the “cancel” button on the Touchpad and the egg
cooker will automatically turn off. The “egg” button will no longer illuminate which
indicates the appliance is off.
Egg & Toast Function
1. Place unit on a clean at surface and remove Lid, Warming Tray, and Steamer
Tray from the appliance.
2. Place an english mufn, bagel, bread, or croissant into the wide Toasting Slots.
3. Select the desired level of darkness by adjusting the Light/Dark Toast Lever.
4. Fill Measuring Cup with water to the “soft” or “medium” line above the “POACHED
EGG” mark and pour into the Heating Tray, or add 2 to 2 1/2 tablespoons of water
directly into the Heating Tray. (See Table on Page 7)
5. Place Steamer Tray above Heating Tray.
6. Apply no-stick cooking spray to the Poaching Tray.
7. Break an egg into the Poaching Tray and place in the Steamer Tray.
8. Place Warming Tray above Steamer & Poaching Trays and add pre-cooked
meat if desired.
9. Place Lid above the Warming Tray.
10. Plug in the appliance.
11. Push the “egg/toast” button on the Touchpad. The “egg/toast” button will ash
blue. Important Note: Neither the egg cooking nor toasting processes will start
until the Carriage Lever is locked down.
12. Press the Carriage Lever down until it locks into position. The “egg” button will
illuminate and the “toast” button will begin to ash.
Important Note: Your Egg & Mufn Toaster has been ingeniously designed to
optimize your cooking abilities by timing the simultaneous completion of the
toast and the egg. This technology ensures that all the ingredients for the per-
fect sandwich will be warm and fresh.
Consistency of Egg
Tbsp. Water
Soft (Runny Center) 2
Medium (Partially Cooked Center) 2.5
Hard (Fully Cooked Center) 3
Soft Cooked
Medium
Cooked
Hard
Cooked
# of Eggs
Tbsp. Water
Tbsp.
Water
Tbsp.
Water
13.5 4.5 7
23.25 4.25 6.75
32.75 3.75 6.25
42.5 3.5 6
Time to Cook 6-8 Minutes
10-12 minutes
13 - 15 Min
78822_SSegg_manual.indd 8 8/10/07 10:45:10 AM

9
Egg & Mufn Toaster™ Control Buttons
13. When poaching and toasting are complete the appliance will automatically shut
off and the toast will automatically “pop up”. The “egg”, “toast”, and “egg/toast”
button lights are no longer illuminated which signals the appliance has turned off.
Note: the egg cooker timing is a function of the amount of water placed in the
heating tray. The more water added the longer the unit will cook.
14. To remove the toast from the Toasting Slots, press up on the Carriage Lever
and remove the toast.
15. Remove the Steamer Tray, Poaching Tray, Warming Tray and Lid off of the
Heating Tray. Caution: Remove trays carefully to avoid being scalded with
steam.
16. Take the Lid off of the Warming and Steamer Trays. Allow the remaining steam
to dissipate.
17. Remove the pre-cooked meat and the poached egg from their respective trays.
Assemble a sandwich or enjoy seperately.
18. Unplug the appliance after each use.
1. TOAST button operates the toaster only.
2. EGG/TOAST button operates the toasting and egg poaching/cooking functions
together. Specially designed to simultaneously complete both functions.
3. EGG button operates the egg poaching or egg cooking only.
4. CANCEL button turns off the appliance at any time.
5. LIGHT/DARK TOAST LEVER allows you to adjust the overall lightness or dark-
ness of the toast. Push the lever to the left for lighter and to the right for darker
toast.
1.
2.
3.
4.
5.
OPERATION
78822_SSegg_manual.indd 9 8/10/07 10:45:11 AM

10
CLEANING
CARE & CLEANING
First Time Use
Before using the rst time, be sure to thoroughly clean per the following:
1. Read all instructions and safety precautions before use.
2. Remove all stickers and packaging materials from the machine.
3. Make sure the unit is not plugged into an outlet. Wipe down the exterior of the
machine. Thoroughly wash the Heating Tray, Steamer Tray, Poaching Tray,
Warming Tray and the Lid with a damp cloth or paper towel.
Do not use abrasive cleaners or scouring pads.
4. The steamer tray, poaching tray, warming tray and the lid can be washed in the
dishwasher when placed on the top rack.
Do not put the actual appliance in the dishwasher.
Do not submerge any part of the base appliance (including the Heating
Tray) in water or any other liquid.
5. Be sure the Carriage Lever is not in the lock down position before plugging in
the power cord.
6. Before placing any food items in the toaster slots, plug in the appliance and se-
lect the toast function and run an initial cycle. Make sure the Toasting Slots are
free from any debris or packing materials. This initial toasting cycle will clean
residue from the heating elements. An odor is not uncommon on this initial
cycle. Once this is complete your Egg & Mufn Toaster is now ready for use!
CLEANING
1. Make sure the appliance is not plugged into the outlet.
2. Make sure the appliance is cool before cleaning.
3. Wipe down the exterior of the machine. Thoroughly wash the Heating Tray,
Steamer Tray, Poaching Tray, Warming Tray and the Lid with a damp cloth or
paper towel.
4. The Steamer Tray, Poaching Tray, Warming Tray and the Lid can be washed in
the dishwasher when placed on the top rack.
Do not put the actual appliance in the dishwasher.
Do not submerge any part of the base unit (including the Heating Tray)
in water or any other liquid.
5. The heating tray may accumulate mineral deposits after prolonged use. To remove
these deposits add 1/2 teaspoon of concentrated vinegar and 1/2 cup of water to
the heating dish. With the lid in place, turn on the egg cooker function and allow
solution to boil for approximately 10 minutes. Turn off machine and wipe
thoroughly with a clean damp cloth.
78822_SSegg_manual.indd 10 8/10/07 10:45:11 AM

11
EGG & MUFFIN SANDWICH
1 English Mufn
1 Poached Egg
1 Slice of pre-cooked Canadian Bacon/Ham or Sausage Patty (optional)
1 Slice of Cheddar Cheese.
To assemble: Lay the poached egg on top of the English mufn half followed
by the pre-cooked meat and then the slice of cheese. Top the sandwich with
the other half of the English mufn. Enjoy!
EGGS BENEDICT
2 English Mufns, split and open
4 eggs
salt and pepper for taste
4 slices of Canadian bacon
Hollandaise Sauce to taste (Hollandaise Sauce recipe below)
To assemble: Lay a slice of Canadian bacon on top of each English mufn
half followed by poached eggs. Season with salt and pepper. Spoon Hollan-
daise Sauce over the eggs.
Enjoy!
HOLLANDAISE SAUCE
2 eggs yolks
4 Tbs. heavy cream
2 large Tbs. butter
1 Tbs. lemon juice
Pinch of salt
Pinch of sugar
Chicken Broth-optional
1 Tbs. white vinegar
Dash of Hot Sauce
Combine all ingredients except white vinegar and chicken broth in top of
double broiler, over boiling water. Stir until thick, about 3 minutes. DO NOT
reheat or COVER the pot. Thin if needed with chicken broth. Stir in vinegar
immediately.
EGGS BENEDICT WITH CHICKEN
Prepare Eggs Benedict as above, except omit canadian bacon. Cut one
skinless, boneless chicken breast into bite-size strips. Add 2 Tbs. cooking oil
to medium skillet; cook and stir for 2 to 3 minutes or until no longer pink. As-
semble Eggs Benedict as described above.
RECIPES
78822_SSegg_manual.indd 11 8/10/07 10:45:11 AM

12
EGGS FLORENTINE
2 English Muffins, split and open
4 eggs
salt and pepper for taste
Steamed spinach leaves
Hollandaise Sauce (Hollandaise Sauce recipe on page 11)
To assemble: Prepare just like Eggs Benedict but replace the Canadian bacon
with spinach leaves. Lay spinach leaves on top of each English muffin half fol-
lowed by poached eggs. Season with salt and pepper. Spoon Hollandaise
Sauce over the eggs.
SMOKED SALMON (LOX) BAGEL
1 Toasted Plain Bagel (or any bagel you like.)
Plain Cream Cheese – The amount to be determined by the maker.
Thin slices of lox (a.k.a smoked salmon)
1 Tomato Slice (optional)
1 Onion Slice
Capers
To assemble: Spread cream cheese on one half of the bagel. Add thin slices of
smoked salmon (a.k.a. lox) over the cream cheese. Top with the slice of tomato
and onion; sprinkle with capers. Spread the other half of the bagel with cream
cheese and place on top. Enjoy!
RECIPES
78822_SSegg_manual.indd 12 8/10/07 10:45:11 AM

13
WARRANTY
Please complete and return this product warranty card or register your product online
at: westbend.com within 10 days of purchase.
THIS INFORMATION IS FOR INTERNAL USE ONLY
Mr. Mrs. Ms. Model: 78822
1. Name ___________________________________________________________________________
2. Address _________________________________________________________________________
City ______________________________________ State ______ Zip Code ___________
3. E-Mail Address __________________________________________________________________
4. Age: 18-24 25-34 35-49 50+
5. Marital Status: Married Single
6. Number of Children in the House : 12 yrs and under _________ 13-18 yrs _________
7. Income: Below $25,000 $25,001-$50,000 $50,001-$75,000 $75,001+
8. Where was this product purchased? _______________________________________________
9. How did you become aware of this product?
____ Gift ____ Recommendation from friend
____ TV advertisement ____ Saw product in store
____ Print ad ____ TV shopping program
____ Magazine article____ Internet
____ Other _________________________
10. What were the two most important reasons inuencing your purchase:
____ Gift ____ Recommended by sales person
____ Special offer ____ Recommended by friend
____ Product appearance ____ Prior experience with Back to Basics
____ Ease of operation ____ Back to Basics brand reputation
____ Quality/durability ____ Value for price
____ Product features ____ Product packaging
____ Other _________________________
11. Why did you purchase this Back to Basics product?
____ To replacement/upgrade current product
____ Not satised with current product(s) already owned
____ First product(s) ever owned
____ Received as a gift
12. Would you be interested in being contacted via e-mail for promotions, recipes, new
product information, etc.? YES NO
COMMENTS _______________________________________________________________________
___________________________________________________________________________________
78822_SSegg_manual.indd 13 8/10/07 10:45:12 AM

14
Focus Electrics, LLC
P. O. Box 2780
West Bend,WI 53095
Fold here and mail registration card within 10 days of purchase to validate warranty.
Place
Stamp
Here
78822_SSegg_manual.indd 14 8/10/07 10:45:12 AM

1
Guide d’utilisation
ŒUF ET
MUFFINMD
VEUILLEZ CONSERVER CE MODE D’EMPLOI POUR UNE CONSULTATION
ULTÉRIEURE CAR CELUI-CI CONTIENT DES INFORMATIONS IMPORTANTES
© 2007 West Bend, une marque de Focus Electrics, LLC.
www.focuselectrics.com
78822_SSegg_manual.indd 1 8/10/07 10:45:15 AM

2
Pièces du Grille-pain Œuf et mufn
AIDE-MÉMOIRE
Levier du
chariot
Réglage de
la couleur
Plat à chauffer
Plat à réchauffer
Couvercle
Plat à vapeur
Évent à vapeur
Plat à pocher
EGG COOKER ASSEMBLY
Verre gradué et
perce-œuf
Boutons de commande
Grille-pain
MD
78822_SSegg_manual.indd 2 8/10/07 10:45:18 AM

3
!
CONSIGNES DE SÉCURITÉ
Plat à chauffer
MISE EN GARDE
MISE EN GARDE : Cet appareil n’est pas un jouet. La supervision d’un
adulte est nécessaire lorsque l’appareil est utilisé par un enfant ou près
d’un enfant. Ne laissez jamais sans surveillance un enfant qui utilise cet
appareil. Débranchez cet appareil quand vous ne l’utilisez pas.
Suivez toujours les consignes de sécurité lorsque vous utilisez des appareils
électriques.
• Lisez toutes les consignes avant l’utilisation.
• Pour éviter les chocs électriques, ne plongez jamais le cordon, la fiche ou
l’appareil dans l’eau ou dans tout autre liquide.
• La supervision d’un adulte est nécessaire lorsque l’appareil est utilisé par un
enfant ou près d’un enfant.
• Débranchez l’appareil de la prise de courant quand vous ne l’utilisez pas,
avant de retirer ou de replacer des pièces et avant de le nettoyer.
• Ne touchez pas aux pièces chaudes.
• N’utilisez pas cet appareil si le cordon ou la fiche sont endommagés, s’il
fonctionne mal, si vous le laissez tomber ou s’il est endommagé. En cas de
problème avec votre appareil, débranchez-le immédiatement de la prise de
courant et communiquez avec Focus Electrics au 1.866.290.1851.
• N’utilisez aucun accessoire qui n’est pas recommandé ou vendu par Focus
Electrics, car cela peut causer un incendie, des chocs électriques ou des
blessures.
• N’utilisez pas l’appareil à l’extérieur.
• Ne laissez pas pendre le cordon sur le bord d’une table ou d’un comptoir.
• Ne laissez pas le cordon toucher à des surfaces chaudes, dont une cui-
sinière.
• Ne placez pas l’appareil près d’un brûleur électrique ou à gaz chaud ou d’un
four à micro-ondes.
• N’utilisez pas cet appareil à d’autres fins que celles prévues.
• Éteignez l’appareil avant d’en retirer des aliments.
• N’insérez aucun ustensile, doigt ou aliment trop gros dans les fentes du
grille-pain.
• Éloignez les mains et les ustensiles du grille-pain pour réduire les risques de
blessure corporelle grave ou de bris de l’appareil.
78822_SSegg_manual.indd 3 8/10/07 10:45:19 AM

4
• Pour débrancher l’appareil, saisissez la fiche et retirez-la de la prise de cou-
rant.
Ne tirez jamais sur le cordon pour débrancher l’appareil.
• Ne quittez jamais la maison quand l’appareil fonctionne.
• Le cordon court réduit les risques d’emmêlement ou de chute associés à un
cordon plus long.
• Vous pouvez utiliser des rallonges si vous le faites prudemment. Les car-
actéristiques électriques de la rallonge doivent au moins égaler celles de
l’appareil. La rallonge doit être disposée de manière à ne pas dépasser le
bord du comptoir afin qu’aucun enfant ne la tire ou s’y accroche.
• Cet appareil est muni d’une fiche polarisée (l’une des lames est plus large
que l’autre). Pour réduire les risques de choc électrique, cette fiche n’entrera
que d’une seule manière dans une prise de courant polarisée. Si la fiche
n’entre pas correctement dans la prise de courant, inversez les lames. Si
elle ne pénètre toujours pas adéquatement, communiquez avec un élec-
tricien qualié. Ne modiez jamais la che de l’appareil.
• Pour éviter de renverser du liquide chaud, ne déplacez pas l’appareil après
le début de la cuisson des œufs.
• Après le début de la cuisson des œufs, n’ajoutez pas d’eau ou de liquides
dans l’appareil.
• Installez toujours l’appareil sur une surface plate propre.
• N’utilisez pas l’appareil près de matières combustibles (c.-à-d. tentures,
rideaux, etc.).
• Installez toujours le cuiseur à œufs avant d’utiliser l’appareil.
• Ne versez jamais d’eau dans les fentes du grille-pain.
• Ne tendez jamais le bras ou la main au-dessus de l’évent à vapeur ou du
cuiseur à œufs quand l’appareil fonctionne.
• N’utilisez jamais le cuiseur à œufs sans mettre d’eau dans le réservoir.
• Ne déplacez pas l’appareil s’il fonctionne.
• Soulevez et ouvrez délicatement le couvercle pour éviter de vous brûler.
Soyez prudent quand vous utilisez le cuiseur à œufs.
• Le perce-œuf au bas du verre gradué est pointu. Soyez prudent lorsque
vous utilisez le verre gradué.
CONSIGNES DE SÉCURITÉ
78822_SSegg_manual.indd 4 8/10/07 10:45:19 AM

5
GARANTIE
Focus Electris, LLC garantit le bon fonctionnement de votre nouveau Grille-pain Œuf
et mufn pendant un an à compter de la date d’achat. Durant cette période, Focus
Electrics réparera les défectuosités ou remplacera le produit gratuitement à sa dis-
crétion. Cette garantie ne couvre pas le ni intérieur ou extérieur ni les dommages
causés par une mauvaise utilisation, un accident ou de la négligence.
Il faut produire un reçu d’achat ou toute autre preuve de la date d’achat avant de
se prévaloir de la garantie. Veuillez remplir et retourner la che d’inscription de la
garantie à la page 13.
En cas de problème avec cet appareil pendant ou après la période de garantie,
veuillez communiquer avec Focus Electrics pour obtenir du service.
Dans un tel cas, suivez les consignes ci-dessous.
• Envoyez une courte lettre expliquant le problème. Assurez-vous d’inscrire votre
nom, votre adresse et votre numéro de téléphone.
• Pour obtenir un service plus rapide, veuillez téléphoner au 1.866.291.1851 ou
• La plupart des problèmes sont résolus par le remplacement d’une pièce. Si
tel n’est pas le cas, nous vous transmettrons des directives pour retourner
l’appareil.
Vous devez envoyer votre appareil à réparer à l’adresse suivante (frais de transport
payés) :
Focus Electrics, LLC
Attn: Customer Service
P. O. Box 2780
West Bend, WI 53095
Si vous avez des questions sur l’utilisation ou l’entretien de ce produit ou si vous
avez des commentaires sur son utilisation, veuillez nous en faire part par écrit.
78822_SSegg_manual.indd 5 8/10/07 10:45:19 AM

6
FONCTIONNEMENT
FONCTIONNEMENT
Grille-pain
1. Placez l’appareil sur une surface plate propre.
2. Insérez un mufn anglais, un bagel, une tranche de pain ou un croissant dans
les lar fentes du grille-pain.
3. Choisissez le niveau de grillage souhaité à l’aide du bouton de réglage de la
couleur.
4. Appuyez sur le bouton « TOAST ». Un voyant bleu clignote pour conrmer la fonc-
tion choisie.
5. Appuyez sur le levier du chariot jusqu’à ce qu’il soit verrouillé. Le bouton «
TOAST » cesse de clignoter et demeure allumé jusqu’à ce que la rôtie soit
prête. (Note : Le levier du chariot ne reste pas enfoncé si l’appareil n’est pas
branché.)
6. Lorsque la rôtie est prête, elle sort automatiquement. Le voyant du bouton « TOAST
» s’éteint.
7. Pour retirer la rôtie de la fente, poussez le levier du chariot vers le haut et saisis-
sez la rôtie.
8. Débranchez l’appareil après chaque utilisation.
Annulation – Appuyez sur le bouton « CANCEL » pour faire sortir la rôtie et éteindre im-
médiatement l’appareil. Pour interrompre le grillage avant la n, appuyez sur le bouton «
CANCEL ». Ne poussez pas le levier du chariot vers le haut pour arrêter la cuisson.
Mises en garde
• Les aliments grillés peuvent être chauds. Soyez donc prudent lorsque vous les
sortez des larges fentes du grille-pain.
• N’insérez aucun ustensile ou doigt dans les fentes du grille-pain.
• Nettoyez régulièrement le ramasse-miettes, car une accumulation de miettes
peut causer un incendie. N’utilisez jamais l’appareil sans le ramasse-miettes.
• N’insérez jamais de pain beurré ou de pâtisseries garnies (c.-à-d. beignes remp-
lis de gelée) ou glacées dans le grille-pain, car ils pourraient causer un incendie.
Cuiseur à œufs
Œuf poché (pour sandwich au petit déjeuner)
1. Placez l’appareil sur une surface plate propre et retirez le cuiseur à œufs.
2. Remplissez le verre gradué d’eau jusqu’à la ligne « soft » ou « medium » au-
dessus de la marque « POACHED EGG » et versez l’eau dans le plat à chauffer
ou ajoutez entre
2 et 2 _ cuillers à soupe d’eau dans le plat à chauffer. (Consulter le tableau à la
page 7.)
3. Placez le plat à vapeur sur le plat à chauffer.
4. Appliquez un aérosol de cuisine antiadhésif sur le plat à pocher.
5. Cassez l’œuf dans le plat à pocher et placez le plat à pocher dans le plat à
vapeur.
6. Percez le jaune d’œuf avec une fourchette. Vous pouvez aussi faire des œufs
brouillés.
7. Facultatif : Placez la viande cuite dans le plat à réchauffer et installez-le sur les
plats à vapeur et à pocher.
8. Déposer le couvercle sur le plat à réchauffer.
9. Branchez l’appareil.
78822_SSegg_manual.indd 6 8/10/07 10:45:19 AM
Other manuals for EGG & MUFFIN TOASTER
1
This manual suits for next models
1
Table of contents
Languages:
Other West Bend Toaster manuals

West Bend
West Bend TEM4500W User manual

West Bend
West Bend 78822 User manual

West Bend
West Bend Studio Toaster User manual

West Bend
West Bend 4-SLICE EGG & MUFFIN TOASTER User manual

West Bend
West Bend L5559C User manual

West Bend
West Bend Chefscape L5748 User manual

West Bend
West Bend EGG & MUFFIN TOASTER User manual

West Bend
West Bend 78220 User manual

West Bend
West Bend STAINLESS STEEL TOASTER User manual

West Bend
West Bend Quikserve Infrared Toaster User manual