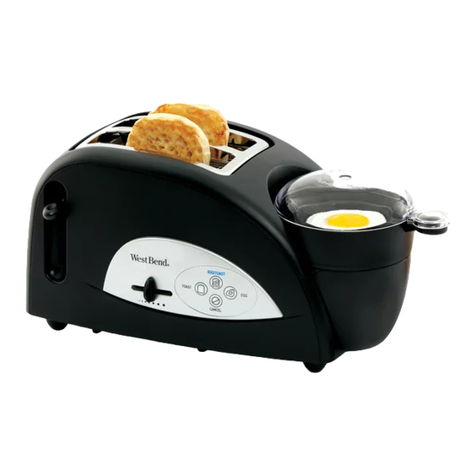
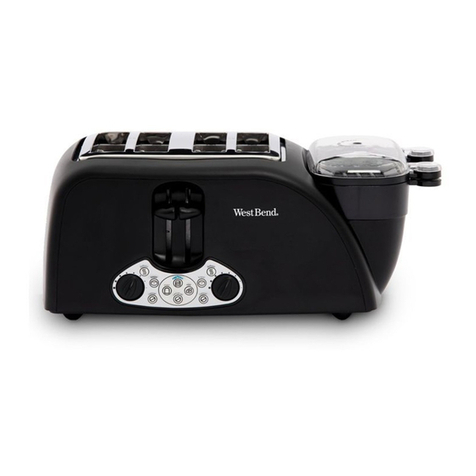
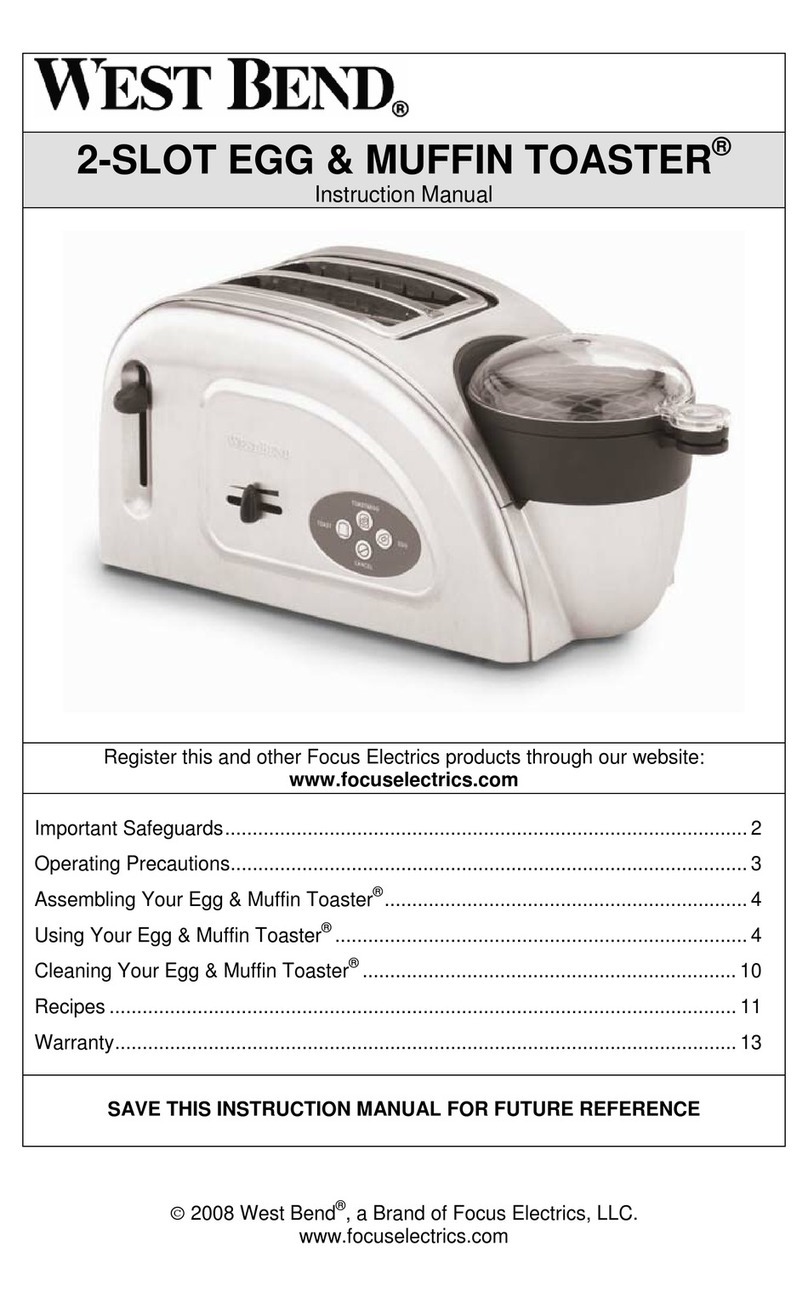
West Bend TEM4500W User manual

©2014 West Bend®, a Brand of Focus Products Group International, LLC.
www.westbend.com
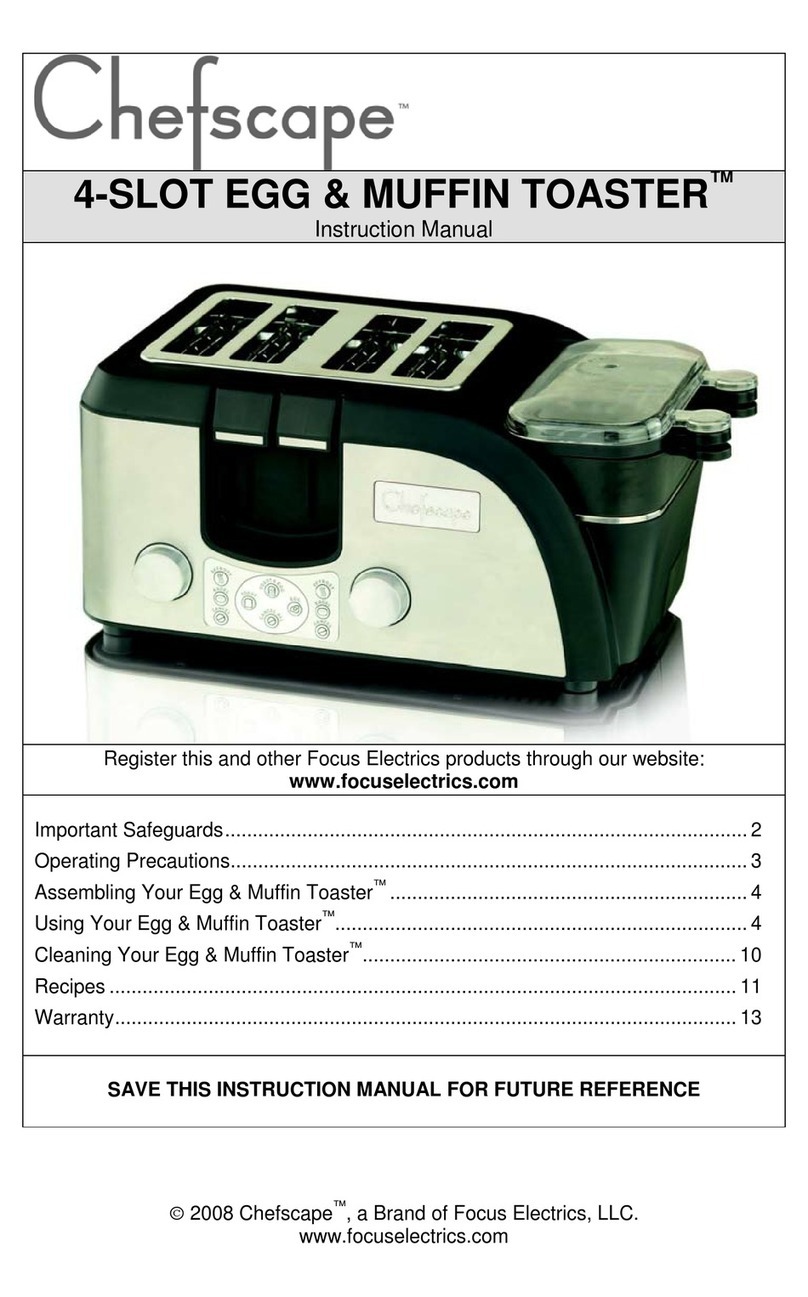
4-SLICE EGG &MUFFIN TOASTER
®
Instruction Manual
Register this and other Focus Products Group International products through our
website: www.registerfocus.com.
Product registration is not required to activate warranty.
Important Safeguards...............................................................................................2
Before Using for the First Time ................................................................................3
Using Your Egg & Muffin Toaster®...........................................................................4
Cleaning Your Egg & Muffin Toaster®......................................................................7
Helpful Hints.............................................................................................................7
Recipes....................................................................................................................8
Warranty...................................................................................................................9
SAVE THIS INSTRUCTION MANUAL FOR FUTURE REFERENCE

English - 2
IMPORTANT SAFEGUARDS
To prevent personal injury or property damage, read and follow all instructions
and warnings.
When using electrical appliances, basic safety precautions should always be
followed including:
•Read all instructions.
•Do not touch hot surfaces. Use handles or knobs.
•To protect against fire, electric shock, and injury to persons do not immerse cord,
plugs, or other electric parts in water or other liquids.
•Close supervision is necessary when this appliance is used by or near children.
•Always unplug from outlet when not in use and before cleaning. Allow to cool
before putting on or taking off parts and before cleaning.
•Do not operate any appliance with a damaged cord or plug, after the appliance
malfunctions, or has been damaged in any manner. For service information see
warranty page.
•The use of accessory attachments not recommended by Focus Products Group
International may cause fire, electric shock, or injury.
•Do not use this appliance outdoors.
•Do not let cord hang over the edge of the table or counter, or touch hot surfaces.
•Do not place on or near a hot gas or electric burner, or in a heated oven.
•Attach plug to appliance first, then plug cord into wall outlet. To disconnect, turn
any control to “OFF,” then remove plug from wall outlet.
•Do not use appliance for other than intended use.
•Extreme caution must be used when moving an appliance containing hot oil or
other hot liquids.
•Do not attempt to repair this appliance yourself.
•A short power-supply cord is provided to reduce risks resulting from becoming
entangled in or tripping over a longer cord.
•Longer extension cords are available, but care must be exercised in their use.
While use of an extension cord is not recommended, if you must use one, ensure
that the marked electrical rating of the extension cord is equal to or greater than
that of the appliance. If the plug is of the grounded type, the extension cord must
be a grounding-type 3-wire cord. To avoid pulling, tripping or entanglement,
position the extension cord so that it does not hang over the edge of the counter,
table or other area where it can be pulled on by children or tripped over.
•Do not use an outlet or extension cord if the plug fits loosely or if the outlet or
extension cord feels hot.
•Avoid contact with moving parts.
•Oversized foods, metal foil packages, or metal utensils must not be inserted in a
toaster as they may involve a risk of fire or electric shock.
•A fire may occur if the appliance is covered or touching flammable material,
including curtains, draperies, walls, and the like, when in operation.
•Do not attempt to dislodge food when toaster is plugged in.

English - 3
•Avoid toasting foods with frostings or fillings that may run or that are made with
open fillings. Frostings and fillings can catch fire.
•Do not toast pastries, tarts and the like at any setting other than the lowest or
lightest setting and never toast twice as these items can ignite if over-heated and
cause fire.
•Failure to clean and replace crumb tray after each use may result in fire hazard.
•Lift and open the egg cooker lid carefully to avoid scalding.
•Do not attempt to operate the egg poacher without water in the reservoir.
•For household use only.
SAVE THESE INSTRUCTIONS
BEFORE USING FOR THE FIRST TIME
Please check all packaging material carefully before discarding. Accessory
parts may be contained within the packaging material.
See “Cleaning your Egg & Muffin Toaster®” section of this manual.
Be sure the carriage lever is not in the locked down position before plugging in the
power cord.
Before placing any food items in the toaster slots, plug in the appliance, select the
“TOAST” function and run an initial cycle. Make sure the toasting slots are free of
any debris or packing materials. Press the carriage lever down until it locks in
position. This initial toasting cycle will clean residue from the heating elements.
Please note that a small amount of smoke and/or odor may occur upon heating
due to the release of manufacturing oils - this is normal. Some minor expansion/
contraction sounds may occur during heating and cooling - this is also normal.
CAUTION: Do not immerse any part of the base appliance in water or any other liquid.
Steam Vents
Lid
Warming Tray
Poaching Trays
Steaming Tray
Heating Tray
Measuring Cup with
Egg Piercer
Toast Slots
Carriage Levers
Browning Control
Dials
Control Touchpad

English - 4
USING YOUR EGG &MUFFIN TOASTER®
Egg & Muffin Toaster®Control Buttons
“TOAST” - Operates the toaster only.
“EGG/TOAST” - Operates the toasting and egg poaching/cooking functions together.
Note: Bread will toast at the same time as the eggs cook. Toast will remain in the slots
until the eggs have completed cooking. When eggs are done, the toast will pop up.
“EGG”- Operates the egg function only.
“CANCEL” - Turns the corresponding side off at any time during the cooking cycle.
“DEFROST” - Adds approximately 30 seconds to the current browning control
setting. Note: “BAGEL” and “DEFROST” may be used in any combination with the
“TOAST” or “EGG/TOAST” functions.
“BAGEL” - Toasts one side of the bread.
“CANCEL ALL” - Turns both sides of the appliance off at any time during the
cooking cycle. Use “CANCEL” if only turning appliance off on one side.
Toaster Only Function:
1. Place the appliance on a clean, dry, flat surface.
2. Place the food to be toasted into one or both of the slot sets.
3. Select the desired level of darkness by adjusting the browning control knob(s).
4. Plug the appliance into a 120 volt, AC electrical outlet only.
5. If toasting bread, push the “TOAST” button on the touchpad. The “TOAST” button
will flash, indicating the function is selected. If toasting bagels, push the “BAGEL”
button on the touchpad. The “BAGEL” and “TOAST” buttons will flash, indicating
that the “BAGEL” setting is selected.
6. Press the carriage lever(s) down until locked in position. The “TOAST” button will
be illuminated solid to indicate the toasting cycle is in operation. Note: The
carriage lever(s) will not stay down if the appliance is not plugged into an
electrical outlet.
7. When the selected browning level of toast is reached, the toast will automatically
pop up and the “TOAST” light will turn off.
8. To remove the toast from the toasting slots, push up on the carriage lever(s).
9. Unplug the appliance from the electrical outlet after each use.
The Cancel Function: Press the corresponding “CANCEL” button(s) to stop the
toasting cycle(s) before they finish. Or, the “CANCEL ALL” button, found in the
center of the control panel, will stop both toasting cycles.Do not pull up on the
carriage lever(s) to stop the toasting process as this may damage the appliance.

English - 5
Egg Poaching:
CAUTION: Use extreme care when operating the egg poacher as hot steam is
released through the steam vents.
1. Place the appliance on a clean, dry, flat surface and remove the lid and trays. Fill
the measuring cup with water to the “soft” or “medium” line above the “POACHED
EGG” mark and pour into the heating tray, or add 2 to 2½ tablespoons of water
into the heating tray.
2. Place the steaming tray on top of the heating tray.
3. We recommend applying a small amount of butter or oil to the poaching tray(s).
Break an egg into the poaching tray(s) and place the poaching tray(s) on top of
the steaming tray. If desired, break the egg yolk by poking it with a fork. The egg
may also be scrambled.
4. Place the lid on top of the steaming tray.
5. Plug the appliance into a 120 volt, AC electrical outlet only.
6. Push the “EGG” button on the touchpad. The “EGG” button will illuminate to a
solid color.
7. When the poaching is complete, the light will turn off.
8. Remove the poaching tray(s) and lid. CAUTION: Remove the lid and tray(s)
carefully to avoid scalding.
9. Unplug the appliance from the electrical outlet after each use.
Egg Cooking:
1. Place the appliance on a clean, dry, flat surface and remove the lid and trays
from the appliance.
2. Select the cooked consistency and number of eggs to be cooked. This appliance
can cook up to 8 eggs at a time. Use the provided measuring cup or the below
chart, add the corresponding amount of water to the heating tray to achieve
desired results.
3. Place the steaming tray on the heating tray. Clean the eggs to be cooked by
rinsing, then place them in the holes in the steaming tray.
4. Place the lid on top of the steaming tray.
5. Plug the appliance into a 120 volt, AC electrical outlet only.
6. Push the “EGG” button on the touch pad. The “EGG” button will illuminate to a
solid color.
7. When cooking is complete, the light will turn off.
8. Remove the steaming tray and lid from the heating tray. CAUTION: Remove the
steaming tray and lid carefully to avoid scalding.
9. Unplug the appliance from the electrical outlet after each use.
Boiled Egg Soft Medium Hard
# of Eggs Tbsp. Water Tbsp. Water Tbsp. Water
1 3½ 4½ 7
2 3¼ 4¼ 6¾
3 2¾ 3¾ 6¼
4 2½ 3½ 6
5 2½ 3½ 5
6 2¼ 3¼ 4¾
7 2 2¾ 4¼
8 1¾ 2½ 4

English - 6
Egg & Toast Function (for breakfast sandwich):
1. Place the appliance on a clean, dry, flat surface and remove the lid and trays
from the appliance.
2. Place the food to be toasted into one or both of the slot sets.
3. Select the desired level of darkness by adjusting the browning control dial.
4. Fill the measuring cup with water to the “soft” or “medium” line above the
“POACHED EGG” mark and pour into the heating tray, or add 2 to 2½
tablespoons of water directly into the heating tray.
5. Place the steaming tray on top of the heating tray.
6. We recommend applying a small amount of butter or oil to the poaching tray(s).
Break an egg into the poaching tray(s) and place the poaching tray(s) on top of
the steaming tray. If desired, break the egg yolk by poking it with a fork. The egg
may also be scrambled.
7. Place the warming tray on top of the poaching tray(s) and add pre-cooked meat,
if desired. Note: DO NOT use raw or uncooked meats in this appliance.
8. Place the lid on top of the warming tray.
9. Plug the appliance into a 120 volt, AC electrical outlet only.
10. Push the “EGG/TOAST” button on the touchpad. The “EGG/TOAST” button will
flash.
11. Press the carriage lever(s) down until locked into position. The “EGG,” “TOAST,”
and “EGG/TOAST” buttons will illuminate. Note: Neither the egg cooking, or the
toasting process will start until the carriage lever(s) are locked down.
The Egg & Muffin Toaster®“EGG/TOAST” function enables synchronized
toasting and egg cooking. The bread will toast to the color set by the browning
control lever but will not pop up until the egg cycle has completed. The carriage
will remain down, keeping the bread warm until the egg has completed cooking.
12. When both the egg cycle and toasting are complete, the appliance will
automatically shut off and the toast will pop up. The “EGG,” “TOAST,” and
“EGG/TOAST” button lights will no longer be illuminated, which signals the
appliance has turned off.
13. To remove the toast from the toasting slots, lift up on the carriage lever(s).
14. Remove the lid and trays from the heating tray. Allow the remaining steam to
dissipate. CAUTION: Remove the lid and tray carefully to avoid being scalded
with steam.
15. Unplug the appliance from the electrical outlet after each use.
HELPFUL HINTS
•Use caution when removing the trays from the toaster, steam will be released and
could cause scalding.
•The egg cooker timing is controlled by the amount of water placed in the heating
tray. The more water added, the longer the appliance will cook.
•We do not recommend using most non-stick cooking sprays in the poaching tray.
If you do use a non-stick spray, be sure that it is a 100% oil cooking spray with no
flours or binders.
•If you have issues with breakage when hard boiling eggs, puncture each egg, after
cleaning, with the egg piercer located on the bottom of the measuring cup, then
place them in the steaming tray, hole side up. This will prevent the eggs from
cracking and possible spillover.

English - 7
•Even pierced, there is still some possibility of egg expanding and leaking out of the
shell. This is normal.
•Please note that many variables factor into making toast; moisture content and
temperature of the bread, thickness, sugars and starches, and grains can all affect
the browning of the bread when making toast.
•Wheat and whole grain breads tend to require longer toasting times. We
recommend toasting somewhere between settings 3 and 5.
•When toasting, you may notice variations in toast color from side to side. This is
normal, especially when toasting one slice of bread.
CLEANING YOUR EGG &MUFFIN TOASTER®
1. Unplug the appliance from the electrical outlet and allow to cool completely
before cleaning.
2. Wipe down the exterior of the appliance with a damp cloth.
3. Thoroughly wash the heating tray, steaming tray, poaching trays, warming tray,
and the lid in warm, soapy water.
4. The steaming tray, poaching trays, warming tray and the lid can be washed in the
top rack of a dishwasher.
5. The heating tray may accumulate mineral deposits after use. To remove these
deposits add ½ teaspoon concentrated vinegar and ½ cup water to the heating
tray. With the lid in place, turn on the egg cooker function and allow the solution
to boil for approximately 10 minutes. CAUTION: The water will be hot! After 10
minutes, press the “CANCEL” button, unplug the appliance, and let cool. When
cooled, carefully dump out the remaining water, then wipe clean with a soft cloth.
CAUTION: Do not immerse any part of the appliance base (including the heating-
tray) in water or any other liquid.
This appliance has no user serviceable parts.
RECIPES
Egg & Muffin Sandwich
1 English muffin
1 Poached egg
1 Slice of pre-cooked Canadian Bacon, Ham, or Sausage Patty (optional)
1 Slice of Cheddar cheese
To assemble: Lay the poached egg on top of the English muffin half followed by
the pre-cooked meat and then the slice of cheese. Top the sandwich with the
other half of the English muffin.
Eggs Benedict
2 English muffins, split and open
4 Poached eggs
4 Slices of pre-cooked Canadian bacon
Salt and pepper to taste
Hollandaise sauce to taste (see recipe)
To assemble: Lay a slice of Canadian bacon on top of each English muffin half
followed by a poached egg. Season with salt and pepper. Spoon Hollandaise
sauce over the eggs.

English - 8
Hollandaise Sauce
2 Egg yolks
4 tbs. Heavy cream
2 tbs. Butter
1 tbs. Lemon juice
1 tbs.White vinegar
Pinch of salt
Pinch of sugar
Chicken-broth (optional)
Dash of hot sauce
Combine all ingredients except the white vinegar and chicken broth in the top of
a double boiler, over boiling water. Stir until thick, about 3 minutes. Note: Do not
reheat or cover the pot. Thin if needed with the chicken broth. Stir in the vinegar
immediately.
Eggs Benedict with Chicken
Prepare Eggs Benedict as directed except omit the Canadian bacon. Cut one
skinless, boneless chicken breast into bite-size strips. Add 2 tbs. cooking oil to a
medium skillet; cook and stir for 2 to 3 minutes or until no longer pink. Assemble
the Eggs Benedict as usual.
Eggs Florentine
2 English muffins, split and open
4 Eggs
Salt and pepper to taste
Steamed spinach leaves
Hollandaise sauce
To assemble: Prepare this just like the Eggs Benedict recipe but replace the
Canadian bacon with the spinach leaves. Lay the spinach leaves on top of each
English muffin half followed by a poached egg. Season with salt and pepper.
Spoon Hollandaise sauce over the eggs.
Smoked Salmon (lox) Bagel
1 Toasted plain bagel (or any bagel you like)
1 Tomato slice (optional)
1 Onion slice
Thin slices of lox (smoked salmon)
Plain cream cheese
Capers
To assemble: Spread cream cheese on one half of the bagel. Add thin slices of
smoked salmon on top of the cream cheese. Top with a slice of tomato and onion;
sprinkle with capers. Spread the other half of the bagel with cream cheese and place
on top.

English - 9
L5768B 07/14 West Bend®, a Brand of Focus Products Group International, LLC.
Printed in China
PRODUCT WARRANTY
Appliance 1 Year Limited Warranty
Focus Products Group International, LLC (“the Company”) warrants this appliance from failures
in the material and workmanship for one (1) year from the date of original purchase with proof
of purchase, provided that the appliance is operated and maintained in conformity with the
Instruction Manual. Any failed part of the appliance will be repaired or replaced without charge
at the Company’s discretion. This warranty applies to indoor household use only.
This warranty does not cover any damage, including discoloration, to any non-stick surface of
the appliance. This warranty is null and void, as determined solely by the Company, if the
appliance is damaged through accident, misuse, abuse, negligence, scratching, or if the
appliance is altered in any way.
THIS WARRANTY IS IN LIEU OF ALL IMPLIED WARRANTIES, INCLUDING WARRANTIES
OF MERCHANTABILITY, FITNESS FOR A PARTICULAR PURPOSE, PERFORMANCE, OR
OTHERWISE, WHICH ARE HEREBY EXCLUDED. IN NO EVENT SHALL THE COMPANY
BE LIABLE FOR ANY DAMAGES, WHETHER DIRECT, INDIRECT, INCIDENTAL,
FORSEEABLE, CONSEQUENTIAL, OR SPECIAL ARISING OUT OF OR IN CONNECTION
WITH THIS APPLIANCE.
If you think the appliance has failed or requires service within its warranty period, please
contact the Customer Care Department at (866) 290-1851, or e-mail us at
[email protected]. A receipt proving the original purchase date will be required for
all warranty claims, hand written receipts are not accepted. You may also be required to
return the appliance for inspection and evaluation. Return shipping costs are not refundable.
The Company is not responsible for returns lost in transit.
Valid only in USA and Canada
REPLACEMENT PARTS
Replacement parts, if available, may be ordered directly from the Company several ways.
Order online at www.westbend.com, e-mail customercare@focuspg.com, over the phone by
calling (866)290-1851, or by writing to:
Focus Products Group International, LLC.
Attn: Customer Care Dept.
P. O. Box 53
West Bend, WI 53095
To order with a check or money order, please first contact Customer Care for an order total.
Mail your payment along with a letter stating the model or catalog number of your appliance,
which can be found on the bottom or back of the appliance, a description of the part or parts
you are ordering, and the quantity you would like. Your check should be made payable to
Focus Products Group International, LLC.
Your state/province’s sales tax and a shipping fee will be added to your total charge. Please
allow two weeks for processing and delivery.
This manual contains important and helpful information regarding the safe use and care of your
product. For future reference, attach dated sales receipt for warranty proof of purchase and
record the following information:
Date purchased or received as gift: _______________________________________________
Where purchased and price, if known: _____________________________________________
Item number and Date Code (shown bottom/back of product):___________________________
©2014 West Bend®, une Marque de Focus Products Group International, LLC.
www.westbend.com
4FENTES EGG &MUFFIN TOASTER
®
Mode d’Emploi
Veuillez enregistrer cet appareil ainsi que vos autres produits Focus Products Group
International sur notre site Internet: www.registerfocus.com
L'enregistrement d’un produit n'est pas exigé pour activer la garantie.
Précautions Importantes .........................................................................................2
Avant la Première Utilisation....................................................................................4
Utilisation de Votre Grille-pain à Egg & Muffin Toaster®...........................................4
Nettoyer Votre Grille-pain à Egg & Muffin Toaster®..................................................7
Astuces ....................................................................................................................7
Recettes...................................................................................................................8
Garantie ...................................................................................................................9
CONSERVER CE MODE D’EMPLOI POUR UNE CONSULTATION ULTÉRIEURE

Française - 2
PRÉCAUTIONS IMPORTANTES
Afin de prévenir toute blessure ou tout dégât matériel, veuillez lire la totalité
des instructions et des mises en garde.
Lorsque vous utilisez des appareils électriques, les précautions de sécurité
élémentaires devraient toujours être suivies, notamment:
•Lisez la totalité des instructions.
•Ne touchez pas les surfaces à haute température. Utilisez les poignées carrées ou
rondes.
•Afin de vous protéger contre l’incendie, l’électrocution et les blessures, veuillez ne
pas plonger le cordon, les fiches, ou toute autre composant électrique dans de
l’eau ni dans tout autre liquide.
•Une surveillance attentive est nécessaire lors de l’utilisation de cet appareil par
des enfants ou à proximité de ceux-ci.
•Débranchez toujours l’appareil de la prise secteur lorsque vous ne l’utilisez pas et
avant de le nettoyer. Laissez refroidir avant de mettre ou de retirer des pièces et
avant le nettoyage.
•N’utilisez aucun appareil électrique ayant un cordon d’alimentation ou une fiche en
mauvais état, après un dysfonctionnement de l’appareil, ou toute autre détérioration.
Pour des informations sur les réparations, voir la page de garantie.
•L’utilisation d’accessoires non recommandés par Focus Products Group
International risque de provoquer un incendie, une électrocution ou une blessure.
•N’utilisez pas cet appareil en extérieur.
•Ne laissez pas le cordon d’alimentation pendre depuis l’extrémité d’une table ou
d’un plan de travail, ni entrer en contact avec des surfaces à haute température.
•Ne placez pas l’appareil sur, ou à proximité, d’une gazinière chaude ou d’une
plaque électrique, ou dans un four chaud.
•Commencez par brancher la fiche sur l’appareil, puis le cordon dans la prise
secteur. Pour débrancher, réglez tous les boutons sur « OFF » (arrêt), puis retirez
la fiche de la prise secteur.
•N’utilisez pas l’appareil pour un autre usage que celui pour lequel il a été conçu.
•Vous devez faire preuve d’une extrême prudence lorsque vous déplacez un
appareil contenant de l’huile ou d’autres liquides à haute température.
•Ne tentez pas de réparer cet appareil vous-même.
•Un cordon d’alimentation électrique court est fourni afin d’éviter les risques de se
prendre les pieds ou de trébucher sur un cordon d’alimentation plus long.
•Des cordons d’alimentation plus longs sont disponibles, mais il convient de faire
preuve de prudence en les utilisant. Bien que l’utilisation d’un cordon de rallonge
ne soit pas recommandée, si vous devez en utiliser un, assurez-vous que la
puissance nominale indiquée sur le cordon de rallonge, soit supérieure ou égale à
celle de l’appareil. Si la fiche est raccordée à la terre, le cordon de rallonge doit
être un cordon à 3 brins, raccordé à la terre. Afin d’éviter que le cordon ne soit tiré
ou que quelqu’un s’y prenne les pieds, positionnez le cordon de rallonge afin qu’il
ne pende pas depuis l’extrémité du plan de travail, de la table ou de toute autre
surface d’où il pourrait être tiré par des enfants ou faire trébucher quelqu’un.
•N’utilisez pas une prise secteur ou un cordon de rallonge si la fiche a du jeu ou si
la prise secteur ou le cordon de rallonge vous semble chaud.

Française - 3
•Évitez tout contact avec les pièces en mouvement.
•Les aliments de grande taille, les emballages alimentaires en aluminium, et les
ustensiles de cuisine en métal, ne doivent pas être mis dans un Grille-pain car ils
risquent de provoquer un risque d’incendie ou d’électrocution.
•Un incendie risque de se produire si l’appareil est couvert ou en contact avec des
matériaux inflammables, notamment des rideaux, des draperies, des cloisons, et
tout matériau similaire, pendant son fonctionnement.
•Ne tentez pas de retirer des aliments lorsque le Grille-pain est branché.
•Evitez de faire cuire des aliments recouverts d’un glaçage ou garnis, pouvant fuir
ou comportant des trous pouvant laisser sortir la garniture. Le glaçage et la
garniture peuvent s’enflammer.
•Faites uniquement cuire les pâtisseries, tartes et gourmandises de même type sur
le réglage le moins élevé, et ne jamais les toaster deux fois, car ces aliments
peuvent s’enflammer s’ils sont trop chauffés, et peuvent causer un incendie.
•Manquer de nettoyer et de remettre le plateau à chapelure après utilisation, peut
entrainer un risque d’incendie.
•Soulevez et ouvrez délicatement le couvercle du cuiseur d’œufs afin d’éviter de
vous brûler.
•N’essayez-pas d’utiliser la pocheuse sans eau dans le réservoir.
•Pour une utilisation domestique uniquement.
CONSERVEZ CES CONSIGNES
Event à Vapeur
Couvercle
Chauffe-plat
Plateaux de
Pochage
Plateau à Vapeur
Plateau Chauffant
Tasse à mesurer avec
Perceur d’Œuf
Orifices pour les Toasts
Leviers
Cadrans de Contrôle
de la Coloration
Clavier Tactile
de Contrôle

Française - 4
AVANT LA PREMIÈRE UTILISATION
Veuillez vérifier la totalité de l’emballage avec soin, avant de le jeter. Des pièces
peuvent se trouver dans l’emballage.
Voir la section « Nettoyage de votre Grille-pain à Egg & Muffin Toaster® »de ce manuel.
Assurez-vous que le levier soit bloqué en bas, avant de brancher le cordon d’alimentation.
Avant de mettre des aliments dans les orifices du grille-pain, branchez l’appareil, choisissez
la fonction « TOAST » (toaster) et utilisez du début à la fin, une fois. Assurez-vous que les
orifices soient exempts de débris ou de matériaux d’emballage. Abaissez le levier du Grille-
pain jusqu’à ce qu’il se verrouille en place. Le cycle initial de cuisson éliminera les résidus
provenant des éléments chauffants. Veuillez noter qu’une petite quantité de fumée et/ou
d’odeur d’huiles de fabrication peut se dégager au moment de la chauffe. C’est tout à
fait normal. De petits bruits d’expansion/contraction peuvent être émis pendant le
chauffage et le refroidissement. C’est tout à fait normal.
PRECAUTION: N’immergez aucune pièce de l’appareil, dans de l’eau ou tout autre
liquide.
UTILISATION DE VOTRE GRILLE-PAIN À EGG &MUFFIN TOASTER®
Boutons du Grille-pain à Egg & Muffin Toaster®
« TOAST » (toaster) – Ne fait fonctionner que le grille-pain.
« EGG/TOAST » (œuf/toaster) – Fait fonctionner la cuisson et les fonctions de pochage
des œufs/cuisson. Remarque: le pain grillera en même temps que les œufs cuisent. Un
toast restera dans les orifices jusqu’à ce que les œufs soient complètement cuits.
Lorsque les œufs sont cuits, le toast sortira.
« EGG » (œuf)- Ne fait fonctionner que la fonction Œuf.
« CANCEL » (annuler) – Eteint le côté correspondant à tout moment, lors de la cuisson.
« DEFROST » (décongeler) – Ajoute environ 30 secondes au réglage en cours du
contrôle de la coloration. Remarque: « BAGEL » (bagel) et « DEFROST » (décongeler)
peuvent être utilisés avec « TOAST » (toaster) ou « EGG/TOAST » (œuf/toaster).
« BAGEL » (bagel) – Fait cuire un côté du pain.
« CANCEL ALL » (annuler touts) – Eteint les deux côtés de l’appareil, à tout moment
lors de la cuisson. N’utilisez « CANCEL » (annuler) que si l’appareil est éteint d’un côté.
Fonction Grille-pain Uniquement:
1. Mettez l’appareil sur une surface propre, plate et sèche.
2. Mettez la nourriture à faire cuire d’un côté ou des deux, des orifices.
3. Choisissez le niveau de coloration brune désiré en réglant les boutons de contrôle de
la coloration.
4. Branchez le cordon d’alimentation sur une prise secteur 120 volts CA uniquement.

Française - 5
5. Si vous faites cuire du pain, appuyez sur le bouton « TOAST » (toaster) sur le clavier
tactile. Le bouton « TOAST » (toaster) clignotera, indiquant que la fonction est
sélectionnée. Si vous faites cuire des bagels, appuyez sur le bouton « BAGEL »
(bagel) sur le clavier tactile. Les boutons « BAGEL » (bagel) et « TOAST » (toaster)
clignoteront, indiquant que « BAGEL » (bagel) est sélectionné.
6. Abaissez le levier du Grille-pain jusqu’à ce qu’il se verrouille en place. Le bouton
« TOAST » (toaster) s’allumera permanente, indiquant que la cuisson est
commencée. Remarque: Le(s) levier(s) ne restera/restent pas vers le bas, si
l’appareil n’est pas branché sur une prise secteur.
7. Lorsque la coloration de cuisson choisie sera atteinte, le toast sortira
automatiquement et le voyant « TOAST » (toaster) s’éteindra.
8. Pour retirer le toast des orifices, appuyez sur le(s) levier(s).
9. Débranchez l’appareil de la prise secteur après chaque utilisation.
La fonction « CANCEL » (annuler): Appuyez sur le bouton « CANCEL » (annuler)
correspondant pour arrêter toute cuisson avant la fin. Sinon, le bouton « CANCEL ALL »
(annuler touts), se trouvant au centre du panneau de commande, arrêtera toutes les
cuissons. Ne pas lever le levier pour arrêter les cuissons car l’appareil pourrait en être
endommagé.
Pochage des Œufs:
PRECAUTION: Faire très attention en utilisant la pocheuse car de la vapeur chaude se
dégage par les évents.
1. Mettre l’appareil sur une surface sèche, propre et plate, et retirer le couvercle et les
plateaux. Remplir la tasse à mesurer avec de l’eau, jusqu’à la ligne « soft » (mollet) ou
« medium » (moyen), au-dessus de la marque « POACHED EGG » (œuf poché) et
verser sur le plateau chauffant, ou ajouter de 2 à 2 cuillères et demie à soupe d’eau,
sur le plateau chauffant.
2. Mettre le plateau à vapeur, au sommet du plateau chauffant.
3. Nous conseillons de répartir une petite quantité de beurre ou d’huile, sur le plateau de
pochage. Casser un œuf dans le plateau de pochage, et mettre le plateau de pochage
au sommet du plateau à vapeur. Le cas échéant, éclater le jaune d’œuf en le perçant
à l’aide d’une fourchette. L’œuf peut également être brouillé.
4. Mettre le couvercle au sommet du plateau à vapeur.
5. Brancher le cordon d’alimentation sur une prise secteur 120 volts CA uniquement.
6. Appuyer sur le bouton « EGG » (œuf) sur le clavier tactile. Il s’allumera permanente.
7. Lorsque le pochage sera terminé, le voyant s’éteindra.
8. Retirer le(s) plateau(x) de pochage et le couvercle. PRECAUTION: Retirer
délicatement le couvercle et le(s) plateau(x), afin d’éviter tout risque de brûlure.
9. Débrancher l’appareil de la prise secteur après chaque utilisation.
Cuisson des Œufs:
1. Mettre l’appareil sur une surface sèche, propre et plate, et retirer le couvercle et les
plateaux de l’appareil.
2. Choisir la consistance des œufs cuits et le nombre d’œufs à cuire. Cet appareil peut
cuire jusqu’à 8 œufs en une fois. Utiliser la tasse à mesurer fournie, ou le tableau ci-
dessous, ajouter la quantité d’eau correspondante sur le plateau chauffant pour
obtenir les résultats désirés.
3. Mettre le plateau à vapeur sur le plateau chauffant. Nettoyer les œufs à cuire en les
rinçant, puis les mettre dans les trous sur le plateau à vapeur.
4. Mettre le couvercle au sommet du plateau à vapeur.
5. Brancher le cordon d’alimentation sur une prise secteur 120 volts CA uniquement.

Française - 6
6. Appuyer sur le bouton « EGG » (œuf) du clavier tactile. Il s’allumera permanente.
7. Lorsque la cuisson sera terminée, le voyant s’éteindra.
8. Retirer le plateau à vapeur et le couvercle du plateau chauffant. PRECAUTION: Retirer
délicatement le couvercle et le plateau à vapeur afin d’éviter tout risque de brûlure.
9. Débrancher l’appareil de la prise secteur après chaque utilisation.
Œuf à la Coque Mollet Moyen Dur
Nbre d’œufs C. à soupe d’eau C. à soupe d’eau C. à soupe d’eau
1 3½ 4½ 7
2 3¼ 4¼ 6¾
3 2¾ 3¾ 6¼
4 2½ 3½ 6
5 2½ 3½ 5
6 2¼ 3¼ 4¾
7 2 2¾ 4¼
8 1¾ 2½ 4
Fonction Œuf et Toast (pour un sandwich au petit-déjeuner):
1. Mettre l’appareil sur une surface sèche, propre et plate, et retirer le couvercle et les
plateaux de l’appareil.
2. Mettre la nourriture à faire cuire d’un côté ou des deux, des orifices.
3. Choisir le niveau de coloration brune désiré en réglant le bouton de réglage de la
coloration.
4. Remplir la tasse à mesurer avec de l’eau, jusqu’à la ligne « soft » (mollet) ou
« medium » (moyen), au-dessus de la marque « POACHED EGG » (œuf poché) et
verser sur le plateau chauffant, ou ajouter de 2 à 2 cuillères et demie à soupe d’eau,
directement sur le plateau chauffant.
5. Mettre le plateau à vapeur, au sommet du plateau chauffant.
6. Nous conseillons de répartir une petite quantité de beurre ou d’huile, sur le(s) plateau(x)
de pochage. Casser un œuf dans le plateau de pochage, et mettre le plateau de
pochage au sommet du plateau à vapeur. Le cas échéant, éclater le jaune d’œuf en le
perçant à l’aide d’une fourchette. L’œuf peut également être brouillé.
7. Mettre le chauffe-plat au sommet du plateau de pochage, et ajouter de la viande
précuite au besoin. Remarque: NE PAS utiliser de viande crue sur cet appareil.
8. Mettre le couvercle au sommet du chauffe-plat.
9. Branchez le cordon d’alimentation sur une prise secteur 120 volts CA uniquement.
10.Appuyer sur le bouton « EGG/TOAST » (œuf/toaster) sur le clavier tactile. Le bouton
« EGG/TOAST » (œuf/toaster) clignotera.
11.Abaissez le(s) levier(s) jusqu’à ce qu’il se verrouille en place. Les boutons « EGG »
(œuf), « TOAST » (toaster), et « EGG/TOAST » (œuf/toaster) s’allumeront.
Remarque: Ni la cuisson des œufs ni celle des toasts ne commencera si le(s)
levier(s) est/sont en bas.
La fonction « EGG/TOAST » (œuf/toaster) du Grille-pain à Egg & Muffin Toaster®,
permet de cuire les œufs et de toaster de façon synchronisée. Le pain cuira jusqu’à la
coloration réglée au moyen du levier de contrôle de la coloration, mais ne sortira pas
avant que la cuisson des œufs ne soit terminée. Le levier restera en bas, conservant
le pain au chaud, jusqu’à ce que les œufs soient complètement cuits.

Française - 7
12. Lorsque la cuisson du pain et des œufs est terminée, l’appareil s’éteint automatiquement
et le toast est éjecté. Les voyants « EGG » (œuf), « TOAST » (toaster), et
« EGG/TOAST » (œuf/toaster) seront éteints, indiquant que l’appareil est éteint.
13.Pour retirer le toast des orifices, soulever le(s) levier(s).
14.Retirer les plateaux et le couvercle du plateau chauffant. Laisser la vapeur restante se
dissiper. PRECAUTION: Retirer délicatement le couvercle et le plateau afin d’éviter
de vous brûler avec la vapeur.
15.Débrancher l’appareil de la prise secteur après chaque utilisation.
ASTUCES
•Faites attention en retirant les plateaux du grille-pain, de la vapeur se dégagera et
pourrait vous brûler.
•La minuterie du cuiseur d’œufs dépend de la quantité d’eau mise sur le plateau
chauffant. Plus vous ajoutez de l’eau, plus l’appareil cuira longtemps.
•Nous déconseillons d’utiliser la plupart des plateaux antiadhésifs de cuisson, sur le
plateau de pochage. Si vous utilisez un pulvérisateur antiadhésif, assurez-vous qu’il
soit adapté à 100% à la cuisson à l’huile, sans farine ou liant.
•Si vos œufs se cassent en cuisant, faites un trou dans chaque œuf, après nettoyage, à
l’aide du perceur d’œufs se trouvant au fond de la tasse à mesurer, puis mettez-les sur
le plateau à vapeur, le trou vers le haut. Les œufs ne craqueront pas et vous éviterez
également des débordements potentiels.
•Même percé, un œuf peut toujours enfler et sa coquille fuir. C’est tout à fait normal.
•Veuillez noter qu’un grand nombre de facteurs variables interviennent dans la cuisson;
la teneur en humidité et la température du pain, son épaisseur, les sucres et amidons
ainsi que les grains sont autant d’éléments susceptibles d’affecter la coloration du pain
pendant la cuisson.
•Les pains au blé et aux céréales complètes ont tendance à nécessiter des temps de
cuisson plus longs. Nous recommandons de griller avec l’réglage au milieu de 3 et 5.
•Lorsque vous grillez du pain, vous remarquerez peut-être une variation de la coloration
des toasts d’un côté à l’autre. C’est normal, en particulier lorsque l’on grille une seule
tranche de pain.
NETTOYER VOTRE GRILLE-PAIN À EGG &MUFFIN TOASTER®
1. Débranchez le Grille-pain de la prise secteur et laissez refroidir complètement avant
de procéder au nettoyage.
2. Essuyez l’extérieur de l’appareil à l’aide d’un chiffon humide.
3. Nettoyez à fond le plateau chauffant, le plateau à vapeur, les plateaux de pochage, le
chauffe-plat, ainsi que le couvercle, à l’eau chaude et savonneuse.
4. Il est possible de laver le plateau à vapeur, les plateaux de pochage, le chauffe-plat et
le couvercle, dans le panier supérieur d’un lave-vaisselle.
5. Le plateau chauffant peut accumuler des dépôts de minéraux après utilisation. Pour
retirer ces dépôts, ajoutez ½ cuillère à café de vinaigre concentré et ½ tasse d’eau,
sur le plateau chauffant. Le couvercle étant mis, allumez le cuiseur d’œufs et laissez
la solution bouillir pendant environ 10 minutes. PRECAUTION: L’eau sera chaude !
Au bout de 10 minutes, appuyez sur le bouton « CANCEL » (annuler), débranchez
l’appareil et laissez refroidir. Une fois refroidi, retirez délicatement l’eau restante, puis
essuyez avec un chiffon doux.
PRECAUTIONS: N’immergez aucune pièce de l’appareil (notamment le plateau
chauffant), dans de l’eau ou tout autre liquide.
Cet appareil ne contient aucune pièce réparable par l’utilisateur.

Française - 8
RECETTES
Sandwich Muffin et Œuf
1 Muffin anglais
1 Œuf poché
1 tranche de Cheddar
1 tranche de Bacon canadien précuit,
de jambon ou Sausage Patty (en
option)
Pour faire le sandwich: Etalez l’œuf poché au sommet de la moitié du muffin
anglais, suivi par la viande précuite, puis par la tranche de fromage. Recouvrez
le sandwich de l’autre moitié du muffin anglais.
Œufs Benedict
2 Muffins anglais, coupés et ouverts
4 Œufs pochés
4 tranches de Bacon canadien précuit
Sel et poivre pour le goût
Sauce hollandaise pour le goût (voir
recette)
Préparation: Etalez une tranche de bacon sur chaque moitié de muffin anglais,
suivie par un œuf poché. Assaisonnez de sel et de poivre. Répandez la sauce à
la cuillère sur les œufs.
Sauce Hollandaise
2 jaunes d’œuf
4 c. à soupe de Crème épaisse
2 c. à soupe de Beurre
1 c. à soupe de Jus de citron
1 c. à soupe de Vinaigre blanc
une pincée de Sel
Une pincée de Sucre
Bouillon de poulet (en option)
Un rien de sauce épicée
Mélangez tous les ingrédients, à l’exception du vinaigre blanc et du bouillon de
poulet, au sommet d’un bain-marie, au-dessus de l’eau bouillante. Remuez
jusqu’à ce que le tout s’épaississe; environ 3 minutes. Remarque: Ne faites pas
trop chauffer ou couvrez le bain-marie. Allongez au besoin, à l’aide du bouillon
de poulet. Ajoutez le vinaigre immédiatement en remuant.
Œufs Benedict au Poulet
Préparez les œufs Benedict comme indiqué, mais en omettant le bacon
canadien. Découpez du blanc de poulet, sans os, sans peau, en tranches de la
taille d’une bouchée. Ajoutez 2 c. à soupe d’huile de cuisson dans un poêlon de
taille moyenne. Cuisez et remuez 2 à 3 minutes, ou jusqu’à ce que le tout ne
soit plus rose. Assemblez les œufs Benedict comme d’habitude.
Œufs Florentine
2 Muffins anglais, coupés et ouverts
4 Œufs
Sel et poivre pour le goût
Feuilles d’épinard en vapeur
Sauce Hollandaise
Préparation: Préparez en suivant la recette des œufs Benedict, mais remplacez
le bacon canadien par des feuilles d’épinard. Etalez les feuilles d’épinard sur
chaque moitié des muffins anglais, suivies par un œuf poché. Assaisonnez de
sel et de poivre. Répandez une cuillère de sauce hollandaise sur les œufs.
Bagel au Saumon Fumé
1 Bagel toasté ordinaire (ou le Bagel que
vous aimez)
1 tranche de Tomate (en option)
1 tranche d’Oignon
De fines tranches de saumon fumé
Fromage Philadelphia ordinaire
Câpres
Préparation: Etalez le fromage sur une moitié du Bagel. Ajoutez de fines
tranches de saumon fumé sur le fromage. Recouvrez d’une tranche de tomate
et d’oignon; saupoudrez de câpres. Etalez l’autre moitié du Bagel de fromage, et
posez dessus.

Française - 9
L5768B 07/14 West Bend®. une Marque de Focus Products Group International, LLC.
Imprimé en Chine
GARANTIE DU PRODUIT
Garantie Limitée de 1 An de l’Appareil
Focus Products Group International, LLC (“la société”) garantit “pièces et main d’œuvre” que
cet appareil est, et demeurera, exempt de défauts, pendant une durée d’un (1) an, à compter
de la date originelle d’achat, en fonction d’une preuve d’achat, si ce dernier est utilisé et
entretenu conformément au mode d’emploi. Toute pièce défectueuse de l’appareil sera
réparée ou remplacée sans frais, et à la discrétion de la société. Cette garantie ne s’applique
qu’à une utilisation domestique en intérieur.
Cette garantit ne couvre pas les dégâts, notamment toute décoloration, causés à toute surface
non collante de l’appareil. Cette garantie sera annulée, à la seule discrétion de la société, si
l’appareil est endommagé suite à un accident, à une mauvaise utilisation, à un abus, à une
négligence, par des rayures, ou si l’appareil est modifié de quelle que façon que ce soit.
CETTE GARANTIE SUPPLANTE TOUTES GARANTIES SOUS-ENTENDUES, NOTAMMENT
TOUTES GARANTIES DE VALEUR MARCHANGE, D’ADEQUATION A UN OBJET
PARTICULIER, DE PERFORMANCES OU AUTRES, QUI SONT ICI EXCLUES. EN AUCUN
CAS, LA SOCIETE NE POURRA ETRE TENUE RESPONSABLE DE TOUS DEGATS,
DIRECTS OU INDIRECTS, FORTUITS, PREVISIBLES, CONSECUTIFS OU SPECIAUX,
SURVENANT DE L’UTILISATION DE CE PRODUIT
Si vous pensez que l’appareil est tombé en panne ou devrait être réparé en étant couvert par
sa garantie, veuillez contacter le service d’assistance à la clientèle au (866) 290-1851, ou
originelle de l’achat, sera demandé pour toutes les demandes faites sous garantie ; les reçus
rédigés à la main ne seront pas acceptés. Il se peut également que l’on vous demande de
renvoyer l’appareil pour qu’il soit vérifié et évalué. Les frais de renvoi ne sont pas
remboursables. La société n’est pas responsable de la perte en transit de tout appareil
renvoyé. Valable uniquement aux USA et au Canada
PIÈCES DE RECHANGE
Les pièces détachées / de rechange, si disponibles, peuvent être commandées directement à
la société de plusieurs façons. En les commandant en ligne sur le lien www.westbend.com, par
écrivant à :
Focus Products Group International, LLC.
Attn: Customer Care Dept.
P. O. Box 53
West Bend, WI 53095
Pour commander à l’aide d’un chèque ou d’un mandat, veuillez commencer par contacter le
service d’assistance à la clientèle pour obtenir un total de commande. Envoyez par courrier
votre commande, accompagnée d’une lettre mentionnant le modèle et le numéro de catalogue
de votre appareil, que vous pourrez trouver en bas ou à l’arrière de l’appareil, une description
de la pièce ou des pièces que vous voulez commander, ainsi que la quantité désirée. Votre
chèque devra être libellé à l’ordre de Focus Products Group International, LLC.
La TVA de votre province et les frais d’envoi, seront ajoutés au montant total. Veuille patienter
deux semaines pour que la livraison et le traitement puissent avoir lieu.
Ce manuel contient des informations utiles et importantes, sur l’utilisation et l’entretien
sécurisés de votre appareil. A titre de référence future, attachez le reçu daté qui vous tiendra
lieu de preuve d’achat pour la garantie, et consignez les informations suivantes:
Date d’achat ou de réception en cadeau: ___________________________________________
Lieu d’achat et prix, si connus: ___________________________________________________
Numéro de l’article et Code de date (dessous/arrière de l’appareil):______________________
©2014 West Bend®, una Marca de Focus Products Group International, LLC.
www.westbend.com
TOSTADORA DE 4REBANADAS EGG &
MUFFIN TOASTER®
Manual de Instrucciones
Registre este y otros productos Focus Products Group International a través de
nuestro sitio web: www.registerfocus.com
No se requiere registrar el producto para activar la garantía.
Precauciones Importantes........................................................................................2
Antes de Utilizarse por Primera Vez ........................................................................3
Cómo Utilizar su Tostadora Egg & Muffin Toaster®..................................................4
Limpieza de su Tostadora Egg & Muffin Toaster®....................................................7
Consejos Prácticos...................................................................................................7
Recetas....................................................................................................................8
Garantía...................................................................................................................9
CONSERVE ESTE MANUAL DE INSTRUCCIONES PARA FUTURAS CONSULTAS

Español - 2
PRECAUCIONES IMPORTANTES
Para evitar lesiones personales o daños materiales, lea y siga todas las instrucciones y
advertencias.
Al utilizar aparatos eléctricos, siempre deben acatarse las precauciones básicas de seguridad,
entre ellas las siguientes:
•Lea todas las instrucciones.
•No toque las superficies calientes. Use las asas o perillas.
•Para protegerse contra los peligros de fuego, descargas eléctricas y lesiones no sumerja el
cordón eléctrico, los enchufes u otras partes eléctricas en agua u otros líquidos.
•Se requiere una supervisión cercana cuando este aparato electrodoméstico sea usado por o
cerca de niños.
•Siempre desenchufe el aparato electrodoméstico del tomacorriente cuando no esté en uso y
antes de limpiarlo. Permita que se enfríe antes de colocarle o quitarle piezas o antes de
limpiarlo.
•No haga funcionar ningún aparato electrodoméstico que tenga el cordón eléctrico o el
enchufe dañados, después de haber sufrido una falla o de haberse dañado de cualquier
manera. Para información relacionada con el servicio de reparaciones vea la página de
garantías.
•El uso de accesorios no recomendados por Focus Products Group International puede
causar incendios, descargas eléctricas o lesiones.
•No use este aparato electrodoméstico al aire libre.
•No permita que el cordón eléctrico cuelgue sobre el borde de una mesa o encimera, ni que
toque superficies calientes.
•No lo coloque sobre o cerca de un calentador eléctrico o de gas, ni dentro de un horno
caliente.
•Conecte el enchufe al aparato electrodoméstico primero, y luego enchufe el cordón eléctrico
al tomacorriente de la pared. Para desconectarlo, coloque cualquier control en la posición
"OFF" (apagado), y luego desenchúfelo del tomacorriente.
•No utilice el aparato electrodoméstico para usos distintos de los indicados.
•Debe tenerse extremo cuidado al mover cualquier aparato electrodoméstico que contenga
aceite caliente u otros líquidos calientes.
•No trate de reparar este aparato electrodoméstico usted mismo.
•Se suministra un cordón eléctrico corto con el fin de reducir los riesgos de enredarse o de
tropezar con un cordón más largo.
•Hay disponibles cables de extensión más largos, pero se debe tener cuidado al usarlos.
Aunque no se recomienda utilizar un cable de extensión, si debe usar uno, asegúrese de que
la capacidad eléctrica nominal marcada en el cable de extensión sea igual o mayor a aquella
del aparato. Si el enchufe es del tipo conectado a tierra, el cable de extensión deberá ser un
cordón eléctrico de 3 hilos con conexión a tierra. Para evitar halar, tropezar o enredarse con el
cable de extensión, coloque éste de manera que no cuelgue sobre el borde de la encimera,
mesa u otro lugar donde pueda ser halado por niños o tropezarse con el mismo.
•No use un tomacorriente o cable de extensión en el cual el enchufe calce flojamente, o si el
tomacorriente o el cable de extensión se calientan.
•Evite cualquier contacto con las piezas móviles.
•Alimentos de gran tamaño, paquetes con papel de aluminio o utensilios metálicos no deben
ser introducidos en una tostadora, ya que pueden suponer un riesgo de incendio o descarga
eléctrica.
•Un incendio podría iniciarse si al artefacto en funcionamiento lo cubriesen o tocasen
materiales inflamables, tales como cortinas, colgaduras, paredes, y similares.
Table of contents
Languages:
Other West Bend Toaster manuals

West Bend
West Bend 78220 User manual

West Bend
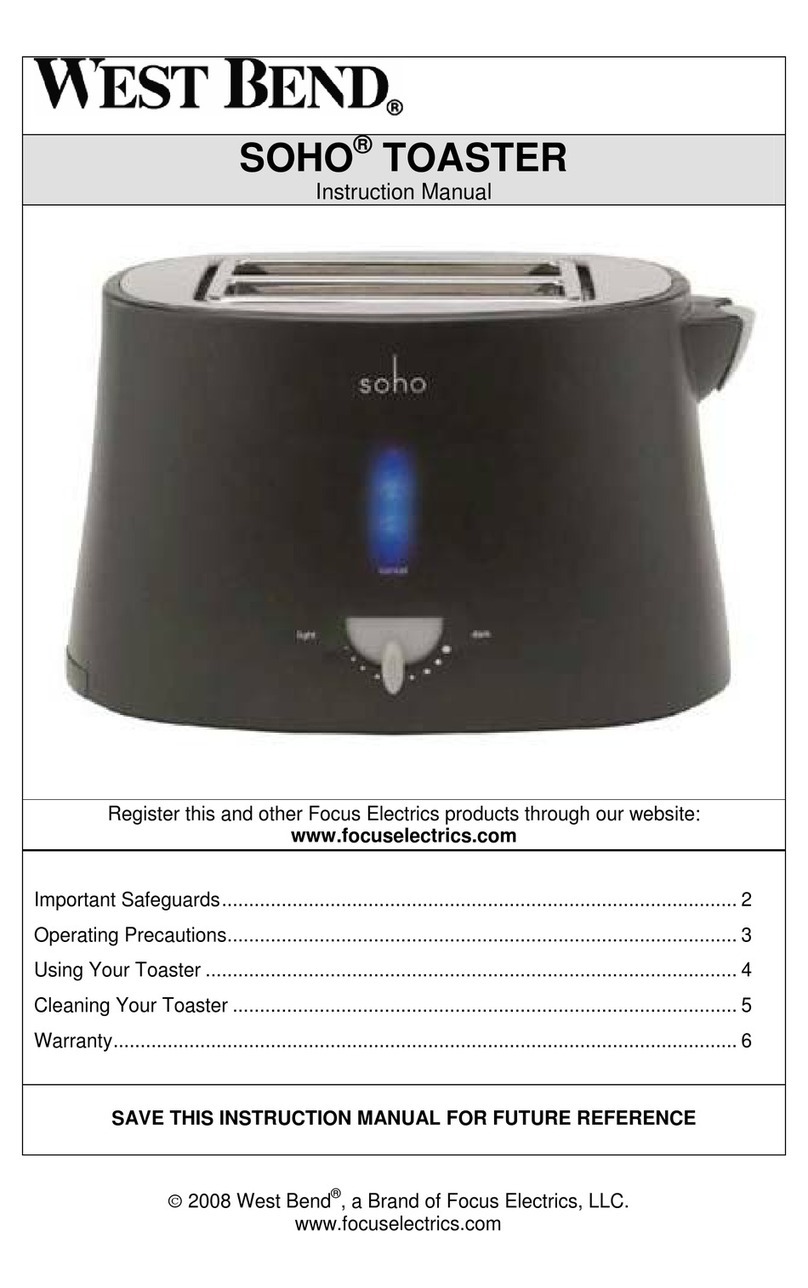
West Bend SOHO Toaster User manual

West Bend
West Bend 2-Slice Toaster User manual

West Bend
West Bend STAINLESS STEEL TOASTER User manual

West Bend
West Bend TEM500W User manual

West Bend
West Bend 4-SLICE EGG & MUFFIN TOASTER User manual

West Bend
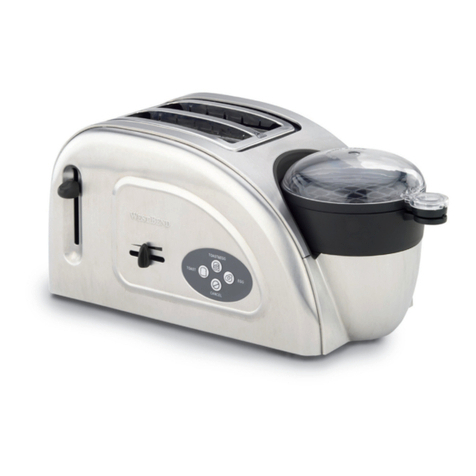
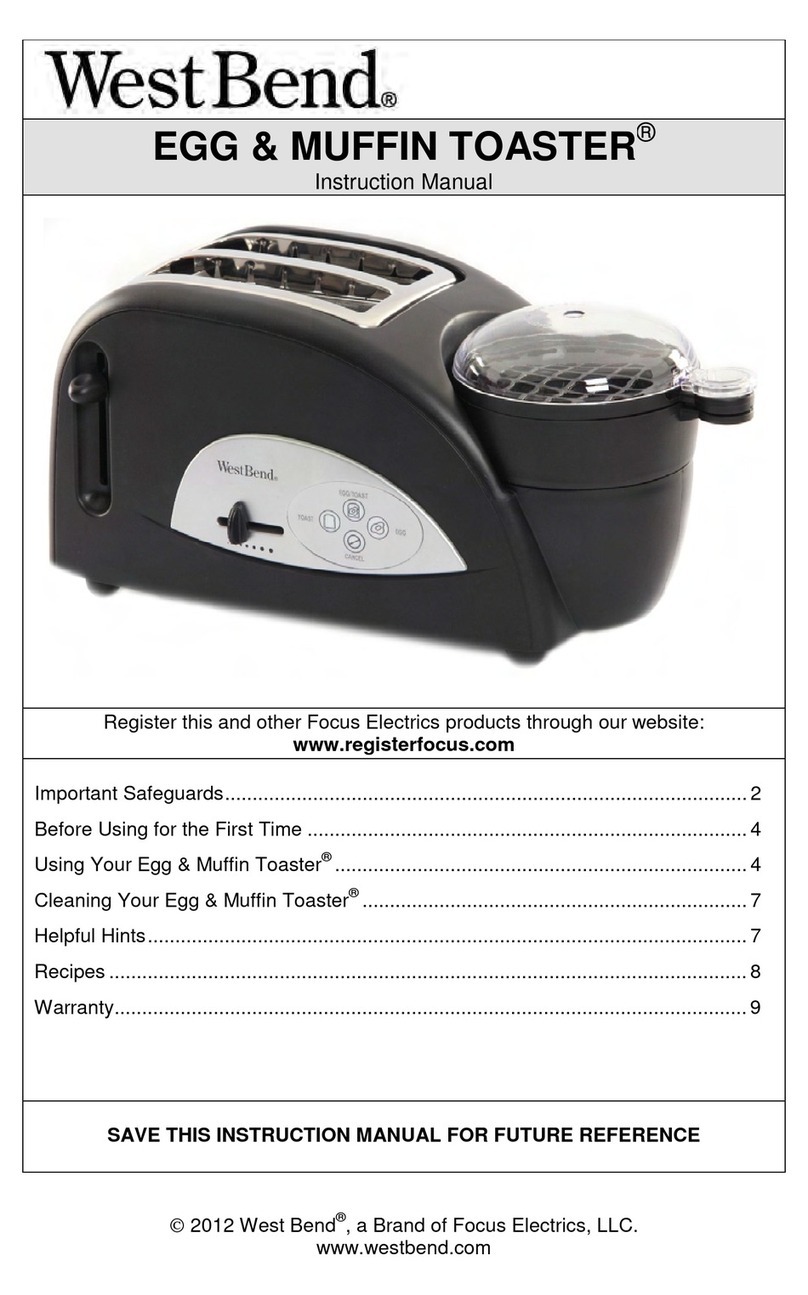
West Bend EGG & MUFFIN TOASTER User manual

West Bend
West Bend L5936 User manual

West Bend
West Bend 78822 User manual

West Bend
West Bend EGG & MUFFIN TOASTER User manual