GENERAL SAFETY RULES
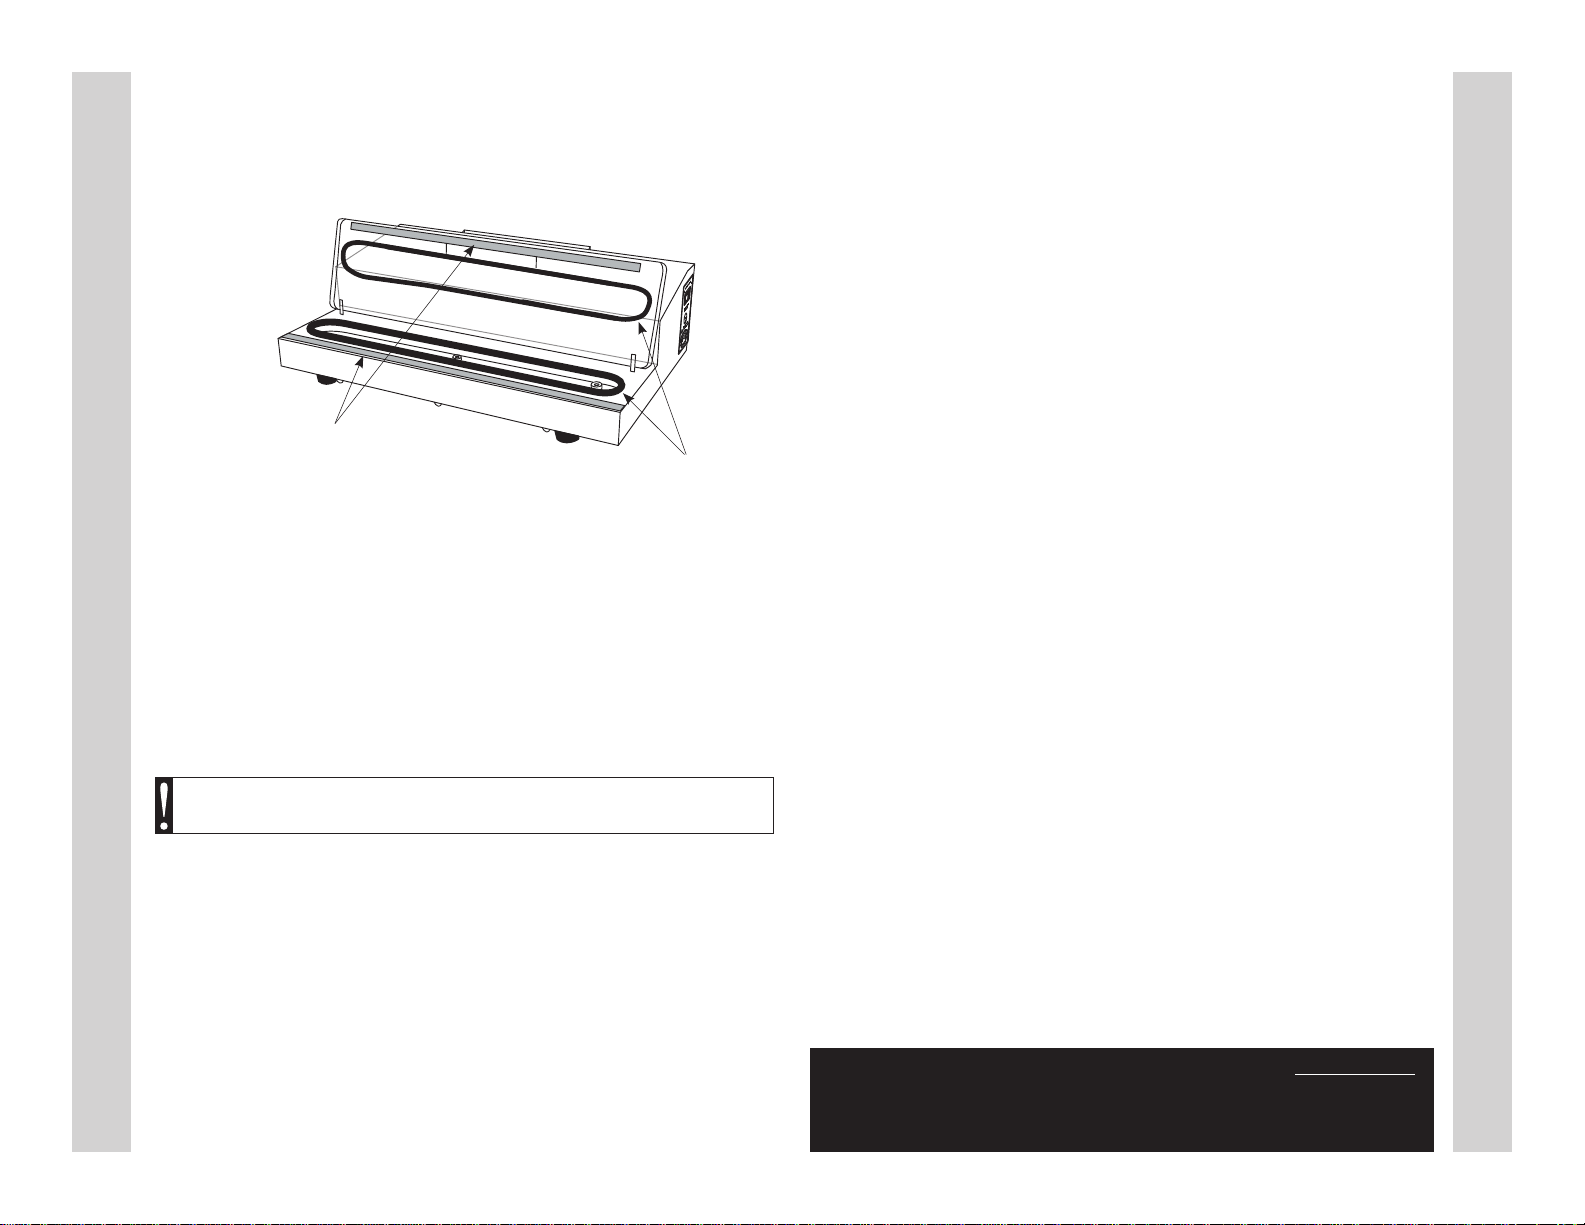
COMPONENT LIST
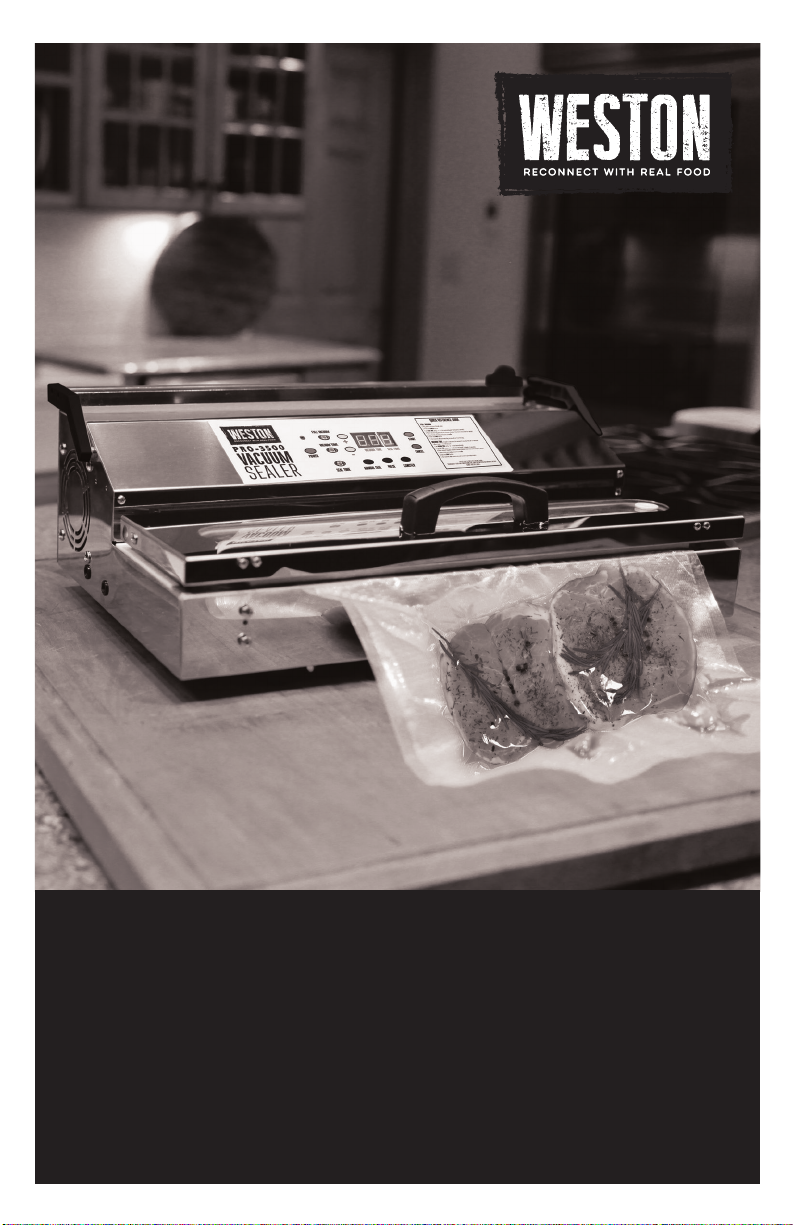
PROTECTIVE TAPE
CLEANING INSTRUCTIONS
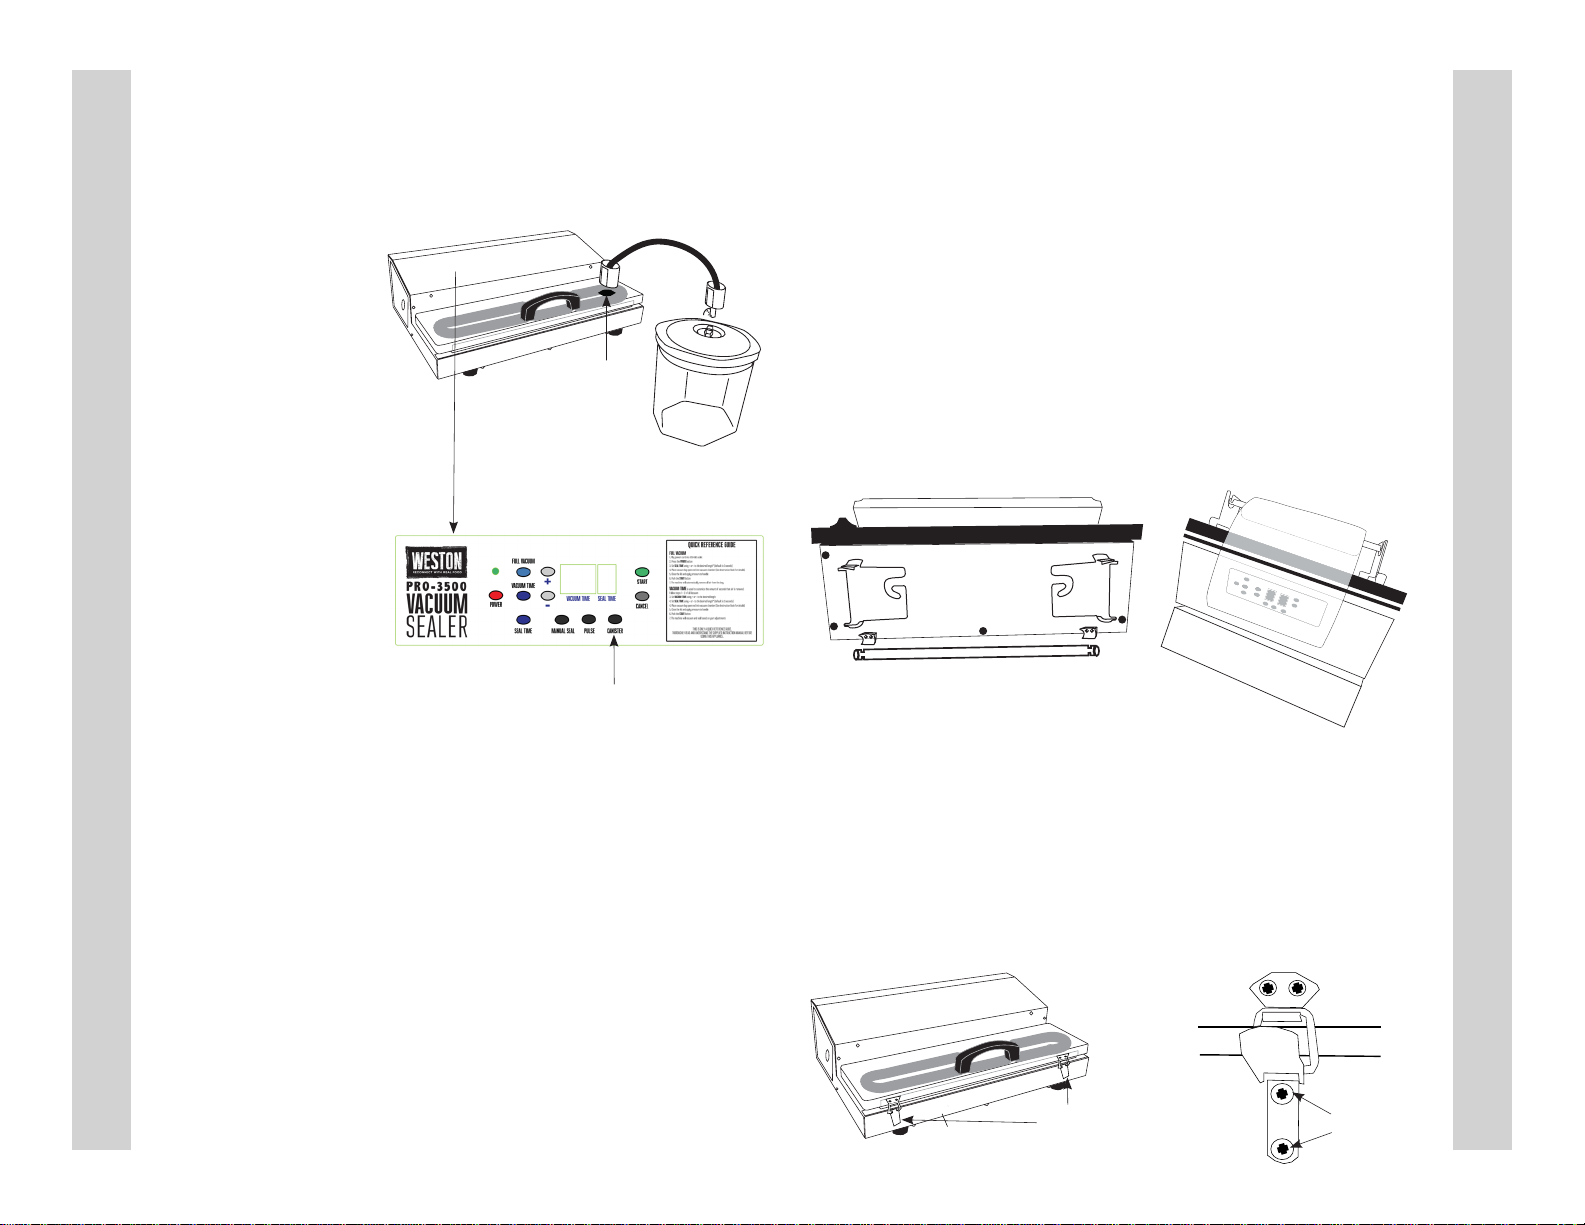
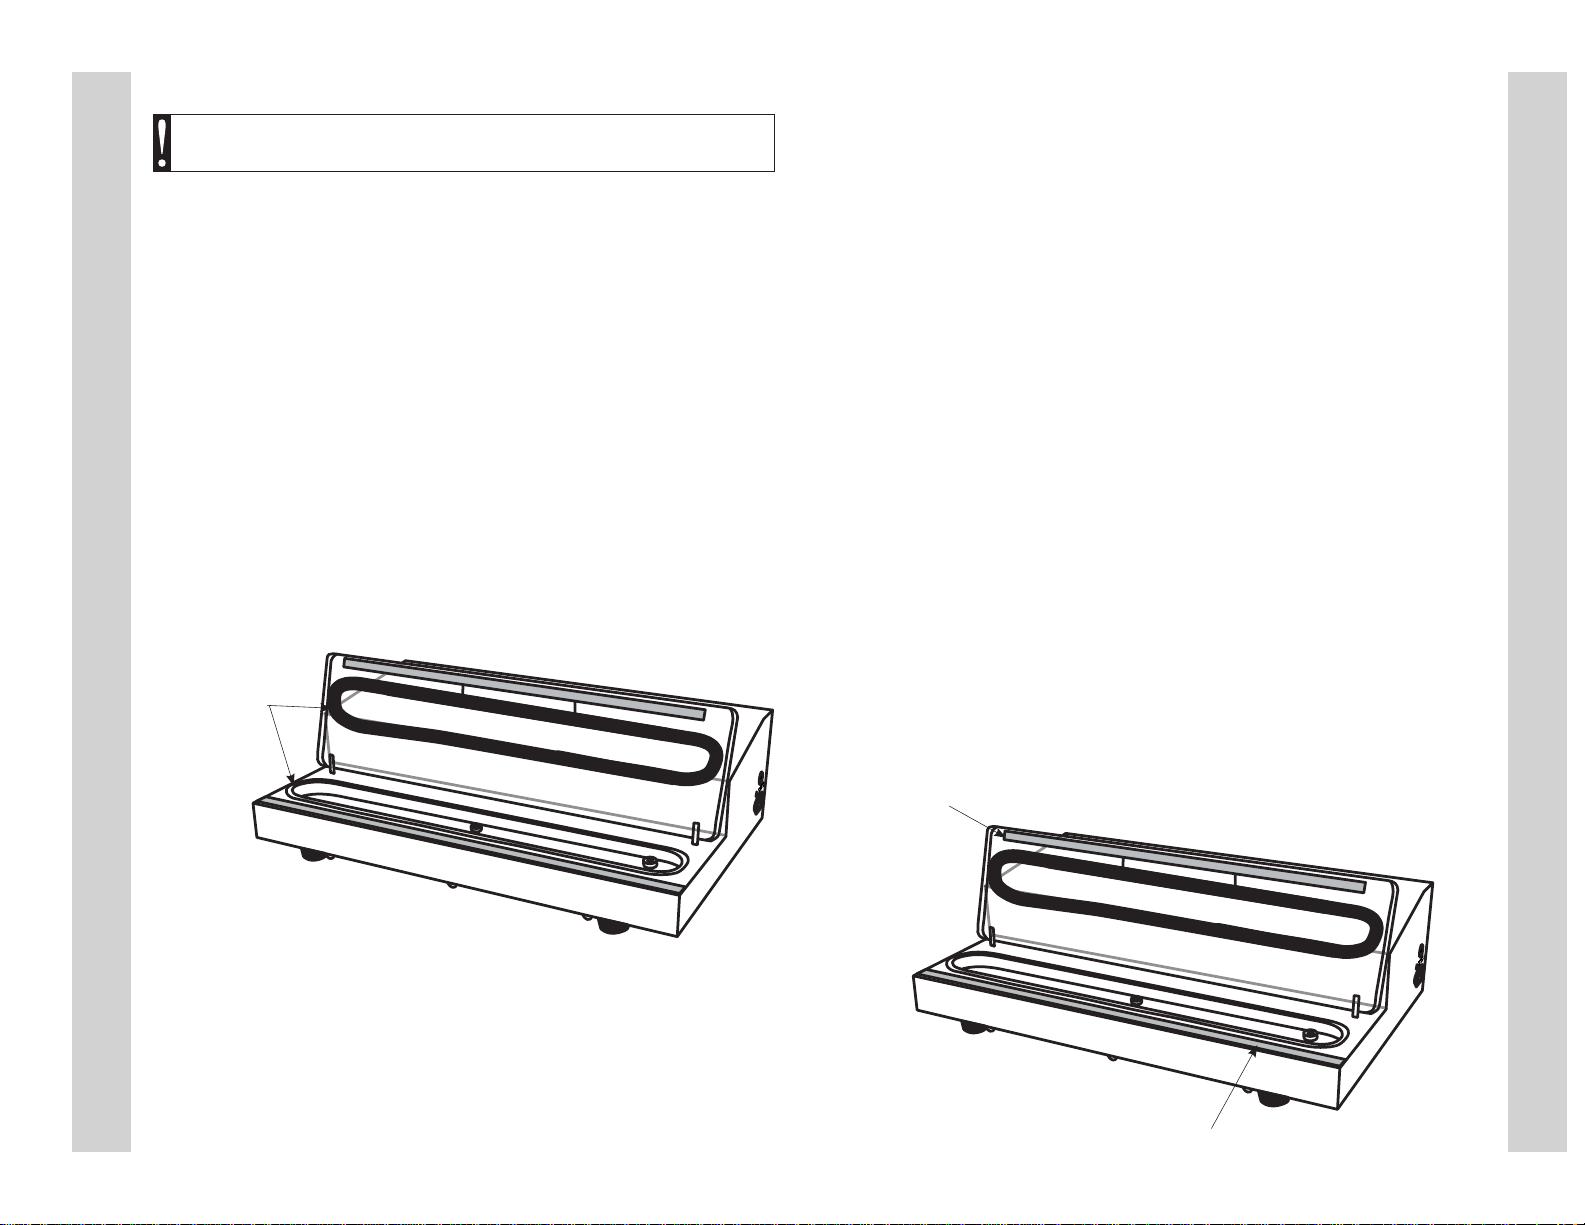
VACUUM CHAMBER SEALS
COOLING FANS
THERMAL OVERLOAD PROTECTOR
LIMIT SWITCH
GROUNDING INSTRUCTIONS
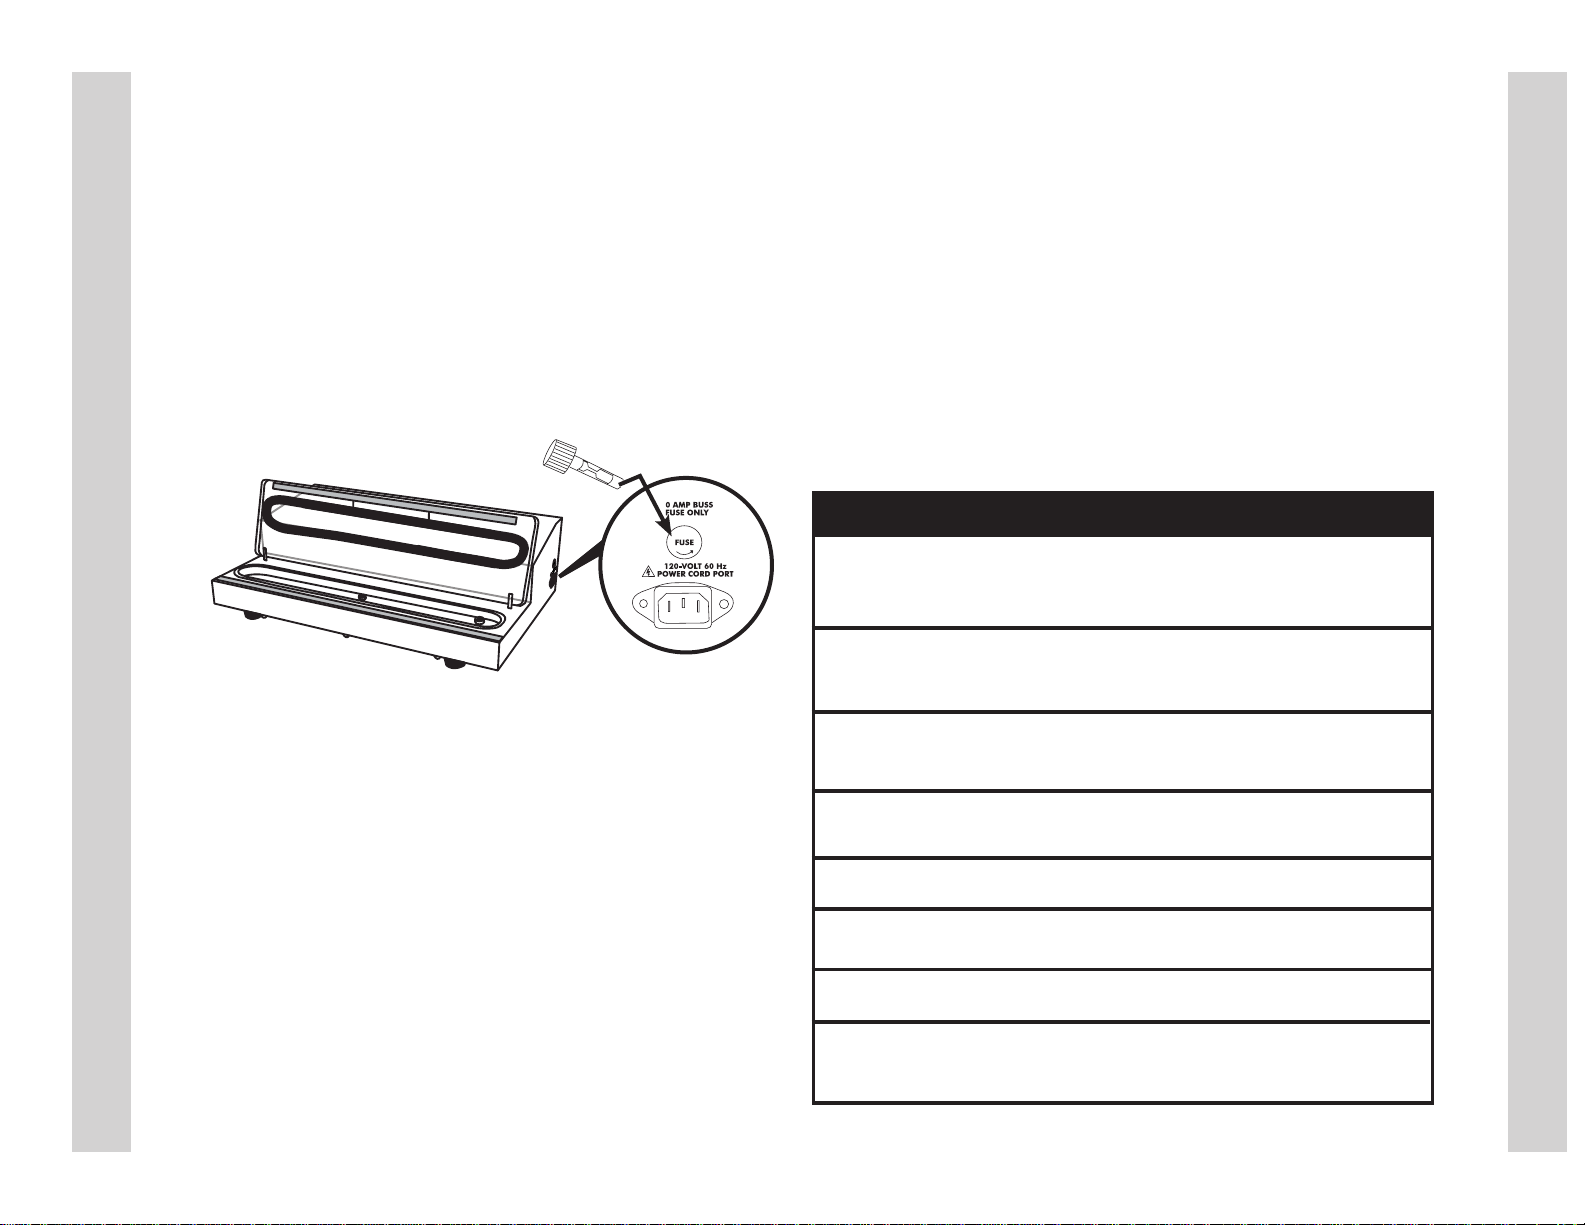
POWER SUPPLY
CONTROL BUTTONS
INITIAL TESTING OF BAG SEAL
PREPARING BAGS FROM A ROLL
USING MANUAL SEAL
SETTING SEAL TIME
FULL VACUUM OPERATION
CUSTOMIZING VACUUM TIME
VACUUM PULSE OPERATION
VACUUM SEALER CANISTERS
USING THE ROLL HOLER & CUTTER
INSTALLING LID LATCHES
SERVICE INSTRUCTIONS
REPLACING THE FUSE
STORAGE LIFESPAN GUIDELINES
FOOD SAFETY GUIDELINES
WARRANTY
REGLAS IMPORTANTES DE SEGURIDAD
LISTA DE COMPONENTES
CINTA PROTECTORA
INSTRUCCIONES DE LIMPIEZA
SELLOS DE LA CÁMARA DE VACÍO
VENTILADORS DE REFRIGERACIÓN
PROTECTOR DE SOBRECARGA TÉRMICA
INTERRUPTOR DE LÍMITE
INSTRUCCIONES PARA HACER TIERRA
FUENTA DE ALIMENTACIÓN
BOTONES DE CONTROL
PRUEBA INICIAL DEL SELLO DE BOLSA
CÓMO PREPARAR LAS BOLSAS DE VACÍO DE UN ROLLO
USO DEL MANUAL SEAL (SELLADO MANUAL)
AJUSTE DEL TIEMPO DE SELLADO
OPERACIÓN DE VACÍO COMPLETO
PERSONALIZACIÓN DEL TIEMPO DE VACÍO
OPERACIÓN DEL PULSO DE VACÍO
LATAS DE SELLADOR POR VACÍO
UTILIZACIÓN DEL PORTAROLLOS Y EL CORTADOR
INSTALACIÓN DE CIERRES DE TAPA
INSTRUCCIONES DE SERVICIO
REEMPLAZO DEL FUCIBLE
PAUTAS SOBRE LA VIDA EN ALMACENAMIENTO
SEGURIDAD DE LOS ALIMENTOS
GARANTÍA
IMPORTANTES RÈGLES DE SÉCURITÉ
LISTES DES PIÈCES
RUBAN PROTECTEUR
INSTRUCTIONS DE NETTOYAGE
GARNITURE DU CANAL D'ASPIRATION
VENTILATEURS
LIMITEUR DE SURCHARGE
INTERRUPTEUR DE POSITION
INSTRUCTIONS DE MISE À LA TERRE
ALIMENTATION ÉLECTRIQUE
BOUTONS DE CONTRÔLE
ESSAI INITIAL DE SCELLAGE DE SAC
PRÉPARATION DES SACS D'EMBALLAGE SOUS VIDE EN ROULEAU
UTILISATION DU SCELLAGE MANUEL
PROGRAMMATION DU TEMPS DE SCELLAGE
FONCTIONNEMENT DU SCELLAGE SOUS VIDE COMPLET
PERSONNALISER LE TEMPS DE MISE SOUS VIDE
FUNCIONNEMENT DE MISE SOUS VIDE PAR IMPULSION
CONTENANTS D'EMBALLAGE SOUS VIDE
UTILISATION DU PORTE-ROULEAU ET DU COUPE-SAC
INSTALLATION DES VERROUS POUR COUVERCLE
INSTRUCTIONS DE SERVICE
REMPLACEMENT DE FUSIBLE
GUIDE DE CONSERVATION DES ALIMENTS EMBALLÉS
SÉCURITÉ ALIMENTAIRE
GARANTIE
3
4-5
6
6
7
7
7
7
8
8
9
10
11
11
12
12
13
13
14
15
15
16/17
18
19
20
21
23
24-25
26
26
27
27
27
27
28
28
29
30
31
31
32
32
33
33
34
35
35
36-37
38
39
40
41
43
44-45
46
46
47
47
47
47
48
48
49
50
51
51
52
52
53
53
54
55
55
56-57
58
59
60
61
TABLE OF CONTENTS / ÍNDICE / TABLE DES MATIÈRES
2
1. ALWAYS DISCONNECT Vacuum
Sealer from power source before
servicing, changing accessories or
cleaning the unit.
2. Plug the Vacuum Sealer into a
standard 120 Volt, 60 Hz wall outlet.
Avoid using extension cords.
3. DO NOT USE the Vacuum Sealer
if the Power Cord, Plug or any other
parts are damaged. If the Power
Cord or the Vacuum Sealer is
damaged, call Customer Service.
DO NOT ATTEMPT TO REPLACE
THE CORD. Be sure to not allow
the Power Cord to drape into your
work area. Check that all parts are
operating properly, and perform the
intended functions. Check for any
other conditions that may affect the
operation.
4. NEVER use any accessories
or parts from other manufacturers.
Doing so will VOID YOUR
WARRANTY and may cause re,
electrical shock or injury.
5. Reduce risk of unintentional
starting. Make sure the Power Button
is “OFF” before attaching to the
power source.
6. KEEP FINGERS CLEAR of the
Heat Sealing Bar and Seal Bar Tape
AT ALL TIMES, these areas become
HOT. Doing so may cause serious
injury.
7. DO NOT take this appliance
apart; doing so will VOID YOUR
WARRANTY and may result in
personal injury.
GENERAL SAFETY RULES
READ AND FULLY UNDERSTAND ALL INSTRUCTIONS AND WARNINGS
PRIOR TO USING THIS UNIT. YOUR SAFETY IS MOST IMPORTANT!
FAILURE TO COMPLY WITH PROCEDURES AND SAFE GUARDS MAY
RESULT IN SERIOUS INJURY OR PROPERTY DAMAGE. REMEMBER:
YOUR PERSONAL SAFETY IS YOUR RESPONSIBILITY!
8. TO PROTECT AGAINST RISK
OF ELECTRICAL SHOCK: DO
NOT SUBMERGE THE VACUUM
SEALER INTO WATER OR LIQUID.
BE SURE THE VACUUM SEALER
IS DISCONNECTED FROM THE
POWER SOURCE BEFORE
CLEANING. Follow the “Cleaning
Instructions” in this booklet. NEVER
rinse appliance Vacuum Sealer under
tap.
9. NEVER LEAVE THE VACUUM
SEALER UNATTENDED. Be safe,
DISCONNECT the Vacuum Sealer
from power source before leaving
the work area. Close supervision is
necessary when any appliance is used
near children. This appliance is NOT to
be used by children.
10. DO NOT let the Power Cord hang
over edge of work surface.
11. Be sure the Vacuum Sealer is on
a stable work surface. Be sure all the
Vacuum Sealer Feet are stable.
12. DO NOT use the Vacuum Sealer
outdoors.
13. DO NOT use the Vacuum Sealer
while under the inuence of drugs,
medications or alcohol.
14. The Vacuum Sealer is ONLY
intended to be used with VACUUM
BAGS. For best results, only use the
recommended vacuum bags. DO
NOT USE HOUSEHOLD BAGS! Any
other uses of the Vacuum Sealer,
other than the uses described in this
booklet, could potentially damage the
appliance and void the warranty!
SAVE THESE INSTRUCTIONS 3
ENGLISH INSTRUCTIONS