2
Westward Instrucciones de operación y manual
El enchufe del aparato debe corresponder a la
toma de corriente. No modifique el enchufe de
ninguna manera. No utilice ningún adaptador de
enchufe con las herramientas eléctricas a tierra
(tierra). Tomas de corriente reducen el riesgo de
descarga eléctrica.
Evite el contacto corporal con superficies
aterrizadas tales como tuberías, radiadores,
estufas y refrigeradores. Hay un mayor riesgo de
descarga eléctrica si su cuerpo estáconectado a
tierra.
No exponga las herramientas eléctricas a la lluvia
oa la humedad. Si agua entra en una herramienta
eléctrica, aumenta el riesgo de descarga eléctrica.
No maltrate el cable. Nunca use el cable para
transportar, tirar o desenchufar la herramienta
eléctrica. Mantenga el cable lejos del calor, aceite,
bordes cortantes o piezas móviles. Los cables
dañados o enredados aumentan el riesgo de
descarga eléctrica.
Cuando se trabaja con la herramienta eléctrica,
use un cordón de extensión adecuado para uso
en exteriores. El uso de un cable adecuado para uso
al aire libre reduce el riesgo de descarga eléctrica.
Si utiliza una herramienta eléctrica en un lugar
húmedo, es necesario utilizar un dispositivo de
corriente residual (RCD) de seguridad. El uso de
un interruptor de circuito por falla a tierra (GFCI)
reduce el riesgo de descarga eléctrica.
SEGURIDAD PERSONAL
Manténgase alerta, observe lo que estáhaciendo
y use el sentido común cuando utilice una
herramienta eléctrica. No utilice una herramienta
eléctrica cuando estécansado o bajo la influencia de
drogas, alcohol o medicamentos. Un momento de
distracción mientras opera herramientas eléctricas
puede resultar en lesiones personales graves.
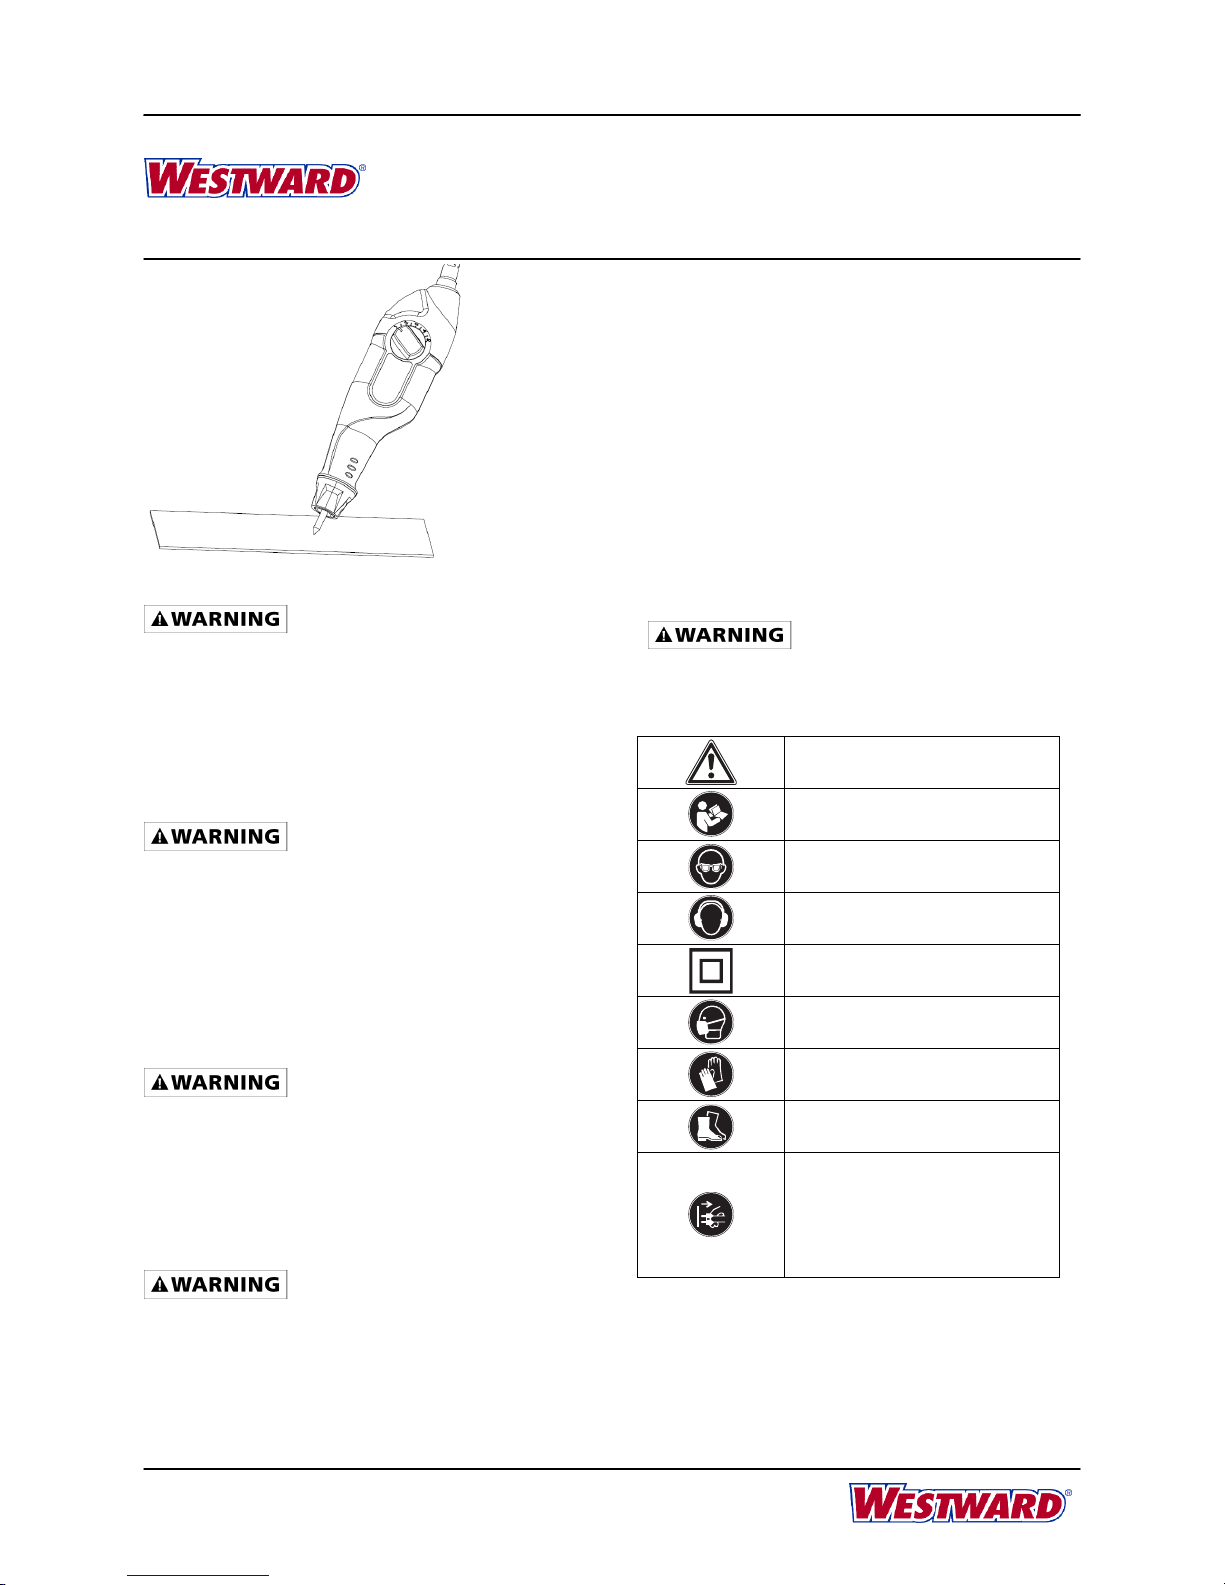
Use conjunto de protección personal. Siempre use
protección para los ojos. El conjunto de protección
como una mascarilla antipolvo, antideslizantes
zapatos de seguridad, casco o protección para los
oídos en las condiciones adecuadas reducirálas
lesiones personales.
Evite el arranque accidental. Asegúrese de que el
interruptor estáen la posición inicial antes de
conectarlo a la fuente de alimentación y / o la batería,
recoger o transportar la herramienta. Transportar
herramientas eléctricas con el dedo sobre el
interruptor o enchufar herramientas eléctricas con el
interruptor de encendido puede provocar accidentes.
Retire cualquier llave de ajuste antes de encender
la herramienta eléctrica. Una herramienta o llave
colocada en una pieza giratoria de la herramienta
eléctrica puede resultar en lesiones personales.
No se extralimite. Mantenga la postura y equilibrio
en todo momento. Esto permite un mejor control de la
herramienta eléctrica en situaciones inesperadas.
Vístase de manera adecuada. No use ropa suelta o
joyas. Mantenga su cabello, la ropa y los guantes
alejados de las piezas móviles. La ropa suelta, joyas
o el cabello largo pueden quedar atrapados en las
piezas móviles.
Si se proporcionan dispositivos para la conexión
de extracción y recolección de polvo, asegúrese
de que estén conectados y se utilicen
correctamente. El uso de recolección de polvo
puede reducir los riesgos relacionados con el polvo.
UTILIZACIÓN DE HERRAMIENTAS Y ATENCIÓN
No fuerce la herramienta eléctrica. Utilice la
herramienta eléctrica apropiada para su aplicación.
Con la herramienta adecuada, el trabajo serámás
segura y completa de manera más eficiente.
No utilice la herramienta eléctrica si el interruptor
no la enciende y se apaga. Las herramientas
eléctricas que no se puede controlar con el interruptor
es peligrosa y debe ser reparada.
Desconecte la herramienta de su fuente de
energía antes de hacer cualquier ajuste, cambiar
accesorios o almacenar. La seguridad preventiva,
tales medidas reducen el riesgo de que la
herramienta eléctrica de forma accidental.
Guarde las herramientas fuera del alcance de los
niños y no permita que personas no
familiarizadas con la herramienta eléctrica o estas
instrucciones para operar la herramienta eléctrica.
Las herramientas eléctricas son peligrosas en manos
de personas inexpertas.
Mantenga las herramientas eléctricas. Inspeccione
la herramienta para la unión de las partes móviles,
piezas rotas, mala alineación, y otras condiciones que
pueden afectar el funcionamiento de la herramienta.
Si estádañada, repare la herramienta eléctrica antes