manuals.online logo
Brands
  1. Home
  2. •
  3. Brands
  4. •
  5. Whale
  6. •
  7. Water Pump
  8. •
  9. Whale Gulper BP2552B User manual

Whale Gulper BP2552B User manual

Gulper Toilet Pump
Ensure all relevant personnel read the points listed
below and that a copy is passed on to the end user.
Read the points listed below before installation and
use of equipment.
The Whale Gulper Toilet pump is designed to pump
macerated and non-macerated toilet waste without
blocking. It offers a reliable means of emptying
waste holding tanks overboard and may be used in
vacuum toilet systems.
Ensure pump inlet and outlet valves are assembled
in correct orientation (Fig.1). Check that valves are
properly seated and inner and outer valve housings
are tightened fully.
1. Mount the pump above the level of the holding
tank. If this is not possible, fit a service valve on the
holding tank side of the pump. This prevents waste
draining into the pump during maintenance.
2. Mount the pump horizontally.
3. Direction of flow can easily be altered by loosen-
ing the screws which hold the clamping rings.
Rotate the pump head to the required angle, check
direction of flow and re-tighten (Fig.2).
Note:
a) The pump is designed to work at a maximum
lift/head combination of 3m (10ft). This includes
height of pump above holding tank outlet and
distances from pump to the highest point in the
discharge line and distance of seacock discharge
below waterline.
b) As the holding tanks on most boats are installed
below the waterline it is essential that proper siphon
breaks (vented loops) are installed to prevent siphon-
ing water into the toilet by leakage past the suction
or discharge valves of the pump.
4. A typical installation is shown in (Fig.3).
5. Position the pump in a dry, ventilated area that
allows maintenance access. Fix the pump in
position by attaching the screws and washers provid-
ed through the rubber feet.
1. It is recommended to use 38mm (11/2")smooth
bore thick walled non-collapsing hose which is
designed to minimise the permeation of waste
system odours.
2. To reduce the likelihood of permeation of odours,
keep the hose runs as short and as straight as
possible. Avoid dips in the hose which will remain
“wet”. Sweep connections instead of elbows should
be used whenever possible.
3. Connect the inlet and outlet hose to the pump
ensuring the flow direction is correct (Fig.1). Two
stainless steel hose clamps should be used at each
connection.
4. Where appropriate the Whale Diverter Valve
(DV5606), which has been specifically designed to
handle toilet waste should be used.
5. Install seacocks, deck fittings, etc. as per
manufacturers recommendations.
6. Do not connect pump directly in line with a deck
pumpout fitting.
Note:
An in-line fuse assembly is already fitted. This is
to prevent serious damage in the event of system
blockages. Ensure valves, seacocks etc. are
fully open before operating the pump.
1. Use recommended replacement fuse and correct
wire size (see specifications).
2. Connections for a typical holding tank pump out
system are shown inn Fig.4.
3. Connect the power cable to the spade terminals
on the pump using crimped on connectors. Note: the
pump is polarity sensitive and will not operate if
connected wrongly. Protect the cable where it runs
through holes or over sharp edges.
4. Wiring must comply with applicable electrical
standards.
1. The pump is rated for up to 40 minutes continuous
running.
Warning:- Pump motor casing can become hot. Avoid
prolonged contact.
2. Always fit correct fuse.
3. Unnecessary running will reduce the life of the
valves and diaphragm. Turn off the pump when
leaving the boat. If some power has to be
maintained install a dedicated pump switch (Fig.5).
4. Ensure valves are seacocks are open before
operating pump.
5. Do not flush paper towels or feminine hygiene
Electrical Connections
Assembly
Application
To the User
To the Fitter Plumbing
Installation
Operation
products. Keep paper usage to a minimum.
6. Ensure system is properly vented. To prevent
odours, run vent lines from siphon breaks to vent fit-
tings above maximum heeled water line.
7. Keep pump manufacturer’s recommended spares
kit on board (also toilet system spares).
Pump
1. Isolate power to pump and close service valve, if
fitted before dismantling pump.
Place a drip tray below pump head and inlet and out-
let hoses during maintenance.
Valve Replacement/Inspection
1. Disconnect the inlet and outlet hoses and unscrew
outer and inner valve housings to give access to the
valves.
2. The valves should be flexible and the opening silt
should be closed to its relaxed state. Trapped debris
in the valves or valve housings should be removed.
3. When refitting ensure the valves are assembled in
the correct orientation (Fig.1).
Diaphragm Replacement/Inspections
1. Remove the pump head clamping rings by
unscrewing the two clamping screws which will
release the pump head and allow easy access to the
diaphragm.
2. To replace/inspect diaphragm it is not necessary to
disassemble valves. This will minimise spillage.
3. Remove diaphragm by undoing 8mm locking nut
holding diaphragm plate against diaphragm and
crank arm.
4. When re-assembling ensure that the outer edge of
the diaphragm is located securely in the grooves
between the body and the gear housing. Failure to
do so will cause priming/vacuum creation problems.
5. It is important that the diaphragm plate is assem-
bled with the rounded edge towards the diaphragm.
6. Refit the locking nut and clamping ring and tighten
screws.
1. Periodically check all connection clamps for slack
and corrosion and replace as necessary.
2. Use toilet cleaners made specifically for marine
toilets. DO NOT USE bleach or drain cleaner. Rinse
and flush the holding tank after each pump out. This
will dilute any residual waste, and help prevent
blockage and reduce odours.
3. Properly winterize the toilet system. As a rule it is
best to leave the system completely drained and dry.
Pump operates but no waste pumped ?
Check:
a) all connections are airtight and secure.
b) seacocks/valves are open.
c) clamping ring screws are tight and diaphragm fit-
ted correctly.
d) diaphragm/valves do not need replacement.
Pump will not operate?
Check:
a) electrical connections / fuse. If fuse blows check
for closed valves and blocked pipes.
b) correct polarity connections to pump.
Spares Kit Part No: AK1557.
Any questions contact our service desk -
Email: [email protected].
This Whale product is covered by 1 years warranty.
Please see the enclosed document for details of our
statement of limited warranty.
We hereby declare that the Gulper 220 conforms with
the provisions of the following EC Directives:
Electromagnetic Compatibility Directive 89/336/EEC,
amended by 92/31/EEC and 93/68/EEC on the
approximation of the laws of the member states.
CE mark affixed 26/06/06
Basis on which conformity is declared. The Gulper
220 complies with the protection requirements of the
EMC Directive.
Standards applied
EN55014-12000 and EN55014-2:1997.
Signed:
David Cresswell
Position: Engineering Director
Fault Finding
Maintenance
General
Warranty
Service Kits
Declaration of Conformity
Valves Pump Valves
Fig.2 Altering Flow Direction
Loosen clamping ring screws
Fig.4 Electrical Connections
Fig.1 Pump Head
Fig.4 Typical Pumpout Installation
Munster Simms Engineering Ltd.
Old Belfast Road, Bangor, N. Ireland BT19 1LT Tel: +44 (0)28 9127 0531 Fax: +44 (0)28 9146 6421
Web: www.whalepumps.com Email: [email protected] Ref No. 180.62_v2_0410
Gulper Toilet Pump Specifications
Product Code BP2552B BP2554B
Voltage 12V d.c. 24V d.c.DC
Recommended Fuse Size 10 amp automotive 5 amp automotive
Weight 2.12kg (43/4lbs)
Open Flow Rate Per Minute 18ltrs (43/4US gals)
Hose Conenctions 38mm (11/2”)
Minimum Wire Size 1.5mm2 (16AWG)
Materials Glass filled nylon, bronze, EPDM, Nitrile, Hypalon, Acetal,
stainless steel, brass, aluminium.
Maximum Head 3m (9.8ft)
Maximum Lift 3m (9.8ft)
Maximum Head & Lift 3m (9.8ft)
Dry Running Current 4amps 2amps
Vacuum Capacity 30mm (12”) of mercury
Noise 72db
Ignition Protected to ISO8846

This manual suits for next models

1

Other Whale Water Pump manuals

Whale IS1218B Assembly Instructions

Whale

Whale IS1218B Assembly Instructions

Whale Gulper BP2082B User manual

Whale

Whale Gulper BP2082B User manual

Whale BE0500 User manual

Whale

Whale BE0500 User manual

Whale Gulper Grouper BP4572 User manual

Whale

Whale Gulper Grouper BP4572 User manual

Whale AK1316 User manual

Whale

Whale AK1316 User manual

Whale GW0810 User manual

Whale

Whale GW0810 User manual

Whale mk6 User manual

Whale

Whale mk6 User manual

Whale Gulper BP2082B User manual

Whale

Whale Gulper BP2082B User manual

Whale GP0418 User manual

Whale

Whale GP0418 User manual

Whale Gulper 220 User manual

Whale

Whale Gulper 220 User manual

Whale WD1815 User manual

Whale

Whale WD1815 User manual

Whale Gusher 30 Series Assembly Instructions

Whale

Whale Gusher 30 Series Assembly Instructions

Whale Bilge IC Series User manual

Whale

Whale Bilge IC Series User manual

Whale Watermaster Series Instruction Manual

Whale

Whale Watermaster Series Instruction Manual

Whale BP5012 User manual

Whale

Whale BP5012 User manual

Whale Watermaster Mains Assembly Instructions

Whale

Whale Watermaster Mains Assembly Instructions

Whale UF2415B Assembly Instructions

Whale

Whale UF2415B Assembly Instructions

Whale BP0527 User manual

Whale

Whale BP0527 User manual

Whale UF2025 Assembly Instructions

Whale

Whale UF2025 Assembly Instructions
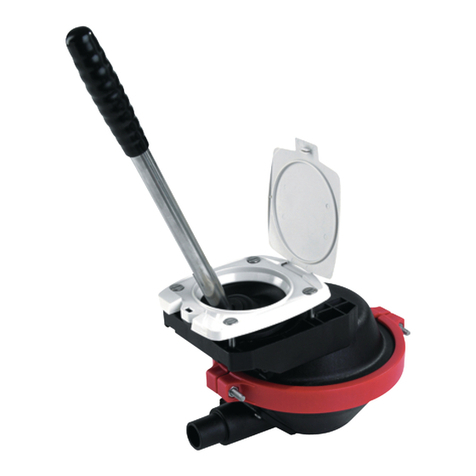
Whale Watermaster FW0814 User manual

Whale

Whale Watermaster FW0814 User manual

Whale Gulper 320 User manual

Whale

Whale Gulper 320 User manual

Whale Supersub SS5022 Instruction sheet

Whale

Whale Supersub SS5022 Instruction sheet

Whale orca auto 1300 User manual

Whale

Whale orca auto 1300 User manual

Whale Gusher 10 MK3 BP3708 User manual

Whale

Whale Gusher 10 MK3 BP3708 User manual

Popular Water Pump manuals by other brands

PFT RITMO L FC-230V plus operating manual

PFT

PFT RITMO L FC-230V plus operating manual

Zoeller ProPak 507 Series installation instructions

Zoeller

Zoeller ProPak 507 Series installation instructions

KABI 40177 Instructions and precautions

KABI

KABI 40177 Instructions and precautions

Xylem Rule 25S-6W instruction manual

Xylem

Xylem Rule 25S-6W instruction manual

BLACKMER SGLD2 Installation, operation and maintenance instructions

BLACKMER

BLACKMER SGLD2 Installation, operation and maintenance instructions

Server 07794 quick start guide

Server

Server 07794 quick start guide

TriContinent C3000 Operator's manual

TriContinent

TriContinent C3000 Operator's manual

Sulzer AS 0530 Installation and operating instructions

Sulzer

Sulzer AS 0530 Installation and operating instructions

Pentair Aurora PVM Series Installation, operation, and parts manual

Pentair

Pentair Aurora PVM Series Installation, operation, and parts manual

Flotec FPSC5000A owner's manual

Flotec

Flotec FPSC5000A owner's manual

IBO E-IBO 15-14 manual

IBO

IBO E-IBO 15-14 manual

Nibe ESV 20 installation instructions

Nibe

Nibe ESV 20 installation instructions

Becker KVT 3.80 operating instructions

Becker

Becker KVT 3.80 operating instructions

Glentronics PRO Series Instruction manual & safety warnings

Glentronics

Glentronics PRO Series Instruction manual & safety warnings

Reverso AFP- 80 manual

Reverso

Reverso AFP- 80 manual

Bosch EasyInflate 18V-500 Original instructions

Bosch

Bosch EasyInflate 18V-500 Original instructions

Graco 246830 instruction manual

Graco

Graco 246830 instruction manual

Ametek T-900 Series Operation manual

Ametek

Ametek T-900 Series Operation manual

manuals.online logo
manuals.online logoBrands
  • About & Mission
  • Contact us
  • Privacy Policy
  • Terms and Conditions

Copyright 2025 Manuals.Online. All Rights Reserved.