manuals.online logo
Brands
  1. Home
  2. •
  3. Brands
  4. •
  5. Whirlpool
  6. •
  7. Range
  8. •
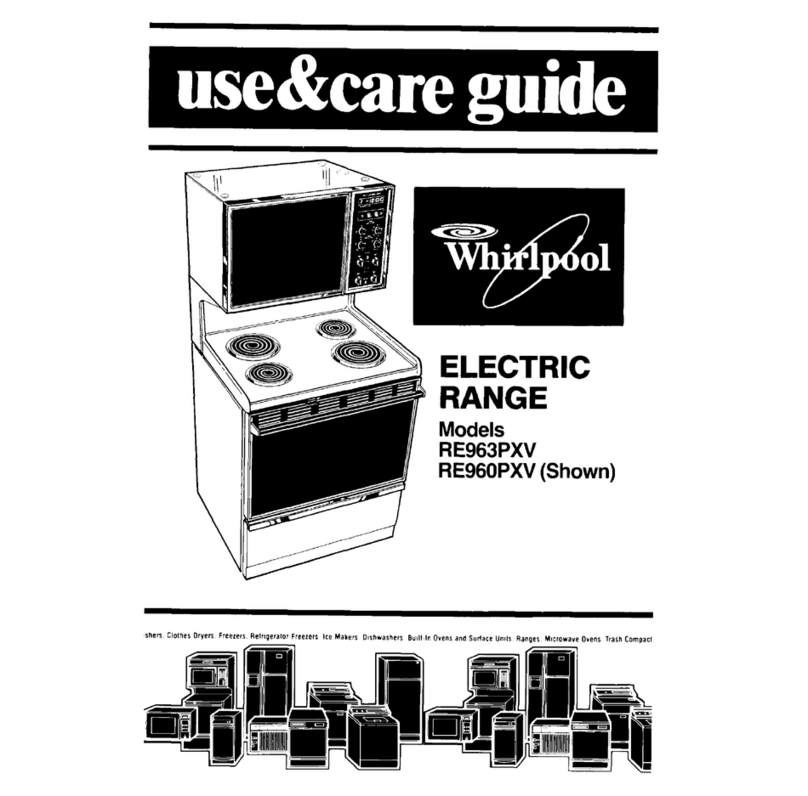
  9. Whirlpool RE960PXK User manual

Whirlpool RE960PXK User manual

Other manuals for RE960PXK

1

This manual suits for next models

1

Other Whirlpool Range manuals

Whirlpool FGP335BL2 User manual

Whirlpool

Whirlpool FGP335BL2 User manual

Whirlpool Roper FES325RQ1 User manual

Whirlpool

Whirlpool Roper FES325RQ1 User manual

Whirlpool GS395LEG User manual

Whirlpool

Whirlpool GS395LEG User manual

Whirlpool RJE-340P User manual

Whirlpool

Whirlpool RJE-340P User manual

Whirlpool RS660BXV User manual

Whirlpool

Whirlpool RS660BXV User manual

Whirlpool RJE-385P User manual

Whirlpool

Whirlpool RJE-385P User manual

Whirlpool 98014106 User manual

Whirlpool

Whirlpool 98014106 User manual

Whirlpool RS696PXGB10 User manual

Whirlpool

Whirlpool RS696PXGB10 User manual

Whirlpool RJE-960P User manual

Whirlpool

Whirlpool RJE-960P User manual

Whirlpool RF301OXT User manual

Whirlpool

Whirlpool RF301OXT User manual

Whirlpool RF361 BXD User manual

Whirlpool

Whirlpool RF361 BXD User manual

Whirlpool WFE260LXS0 User manual

Whirlpool

Whirlpool WFE260LXS0 User manual

Whirlpool RF3020XD User manual

Whirlpool

Whirlpool RF3020XD User manual

Whirlpool SS373PEX User manual

Whirlpool

Whirlpool SS373PEX User manual

Whirlpool TGP305RV1 User manual

Whirlpool

Whirlpool TGP305RV1 User manual

Whirlpool RS610PXG Owner's manual

Whirlpool

Whirlpool RS610PXG Owner's manual

Whirlpool GS440LELB0 User manual

Whirlpool

Whirlpool GS440LELB0 User manual

Whirlpool WEG745H0LZ Specification sheet

Whirlpool

Whirlpool WEG745H0LZ Specification sheet

Whirlpool IGS325RQ1 User manual

Whirlpool

Whirlpool IGS325RQ1 User manual

Whirlpool RF365PXX User manual

Whirlpool

Whirlpool RF365PXX User manual

Whirlpool WFG515S0JW Quick start guide

Whirlpool

Whirlpool WFG515S0JW Quick start guide

Whirlpool CGS365H Operating instructions

Whirlpool

Whirlpool CGS365H Operating instructions

Whirlpool YWFE710H0AW0 User manual

Whirlpool

Whirlpool YWFE710H0AW0 User manual

Whirlpool RS696PXY User manual

Whirlpool

Whirlpool RS696PXY User manual

Popular Range manuals by other brands

Maytag MGR5875QDW - 30 Inch Gas Range Use and care guide

Maytag

Maytag MGR5875QDW - 30 Inch Gas Range Use and care guide

Frigidaire FFGF3024SS use & care

Frigidaire

Frigidaire FFGF3024SS use & care

Capital Precision Series GCR484W Specifications

Capital

Capital Precision Series GCR484W Specifications

Officine Gullo GGS8P Installation and use instruction

Officine Gullo

Officine Gullo GGS8P Installation and use instruction

LG LSD4913 Series owner's manual

LG

LG LSD4913 Series owner's manual

Kenmore 4101 - Elite 30 in. Slide-In Electric Range installation instructions

Kenmore

Kenmore 4101 - Elite 30 in. Slide-In Electric Range installation instructions

Moffat Blue Seal Evolution G576 Technical data sheet

Moffat

Moffat Blue Seal Evolution G576 Technical data sheet

CornuFé C1NF user guide

CornuFé

CornuFé C1NF user guide

GE JGS650SEFSS Dimensions and installation information

GE

GE JGS650SEFSS Dimensions and installation information

LG LDG3015ST Manual De Propietario

LG

LG LDG3015ST Manual De Propietario

Samsung FCQ321HTUW Service manual

Samsung

Samsung FCQ321HTUW Service manual

Kenmore 790.45712 Use & care guide

Kenmore

Kenmore 790.45712 Use & care guide

Wolf CHR CHSSR owner's manual

Wolf

Wolf CHR CHSSR owner's manual

Smeg Built-in Microwave Oven Instructions for the user

Smeg

Smeg Built-in Microwave Oven Instructions for the user

Zanussi ZCG054G user manual

Zanussi

Zanussi ZCG054G user manual

GE JCSS630 quick start guide

GE

GE JCSS630 quick start guide

Samsung NX58M9960P series installation manual

Samsung

Samsung NX58M9960P series installation manual

Hotpoint RB524R Use and care & installation instructions

Hotpoint

Hotpoint RB524R Use and care & installation instructions

manuals.online logo
manuals.online logoBrands
  • About & Mission
  • Contact us
  • Privacy Policy
  • Terms and Conditions

Copyright 2025 Manuals.Online. All Rights Reserved.

013thINCH
FREE-STANDINGEYE-1EVEk
ELECTRKZRANGE /
COntinuous-Cleaning -
Upper Oven b “\
Plug-In
Surface Unlf \
C’ooktop light
Porcelafn4namel
Ccpy
this
r
fOrmct1cn I: “lese spaces Keep this book,
your warranty ant? sales slop tsgether in a handy place.
Service Company and Phone Number
Saa the “CookIng Gulde”for Important safety Informatlon.
Proper instaltation and safe use of your range are your
personal responsibilities. Read this “Use and Care Gulde”and the
‘*Cooking Gulde”carefully for important use and safety informatlon.
Youmust be sure your range is...
l
tnstat4ed and leveted on u floor
that wt4l hold the weight;
l
installed in o well-ventilated
area protected from the
weather;
6 properly connected to the cor-
rect electric supply and
growruing. [See “tnstollotion
tnstrIJc~ons.“]
You
mud be sure your range Is...
l
used only for jobs expected
of home ranges;
l
used only
by people who
con
operate it property;
. property mointalned.
Contents
Responsiur .!,e>
:nstallatlcr
Proper ;:$L’
Sa tery
Using Your Konge
Surface Lnlt Controls
Setting !‘le Clot k
iJsing the Minute Tlrnc
Oven Controls
Oven 3electors
Oven Ternperarure -il,+f: ,-
Baking or Roasting
Adjusting the Over? lemperc-jture
(Controls
Brollirrg
Using the Automatic MEALTIMER, Cl&k
The Oven Vent
The Optional Rotisserie
L
-- “esscry (Zdnr-llig $.,’
*
:-,t’Gven Lights IC
2 ?l
‘I TVe Cooktop Light
.l Cleaning and Caring for Your Range I?
c :~ xntrol Panel ana Knobs 12
L ;,j’tace Units and Reflector Bowli 42
5 L!ft-Up Cooktop 13
c
_, Removing the Storage Drawer 14
5 @mcving the Upper Oven Rack
5 S..rlaes 14
5 The Continuous-Cleaning Upper Oven ?5
h The i 3wer Oven Self-Cleaning Cycle 17
C!eaning Chart 2c
6 If You Need Service or Assistance 21
7 1 Before Calling for Assistance 21
6 i If You Need Assistance 22
9 3 If You Need Service 22
9 4 If You Have a Problem 22
d
L
Ushg your range
Minute Timer
Start Time Knob
Upper Oven
Selector
Lower Oven
Signal Light
Lower Oven
Selector
Cooktop Lrght
Switch
Surface Unit
Controls
Surface Unrl
Signal Lrghts
Manual Oven
Light Swatch
Digital Automatic
MEALTIMER’ Clock
Stop Time Knob
Upper Oven
Signal Light
Adjustable Upper Oven
Temperature Control
Adjustable Lower Oven
Temperature Control
Lock Light
Clean Light
SURFACE UNIT CONTROLS
Control knobs must
be pushed in betore
e
Y-
One of the signal
lights will glow to
remind you which
surface unit is on. Be
sure all signal lights
are oft when you are
not cooklng.
Slgnal lights match
locafion of surface
units on cooktop
Until you get used to the settings, use the following as a guide.
Use HI to start
foods cooking or
to brrng liquids to a
boil Surface unit
will not turn red
If good contact Is
made with bottom
of pan.
‘Tmk
4
Use MED-HI to
hold a rapid boil
or to try chicken
or pancakes.
Use MED for
gravy, puddings
and icings, or
to cook large
amounts or
vegetables.
Use MED-LO to
keep load cook-
ing after starting
it on a higher
setting.
See “The Accessory Canning Kit” (page 9) and
your “Cooking Guide” for important utensil
information.
Use LO to keep
load warm until
ready to serve.
Set the heat
higher or lower
wlthln the LO
band to keep
food at the tem-
perature you
want.
SETTING THE CLOCK
Push in and turn the Minute Timer Knob to set the Clock
1.
Push In Mlnute Tlmer Knob and turn 2. let the Mlnute Timer Knob pop out. Turn
clockwise until clock digits show the right counterclockwise until the Minute Timer
time of day dial shows OFF The clock setting will
change it you push in when turning.
USING THE MINUTE TIMER
DO NOT PUSH IN THE KNOB when setting the Minute fimer.
1
. Without pushing in the Minute Timer
Knob, turn It until the time showing in the
window ISlonger than you want
2. Without pushing in, turn the knob back so
the setting you want shows in the windo:v
3. When the time is up, a buzzer will sound.
To stop the buzzer, turn the
dial
to OFF
without pushing in the knob.
PUSHING IN AND TURNING THE KNOB CHANGES THE CLOCK SETTING.
THE OVEN CONTROLS
Both ovens are controlled by two knobs. an Oven Selector and an Oven Tem-
perature Control. Both knobs
for ePher oven must be on 0 setting for that oven to heat
THE OVEN SELECTORS
With an Oven Selector on
BROIL, only the top element
heats. (Broiling, pg. 7).
With an Oven Selector on With an Oven Selector on
BAKE, the bottom element TIMED, the MEALTIMER’ Clock
does most of the work. The can be used to turn that oven
top element heats, but does on and off automatically.
not turn red. (Baking, pg. 6). (MEALTIMER Clock, pg. 8).
THE OVEN TEMPERATURE COMROLS
Use an Oven Temperature When both the Oven Selec-
Control to set baking or roast- tor and Temperature Control
ing temperature when that are on BROIL, the broil ele-
Oven Selector is on BAKE ment heats all the time. The
or TIMED.
‘Tmk
Oven Temperature Control
can be set on a temperature
for slower broiling (see Broil-
ing, page 71.
5
Put the rack(s) where you
want them before turning on
the oven.
Rack(s) should be placed
so food can be centered in
the oven Always leave at
least 11zto 2 inches (4-5 cm)
between the sides of the pan
and the oven walls and pans.
For more information, see the
“Cooklng Guide.”
Set the Oven Selector on
BAKE.
Put food in the oven. Oven
rock, walls and door will be hot
Set the Oven Temperature
Control to the baking
temperature you want.
6
During baking, the elements
will turn on and off to help
keep the oven temperature
at the setting. The Signal Light
will turn on and off with the
elements.
The top element helps heat
during baking, but does not
turn red.
ADJUSTING THE OVEN TEMPERATURE CONTROLS
Let the oven preheat until the
Signal Light goes off
7
When baking is done, turn
both knobs to OFF
Does either oven seem to be hotter or colder than your old oven at the same
settings? The temperature setting in your old oven may have changed gradually
over the years. The accurate settings of your new ovens can seem different. If
you think either oven temperature needs adjusting, follow these steps:
1.
Pull the Oven Tern- 2. Loosen the lock-
3.
To lower the tem- 4. To raise the tem-
perature Control ing screw; NOTICE perature, move perature, move
straight off. position of notches. black part of knob black part of knob
closer to LO. Each closer toH I. Each
notch equals notch equals
about IO-F (5-C). about 10-F (5’C).
Tighten the locking screw. Replace the knob.
BROILING IN EITHER OVEN
1.
Place the rack where you 2. Put the broiler pan and
3.
Set the Oven Selector on
want it for broiling. food on the rack. BROIL.
4. Set the Oven Temperature 5. During broiling, the oven
6.
When broiling is done,
Control on BROIL (or on a door must be partly turn both knobs to OFF.
lower temperature for open. A built-in stop will
slower broiling). hold it there.
For slower brolllng, set the Oven Temperature Control on a temperature
instead of BROIL. The broil element will then turn on and off instead of
Shying
on.
The lower the temperature setting, the slower the broiling.
The Oven Selector must be on BROIL and the door partly open for all broiling
temperatures.
Su gested oven-rack positions and broiling times for
di fr
erent kinds of meats.
Approximate Minutes -
Inches cm) trom top
I Selector set to BPOIl
Food Descrlptlon of food o Broil
Element 1st side 2nd side
~-~
Beef Steaks
Rare 1 (2.5 cm) 3 (8 cm) 7-9 3-5
Medium I (2.5cm) 3’(8cm) o-11 4-7
Well done 1 (2.5cm) 3’(8cm) I l-13 5-7
-.-
Beef Steaks
Rare 1’ I (4 cm) 4 -5 (lo-13 cm) 13-15 6-8
Medium I’ 2 (4 cm) 4 -5’ (IO-13 cm) 17-19 8-10
Well Done 1’ 2 (4 cm) 4’-5 (lo-13 cm) 19-21 14-16
Hamburgers I2 (I cm) 3’ (8 cm] 6-8 4-5
Lamb Chops
Medium 1 (2.5 cm) 3 (8 cm) 6-8 4-5
Ham slice, precooked ’ 2 -1
or tendered (l-2.5 cm) 3’ (8 cm] 6-8 4-5
Canadian Bacon I>‘(1 cm)- 3’ (8cm) 6 4
Pork Rlb or Loin Chop j., -1
Well done (2-2.5 cm) 4’-5 (lo-13 cm) 15 IO
Chicken 2-3 lb.
(l-1.5 kg)
cut in half 7’ -9” (18-23 cm) 25-30 to-12
Fish whole 3’ (8 cm) 11-16 9-14
fillets 3” (8 cm] 7-8 5-7
Liver ;;.;%,, 3” (8 cm) 3 3
Frankturters 4”-5” (lo-13 cm) 6-7 4-5
~______ 7
USING THE AUIOMETIC MEALTIMER* CLOCK
The Automatic MEALTIMER Clock is designed to turn either oven on and off at
times you set...even when you are not around.
To start and stop baklng automatically:
1.
Put the oven rack(s) 2. Make sure the clock is set 3. Push in and turn the Start
where you want them to the right time of day Time Knob clockwlre
and place the food in the to the time you want bak-
oven ing to start
4. Push in and turn the Stop
Time Knob clockwbe
to the time you want the
oven to shut off
5. Set the Oven Selector on 6. Set the Oven Temperature
TIMED Control on the baking
temperature you want
7. After baking is done, turn
8.
To stop the oven before
both knobs to OFF the preset time, turn both
knobs to OFF
Tostop baklng automatlcally:
1.
Put the oven rack(s) where you want 4. Set the Oven Selector on TIMED
them and place the food In the oven 5. Set the Oven Temperature Control on the
2. Make sure the clock ISset to the right time baking temperature you want
of day
6.
After baking is done, turn both knobs to OFF.
3. Push In and turn the Stop time Knob clock- 7. To stop the oven before the preset time,
wire to the time you want the oven to shut off turn both knobs to OFF.
SPECIAL CAUTION:
Use roods that will not go bad or spoil a covered baking dlsh with about a half-
while walting for cooklng to start. Avoid cup (118 mL) of water for 1 to 1% hours.
using dishes wlth milk or eggs, cream Any food that has to walt for cooklng to
soups, cooked meats or fish, or any Item start should be very cold or frozen before
with baklng powder or yeast. It Is put In the oven. MOST UNFROZEN
Smoked or frozen meats may be used; FOODS SHOULD NEVER STAND MORE THAN
so can vegetables, fruits and casserole- TWO HOURS BEFORE COOKING STARTS.
type foods. Vegetables can be cooked In
a
‘Tmk
THE OVEN VENT
Hot air and moisture escape
from the lower oven through a
vent under the right rear surface
unit You can cook on the unit,
or keep food warm on it while
the oven is on. Plastic utensils
left over the vent can melt.
Do not block the vent. Poor
baktng can result
THE OPTIONAL ROTISSERIE
If you would like a rotisserie for your oven, you can order a kit (Part No. 261881,
RCK79) from your dealer. The kit includes easy installation instructions.
ACCESSORY CANNING KIT (Part No. 242905)
The large diameter of most water-bath or pressure canners combined with high
heat settings for long periods of time can shorten the life of regular surface units and
cause damage to the cooktop.
If you plan to use the cooktop for canning, we recommend the installation of a
Canning Kit. Order the kit from your Whirlpool Dealer or Tech-Care Service Company.
Use only flat-bottomed utensils for best results and to prevent damage to the
range. Specialty items with rounded or ridged bottoms (woks, ridged bottom canners
or tea kettles] are not recommended. See the “Cooking Guide” for important utensil
information.
SEETHE “COOKING GUIDE” FOR IMPORTANT CANNING INFORMATION
9
THE OVEN LIGHTS
Both oven lights will come on when you open the lower oven door. Both will come
on when you push the Oven Light switch on the control panel. Close the lower oven
door or push the switch again to shut them off
To replace the upper oven light bulb:
1.
Turn off the elec-
tric power at
the main power
supply.
2. Remove the light 3. Replace the bulb 4. Turn electric
bulb from its with a PO-watt power back on
socket. appliance bulb at main power
available where- SUPPlY
ever light bulbs
are sold.
To replace the lower oven light bulb:
1.
Turn off the electric power 2. Remove the bulb cover
at the marn power supply by pullrng out on the wire
holder and moving it to the
side.
4. Replace the bulb with a 5. Replace the bulb cover
40-watt appliance bulb and snap the wrre holder
available from most gro- in place. The bulb must
cery, variety and have thlr cover when the
hardware stores oven Is being used.
3. Remove the light bulb from
its socket
6.
Turn the power back on
at the main power supply
10