manuals.online logo
Brands
  1. Home
  2. •
  3. Brands
  4. •
  5. Whirlpool
  6. •
  7. Ventilation Hood
  8. •
  9. Whirlpool AKR 998 Assembly instructions

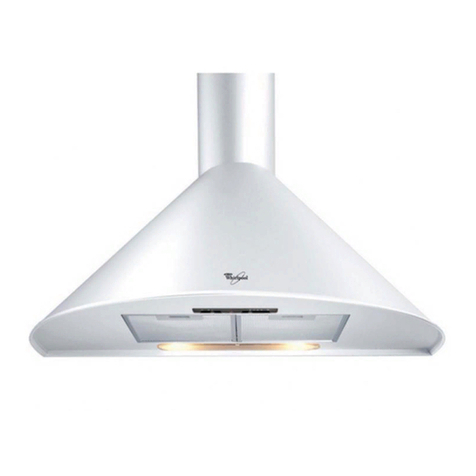
Whirlpool AKR 998 Assembly instructions


5019 318 33058
AKR 998
INSTALLATIONSANGABEN
Mindestabstand zur K chfläche: 60 cm (Elektr k chplatten), 75 cm (Gas-, Öl-
der K hlek chplatten). F lgen Sie bei der Installati n der Nummerierung
(1Ö2Ö3Ö.....). Schließen Sie das Gerät erst nach erf lgter Installati n an die
Str mvers rgung an.
INSTALLATION SHEET
Minimum height ab ve c ker: 60 cm (electric c kers), 75 cm (gas, gas il r
c al c kers). T install f ll w p ints (1Ö2Ö3Ö.....). D n t c nnect the
appliance t the electrical p wer supply until installati n is c mpleted.
FICHE D'INSTALLATION
Distance minimale par rapp rt à la cuisinière : 60 cm (cuisinière électrique),
75 cm (cuisinière à gaz, maz ut u charb n). P ur le m ntage, suivez la
numér tati n (1Ö2Ö3Ö.....). Ne branchez pas l'appareil tant que l'installati n
n'est pas terminée.
INSTALLATIEKAART
Minimumafstand t t het k kt estel: 60 cm (elektrische k kt estellen), 75 cm
(k kt estellen p gas, lie f k len). V lg v r de m ntage de nummering
(1Ö2Ö3Ö.....). Geef het apparaat geen str m t tdat de installatie geheel
v lt id is.
FICHA DE INSTALACIÓN
Distancia mínima desde l s quemad res: 60 cm (quemad res eléctric s), 75 cm
(quemad res de gas, gasóle carbón). Para el m ntaje, siga la numeración
(1Ö2Ö3Ö...). N c necte el aparat a la c rriente eléctrica hasta que la
instalación esté c mpletamente finalizada.
FICHA DE INSTALAÇÃO
Distância mínima d s f gões: 60 cm (f gões eléctric s), 75 cm (f gões a gás,
óle u carb n ). Para m ntar siga a numeraçã (1Ö2Ö3Ö.....). Nã ligue
aparelh à c rrente eléctrica até a instalaçã estar c ncluída.
SCHEDA INSTALLAZIONE
Distanza minima dai fu chi: 60 cm (fu chi elettrici), 75 cm (fu chi a gas,
gas li carb ne). Per il m ntaggi seguire la numerazi ne (1Ö2Ö3Ö.....).
N n dare c rrente allapparecchi finché linstallazi ne n n è t talmente
c mpletata.
ùüùü+ùùùþ
ü$12.)12.1.)2"0120"FP02!"0120"FP0120"
.0! #02!0. #0! # +.22  21.  #1202
.!1ÖÖÖ2! 3 / 2020002!)!0*.21#10#!
2  !&12"0.212.1"
D
GB
F
NL
E
P
I
GR
31833058.fm Page 1 Wednesday, October 30, 2002 6:20 PM

5019 318 33058
AKR 998
Umlenkblech F: nur für die Umluftversion
Deflect r F: f r Filter Versi n nly
Déflecteur F : à installer uniquement pour la version
Filtrante
Deflect r F: h eft alleen te w rden geïnstalleerd in
de versie met luchtrecirculatie
Deflector F: sólo para versión filtrante
Deflect r F: a instalar apenas na Versã filtrante
Deflettore F: da installare solo in Versione Filtrante
ü2! .") 0.212.1) 12. 2.0
..*&1
1 . stromanschluss vorbereiten
14. prepare the electrical c nnecti n
1 . préparer le raccordement électrique
14. v rbereiding van de elektrische aansluiting
1 . preparar la conexión eléctrica
14. preparar a ligaçã eléctrica
1 . preparare il collegamento elettrico
 ! 02 120202!
1*/01
13. Schalldämpfungsschlauch
13. Silencer duct
13. Tuyau silencieux
13. Dempende leiding
13. Tubo silenciador
13. Tub silenciad r
13. Tubo silenziatore
 &."1.12!.
31833058.fm Page 2 Wednesday, October 30, 2002 6:20 PM

5019 318 33058
AKR 998 PRODUCT SHEET
CONTROL PANEL
1. ON butt n (Stand by)/OFF extraction/Reset filter saturati n indicat r:
- ON (Stand by) - the display shows a lighted dot only.
- OFF - the display is OFF: all controls, except for the light button, are disabled.
Reset filter saturati n indicat r. Press and hold for at least 3 seconds, an acoustic signal will sound.
2. Light ON/OFF button.
3. Manual/aut matic (sens r) mode switch:
In the automatic mode (Indicator light -8- turned on) the hood will function (extractor operation) depending on the
envir nmental c nditi ns detected by the hood.
Warning! The hood is supplied with an automatic calibrati n system that defines normal environmental conditions.
In the event of abnormal operation, the calibrati n can be carried ut manually:
- press button 1 and switch OFF the hood (display OFF)
- simultaneously press and hold buttons 5 and 6 for approx. 3 sec. - an acoustic signal will indicate that calibration is
completed.
Before performing calibration, make sure that the burners are off, that room temperature is normal and that there is
not a large amount of steam.
4. Timed intensive speed butt n: The hood operates at this speed for 5 minutes and then returns to the previous
settings.
The display will show P and a blinking dot.
This function can be cancelled by pressing button 1.
5. Extraction speed decrease button.
6. Extraction speed increase button.
7. Display: sh ws the selected extracti n speed, grease filter (F) r Carb n filter (C) saturati n, aut matic perati n
(led r tati n) and Stand by mode (lighted d t).
8. Automatic operation indicator light.
Warning! The carbon filter saturation indicator is normally deactivated (for extractor version  see attached
instructions manual). In order to activate it (for filter operation - see attached instructions manual), simultaneously
press buttons 5 and 6 until C appears on the display. To deactivate the carbon filter saturation indicator,
simultaneously press AND HOLD buttons 5 and 6: letter F will appear on the display, followed by C. The latter will
disappear after a few seconds.
N te: If the - 8 - appears on the display, contact the After-sales Service.
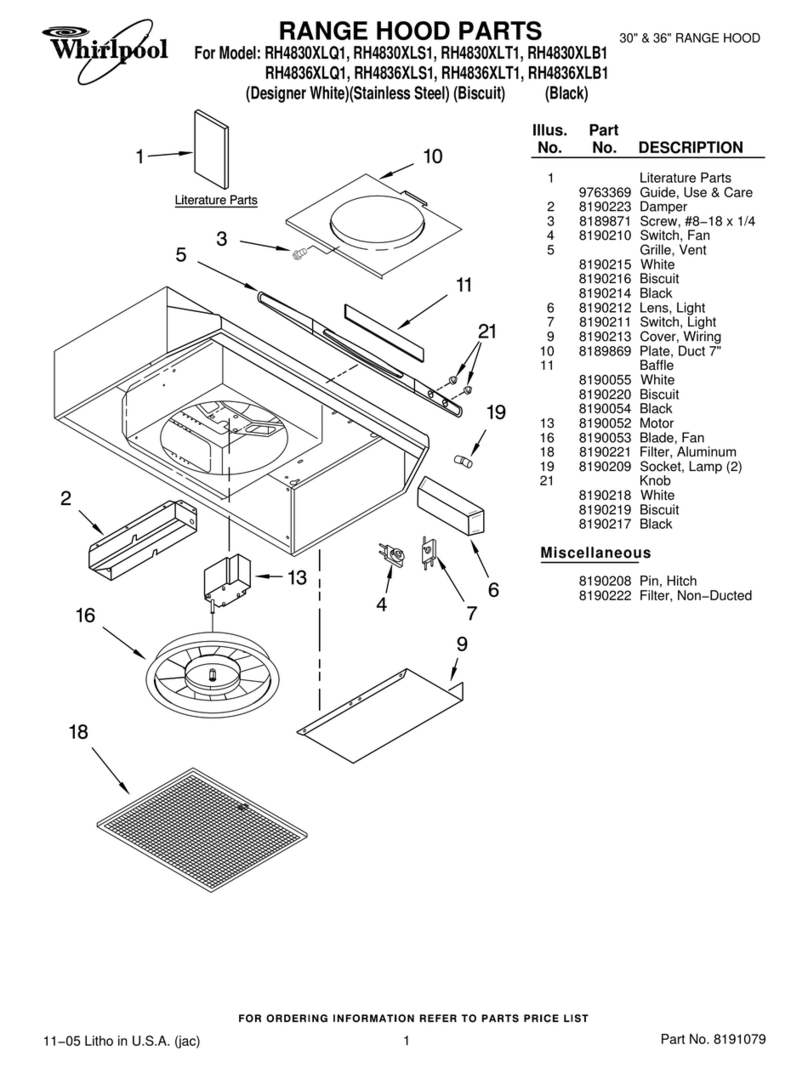
1. Control panel.
2. Grease filters.
3. Grease filter handles.
4. Bottom halogen bulbs.
5. Telescopic flue.
6. Sensors.
D F NL E
GB P I GR
31833058.fm Page 5 Wednesday, October 30, 2002 6:20 PM

5019 318 33058
AKR 998
Cleaning the grease filter - Fig. 1
Wash the grease filter at least once a month, or whenever
the display shows the letter F.
1. Disconnect the electrical power supply.
2. Remove the grease filters: push the handles back (a),
and then downwards (b).
3. After cleaning the grease filter refit in reverse order,
making sure the entire extraction surface is covered.
4. Reset filter saturation indicator - press and hold
button 1 (see control panel) for at least 3 seconds.
Replacing bulbs - Fig. 2
1. Disconnect the electrical power supply.
2. Using a screwdriver or any other suitable tool, prise off
the lamp cover (c).
3. Remove the burnt-out bulb.
Use 20 W max halogen bulbs only, making sure not to
touch them with your hands.
4. Close the lighting unit (snap-close).
Carb n filter Fitting and Maintenance
1. Disconnect the electrical power supply.
2. Remove the grease filters (a,b - Fig. 1).
3. Fit the carbon filter by fixing it with the two screws
supplied (d - Fig. 3).
4. If the carbon filter needs renewing, remove the old
filter and fit a new one.
Change the carbon filter at least once a year and, in any
event, every time the carbon filter saturation indicator
flashes C.
5. Refit the grease filters.
6. Reset filter saturation indicator - press and hold
button 1 (see control panel) for at least 3 seconds.
Fig. 1
Fig. 2
Fig. 3
D F NL E
GB P I GR
31833058.fm Page 6 Wednesday, October 30, 2002 6:20 PM

5019 318 33058
AKR 998
31833058.fm Page 19 Wednesday, October 30, 2002 6:20 PM

5019 318 33058
AKR 998
31833058.fm Page 20 Wednesday, October 30, 2002 6:20 PM

Other Whirlpool Ventilation Hood manuals

Whirlpool GZ5730XR Series User guide

Whirlpool

Whirlpool GZ5730XR Series User guide

Whirlpool YWML75011HW10 User manual

Whirlpool

Whirlpool YWML75011HW10 User manual

Whirlpool RHH 2000 SERIES User manual

Whirlpool

Whirlpool RHH 2000 SERIES User manual

Whirlpool AKR 953 Assembly instructions

Whirlpool

Whirlpool AKR 953 Assembly instructions

Whirlpool GXU7130DXB Manual

Whirlpool

Whirlpool GXU7130DXB Manual

Whirlpool UXT4136AD Product information sheet

Whirlpool

Whirlpool UXT4136AD Product information sheet

Whirlpool 9763375 Manual

Whirlpool

Whirlpool 9763375 Manual

Whirlpool RH2630XJB1 User manual

Whirlpool

Whirlpool RH2630XJB1 User manual

Whirlpool AKR 62F LT K User manual

Whirlpool

Whirlpool AKR 62F LT K User manual

Whirlpool AKR610WH User manual

Whirlpool

Whirlpool AKR610WH User manual

Whirlpool UXL6036Y Parts list manual

Whirlpool

Whirlpool UXL6036Y Parts list manual

Whirlpool AKR601UMIX User manual

Whirlpool

Whirlpool AKR601UMIX User manual

Whirlpool AKR860IX Operating instructions

Whirlpool

Whirlpool AKR860IX Operating instructions

Whirlpool AKR902TBIX User manual

Whirlpool

Whirlpool AKR902TBIX User manual

Whirlpool RH2000 Series User manual

Whirlpool

Whirlpool RH2000 Series User manual

Whirlpool WVI30330LS User manual

Whirlpool

Whirlpool WVI30330LS User manual

Whirlpool MMV4205 User manual

Whirlpool

Whirlpool MMV4205 User manual

Whirlpool Amana UXW7324BSS User manual

Whirlpool

Whirlpool Amana UXW7324BSS User manual

Whirlpool 5019 318 33278 User manual

Whirlpool

Whirlpool 5019 318 33278 User manual

Whirlpool WVW75UC0DS Product information sheet

Whirlpool

Whirlpool WVW75UC0DS Product information sheet

Whirlpool RJH 3330-1 User manual

Whirlpool

Whirlpool RJH 3330-1 User manual

Whirlpool AKR 891 User manual

Whirlpool

Whirlpool AKR 891 User manual

Whirlpool GZ7930XHS0 User manual

Whirlpool

Whirlpool GZ7930XHS0 User manual

Whirlpool IKEA HOO 521-531 Assembly instructions

Whirlpool

Whirlpool IKEA HOO 521-531 Assembly instructions

Popular Ventilation Hood manuals by other brands

ROBINHOOD SWAL60X Installation and operating instructions

ROBINHOOD

ROBINHOOD SWAL60X Installation and operating instructions

Smeg KV90X instruction manual

Smeg

Smeg KV90X instruction manual

Greenheck Hooded Propeller Roof Fans Installation, operating and maintenance manual

Greenheck

Greenheck Hooded Propeller Roof Fans Installation, operating and maintenance manual

Hankel DKE 136 user manual

Hankel

Hankel DKE 136 user manual

Technika TSSUR52S user guide

Technika

Technika TSSUR52S user guide

Fisher & Paykel HS60CIW1 Installation instructions and user guide

Fisher & Paykel

Fisher & Paykel HS60CIW1 Installation instructions and user guide

Electrolux PLHV36W6CC owner's guide

Electrolux

Electrolux PLHV36W6CC owner's guide

Electrolux EFP6500X instruction manual

Electrolux

Electrolux EFP6500X instruction manual

Caple ZEL900GM instruction manual

Caple

Caple ZEL900GM instruction manual

Fujioh FX-900 installation manual

Fujioh

Fujioh FX-900 installation manual

Pkm S34-60 ABT2X instruction manual

Pkm

Pkm S34-60 ABT2X instruction manual

Venmar Connaisseure C700 SERIES installation instructions

Venmar

Venmar Connaisseure C700 SERIES installation instructions

ELICA OM instructions

ELICA

ELICA OM instructions

Eico Vertical Star Instruction on mounting and use

Eico

Eico Vertical Star Instruction on mounting and use

THERMEx Bristol/Optica 661N V-LED installation manual

THERMEx

THERMEx Bristol/Optica 661N V-LED installation manual

Asko CC4527S Instructions for use

Asko

Asko CC4527S Instructions for use

Pando TIM-2 installation manual

Pando

Pando TIM-2 installation manual

Hansa OTC612BH instruction manual

Hansa

Hansa OTC612BH instruction manual

manuals.online logo
manuals.online logoBrands
  • About & Mission
  • Contact us
  • Privacy Policy
  • Terms and Conditions

Copyright 2025 Manuals.Online. All Rights Reserved.