manuals.online logo
Brands
  1. Home
  2. •
  3. Brands
  4. •
  5. Whirlwind
  6. •
  7. Wheelchair
  8. •
  9. Whirlwind RoughRider User manual

Whirlwind RoughRider User manual

Updated 25-Oct-11
Whirlwind Wheelchair http://whirlwindwheelchair.org Updated 25-Oct-11
Whirlwind Wheelchair http://whirlwindwheelchair.org
Rider Name
Rider Age
Rider Gender
Rider Reference #
Rider contact information
Distributing Organization
Assessment performed by
Date
1. Rider has head control
2. Rider can maintain upright sitting position
3. Rider does not have signicant contractures
4. Rider needs pressure relief cushion. Notes:
____________________________________
Yes No
Seat Depth Actual length of seat surface.
ere is an additional 1 1/2” space
between the back edge of seat and backrest.
14”
16”
18”
Choose Seat Depth (Adjustable)
Seat Width e seat with is measured inside the frame tubes.
e RoughRider backrest width matches the seat width.
Seat heights (and footrest adjustment range) vary slightly
based on seat depth. Seat heights are measured from the
top of the seat tubes of the 14” seat depth to the oor.
Choose Wheelchair Width:
12.5” (18 1/2” Seat height)
17” (20 1/4” Seat height)
14” (19” Seat height)
15.5” (19 3/4” Seat height)
18.5” (20 3/4” Seat height)
If any of the answers are“No” in the grey boxes,
the RoughRider may not be appropriate for this
rider without intermediate-level service.
For more information on specications and tting of the RoughRider wheelchair see www.whirlwindwheelchair.org/roughrider
Select Wheelchair Size Options
RoughRider®
Axle Position
#1 (Farthest forward)
#2 (Second from front)
#3 (Center- a good starting point)
Axle position (adjustable)
Select initial axle position, 1 through 5
#1 is farthest forward and is the most active position
#5 is farthers backwatrds and is the most stable
#4 (Second from rear)
#5 (Farthest back-good for double amputees)
1 52 3 4
Backrest Height Select Backrest Height Position
14”
16”
18”
Backrest Height (Adjustable)
A
B
C
D
Hip Width
Rider Hip Width (A)
Rider Upper Leg Lenth (C)
Rider Lower Leg Length (B)
Record where backrest should contact riders back with
cushion; Eective height of back support will vary
Rider Backrest support Height (D)
Measured behind knee to back of buttocks
Lower Leg Length
B
Upper Leg Length
C
Backrest
Height
D
Rider Measurements
e footrest height is adjustable from 11” to 17”
Actual footrest height range varies with seat height
Updated 25-Oct-11
Whirlwind Wheelchair http://whirlwindwheelchair.org
Updated 25-Oct-11
Whirlwind Wheelchair http://whirlwindwheelchair.org
11" to 17"
14", 16", or 18"
2" front thickness
1" back thickness
A: Hip Width
Position the rider sitting with the pelvis upright on a rm surface.• Measure the distance between the widest points of the hips or thighs without compressing• any tissue.
Record this measurement.•
Select seat width using the following chart.•
e Whirlwind RoughRider Distribution Guide explains pressure sore risk.
Risk of Pressure Sores Chair Width Prescription
High Risk and/or bony hips At least Hip/igh Width + 1/2” (refer to Service Guide)
Low Risk At least Hip/igh Width
For riders with extra hip width As narrow as comfortable without causing high pressure
B: Seat Depth/ Upper Leg Length
With the client sitting upright on a rm surface measure the distance from the back of the pelvis to
the back side of the lower leg (the back of the knee). Record this measurement as lower leg length.
Subtract 1/2” to nd the maximum seat depth, to allow for space between the knee and seat fabric,
then add 1 1/2” for backrest sag. Select seat depth.
C: Lower Leg Length
With the rider sitting on a rm surface wearing the footwear they will be using, measure the dis-
tance from the bottom of the foot to the underside of the front of the thigh. Record this measure-
ment. Subtract approximately 2” for the cushion, to nd the desired length between the seat uphol-
stery and the footrest. e footrest height can be adjusted when the wheelchair is t for a rider.
Extra cushion foam can be used to accommodate longer lower legs.
D: Backrest Height
Generally the top of the back support should
be located just below the bottom of the shoul-
der blade. For less active riders needing more
trunk support, the back support can be close
to the level of the armpit. Find this height
by using your hands held at to measure the
lowest place on the riders back where he or she
is comfortably supported.Measure from the
seat surface to the point on the back that is
most appropriate for this rider. To determine
the wheelchair backrest height, add 1” for the
compressed cushion that the rider will be us-
ing. Eective backrest height will vary. A 2010
RR has a 12 degree seat angle and an 8 degree
backrest angle. e actual sitting angle can be
adjusted with a Tension Adjustable Backrest.
1. Head Control
When sitting in a chair with a backrest, can the rider independently hold up and move his/her head?
If no, the RoughRider is not likely an appropriate chair for this rider.
2. Maintain Sitting
Can the rider independently maintain upright sitting in a standard chair with a backrest? If no, the
RoughRider is not likely an appropriate chair for this rider and you may need intermediate-level service.
3. Contractures
Are there contractures in hips or knees that would prevent the rider from sitting comfortably in the
RoughRider wheelchair? (Contractures: Tight muscles that have become shortened and make it dif-
cult to move the joint) If yes, the RoughRider is not likely an appropriate chair for this rider.
4.Sensation
Does rider have full sensation at seat surface? Incomplete sensation increases the likelihood of pres-
sure sores.
Yes: the rider will receive a comfort cushion. No: the rider will receive a pressure relief cushion.
RoughRiderTM Service Quickstart: Assessment
See Whirlwind Screening and Assessment Materials: www.whirlwindwheelchair.org/service
A: Hip Width
D: Backrest Height
C: Lower Leg Length
B: Seat Depth
Updated 25-Oct-11
Whirlwind Wheelchair http://whirlwindwheelchair.org
Updated 25-Oct-11
Whirlwind Wheelchair http://whirlwindwheelchair.org Updated 25-Oct-11
Whirlwind Wheelchair http://whirlwindwheelchair.org
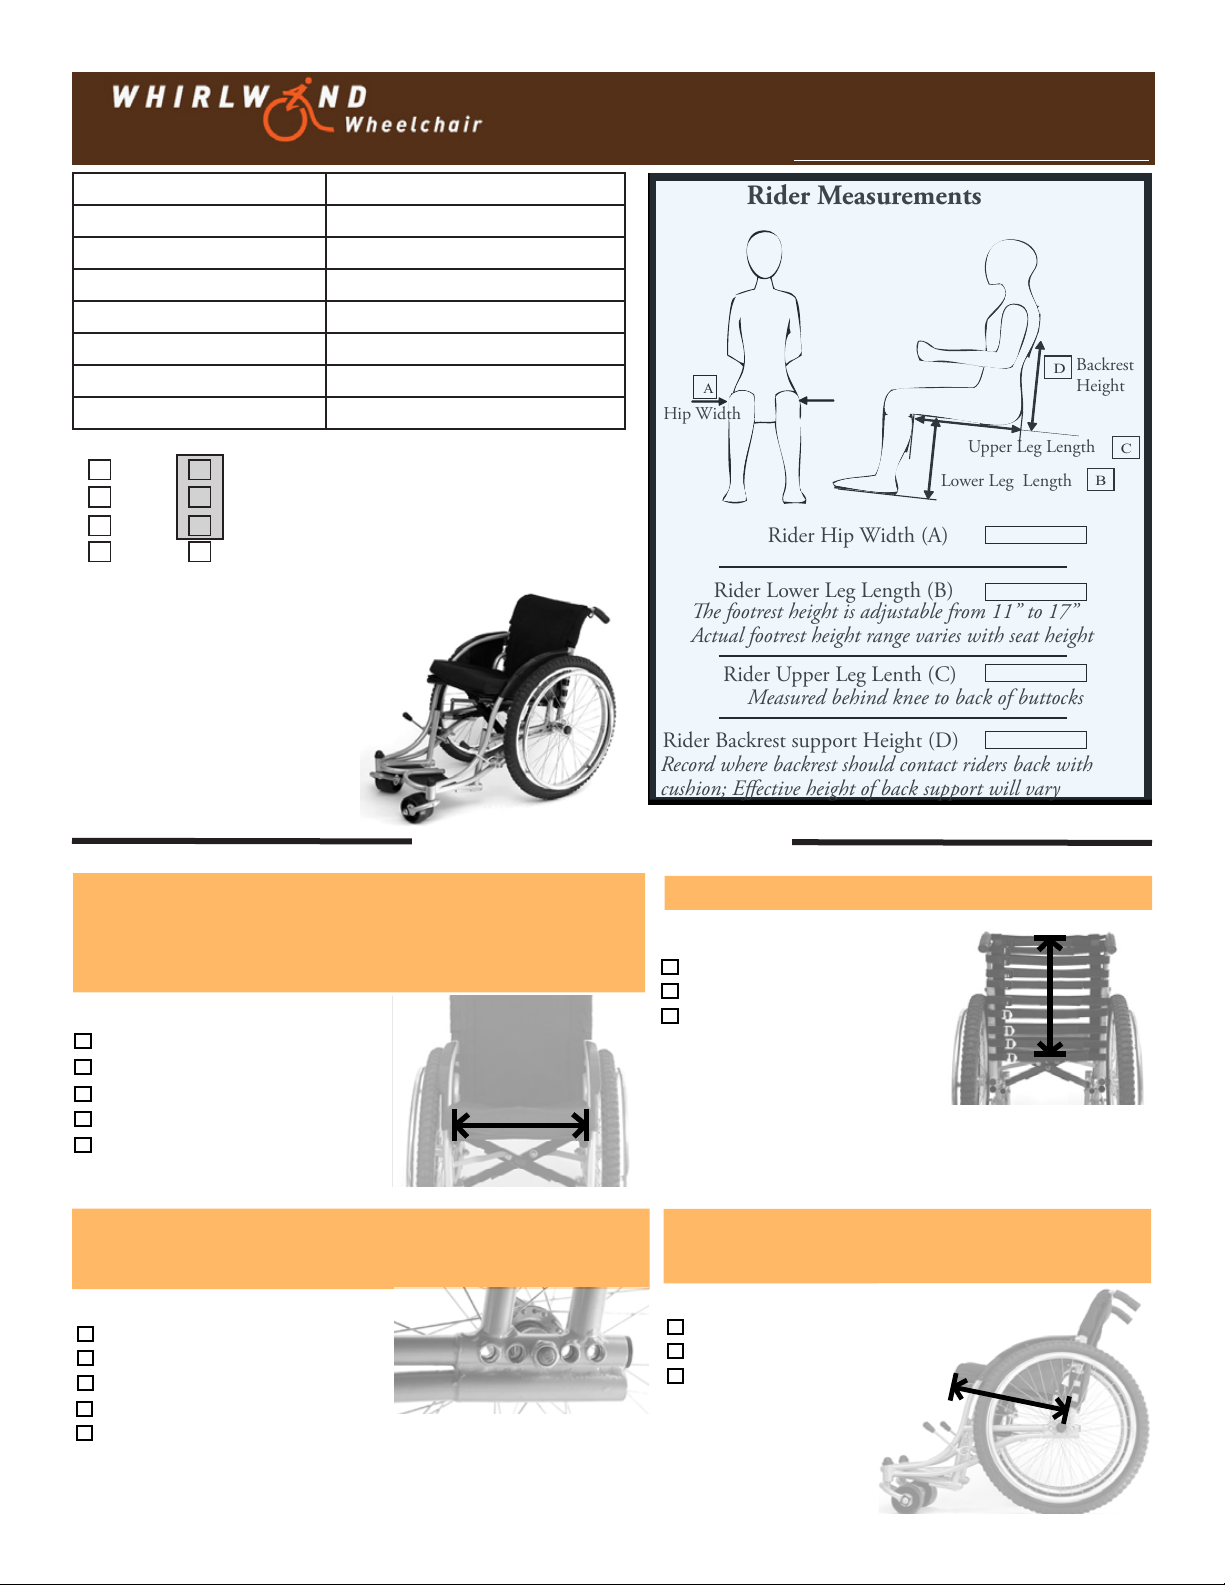
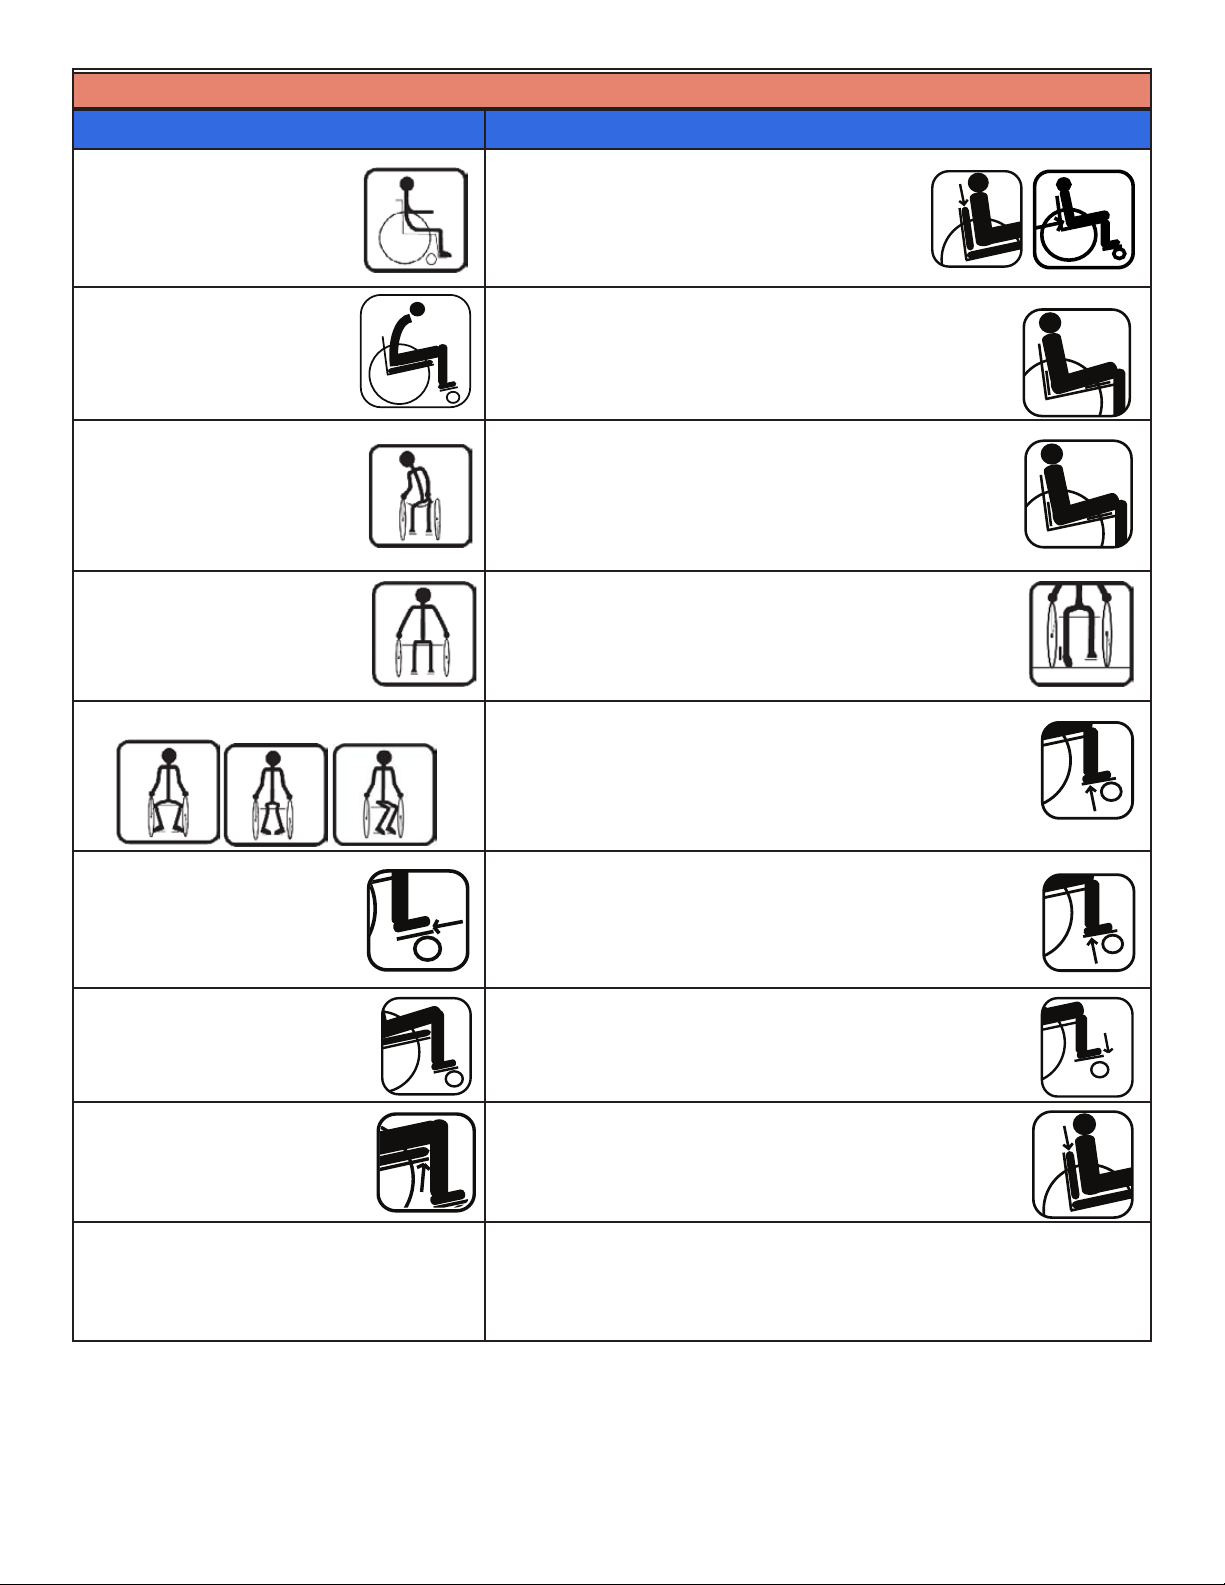
RoughRiderTM Service Quickstart: Fitting
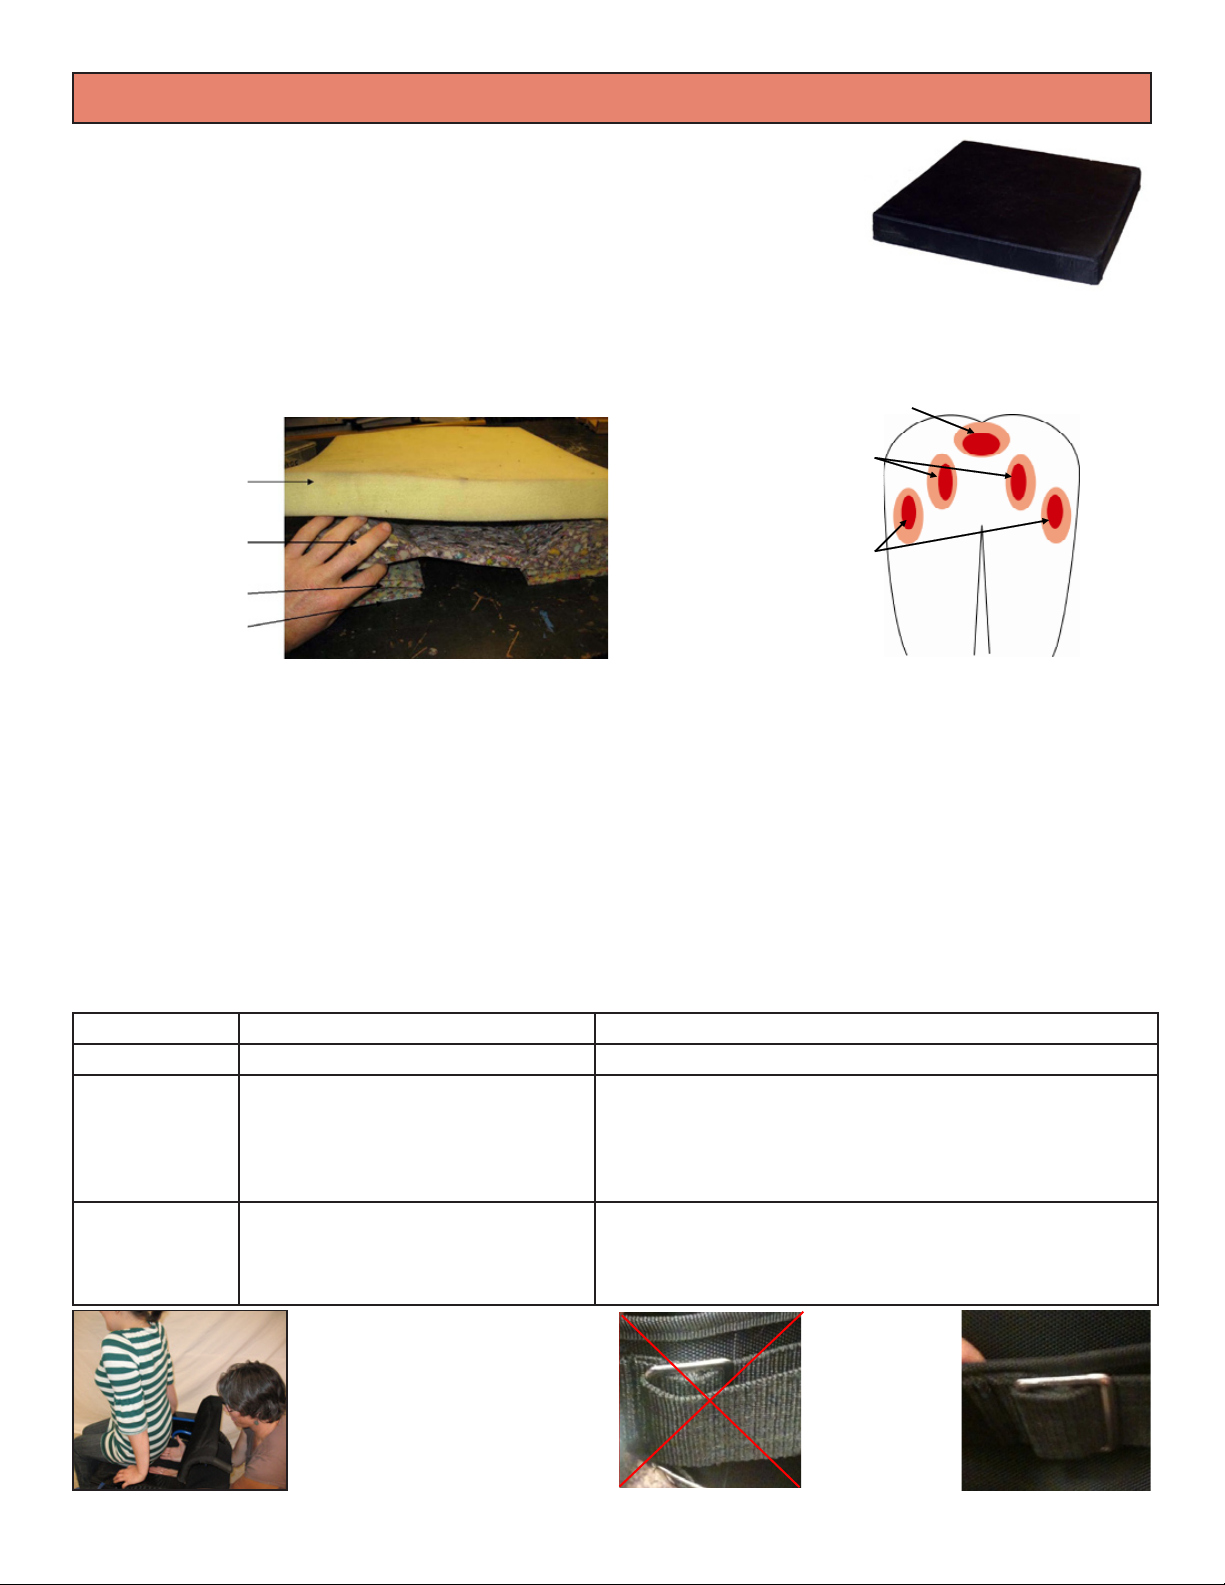
Cushion
Check Sensation Level. (See Whirlwind Service Guide.) Riders without full sensation at seat
surface should use a pressure relief cushion. e cushion should be about 1/2” wider than the seat
width, to hold the cushion in place in the chair. e rider should sit on their cushion for the next
tting steps.
Seat Width
Check that the seat width is appropriate for the rider (no more than Grade 1 pressure on the hips,
see Whirlwind’s Cushion Fitting Guide).
Seat Depth
Check that the front of the seat fabric is not pressing on the back of the rider’s legs, when the legs
are tucked back as far as they will be allowed (check the calf strap). Look for a minimum of 1/2”
gap (1 1/4” is preferable). e 14” seat depth can be adjusted to 16” with a seat depth extension
accessory, and the 16” seat depth can be adjusted to 18”. See Support site for more information.
One philips screwdriver and one 10mm wrench needed
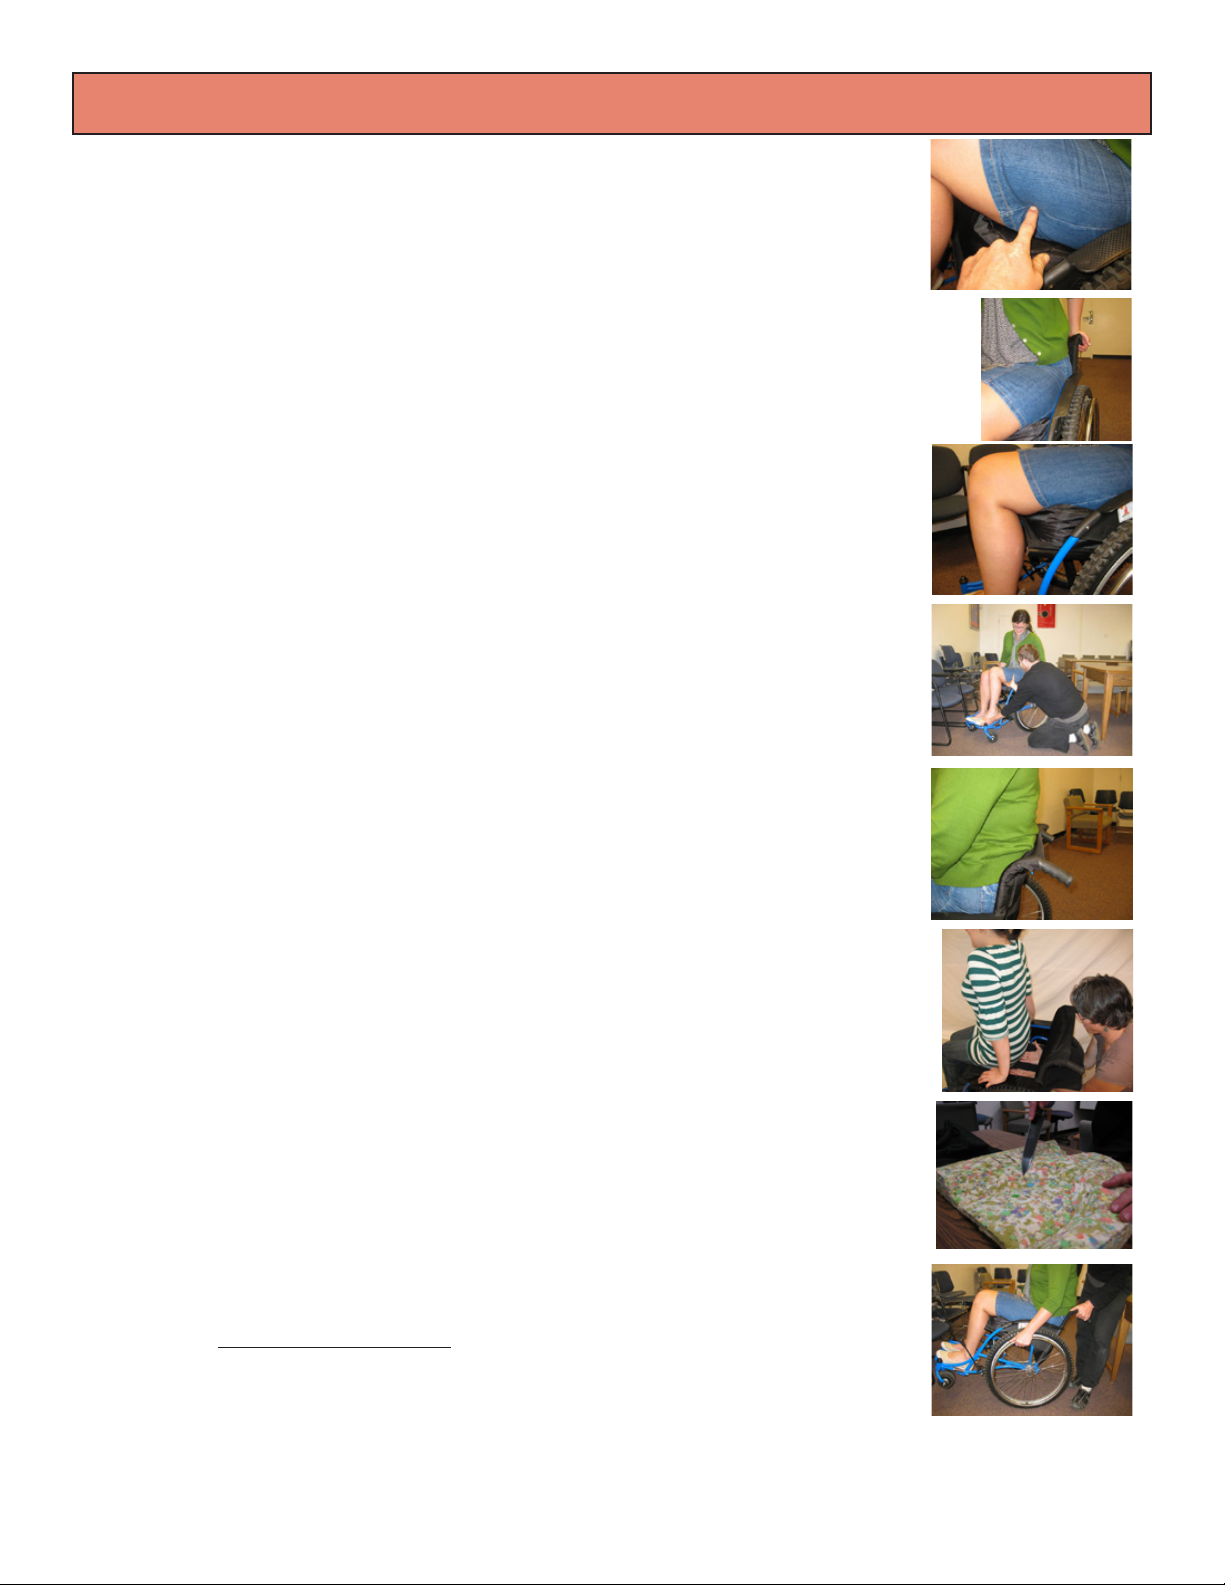
Footrest Height
With the rider sitting in the chair wearing the footwear they will be using in the chair, place one
hand under the lower thigh (closer to the knee) on the cushion and one hand holding the sole of
the foot with the footrest ipped out of the way. Find the optimal height of the foot where there
is moderate pressure under the thigh, where the foot is not hanging, and both foot and thigh
bear approximately equal amounts of weight. Adjust the footrest height by loosening the footrest
clamp bolt and raise or lower the footrest until the weight of the foot and lower thigh on your
hands are equal. If the footrests can’t be adjusted low enough, add extra foam under the cushion
after considering the drawbacks (see Service Guide).
Two 13mm wrenches needed
Backrest Height
Check that the backrest supports the rider’s back, rst supporting the rider’s trunk, and secondly
allowing pushing on the handrims. Check the backrest height again later if cushion height is
changed in the tting process. e 2010 RoughRider backrest height can be adjusted to 14”, 16”,
and 18” from the seat surface. See Support site for more information.
Two 13mm wrenches needed
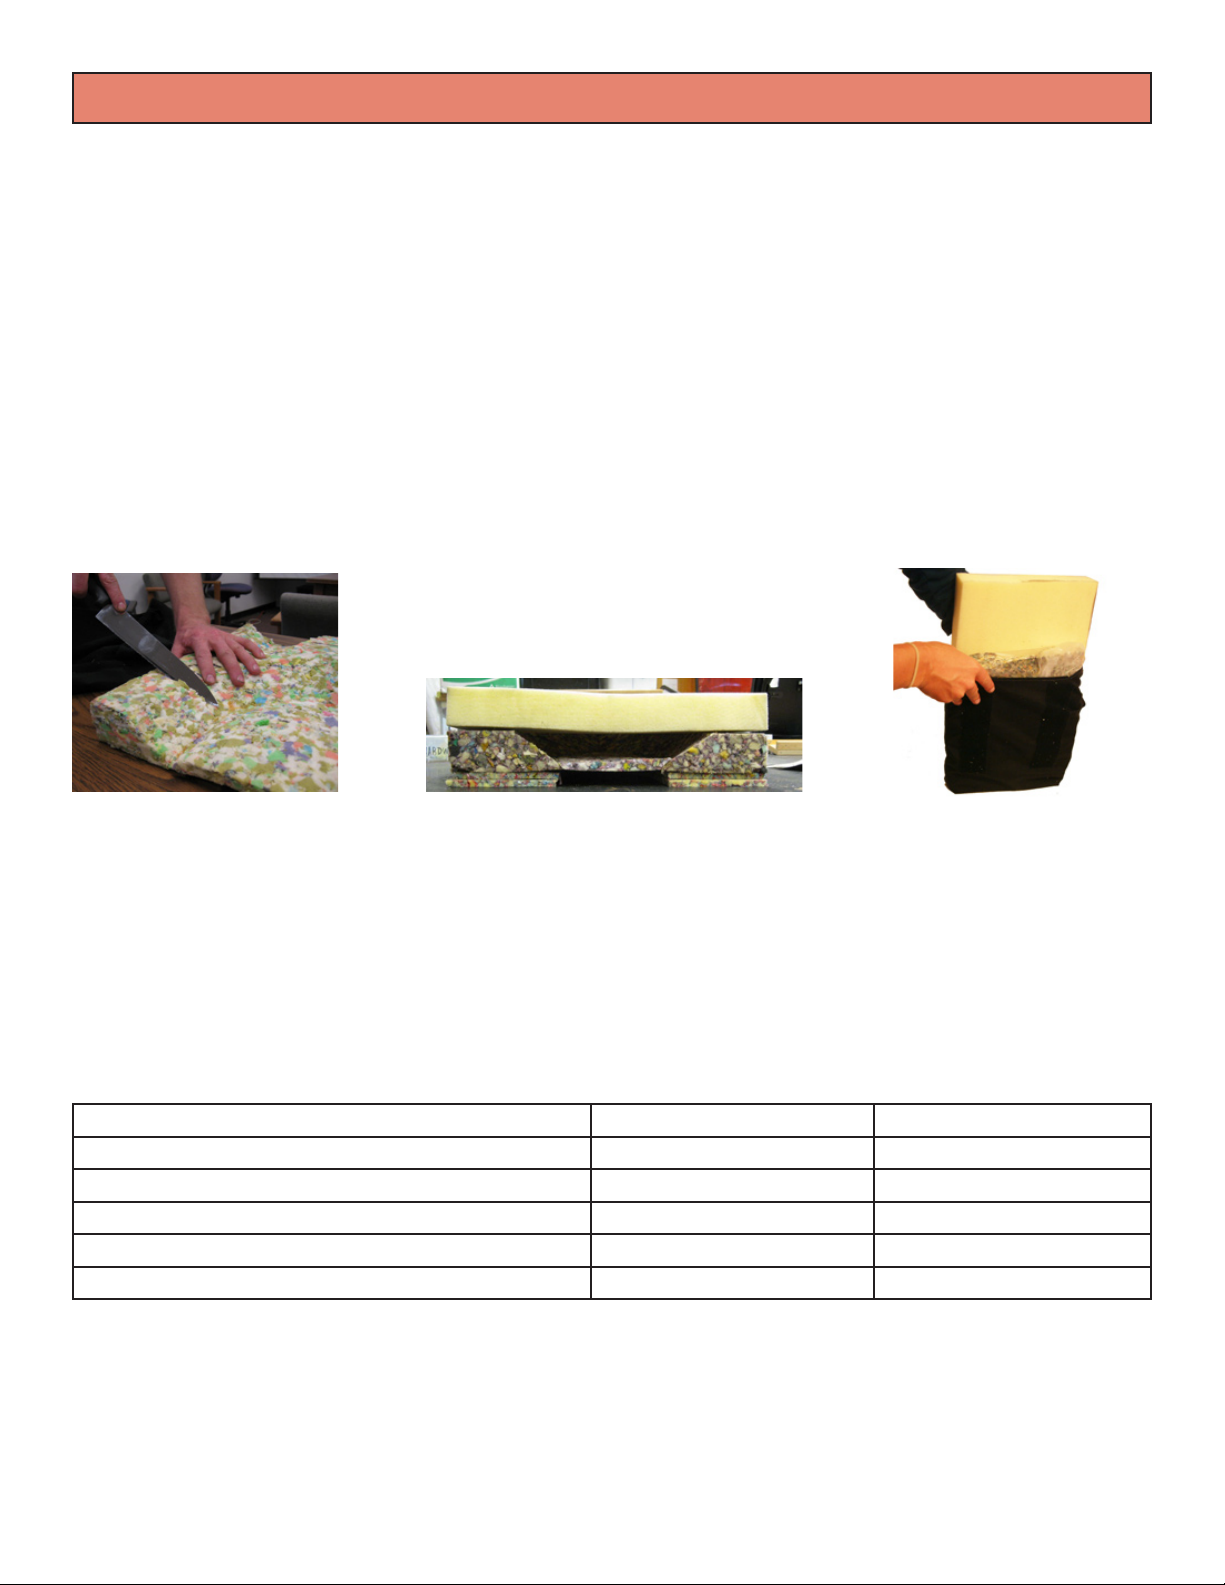
Pressure Relief Cushion Adjustment (if needed)
Evaluate pressure on seat surface, and add additional cutout layers under the cushion or carve
away foam where needed. See cushion tting guide on the following pages.
Rear Wheel Axle Adjustment
Adjust the position of the rear wheels to meet the rider’s needs; a forward position increases the
rearward tippiness of the chair, but makes the chair easier to push and use in rough terrain. Ad-
just the brakes to match the Axle position.
One 19mm socket, one 19mm wrnech, and one 13mm wrench needed
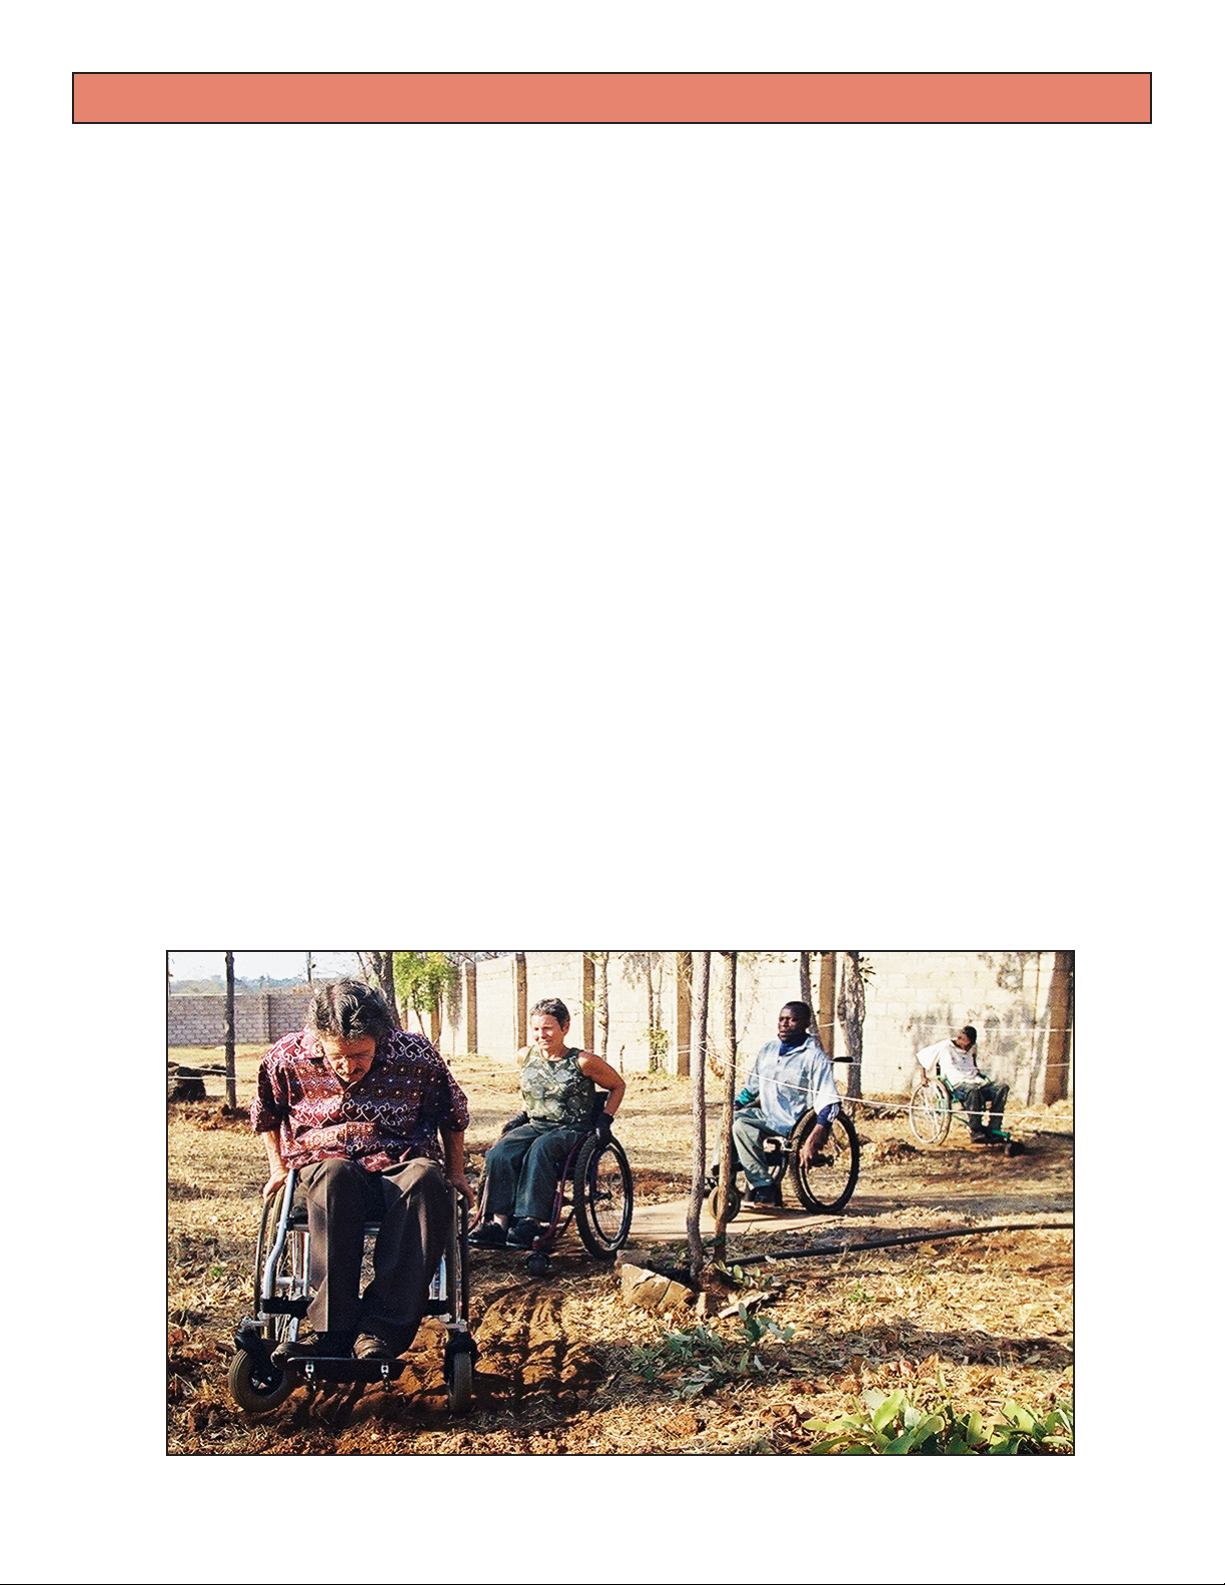
Rider Orientation to Wheelchair
A wheelchair rider should train new riders and attendants in independent and assisted skills in-
cluding moving in the chair, the use of parking brakes, transfers, pressure management, wheelies
and leaning for rough terrain, and managing curbs and steps. Additional topics are maintenance,
cleaning, repairs, and wheelchair adjustments including footrest and rear axle position. A game of
“follow the leader” over mixed terrain helps riders learn and teach each other riding skills.
Check Comfort
Ask about comfort and feel for high pressure grades after a half hour of use, and make adjust-
ments if needed. is is a critical tting step.
For support on tting the RoughRider see www.whirlwindwheelchair.org/support
Updated 25-Oct-11
Whirlwind Wheelchair http://whirlwindwheelchair.org
Updated 25-Oct-11
Whirlwind Wheelchair http://whirlwindwheelchair.org
RoughRiderTM Service Quickstart: Cushion Fitting Guide
For riders with full sensation at seat surface, a comfort cushion may be adequate.
Thecushionshouldtthechairwidthandseatdepth.TheWhirlwindcomfort
cushion is 2” of foam covered in a water-resistant fabric cover. The comfort cush-
ion lifts the rider approximately 1” off the seat surface in the rear, and 2” off the
seat surface in the front of the chair.
Riders without full sensation at seat surface should use a pressure relief cushion.
ThefollowinginformationcanbeusedtocustomizethetofaWhirlwindpressure
reliefcushion.TheWhirlwindpressurereliefcushionhasoptionalsublayersand
an optional plastic layer, between the top foam and the base foam. Include the
plastic if the cushion is likely to frequently come in contact with urine (but be sure
to spend extra time educating about moisture as a cause of pressure sores)
Check Pressure Grades:
Adjust footrests (see Fitting Guide).•
Detatchthebottomstrapofthebackrestfabriconthewheelchair,andadjustthefootreststotthe•
rider while sitting on a pressure relief cushion.
Ask the rider to sit back on your hand(s) in the wheelchair.•
Findeachoftheriskarealocations(Ischialtuberosity,greatertrochanter,Coccyx)withyourngers.•
The rider should then place his or her hands on their legs, face forward, and relax into a natural and•
comfortable sitting posture.
Evaluate the pressure grade using the chart below, and modify the cushion if needed (see Fitting•
Guide).
Replace the backrest fabric as it was. The fabric should be tight when the chair is open, but not so•
tight as to pull the sidesframes of the chair together or to prevent the seat fabric from being opened
fully. The strap/webbing should pass through the buckle three times (see photo below).
Pressure Grade Pressure Test Indication
Grade One Youcanwriggleyourngerseasily. Grade One is safe for most people.
Grade Two You can’t wriggle your ngers but
you can remove them easily.
If there is Grade Two pressure at one of the risk locations
and several risk conditions (history of pressure sores,
moisture, heat, shearing or active sliding, low muscle
mass, older age) are present, make a change to the
cushion to reduce the pressure at that location.
Grade Three It is hard to remove your hand and
you can feel restricted blood ow
tothetipsofyourngersafter10-20
seconds.
Grade Three pressure at one of the locations at risk will
require that the cushion be adapted to reduce the
pressure at that location.
Check pressure grade sitting
in the wheelchair, with an
appropriate cushion
Comfort cushion
I sc hi al tub er o siti es
Greater trochanters
Coccyx
Pressure Sore Risk Areas
Incorrect and
correct fabric
buckle lacing
Layers of a Whirlwind Pressure Relief Cushion
Cushion cover
not pictured
Top Layer
Base Layer
Sub Layer 1
Sub Layer 2
Updated 25-Oct-11
Whirlwind Wheelchair http://whirlwindwheelchair.org
Updated 25-Oct-11
Whirlwind Wheelchair http://whirlwindwheelchair.org Updated 25-Oct-11
Whirlwind Wheelchair http://whirlwindwheelchair.org
RoughRiderTM Service Quickstart: Cushion Fitting Guide (continued)
Modifying cushion
Whirlwindpressurereliefcushionswillcomewithextrabaselayerswhichcanbepositionedunderneaththe
base foam to provide additional cutout for the Iscial Tuberosities (ITs) by lifting the rider up to create more
depth for the rider’s tissue to be supported. Add layers and check for pressure again. If there is still grade two
or three pressure present, modify the cutout shape in the base foam by removing (carving with a knife) a little
material at a time around the area of high pressure. If pressure cannot be resolved with these simple solutions,
refer to a practitioner with further training and instruct the rider to do longer pressure reliefs more often as well
as frequent skin checks.
If there are any active or recently healed pressure sores, remove some material (approximately 0.5”) below
that area.
After selecting the number of foam layers to use and further carving the foam if necessary, place a plastic
cover between the top layer and base layer (if needed), and enclose the cushion in its cover. The pleats in the
cover, the closure system, and the cutout should be at the back of the cushion.
Using extra cushions to accommodate longer lower leg length:
If the rider has a long lower leg length that cannot be accomodated by the RoughRider wheelchair without
additional cushioning, add additional foam underneath the cushion to lift the rider higher off the seat fab-
ric. This foam can be placed inside the cushion cover and underneath the base foam, as long as it does not
stretch the top fabric of the cushion cover. Raising a rider with extra foam will increase the tippiness of the chair
andmakeitmoredifculttotkneesundertables.
Approximate elevation gains of compressed cushions (at back of cushion)
Cushion Type Back Elevation from seat Front Elevation from seat
Comfort Cushion 1” 2”
Foam pressure relief cushion without sub-layers 3/4” 1 1/2”
Foam pressure relief cushion with 2 sub layers 1 1/2” 2 1/4”
Additional 2” of foam lift under cushion adds 1 1/2” elevation adds 1 1/2” elevation
No Cushion (sitting on sling seat) 3/4”belowatseat 3/4”belowatseat
Use additional layers under
base foam if needed
Carve areas of high
pressure if needed.
Replace base foam (in plastic
if needed), in cushion cover
Updated 25-Oct-11
Whirlwind Wheelchair http://whirlwindwheelchair.org
Updated 25-Oct-11
Whirlwind Wheelchair http://whirlwindwheelchair.org
RoughRiderTM Service Quickstart: Rider Orientation
Anexperiencedwheelcairridershouldorientnewriderstotheirwheelchaironcetheyhavebeenproperlyt.
Play a game of “follow the leader” to practice riding skills, and include attendants in the training.
SeetheWhirlwindBasicGuidetoWheelchairServiceandDistribution,atwww.whirlwindwheelchair.org/service
Rider orientation Topics
Wheel-locks/Brakes•
Transfers (in and out of chair)•
Independent and assisted•
To/from chairs•
To/fromtheoor•
Leaning•
MovingtheWheelchair•
Forward, Backward, Turning•
Uphill, downhill•
Wheelies,curbs•
Pressure Management•
Axle Position•
TransportingWheelchair•
Attendant Training•
Transfers•
Up/Down Curbs•
Up/Down stairs•
Maintenance•
Cushion Care•
Cleaning•
Tires•
Parking Brakes•
Repair•
Updated 25-Oct-11
Whirlwind Wheelchair http://whirlwindwheelchair.org
Updated 25-Oct-11
Whirlwind Wheelchair http://whirlwindwheelchair.org Updated 25-Oct-11
Whirlwind Wheelchair http://whirlwindwheelchair.org
RoughRiderTM Service Quickstart: Basic Problem-solving
Problem Possible Solution
Hips sliding forward Put a cushion between the rider’s back
and the backrest if the seat is too long.
Tie or velcro the cushion to the seat
if the cushion is sliding.
Trunk falls forward Use up to 1/2” cushioning behind the rilower back and under
to help rider’s torso to recline farther into the sling backrest.
Use a more supportive seating system.
Trunk falls to side Is wheelchair too wide? A narrower wheelchair will help.
Use up to 1/2” cushioning behind the rilower back and under
to help rider’s torso to recline farther into the sling backrest.
Use a more supportive seating system.
Difculttoself-propel Is a narrower wheelchair possible?
Is rider sitting on enough cushioning?
Could the rider propel with one leg?
Can an assistant help rider practice riding skills?
Move the wheel axles forward.
Improper leg position Adjust footrests and calf strap for better leg and foot support.
Build or cut contour abductor (foam between knees) or Adductor
(foam outside of knees) into cushion with foam to position knees.
Gap between foot and footrest Raise footrest height to lightly support foot.
Add blocks/raises to footrest if the footrest cannot be raised enough.
Front of thigh is not
supported by cushion
Lower footrest.
If needed, insert extra foam underneath cushion.
Seat fabric presses back of knee Tighten back fabric.
Put a cushion between the backrest and rider’s back to
move the rider forward, and adjust the axle position forward.
Wheelchairistippybackwards Move the wheels backward one axle position.
Beginner riders: balance point of a wheelie holds caster wheels 7”-9” high.
Experienced riders: balance point of a wheelie holds caster wheels 5”-7” high.

Other manuals for RoughRider

4

Other Whirlwind Wheelchair manuals

Whirlwind RoughRider User manual

Whirlwind

Whirlwind RoughRider User manual

Whirlwind RoughRider User manual

Whirlwind

Whirlwind RoughRider User manual

Whirlwind RoughRider User manual

Whirlwind

Whirlwind RoughRider User manual

Whirlwind RoughRider User manual

Whirlwind

Whirlwind RoughRider User manual

Popular Wheelchair manuals by other brands

Rhythm Healthcare B3400F manual

Rhythm Healthcare

Rhythm Healthcare B3400F manual

Everest & Jennings EJ78X-1 Operation manual

Everest & Jennings

Everest & Jennings EJ78X-1 Operation manual

Leckey leeway User instructions

Leckey

Leckey leeway User instructions

Permobil ROHO MOSAIC Operation manual

Permobil

Permobil ROHO MOSAIC Operation manual

Nissin CB user manual

Nissin

Nissin CB user manual

Drive DeVilbiss Ecotec 2G operating instructions

Drive DeVilbiss

Drive DeVilbiss Ecotec 2G operating instructions

Drive DeVilbiss Healthcare Silver Sport Wheelchair Instructions for use

Drive DeVilbiss Healthcare

Drive DeVilbiss Healthcare Silver Sport Wheelchair Instructions for use

Quickie Neon 2 Instructions for use

Quickie

Quickie Neon 2 Instructions for use

HD Rehab Motion 15680 Assembly instructions

HD Rehab

HD Rehab Motion 15680 Assembly instructions

Sunrise Medical Quickie Freestyle M11 User instruction manual & warranty

Sunrise Medical

Sunrise Medical Quickie Freestyle M11 User instruction manual & warranty

Evocare LM9515 owner's manual

Evocare

Evocare LM9515 owner's manual

CareCo Lynx 4 user manual

CareCo

CareCo Lynx 4 user manual

PDS hygiene Bio Bidet manual

PDS hygiene

PDS hygiene Bio Bidet manual

Invacare top end terminator series brochure

Invacare

Invacare top end terminator series brochure

Patron CLASSIC RPRB018UN INFORMATION FOR USE

Patron

Patron CLASSIC RPRB018UN INFORMATION FOR USE

ROHO AGILITY Operation manual

ROHO

ROHO AGILITY Operation manual

aidapt Lenham VR231 Fixing and maintenance instructions

aidapt

aidapt Lenham VR231 Fixing and maintenance instructions

Freedom CGX Standard user guide

Freedom

Freedom CGX Standard user guide

manuals.online logo
manuals.online logoBrands
  • About & Mission
  • Contact us
  • Privacy Policy
  • Terms and Conditions

Copyright 2025 Manuals.Online. All Rights Reserved.